krow113 Posted February 15, 2020 Author Posted February 15, 2020 Thanks Jeff and all others interested. Todays work starts with a fix. The tail area left exposed , filled: Ill be removing the '2's in a little while. Keep watching this post as I'll add to it as the work progress' 5
GazzaS Posted February 15, 2020 Posted February 15, 2020 Steve, I was wondering what machine you were doing all of your work with. This will be great! 4
HubertB Posted February 15, 2020 Posted February 15, 2020 Now, this is pushing painting-by-numbers one step further Hubert 4
krow113 Posted February 16, 2020 Author Posted February 16, 2020 Hub & Gaz ; Thank you. I was wondering when someone would make the PbN correlation! Looking at things , I wemt over the masks picking out any problems. Then well into it peeling off all of the '2's and stowing them on a piece of mask backing sheet. This is the material the vinyl is on. This allows the pieces to be sealed down, saving the adhesive. I think this is where some of you were lost on the procedure. The stowed masks will be REPLACED after the color application. Peeled: Some minor adhesion problems , not to be unexpected , but not enough to worry about. Looks like about 3 minutes sanding. I was going to use solvent based paint for the base blue , but lost sight of that in the mixing procedure. I would recommend a laquer or enamel for the first color: 3
krow113 Posted February 16, 2020 Author Posted February 16, 2020 Second color on , Vallejo 809 royal blue , color chip cards at the top of the pic: I'm keeping the colors straight out of the bottle to avoid any problems later with possible touch ups. 2 down , 3 to go. 4 1
GazzaS Posted February 16, 2020 Posted February 16, 2020 The paint lift scares me. Your masking material shouldn't lift paint that often. I think three outta five in that small area would inspire me to pull all of the masks, reprint them, and then strip the uppers, give them a fine sand and break out the lacquer primer. 5
krow113 Posted February 16, 2020 Author Posted February 16, 2020 Thanks Gaz. And 3 out of 5 does sound too high of an average . However there were adhesion issue's in 9 areas in total. Out of perhaps 300 shapes. I like that percentage better. Not high enough to start over. The royal blue was mixed thinner heavy , hopefully a hotter mix will help. I'll go on , there is a method to removing the masks as well , pulling them right back over as opposed to srtaight up , if you get my meaning. 4 1
Jeff Posted February 16, 2020 Posted February 16, 2020 This is an incredible amount of work................ so................ when you replace the '2's did you keep them in the order you removed them, as they don't look to be all the same shape............. that may be a test if they were randomly stuck back on the backing paper........ to find the right shape for the right spot? Or am I missing a detail I didn't see? Either way, you have patience beyond reproach ..................... this is going to be Museum quality no matter what............... I look forward to every update...... 3
Bomber_County Posted February 16, 2020 Posted February 16, 2020 Steve, hats off to you Sir, this is amazing.......you must have an iron will concentration.......looking forward to the reveal..... 4
krow113 Posted February 16, 2020 Author Posted February 16, 2020 Jeff and Phil - Thank you. The shapes are ALL DIFFERENT. They are placed on the backing in a random order. The backing is divided by a felt marker line and designated as well , you can see it 2 posts up in front of the top wing with all the 2's on it. Since I placed them I did do a sort of random/pattern placement as stated. I see no difficulty in fitting them back into their original spot. Looking from distance at the pattern of the polygons I can see it is a nice even spread over the parts , this is key to the success here I think. Some more keys; The joints have to be extremely well fused, there is a lot of manipulation of the parts , especially the fuse. Pressing home the masks and repeated on/off stress' the joints. Also I'm afraid this would be tough for a modeller who is not well versed in vinyl application, the properties of the material and application techniques. Especially the patience to step off and let the vinyl settle by itself onto the parts. A solvent based first color is highly recommended by myself and others as it is the smartest way to alleviate the lifting issue. Here are the lower wings and backing sheet with '2's : '2's going back on ... ...wait for it.... now! 4
krow113 Posted February 16, 2020 Author Posted February 16, 2020 '2's back on! This took an hour, could prolly be less with better placement during removal , meh , how much easier can it get...: 5
krow113 Posted February 17, 2020 Author Posted February 17, 2020 Color # 3 XF17 Sea Blue on. I' m actually settling into this nicely. Paint lift was again marginal and easily handled. Color spread: 3 out of 5 mothafokkers! 4
Jeff Posted February 17, 2020 Posted February 17, 2020 THIS is CRAZY good ..................................... 2
krow113 Posted February 17, 2020 Author Posted February 17, 2020 Thanks Jeff. Color #4 Lifecolor Camo Series UA 732 Vulcanized Rubber. A last minute change , paint full of 'leeches' (dried paint strips) as if its not hard enough already. O/A: Color spread: Saved the 'spoiler' , the wild card , the mauve for last. And a happy thought , after the mauve there is no replacing polygons there is only the reveal... 4
krow113 Posted February 18, 2020 Author Posted February 18, 2020 Color # 5 AK 2274 German Mauve applied: And looking VERY complimentary: Color spread: Whew! Getting done never felt so good, I can see some issues but I've known for years there is no such thing as a perfect paint job. Gotta get on with paying work now, this has to dry for a while too. 5
Ryan Posted February 18, 2020 Posted February 18, 2020 Dude you are better than me, don't mind saying that. 3
krow113 Posted February 20, 2020 Author Posted February 20, 2020 Thanks Ryan. Adhesion issues persisted , no biggie. I don't want to post pics of an unfinished work. First color must be applied dilifgently. The technique is sound and is a viable procedure. Please bear with me as I work through the cleanup. Thank you . 2
krow113 Posted March 2, 2020 Author Posted March 2, 2020 Getting my machines repaired , impaired modelling for a while. Here is the camo. All 5 colors are applied and touch up underway. These are some pretty good shots of the work: Points to consider: 1) The procedure is a viable one , akin to armour track assy or stencil decals on a jet. 2) There is really no 'paint edge' as the paint is actually butting up against the applications around it. 3) First coat is crucial to get adhered properly. 4) Time learning the properties of the mask material is needed. 5) Cut polygonal shapes fall back into place as there are surrounding shapes to help guide it. 6) Most likely not a commercially viable set of masks. All of the ones I've developed for A Gotha would be a lot! Thanks for looking and commenting. 14044 6 1
DocRob Posted March 3, 2020 Posted March 3, 2020 The result is well worth the pain, this scheme looks amazing. Cheers Rob 5
krow113 Posted March 3, 2020 Author Posted March 3, 2020 harv , Gaz , Doc , Jeff - Thank you! Work goes on leisurely , touch up of the shapes easily done with post-it notes: Sanding and manipulation causing minor issues: And like that: Nice with the shapes all next to each other without any drama , certainly a viable camo technique. 5 1
GusMac Posted March 3, 2020 Posted March 3, 2020 Stunning results and the touch ups don't seem too onerous. Going to look fantastic when it's done. 4
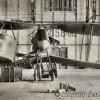
krow113 Posted March 4, 2020 Author Posted March 4, 2020 Gmac - Thank you. Touch ups arrive in flurries , do some , preen a little , then do some more as the color comes up. I dropped the tail on: Mismatch at he bottom , no biggie , I wasn't trying to get a perfect transition, not that good. Some touch up should make it better. Other side better: 6

Recommended Posts
Create an account or sign in to comment
You need to be a member in order to leave a comment
Create an account
Sign up for a new account in our community. It's easy!
Register a new accountSign in
Already have an account? Sign in here.
Sign In Now