Trigger Posted July 8, 2019 Posted July 8, 2019 Good evening, I have started with my version of the Airfix Hellcat, i see there is a very detailed build underway on the forum about the P&W engine, amazing detailing! I have already built up the engine, and I ran in to the same problems as Nigel described on his you tube channel. It has been an endless sanding and fitting struggle to make everything fit as it should. I have used the colors on the engine as advised in the manual, except the engine color, this should be a blue grey color, so I used that color, I hope I have got the color right. The fit of the parts wasn't without it's problems. It is so busy with parts on the rear of the engine, that is was a challenge to get the exhaust pipes in to the right position, but with some effort I managed to get them in. After endless fitting and sanding I painted the parts before I installed them, gave the cilinder heads a wash so the detail of the cilinder heads was better visible. I have pretty much assembled everything out of the box. I want to build the Hellcat as an in flight model, so it will be with wheels up, and I decided to install the electric engine so the propeller can spin. Here are some pictures of the engine build up, I installed the front cowling to get an idea how it all wold look, I am going for the "Paper doll" version, so I painted the inside of the cowling red and white as a shark mouth, And with the entire exhaust build up and rear end of the engine, still need to do some touch up work here and there, And with the prop test fitted, So far for my build, now working on the cockpit and fuselage, Greetz, Frank 10
Grunhertz Posted July 8, 2019 Posted July 8, 2019 Nice work finally started laying down paint tonight on mine 4
DocRob Posted July 9, 2019 Posted July 9, 2019 Nice job on the engine. Are these ignition wires kit parts or did you add them? Cheers Rob 3
Trigger Posted July 9, 2019 Author Posted July 9, 2019 Hello rob, thanks for the comment, you have to make the ignition wires yourself from 0,7mm lead wire or copper wire, Frank 4
CrankyCrafstman Posted July 9, 2019 Posted July 9, 2019 Great job on the engine Trigger. Just a few pointers...the pipes or tubes that you have painted blue with silver tops on the rear should be semi-gloss black like the front ones, these are the push rod tubes. The ring that you have painted silver on the rear of the engine should be the same color as the rest of the engine crankcase/supercharger a Grumman engine gray. The little copper colored pipes on the top of the cylinders should be painted silver like the rest of the cylinders. Not trying to be critical, just some observations to help improve your modeling skills. Everything else likes spot on. Ron G 2 2
Trigger Posted July 9, 2019 Author Posted July 9, 2019 Thanks for the comment Ron, my guideline was the Airfix manual that says otherwise, but they got the color of the crankcase wrong too, so I was just in time to correct that, it's now no longer possible to correct this one. Saw your build of the P&W engine, that's looking great, love the braided hoses, looks like the real thing! Will be watching your progress, Greetz, Frank 4
Trigger Posted July 9, 2019 Author Posted July 9, 2019 Have been busy with a "sub" build, the HVAR rockets Only added ignition wires as en extra, tomorrow the fuselage and cockpit 6
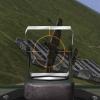
Trigger Posted July 10, 2019 Author Posted July 10, 2019 Assembled the wings and the fuselage and cockpit. Gave the fuselage and wings a coat of Tamiya grey primer because I think that the surface texture of the model is a bit "rough" , I am afraid that when I put the color on if left untreated, the surface texture wouldn't be smooth enough. Carefully sanded the primer as not to ruin the detailing of the fuselage and wings. Used 6000 grid sanding paper and after that a rub down with a fine micro mesh cloth, the model now feels much smoother. Masked everything for painting. Wings assembled.... Ready for primer...... And then the color,.............. I first tried mr color 71 gloss, but I couldn't get the result I wanted, so I switched to Tamiya XF17 Matt finish and gave it a gloss clear coat. That came out better. Needles to say is that everything you have done wrong now pops up, I've got a few scratch marks from sanding that I didn't see on the starboard fuselage that are now staring right in my face, aargh. I hope that when I spray the markings on some of them will be less visible, also need to tone down the gloss coat here and there when I start weathering the plane. Couldn't resist test fitting the engine...............what a beast! that's all for now, Frank 8 1
Administrators Clunkmeister Posted July 10, 2019 Administrators Posted July 10, 2019 Looking great so far! That fuselage looks like it suffered a high G pullout. I can't wait to be able to get started on mine 3
Ryan Posted July 10, 2019 Posted July 10, 2019 Man that really looks great under a coat of GSB. Ryan 4
DocRob Posted July 11, 2019 Posted July 11, 2019 That looks awesome, nice and quick work and it seems like sanding down the oil canning effect a little pays off. Cheers Rob 3
Trigger Posted July 11, 2019 Author Posted July 11, 2019 Well, got some work done, made masks myself with the decal sheet as a template, and then got some paint on, the bar next to the American star on the starboard side didn't go very well, the paint just wouldn't stick, probably made a mistake or didn't degrease it good enough before painting, well I will let it dry for the moment and correct it tomorrow. Here are some pics, and the f**ck up with the mask........, will be correcting this tomorrow, 8
Ryan Posted July 11, 2019 Posted July 11, 2019 Fekken' models, always something to keep us on our toes. You will sort it out. Ryan 5
Bomber_County Posted July 12, 2019 Posted July 12, 2019 Amazing build Trigger, man you build at amazing speed.......the kit has only been out a couple of weeks. I’m still looking through reviews and you’ve all finished........that’s my pace of building as well........ 5
Trigger Posted July 12, 2019 Author Posted July 12, 2019 Well, I have corrected the insignia on the left side of the plane, resprayed it, and now it came out fine, have sprayed the other insignia as well on the sides and the top half of the Hellcat, need to to do the bottom of the aircraft. I couldn't resist tot start with the decals, cost me Half a day to get them on only on the top and sides of the aircraft, need to do the bottom half still. Sprayed the engine covers in Gloss Sea Blue, those are drying now, so I act start fitting them tomorrow and put on the decals. So here's where i'am at...... Decals on........... Painted the engine covers and the centerline fuel tank................ So this is all for today, see you all next time, and thanks for all the thumbs up, keeps the motivation going, Frank 8
Administrators Clunkmeister Posted July 13, 2019 Administrators Posted July 13, 2019 Trigger, will you have this a Chattanooga in a few weeks? Looking awesome, mang! 2

Recommended Posts
Create an account or sign in to comment
You need to be a member in order to leave a comment
Create an account
Sign up for a new account in our community. It's easy!
Register a new accountSign in
Already have an account? Sign in here.
Sign In Now