FME erk Posted January 27, 2021 Author Posted January 27, 2021 Hi Gazza I tink I was 'lucky' as the break was fairly clean with both parts having flat edges. I used Tamiya thin on the inside on the tabs and put plenty on. When that I had dried I then applied the HK sprue glue which, and I think I am correct, didnt shrink because its the same plastic as the kit. I did use Mr. Surfacer when correcting the wings issues and I gave that several weeks before sanding that and so far, it still looks OK. I shall be applying a coat of primer in a day or so to look for any flaws then I shall start the scribing . . . . Cheers Ian 5
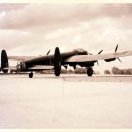
FME erk Posted February 1, 2021 Author Posted February 1, 2021 I got around to cleaning up that breakage down the fuselage and scribing some of the fuselage lines and rivets . . . . and with a touch of paint on . . . and whilst waiting for the repairs to be completed I got a touch of paint on the tailplanes, comparison to the 72nd scale included Still working on the correction list . . . cheers for now Ian 6
Kaireckstadt Posted February 1, 2021 Posted February 1, 2021 5 minutes ago, FME erk said: I got around to cleaning up that breakage down the fuselage and scribing some of the fuselage lines and rivets . . . . and with a touch of paint on . . . and whilst waiting for the repairs to be completed I got a touch of paint on the tailplanes, comparison to the 72nd scale included Still working on the correction list . . . cheers for now Ian Well done Ian! Looks as if it never broke! Also good job on the tail-surfaces! Which paint did you use? Masks homemade? 3 1
FME erk Posted February 1, 2021 Author Posted February 1, 2021 Thanks Kai I was hoping it would turn out so its wasnt to obvious that it HAD been broken. Paints I used are still Humbrol cos I'm still a brush painter and Ye, a home made mask. I have had a camouflage plan blown up to scale and then cut out the tail=plane, pasted to card and then cut out . . . . I did try to create 'canning' with paint, slightly sanded and then camo applied. Hard to see but in the right light you can see an uneven surface across the tail-planes . . . I keep persevering . . . might try it on the main wings when I get around to them Cheers Ian 8 1
DocRob Posted February 1, 2021 Posted February 1, 2021 Great effect with the painting, I was really astonished, when I read BRUSH . The result looks terrific and it's good to see, how you've done it with your thoughtful use of the brush technique. Cheers Rob 4 1
Kaireckstadt Posted February 1, 2021 Posted February 1, 2021 4 hours ago, DocRob said: Great effect with the painting, I was really astonished, when I read BRUSH . The result looks terrific and it's good to see, how you've done it with your thoughtful use of the brush technique. Cheers Rob That’s really a great idea and it’s looking amazing, Ian! And all achieved with a brush. Unbelievable ! 3 1
FME erk Posted February 3, 2021 Author Posted February 3, 2021 Had a bit of paint to some pieces in the front cockpit section . . . I shall take a look at the Airscale bits and think about wiring etc . . . cheers Ian 6 1
Kaireckstadt Posted February 3, 2021 Posted February 3, 2021 37 minutes ago, FME erk said: Had a bit of paint to some pieces in the front cockpit section . . . I shall take a look at the Airscale bits and think about wiring etc . . . cheers Ian Very nice Ian! Especially the worn seat and working-desks of the w/o and the navigator look very convincing! 4
DocRob Posted February 4, 2021 Posted February 4, 2021 I hope, lots of your fine work will remain visible. You managed to get a very nice worn look to all the components. Cheers Rob 6
JohnB Posted February 4, 2021 Posted February 4, 2021 Coming along well! You have more patience than I have or is it dedication? LOL 5
FME erk Posted February 5, 2021 Author Posted February 5, 2021 Hi John It one of those aircraft kits that you just have to finish or it will be a waste of time. (shelf of Doom) Thats why I started and built the vehicles first , many have said that this kit became a bind with the many issues so a combination of patiences and dedication should get me through along with the encouragement of the many contributions from the likes of your good self . . . Ian 6
FME erk Posted February 5, 2021 Author Posted February 5, 2021 22 hours ago, DocRob said: I hope, lots of your fine work will remain visible. You managed to get a very nice worn look to all the components. Cheers Rob Rob Thank you for the generous comments I think alot of modellers put a great deal of effort into the interiors especially with PE, covered with paint then all enclosed as the fuselage goes together. I know what is in there and the photos are always available to show people the detail should the need arise . . . Ian 6
FME erk Posted February 19, 2021 Author Posted February 19, 2021 Little progress is better than No progress and to date I have been doing the Nose section. I have also been indulging in a GB on another forum, another Lancaster that is no yet finished . . . G-George This is HK's second choice of aircraft, W4783 Getting back to the front nose sections . . . Apart from painting the interiors note also that the navigators small window has gone. Small bits of wiring added and the white square is the beginning of the bomb sight frame holder . . . I plan to add more detail in the nose and of course I have the Airscale panels to fit fairly soon . .. . On the port side of the fuselage, there are two Control rods visible between the pilots platform and the navigators table. There are also three pipes visible at a lower level between the same positions. More to come and thanks for looking in Ian 7
Kaireckstadt Posted February 19, 2021 Posted February 19, 2021 3 hours ago, FME erk said: Little progress is better than No progress and to date I have been doing the Nose section. I have also been indulging in a GB on another forum, another Lancaster that is no yet finished . . . G-George This is HK's second choice of aircraft, W4783 Getting back to the front nose sections . . . Apart from painting the interiors note also that the navigators small window has gone. Small bits of wiring added and the white square is the beginning of the bomb sight frame holder . . . I plan to add more detail in the nose and of course I have the Airscale panels to fit fairly soon . .. . On the port side of the fuselage, there are two Control rods visible between the pilots platform and the navigators table. There are also three pipes visible at a lower level between the same positions. More to come and thanks for looking in Ian Not much progress Ian, but looking really great! Love the details you added and nice weathering too! BTW: Which colors do you use? The RAF interior green looks spot on. I was happy that I didn’t need the Bomb-Aiming-Sight for my Lanc. The HK one needs much attention! Looking forward to seeing your next update! Cheers Kai 3 1
Wingco57 Posted February 19, 2021 Posted February 19, 2021 Pardon me but I think the interior green is a touch on the light side, cameralighting perhaps? 2
Peterpools Posted February 19, 2021 Posted February 19, 2021 Excellent progress on the Lancaster - radio gear and the patches on the horizontal stabilizers look great. Keep 'em comin Peter 4 1
FME erk Posted February 19, 2021 Author Posted February 19, 2021 2 hours ago, Kaireckstadt said: Not much progress Ian, but looking really great! Love the details you added and nice weathering too! BTW: Which colors do you use? The RAF interior green looks spot on. I was happy that I didn’t need the Bomb-Aiming-Sight for my Lanc. The HK one needs much attention! Looking forward to seeing your next update! Cheers Kai I used Hum 90. Hum 78 Interior Green is just too Green and although Hu 90 might be lighter, I think it may looked better . . . 2 hours ago, Wingco57 said: Pardon me but I think the interior green is a touch on the light side, cameralighting perhaps? You may be right but the other colour I considered was Tamiya SKY . .. . 4
Wingco57 Posted February 19, 2021 Posted February 19, 2021 The lid of that jar has the same colour als their interior green colour. I made almost made the same mistake on my Dambuster last week 3
FME erk Posted March 1, 2021 Author Posted March 1, 2021 I have slowly been adding wiring and rebuilding the bomb sight frame. Not much to show a photo just yet but the big exciting news is that I have just ordered one of these from New Jersey . . . https://www.ebay.co.uk/itm/1-32-Lancaster-DELUXE-Resin-Pilots-Seat-No-Belts-Resin-Upgrade-for-HK-NEW/184675081819?_trkparms=aid%3D1110006%26algo%3DHOMESPLICE.SIM%26ao%3D1%26asc%3D230925%26meid%3De4a029a46c3946c98ea6ffc2d77eeccf%26pid%3D101195%26rk%3D1%26rkt%3D12%26mehot%3Dpf%26sd%3D184675086911%26itm%3D184675081819%26pmt%3D1%26noa%3D0%26pg%3D2047675%26algv%3DSimplAMLv9PairwiseUnbiasedWeb&_trksid=p2047675.c101195.m1851 I'm sure it will greatly improve the look within the cockpit area Ian 2 1
FME erk Posted March 5, 2021 Author Posted March 5, 2021 I have been adding a touch of color to the Airscale Cockpit set. I have virtually finished adding bits into the nose and cockpit sections as seen above but I am now waiting for the new seat to arrive . . . . More to come soon Ian 4 1
Kaireckstadt Posted March 6, 2021 Posted March 6, 2021 1 hour ago, FME erk said: I have been adding a touch of color to the Airscale Cockpit set. I have virtually finished adding bits into the nose and cockpit sections as seen above but I am now waiting for the new seat to arrive . . . . More to come soon Ian Ian, you are really a master with the brush! You have picked out the details just right! Looks stunning! 3 1
Peterpools Posted March 6, 2021 Posted March 6, 2021 Ian Looking might good for sure. Just went back and re-read your fix for the fuselage - worked out perfectly. Keep 'em comin Peter 2 1
FME erk Posted March 16, 2021 Author Posted March 16, 2021 Progress has been slow because I have been doing extra hours at work . . . . The bomb-aimers position down in the front of the aircraft, extra wiring and a modified bombsight framing added . . . I have also been putting together a bomb load and to that end You really should improve the 4000Ib-er by adding an outer skin to create the lip seen at the front end and also to make the 'empty' end better in appearance by adding a circular disc to hid the joint seam and a couple of photos showing the load . . . The painting of the bombs was taken from the film 'Night Bombers' I should be receiving the AM 3D pilots seat any day now as I have received notification that they are with a courier Thanks for looking in Ian 7
Kaireckstadt Posted March 17, 2021 Posted March 17, 2021 2 hours ago, FME erk said: Progress has been slow because I have been doing extra hours at work . . . . The bomb-aimers position down in the front of the aircraft, extra wiring and a modified bombsight framing added . . . I have also been putting together a bomb load and to that end You really should improve the 4000Ib-er by adding an outer skin to create the lip seen at the front end and also to make the 'empty' end better in appearance by adding a circular disc to hid the joint seam and a couple of photos showing the load . . . The painting of the bombs was taken from the film 'Night Bombers' I should be receiving the AM 3D pilots seat any day now as I have received notification that they are with a courier Thanks for looking in Ian Great progress Ian! And it‘s worth the effort that you again went the extra mile with the bomb-aimers compartment and the cookie. Looks much better than the original kit-parts. Beautiful extra detailing! The bombs look spot on! Curious to see what will be your next step... 4 1

Recommended Posts
Create an account or sign in to comment
You need to be a member in order to leave a comment
Create an account
Sign up for a new account in our community. It's easy!
Register a new accountSign in
Already have an account? Sign in here.
Sign In Now