DocRob
-
Posts
7,082 -
Joined
-
Last visited
Content Type
Profiles
Forums
Events
Gallery
Everything posted by DocRob
-

PZL P.11c - Polish Fighter - IBG - 1/32
DocRob replied to DocRob's topic in LSM 1/35 and Larger Work In Progress
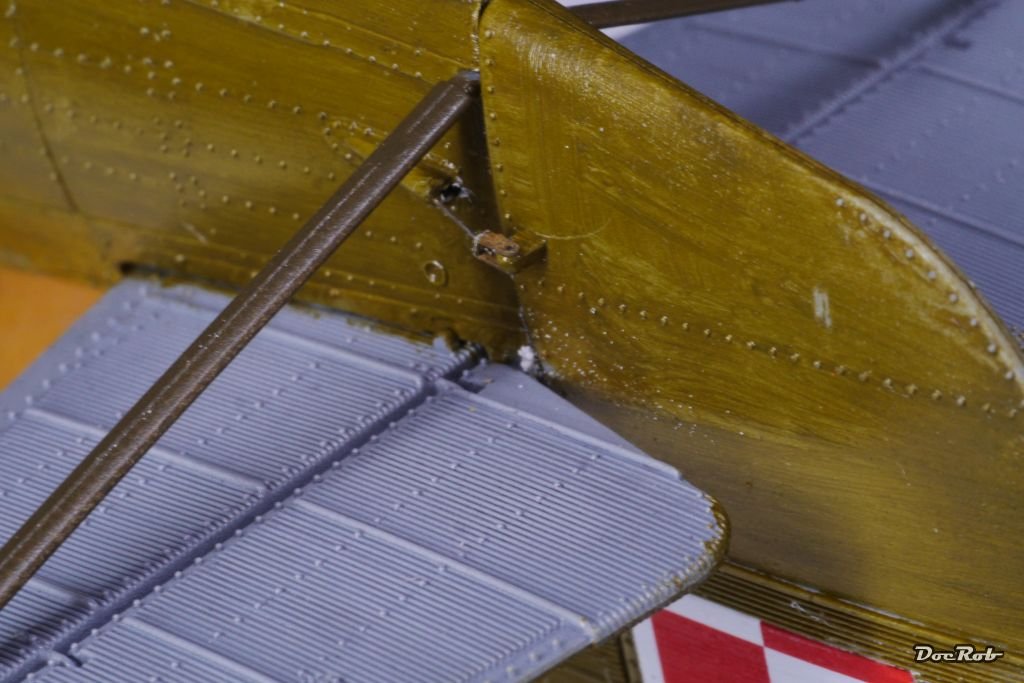
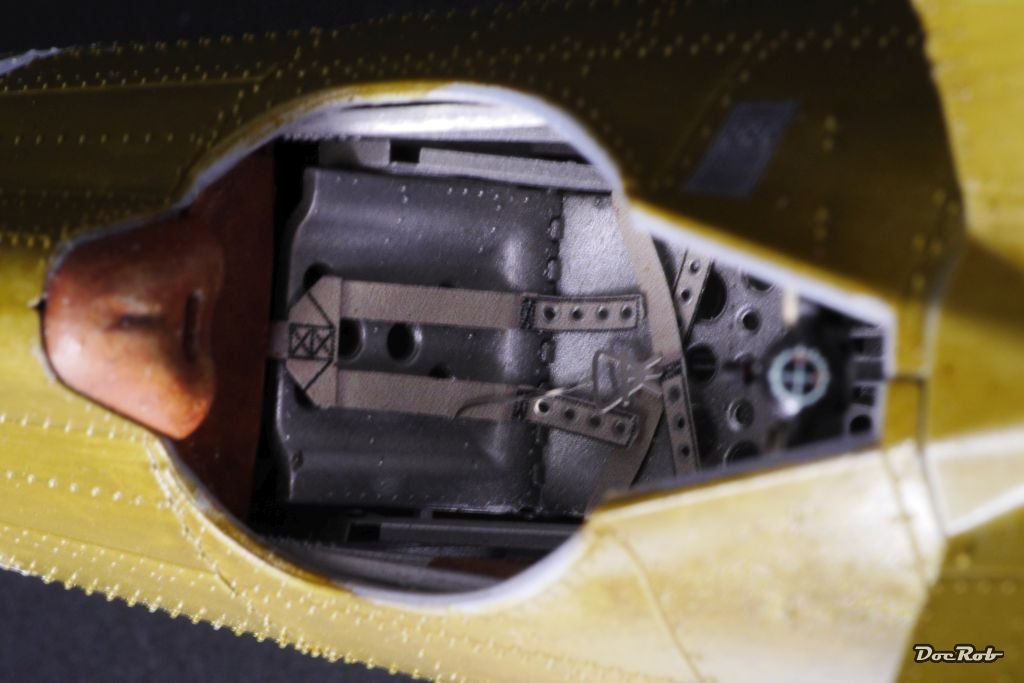
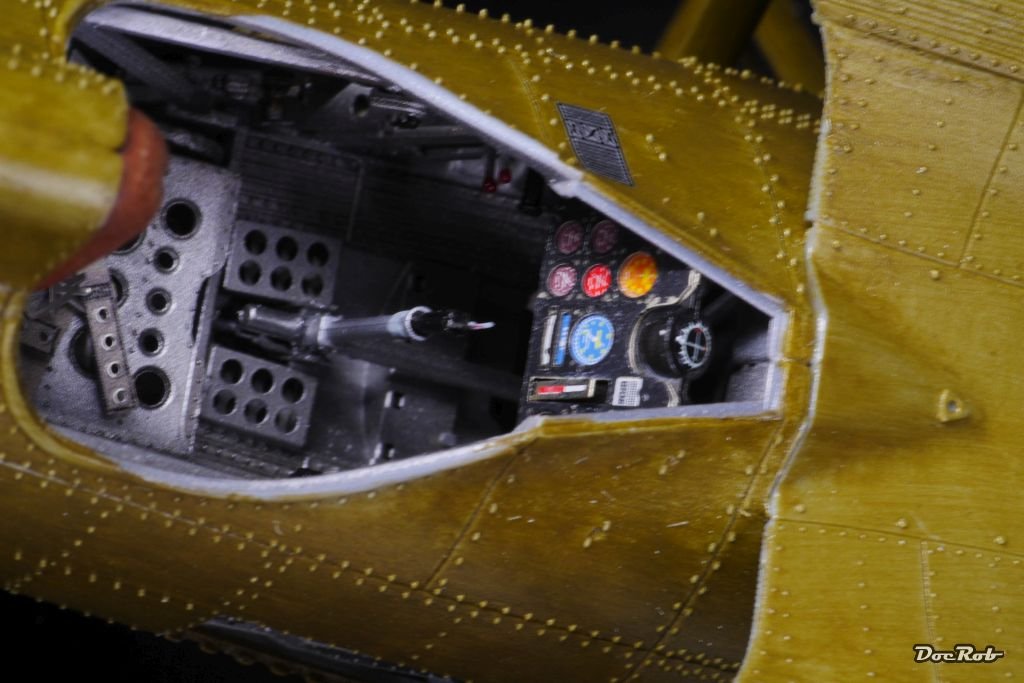
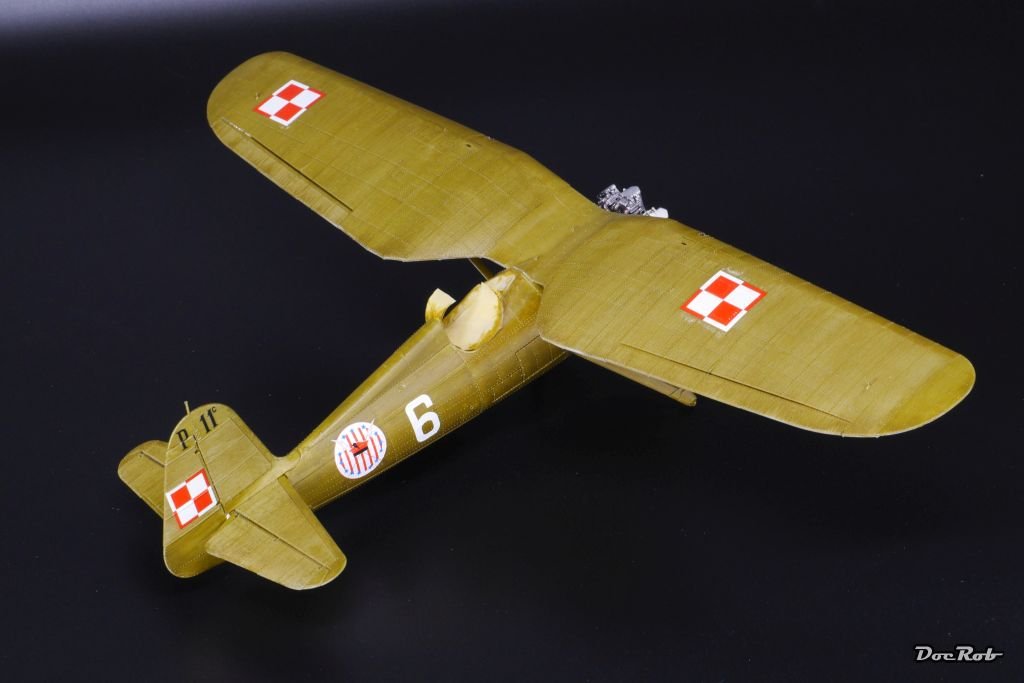
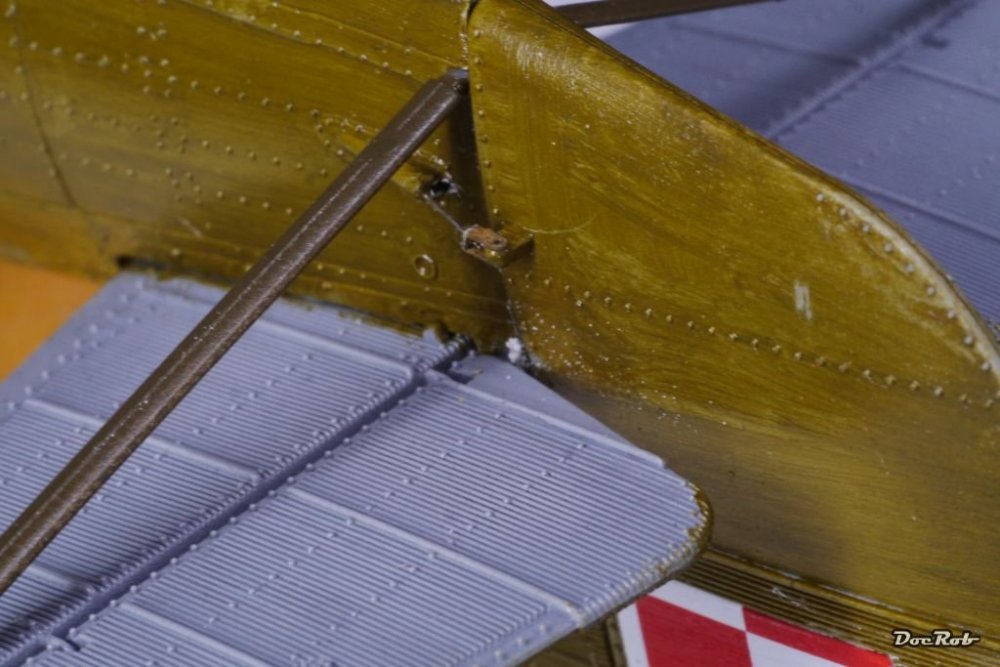
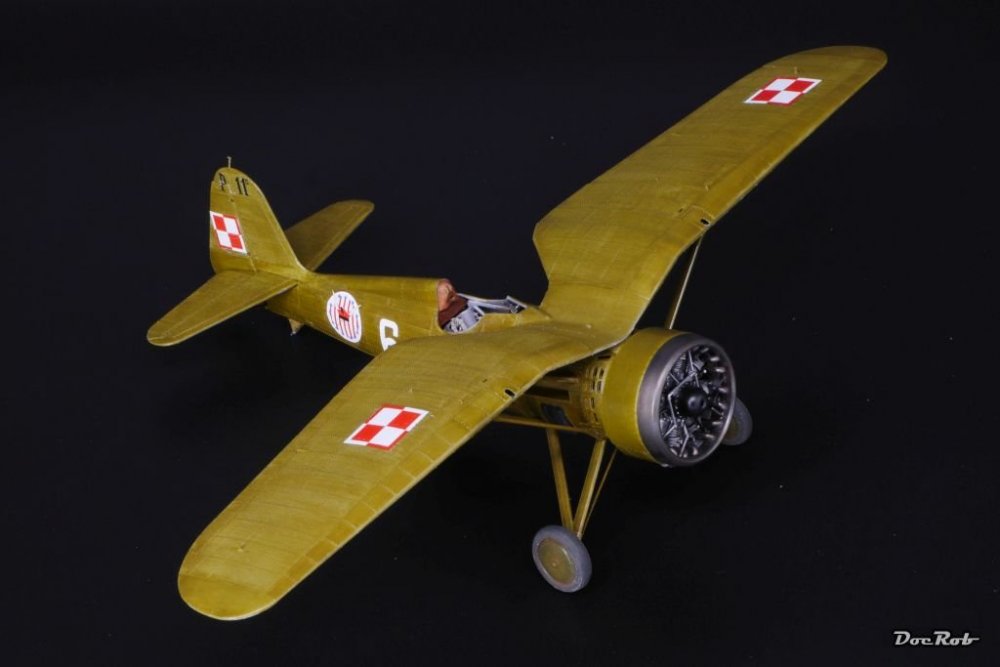
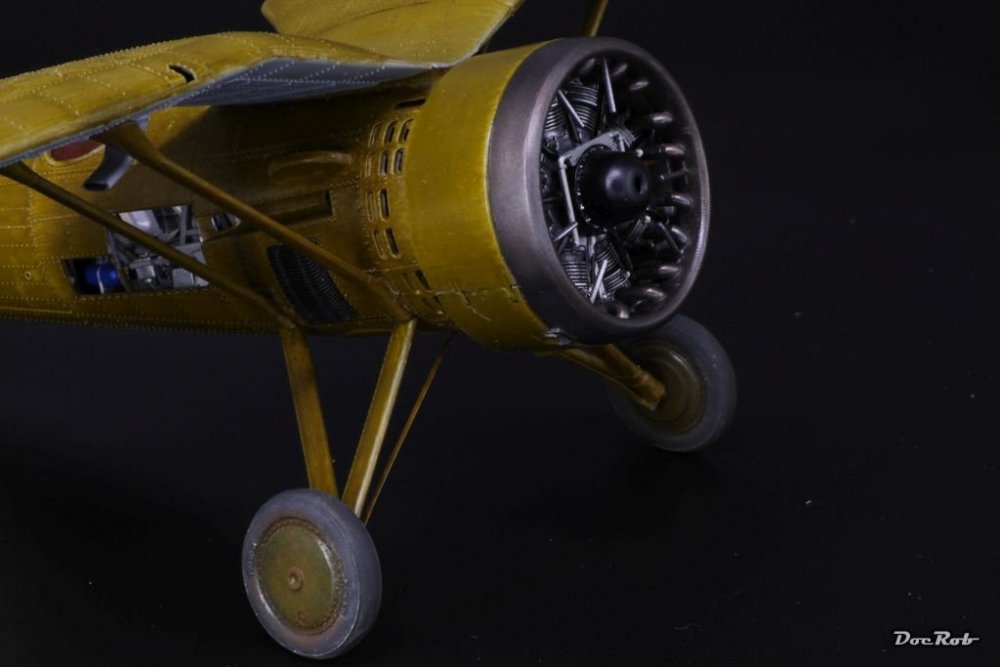
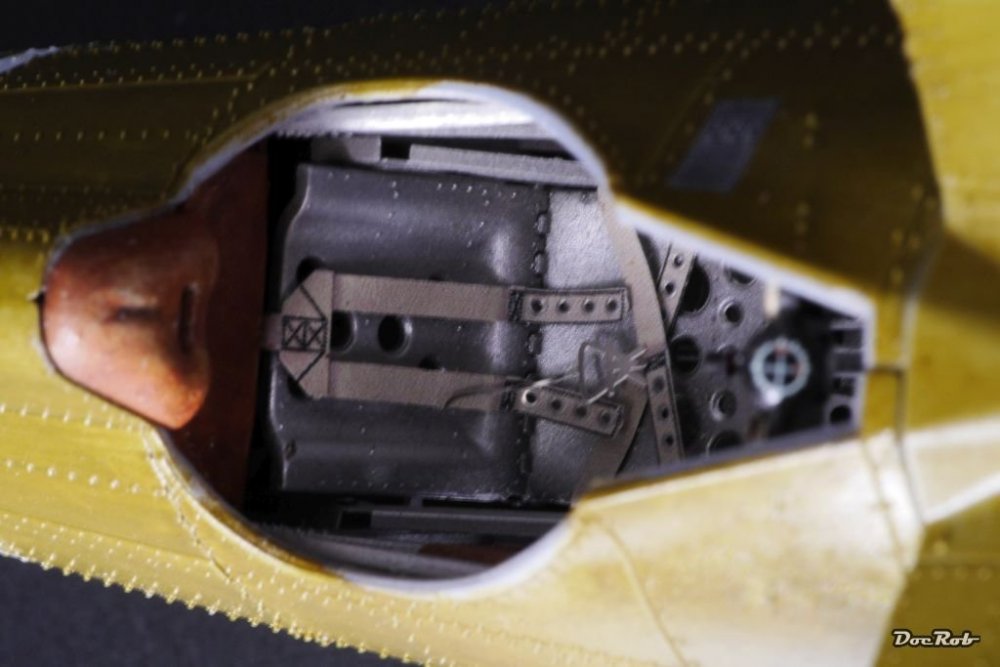
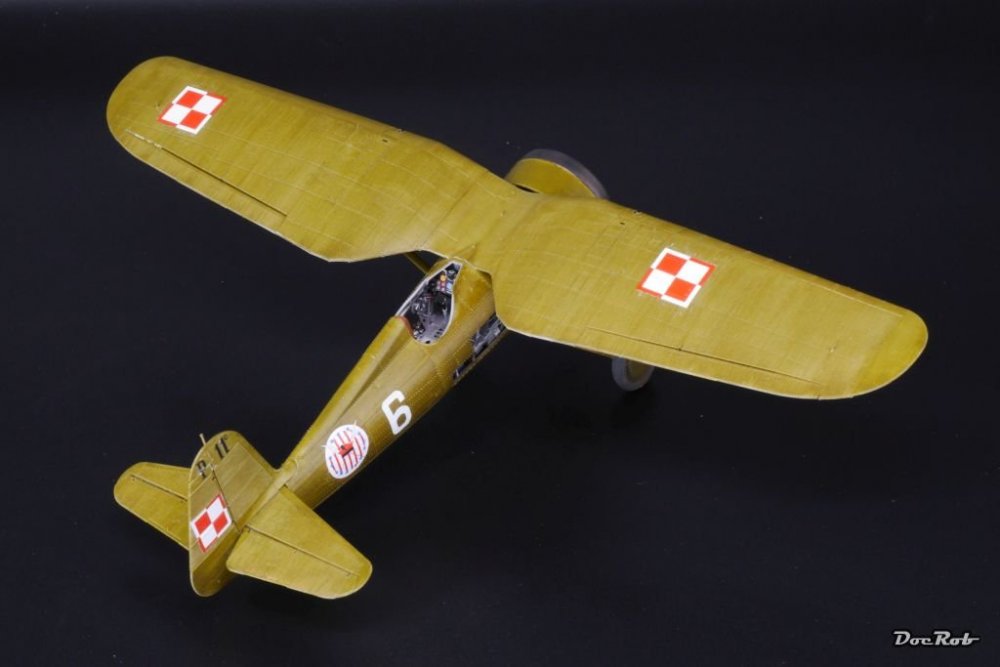
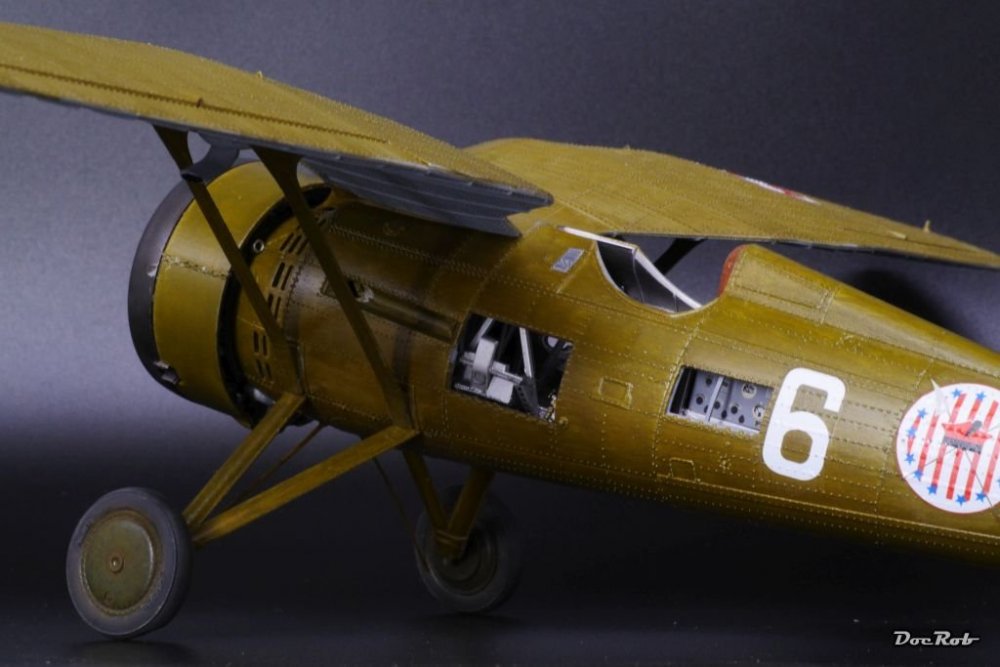
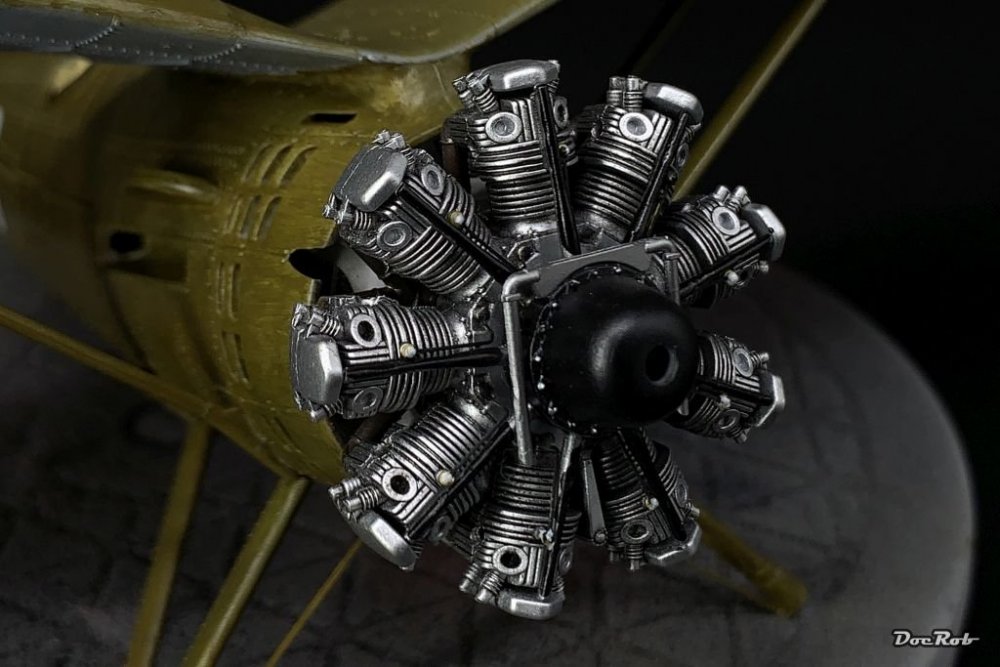
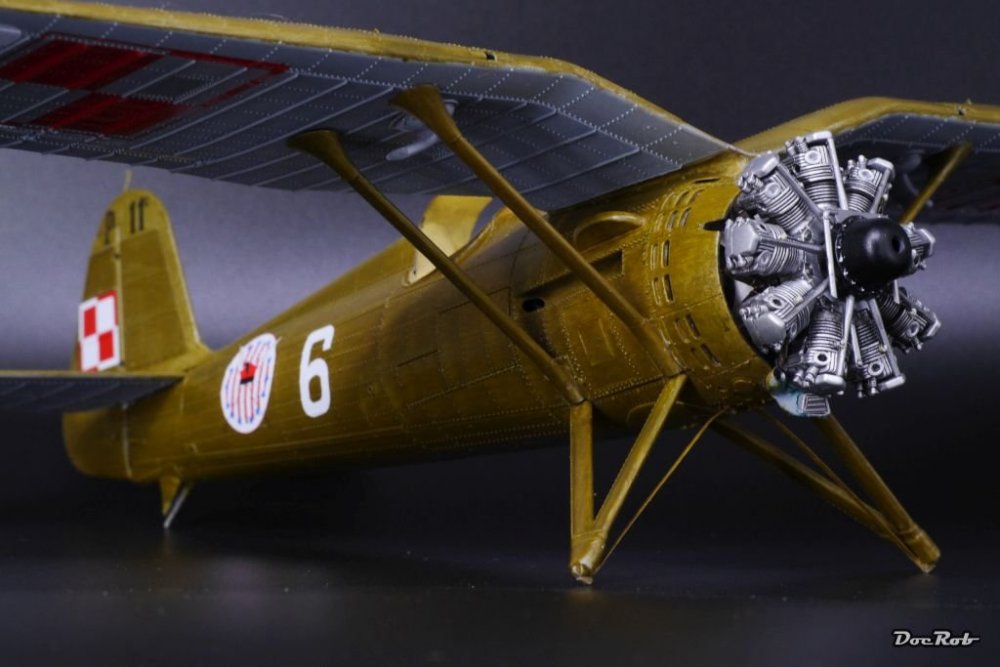
Today I've done all the little things. First I added the exhaust collector and the fairing behind the engine, which I had forgotten to insert, before gluing in the engine. Luckily the plastic is really flexible and I managed to get the part in place. Then it was time for the cowlings, which were not so easy to install, without ruining the paintjob with glue. Next were the wheels, which received some pigments and were painted in different black shades before. I opened the hatches then, which were glued in place temporally for painting with a drop of white glue. I added tine PE brackets and silver nickel rods for the rudder horns. The cockpit is opened again and I added the seat belts and the leather headrest. The equally made from leather paddings around the cockpit will be painted later. The whole thing does look like this now. Cheers Rob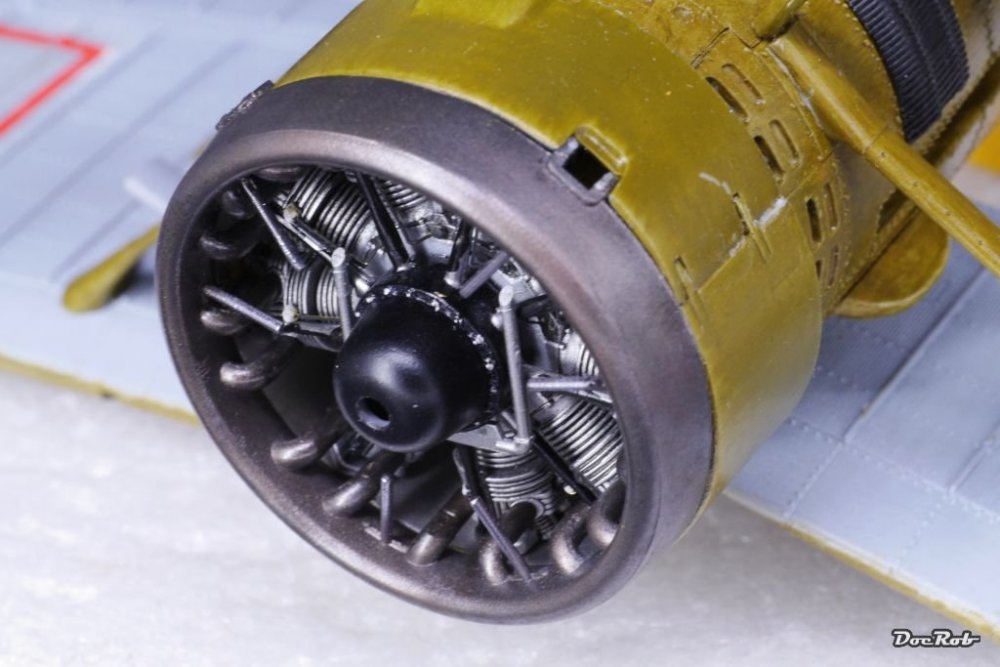

- 127 replies
-
- 11
-

-

-
RCAF Liberator GR Mk VI
DocRob replied to BlrwestSiR's topic in LSM 1/35 and Larger Work In Progress
Nice surgery Carl. Like Kai said, this will be BIG. I always liked the Coastal Command schemes best and I really like to see the big Lib in these colors. Cheers Rob -
Revell P-51D Mustang - 2nd time around
DocRob replied to Peterpools's topic in LSM 1/35 and Larger Work In Progress
Great work on the interior, Peter. These Quinta 'decals' do look good, better than most of the color PE, except maybe these made by Yahu. I hope you won't have too many negative sensations with the kit. It's somehow interesting to see, how big market companies, like Revell or Italerie can shoot you in the foot with so many different type of quirks. While building the PZL, I have to say, I'm amazed, how a relatively small company like IBG made a great kit, without any issues and good buildability. With this start though, I'm sure, you will build another masterpiece out of whatever Revell gives you. Cheers Rob -
Fantastic Peter a clean built Corsair is a thing of beauty. I'm very pleased to see, that you will paint her in tri tone scheme. I always preferred the earlier multi color camos to the boring and detail eating 'GSB'. To quote a very kind member of the forum, whose name starts with 'P', 'keep 'em comin. Cheers Rob
-
Франкентанк Т-34 in 1/35 scale
DocRob replied to GazzaS's topic in LSM 1/35 and Larger Work In Progress
He He, seems, I got it right, because I haven't seen the first threads section . A build thread, great. I will follow, as I browsed my Russian armor stash recently and found some intriguing boxes. I bought some nice Russian figures three days ago, to accompany the tanks, so maybe this will be one of my next builds. I really like your scratch work Gaz, but what's the idea behind? Why did you strip the rubber off the rims. You mentioned ash, will this be a burned out tank? What's the meaning behind the Cyrillic title, which translates to Frankentank? So many questions . Cheers Rob -
PZL P.11c - Polish Fighter - IBG - 1/32
DocRob replied to DocRob's topic in LSM 1/35 and Larger Work In Progress
Muchas gracias Amigos, in all, I'm relatively satisfied with the outcome of the oils experiment. It proved that it is possible to paint monochrome and used airframes with the medium. The hardest part is equal color distribution. I have no idea, how many brush strokes I made, first stronger and to the end barely touching the surface. Panel emphasize and a first grade weathering are possible with the oils. I sprayed some smaller parts, like the canopy framing and you have to find matching colors. To me the most attractive aspect of this build was the challenge itself. I try to learn something new with every build, just to fire me up. Cheers Rob -
OcCre BR 18 Bavarian Dream
DocRob replied to Quintillius's topic in LSM 1/35 and Larger Work In Progress
Cool, engineering at it's best and all visible. You built a very decorative beauty there. I would never put one of my car/plane/armor builds in our living rooms, but a wooden sailing boat or a steam locomotive like yours, would make me thinking... Cheers Rob -
Good to hear, that your wife is back home and is on a good way. The Viggen is developing great Mark. Cheers Rob
-
PZL P.11c - Polish Fighter - IBG - 1/32
DocRob replied to DocRob's topic in LSM 1/35 and Larger Work In Progress
Today, after the decal solutions dried over night, I sprayed a semi matte clear coat on. First only misting onto the decals, as the Levelling thinner, which I used for the semi matte Tamiya LP varnish, can be aggressive to decals. After drying of the first coat, the whole plane was sealed. For Huberts (and mine) well being, I painted at least the push rod fairings black , to be a bit more on the authentic side. Cheers Rob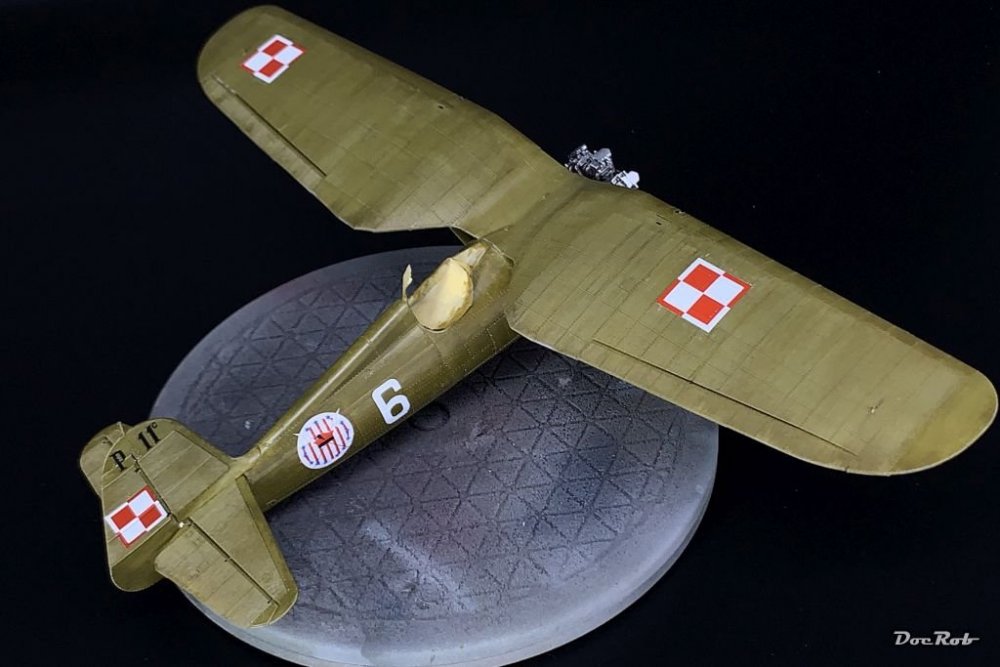
-
PZL P.11c - Polish Fighter - IBG - 1/32
DocRob replied to DocRob's topic in LSM 1/35 and Larger Work In Progress
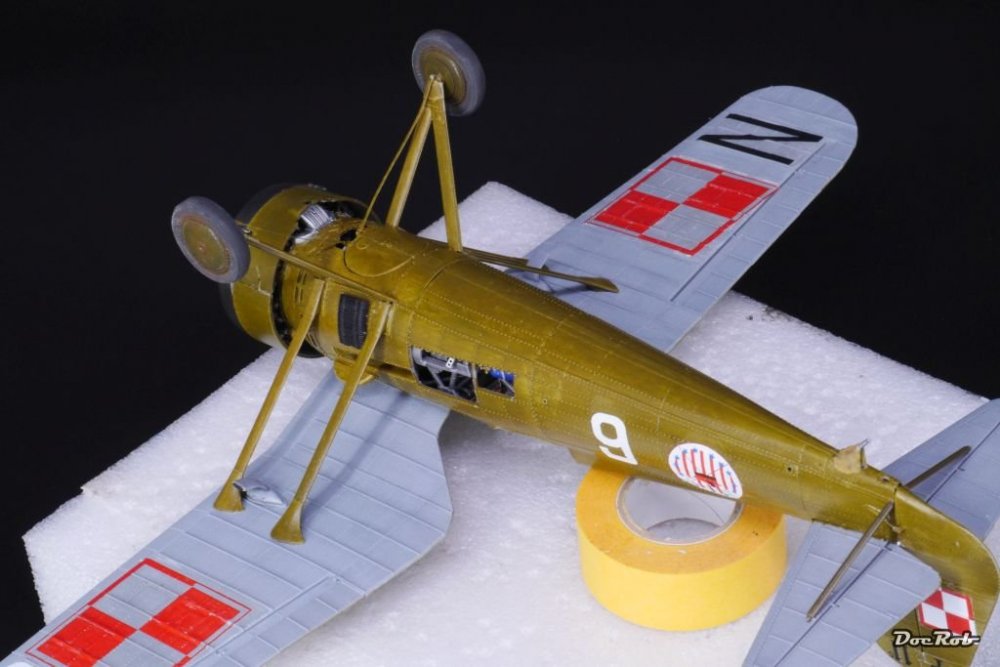
Thank you @GazzaS and @Kaireckstadt. The angular insignia do look different. I'm glad, the decals went on well. Masking and spraying would have been equally difficult, given the corrugated surface. The Polish Khaki is not an utterly attractive color, but it was the cause, why I chose the PZL for my oil color experiment. I wouldn't try it on a splinter camoed Viggen . Cheers Rob -
That sharkmouth enhances the meanness factor of the Kittyhawk to badass heights. Great work on the masking and spraying. Cheers Rob
-
RFM 1/35 Panzerkampfwagen IV Ausf.G-Finished
DocRob replied to KevinM's topic in LSM 1/35 and Larger Work In Progress
Nice work Kevin. Regarding the tools, I don't have a correct answer, but on my tanks, I paint them in wood and metal for esthetical reasons. They add more detail and attract the eye, by giving some contrast. Cheers Rob -
Filters can do some magic and that's what happened here. The binding effect takes the paintjob to the next level Gaz. Cheers Rob
-
PZL P.11c - Polish Fighter - IBG - 1/32
DocRob replied to DocRob's topic in LSM 1/35 and Larger Work In Progress
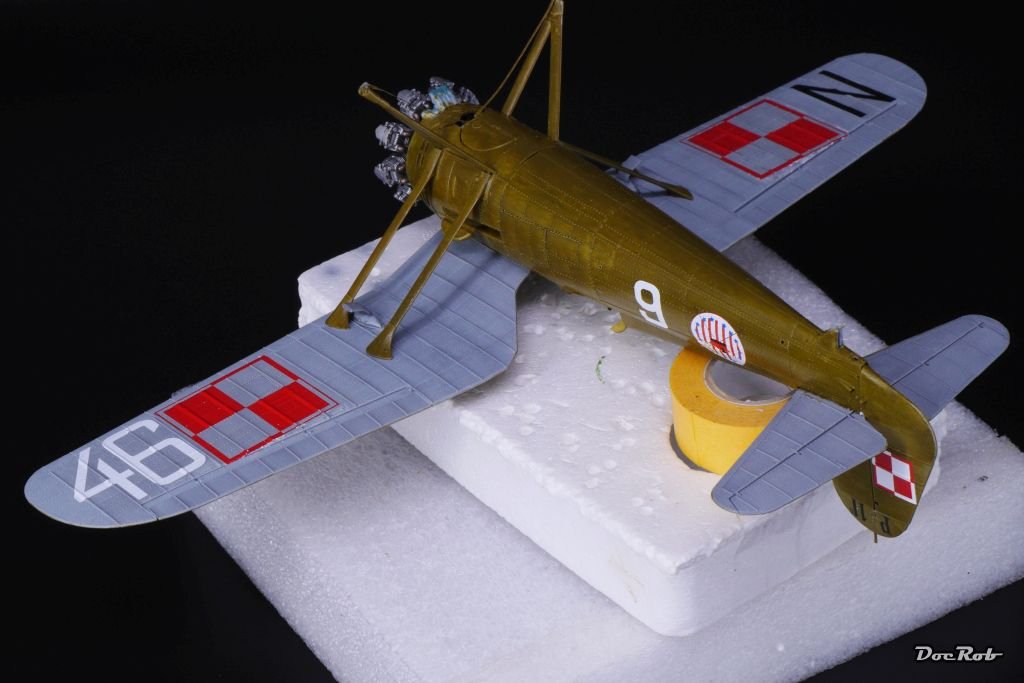
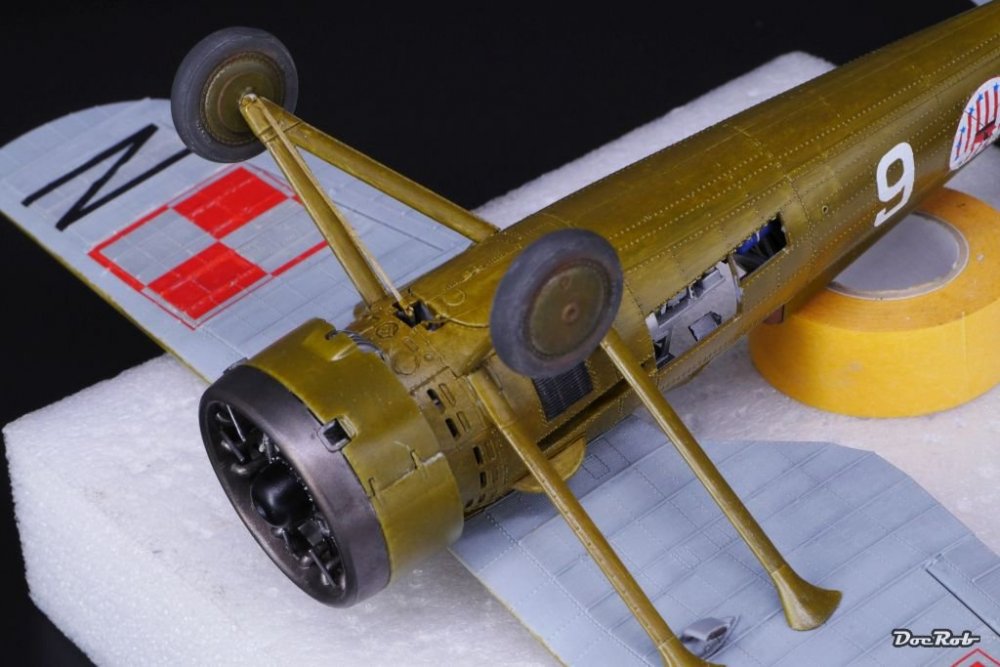
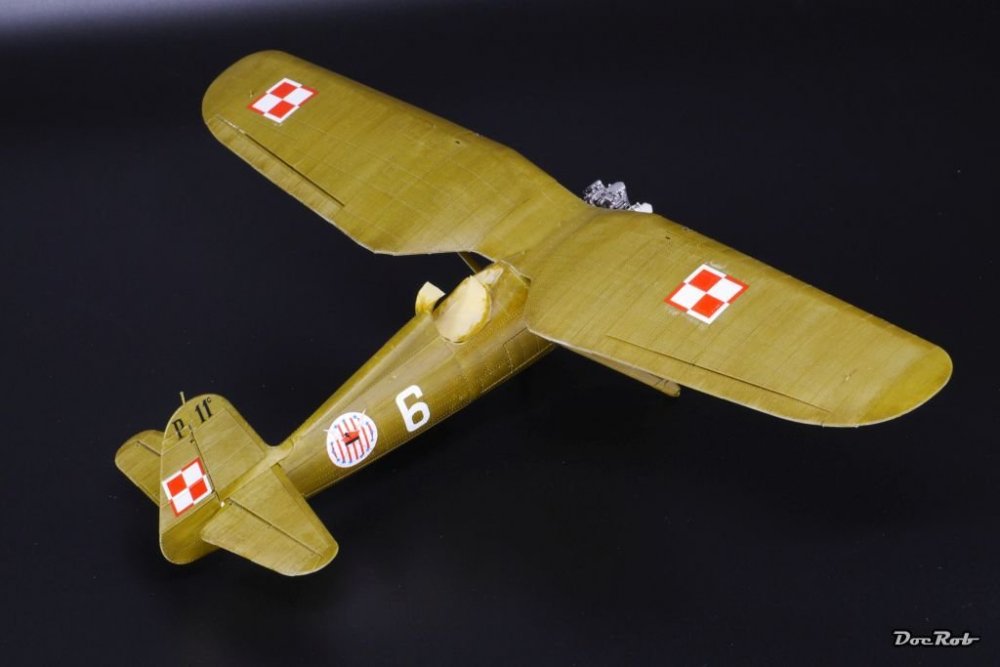
After a looooong drying time of more than a week, I gloss coated the PZL with Tamiya LP clear. The first coat was just misted onto the oil color, to reduce the possibility of unwanted reactions between the oil colors and the varnish. Then I sprayed two liberal coats of gloss coat, to finally seal the oil colors and let, guess what, dry for some time. Up to the decals now, which performed good, given the problematic surface with the corrugated texture. I used Micro Set to apply the decals and then half a litre of Micro Sol, to let them settle into the surface, accompanied by a hairdryer. The lower national insignia are really large and took some time to apply correctly. Then the wings were mounted onto the fuselage with the struts. That's where I am right now. I then refined the exhaust ring with various dabbed on pigments and will let it be until the final assembly, where it will be evaluated. Cheers Rob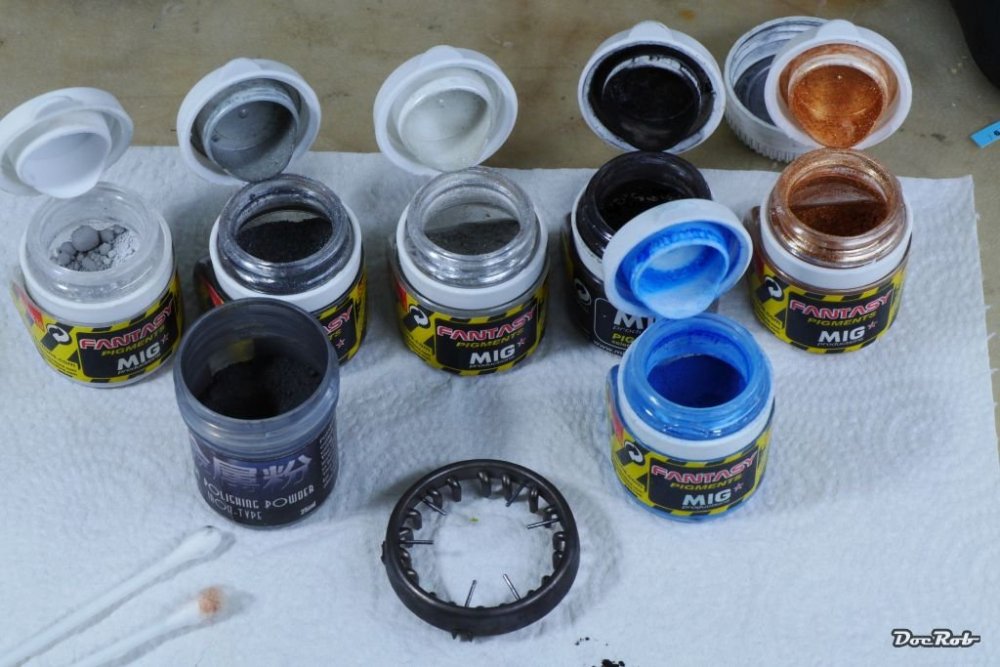

- 127 replies
-
- 10
-
-
-
Nice choice. I'm very eager to see what this will look like in the end. My Cyrillic knowledge is more than a bit shaky, but shouldn't it read 'Suvorov' on the tower, maybe called after General Alexander Suvorov (1729-1800). Cheers Rob
-
I built the Hasegawa carnation of the -D as Eduards Dottie Mae and should have the decals for the following version left. If you are interested, I look for the spares and if they are complete. Cheers Rob
-
The Jeep still is one of the coolest vehicles on this planet, guess how I know. Side steps looking mighty good and I like your matte hood as a glare reduced panel. Cheers Rob
- 2,036 replies
-
- 3
-
-
-
- car related stuff
- anything about cars
- (and 6 more)
-
In the end, you will forget about the hardness the kit threw at you for five month and you'll see a result, to be proud of, Gaz. Beside the lovely detail work with the parachute and the recliner chair, I especially like the paint- and decal job, as it looks like tattooed on, with no unwanted reflections and exactly the right matteness. Cheers Rob
-
What a nicely sorted bar, I I would do a lot of things to have access to something like this, but my island is behind the green door, or better, on the wrong side of it. Cheers Rob
-
John B is Recouperating from Covid
DocRob replied to Peterpools's topic in Site & Forum Announcements
If you linger any longer any longer in recovering, than your average building time, it would be bad news . Hope you will be better soon and fully heal. Cheers Rob -
Diorama IDF Mirage III C finished
DocRob replied to Kaireckstadt's topic in LSM 1/32 and Larger Aircraft Ready for Inspection
The dio looks great and suits the Mirage perfectly. Like Gaz said, the fleshtones are very believable and the figures add a lot of atmosphere. A bit more dust on the tarmac could help to get the same hot and sweaty ambient like on the pics of the real thing. Cheers Rob -
Gottfreid Weiroster Bf 109G6 R6 Revell 1/32
DocRob replied to GazzaS's topic in LSM 1/35 and Larger Work In Progress
Wow, that's a bunch of obstacles you were pushing ahead. I can understand your situation. Some builds are like that, the problems or at least felt problems amount to a mental barrier. Good that you pushed through Gaz, mostly it's a brain bug and not real. I often wonder, how little time and effort I spent on the parts of a build, I feared for weeks. All your detail work looks great to me, the parachute is beautiful and the MK. II chair looks comfy. Cheers Rob -
Would have been a shame. All in all a very nice result Mark. I like the camo scheme, but honestly prefer single seater Mirages, as the second seat looks a bit like added in a field workshop later. Cheers Rob
-
Nice camo Gaz, I like it. Never made a free hand camo myself, a thing to keep in mind for one of my next builds. Can't wait to see the little rodent weathered. Cheers Rob
-
Nice detail work on the Henschel. She will be a stunner. Cheers Rob