DocRob
-
Posts
7,015 -
Joined
-
Last visited
Content Type
Profiles
Forums
Events
Gallery
Everything posted by DocRob
-
 Muchas Gracias Señhores, until now, everything worked to plan, but now; I'm a bit in the open. I want to add some decals, unit signs and stencils, but I'm not sure, how to integrate them into the worn look. I even thought about hand painting the emblems. I will try a decal onto some Pledge brushed on a minor part and then will soft it with a decal solvent and then it's toothpicks and tweezers. Let's see how this blends. @Gaz: I don't see to many opportunities for this technique on our normal subjects in our preferred scales, but there are some, like derelict objects or some crudely cast tanks. I will try, how this will adopt to figure painting in larger scales and on other projects, I have planned. With the Ammoknight, I had a picture in my head of the finished power suit, for which I tried to create the appropriate workflow. Cheers Rob
- 100 replies
-
- 4
-

-

-
- hasegawa
- ammoknight
- (and 1 more)
-
I feel the need... for Shake and Bake... Tamiya StuG
DocRob replied to GazzaS's topic in LSM 1/35 and Larger Work In Progress
And the pictures tell a great story Gaz, I really like your wintery outfit for the Stug. Cheers Rob -
What is on your bench right now ? Share a picture :)
DocRob replied to Martinnfb's topic in Modelling Discussion
I feel your pain with ultra fine repetitive works, like these chains. Without better knowing, I doubt, that an anchor chain would lay loosely on a deck like the back one. Imagine a ship rolling in heavy sea and a loose chain is snaking on the deck looking for prey foot. Cheers Rob -
Fw190A-8 3/JG1 crash Vreeland
DocRob replied to JeroenPeters's topic in LSM 1/35 and Larger Work In Progress
For RLM 66 every airbrush is sufficient . Cheers Rob -
Hi Mike, absolutely no need for apologies, I just wanted to explain my background. Even if I used to work a lot with machines for metal, it was a long time ago and I'm a bit rusty, to stay in the terminology . Thoughts and warnings are highly welcomed and it always enrichens me to get your opinions. About the lathe you are right. Both machines do plug directly into the socket, without a transformer. I didn't know of the existence of an extension for the lathe. For my planned projects, the given length should be sufficient and I think, sometimes it's better to turn the piece 180 degrees and work on the other side, like you suggested, because the risk of failure with thin diameters raises with length. Cheers Rob
-
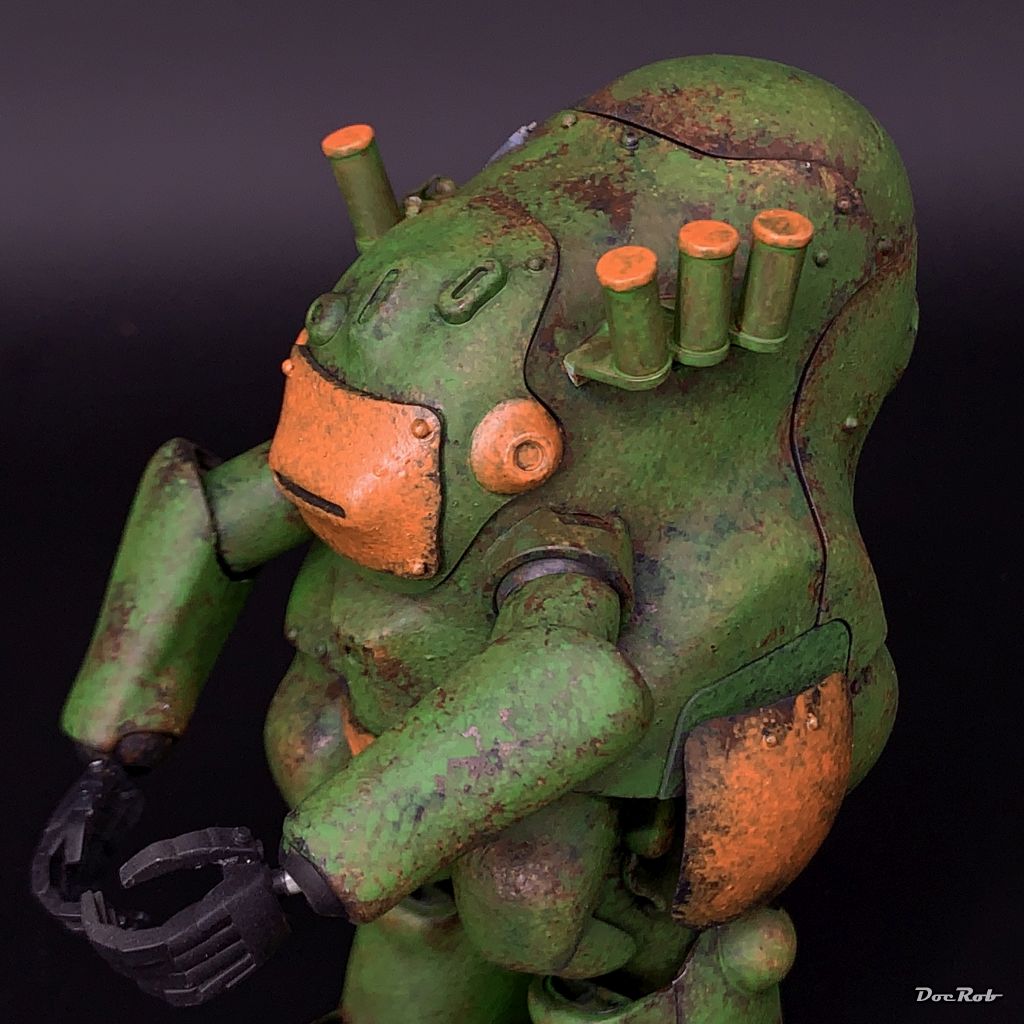
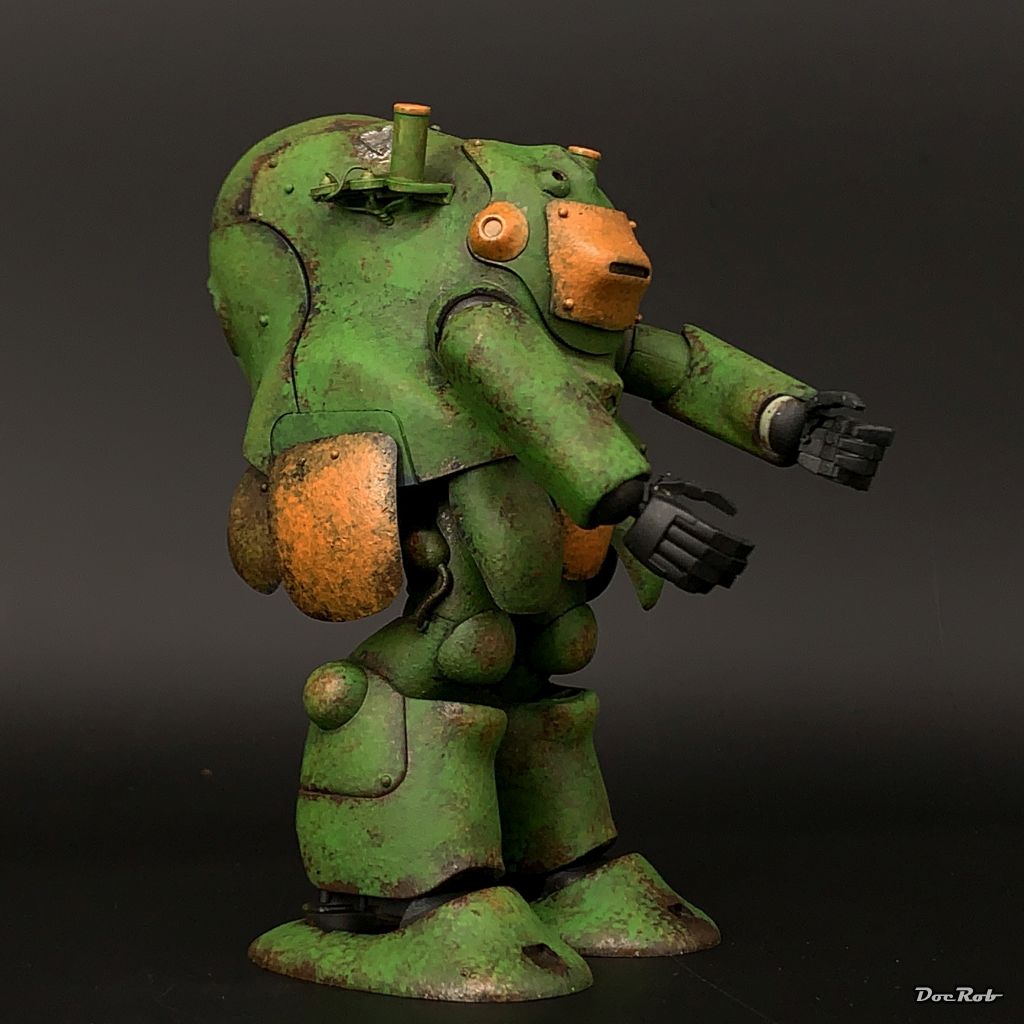
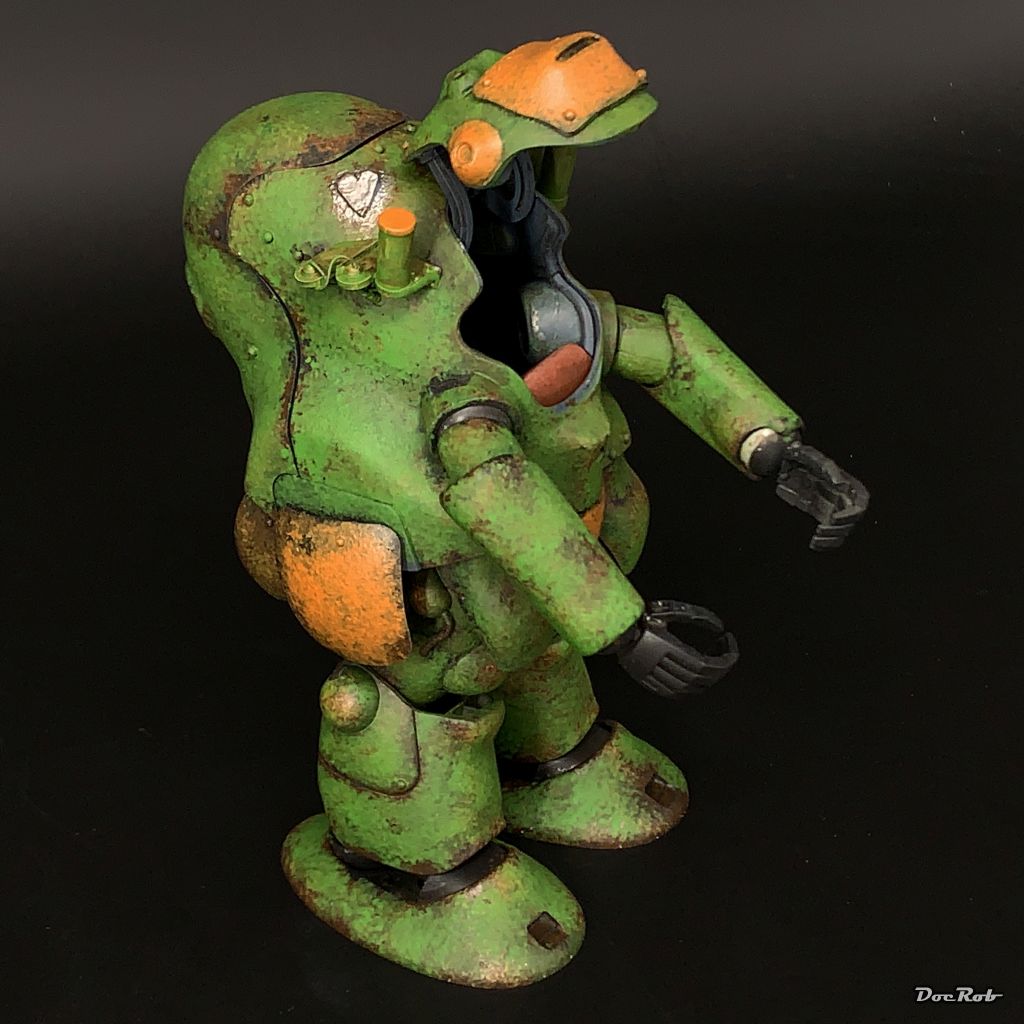
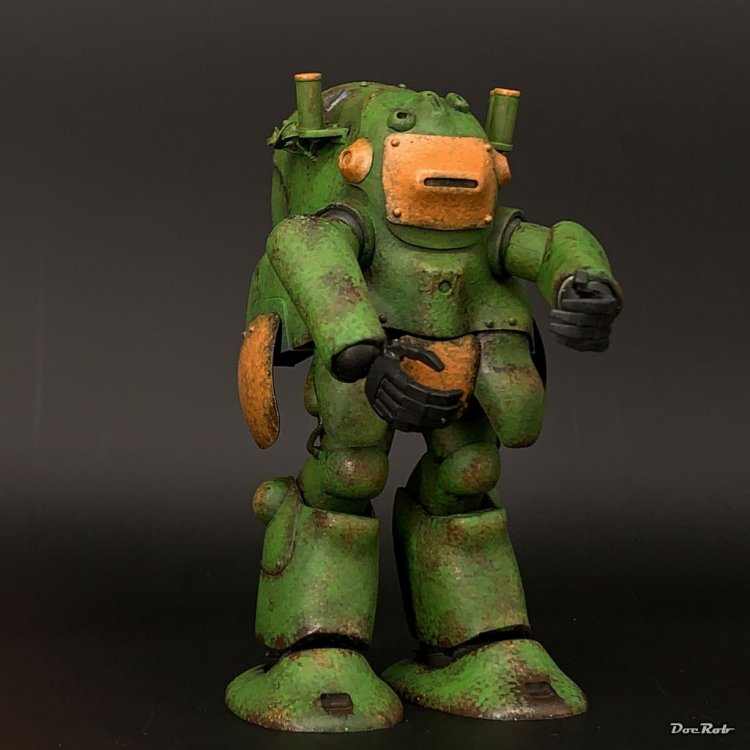
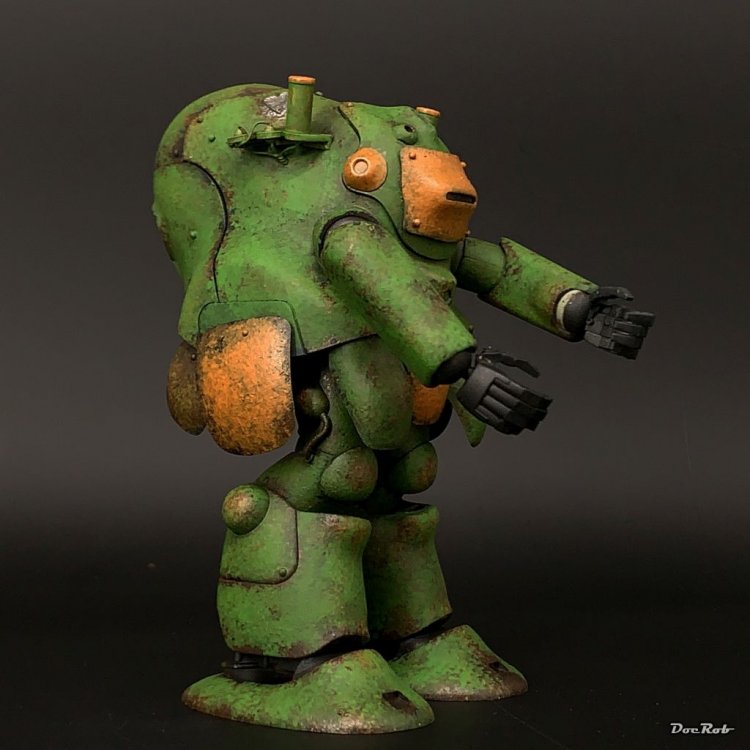
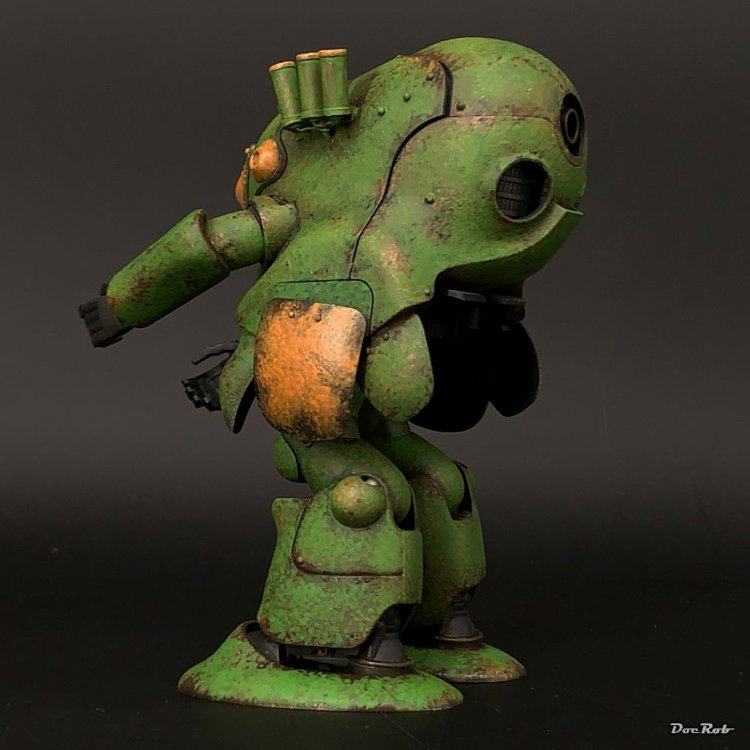
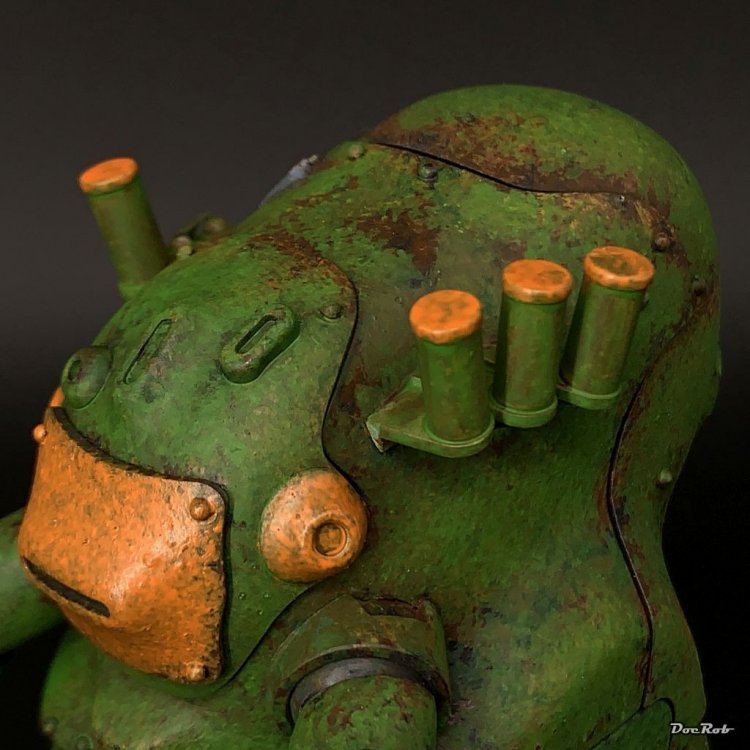
The madness continues with primarily dotting on Scale 75's Slimer Green onto the rust. I never stroke with the brush, just dotted with the color thinned with water from a wet palette, to have a slight translucency. I dotted with different brushes all not the newest in two to three layers, to build up the colour. Psychological the hardest part, is to stay away from the left out rust chips from the first layer with the following layers. I'm so used, to fill in, that I had really to concentrate not to . The same tape of application was used for Tiamat Orange. In all, I'm pleased, how this worked out and when everything dried properly, I will think about the next steps. Cheers Rob


- 100 replies
-
- 9
-
-
-
- hasegawa
- ammoknight
- (and 1 more)
-
Thanks for your view on the Lathe subject, Mike. I know the limitations of the Proxxon about not being able to work on metal or bigger wooden parts, but for my cases it's optimal, small, easy to handle, near silent and relatively cheap. I would trot another path, if, like you have planned, I would put my interest into scratching and constructing my own ship models. I can't see, that I will have lots of use for metal machining with my builds, given that e.g. most of the tiny brass barrels of aircraft guns have hard to reproduce punctured air jackets,.... In my late teens and early twens, before studying engineering, I worked in the workshop of a research institute for years with all the machinery, be it lathes or milling machines. We even built our own small sized CNC milling machine ourselves, with a PC as commanding unit, mind, that were the early eighties, where most of the professional CNC machines still used punched paper type, to get the code. By this times, I learned about the risks of working with metal machines too, as I nearly lost my finger in a M16 brass thread in a milling machine. I was able to pull the finger out in the instant of the second it was caught, causing the loss of only the cap of the finger and the nail of course and a decent amount of blood. The Sherline machinerey seems to be fit for the job, but for me at the moment they are oversize, but I will keep them in mind, as I have some future plans, to design Lamps from copper and other metals accompanied by wood and maybe paper. This will of course need a complete overhaul of my workshop Cheers Rob
-
Israeli Mirage III C with Atar9C
DocRob replied to Kaireckstadt's topic in LSM 1/35 and Larger Work In Progress
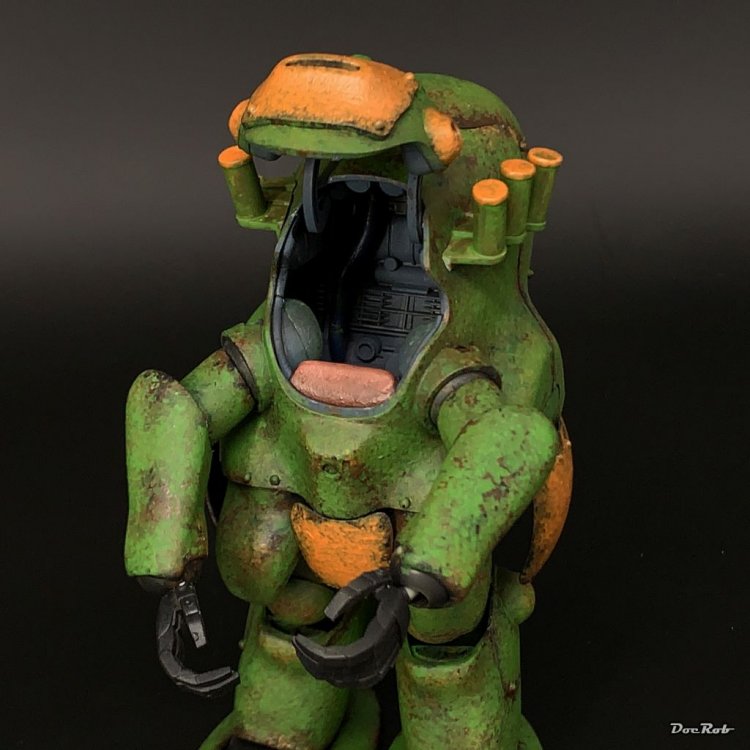
I have different types of metal pigments, but the best, because they are the finest and so far polishable are these from Uschi van der Rosten, but there are only three types, steel iron and chrome. For your case, i would use steel or maybe iron. The Scale75 metal colours are relatively new, but I used them for detail painting on several builds since then, lately on the innards of the Ammoknight and on the Fokker D.VIII, but only by brush. Cheers Rob -
There is another brand out there, which covers another important aspect in metal tracks to me, time and effort saving. I have some sets from Easy Metal Tracks for my Panzer IV derivates and they assemble easy, without glue, just bending some tiny latches on the inside of each track link. They are in the price range of Friul and others and are maybe hard to source. For me there is no real substitute for metal tracks, as they sag perfect, and I like to blacken them chemically, to get a perfect base layer. The cement free assembly helps, because there are no CA residues to hinder the blackening. Easy Metal Links (DE) (scalemates.com) Cheers Rob
-
Re-posting AMT/Ertl A-20G completed
DocRob replied to JohnB's topic in LSM 1/32 and Larger Aircraft Ready for Inspection
Nice and subtle job on painting and decaling, which lead to a very nice model. Your A-20 looks great, John. Cheers Rob -
Israeli Mirage III C with Atar9C
DocRob replied to Kaireckstadt's topic in LSM 1/35 and Larger Work In Progress
I sometimes use light grey on very fine parts, which should be matte metallic. When you lean back and look at your last pic, it looks almost grey. Some carefully rubbed on steel pigments may enhance the metallic appearance. Most brushable metallic paints have a too coarse grain for my liking and do absolutely not look like the real thing. The only exception I sometimes make are the Scale75 metallic sets, which behave a bit better than others I tried. METAL and ALCHEMY STEEL paint set - Scale75 Between history and legend METAL and ALCHEMY GOLDEN paint set - Scale75 Between history and legend Cheers Rob -
Working with lathes on metal does include a lot of learning and understanding of the different metals and their characteristics. Metallurgy is a wide field and you absolutely need the knowledge, to get decent results, guess how I know . Cheers Rob
-
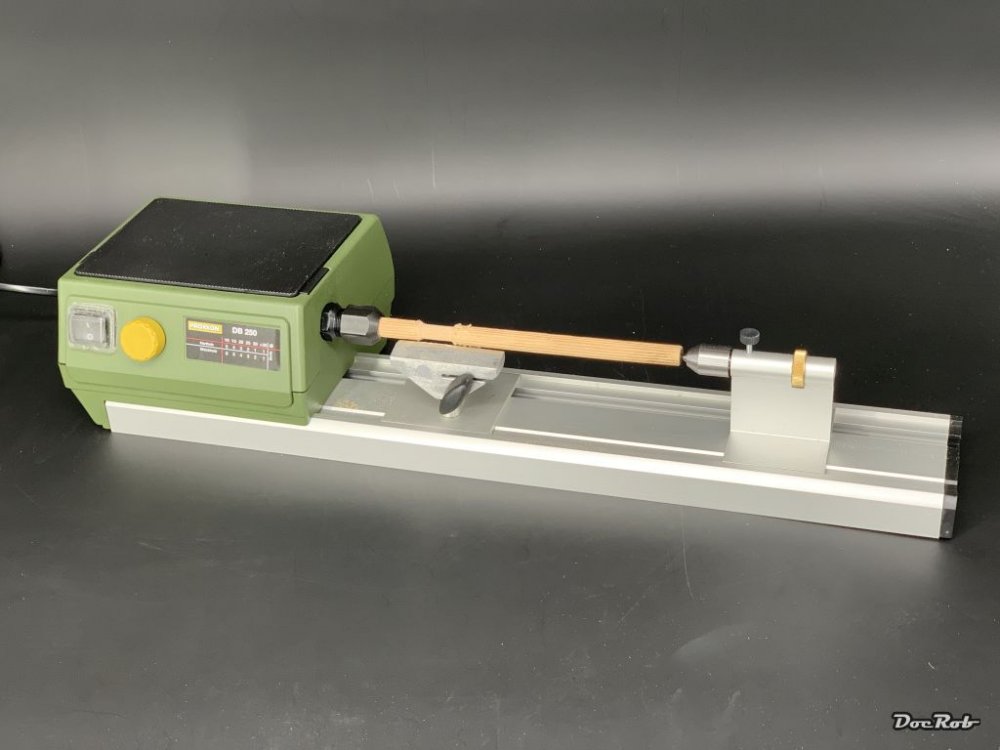
I couldn't have said it better than Hubert, thanks for that. Another aspect in working with metals by machines is, most kinds of metal need cooling or lubricating while working on. You can't do that with the Proxxon. When I was young, I worked in light engineering for years, using all types of machines for a wide array of metals and these were definitely another breed. The tiny Proxon is only sufficent for small wooden parts. It has a relatively low torque and you can fit long parts through it's spindle only up to a diameter of 10 mm. You are able to work with bigger diameters, but I doubt, the torque will be enough. It's a machine specialized for working on the masts and yards, which have a surprisingly variety of conical areas or indentions and this is, where this machine will shine, working with a chisel or sanding paper. I got the pair relatively cheap and they will be used for my shipbuilding projects with the additional benefit of working relatively quite and not covering too much space on the bench. Cheers Rob
-
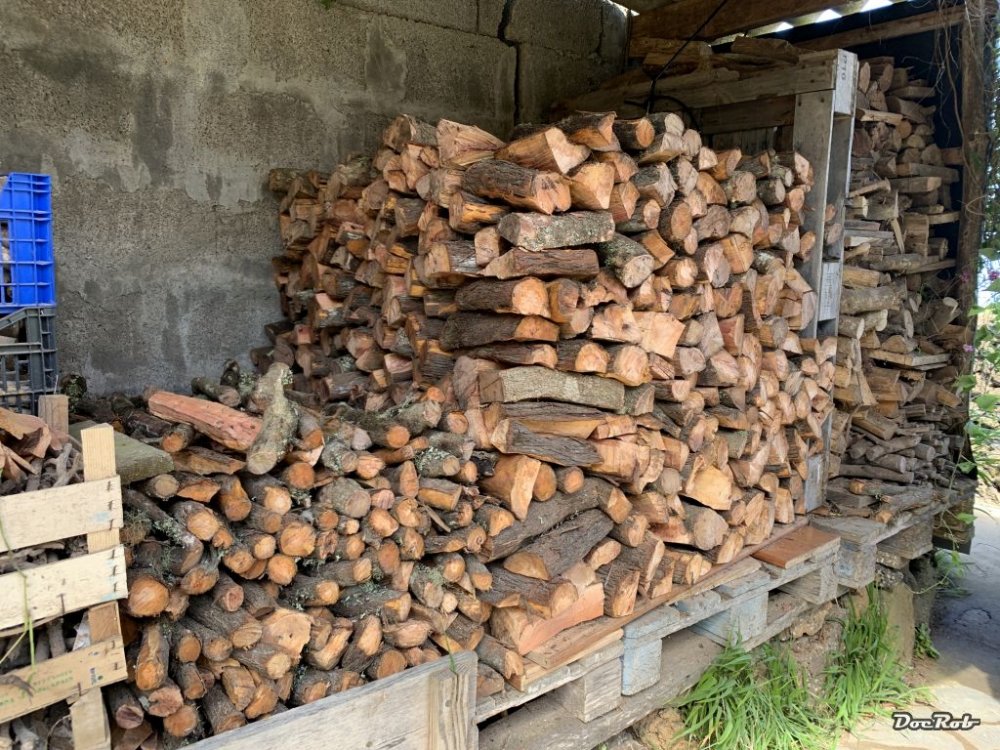
Gracias Amigos, this fresh cut wood has to dry for some time. In the next winter it will give our house a nice aroma when the fireplace is in use. Cheers Rob
-
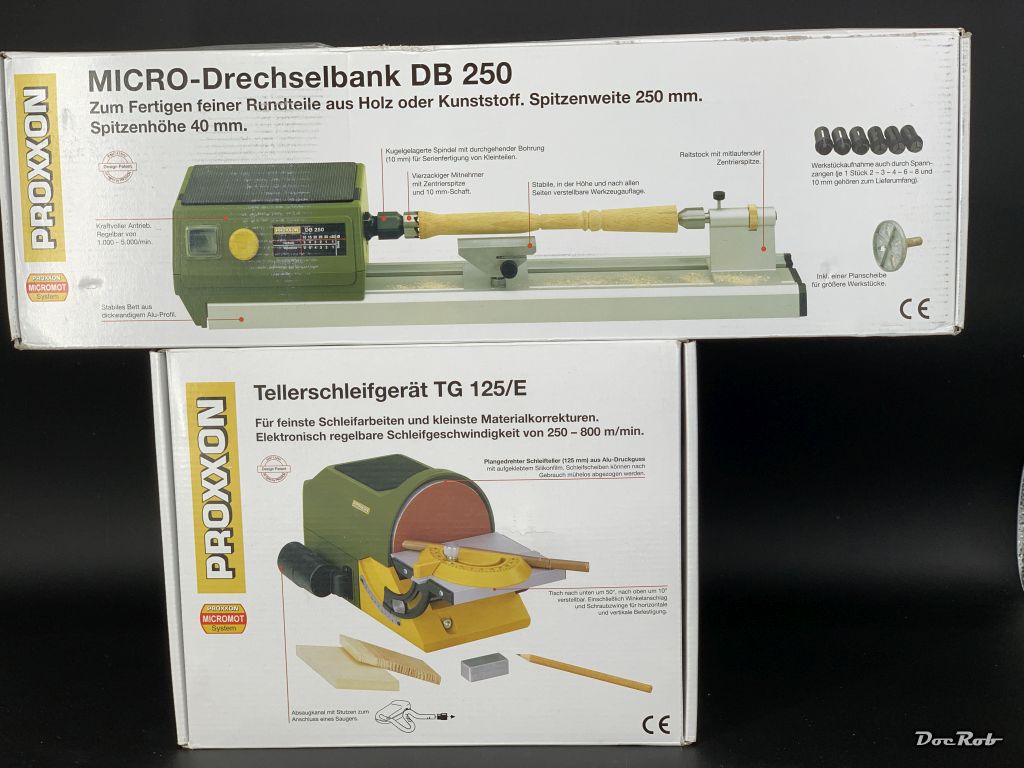
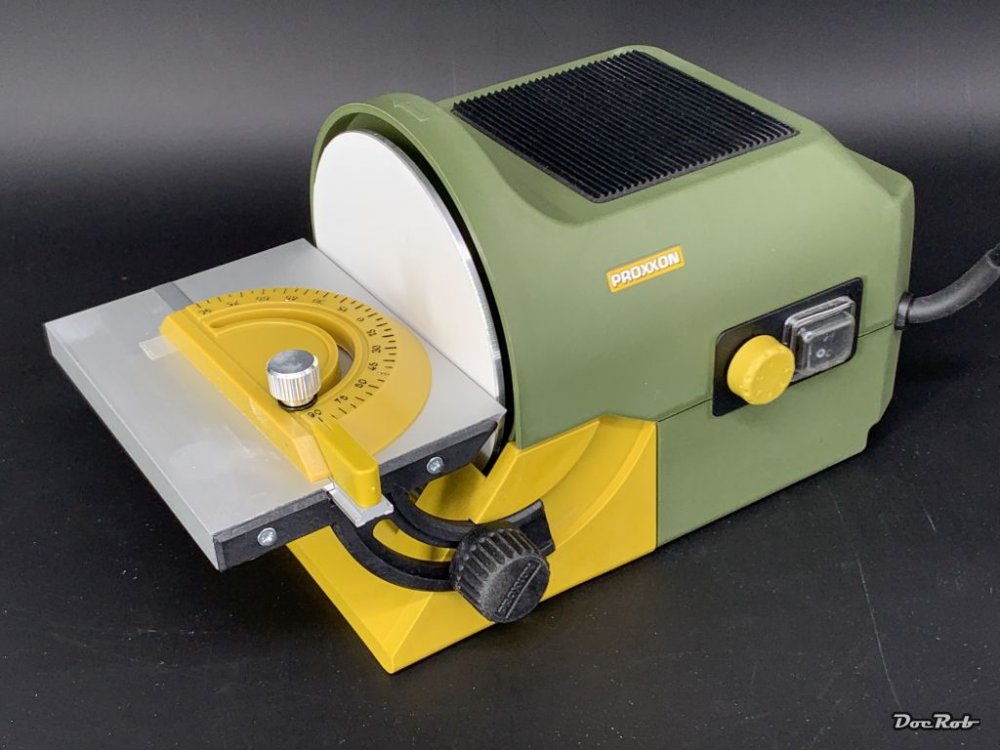
What is better than tools, right guys, machiiines. Today, I received my Proxxon Lathe and disc sander, which will be very helpful for my wooden ship projects. The sander is equipped with adhesive sanding discs, which are easy to interchange. the adjustable table and the tiny gap, will make it ideal for sanding planks and other small parts and the best, it's relatively quiet. The lathe will be helpful shaping the masts with different diameters and sanding the yards conical. To add to the woodworking experience, I recieved almost two tons of firewood today. Finest Brezo and Haya wood, which are different types of beechwood. My back can tell you something about the two tons . Cheers Rob

-
I thought about this too, seems to be an interesting one. Cheers Rob
-
Fw190A-8 3/JG1 crash Vreeland
DocRob replied to JeroenPeters's topic in LSM 1/35 and Larger Work In Progress
Noice Jeroen, where I would have closed the hatch, you made a mini kit out of it . Cheers Rob -
Israeli Mirage III C with Atar9C
DocRob replied to Kaireckstadt's topic in LSM 1/35 and Larger Work In Progress
Good to know, otherways, it would lead to panicked outcries like: 'I said flaps down, not up...' . Than god for international standards. Cheers Rob -
I feel the need... for Shake and Bake... Tamiya StuG
DocRob replied to GazzaS's topic in LSM 1/35 and Larger Work In Progress
I'm sure you will Gaz, your whitewash looks great and will be enhanced by the use of oils. For the washable white, I'm not so sure, I haven't tried the stuff and it will be tested thoroughly before use. If it fails, it will be hairspray too . Cheers Rob -
Zoukei-Mura P51D Mustang SWS No 4.
DocRob replied to Bomber_County's topic in LSM 1/35 and Larger Work In Progress
I just found a new product from HGW. It's a masking set, unfortunately for the Tamiya kit, for masking the body panels. If they fit, that could be a serious time saver for a NMF bird. P-51D MUSTANG - SURFACE PANELS MASK - 1/32 - MIR/32008 (hgwmodels.cz) Cheers Rob -
Zoukei-Mura P51D Mustang SWS No 4.
DocRob replied to Bomber_County's topic in LSM 1/35 and Larger Work In Progress
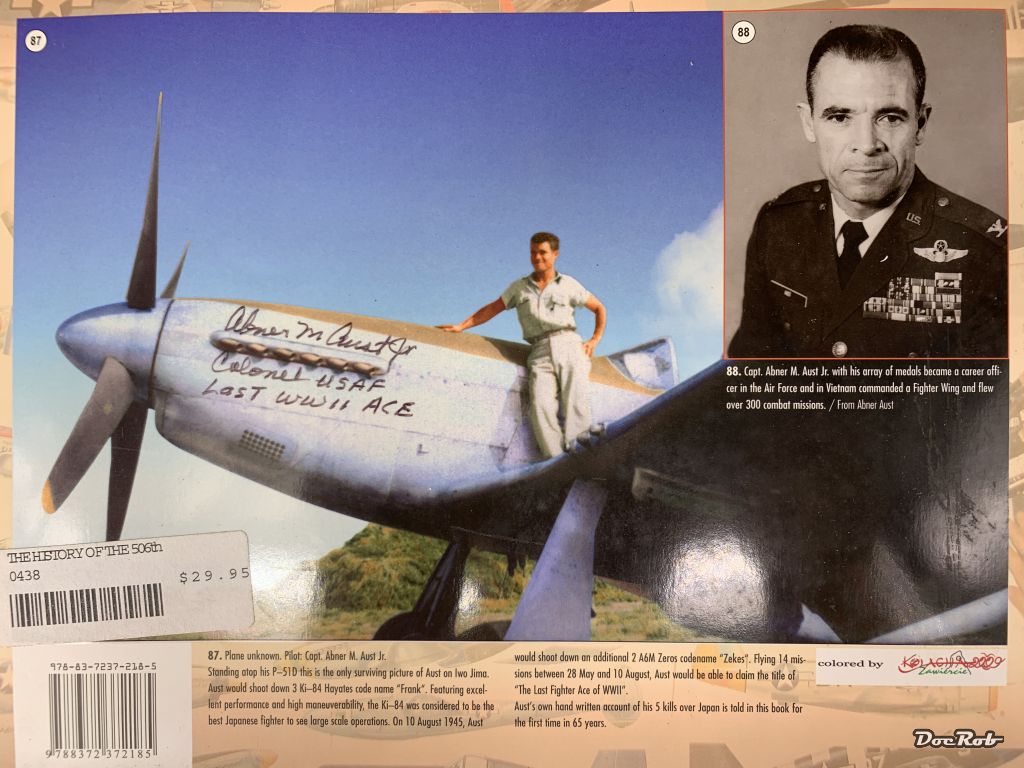
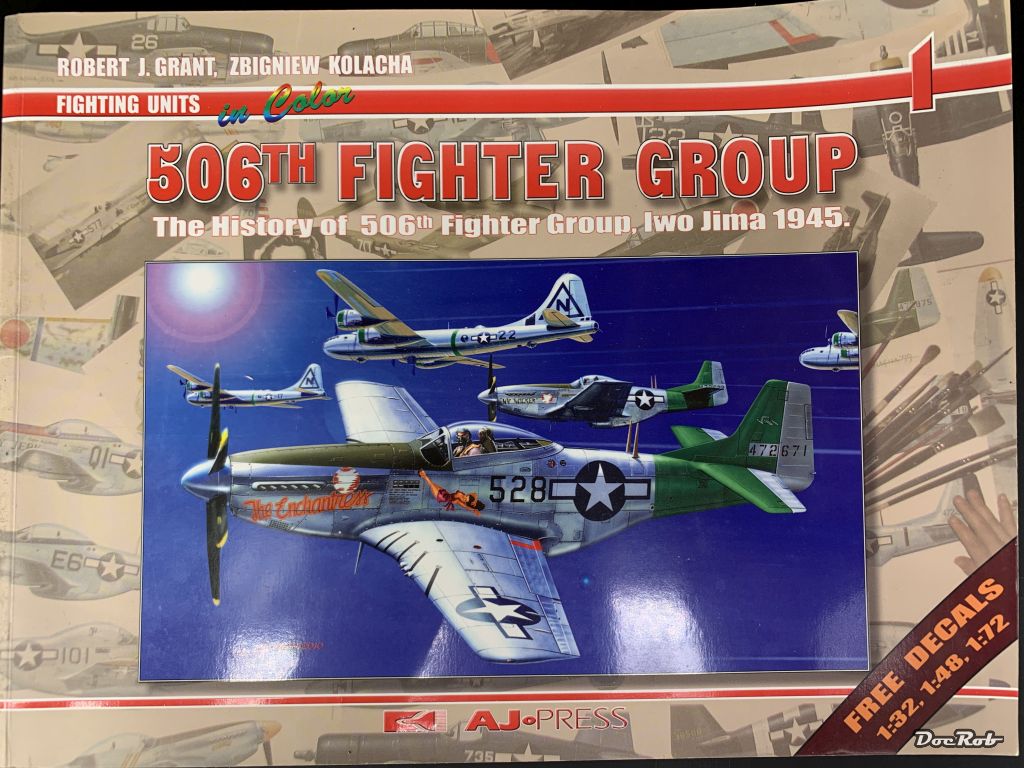
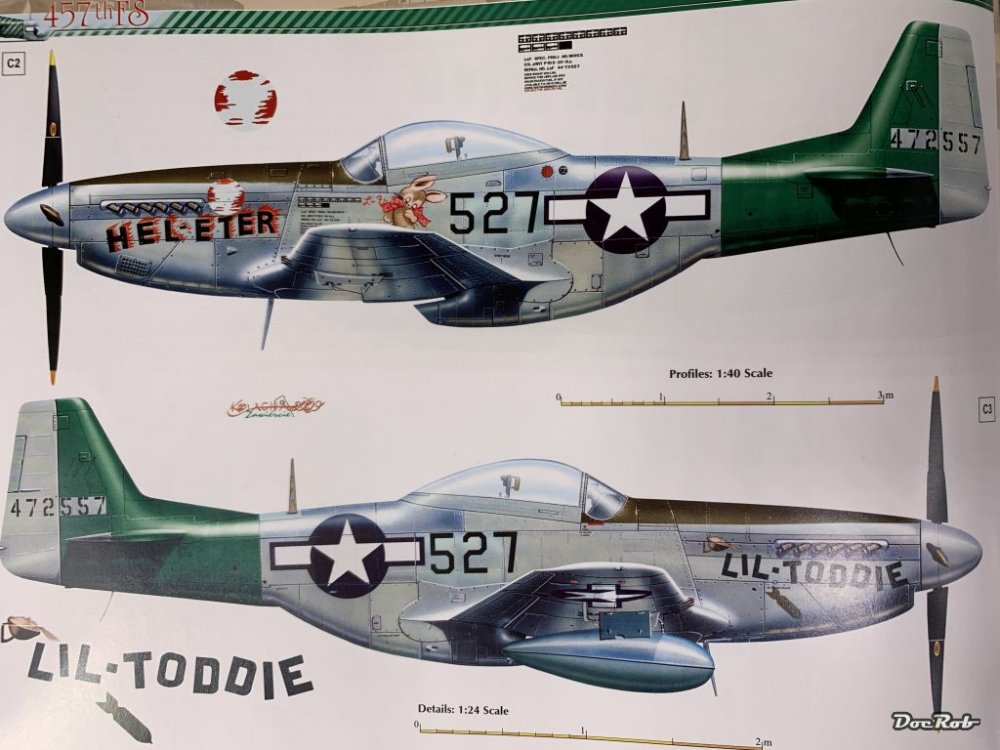
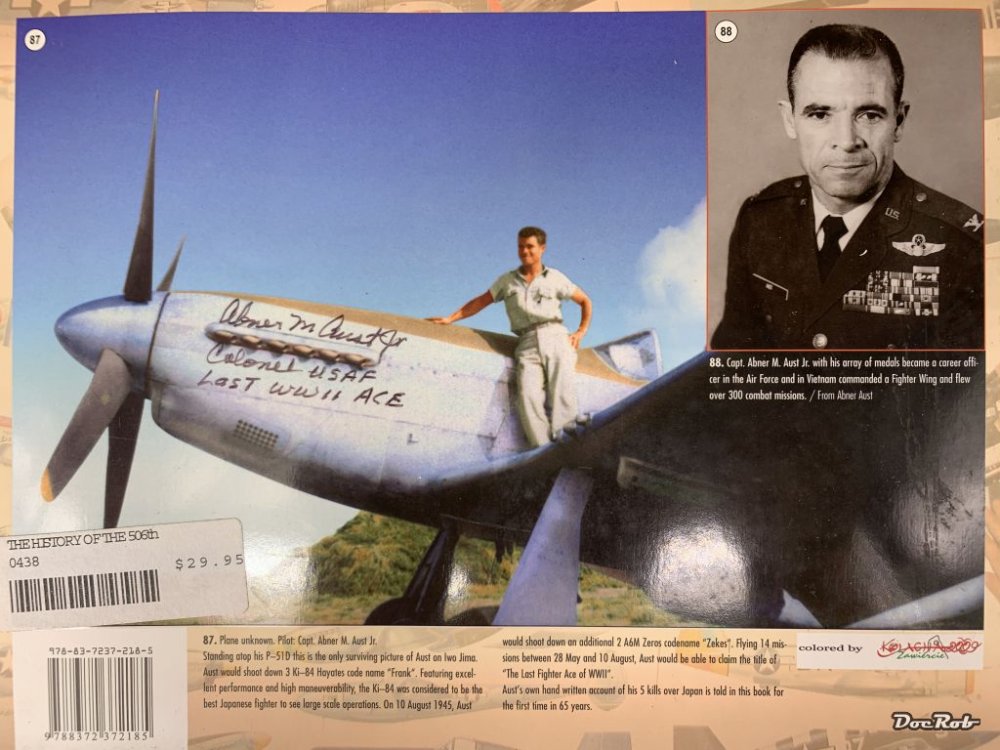
When I visited Planes of Fame in Chino, California some years ago, I bought a book about the 506th Fighter Group, signed by Abner m. Aust, the last WWII ace. If I do a NMF Mustang, it will be one of the schemes in the book. Luckily the decals are included for some of the planes in different scales and they are printed by Techmod, which is a good sign. Cheers Rob This is the book These are my favorite schemes: This is the signed back cover

-
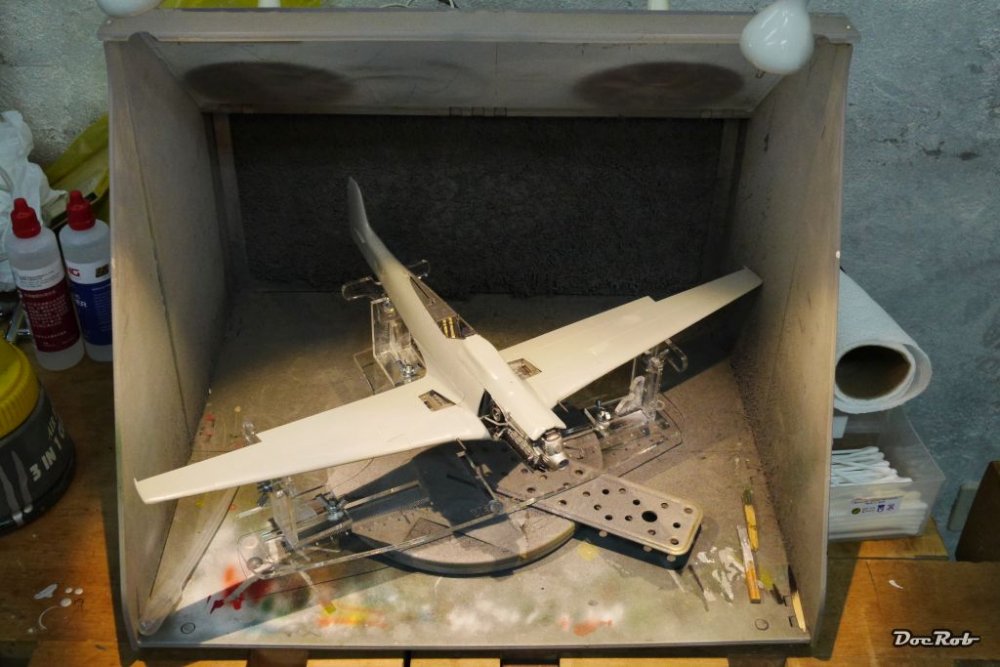
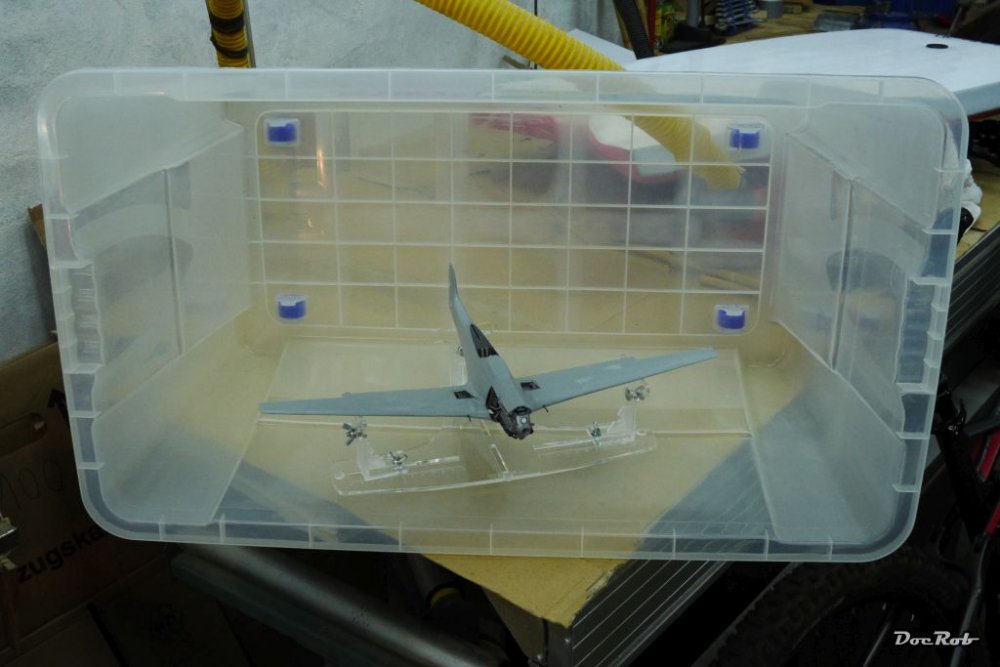
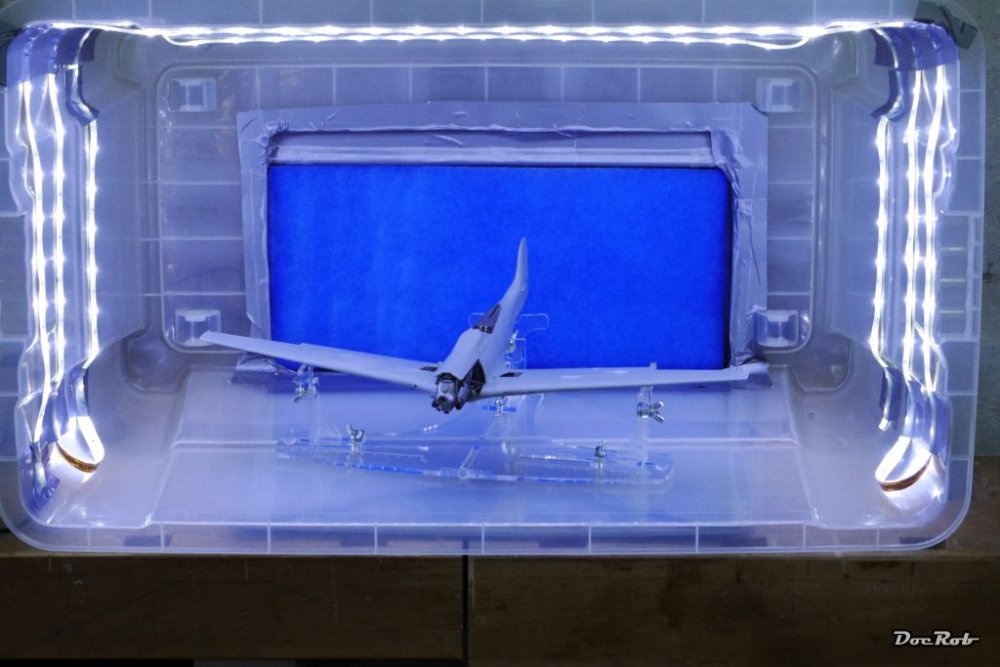
Very interested to see your aluminum results in your WIP. I had to enlarge my spray booth to and used the good working fan of the old one with a transparent plastic container as the new booth. After some cutting and duct-taping, I added some flexible LED strips around, finished. The booth still works t my satisfaction after three years of use and was a real cheapo. Cheers Rob Old one not fitting the ZM TA-152 Better Finished
-
Nice progress on the U boat. The wooden deck looks great as does the Flak. Do you plan to substitute the turret railings? They seem to be a bit oversized and shouldn't be to hard to replace with brass. Cheers Rob
-
Israeli Mirage III C with Atar9C
DocRob replied to Kaireckstadt's topic in LSM 1/35 and Larger Work In Progress
Exactly the right decision, to stay away from black for weathering. The way you did it, it remarkably pops and brings everything to live. For removing oil colours, I use cotton swabs only on a few occasions. I prefer a flat midsized brush, which has a good holding capacity for paint and thinner. This makes the oil effects more controllable, as you can play with the amount of thinner and the dampness of the brush. As a side effect there is less plastic trash, for which some sea turtles will be thankful. Cheers Rob -
Gracias Carl, as this paintjob requires a thorough plan, it's easy to do a step by step. Until now, everything was easy and redoable, now comes the make or brake part . Cheers Rob
- 100 replies
-
- 4
-
-
- hasegawa
- ammoknight
- (and 1 more)