


DocRob
-
Posts
7,048 -
Joined
-
Last visited
Content Type
Profiles
Forums
Events
Gallery
Everything posted by DocRob
-
 That's a gorgeous build and paintjob and like Ernie said, quite unique. The girl looks great while doing a feet first slide and reaches the base safely . Cheers Rob
 -
Two little Brewsters, now a Buddy Build.
DocRob replied to Clunkmeister's topic in LSM 1/35 and Larger Work In Progress
Your Brewster seems to be more than worthy to be finished Ernie. Seeing the seams inside the cowling, I would tend to option one, finish the build and lay on a beautiful paintjob to hinder the eyes of the beholder to wander to deep into the innards . Cheers Rob -
That is some impressive stuff, you are showing here. The depth of detail is breathtaking and your paint- and decalwork is perfect. Not the least your work, inspired me to think about building a 1/12 car and I ordered a Tamiya Porsche 935 last week. Cheers Rob
-
It really does, the tracks will be fiddly and the chosen scheme is a bit boring, but that aside the plastic on the sprues looks great and the additional goodies are perfect for a little vignette with those nice figures. Cheers Rob
-
What kind of pics do you desire Harv? There is a review video on Youtube: Sprue Review Meng 1/35 M4A3 Sherman 'Victory Kiss' Limited Edition - YouTube Tell me if you need more info. Cheers Rob
-
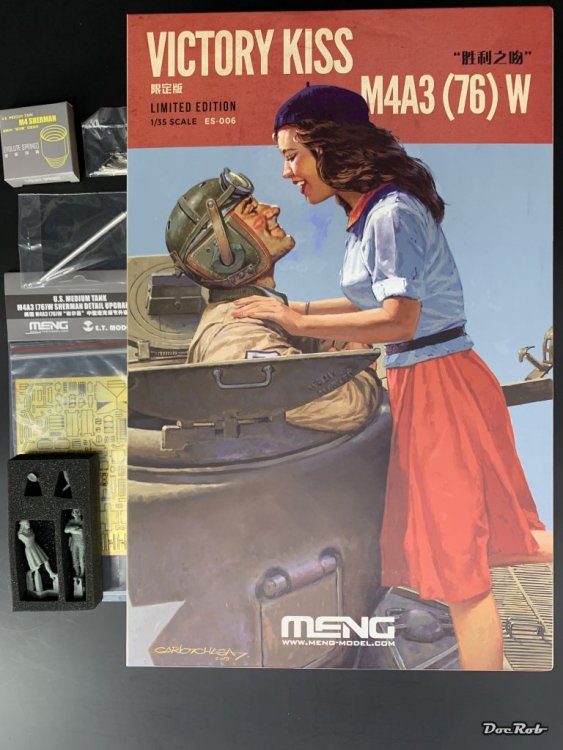
Today the kit of Mengs M4A3 arrived in the 'Victory Kiss' limited edition. It includes the Meng model with workable tracks, metal track pins, metal coils and a metal barrel. Additional there is the shown PE set by ET and last but not least, the two fine casted resin figures of the commander and the Mademoiselle. I got the kit for less than half the regular price, including shipping, so it would have been a crime to resist. Have I mentioned the great boxart Cheers Rob
-
Do you mean this particular version, Ron. The Wessex is available in 32 scale from Fly in two variants and there is a third variant announced. Cheers Rob
-
Takom Panzerkampfwagen I 1/16 scale... with figure
DocRob replied to GazzaS's topic in LSM 1/35 and Larger Work In Progress
This guy looks a little wired, but as he seems to be in DAK livery you could sculped a scarf around the head as a protection from a sandstorm. I have the Spanish PZ. I variant with Breda gun in my stash, so I'm naturally interested in how yours went together. Cheers Rob -
Israeli Mirage III C with Atar9C
DocRob replied to Kaireckstadt's topic in LSM 1/35 and Larger Work In Progress
That nozzle looks great and appears to be metal made after painting. I switched completely to Xtreme metals from AK, which are pure gold to me, but there are two Alclad's which I can't substitute, exhaust manifold and jet exhaust. The Alclad titanium looks also better than the Xtreme metal one, but it's so fragile, that I don't use it anymore. Cheers Rob -
I liked it the way it was, but it's hard to tell from the pics, with the lightning being completely different. Cheers Rob
-
Atlas Cheetah E Scaleworx Conversion
DocRob replied to GusMac's topic in LSM 1/35 and Larger Work In Progress
I'm with the guys here Gus, your resin work is awesome and will make the Cheetah look great and different from the 'normal' Mirage. Cheers Rob -
What is on your bench right now ? Share a picture :)
DocRob replied to Martinnfb's topic in Modelling Discussion
Bummer, but you can't blame the dog for it this time, at least not the decal. I hope you find a solution. Isn't there a second canopy for an opened display? Cheers Rob -
Carl you need help, If my bench would look like yours (and mine is not very tidy) I would start a fire and call the insurance afterwards. BTW, do you now, where you left your decal tweezers? Cheers Rob
-
What is on your bench right now ? Share a picture :)
DocRob replied to Martinnfb's topic in Modelling Discussion
Do what's best for you and your family Phil, there is nothing won with feeling guilty, because of what... ? These are weird times and we should look and care for the people which are important to us and when there is time left, have some FUN. Cheers Rob -
What is on your bench right now ? Share a picture :)
DocRob replied to Martinnfb's topic in Modelling Discussion
Progress is slow on the Hellcat, due to drying times and lots of 1/1 scale modelling on the house . The basic paintjob is done so far, this time with Gunze colors, a first for me. They sprayed well onto the 3D enhancing black and white base coat, which still shows a little. After applying the three camo colors, I used heavy thinned variants of them for panel accentuation and a little shading and lighting. Then I added the wings and tail, because it was way easier to apply the camo freehand, without the wings. Next will be an oil treatment as a pre weathering and to get the blues a bit more vibrant and then it's decaling / wet transfer time. Cheers Rob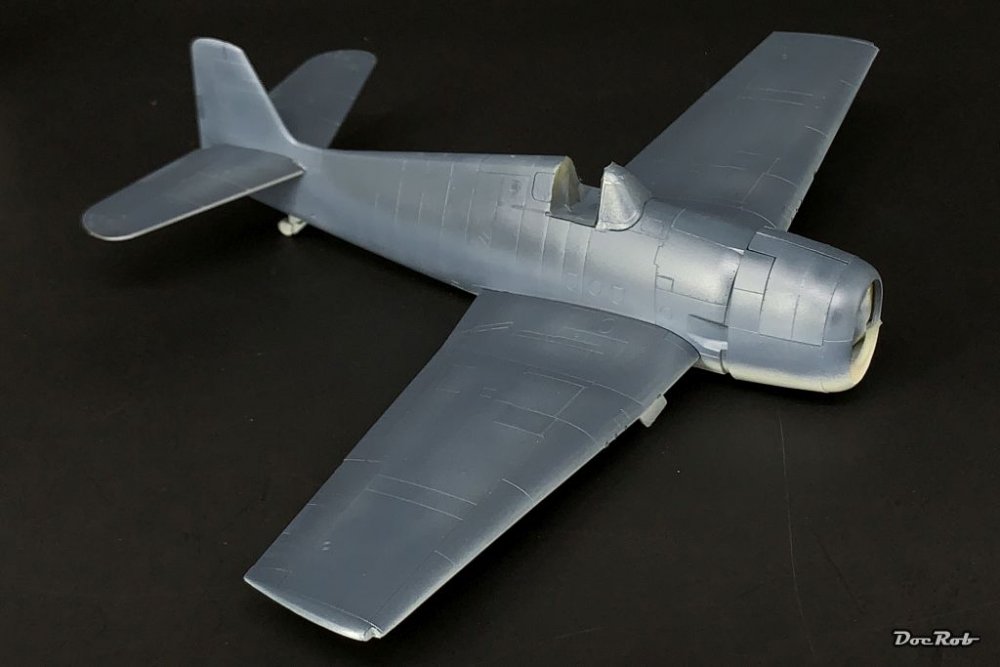
-
I like your shadowing Gaz, the green hue is part of the palette of colors used, so that's fine by me. I experimented a lot with oil colors and pigments year the last year and found, it's best to stay in the array of colors used for shading or use vibrant often contrary colors, which involved pink orange and violet tones in some cases. You can learn a lot about color techniques and shading from good figure painters, some of them seem to have found the holy grail of color rendition. Another important thought is always 'go with the imagined lighting', nothing looks worse than false shadows. Cheers Rob
-
Israeli Mirage III C with Atar9C
DocRob replied to Kaireckstadt's topic in LSM 1/35 and Larger Work In Progress
Congrats Kai, the detailing payed off, the landing gears look like the real thing. Wish you fun with the painting. Cheers Rob -
Awesome progress Peter, the pit looks beautiful with all the added detail. Cheers Rob
-
That's a truly beautiful ignition harness, great attention to detail and well described. Cheers Rob
-
The oil treatment turned out great. It results in a very realistic look. I like the little differences in the three camo colors, which enhances the realism to my eye. Cheers Rob
-
What is on your bench right now ? Share a picture :)
DocRob replied to Martinnfb's topic in Modelling Discussion
Absolutely stunning in every aspect. Cheers Rob -
What is on your bench right now ? Share a picture :)
DocRob replied to Martinnfb's topic in Modelling Discussion
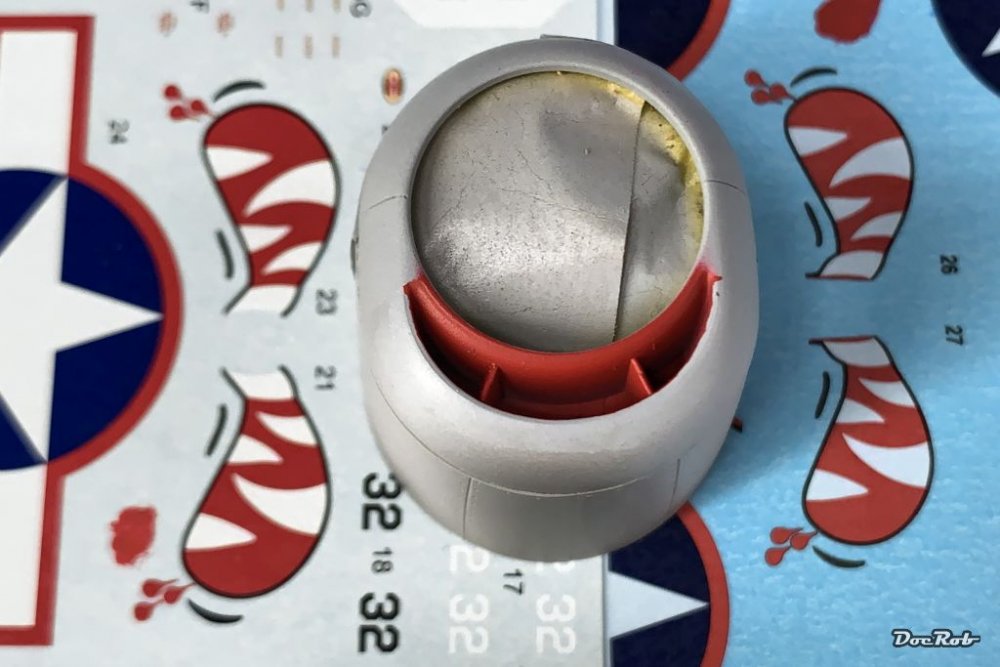
Wildcats, Hellcats and some untidy cats, sounds like a zoo here . I primed my Hellcat and chose a new approach with using black and white gloss paint to emphasize a little 3D effect as a base layer for the paintjob, which will naturally need to be a little translucent. As I will freehand the three tone camo, I will join the tail and wings later with the fuselage, for an easy workflow.. It took me some time to find the matching red color for the cat mouth. The sides with the fangs will either be decals (left on the pic) or wet transfers from HGW (right) The best matching color was Scale 75's 'Baal Crimson', which I dotted onto the transfer material to test. Interestingly the HGW transfers doesn't cover the bloodshots in the eyes, where the Eduard decals have an extra decal to apply onto the eye decal. Cheers Rob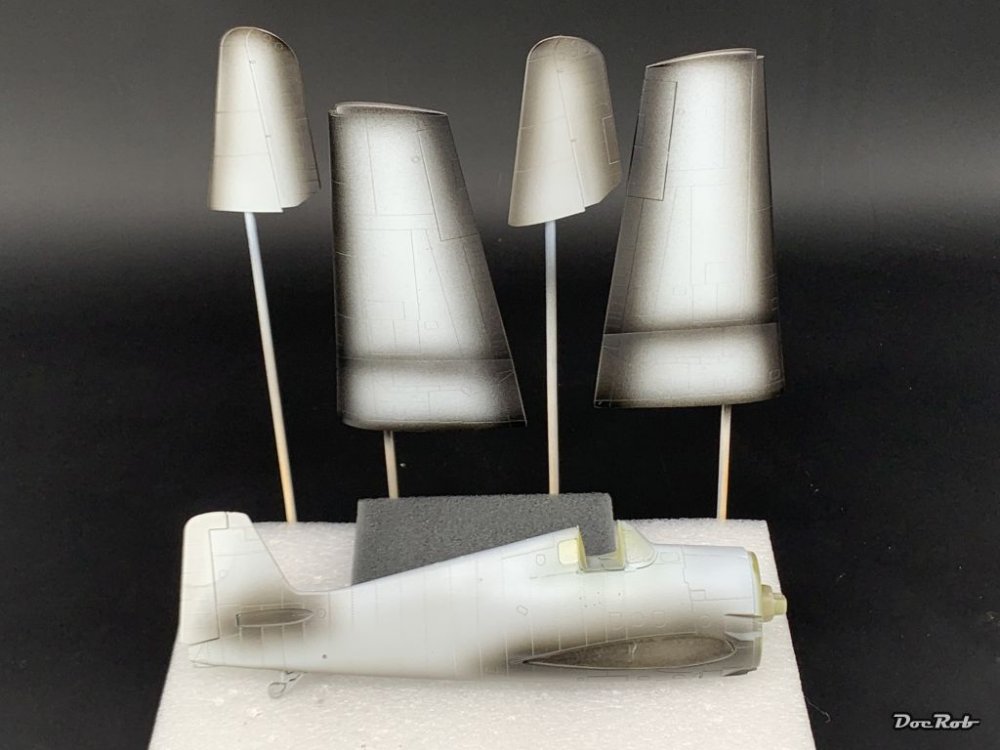
-
Voroshilovets 1/35 tractor.
DocRob replied to belugawhaleman's topic in LSM 1/35 and Larger Work In Progress
The tractor is looking great. I have a soft spot for strange looking vehicles too and sometimes thought about building one. If you are planning to blacken the Friul's chemically, it's best to clean them with some alcohol and a brush before. When soaking in the bath, it's a good idea to move them, as the process produces bubbles, which will hinder the blackening at the spot. The end result looks better than painted tracks, it has the perfect black brown hue and with a petite rub you have some metal shining through. Cheers Rob -
Atlas Cheetah E Scaleworx Conversion
DocRob replied to GusMac's topic in LSM 1/35 and Larger Work In Progress
Great work at the intakes Gus, they blend in smoothly now. With all the heavy resin and tons of filler, you might not have to think about producing a tailsitter. On the other hand, maybe a stronger undercarriage is needed. Cheers Rob -
Israeli Mirage III C with Atar9C
DocRob replied to Kaireckstadt's topic in LSM 1/35 and Larger Work In Progress
Exactly like the others said, you are on the way to produce a gem with all the added detail and scratchwork. Cheers Rob


