DocRob
-
Posts
6,761 -
Joined
-
Last visited
Content Type
Profiles
Forums
Events
Gallery
Everything posted by DocRob
-

Kitty Hawk F-5F done.
DocRob replied to Clunkmeister's topic in LSM 1/35 and Larger Work In Progress
Looking great Ernie, shouldn't be your last jet. Sometimes you just have to stay with the oob approach. Trough a build the small errors and tiny 'I should have make it different ' add up naturally and it's easy to lose yourself, getting everything perfect. Finishing a project is also very satisfactory Cheers Rob -
Wow, what a beauty. Would be nice, if you could add some detail pics. Cheers Rob
-
Thanks guys, I like that effect too, but would have wished for a little lesser grain, but that is probably my fault. Lots of experimenting ahead to get the right sheen on the plastic. Cheers Rob
-
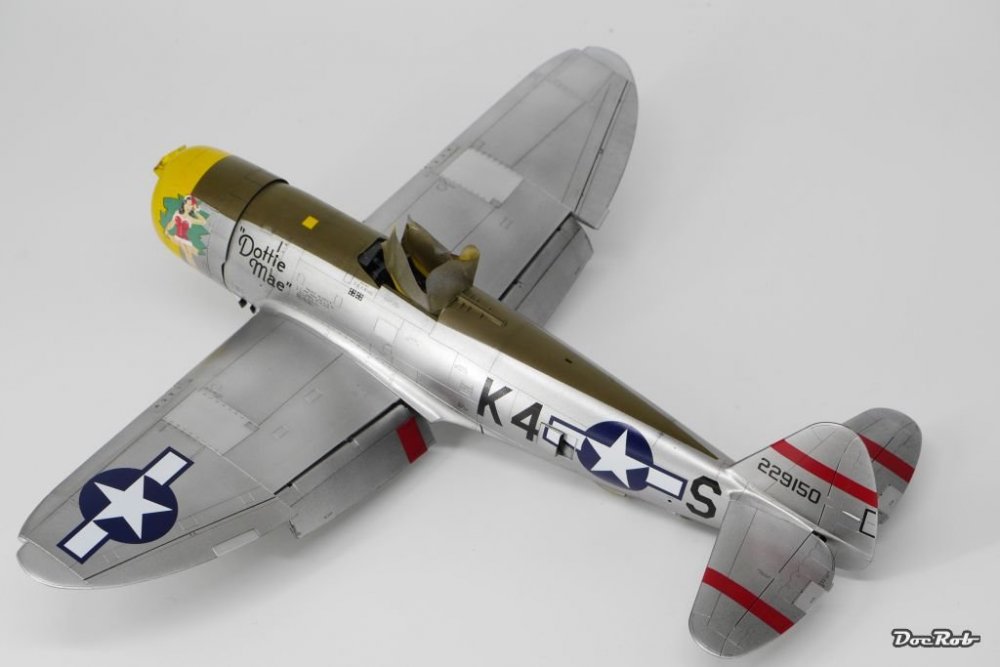
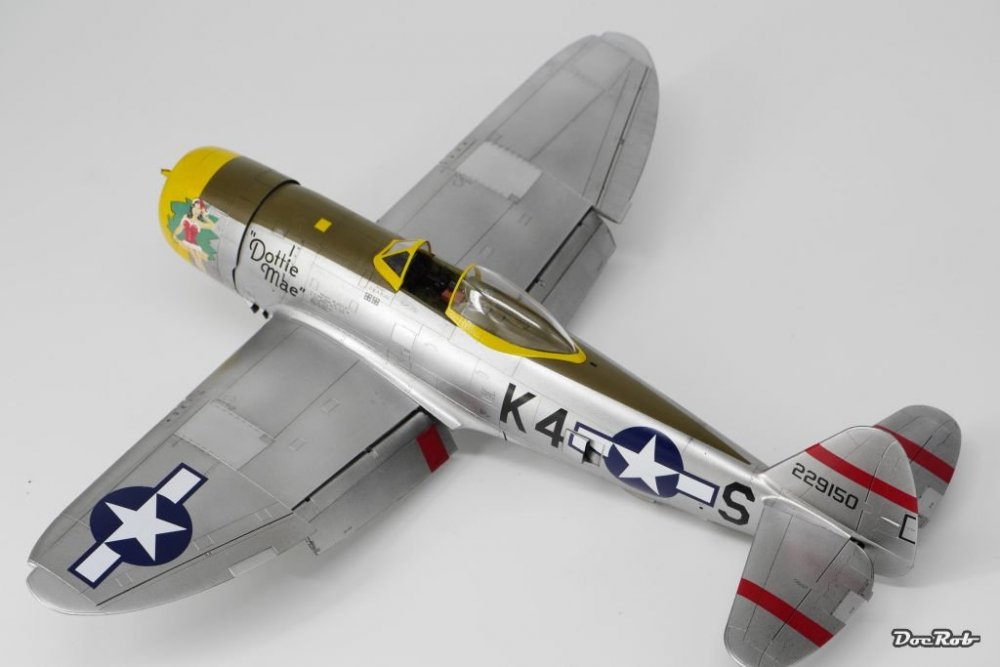
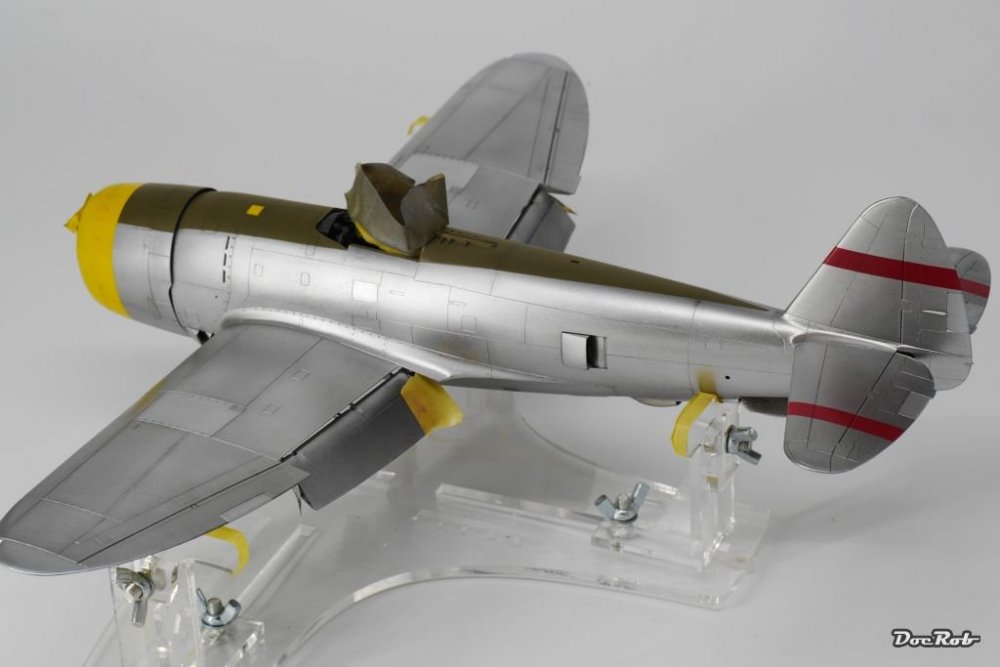
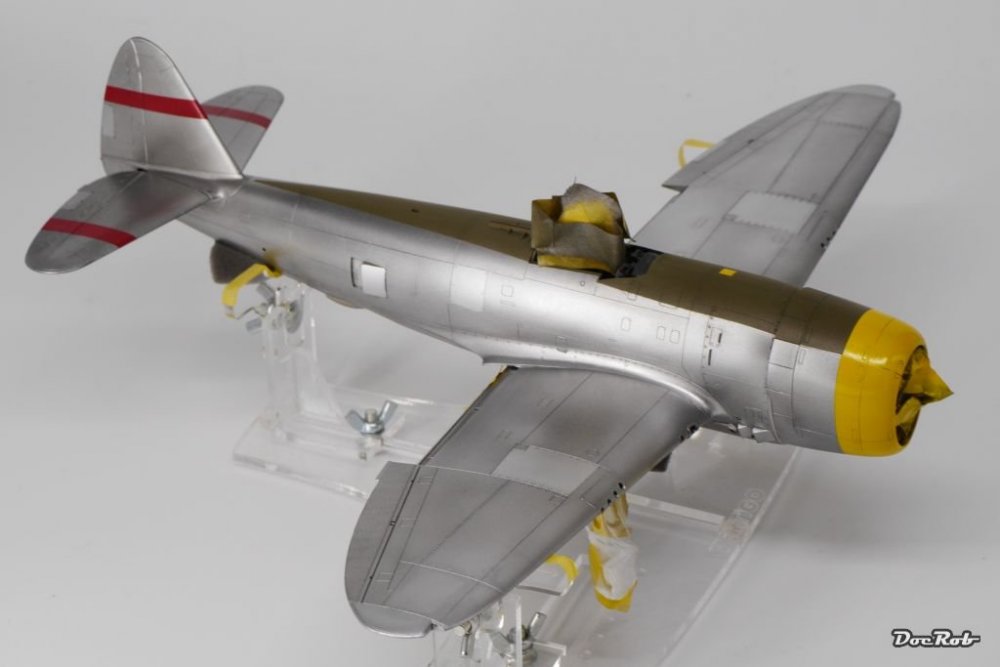
Hola Hombres, I made some progress today finishing the decals and numerous stencils. Everything went well with the Cartograph stuff, but they take a lot of time to soak. After a coat of future it's time for the final assemblies. The decals blended well after sealing, the NMF hides the carrier film well. The canopy and windscreen were not test fitted, because I like to keep them on a piece of sprue for futurizing, masking and painting but they seem to fit well, phew. Cheers Rob
-
Thanks Danny, some things have to be finished before calling her done. Next week I will have a little garden project to distract me . Cheers Rob
-
What is on your bench right now ? Share a picture :)
DocRob replied to Martinnfb's topic in Modelling Discussion
Hairspray technique? -
Eduard P-47D Thunderbolt "Dottie Mae" WIP
DocRob replied to a topic in LSM 1/35 and Larger Work In Progress
Nice save Danny, hope mine will be near as good as yours. Actually yesterday I put the large decals on my Jug, including Dottie. Next are the numerous and boring stencils. Cheers Rob -
Barker's Sopwith Camel 1:32 scale
DocRob replied to sandbagger's topic in WNW and WW1 Ready for Inspection'
Wow, a great looking Camel. The little dio enhances the look of your wonderful Camel a lot. The attention to detail is amazing. Cheers Rob -
Looking great, can't wait to see the camo completed. Cheers Rob
-
That has nothing to do with stress, thin materials or weak construction, it is an advanced technology feature
-
Nice looking Raiden and quite rare without heavy weathering. One year ago I built one too, without any aftermarket, a first since being a kid. As you mentioned it is a trouble free relaxing experience. The Hasegawa Raidens should be prescribed for frustrated modelers. Cheers Rob
-
1/18 P51C Mustang "Lopes Hope 3rd"
DocRob replied to airscale's topic in LSM 1/35 and Larger Work In Progress
I trash my Hasegawa Jug and look for another hobby . Inspirational and desillusionating at the same time, I'm cought in a paradoxon and just applaude. Cheers Rob -
What is on your bench right now ? Share a picture :)
DocRob replied to Martinnfb's topic in Modelling Discussion
Don't forget, chaos can be an inspirational force Cheers Rob -
1976 Revell Bf109 Gustav
DocRob replied to GazzaS's topic in LSM 1/32 and Larger Aircraft Ready for Inspection
You made a little gem out of that dinosaur 109. It was a nice travel back into the ages with your build. Cheers Rob -
I would use a neutral grey wash from MIG (no pun) Cheers Rob
-
Tamiya F4U-1D Corsair: Update: 2/1019
DocRob replied to Peterpools's topic in LSM 1/35 and Larger Work In Progress
I think I've seen a picture once where the folded wings were secured with a rod between the folded part and the top side of the wing or fuselage. If that is true (hello Corsair experts) it would be another possibility to strengthen the joint with a steel bar. Cheers Rob -
Nope Señhor , I'm sorry
-
Great photos Martin, thank you. It's interesting to see the effect, that b&w photos have on Colours especially yellow and red, which appear to be much darker than they are on some of the pics. Another noticeable area is the tail area, without the black painted 'borders' which are mentioned in the Eduard manual (at least with a question mark). a) yes, b) no . Go for it Ivan, it's a pure pleasure build (don't know about the resin). As you chose a non NMF scheme you left out the only area of the build which troubled me. Cheers Rob
-
Tamiya F4U-1D Corsair: Update: 2/1019
DocRob replied to Peterpools's topic in LSM 1/35 and Larger Work In Progress
I hope you will find a way to repair the damaged part. Sometimes the welding effect of plastic glue can do wonders. I always felt that this effect is stronger with the white capped normal Tamiya cement, than with the green thin stuff. Is there a possibility of reinforcement with a steel rod? Surfaces of your corsair look great and should luck perfect in Colour. Cheers Rob -
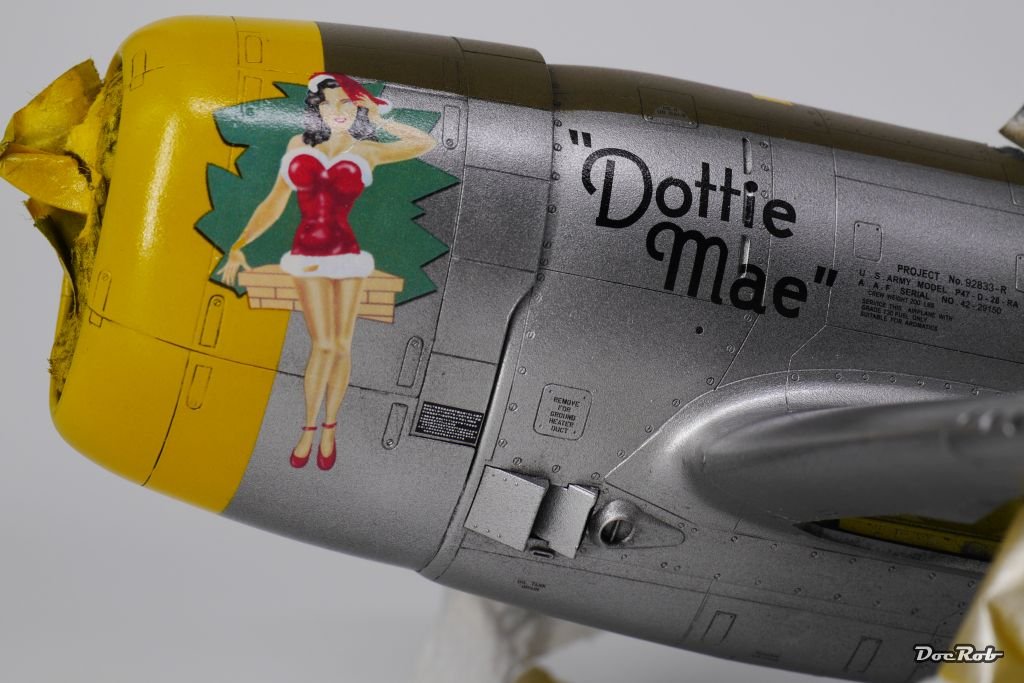
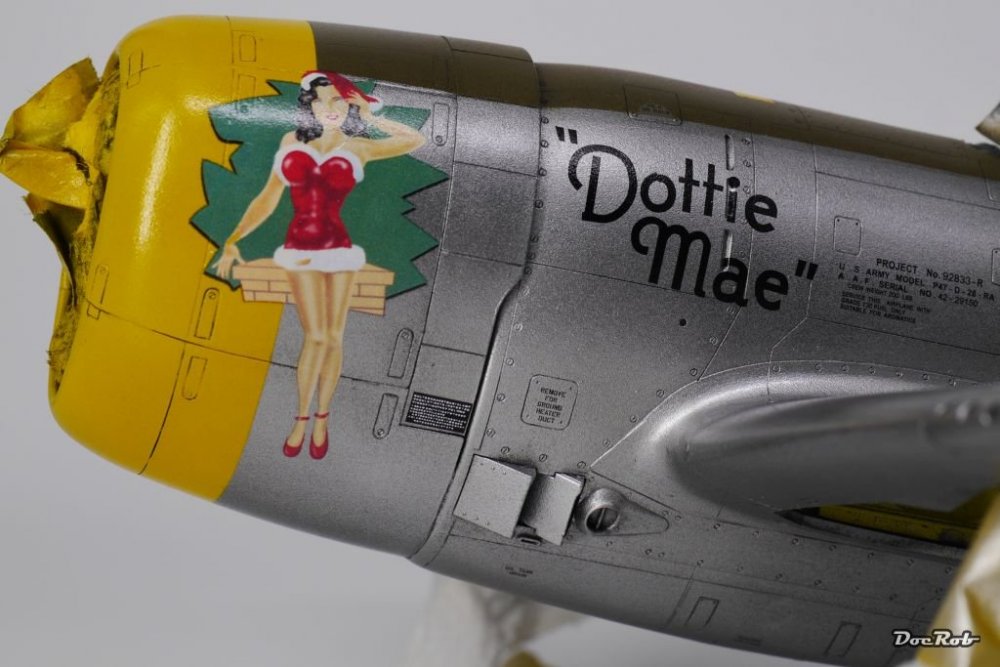
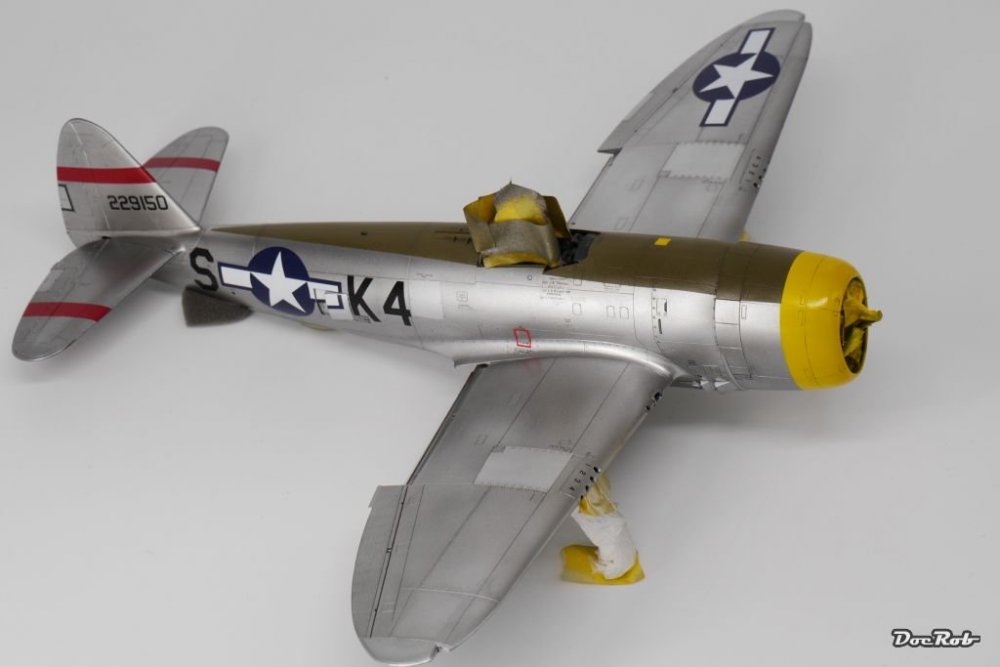
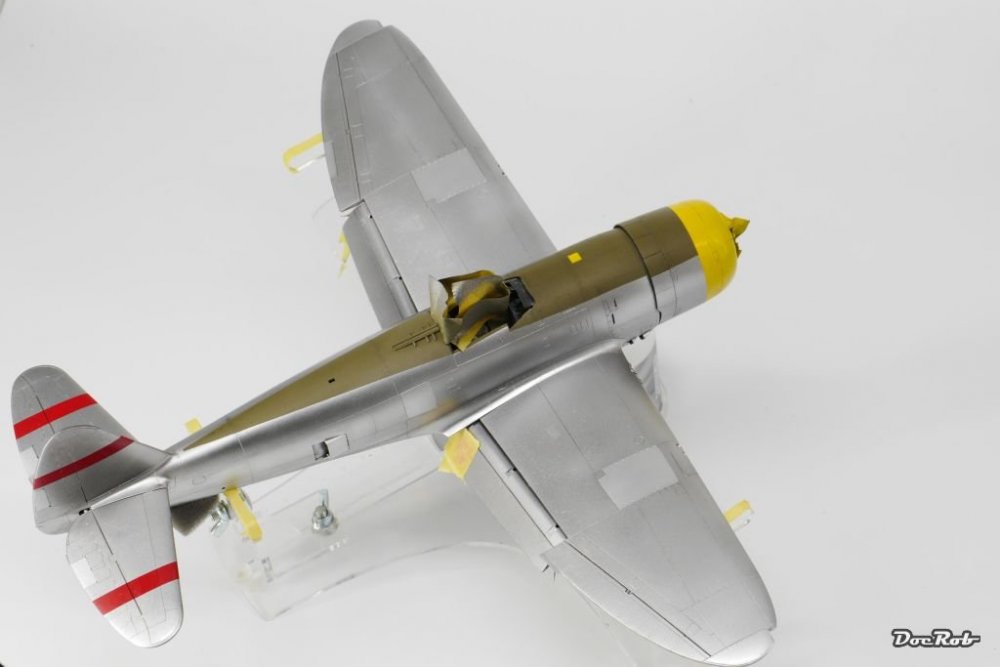
Thanks Peter, sometimes you have to take what you get, Dottie was supposed to look newish. After my little accident and the necessary repairs, she looks not that new anymore, but you are right, the metal shine is nice and looks like metal. Cheers Rob
-
Tres chic, love the weathering and painting. I was tempted to get me one of those and produce a Vietnamese 'Swamp Thing' out of it. Your build is a very inspirational support. Cheers Rob
-
What is on your bench right now ? Share a picture :)
DocRob replied to Martinnfb's topic in Modelling Discussion
There is an unspoken rule of thumb for a decent workbench. It has to hold at least the amount of tools, brushes, tapes, jars, …, than the actual kit has parts Cheers Rob -
Revell fw 190 A8/R11 to "R2 Sturmbocke"
DocRob replied to coolboxx's topic in LSM 1/35 and Larger Work In Progress
Wow, amazing weathering. Can't wait to see your magic working on the Sturmbock itself. The Scheuklappen (extra armor) looking bueno too. Cheers Rob- 62 replies
-
- 3
-

-

-
- 1 32 fw 190 a8
- willi maximowitz fw 190 a8
- (and 1 more)
-
Hi Ivan, thanks for your tips. Yes I varnished polished Aluminium with Future and that worked well. I tried it on test pieces and no problems arose. Varnish tones down the polished Aluminium a fraction, but enhances the surface sheen and that was fine to me. You are probably right about the cloth, I will use cotton for future projects. The fine overspray with polished aluminium gave me a result, which at least backed off the possibility of throwing Dottie out of the window instantly . Cheers Rob And that's how the dame is dressed after some polished Aluminium perfume
-
Thanks Gus, the better areas look really good and have a very convincing metal shine, like they were supposed to be. Cheers Rob