BlrwestSiR
-
Posts
9,183 -
Joined
-
Last visited
Content Type
Profiles
Forums
Events
Gallery
Everything posted by BlrwestSiR
-

What is on your bench right now ? Share a picture :)
BlrwestSiR replied to Martinnfb's topic in Modelling Discussion
Sounds like a fantastic meal in its own right. Cheers and enjoy! Carl -
What is on your bench right now ? Share a picture :)
BlrwestSiR replied to Martinnfb's topic in Modelling Discussion
Come on by! We're doing a double batch so should be plenty for everyone. Carl -
What is on your bench right now ? Share a picture :)
BlrwestSiR replied to Martinnfb's topic in Modelling Discussion
Happy Chinese New Year! Making dumplings from scratch. Hopefully I'll get some help from the minions shortly. If I can get them away from the TV.
-
What is on your bench right now ? Share a picture :)
BlrwestSiR replied to Martinnfb's topic in Modelling Discussion
Me too! -
RFM Sherman Firefly
BlrwestSiR replied to BlrwestSiR's topic in LSM 1/35 and Larger Work In Progress
Well the reference photo that I have for the tank is during the victory parade in the Netherlands and it's all clean and shiny... I do have some pics of other tanks in the division from slightly earlier in time and they're more typical looking as far as gear storage and weathering so we'll see. -
Let us know how well it works Gaz. Always nice to have another option. Carl
-
Fokker E.V / D.VIII Parasol Mikro Mir 1/32
BlrwestSiR replied to DocRob's topic in LSM 1/35 and Larger Work In Progress
This belongs in the Make the others Jealous section. Meantime, the weathering looks great, nice and subtle. Glad to see it looks like the decal issues are now behind you. Carl -
RFM Sherman Firefly
BlrwestSiR replied to BlrwestSiR's topic in LSM 1/35 and Larger Work In Progress
Only if getting covered with tracks counts as dirty. -
Takom Renault ft 1/16.....again.
BlrwestSiR replied to belugawhaleman's topic in LSM 1/35 and Larger Work In Progress
Looks great there Paul. For the spark plug wires, check out ones made for model cars. I'm not sure where you are but BNA Modelworld, Hobbyeasy, SpotModels all usually carry an assortment of styles and diameters, including braided ones. Carl -
Takom Renault ft 1/16.....again.
BlrwestSiR replied to belugawhaleman's topic in LSM 1/35 and Larger Work In Progress
I tend to build my models in showroom or "like new" condition so it's something I appreciate. To me, it's harder to pull off the precision that a clean build requires. A light weathering of course can add quite a bit of life to something too. Generally, I find excessively weathered models more distracting. Carl -
RFM Sherman Firefly
BlrwestSiR replied to BlrwestSiR's topic in LSM 1/35 and Larger Work In Progress
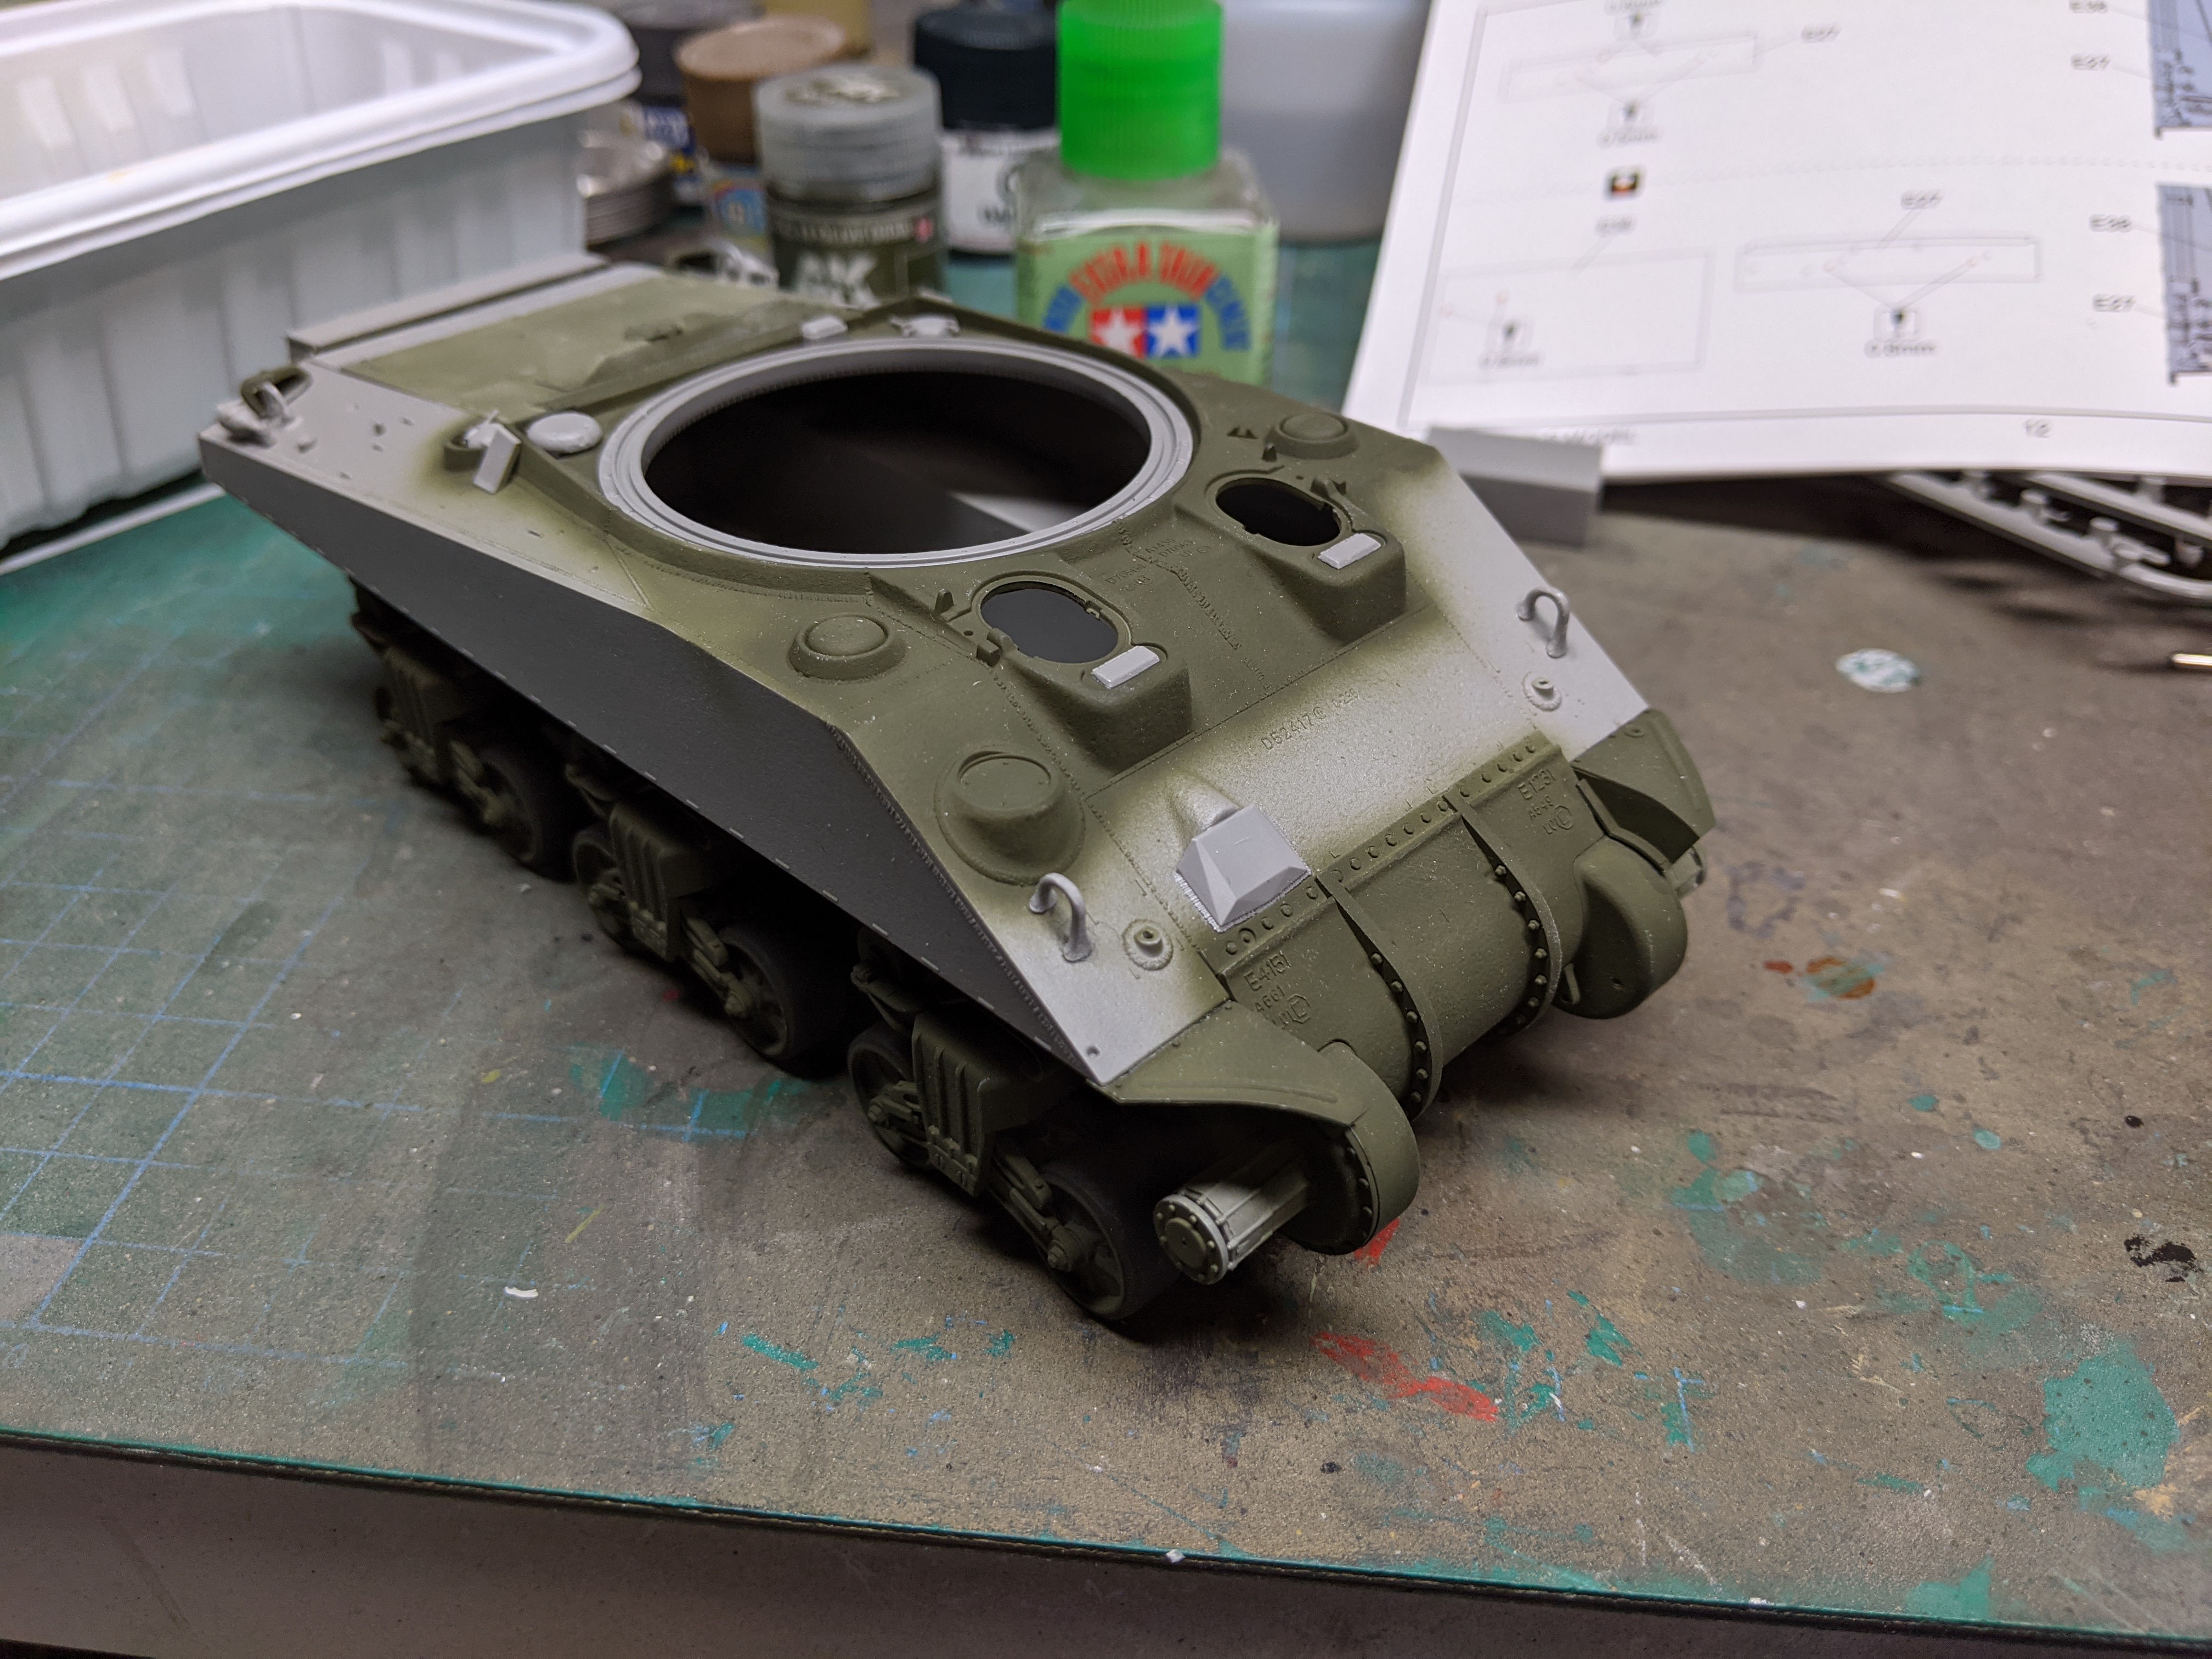
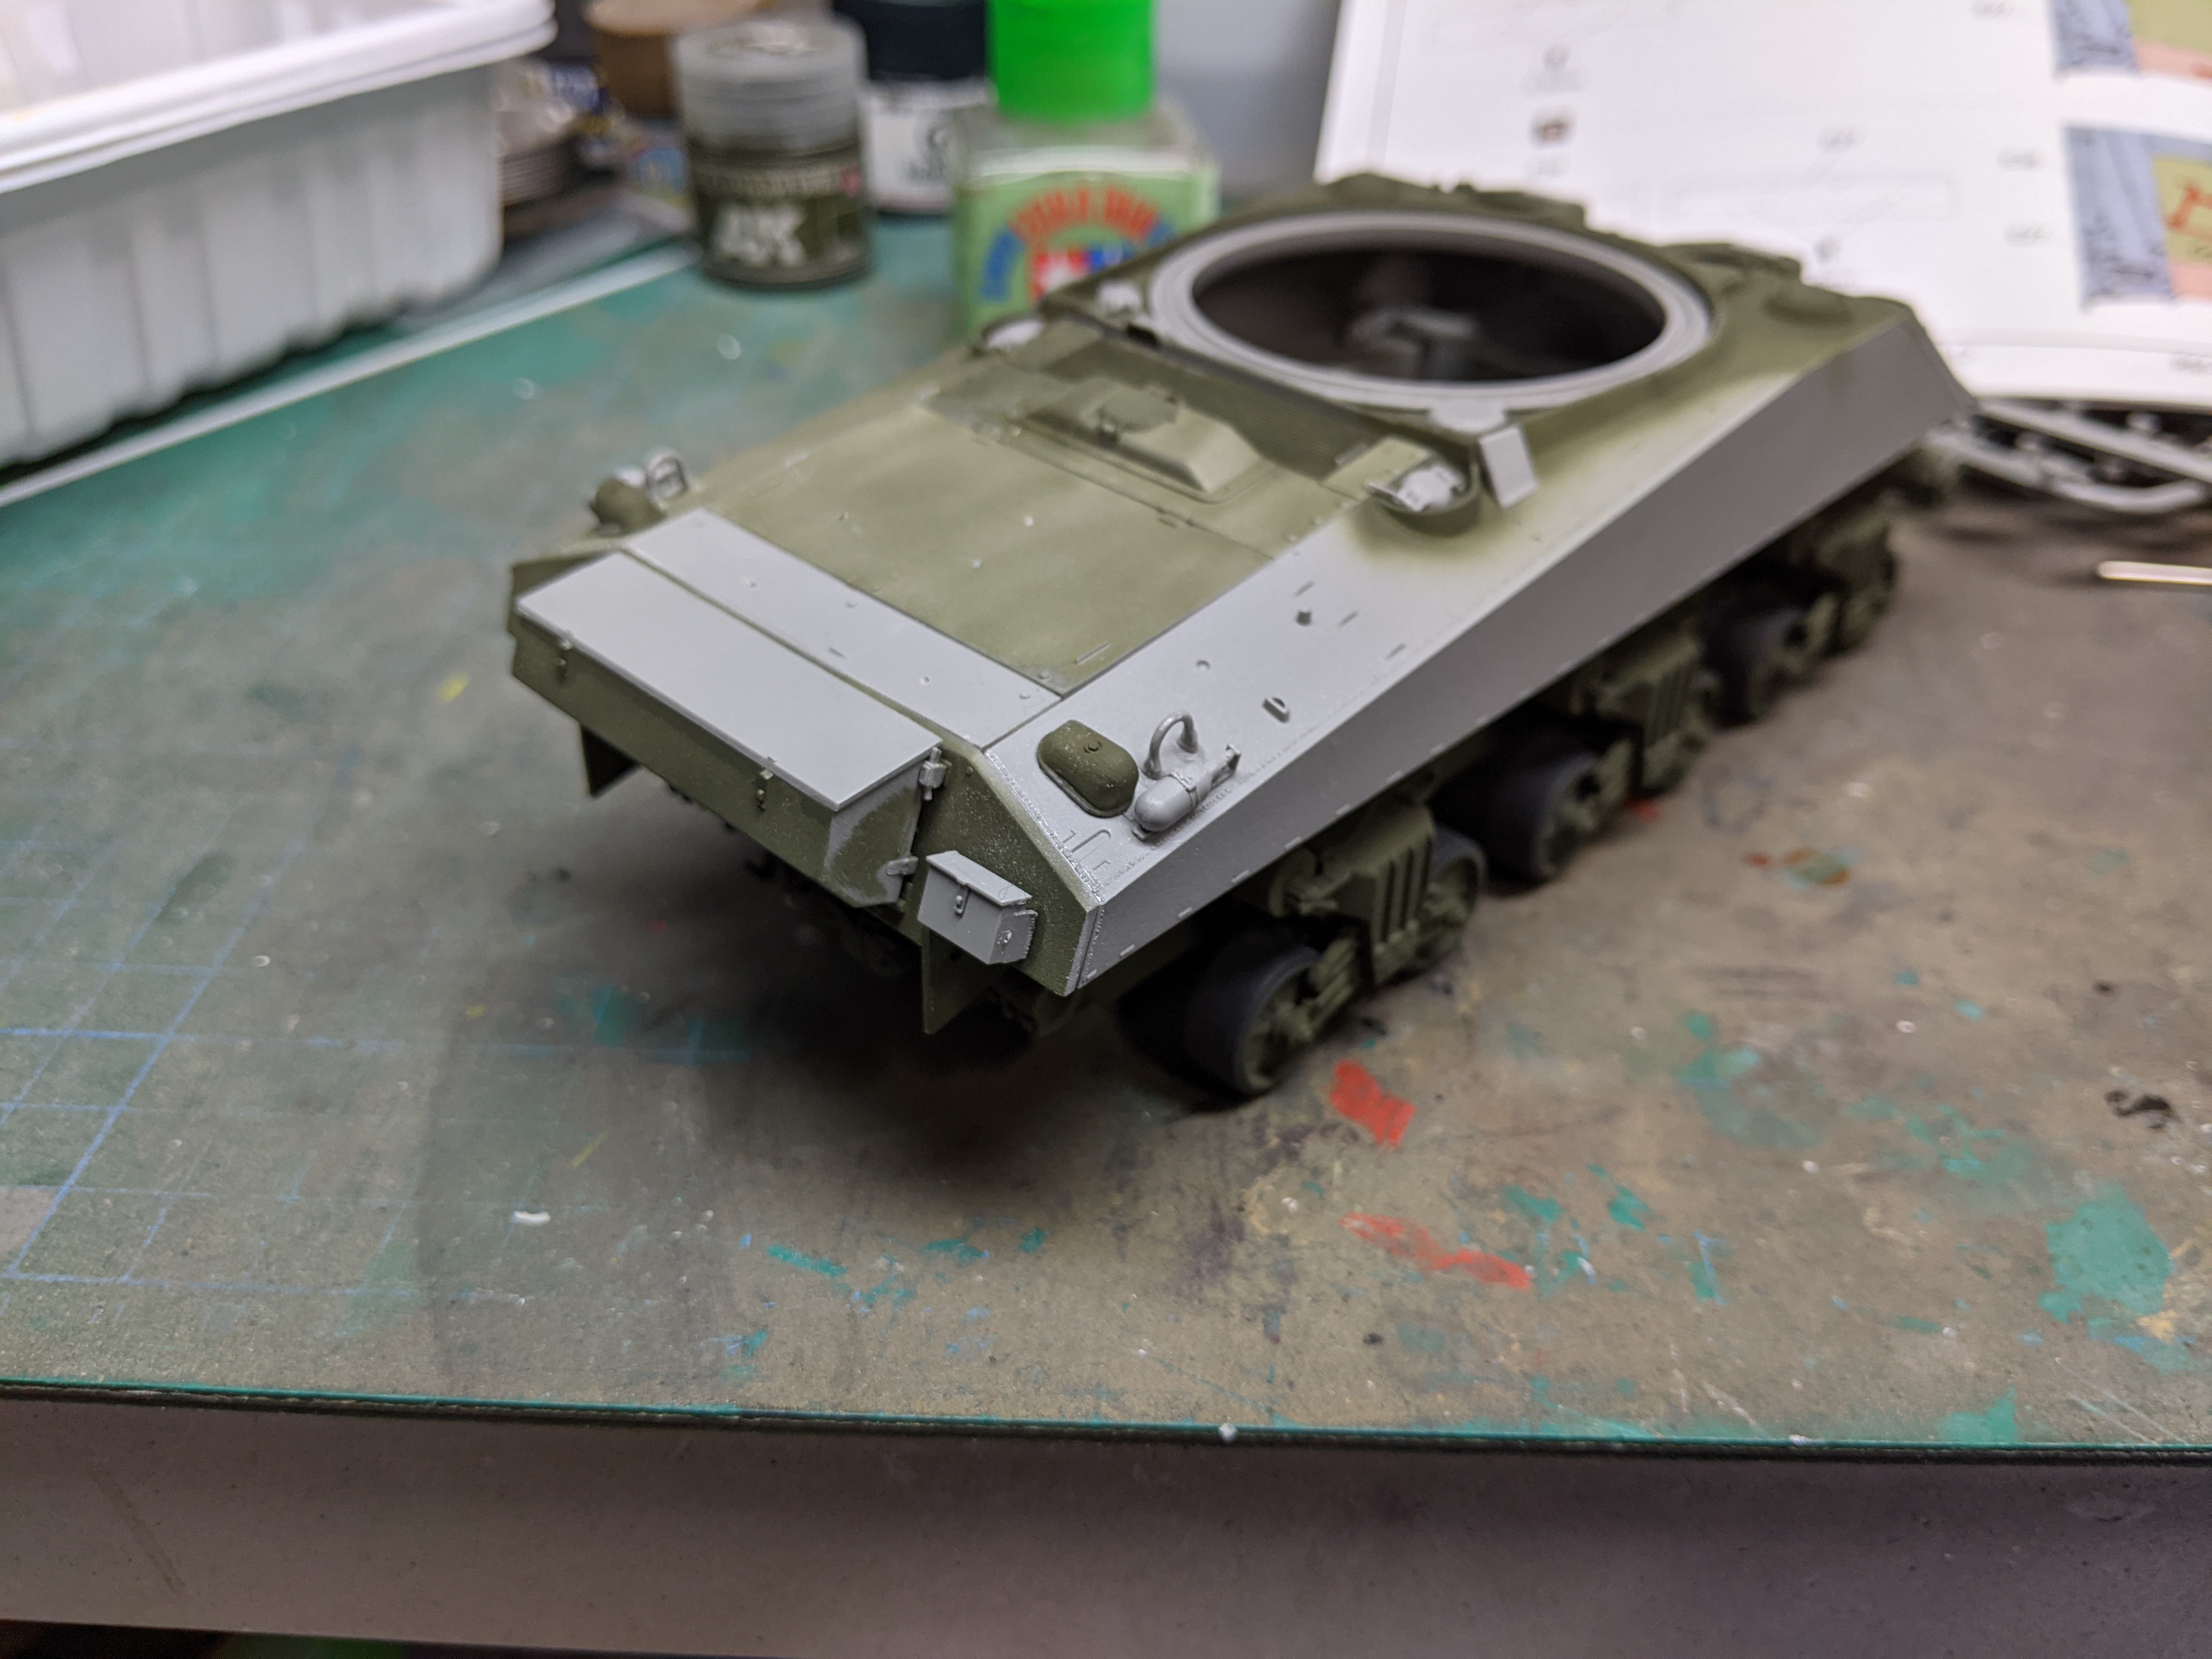
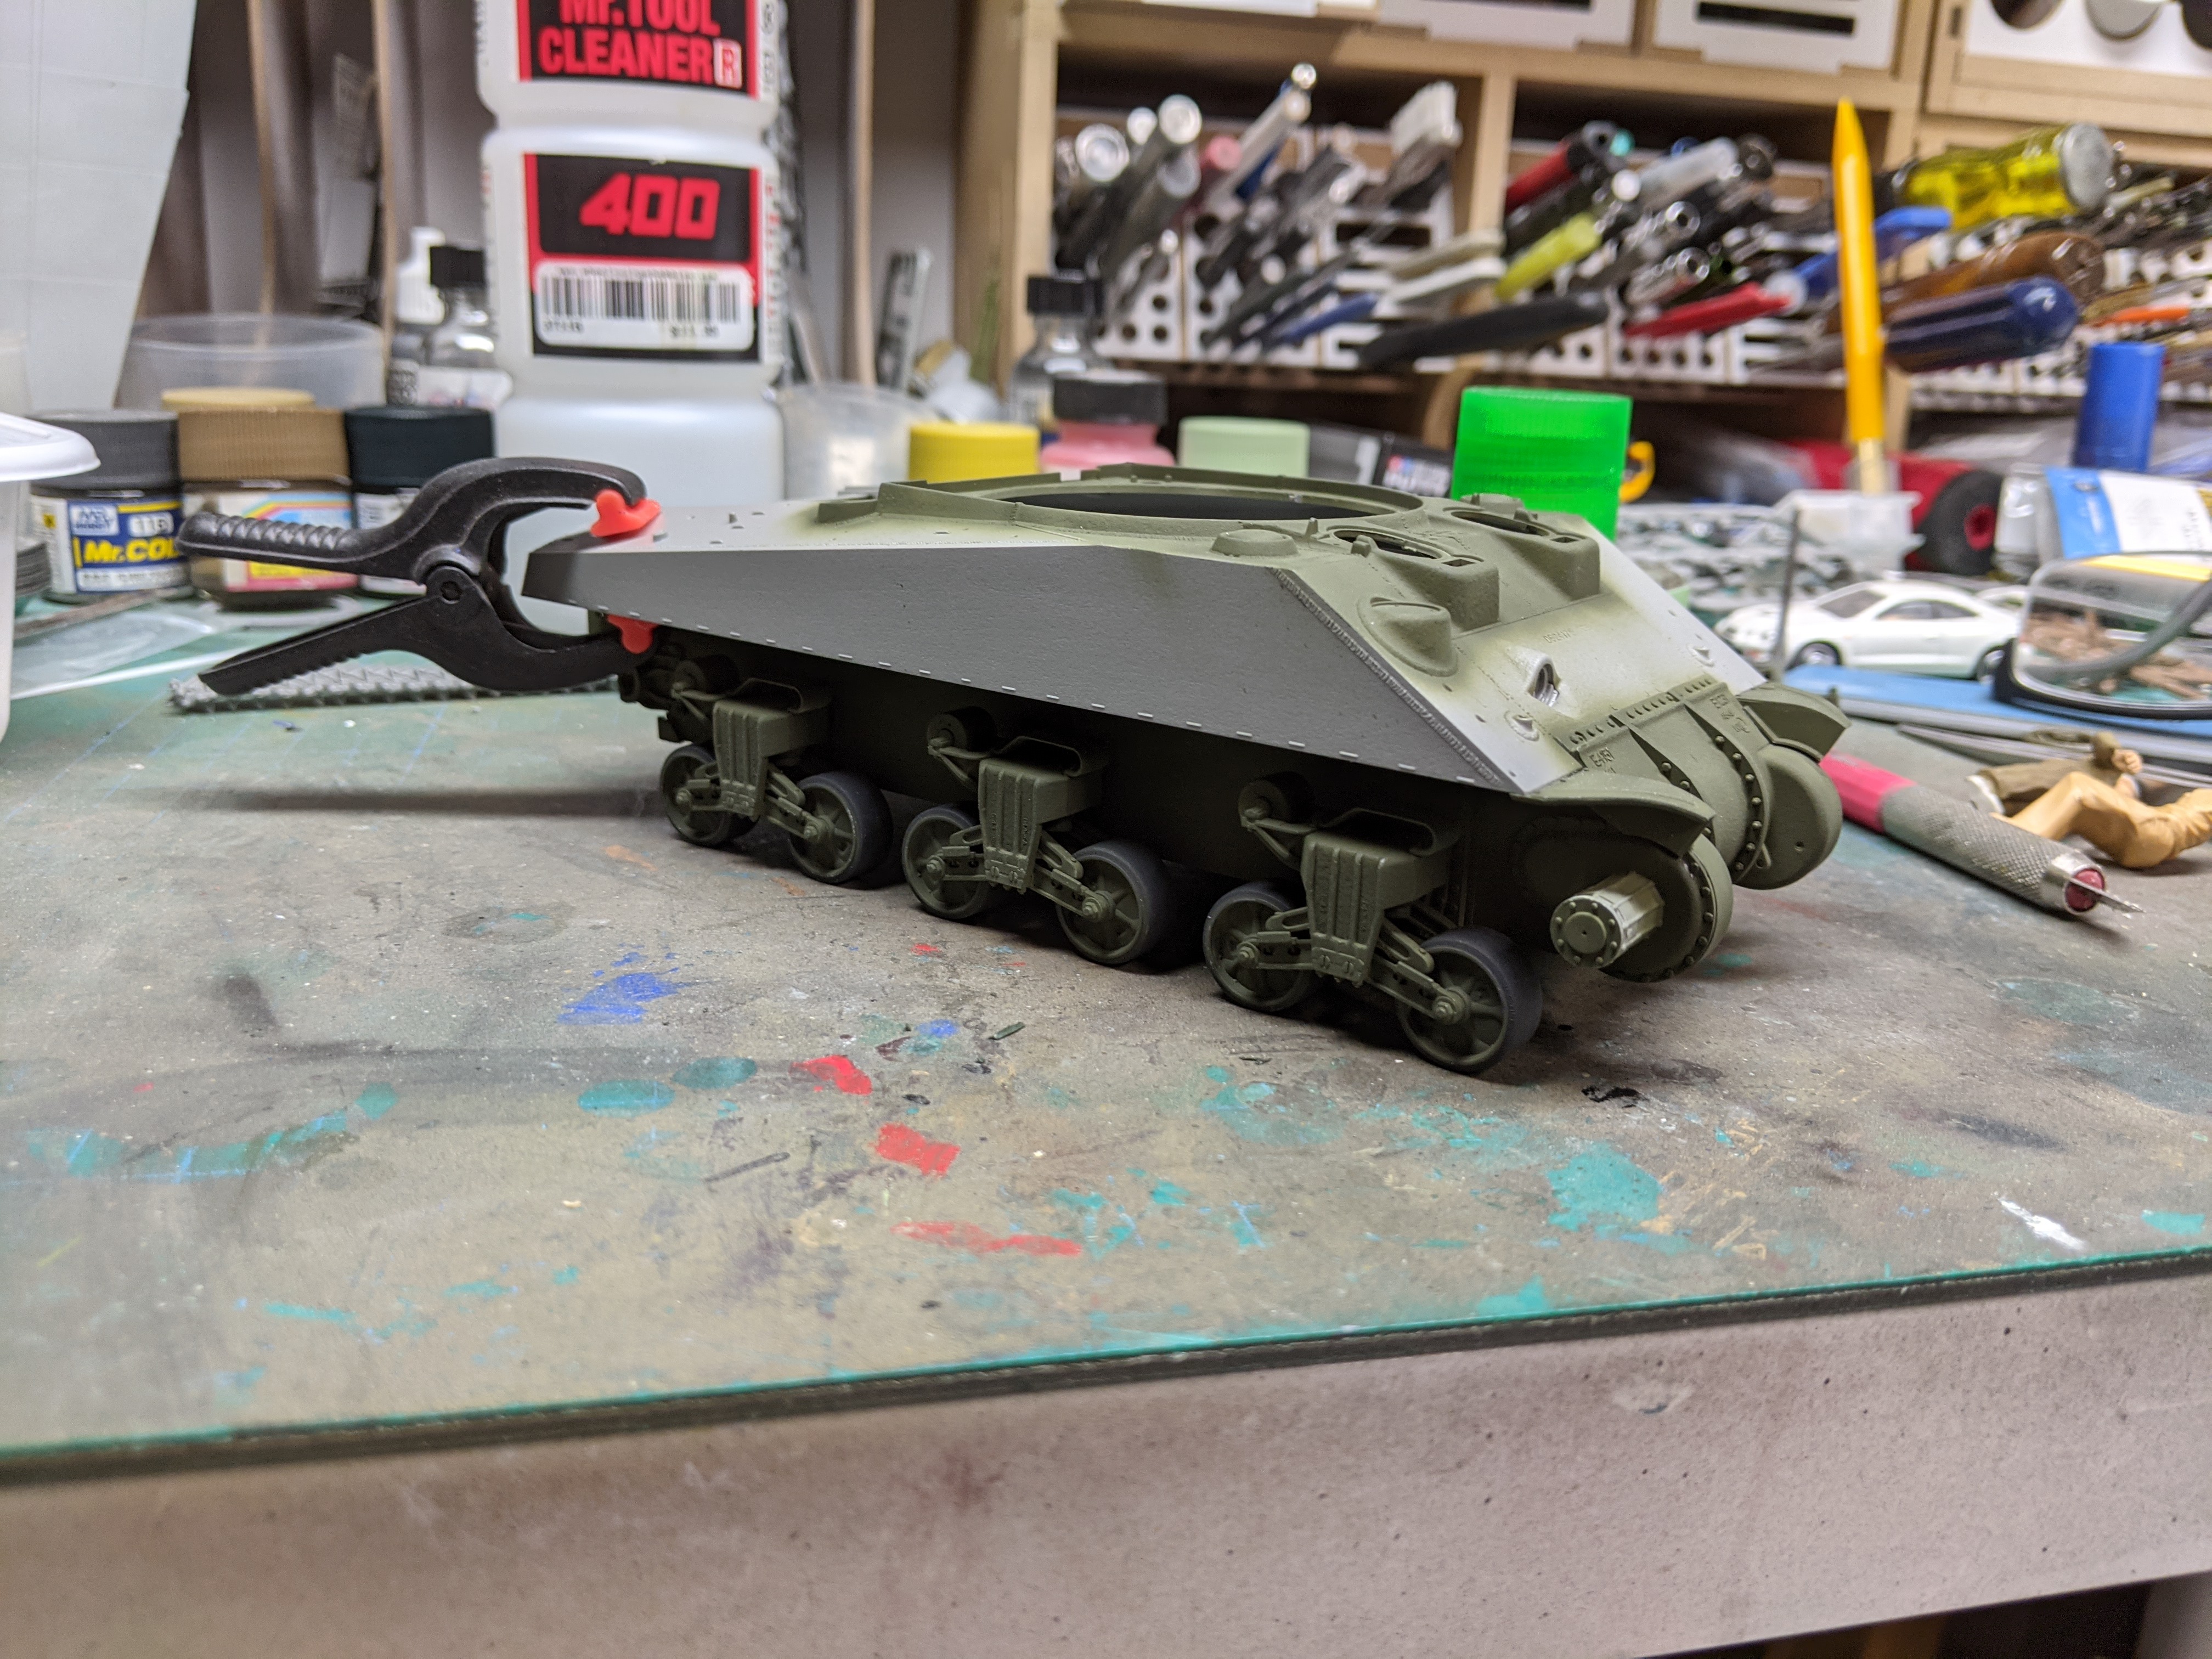
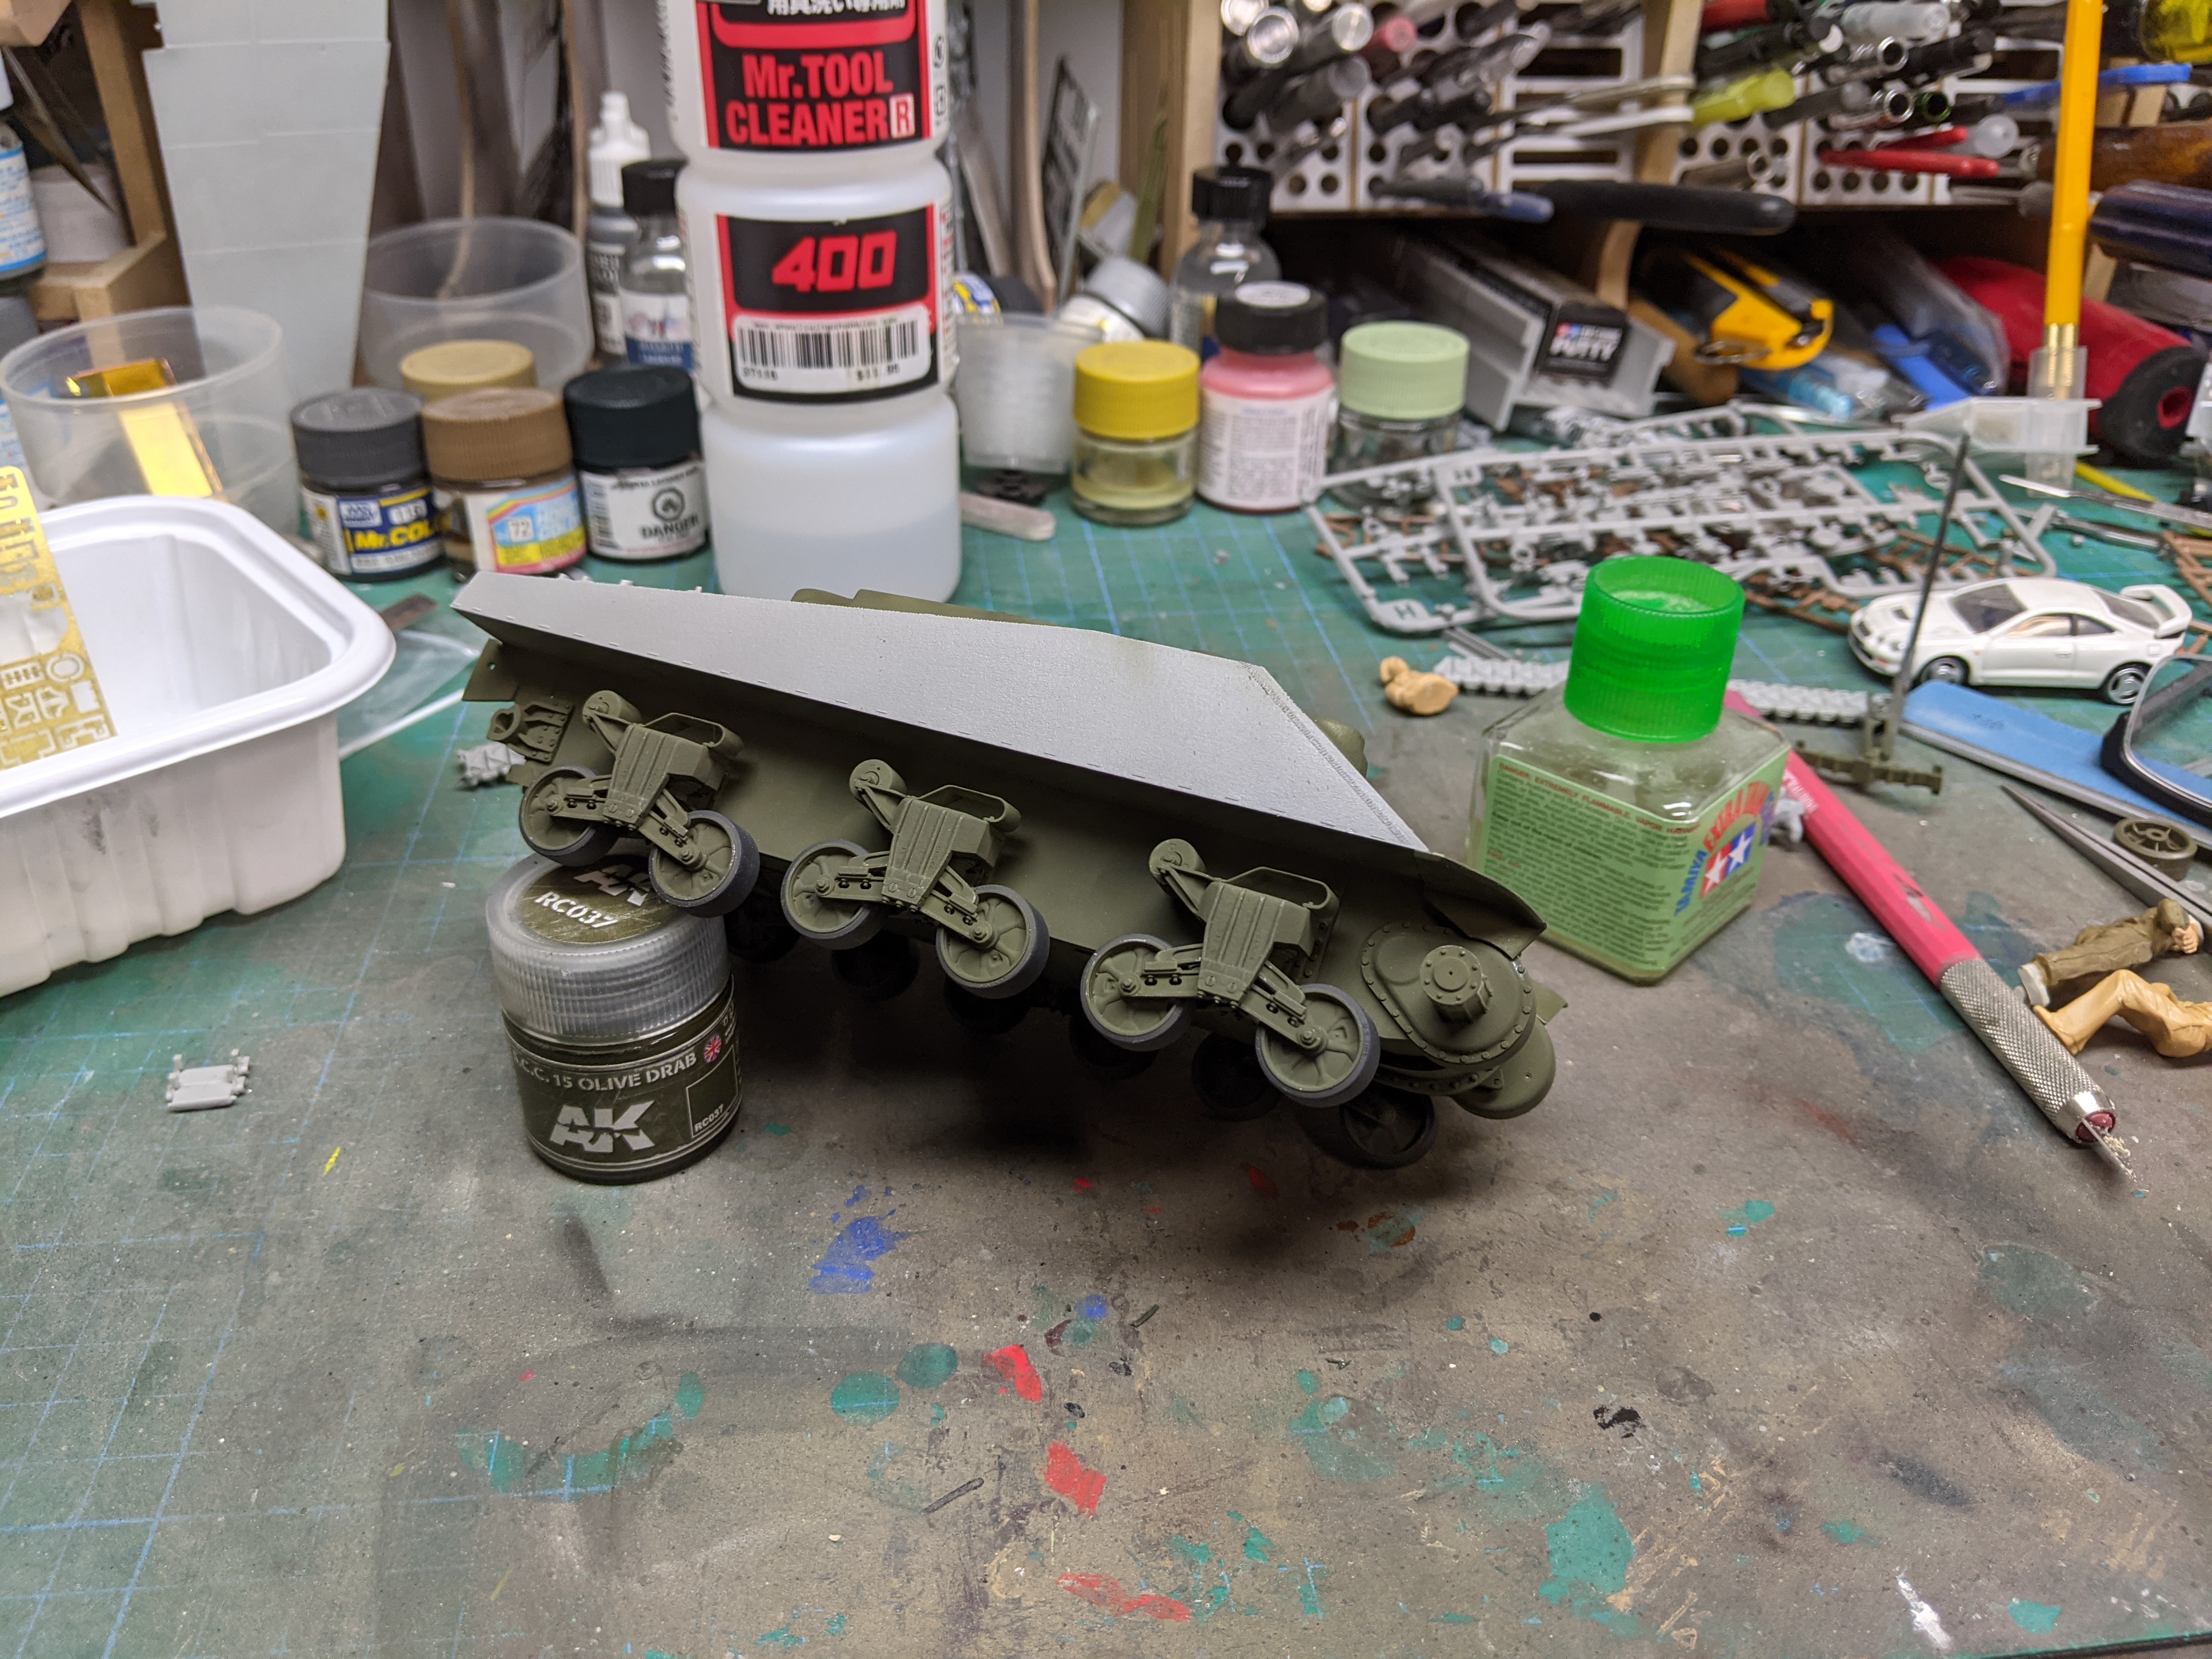
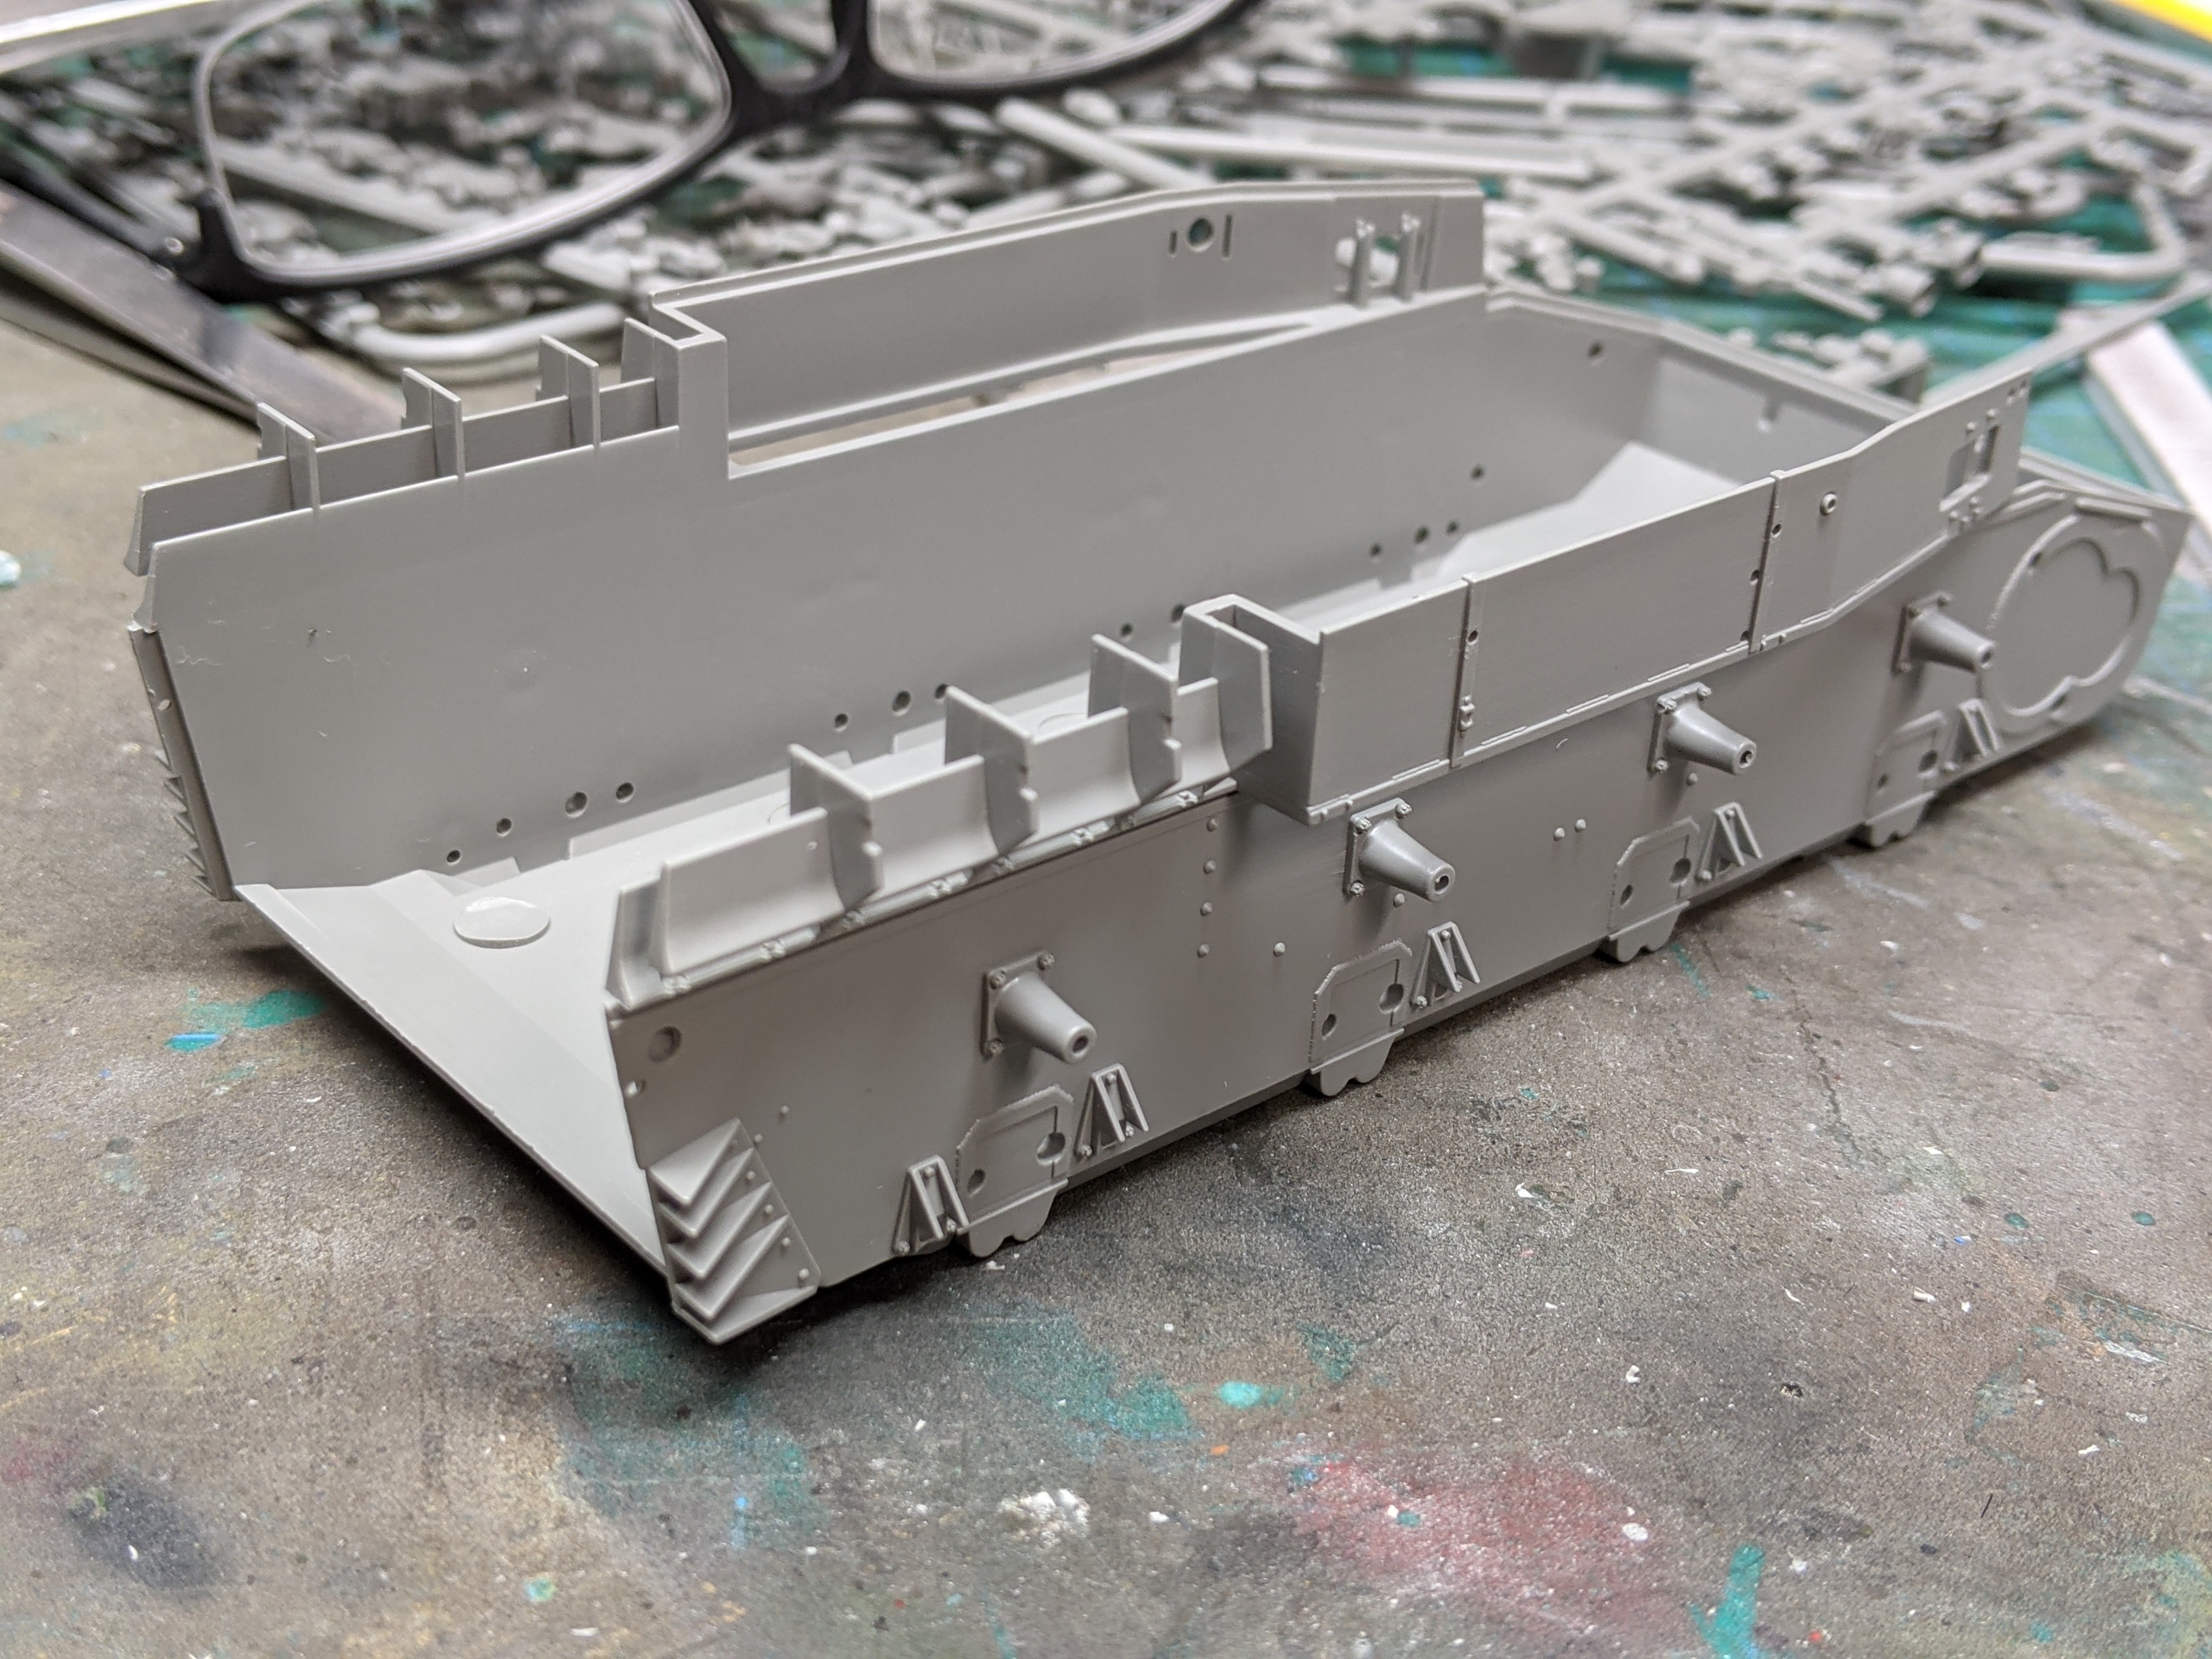
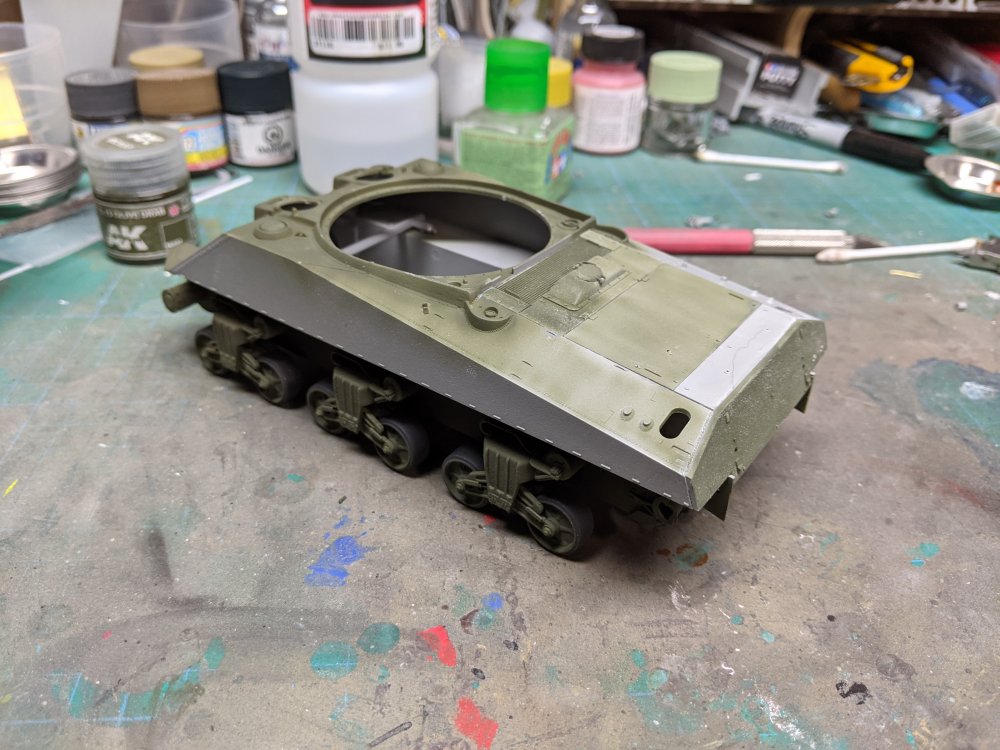
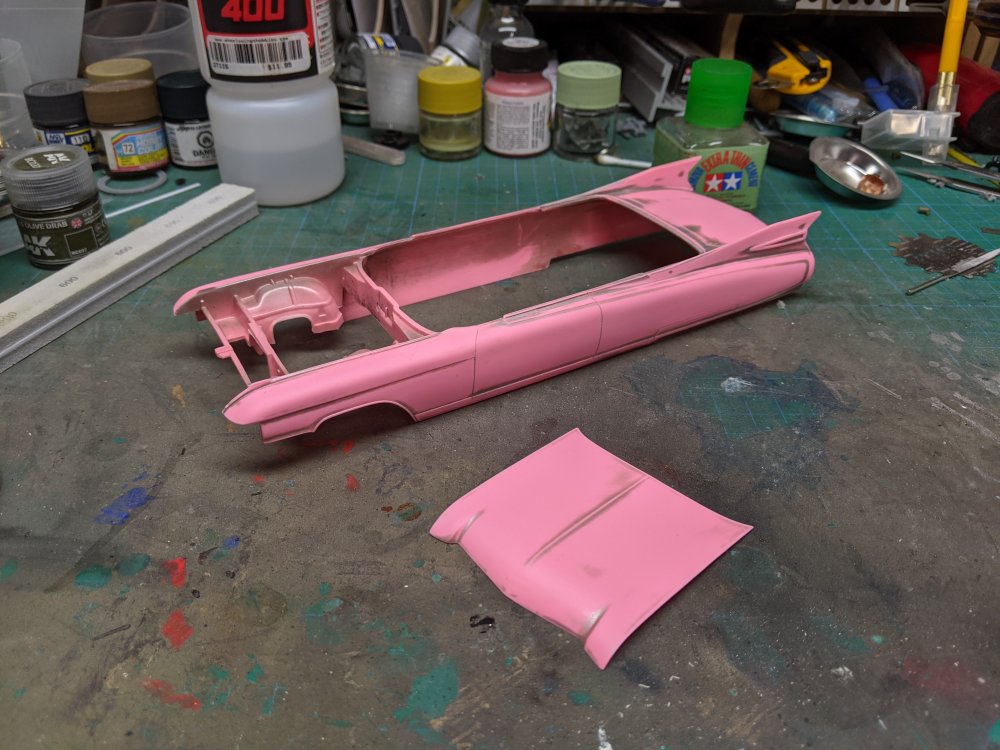
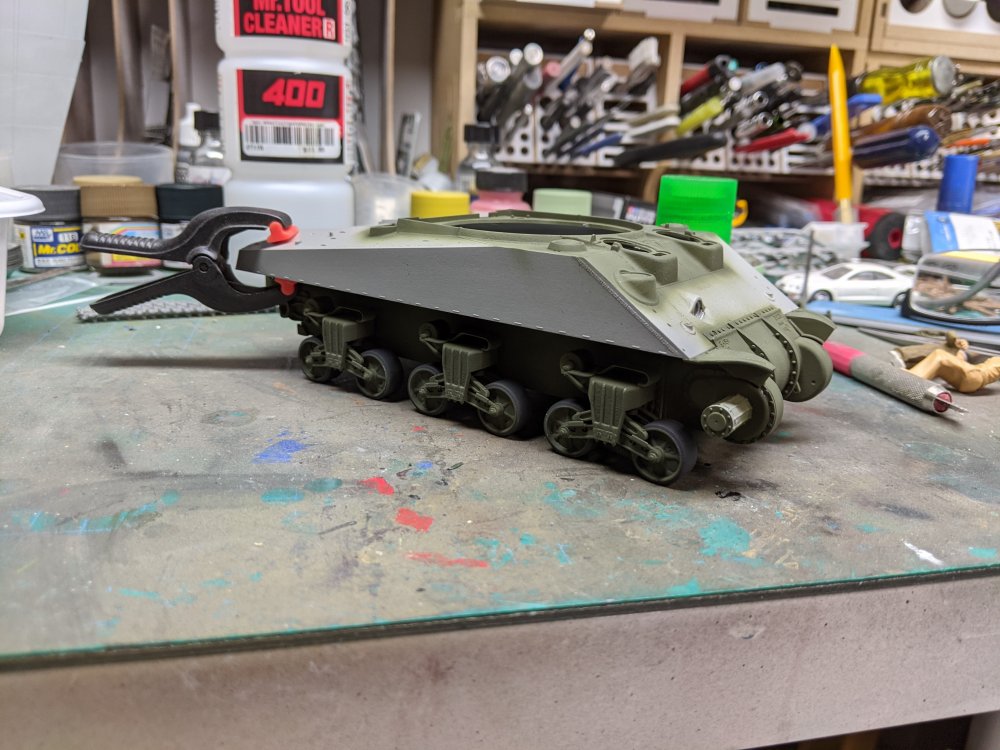
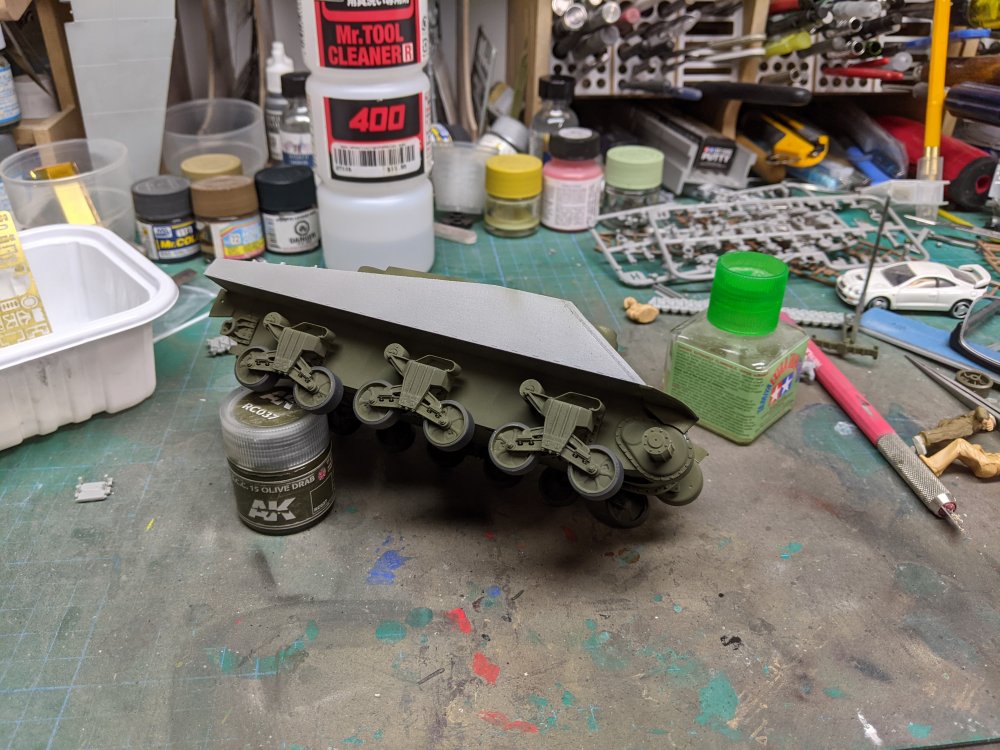
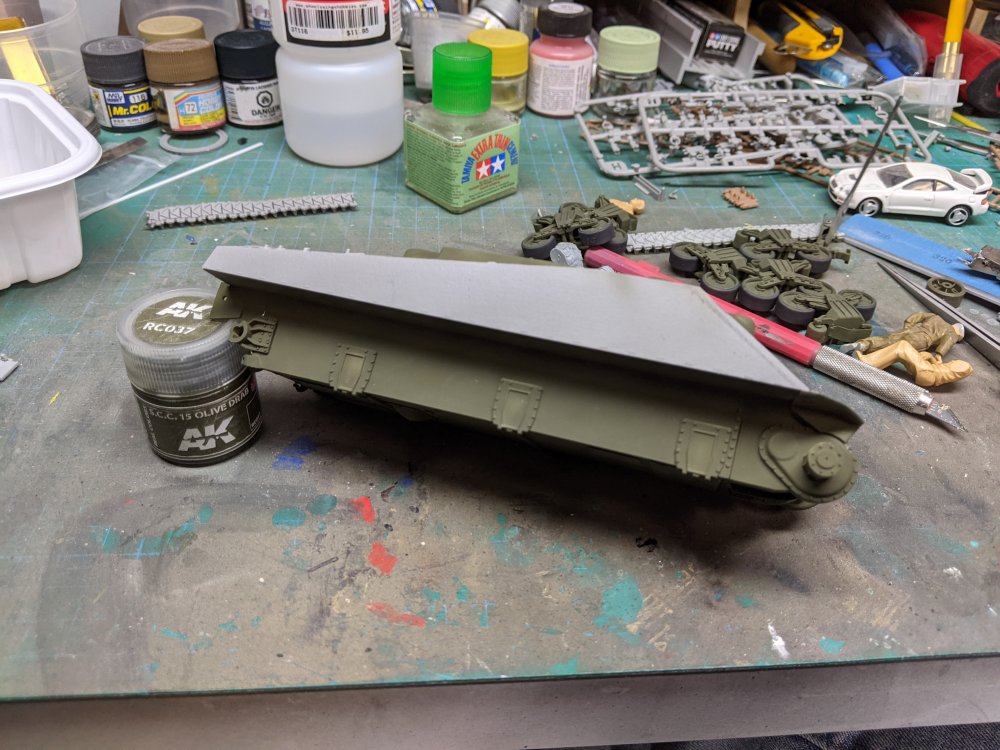
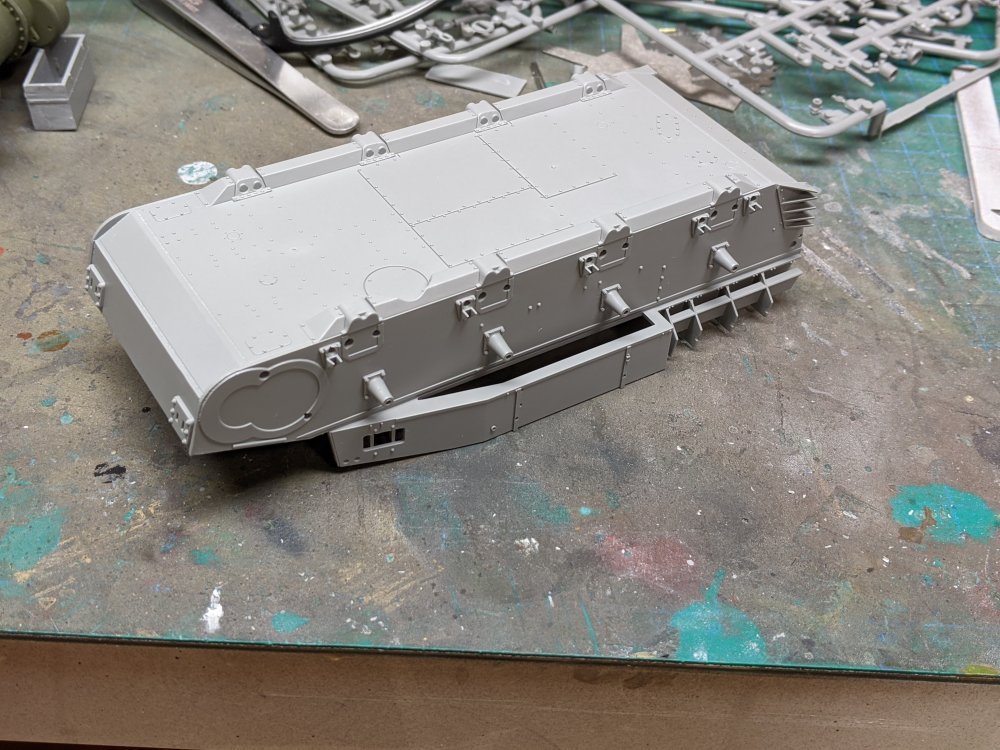
I've been adding the hull details to the kit over the last couple of days. But first, I attached the bogies to the lower hull. After I joined the upper and lower hulls. I then took out the '59 Caddy and after some sanding on the body, I put that back. The instructions tell you to mount the front fenders to the upper hull before you join them together. Don't. They overlap the lower hull and with the way the upper and lower halves join, you'll have interference. Of course the instructions tell you to mount all the upper hull details first before joining them which I properly ignored. The rear deck was next. Followed by the storage box and miscellaneous hull details.

-
RFM Sherman Firefly
BlrwestSiR replied to BlrwestSiR's topic in LSM 1/35 and Larger Work In Progress
It snuck up on me too Harv. Just wanted to do something OOB and that I was familiar with. -
HK's 1/32 Mosquito-Finished
BlrwestSiR replied to KevinM's topic in LSM 1/35 and Larger Work In Progress
Yup, what Harv said, some great work. Carl -
Takom Renault ft 1/16.....again.
BlrwestSiR replied to belugawhaleman's topic in LSM 1/35 and Larger Work In Progress
Very neat and tidy looking finish. Showroom clean. Carl -
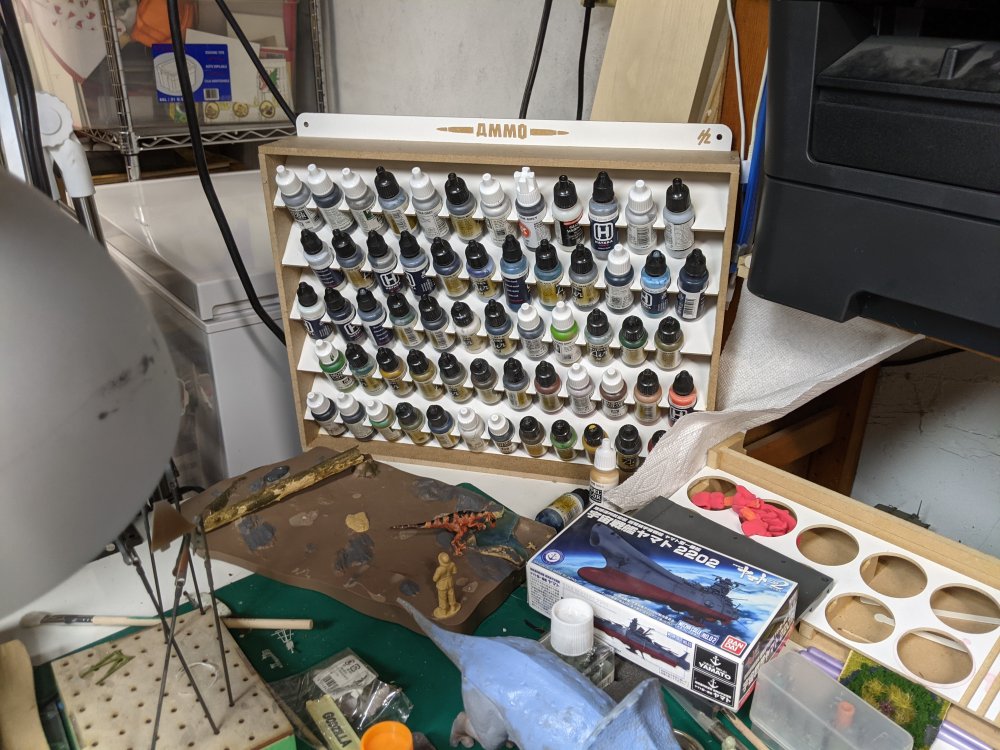
If I remember correctly, the Ammo ones are about the same price as the Hobbyzone ones. Unfortunately Hobbyzone no longer ships to Canada from the US and ordering from Poland pretty much doubles the price. The shelves are around $20-30 depending on where you get them from. They're made by Hobbyzone too. The Tamiya version holds 54 bottles to a rack and the Vallejo ones 60. They have one for the Ammo/Mig washes as well which would also fit the Xtreme Metal bottles. I may get one of those next.
-
“Dinghy” Young’s “Dambusters” Lancaster
BlrwestSiR replied to Wingco57's topic in LSM 1/35 and Larger Work In Progress
Looking good. I like the paint as you build approach as well. -
Mike, they can be freestanding. The bottoms are completely flat if a bit narrow. The one I have for Vallejo paints just sits on my bench as it's for my boys to use. I've had them sit on the floor in the past.
-
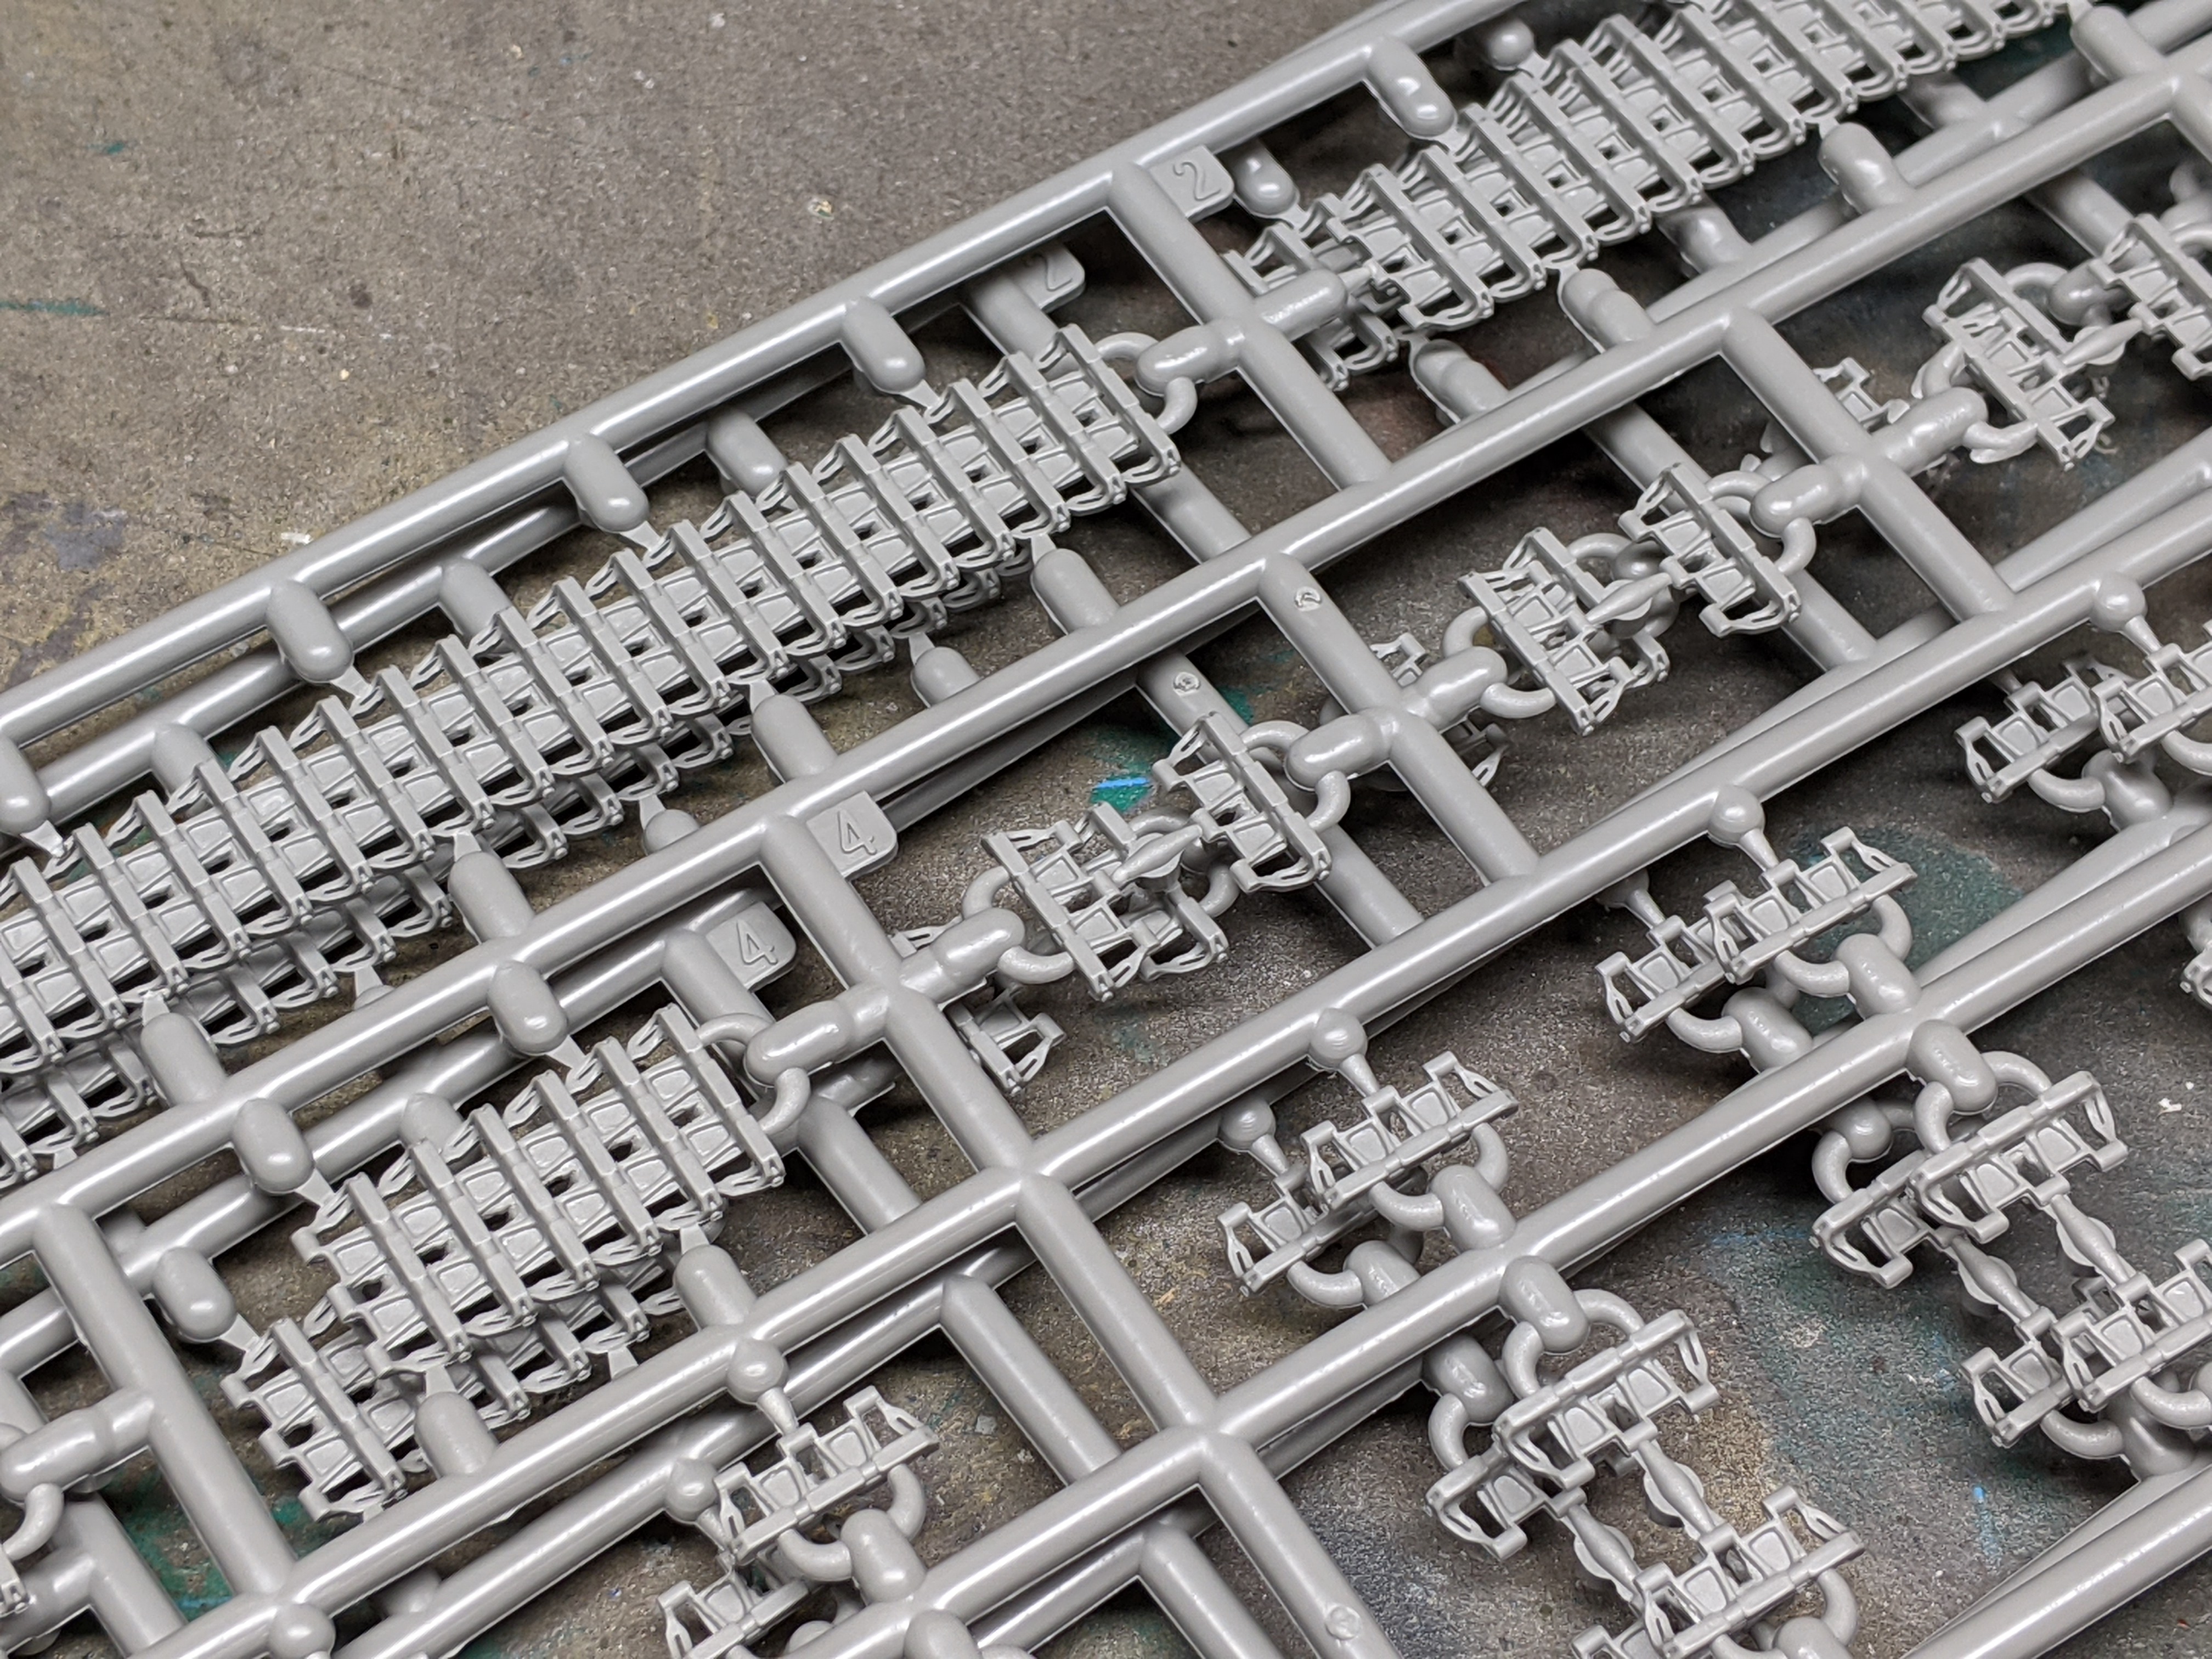
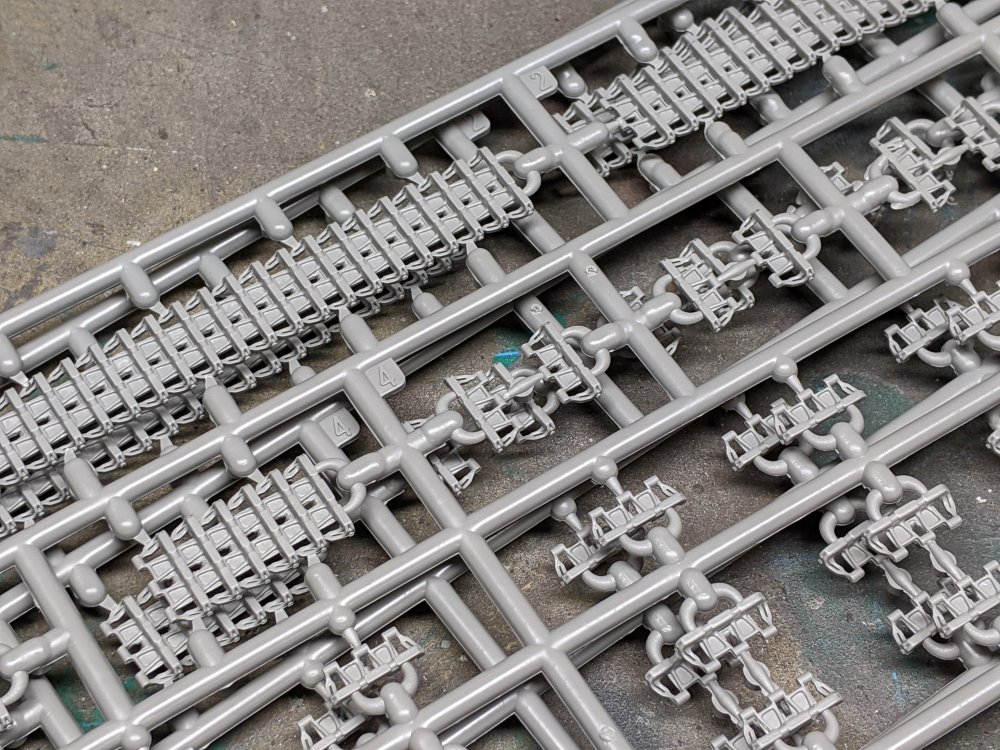
Rog, it's my first Border kit. I haven't started on it and well, forgot I had it. So thanks to your reminder I took a closer look at it. The detail is quite good. Everything seems to be nice and sharp. It's link and length track. The upper run has the sag moulded into it. The lower hull is one piece and a pretty impressive piece of moulding. For the money, I'd say it's well worth it. Oh and the instructions seem to actually make sense and point out the detail differences. I'm looking forward to their Crusader tank. Carl

-
To go with the recent reissue of Tamiya's 1/12 Porsche 935, Scale Motorsports had announced they're going to re-release their detail set. https://scalemotorsport.com/collections/super-detail-kits/products/porsche-935-big-scale-super-detail-kit It was more than double the kit price when it first came out so I'll be curious to see what it goes for this time. I had someone offer the original set to me for €750 recently....
- 161 replies
-
- 3
-

-
- greatwallhobby
- italeri
- (and 6 more)
-
Fokker E.V / D.VIII Parasol Mikro Mir 1/32
BlrwestSiR replied to DocRob's topic in LSM 1/35 and Larger Work In Progress
Wow, good save. Not sure if it would work but Tamiya make a brush on decal adhesive. I have a couple bottles of it, one even has decal softener in it. Carl -
Harv, it's on their Facebook page. https://www.facebook.com/JETMADS2016/photos/a.304487680473524/760241194898168/?type=3&source=48&refid=7&_ft_=qid.6926684150227830222%3Amf_story_key.6785272042880982993%3Atop_level_post_id.760241394898148%3Acontent_owner_id_new.302443914011234%3Apage_id.302443914011234%3Asrc.22%3Aphoto_id.760241194898168%3Astory_location.5%3Astory_attachment_style.photo%3Aview_time.1612744329%3Afilter.h_nor%3Atds_flgs.3%3Aott.AX_O00uzM2Ghben_&__tn__=EH-R Hope the link works. Carl
- 161 replies
-
- 3
-
-

-
- greatwallhobby
- italeri
- (and 6 more)
-
Jetmads wants to know what should they work on next. They've posted that after the Lear and X-3, they're doing a 1/48 kit and have three in mind. The options are B-47, P2V and a Tu-128. I think I know what @Clunkmeister will be voting for since it'll look perfect next to his B-36... Carl
- 161 replies
-
- 3
-
-
-
- greatwallhobby
- italeri
- (and 6 more)
-
Stash stock take, I should be..........
BlrwestSiR replied to Bomber_County's topic in General Discussion
It really does seem that way doesn't it? I had some pics up of the stash earlier this year after my reorganization but just in case: -
Some fantastic looking builds here so far. It's not hard to see the love and effort out into them. For me, I think it's my Spitfire FR IX. Being pink, it definitely stands out and people are often surprised by its colour. Carl
- 25 replies
-
- 12
-
-
-
HH-60G Pavehawk
BlrwestSiR replied to Pete Fleischmann's topic in LSM 1/35 and Larger Work In Progress
Truly stunning. How long did it take to do all the rivets? Not sure I want to know. Carl