BlrwestSiR
-
Posts
9,183 -
Joined
-
Last visited
Content Type
Profiles
Forums
Events
Gallery
Everything posted by BlrwestSiR
-

Lancaster ND644 in 32nd scale
BlrwestSiR replied to FME erk's topic in LSM 1/35 and Larger Work In Progress
Ian, do you have the clear fuselage you could substitute? If not, let me know as both my kits have one. Carl -
Phil, that's a nice kit to have. I've got my first one still as it's full of spare bits from my builds.
-
Wheels and Wings have a number of PCM kits listed in stock. They've got the Ta-152, FW-190 ad some of the Italian planes listed. Prices seem reasonable too. I just thought it would be worth mentioning as I know some of the subjects are hard to find. https://www.wheelswingsestore.com/products-added-on-january-20-2021 Carl
-
Yeah, it's a monster.
-
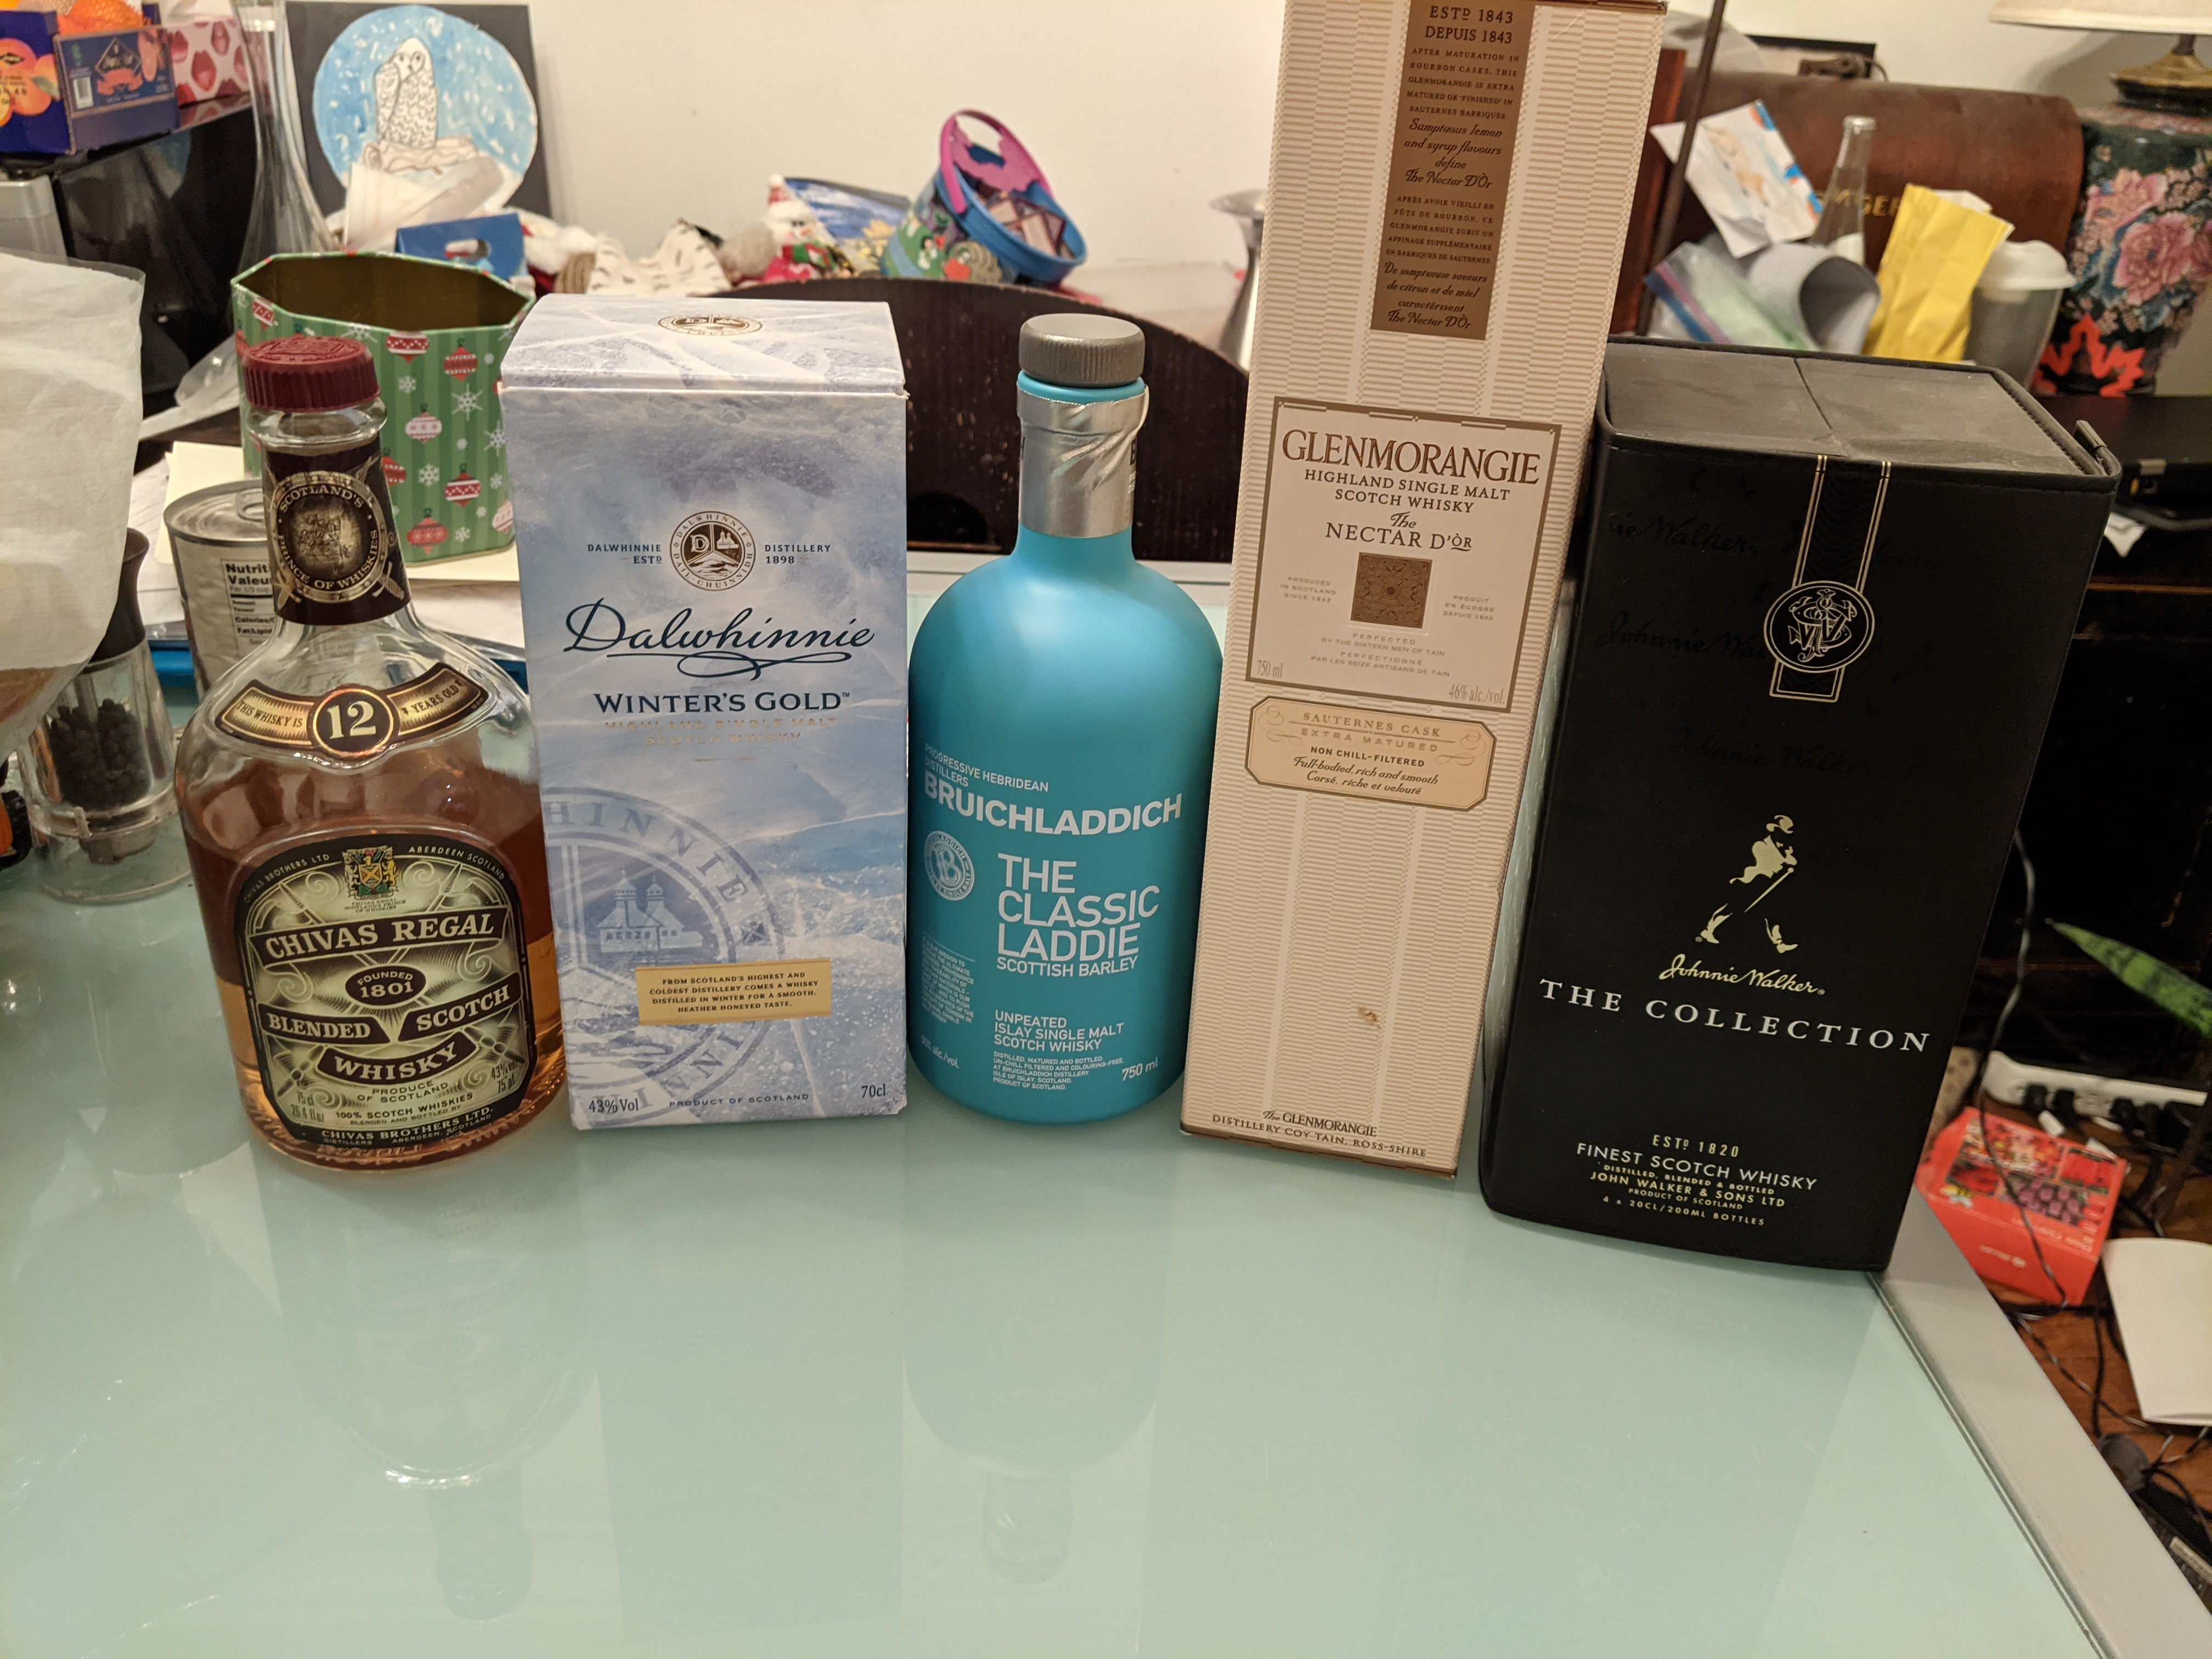
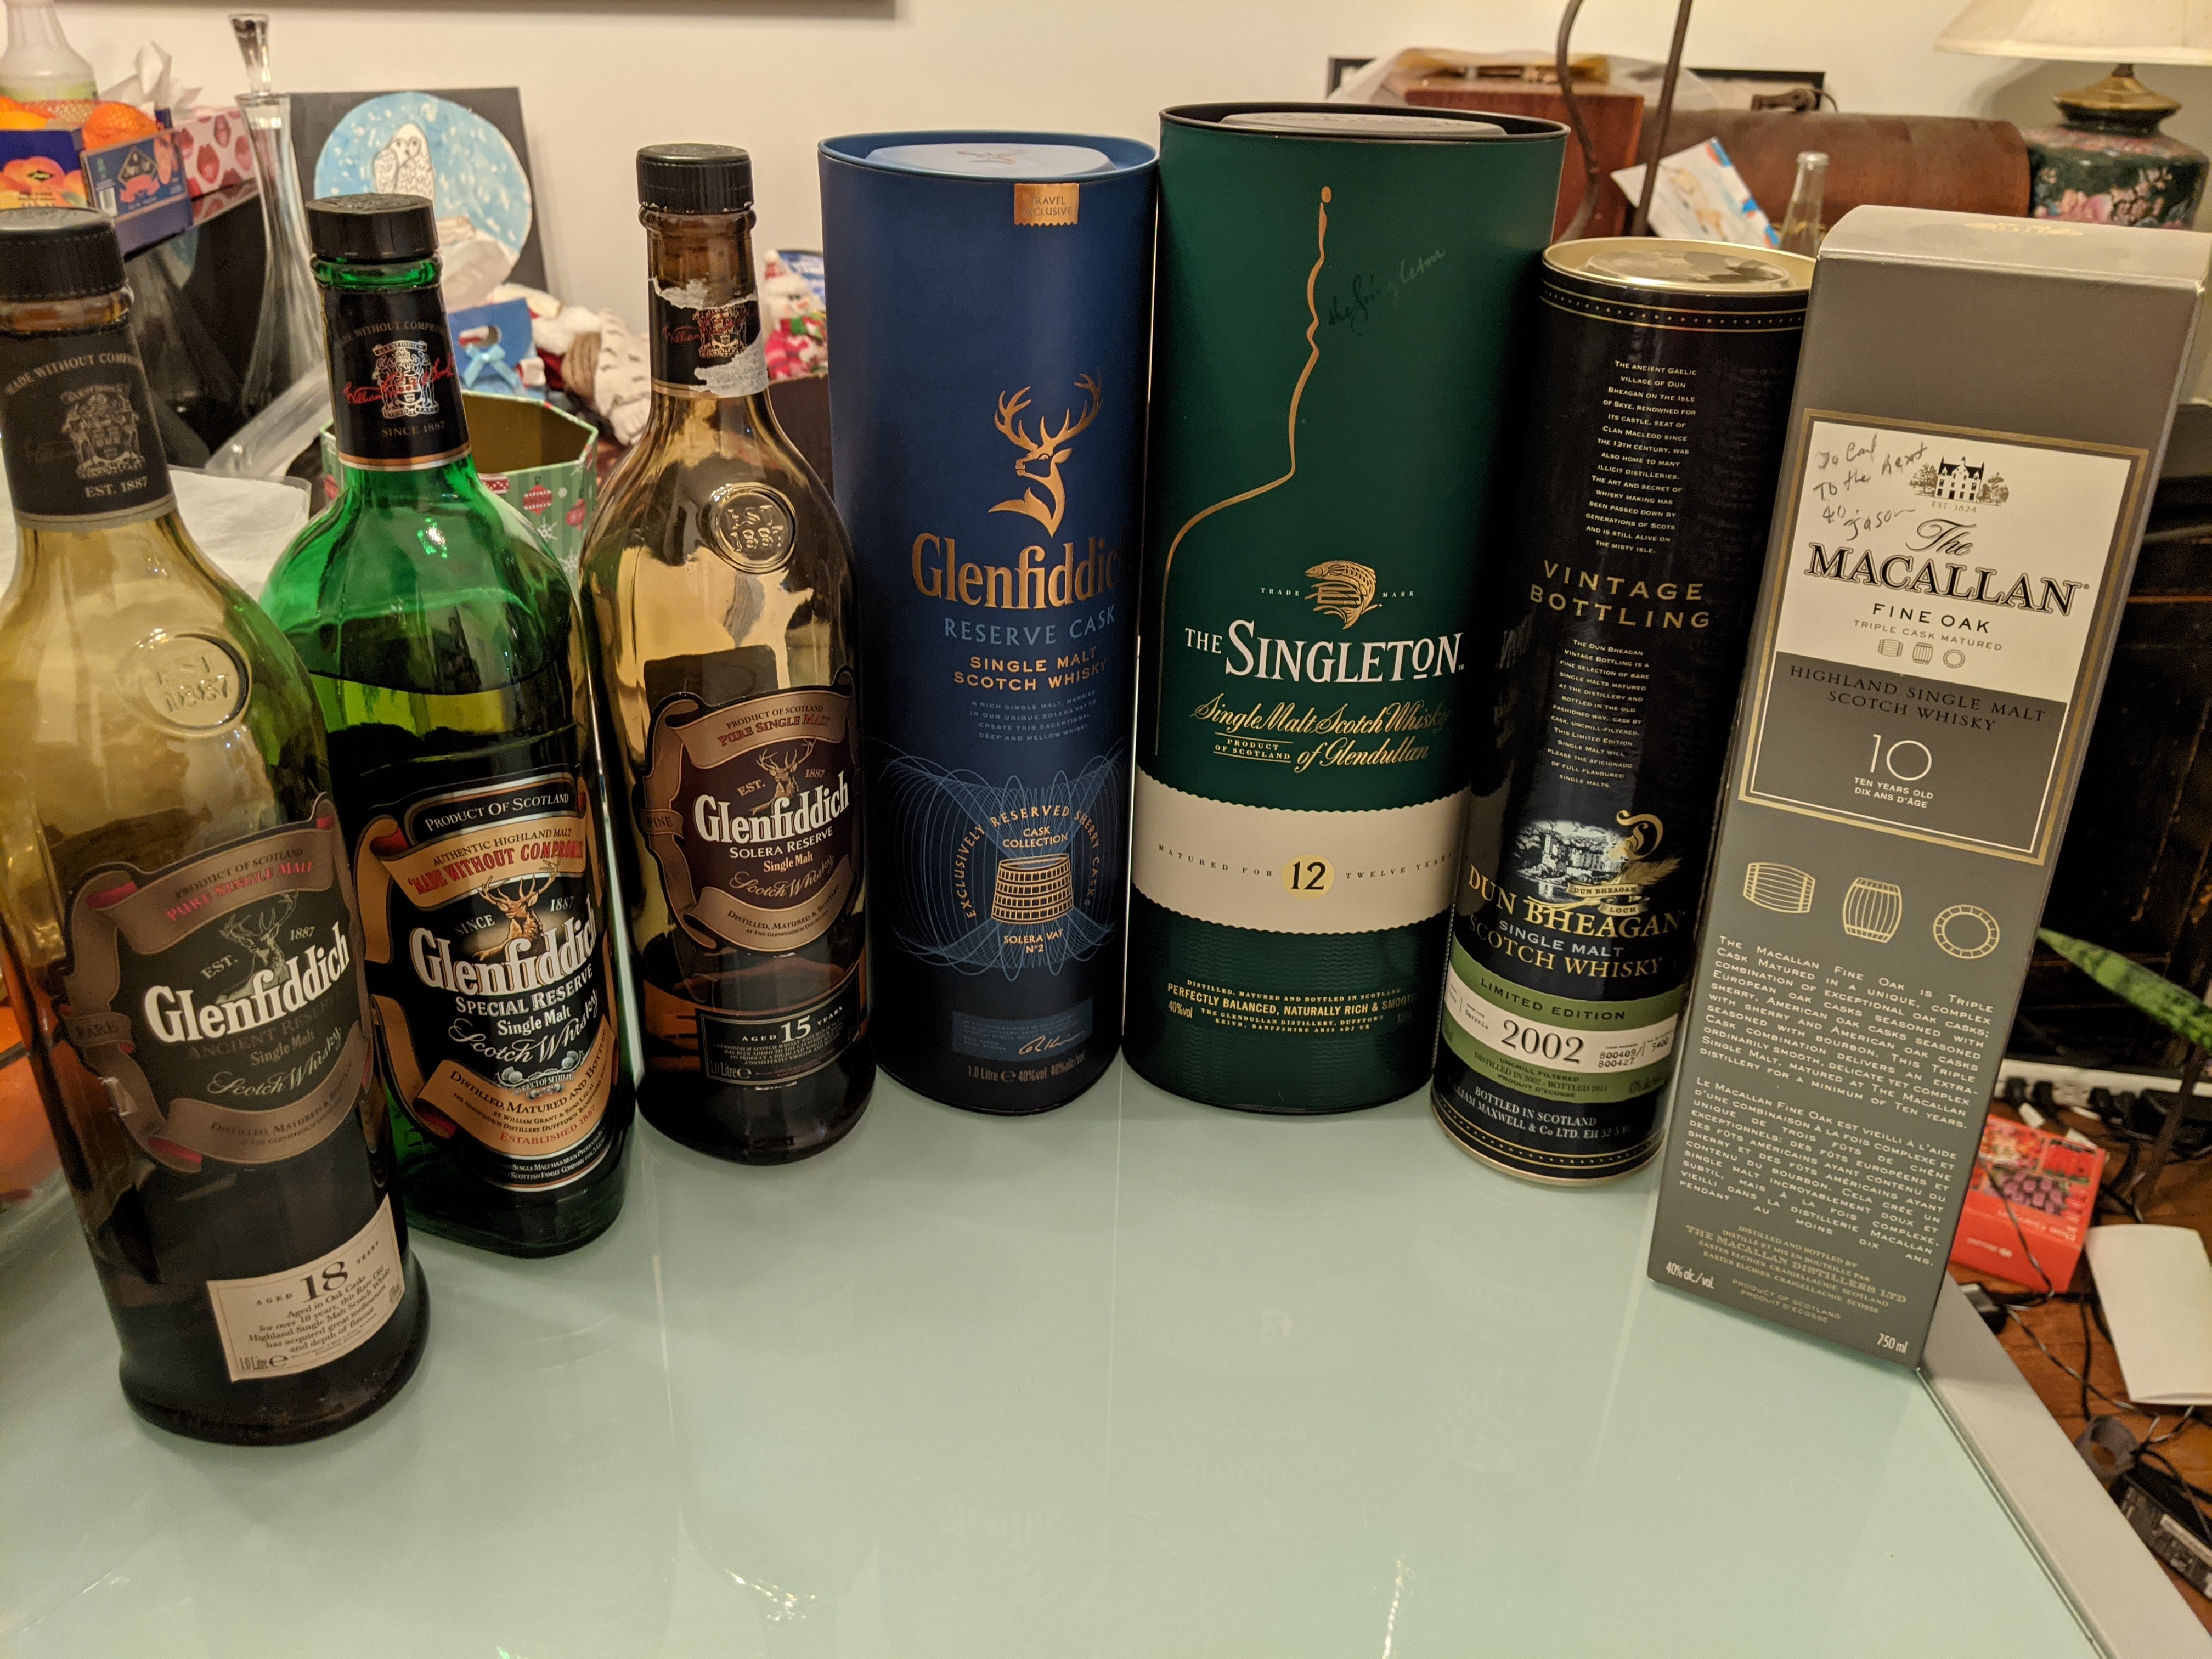
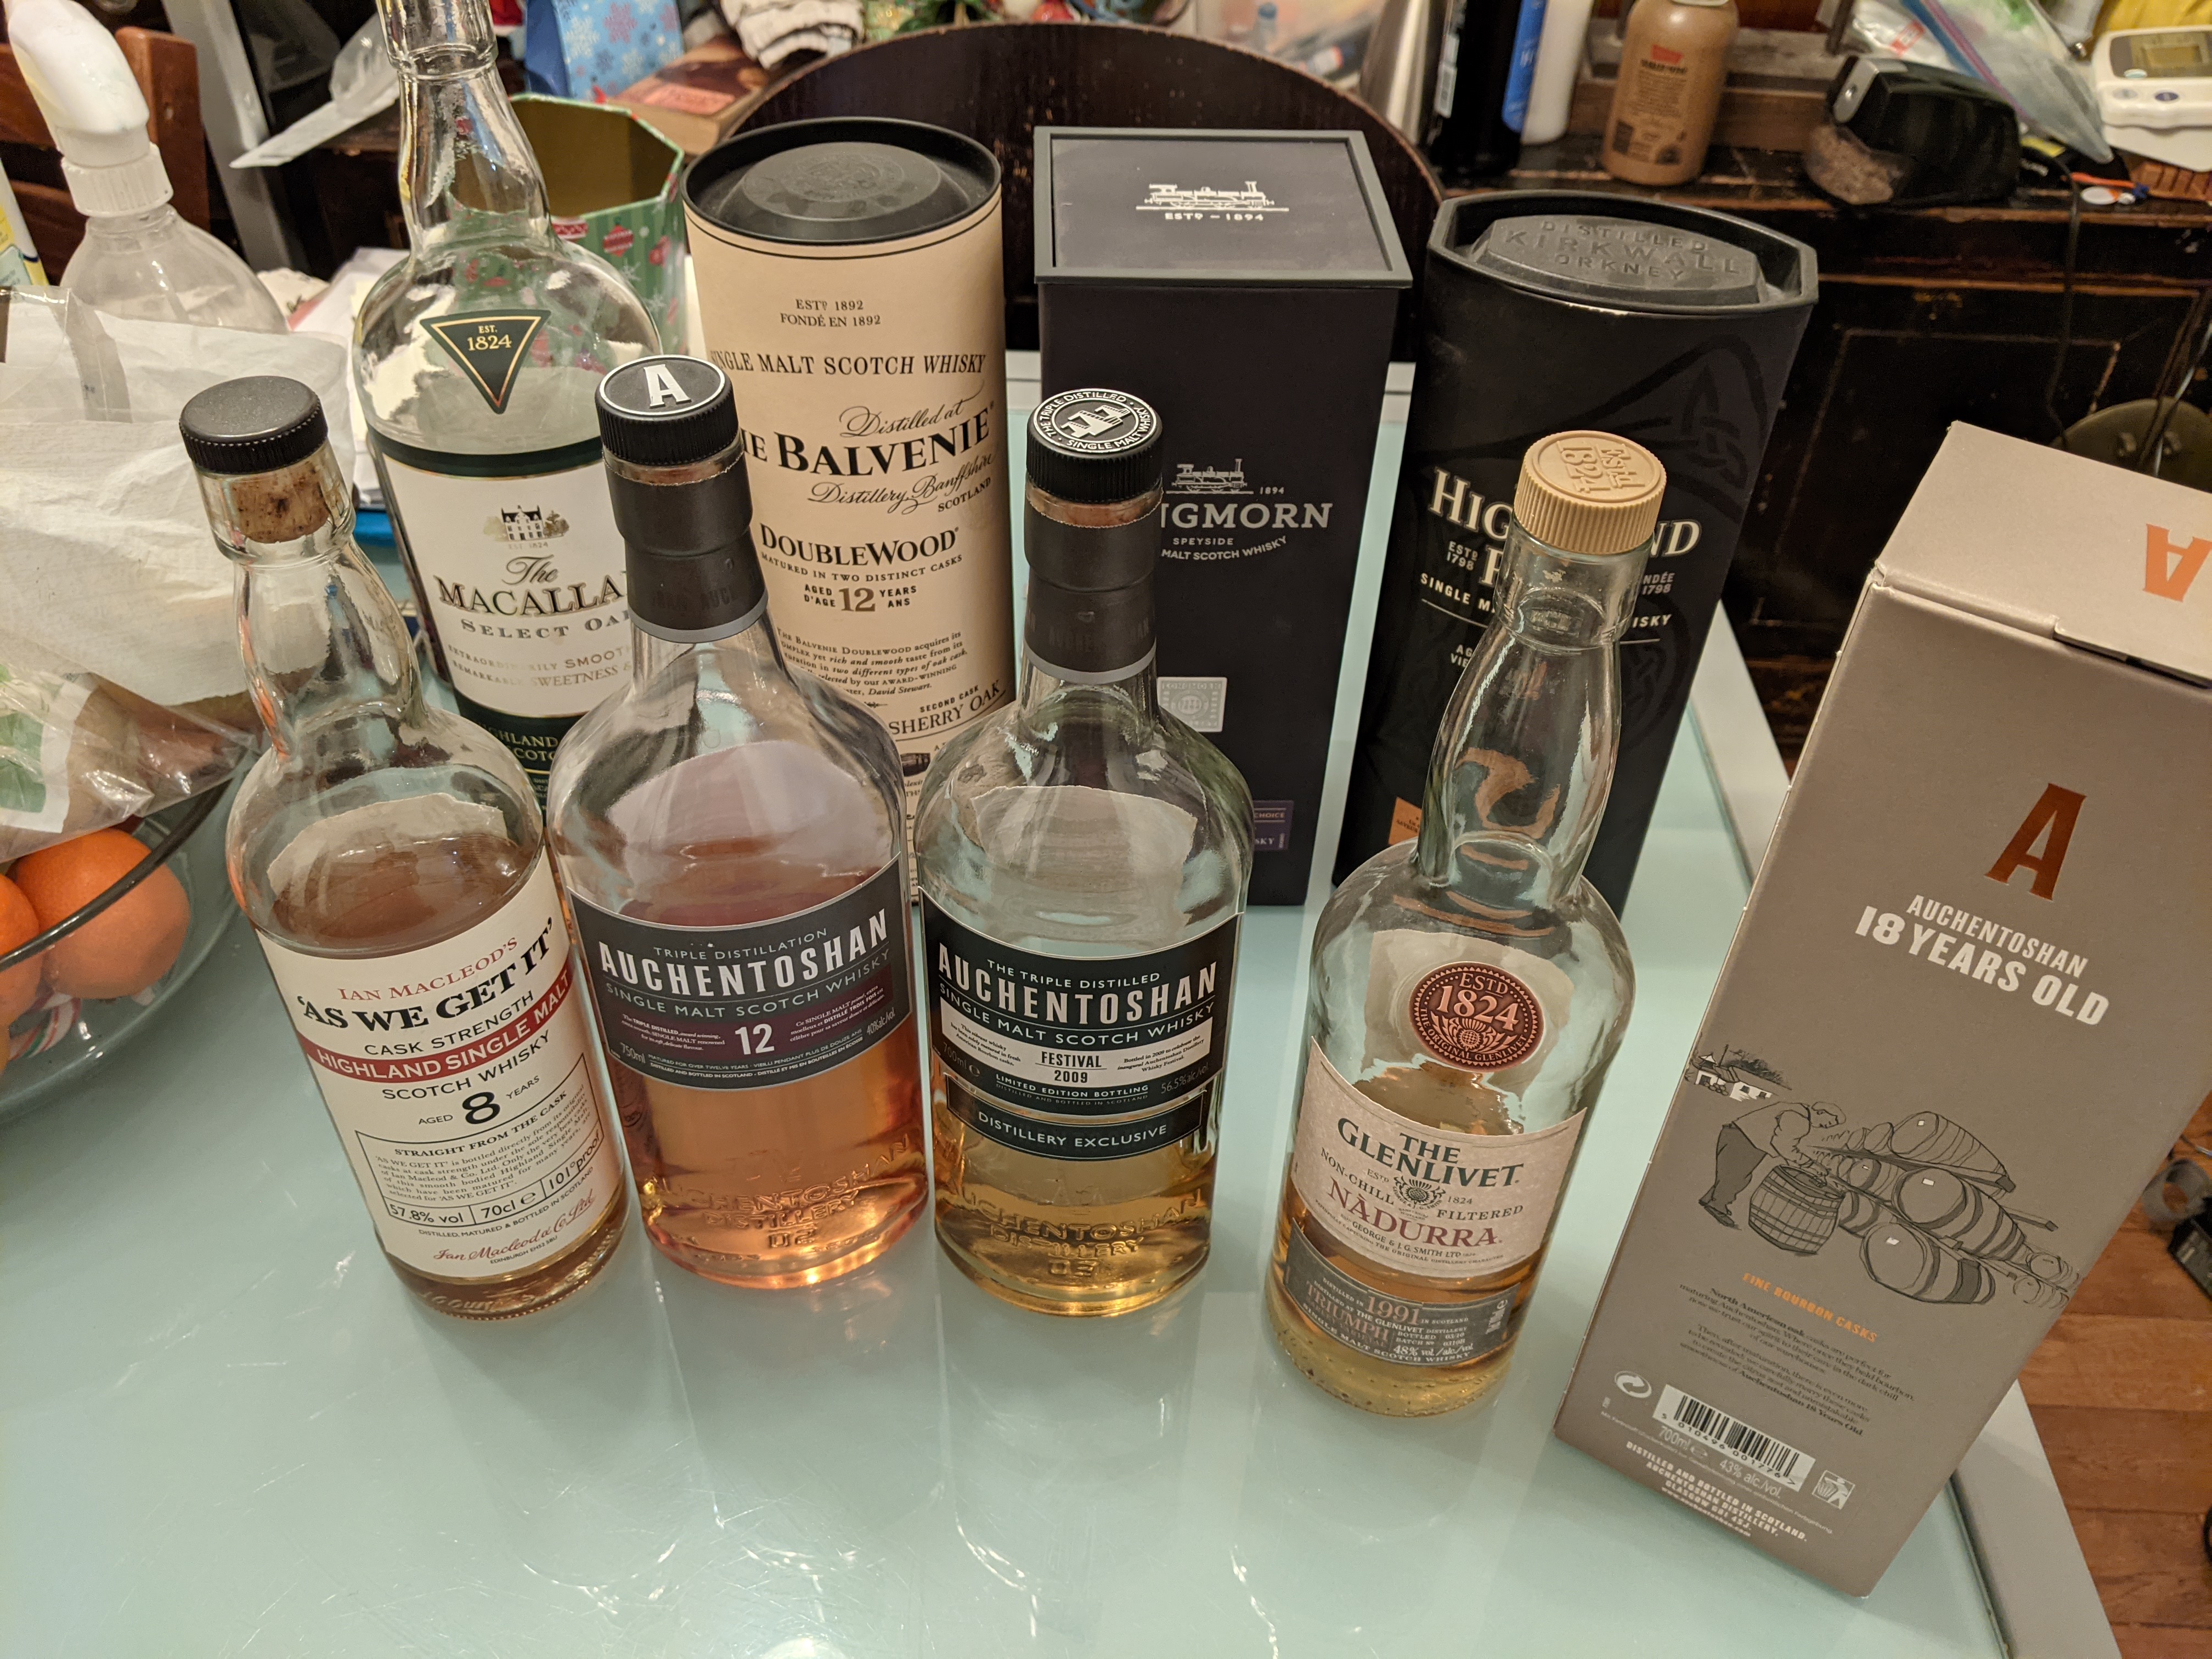
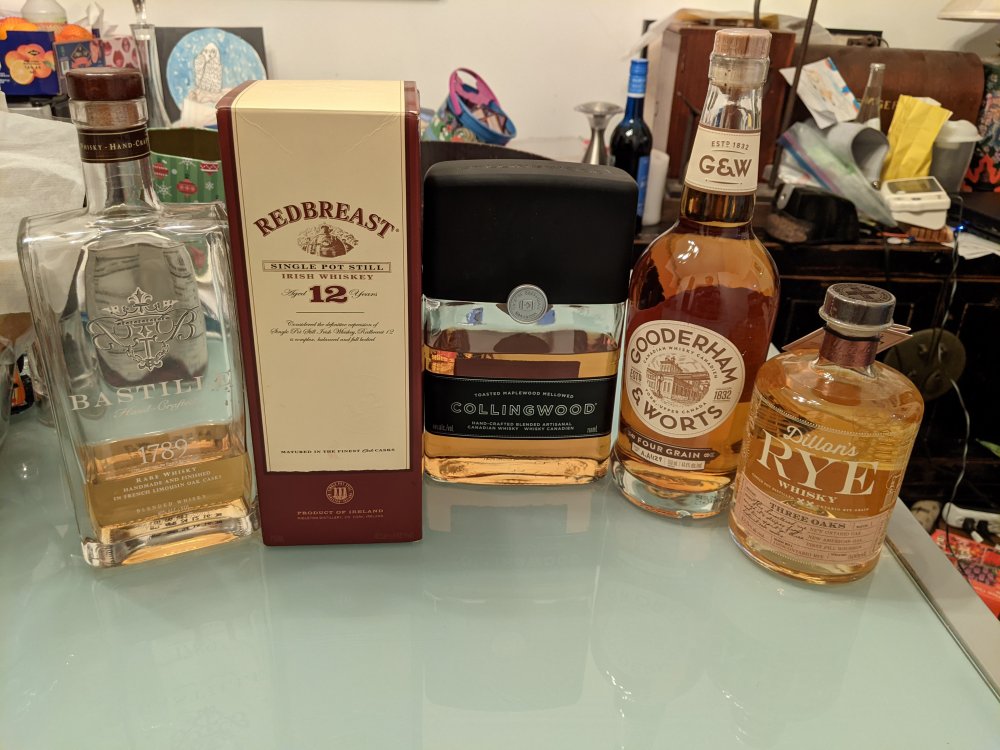
Not a Brit but grew up with whisky so very much up my alley. And some from other than Scotland. Some are from visiting Scotland and my wife's relatives there. Couldn't come home empty handed after all. A fair number of these are from when my folks traveled all the time prior to Covid. They never knew what to bring back for me so once I suggested a bottle of Scotch from the duty free. Nowadays, that's pretty much all they get me instead of souvenirs. Hard to complain I guess. Well Harv, you just need to get here and I can educate you real quick on them. Carl


-
Had a small bit of 1792 tonight with dinner. It's smooth but had more bite than Makers 46. Still a nice drink.
-
For me, this is an easy one. My Max Factory VF-1S Strike Valkyrie: Here it is compared to the HB B-24 which is not a small box either: Here's the owner of Max Factory when he announced the kit.
- 38 replies
-
- 11
-

-

-

-

-
What is on your bench right now ? Share a picture :)
BlrwestSiR replied to Martinnfb's topic in Modelling Discussion
I've got a Tamiya McLaren MP4/6 I started in 1993 that I work on once in a while... -
Same here. We've got a nice brew pub nearby and there's a ton of craft breweries around these days. Which makes for a silly amount of choice.
-
It's been a while since I had the 1792 so I'll have to have a glass tomorrow and remind myself. Just finished a beer or I'd find out tonight.
-
I've got: - Maker's 46 - 1792 small batch - Eagle Rare I need to finish some of these before I get more. Or my liquor cabinet will look worse than my stash.
-
New one for me too. Let us know what you think of it.
-
F-16 I think.
-
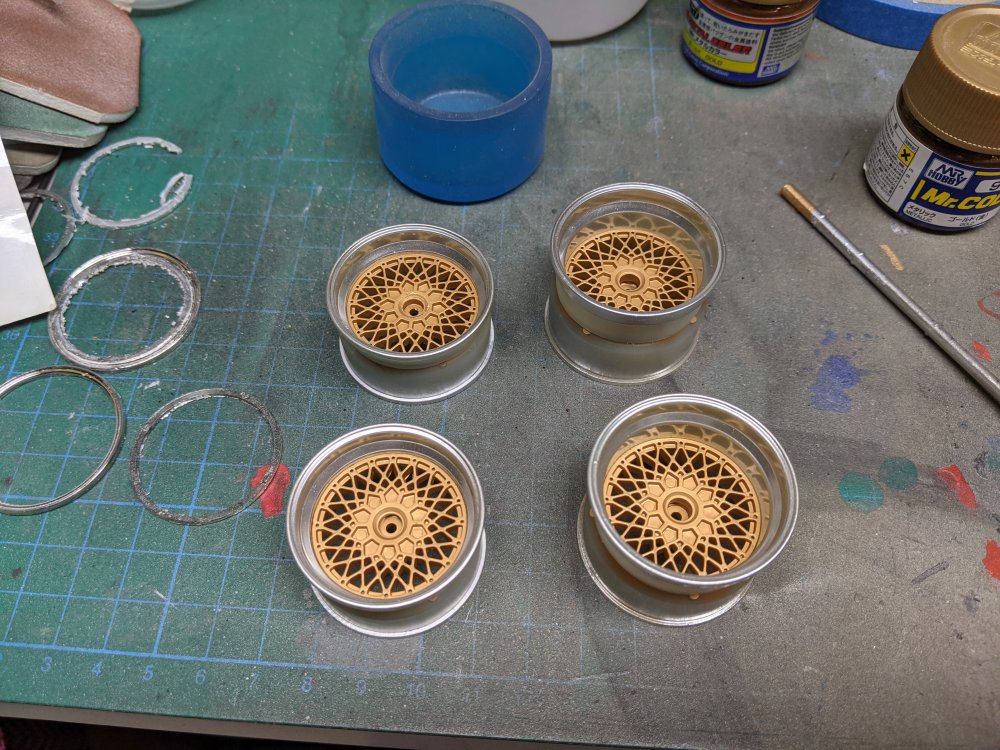
Having used both, I like the Xtreme Metal more. They seem to be less fragile than Alclad and for me, have sprayed nicer. I've found it too easy to flood the model surface when I used Alclad. I'm sure it's user error but it happens frequently enough that u think otherwise. Here's Xtreme Metal polished aluminum on the rims for my Stratos. This is on bare plastic with no primer. Here's Alclad stainless steel on the burner area of the F-4: The only shade where the Alclad is better is chrome. It's looks more like chrome versus Xtreme metal's version.
-
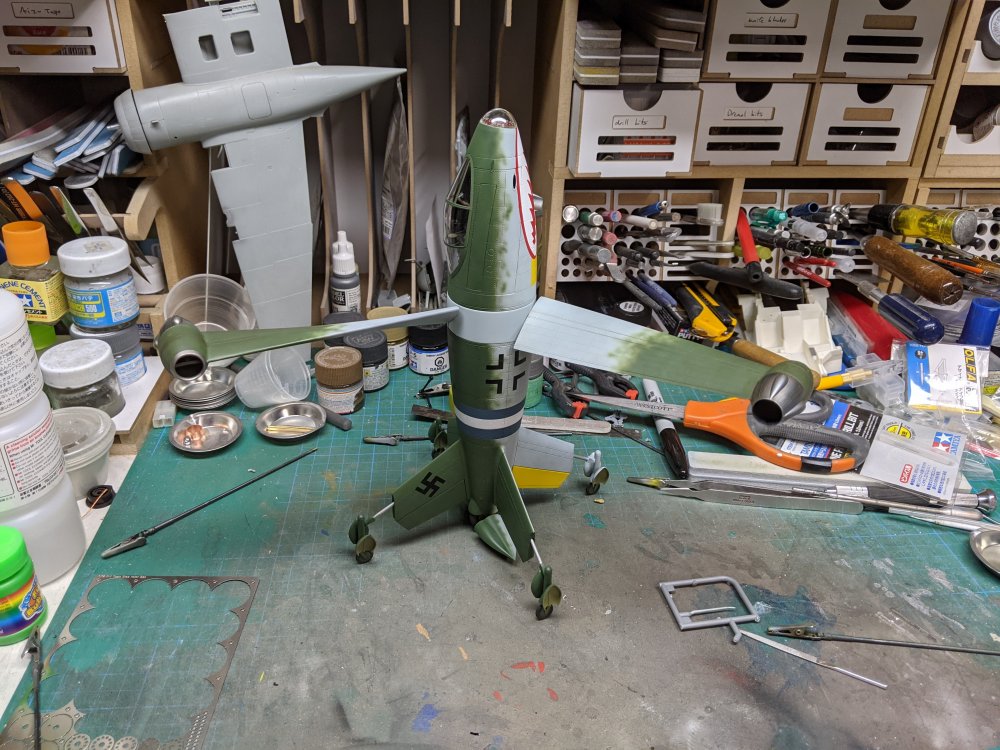
Focke Wulf.... Triebflugel.
BlrwestSiR replied to BlrwestSiR's topic in LSM 1/35 and Larger Work In Progress
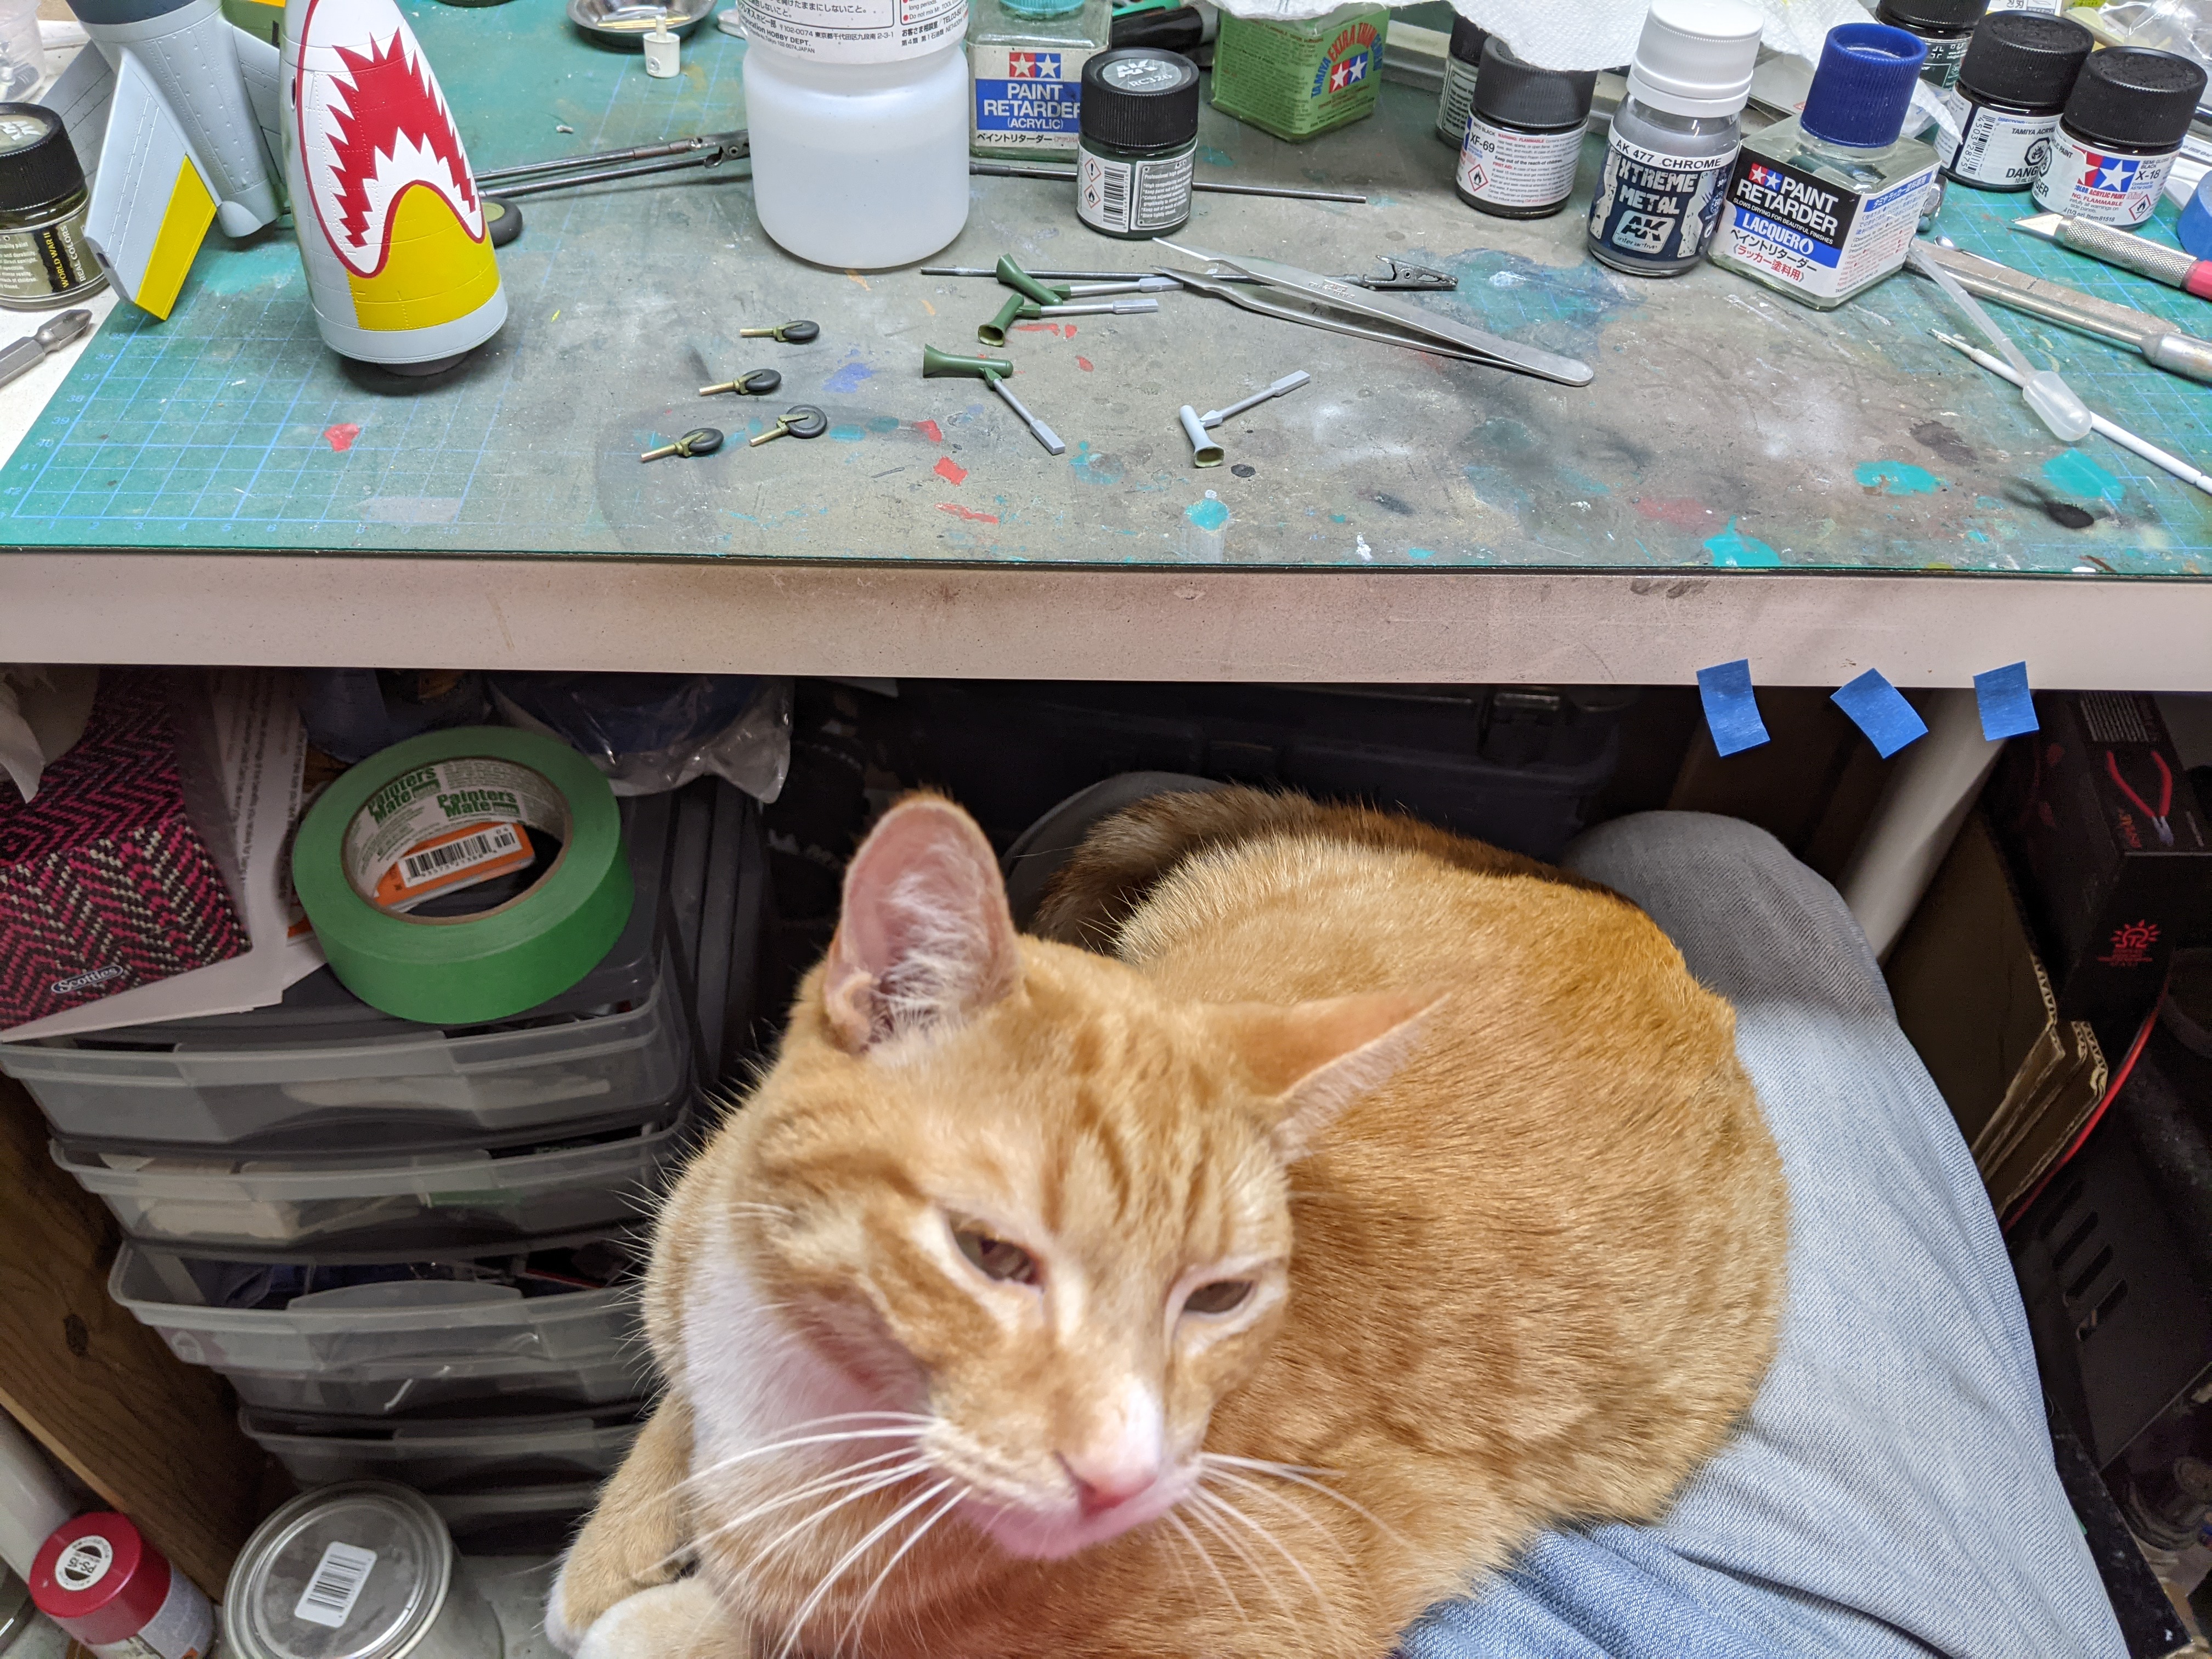
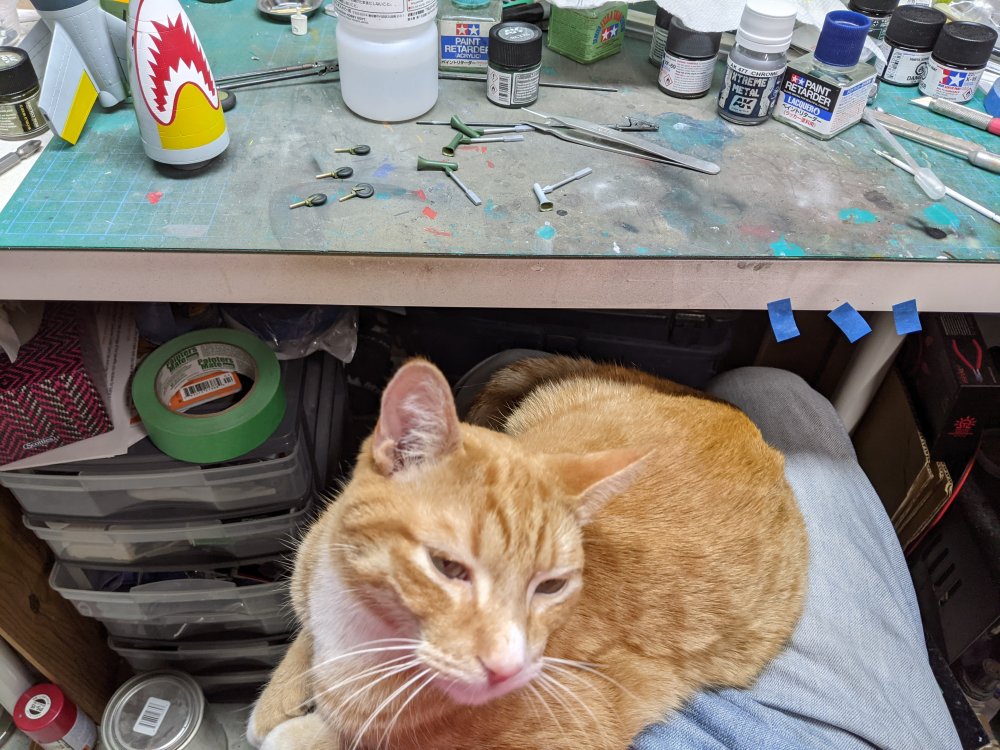
Thanks gents! Glad to be a bad influence. As for cat handicaps, that might be an idea for a group build. Meantime, I finished the landing gear and installed it. I finally found the hardest part of the kit which is to get the clamshell doors for the gear glued on and stay on. I had to glue a couple of them on more than once but it's all done now. Overall, a very fun build with pretty much no hiccups or issues. I can't wait to see what Miniart comes out with next. Carl
-
It really is isn't it? Nice to see other manufacturers get into the game.
-
Lancaster ND644 in 32nd scale
BlrwestSiR replied to FME erk's topic in LSM 1/35 and Larger Work In Progress
Nice job on improving the gear legs Ian. I'm wondering anyone has compared the length of the recent brass gear legs that Aerocraft came out with to see if they're shorter. They filled in the voids in the HK legs. Kai, I believe the Canadian built Mk X Lancs had the square rad openings and corresponding rad shape depicted in the kit. -
HGW had them in-stock back in October. I picked up mine from them for 20% off then. I think it's pretty much the only way to get the Dragon kit currently at a reasonable price.
-
Definitely a cool diorama. Must be huge too as that looks to be the 1/48 Eagle which is 22" in length.
-
The Minibase Su-33 is almost ready for release. There's a test build up on The Modelling News that looks stunning. I'm really tempted by this kit since I doubt we'll see an Su-33 in 1/32. https://www.themodellingnews.com/2021/01/test-kit-dry-fit-review-48th-scale.html?m=1
- 161 replies
-
- 2
-
-
- greatwallhobby
- italeri
- (and 6 more)
-
EF-105F Thunderchief YGBSM
BlrwestSiR replied to Clunkmeister's topic in LSM 1/35 and Larger Work In Progress
Lots of splicing and dicing there Ernie. Nicely done too. I don't always remember the measure thrice, cut once rule myself. Carl- 41 replies
-
- 4
-
-
- zotz decals
- barracudacast
- (and 9 more)
-
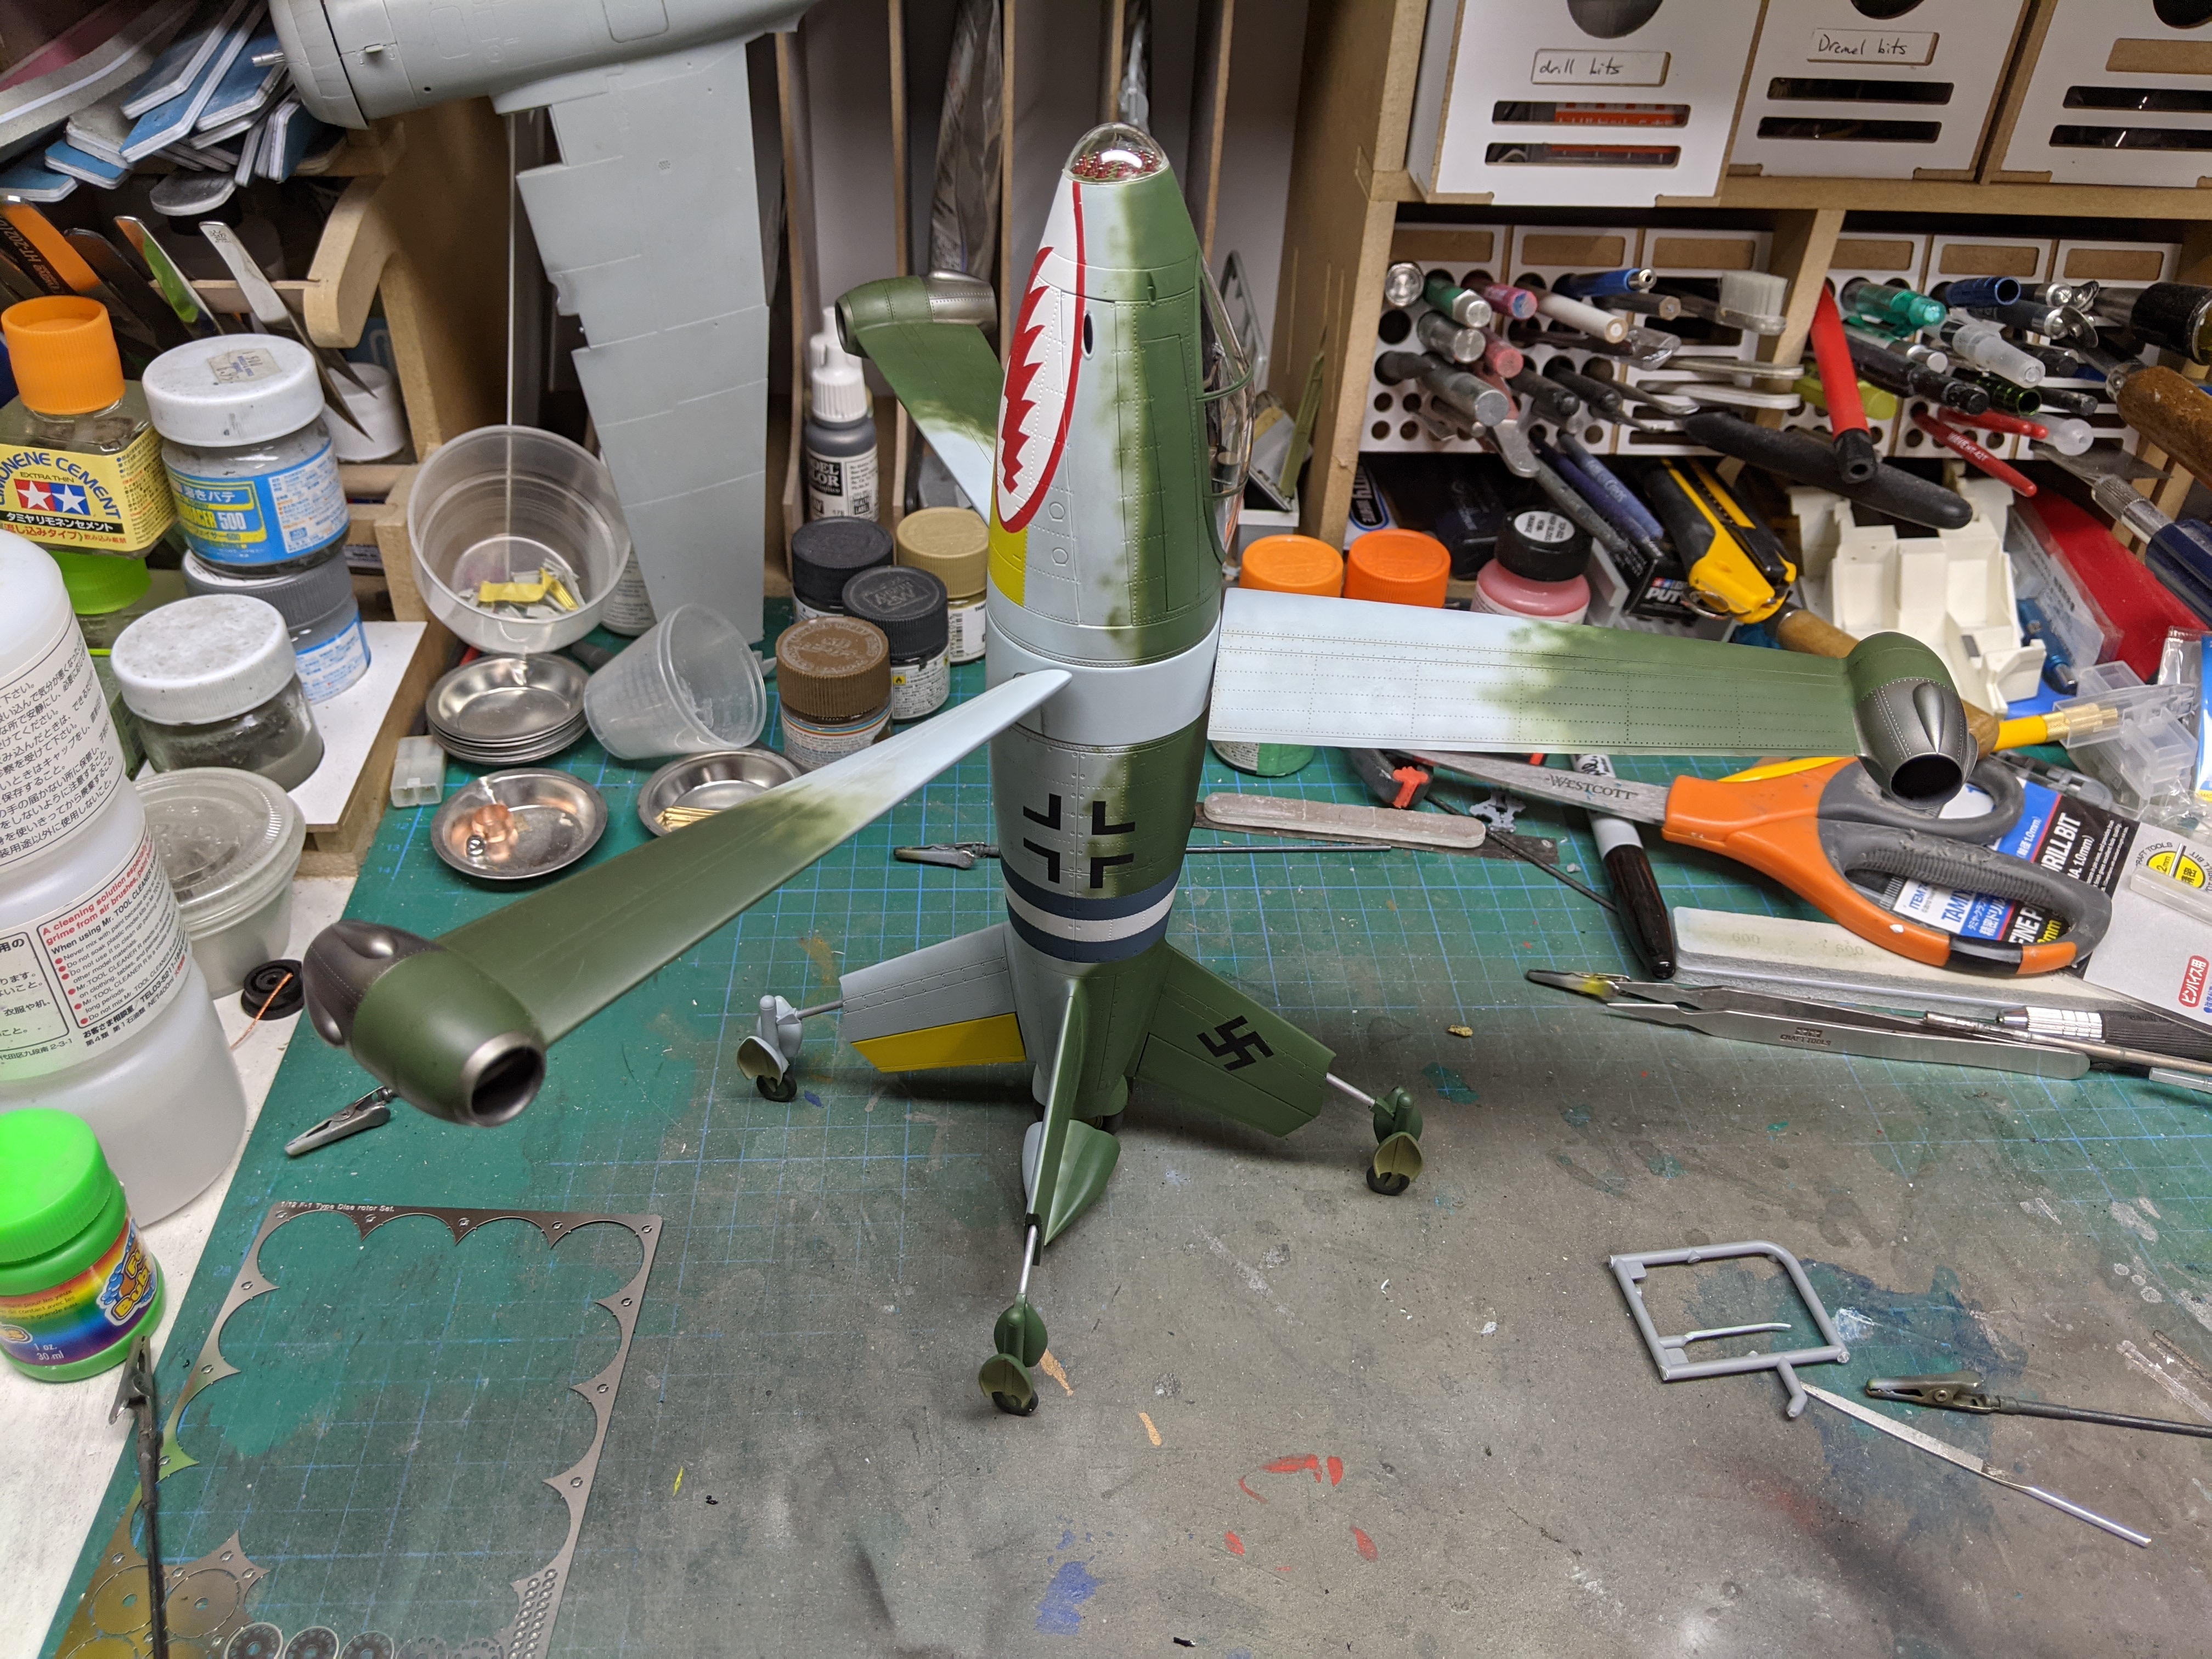
Focke Wulf.... Triebflugel.
BlrwestSiR replied to BlrwestSiR's topic in LSM 1/35 and Larger Work In Progress
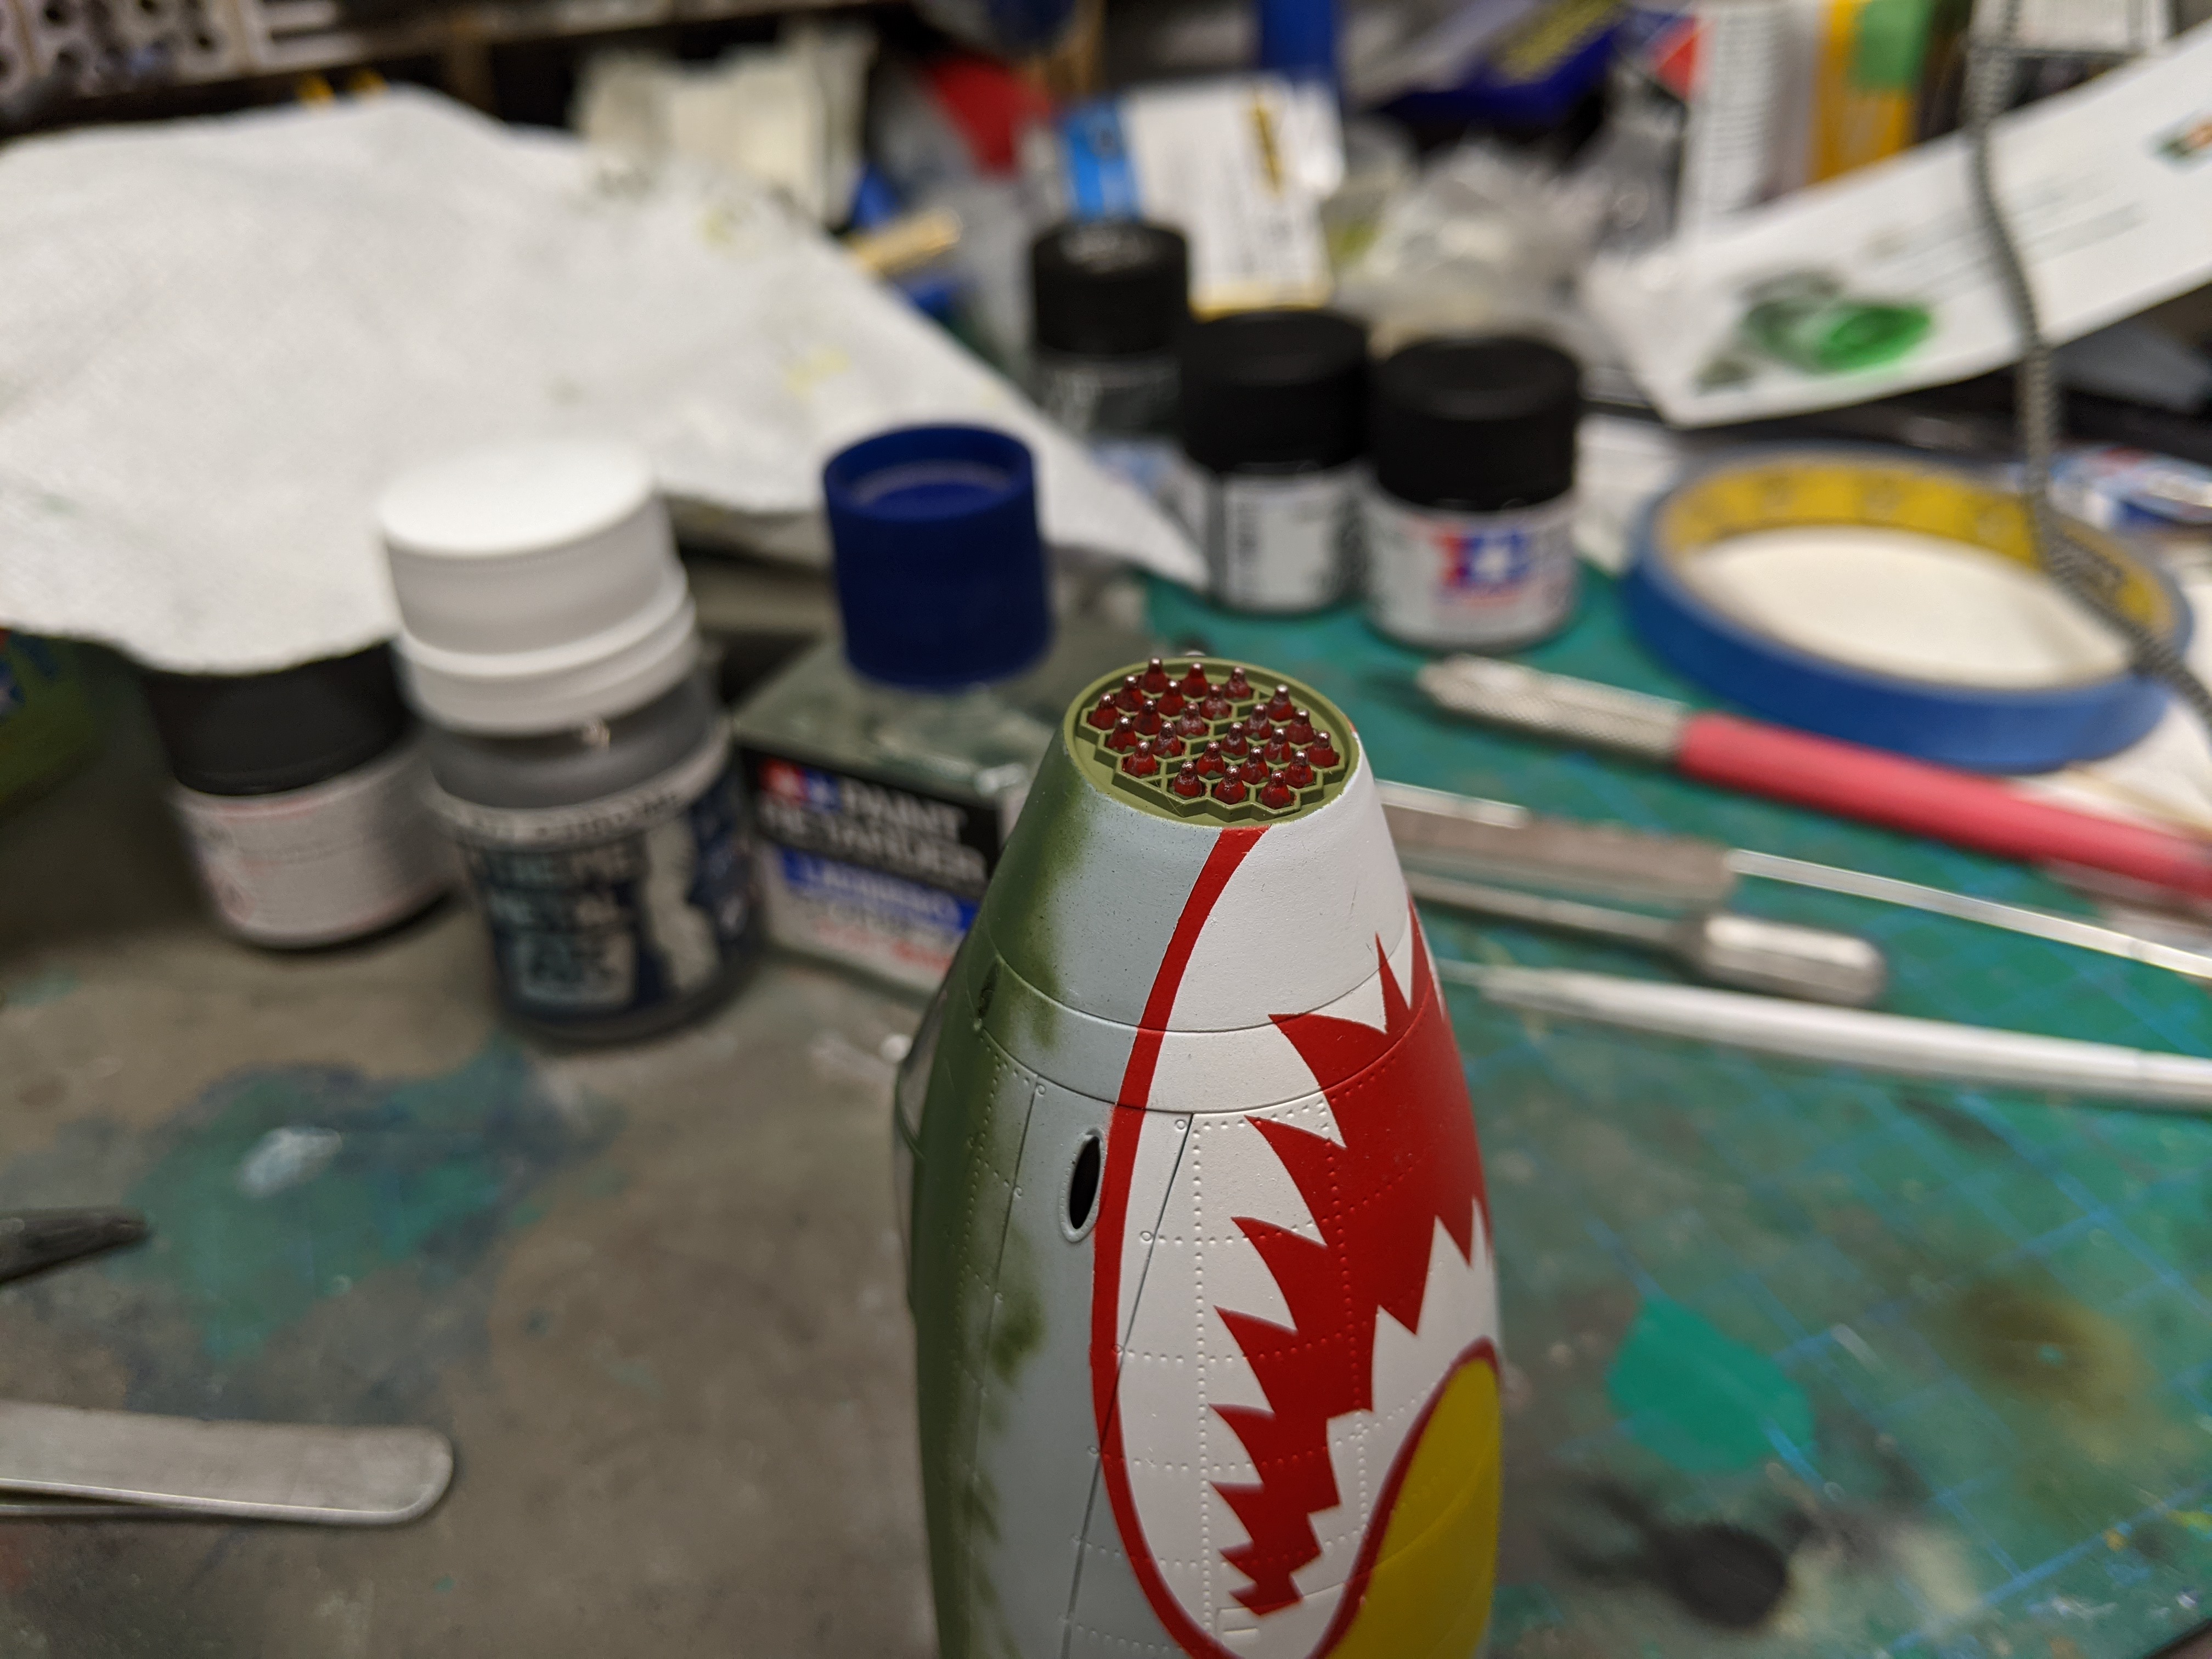
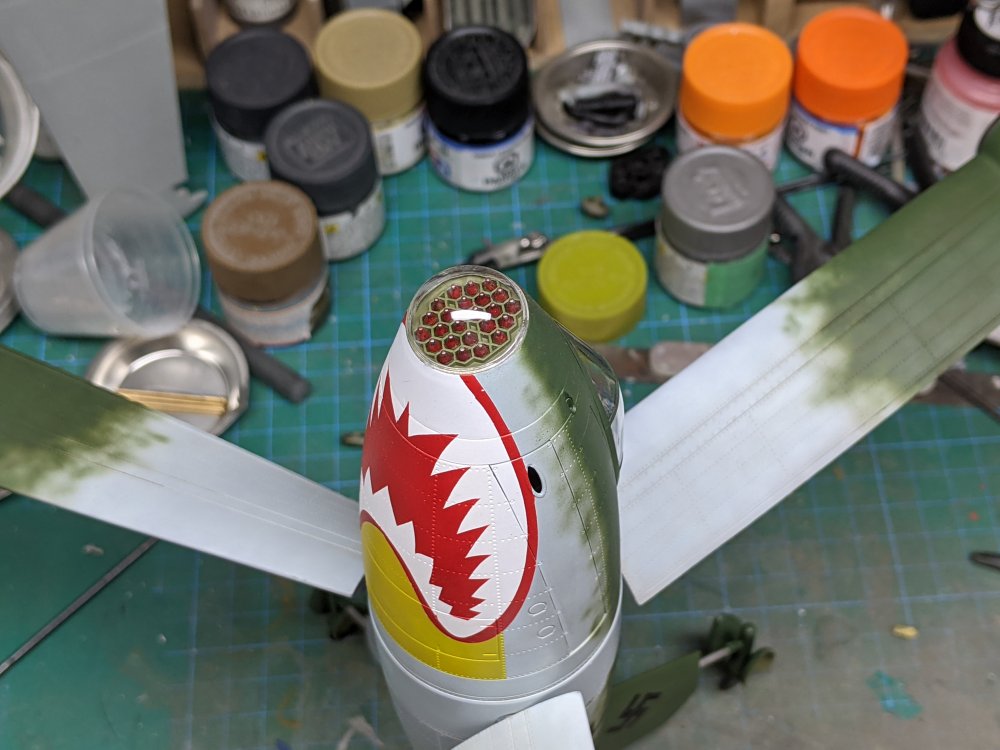
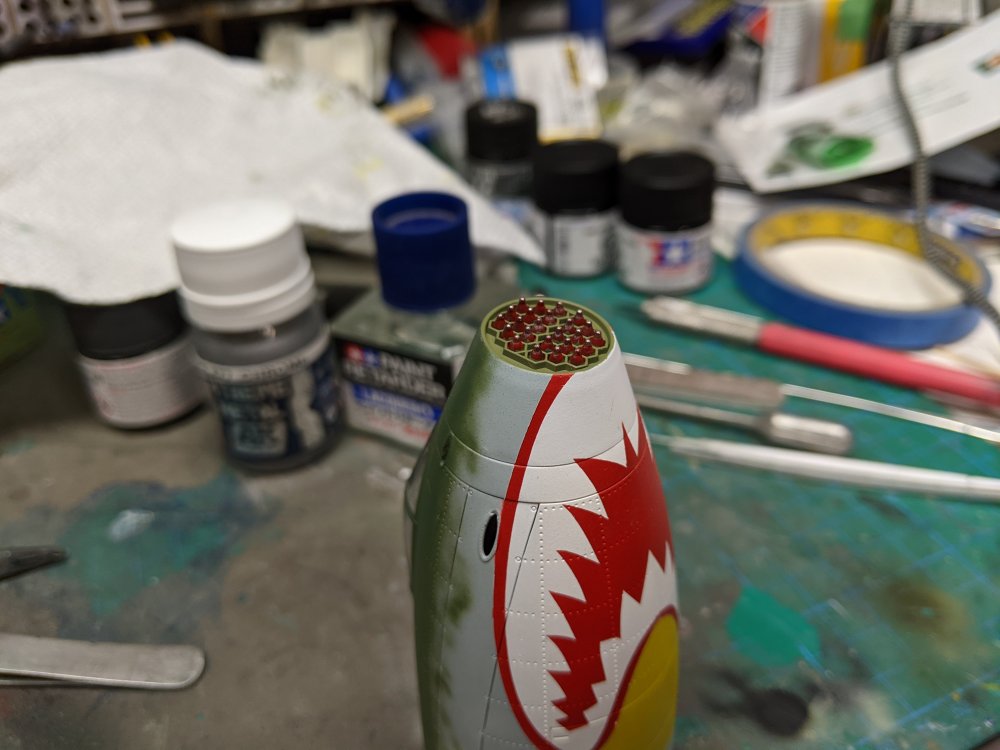
I got a bit more done on the landing gear. The retraction struts are in silver now and I painted the tires on the outriggers. I had some extra challenges in getting them done. The rockets in the nose are now done as well. Red with a silver tip.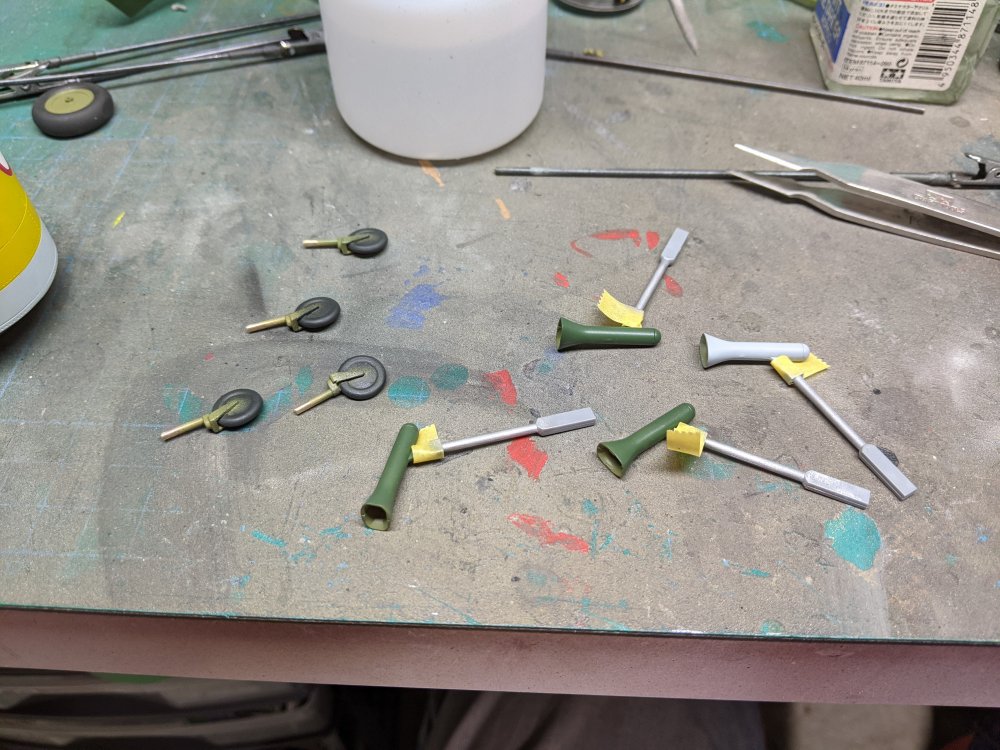
-
And in for a rest before carving.

-
It's only 11 lbs so a couple high school boys at most. Thankfully mine aren't there yet or I'd be having to sell off parts of my stash.
-
Lunchtime update. Still has 4 hours to go...