BlrwestSiR
-
Posts
9,213 -
Joined
-
Last visited
Content Type
Profiles
Forums
Events
Gallery
Everything posted by BlrwestSiR
-
Welcome aboard! My wife is Scottish so does that count? I've even been to the Edinburgh model show. Carl
-
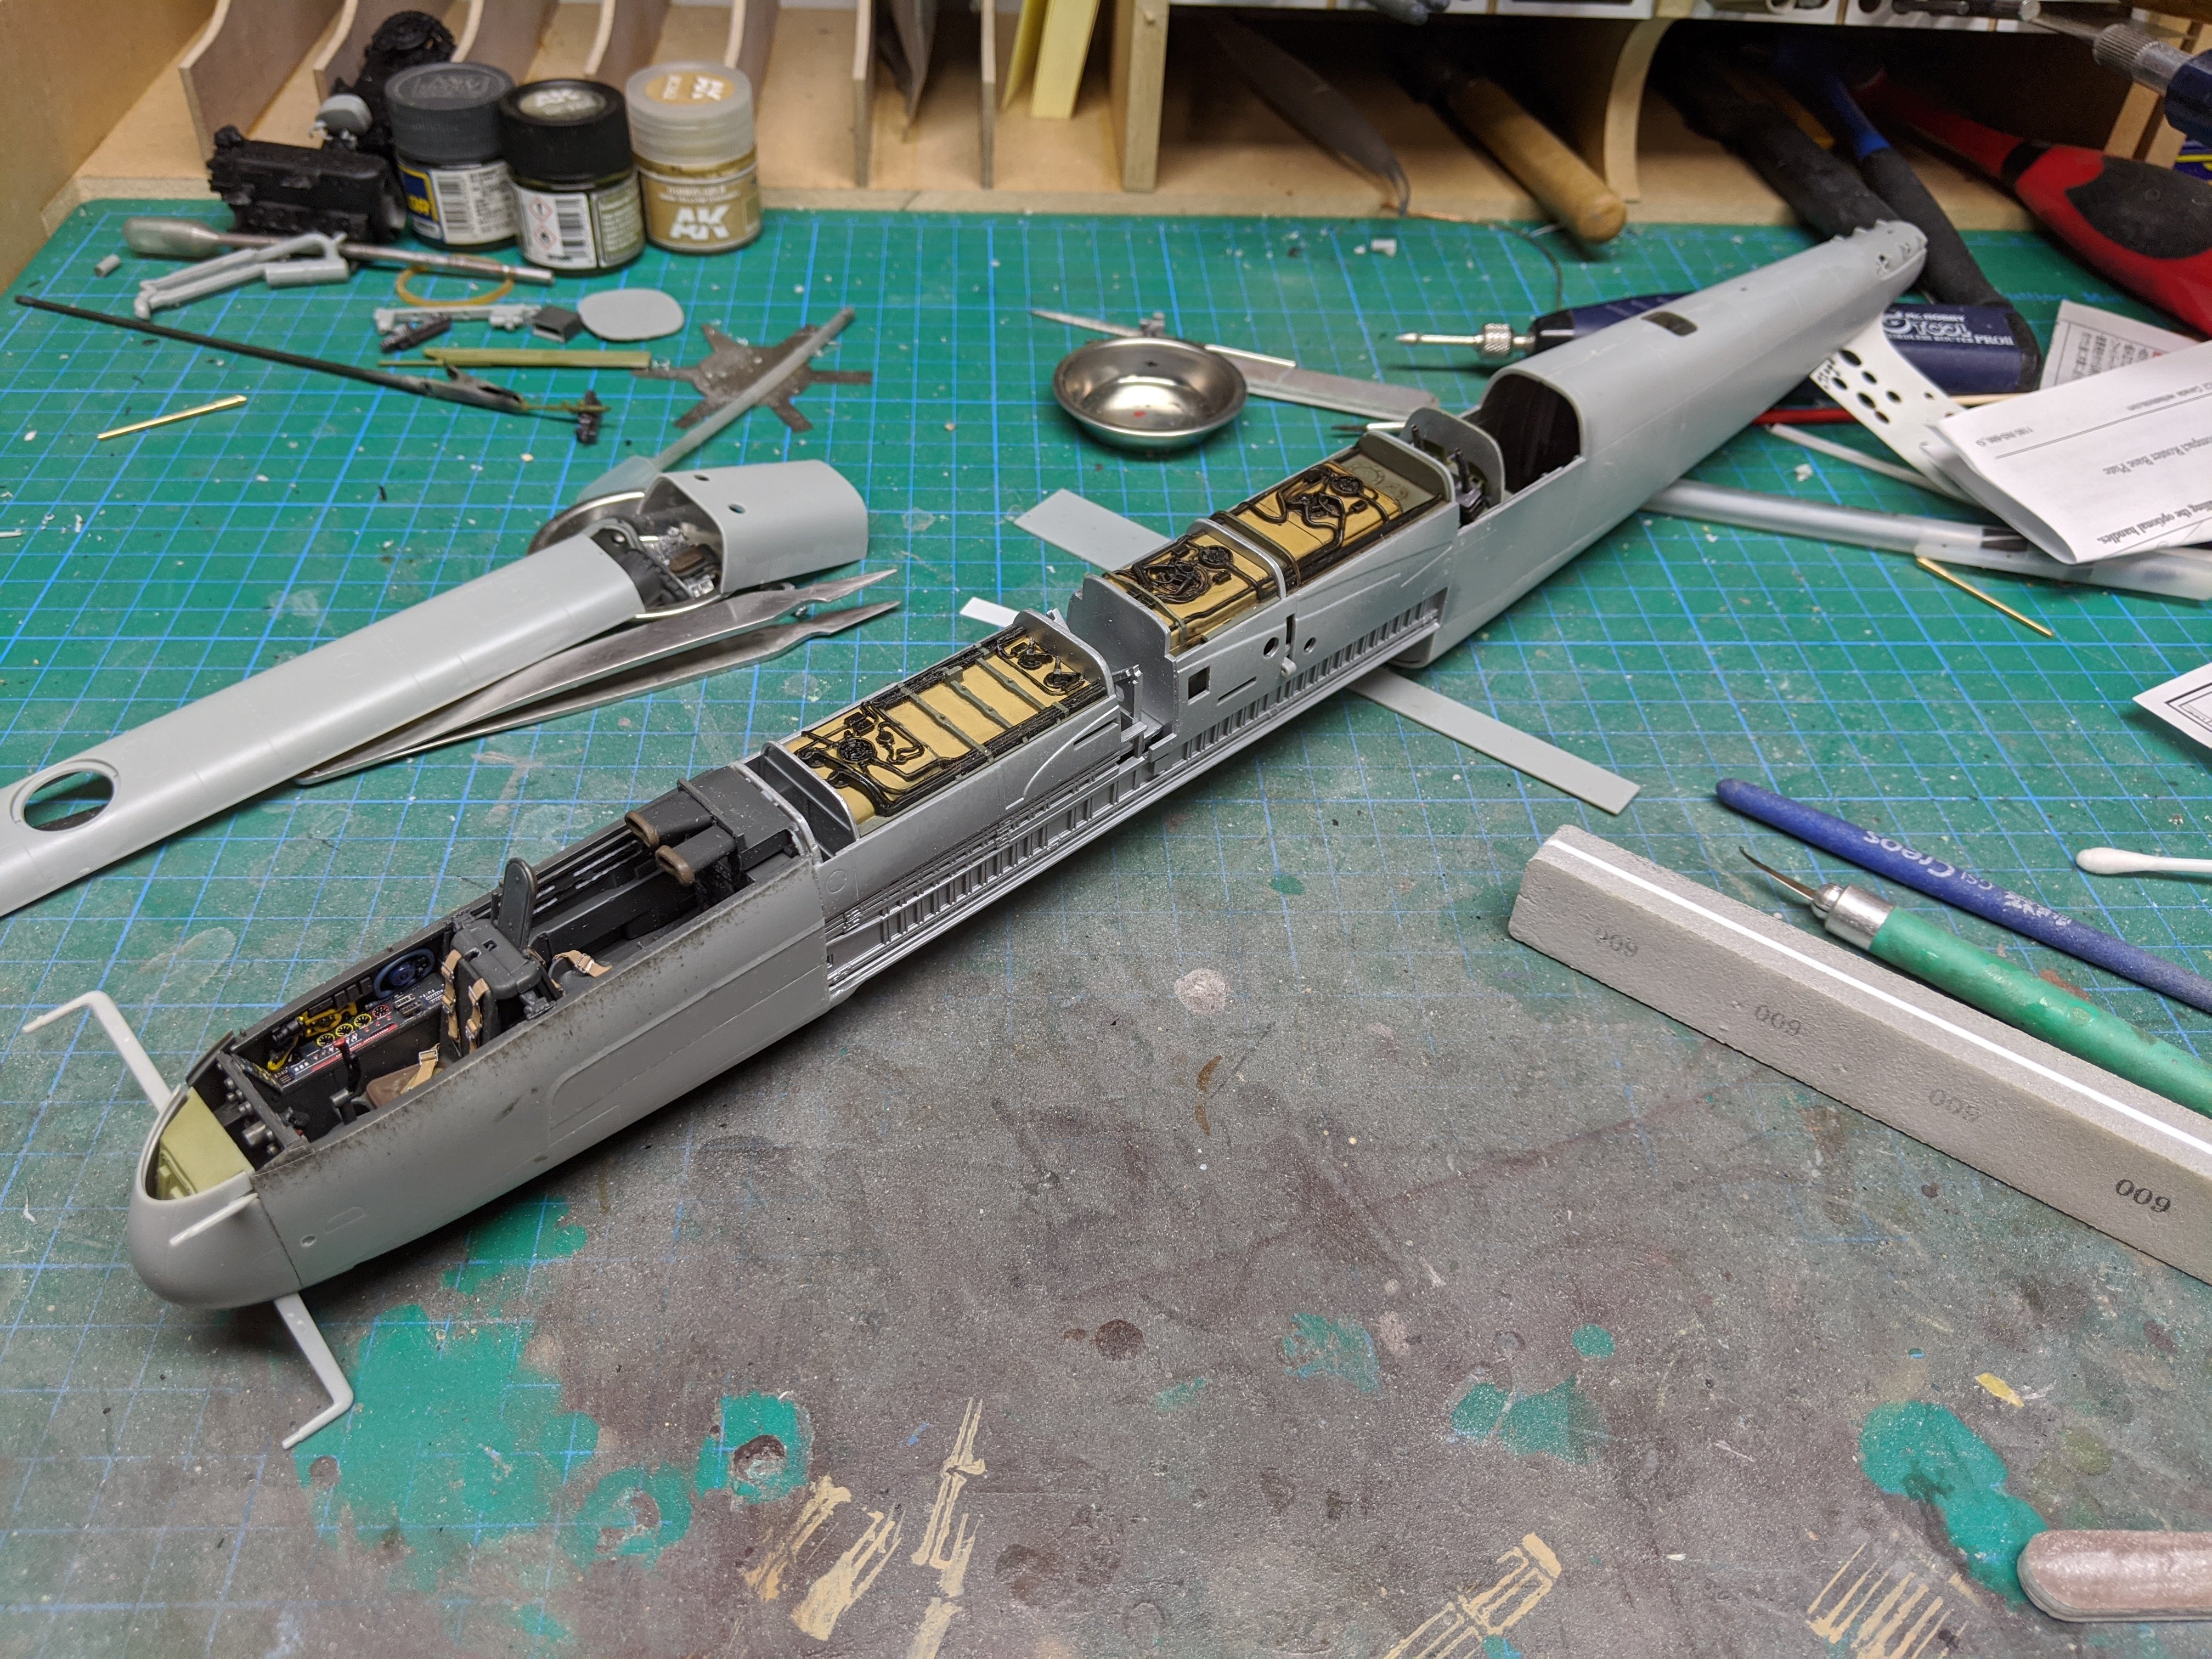
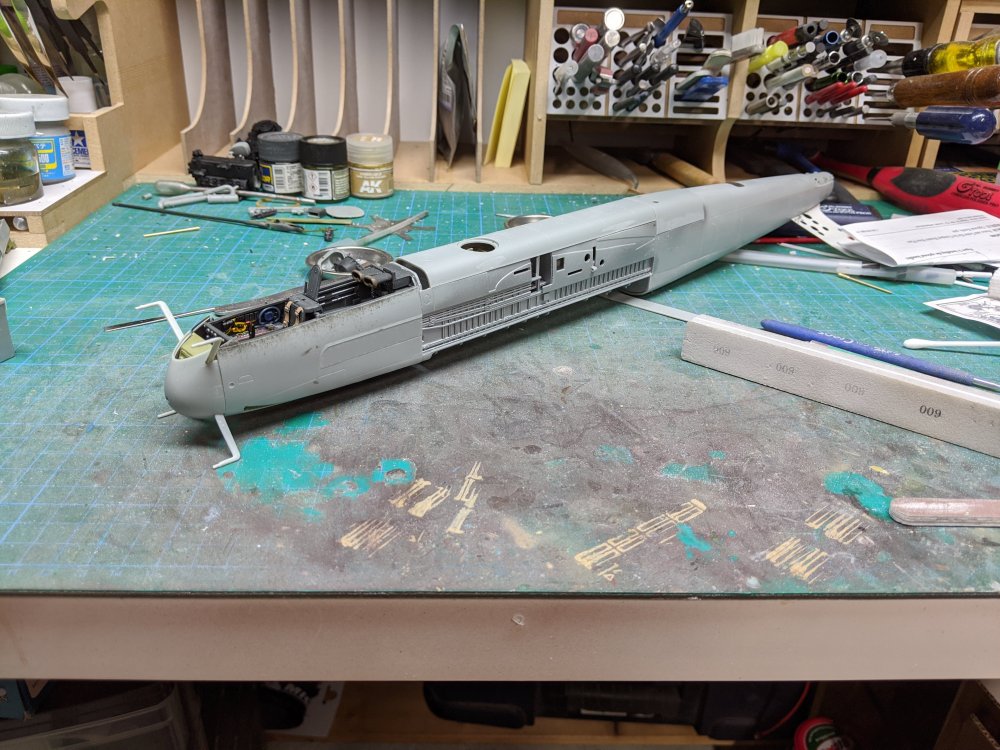
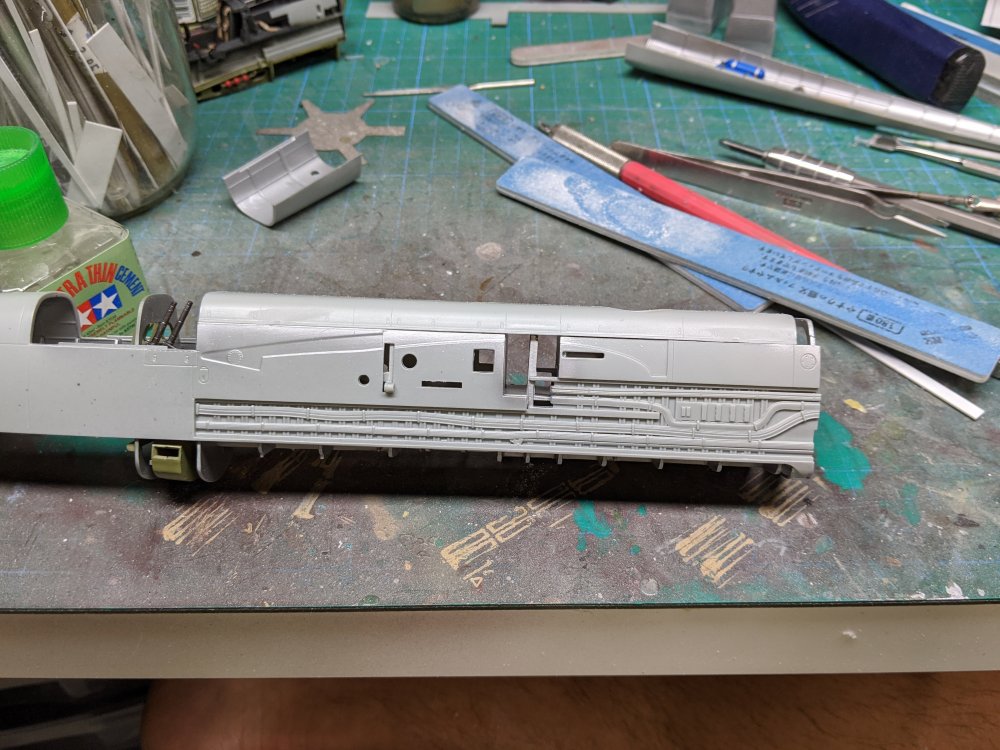
Thanks Dennis! Thanks Rob! Much of the internal detail doesn't get seen unless you do a maintenance scene I suspect. So I've gone through the build to see what does need to be added or what can be viewed after completion. This was the same approach I took with my ZM Skyraider. I ended up leaving out a lot of the internal detail on that one. For the fuselage tanks, the top panel fits well enough that I can get away with not gluing it in place so that the details will still be accessible. Here's the fuselage as of this morning: With the panels in place. The last second intervention worked. There's only a small seam on either side that's no wider than the panel lines. The only one that needs any filler is on the underside and that gets covered by the ventral gun pack.

-
Nice and shiny there Ryan. Time to throw some mud at it now. Carl
- 2,036 replies
-
- 3
-

-
- car related stuff
- anything about cars
- (and 6 more)
-

Arado 234 Nachtigall on Speed
BlrwestSiR replied to DocRob's topic in LSM 1/35 and Larger Work In Progress
Looks great Rob. I used pennies for the counterweight but can't recall how many I used. They were placed behind the cockpit bulkhead before it was installed. Carl -
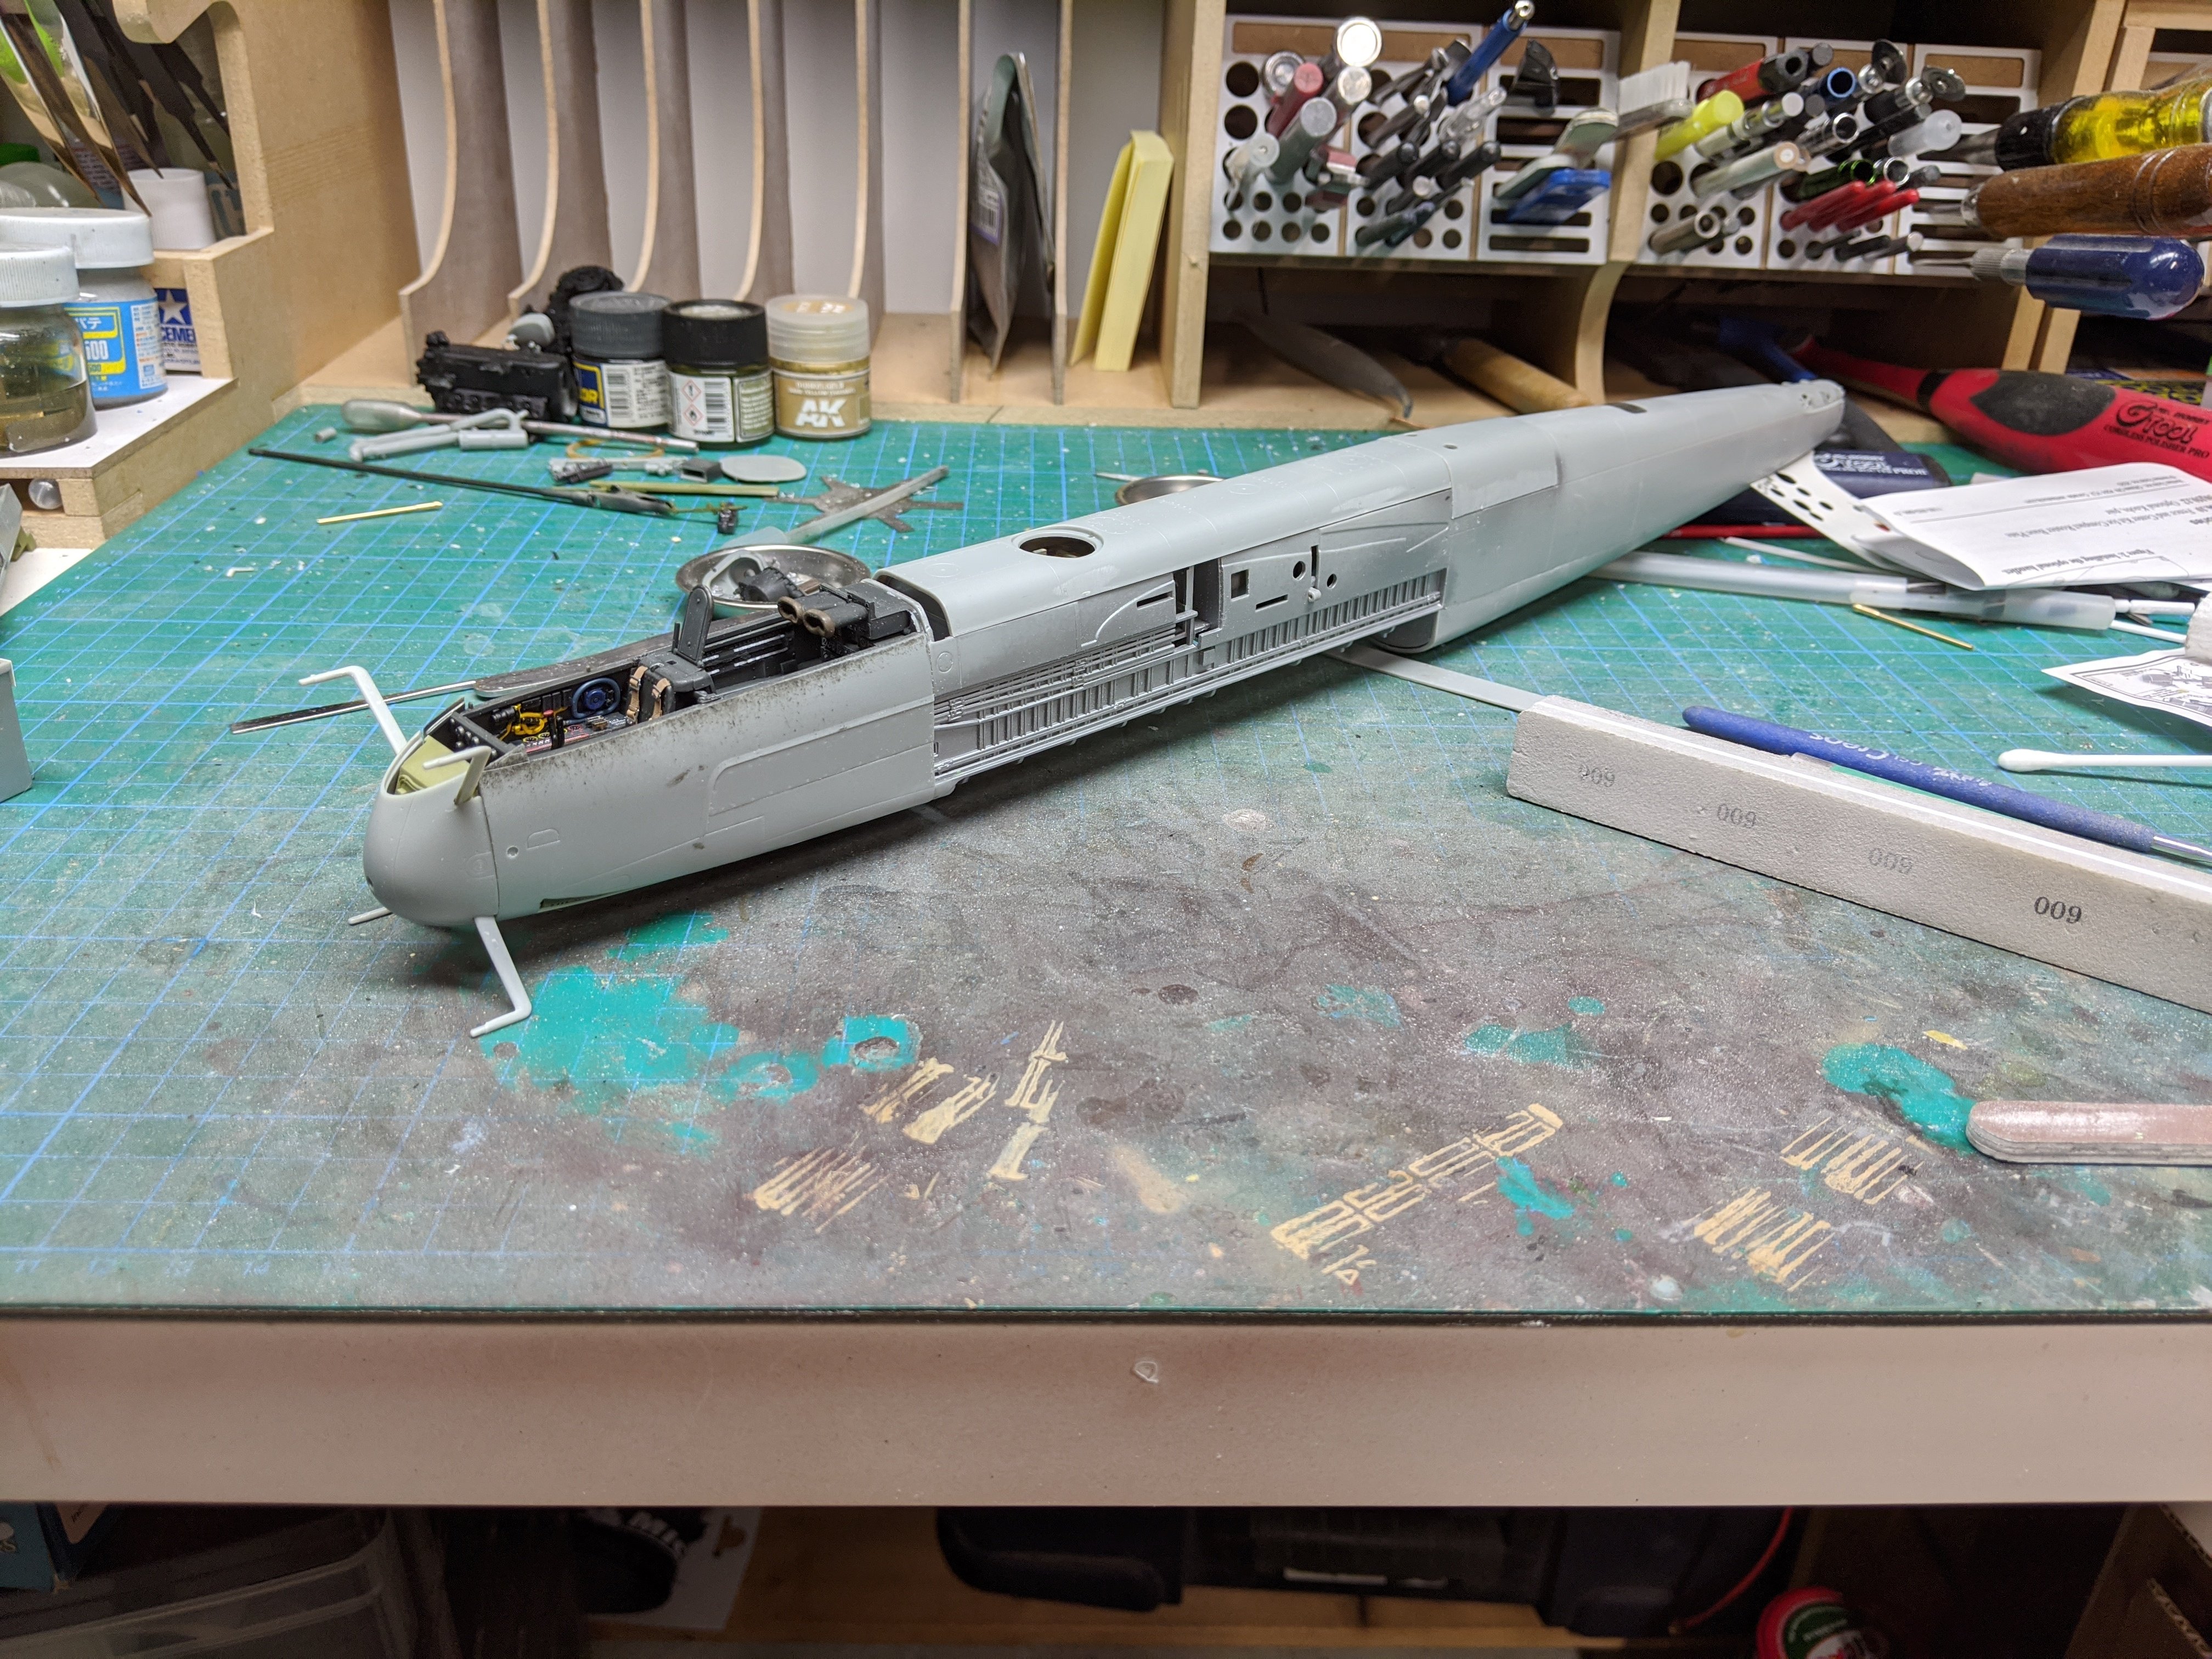
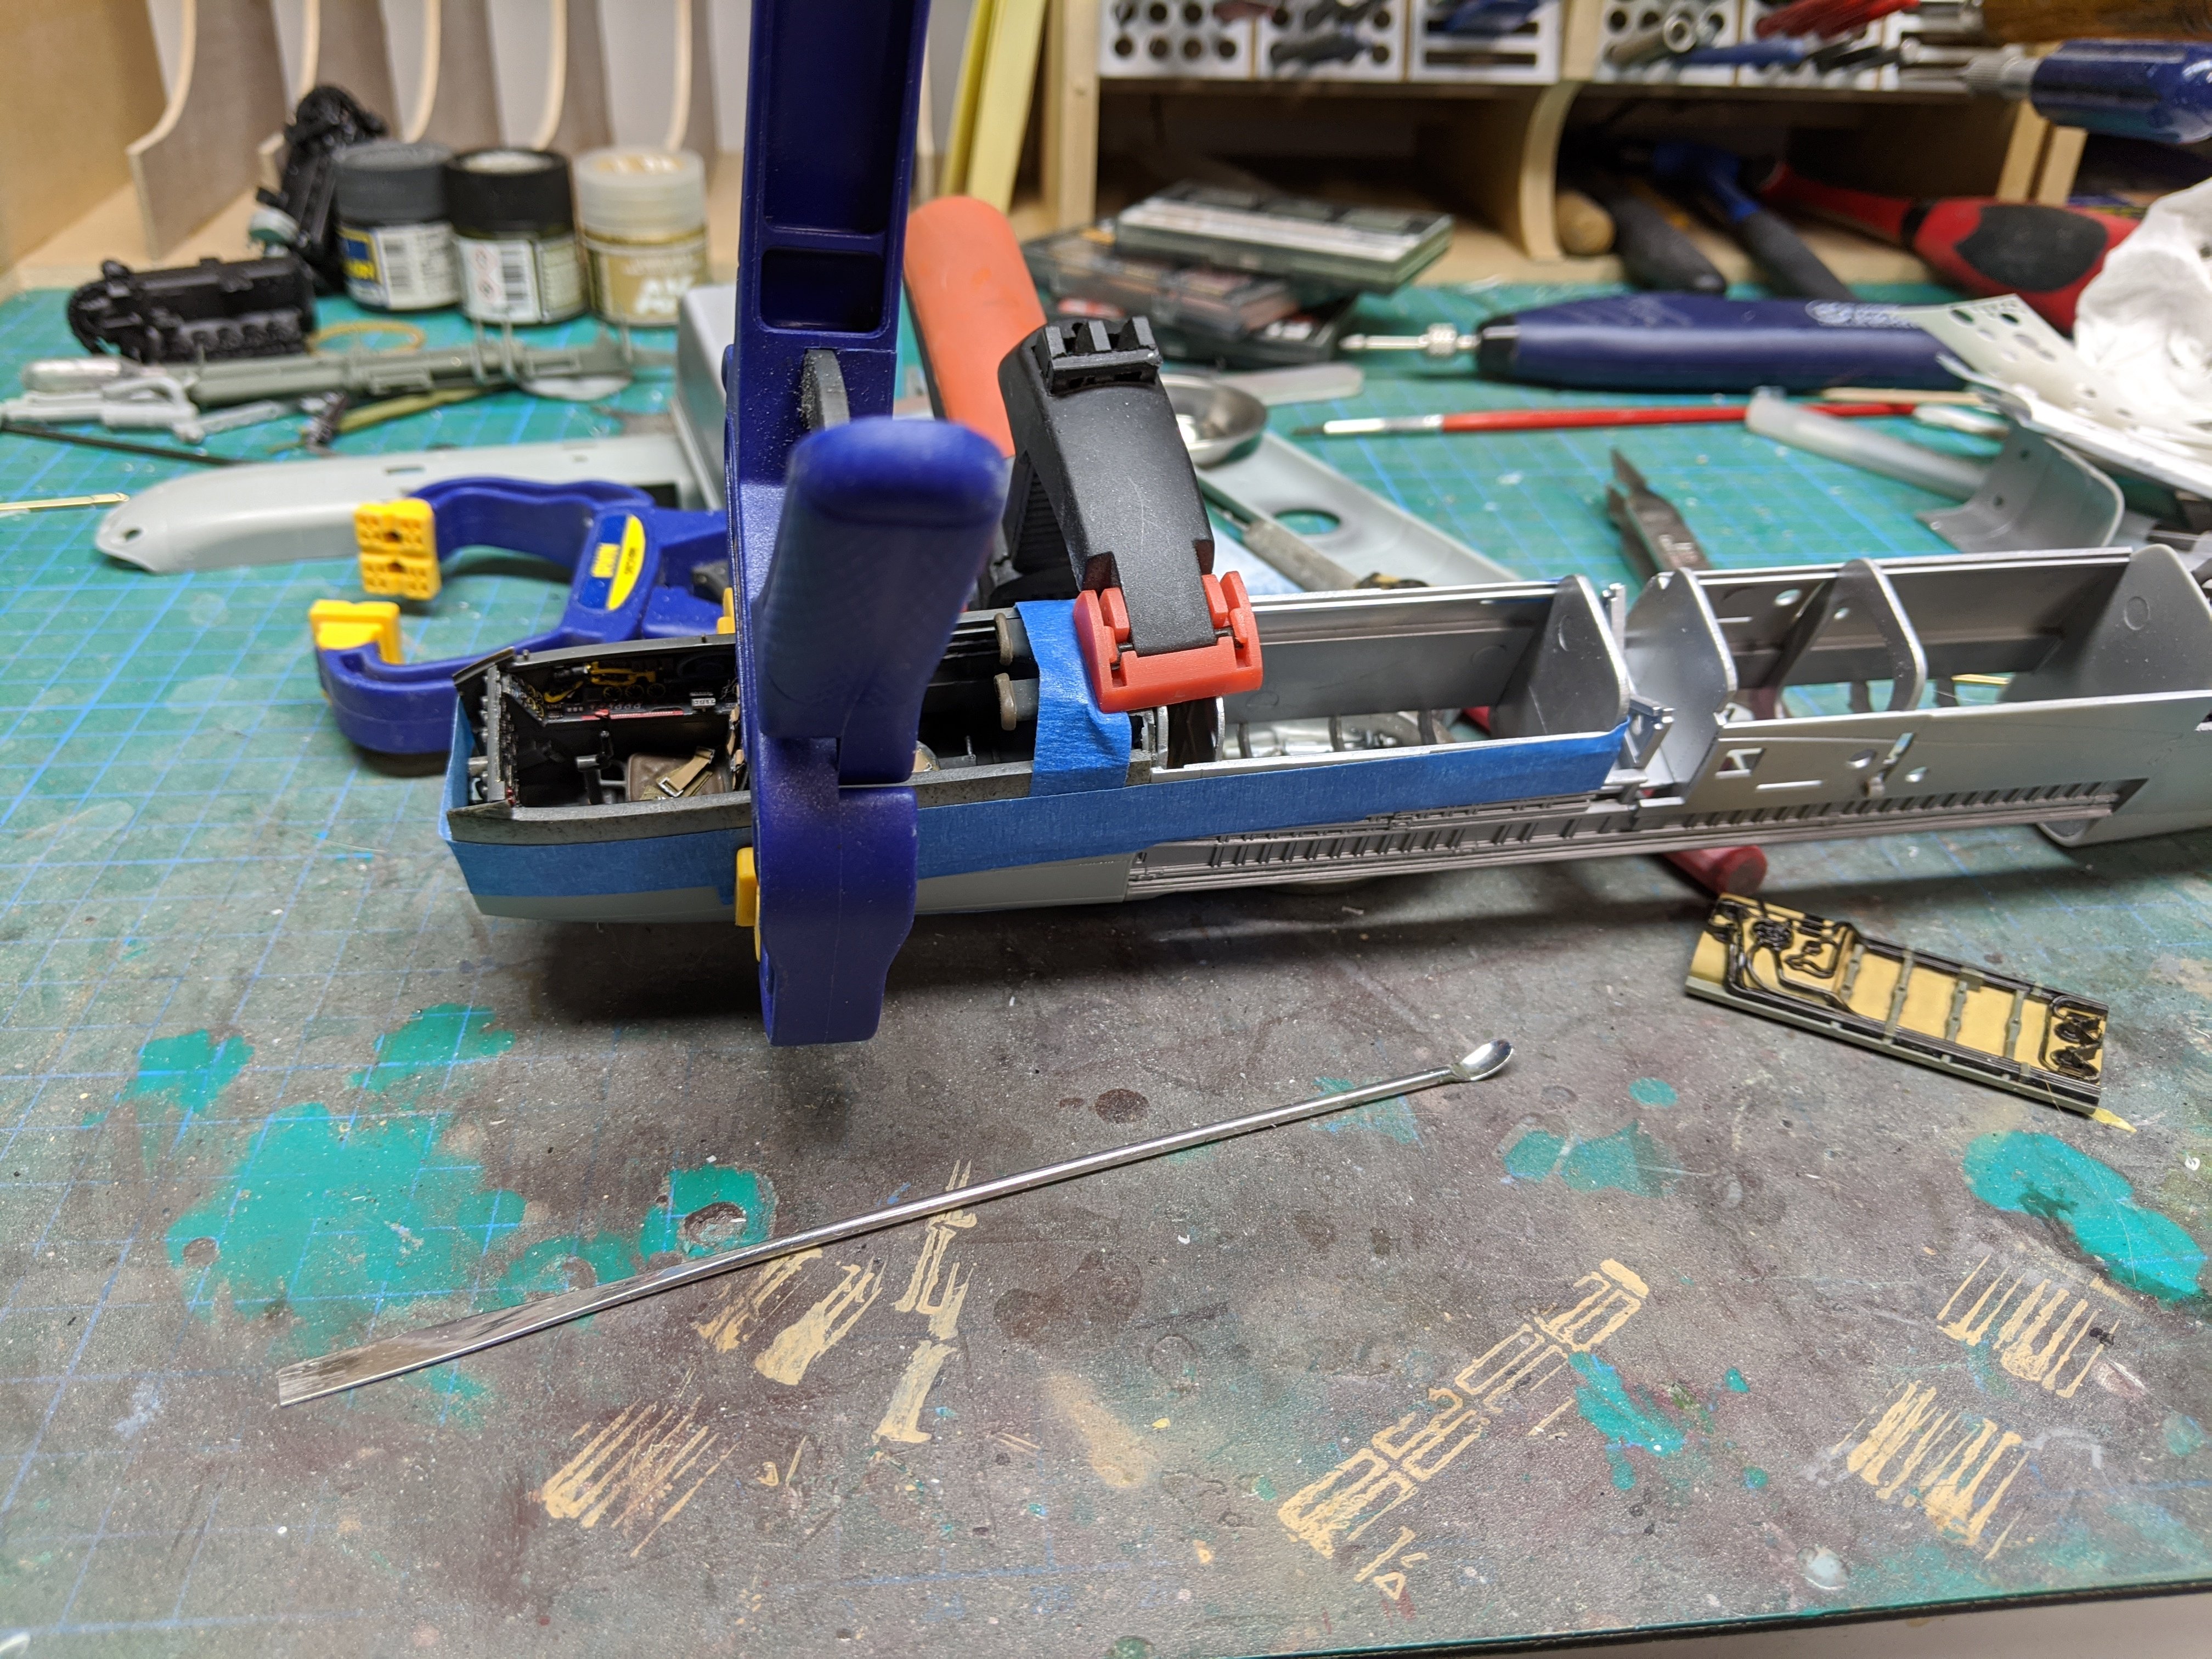
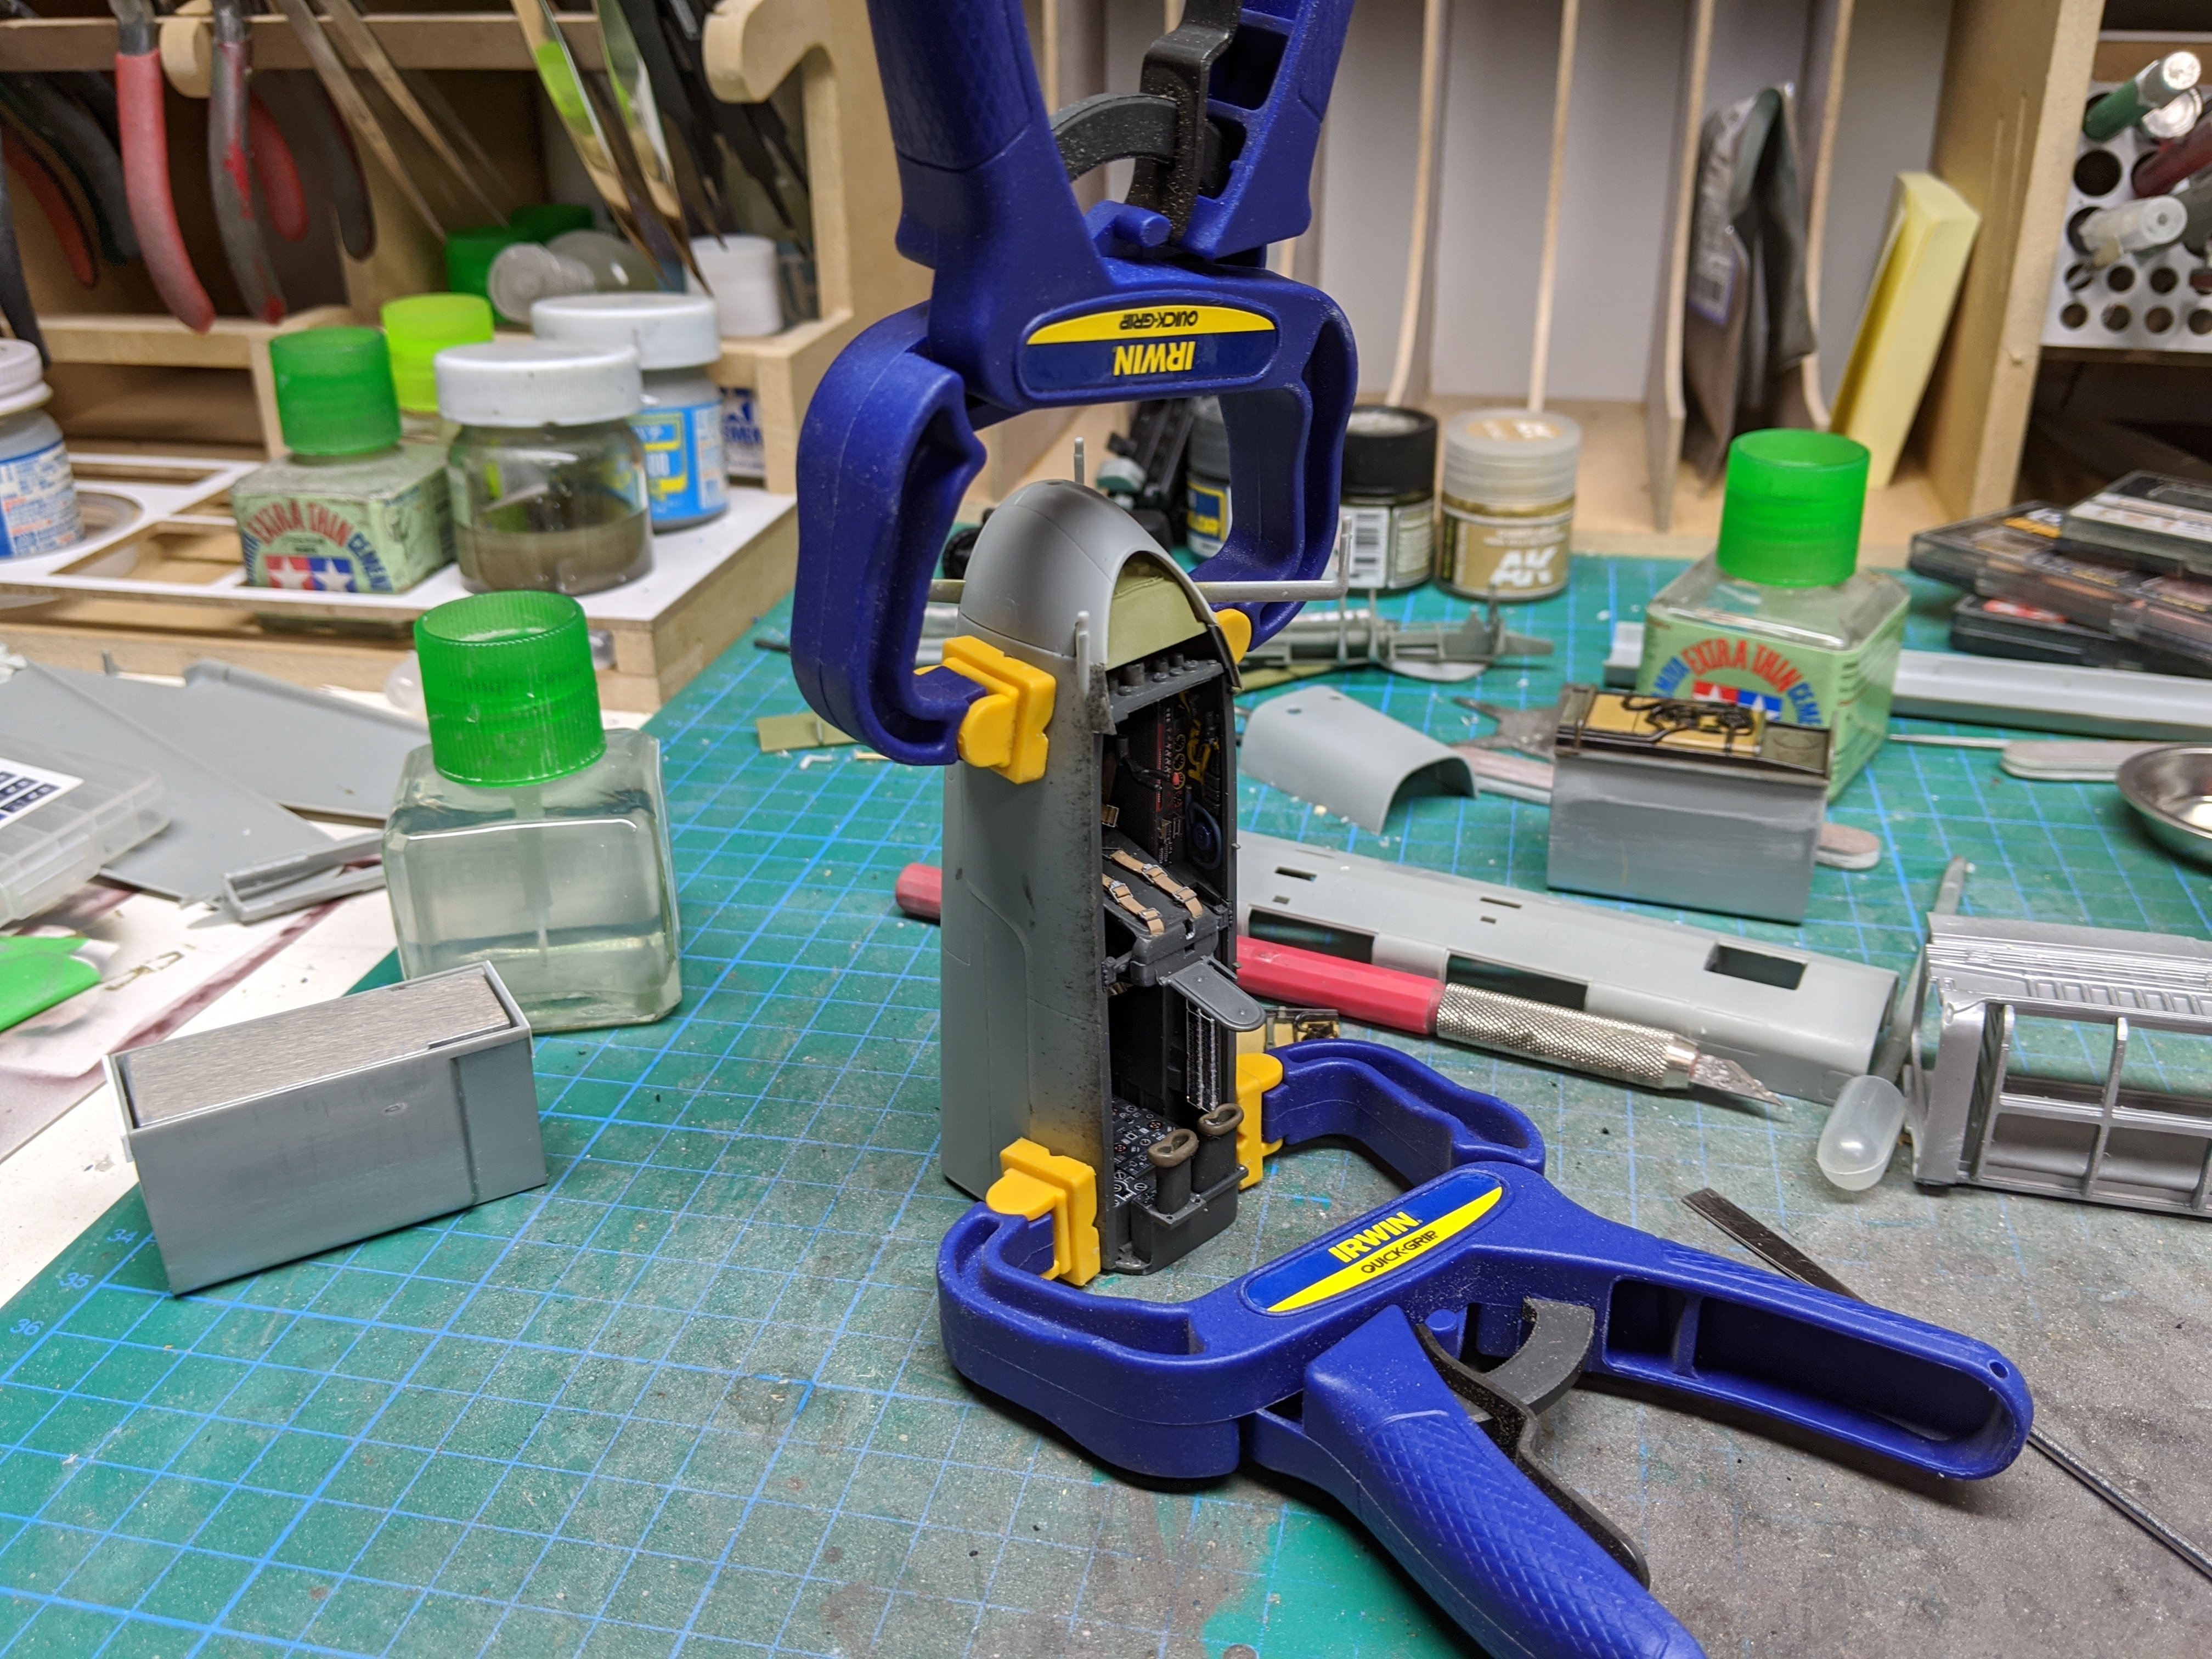
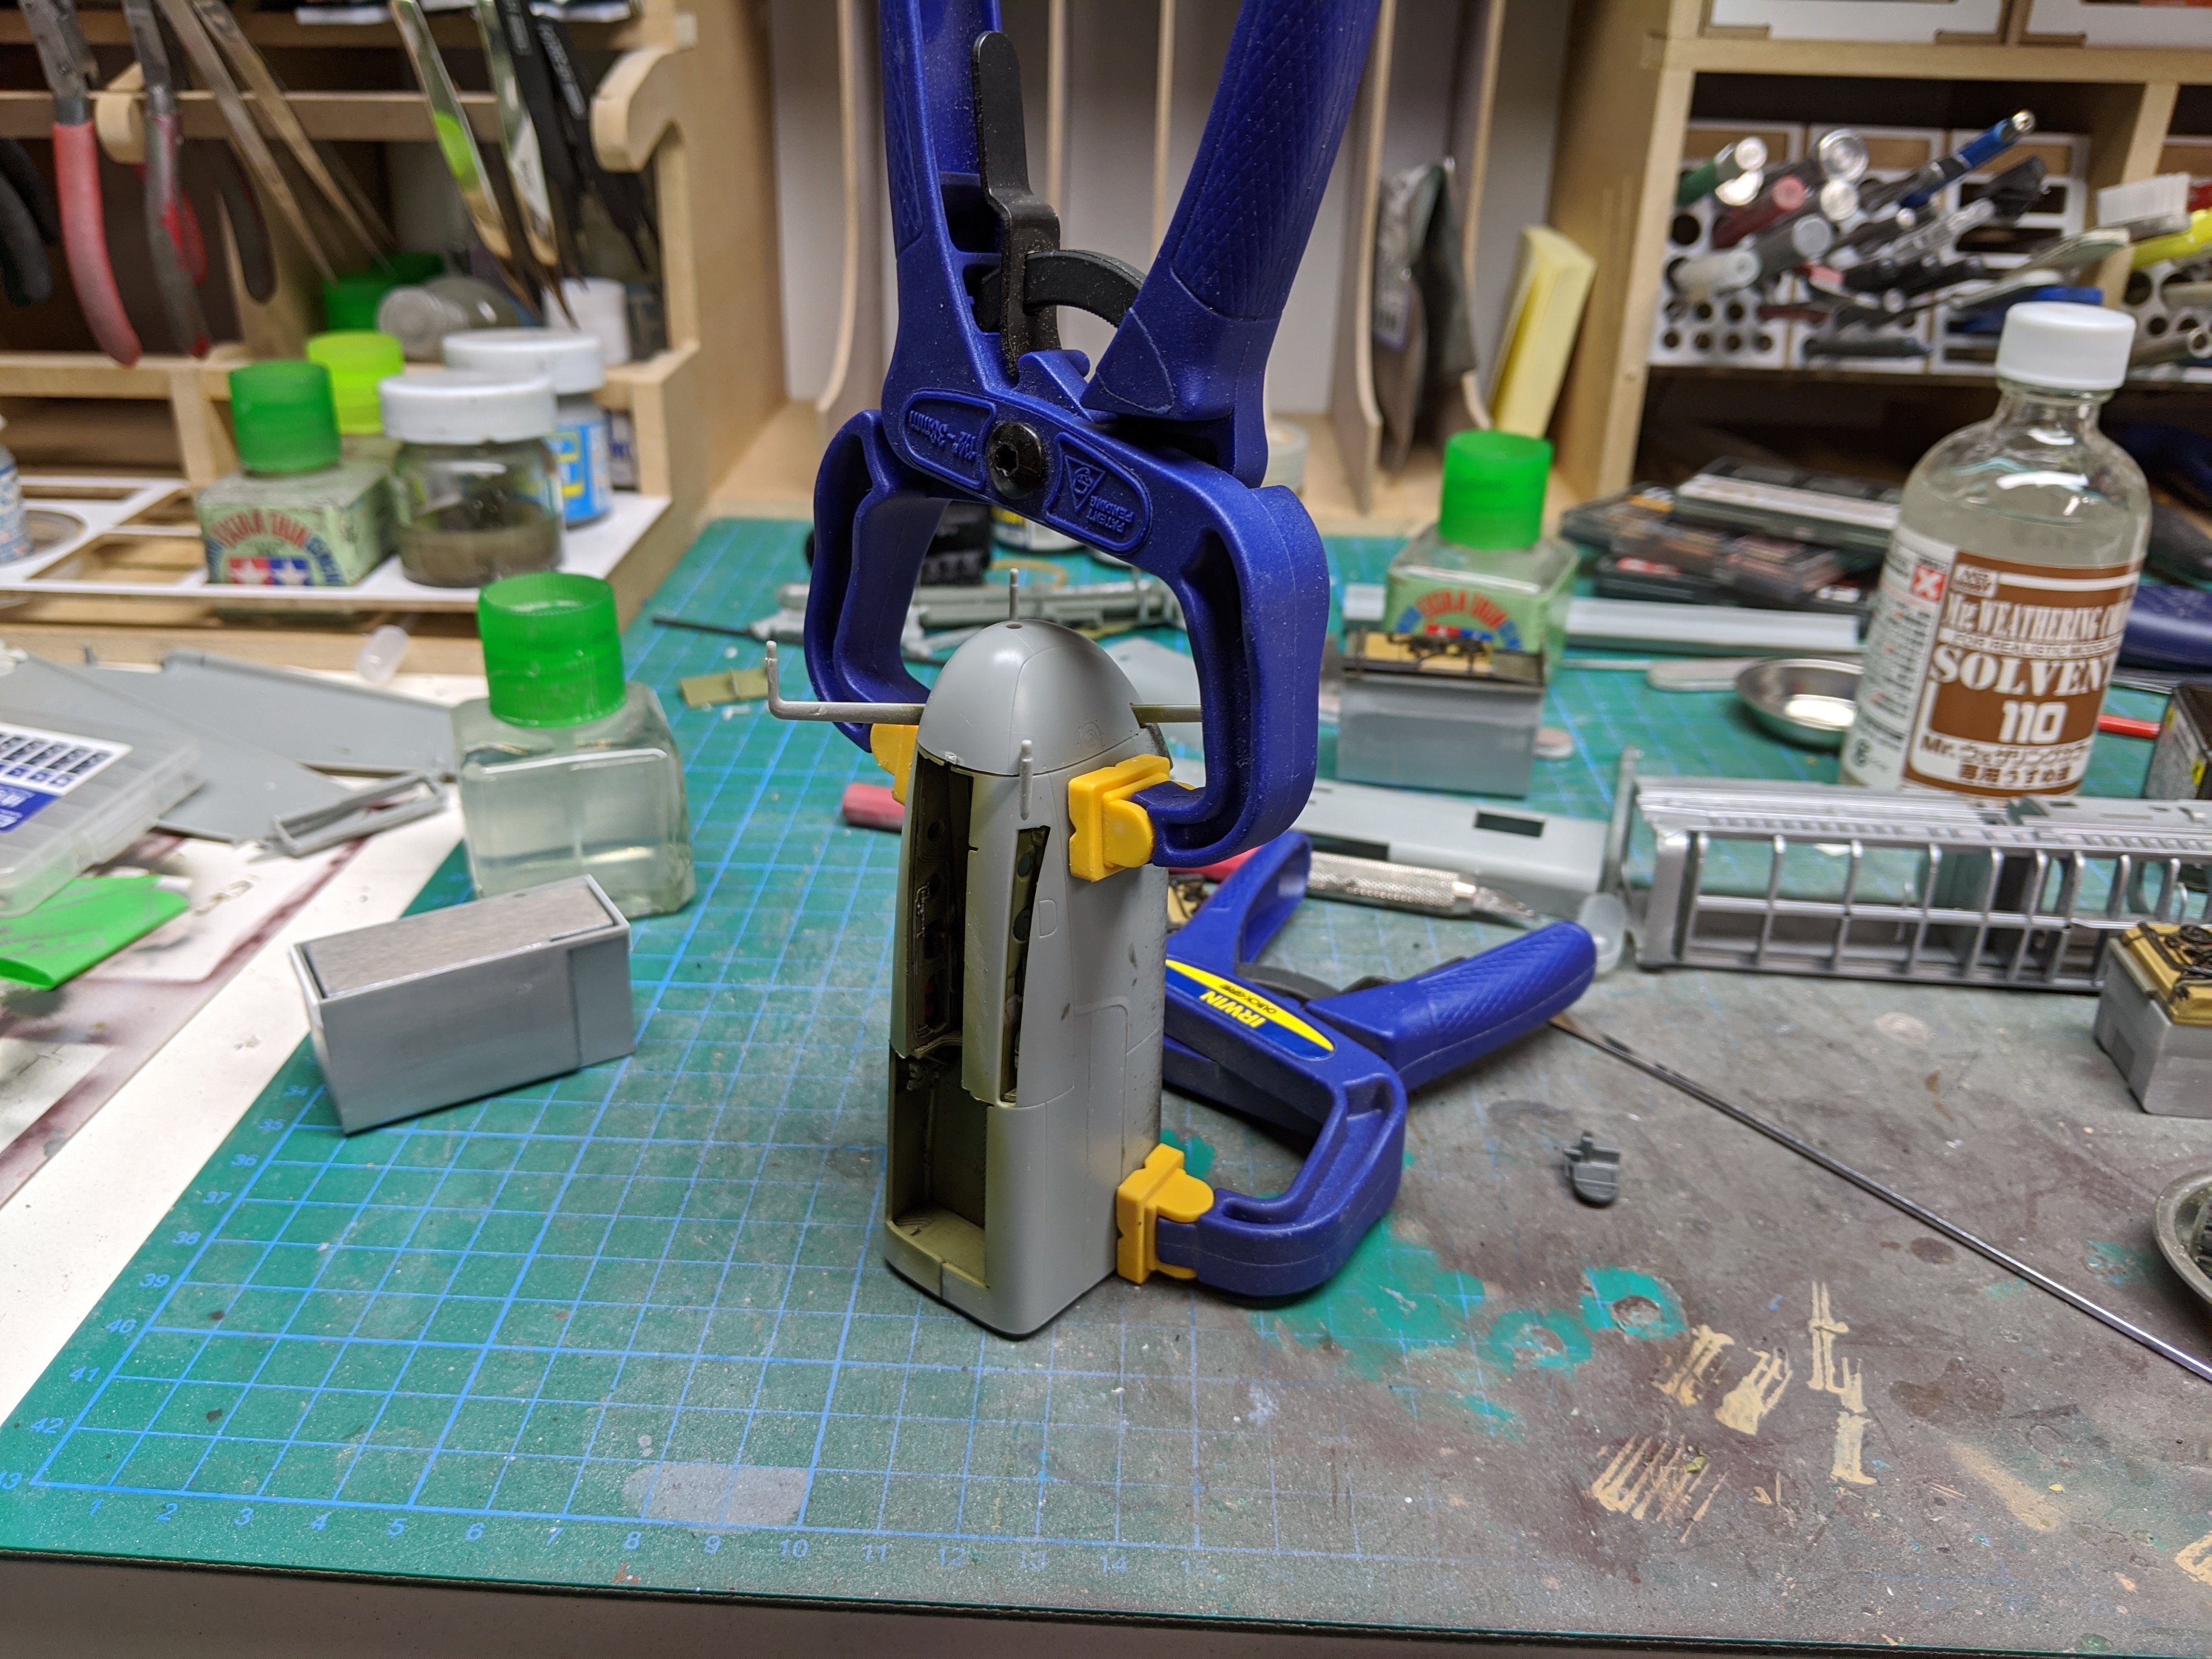
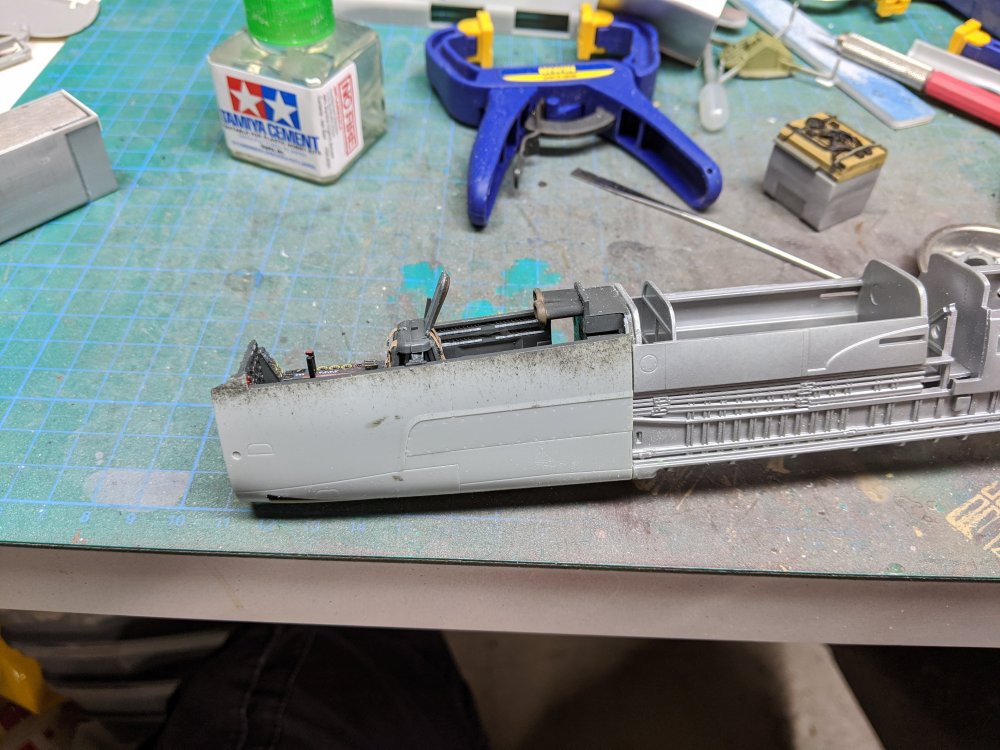
After about a half hour, I decided to see how the fit of the front section was. I'm glad I checked as somehow, it no longer fit to the rear section as cleanly. So I decided to carefully (ok, not really) pry apart the front fuselage and try a different approach. This time I glued the interior section to the rear fuselage. I then added the outer halves and adjusted the fit as I went. Some tape and clamps to keep things where they're supposed to be and hopefully this time it'll work.


-
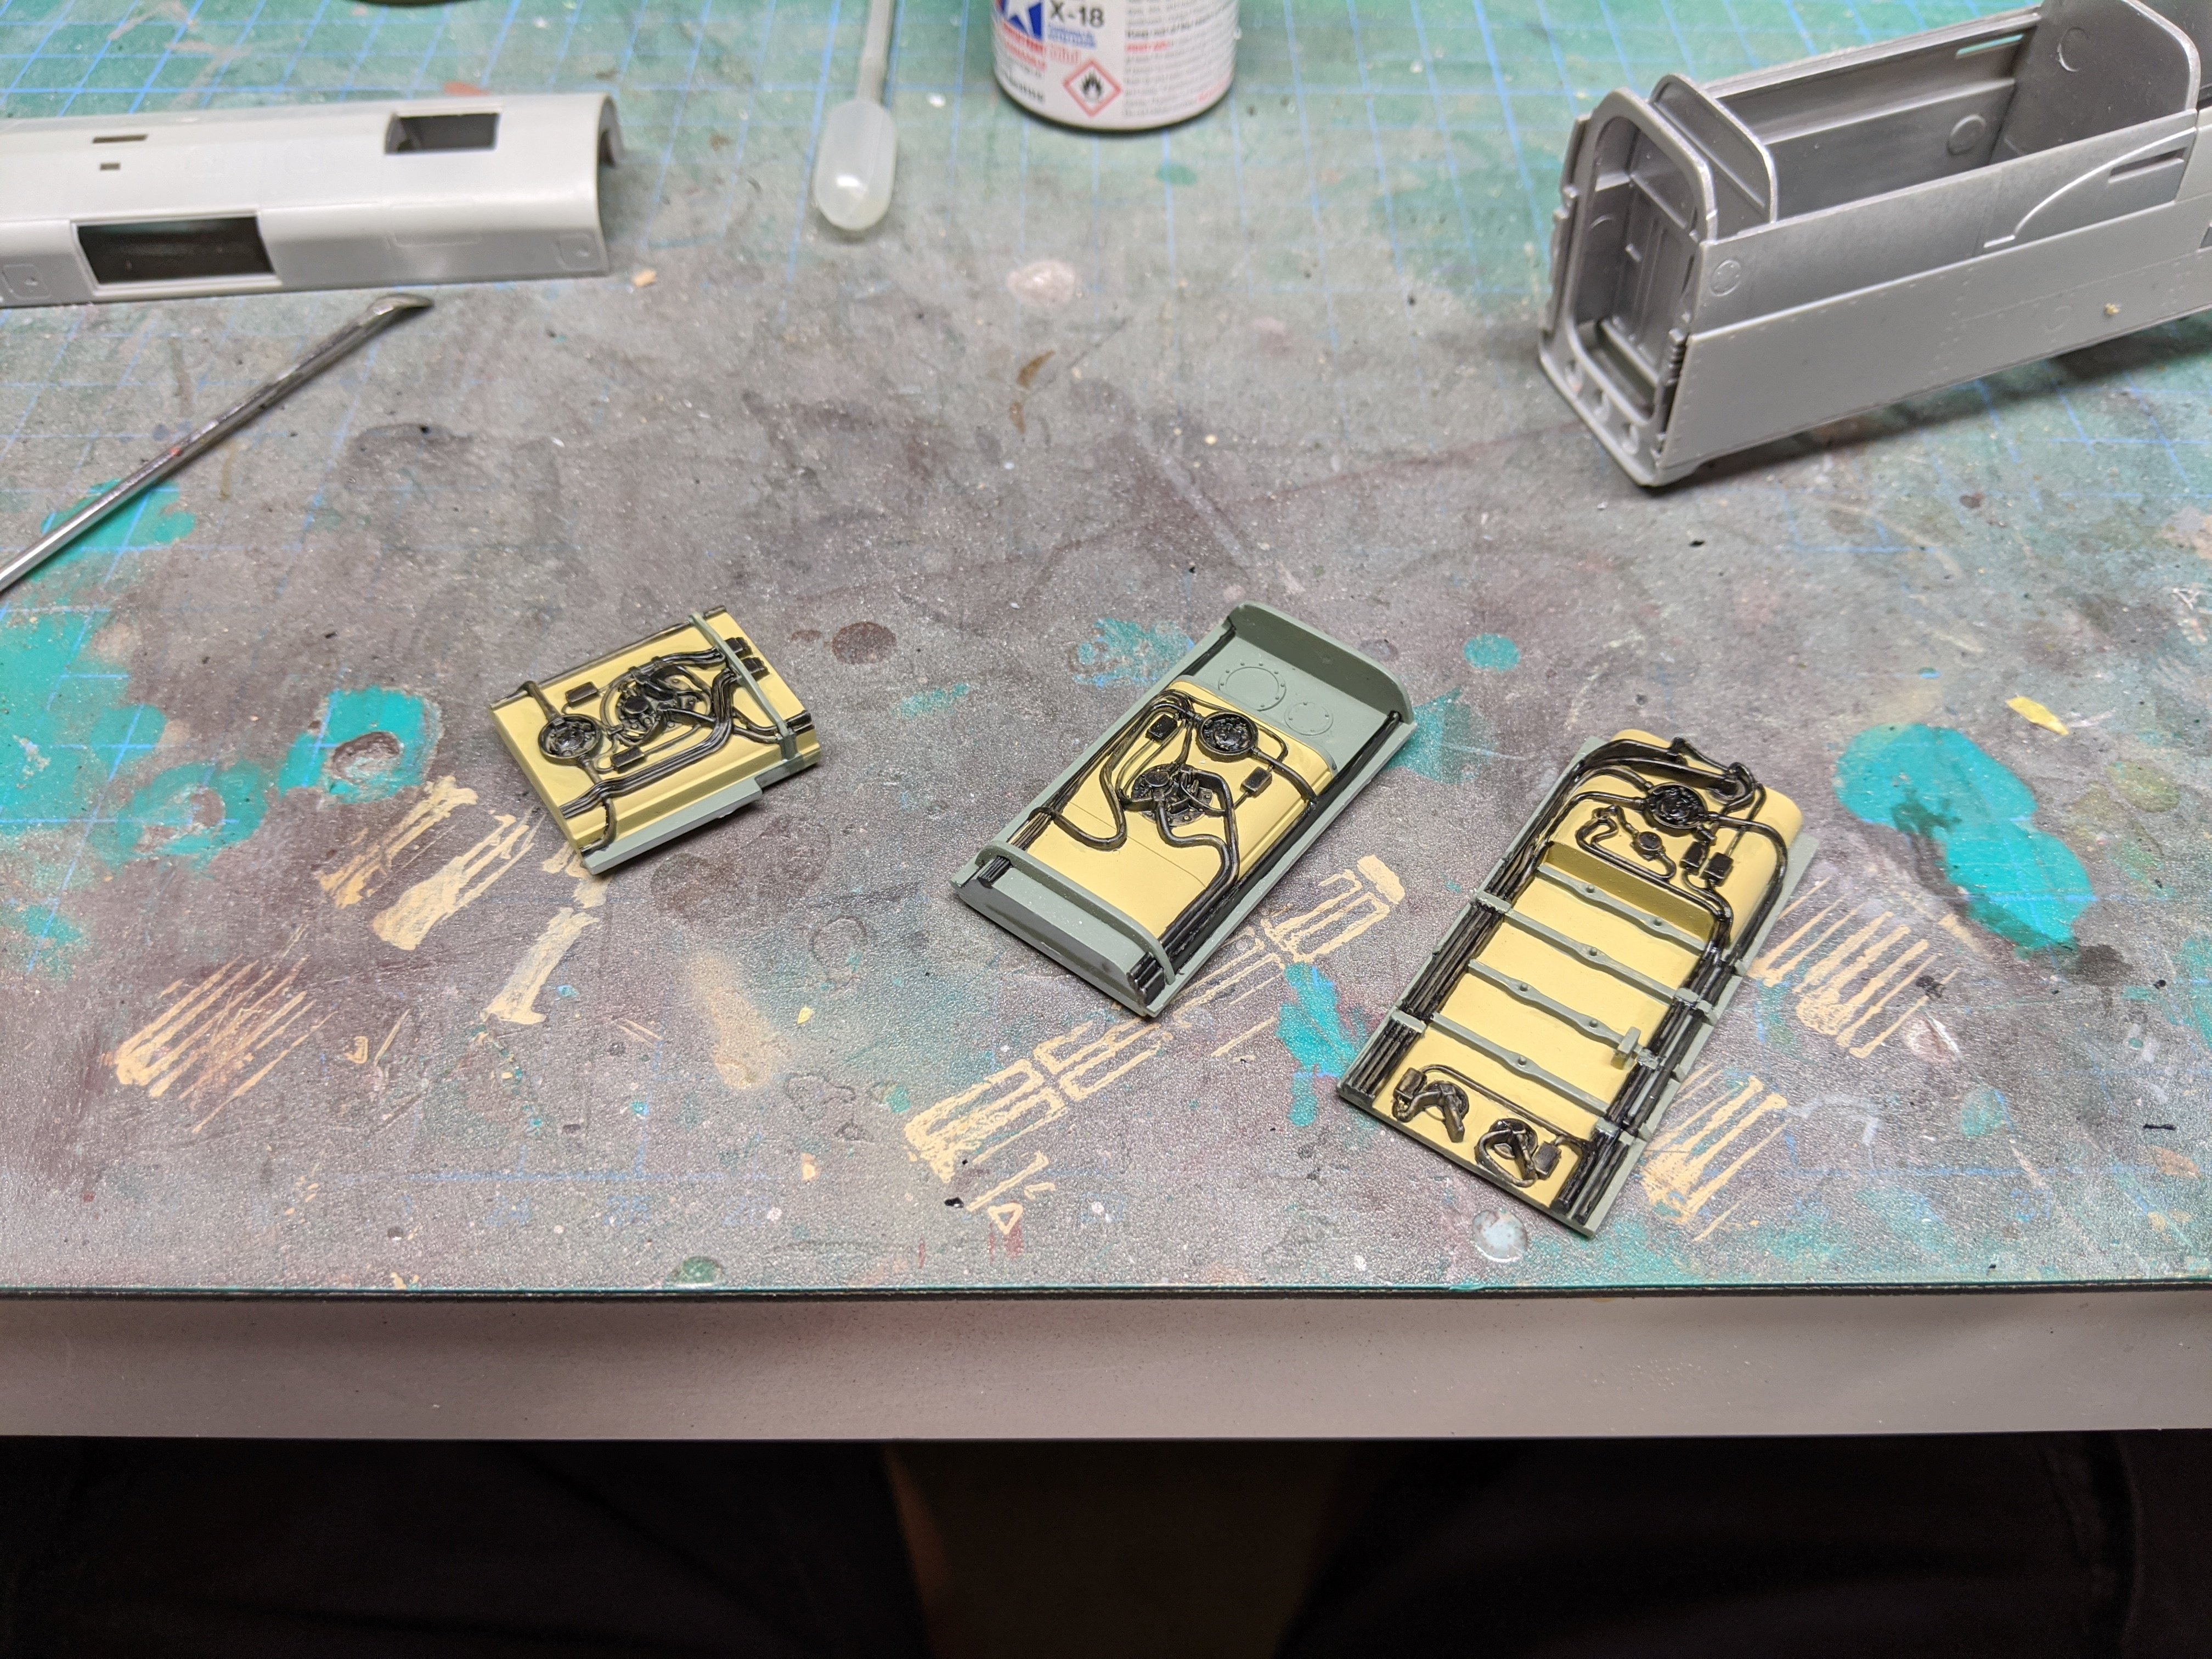
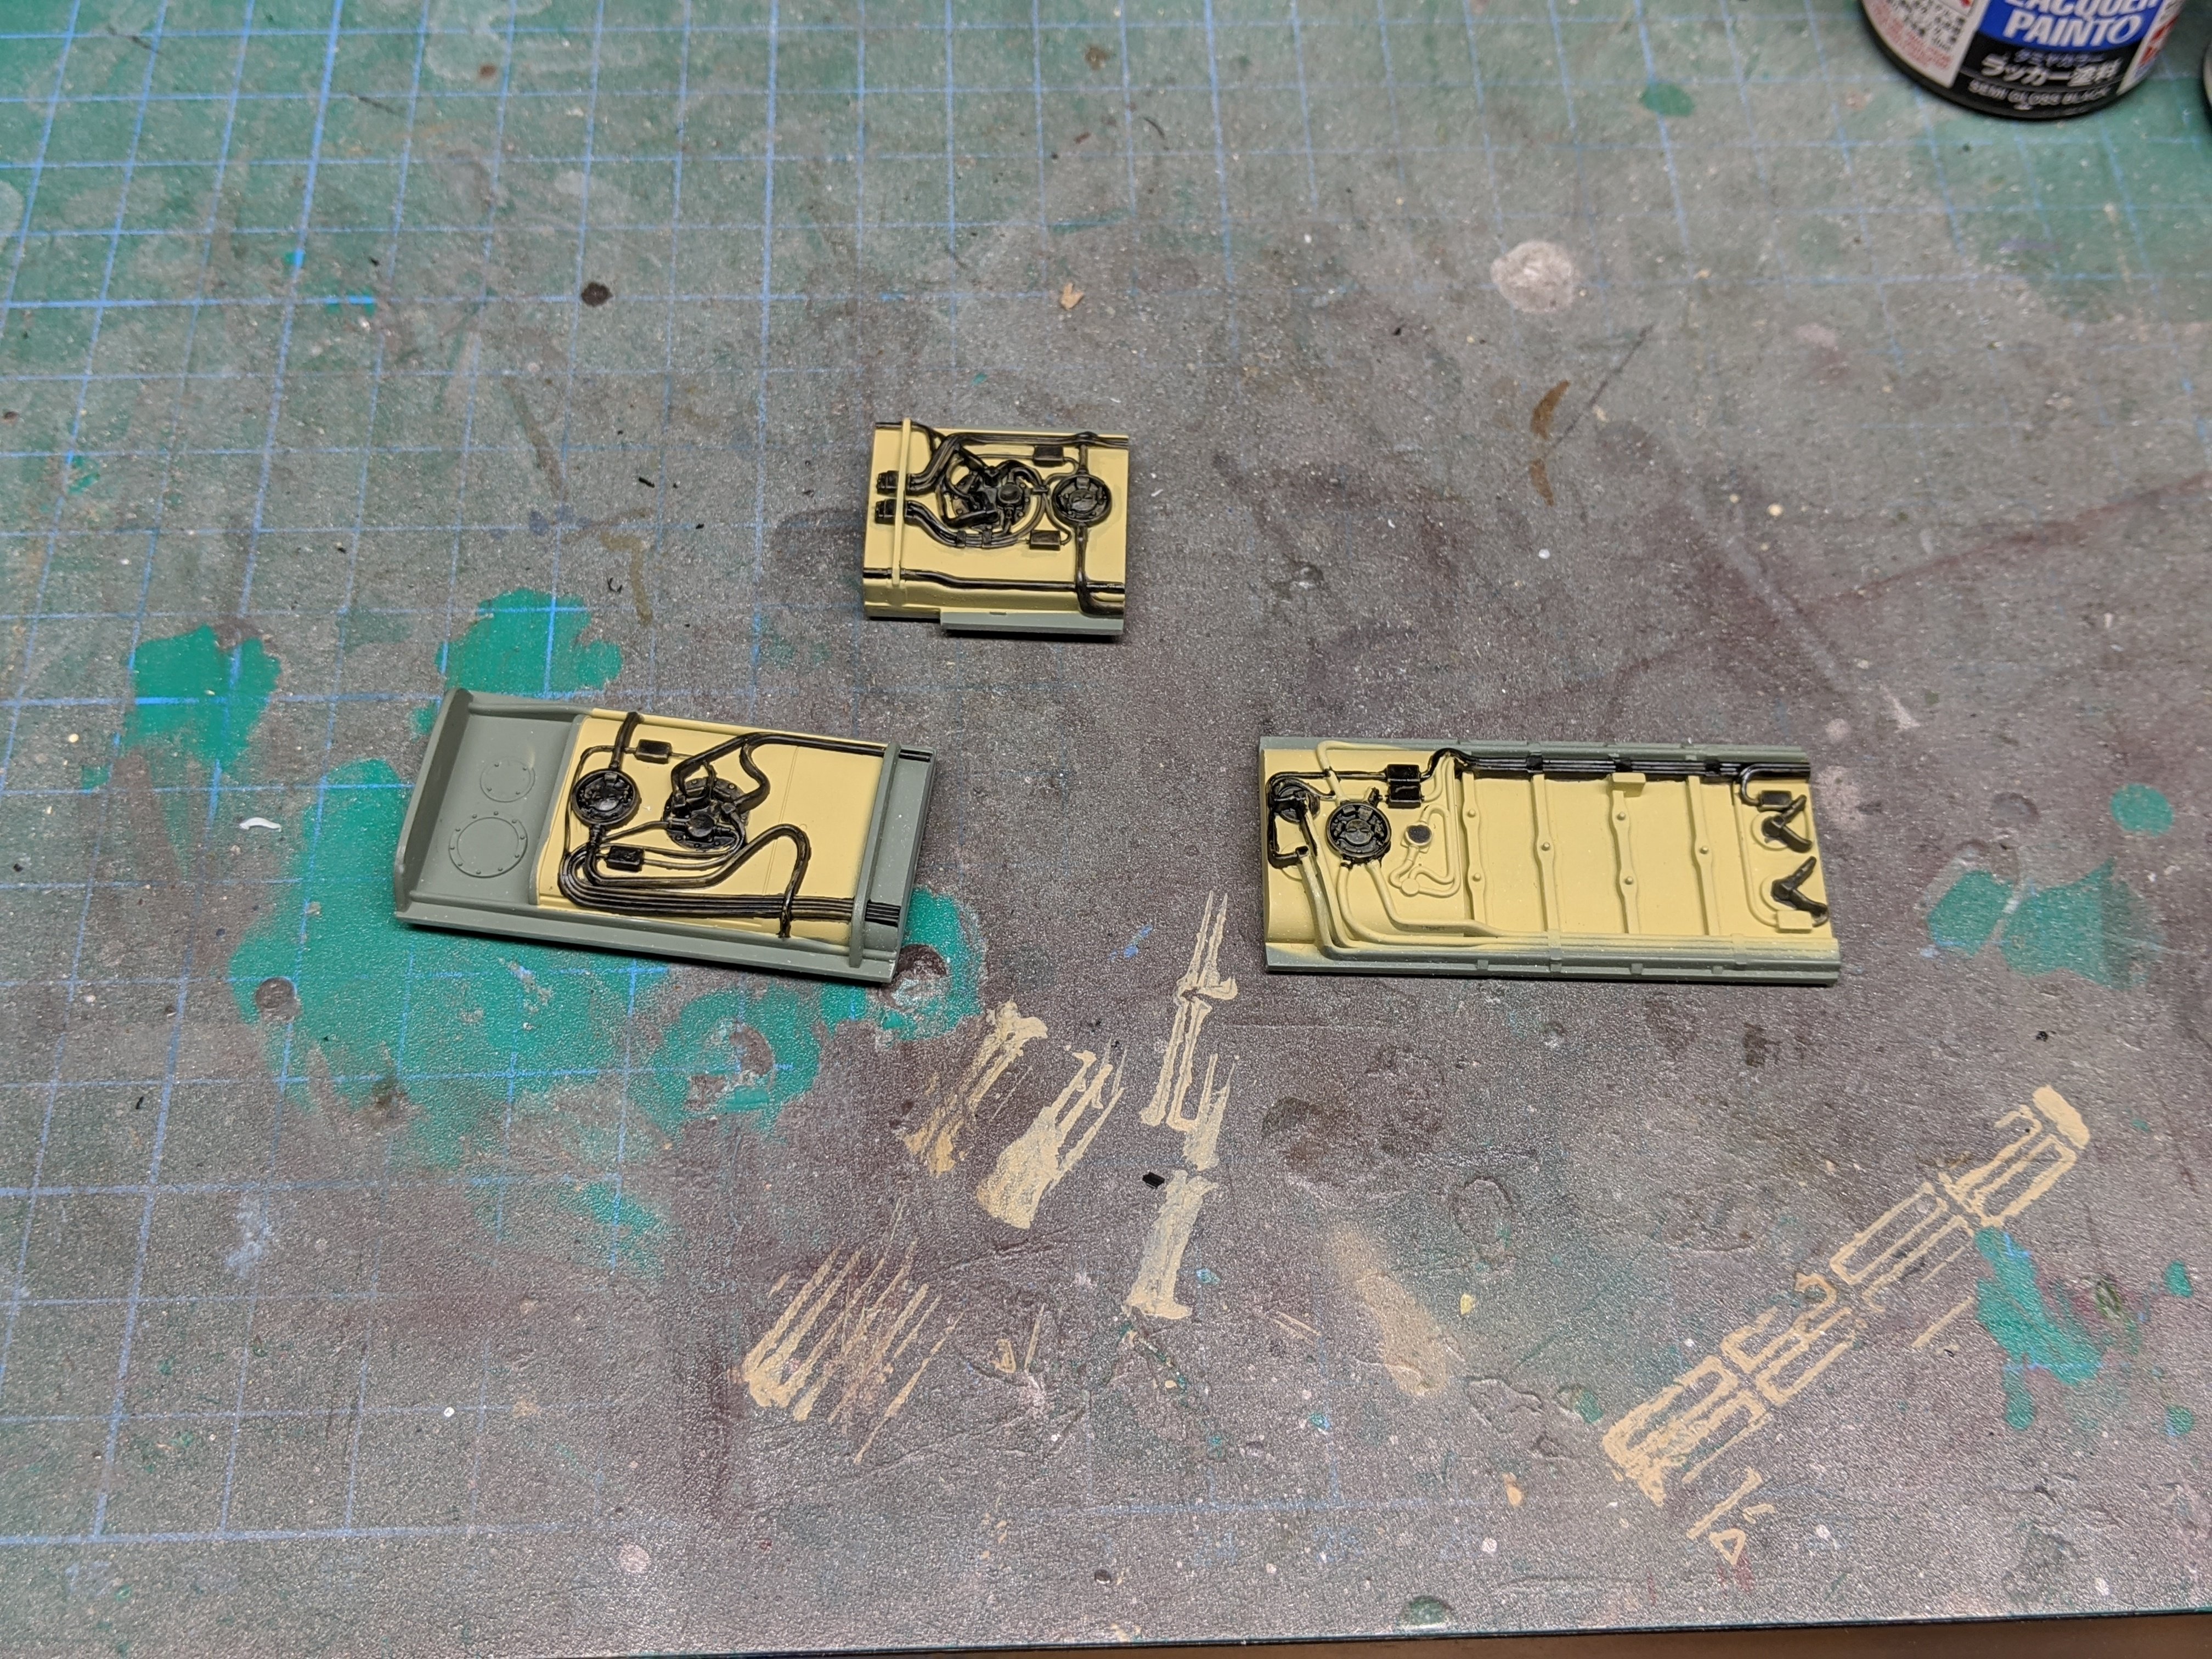
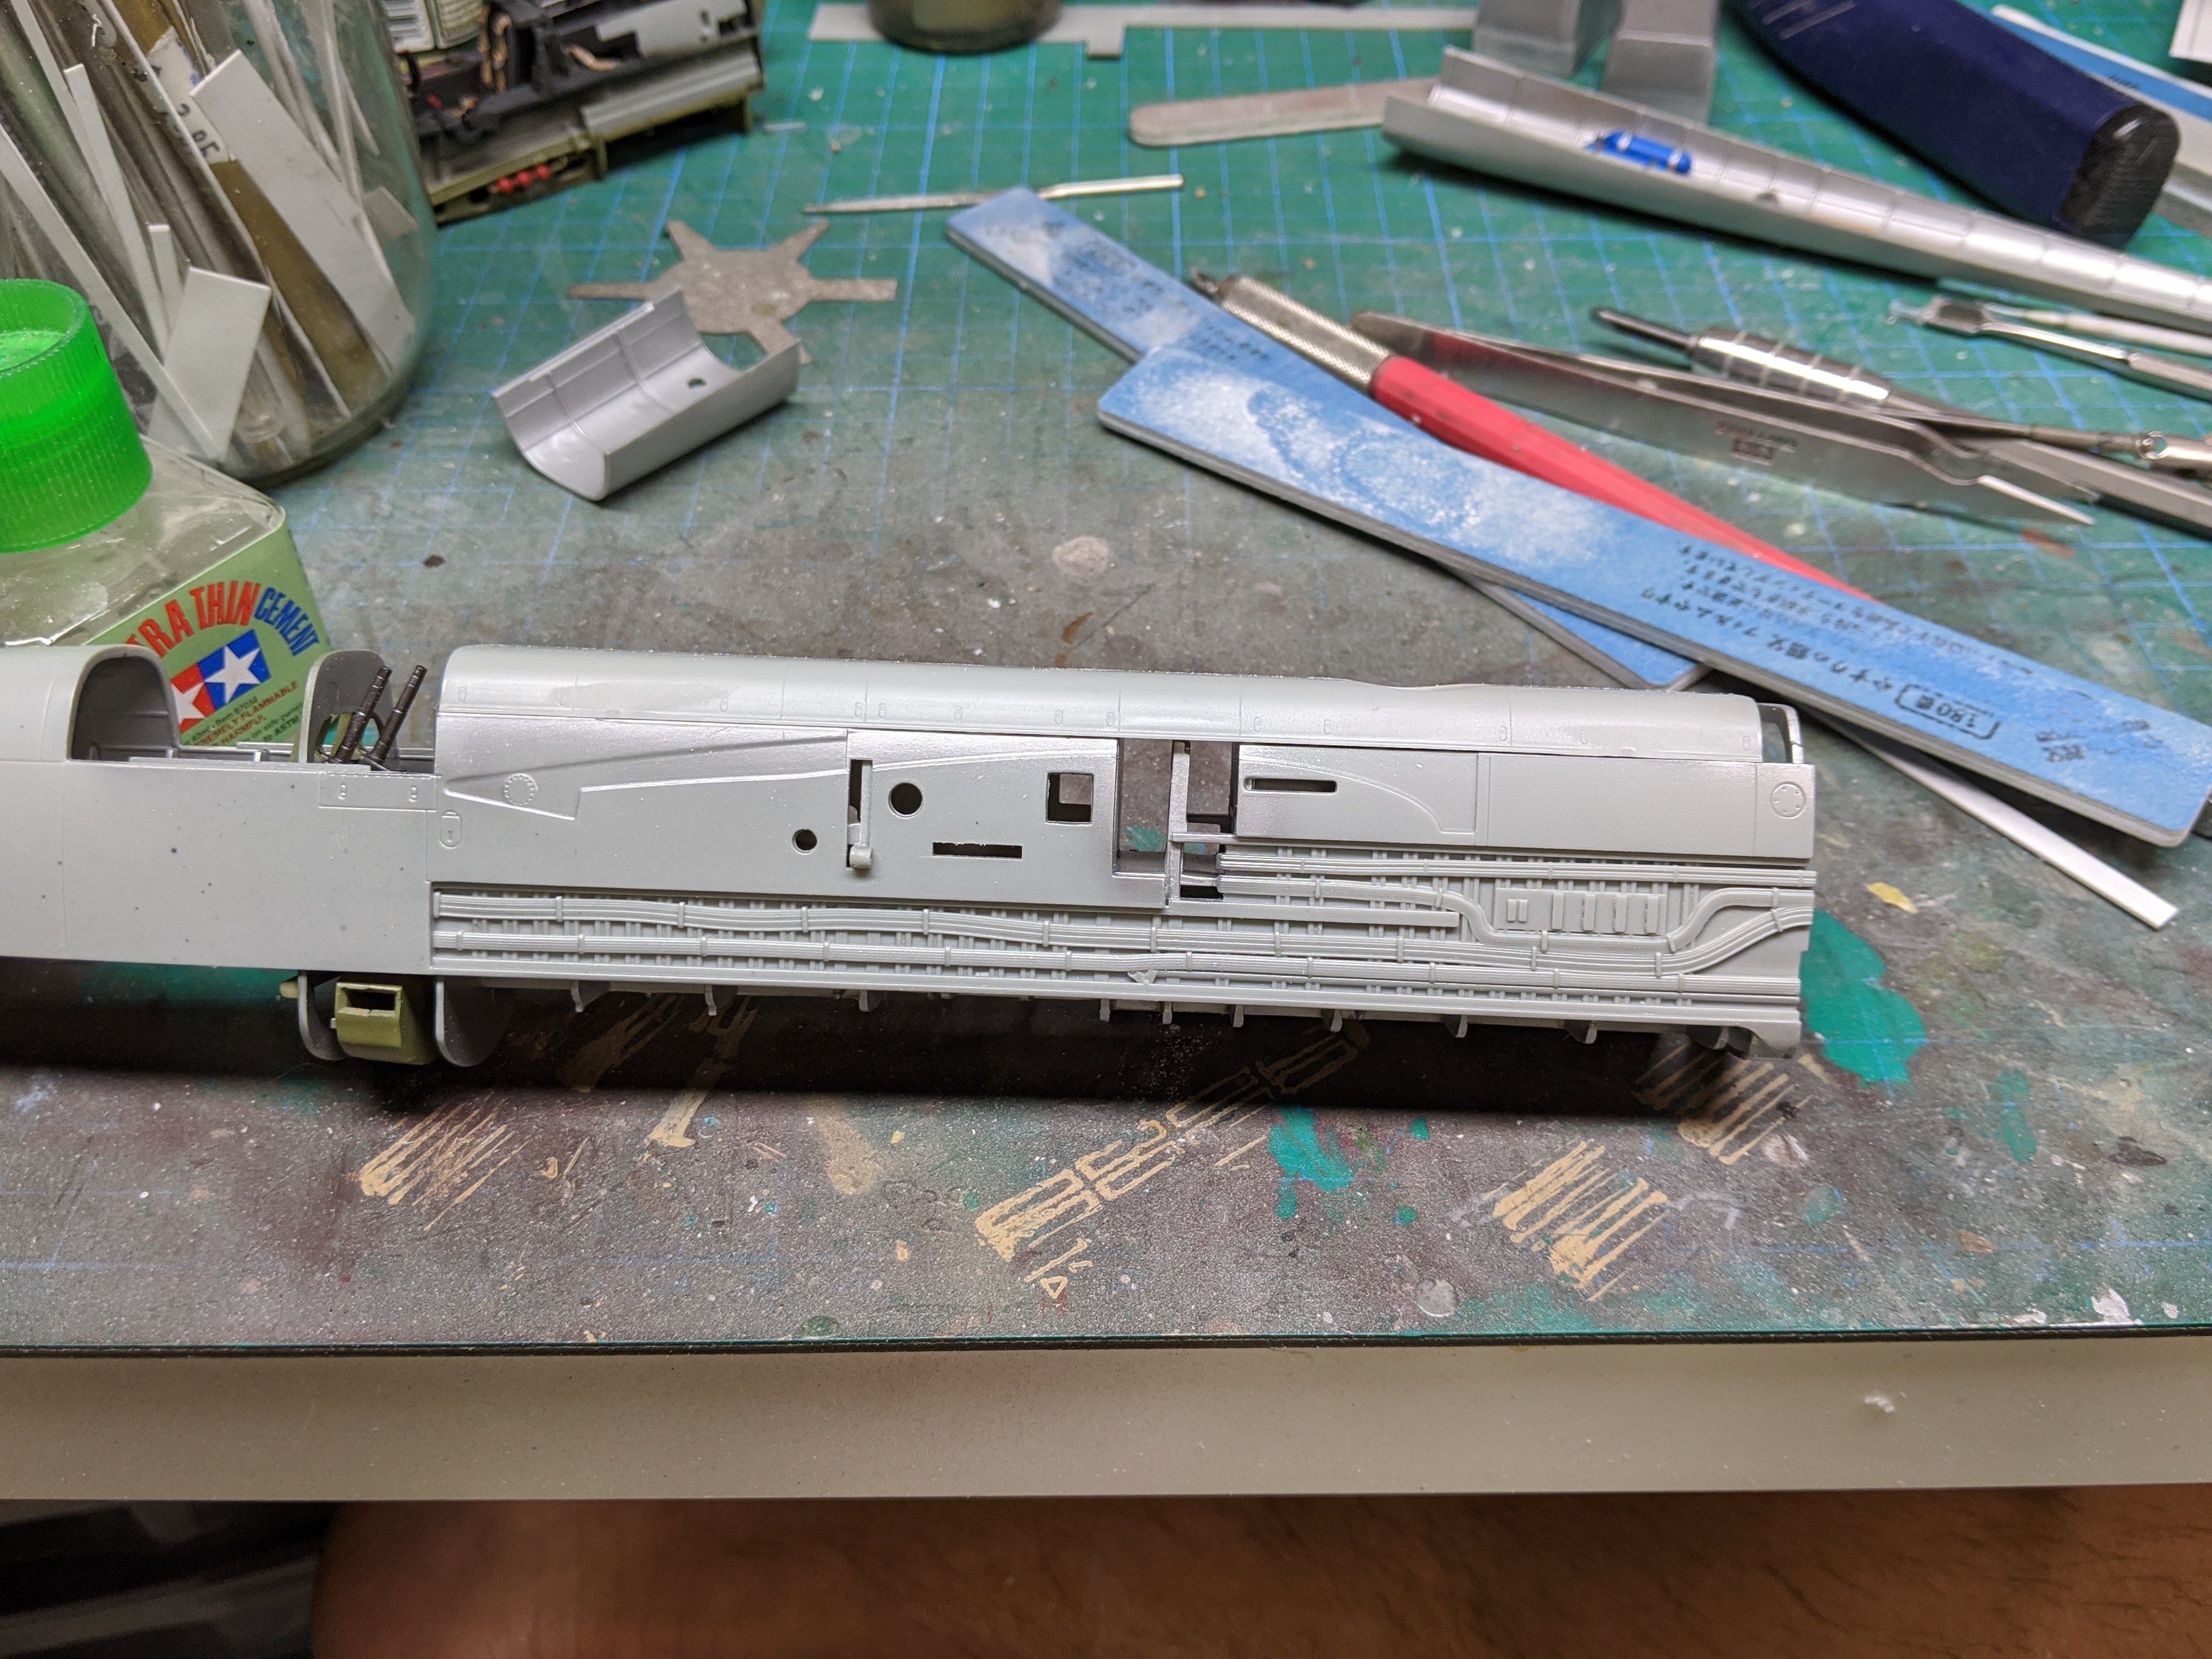
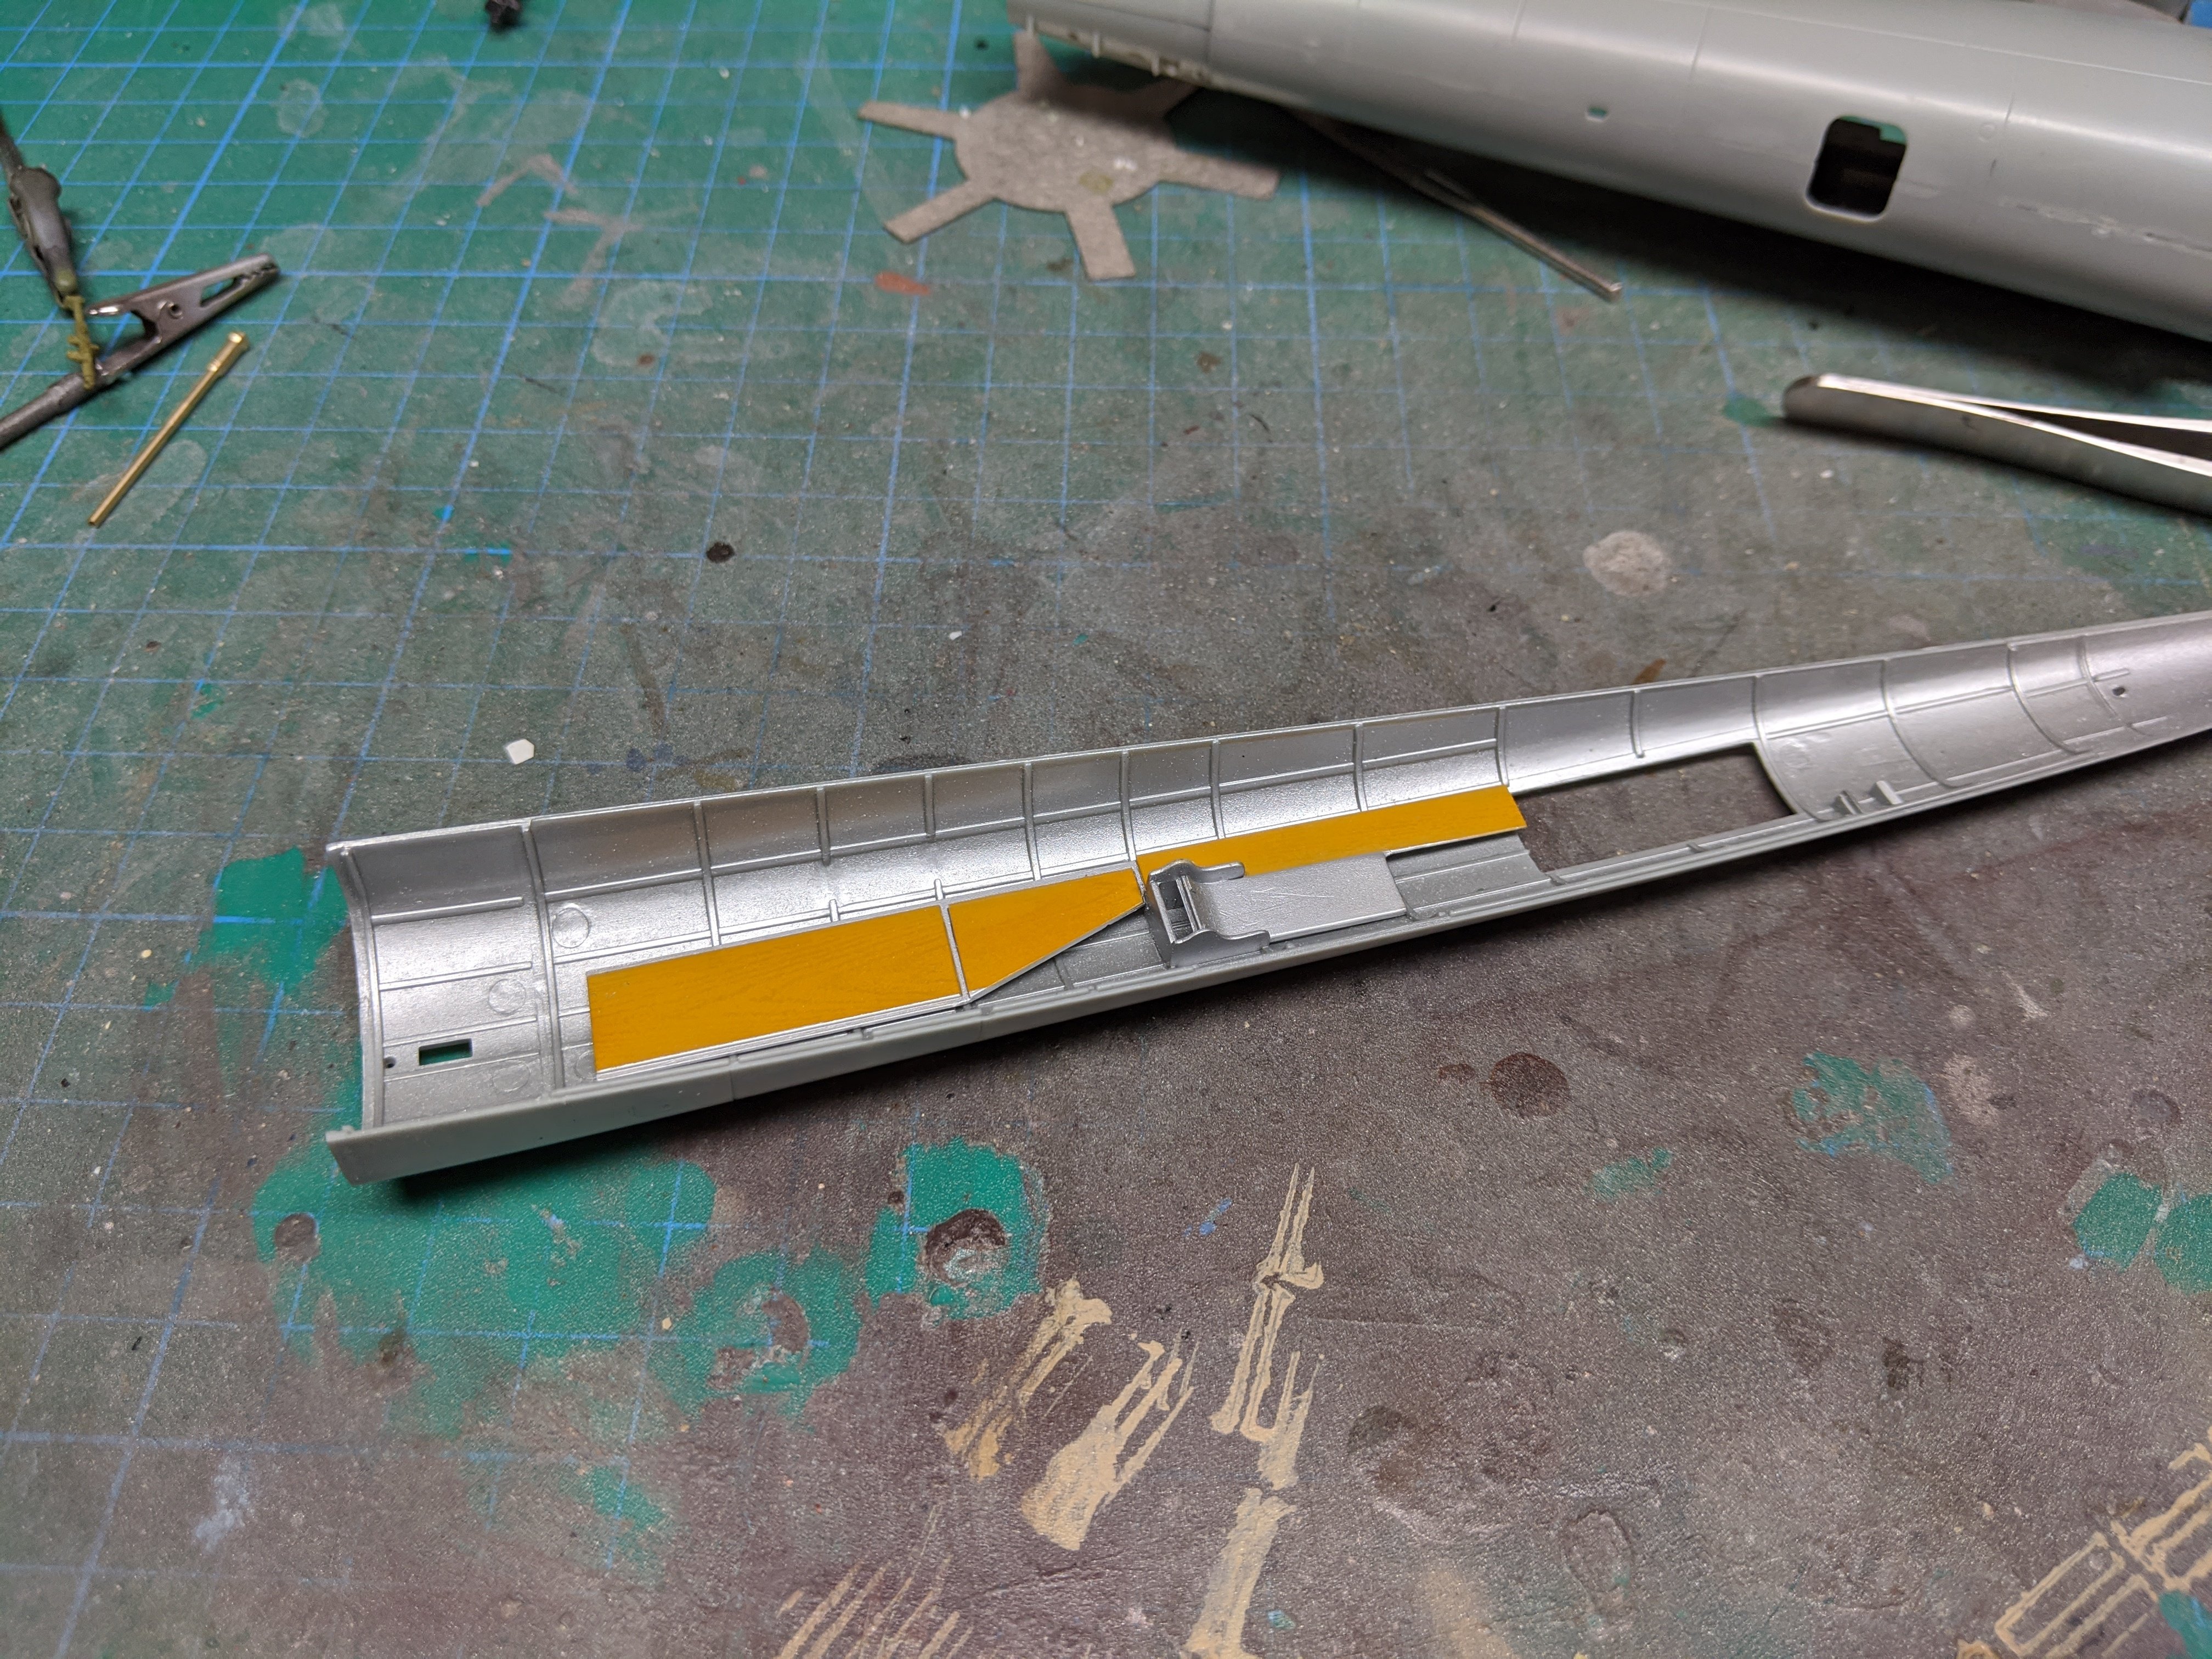
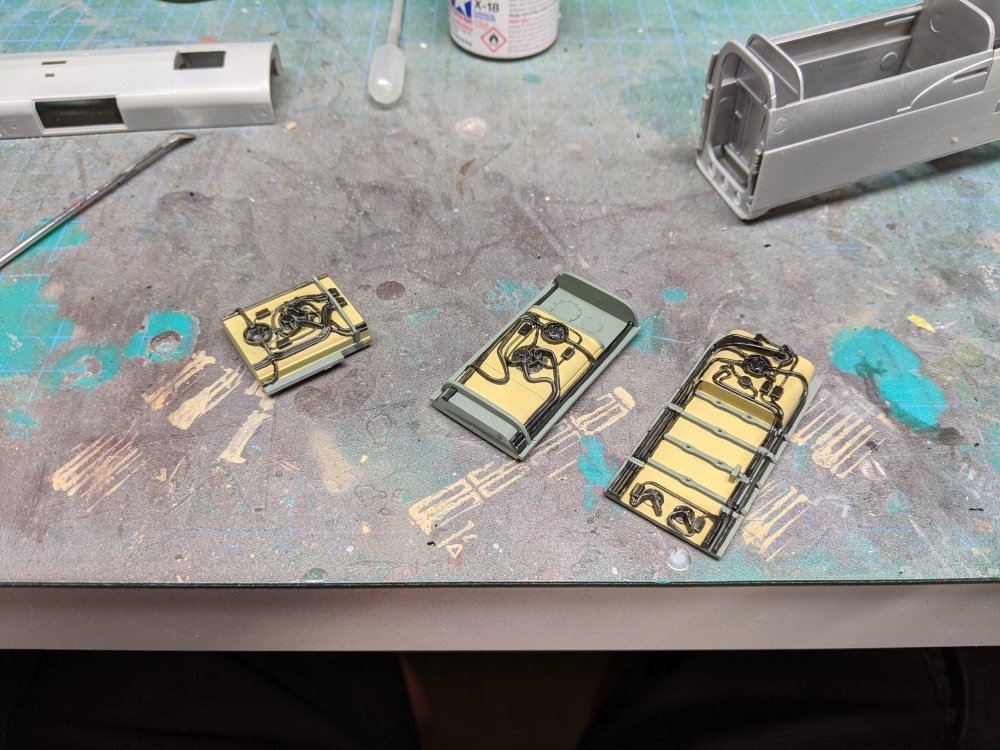
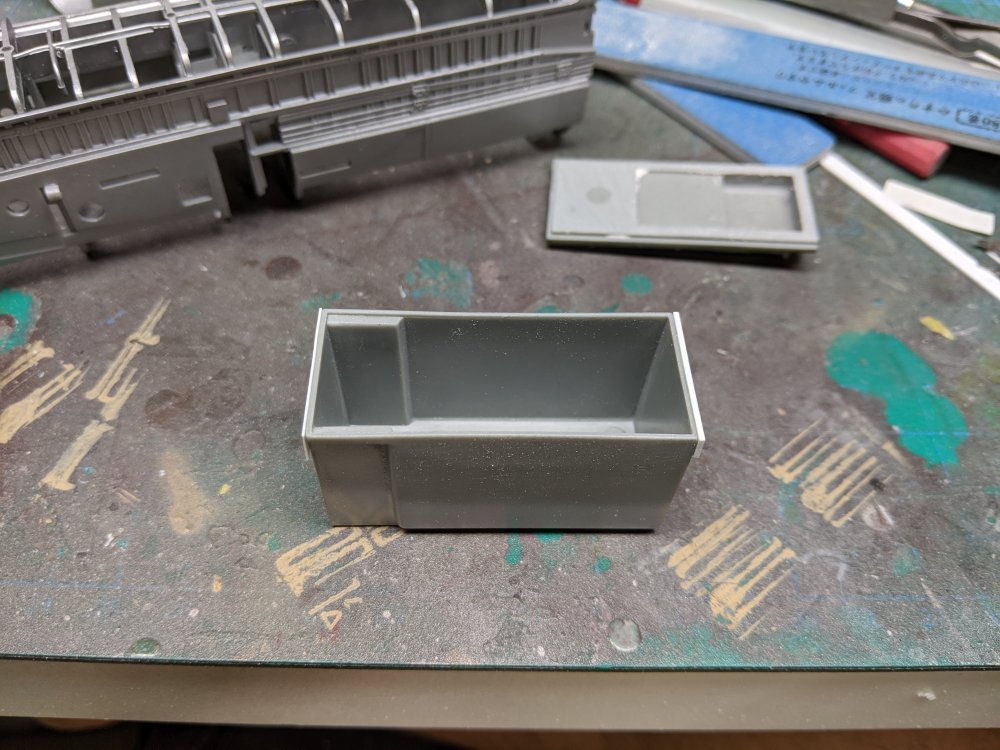
A small update today. With the fit of the fuselage fuel tanks resolved, I gave them a coat of paint. Using some of the images in the Kagero books, I decided to paint the tanks in a dark yellow and then all the various lines in semi gloss black. I needed a bit of touch up back and forth on the colours I then attached them to the lower tanks and have them a wash of Gunze Ground Brown wash. Next up I finally closed up the front fuselage. To make sure I had the right spacing at the front, I attached the forward bulkhead and placed the nose on. The nose is still removable at this point.


-
HobbyBoss' 1/32nd B-24D Liberator
BlrwestSiR replied to ThomasProbert's topic in LSM 1/35 and Larger Work In Progress
This should be lots of fun to following along with. Carl -
Nice job fixing the cowl flaps. Sometimes it's those little things that just bug you. Can't wait to see what you do on the Mossie.
-
The plan is to do both. I've got the wire anchors and acrylic sheet for the extra shelves and I've just started on the new base and top to combine two units.
-
Ok, I'll start one in the next day or so.
-
I guess it's time to drag this one up from the depths. I've started on my Ikea Detolf shelf mod project and wanted to know if I should it post it here or possibly as a WIP thread? Carl
-
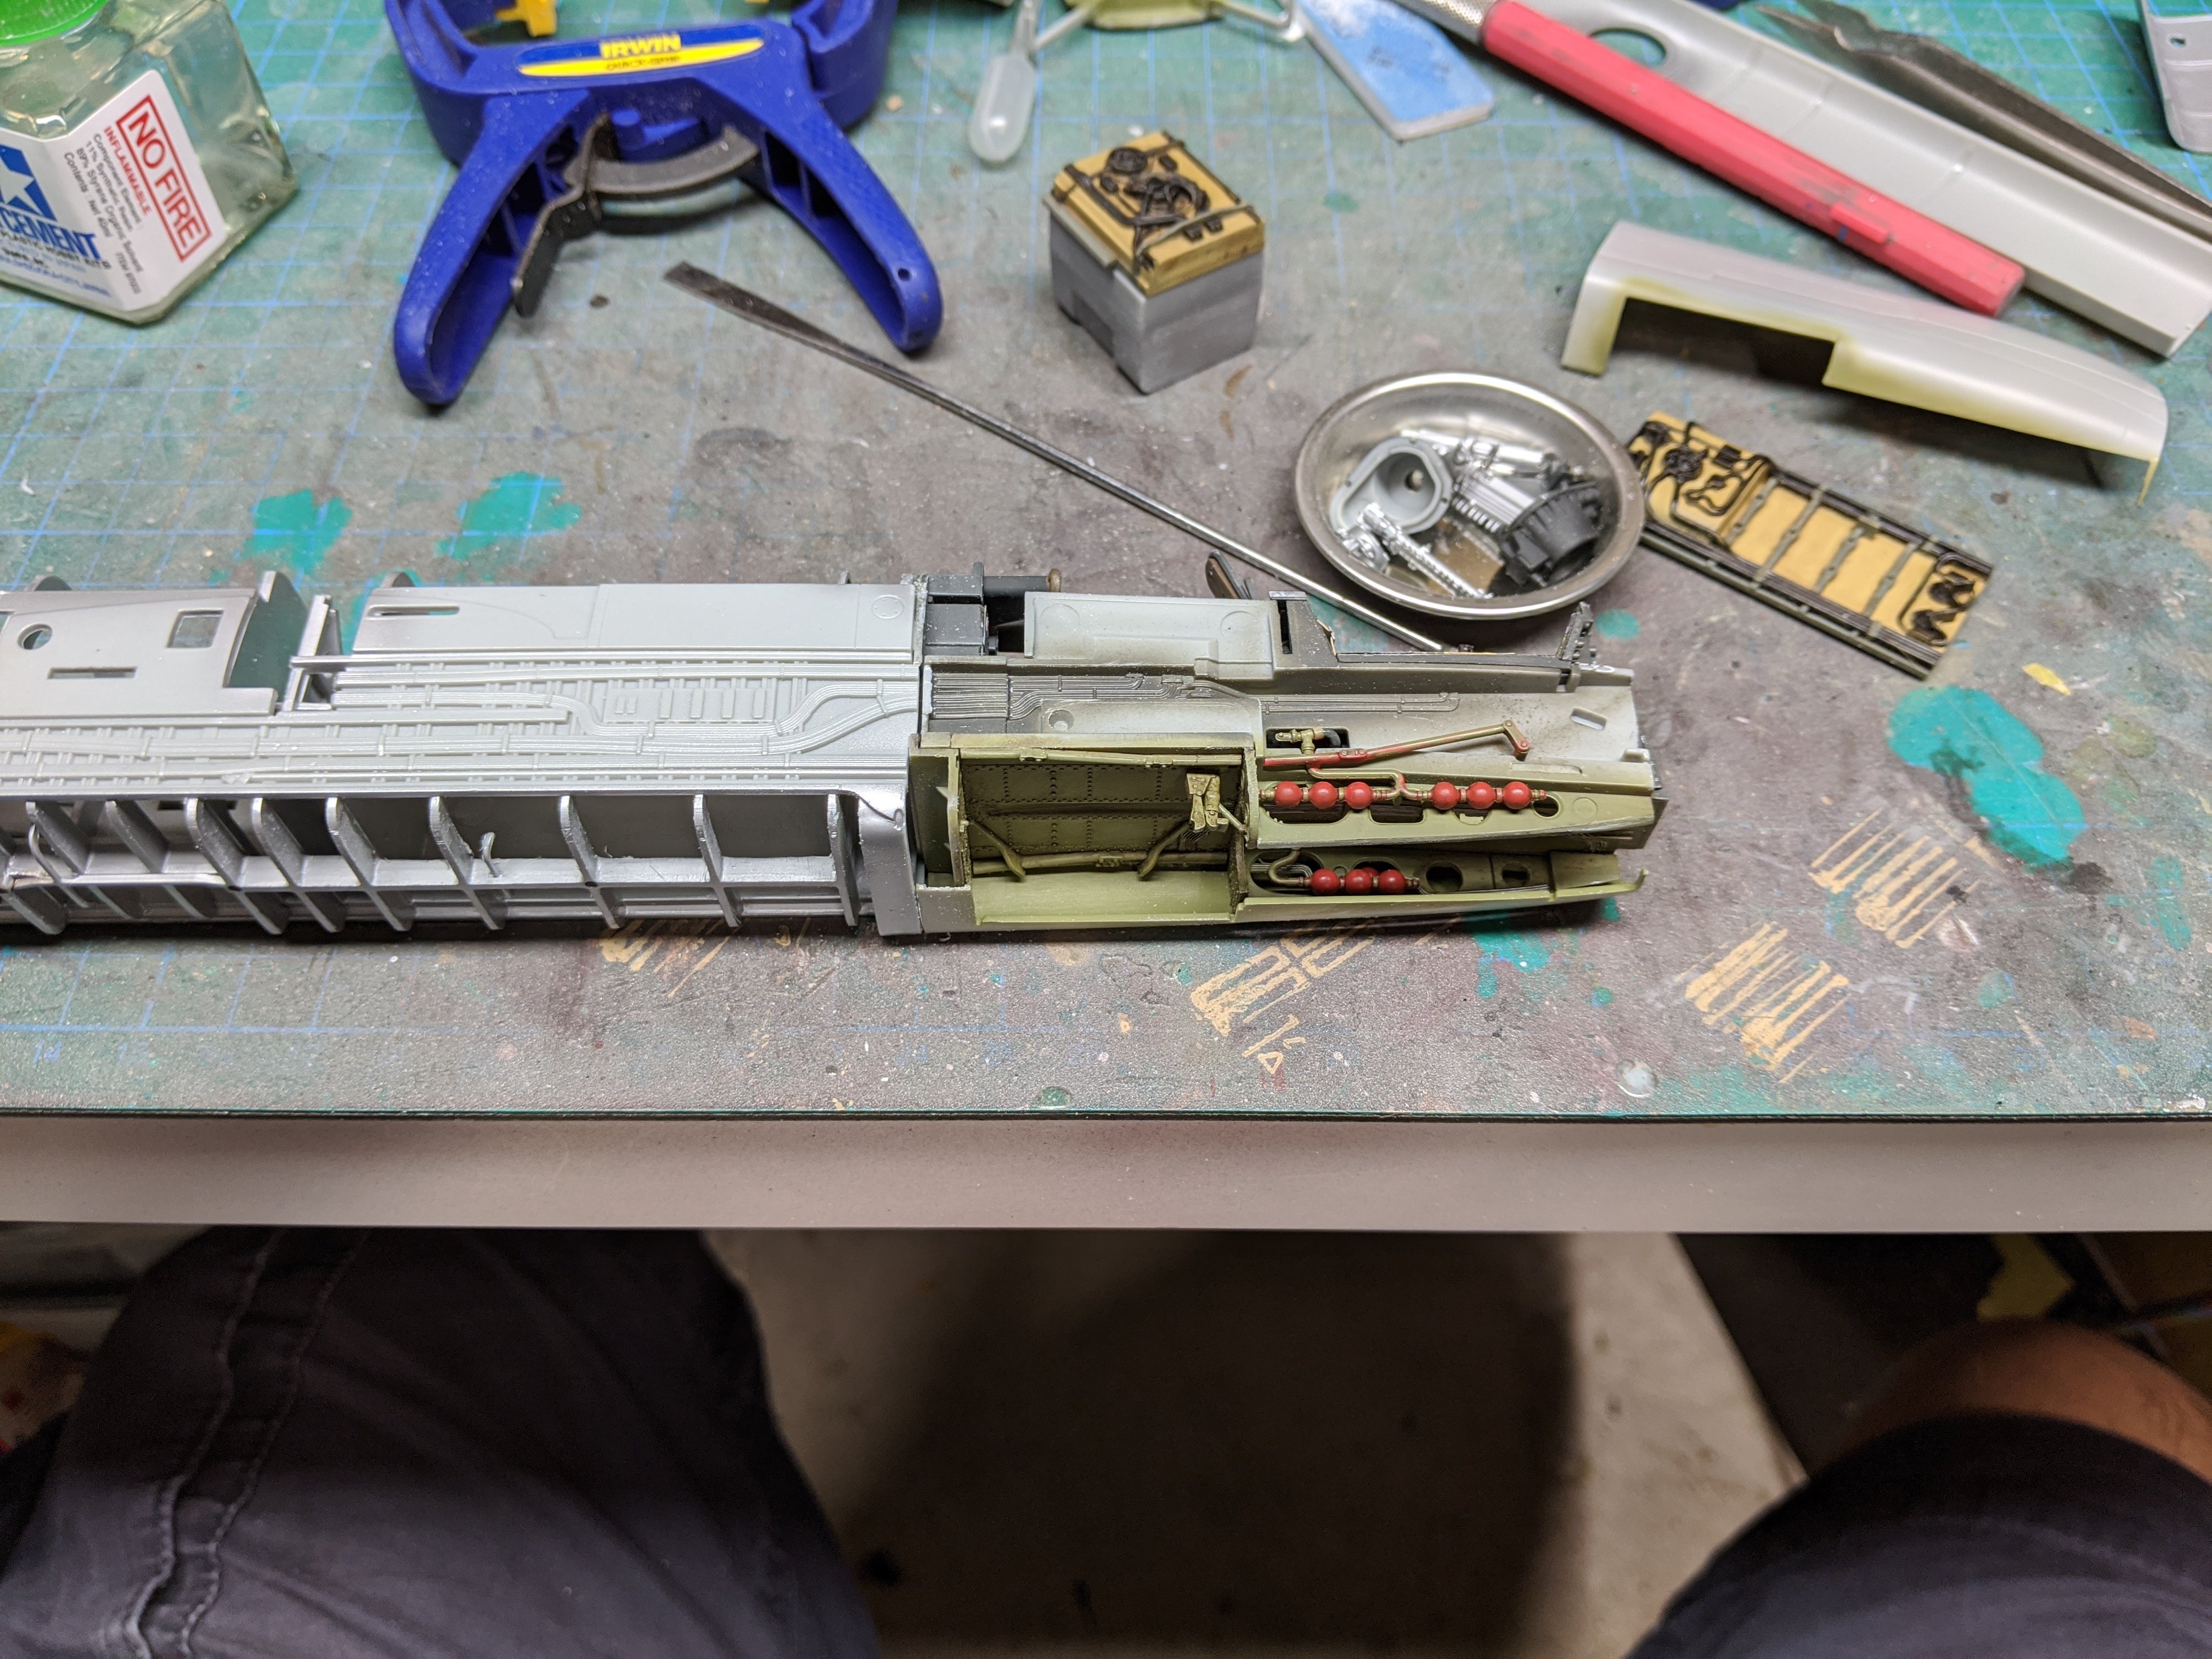
Thankfully they do line up. They were a real pain to install as these are the replacement brass ones. This is the stock part with the replacement brass tubes. Partway through their installation. Honestly, the biggest difference is that the inner pair of tubes are full length in the brass versus the stock part which is only partially moulded. Otherwise it probably isn't worth the hassle.
-
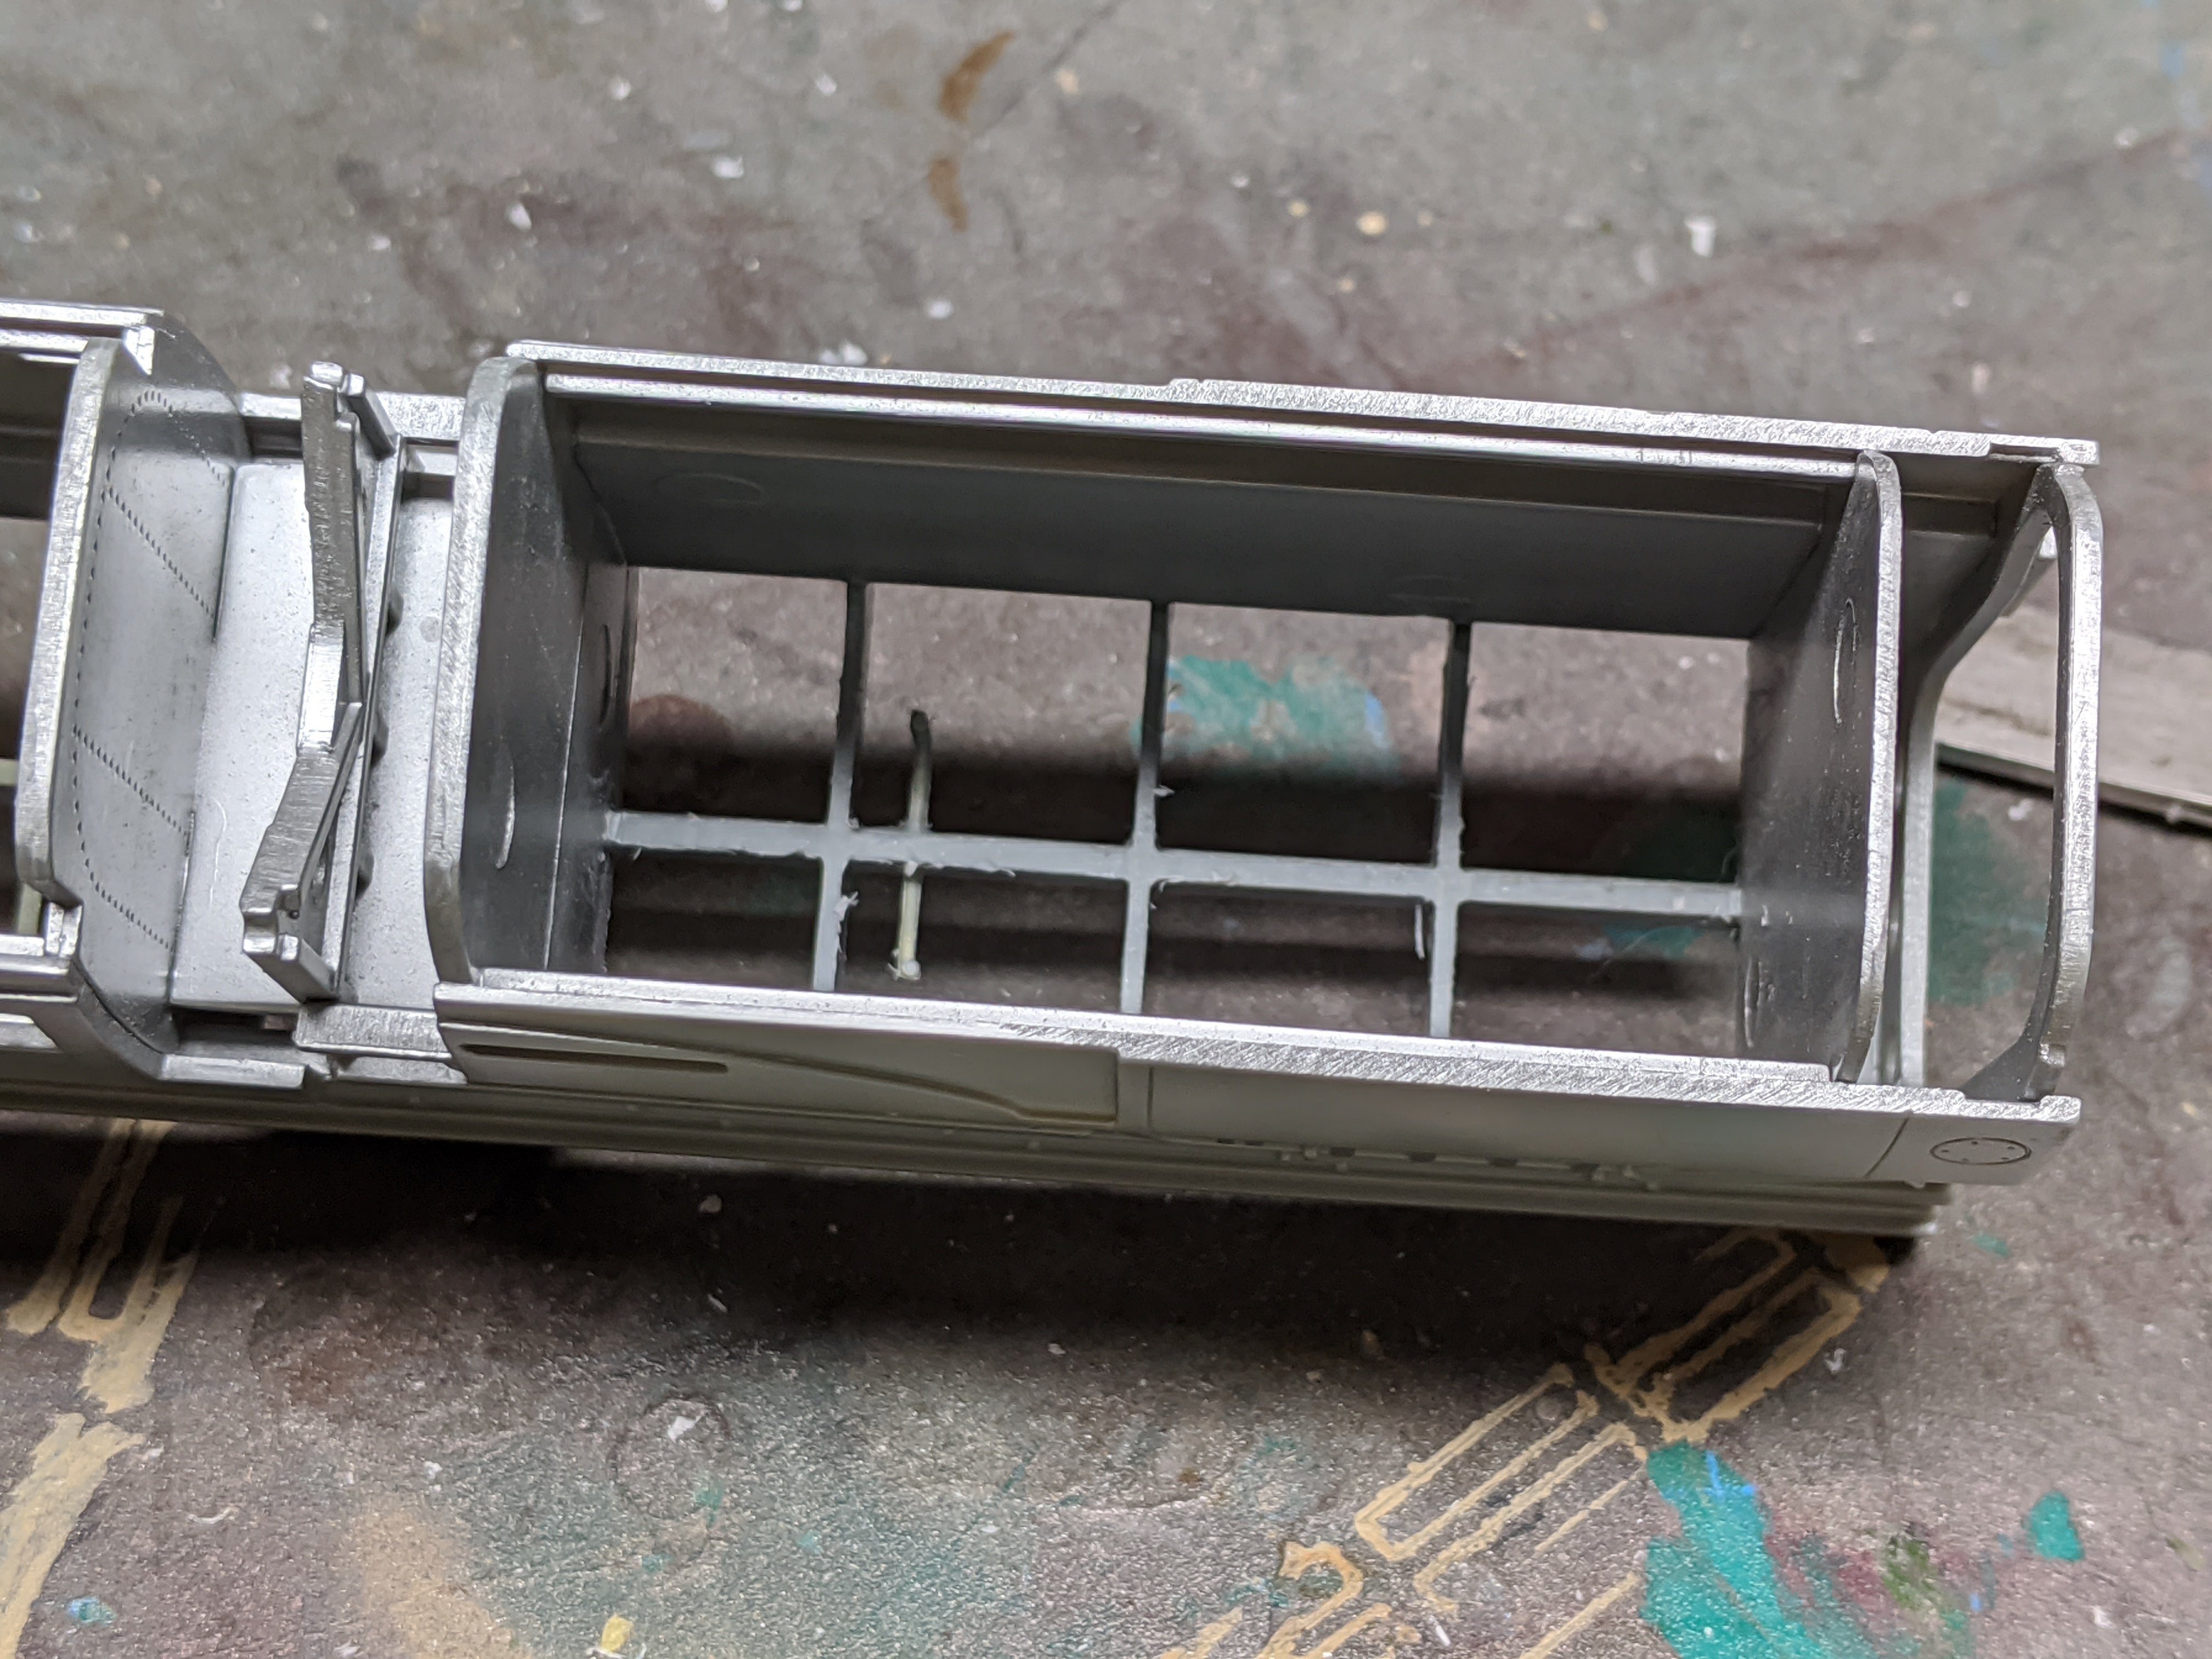
I thought the same thing and gave it a quick sanding along the underside. It helped a bit at the rear but not so much at the front. I took a closer look at the blast tubes and they're interfering at the front edge against the fuselage itself. I'm going to leave it for the moment as it's right where the front fuselage joins to the rear. Once I have the fuselage together I'll see what tweaking is needed.
-
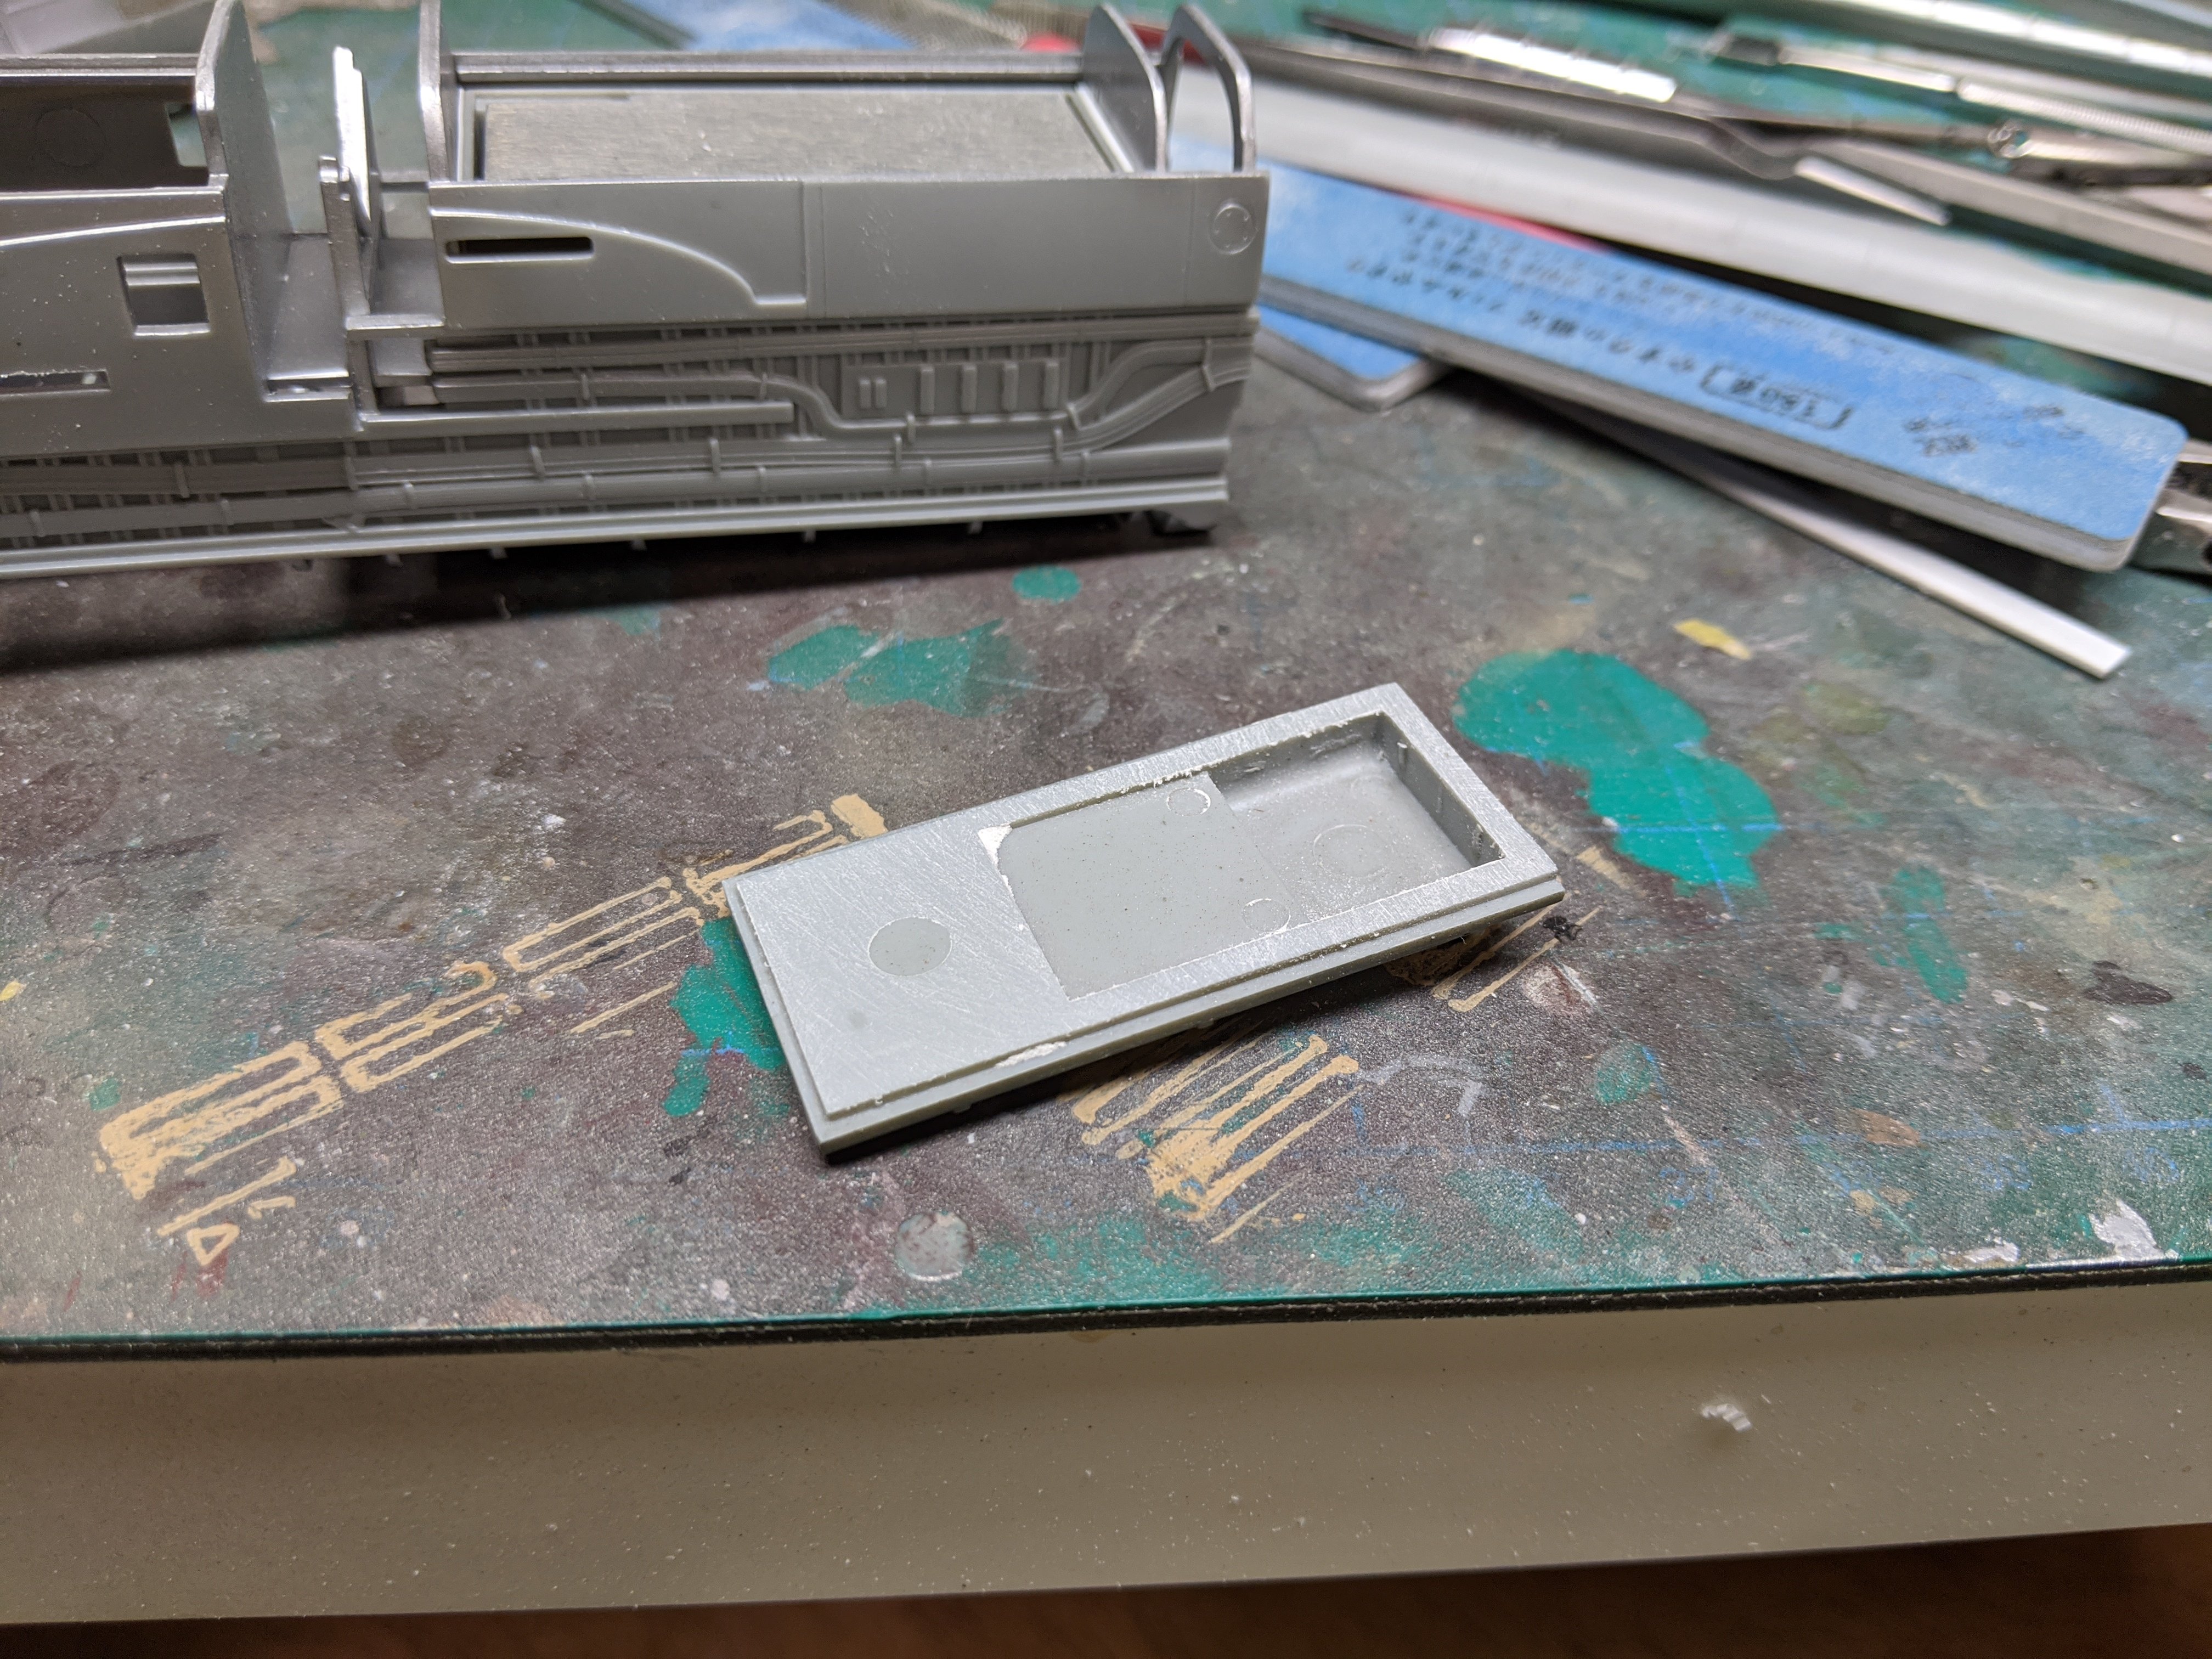
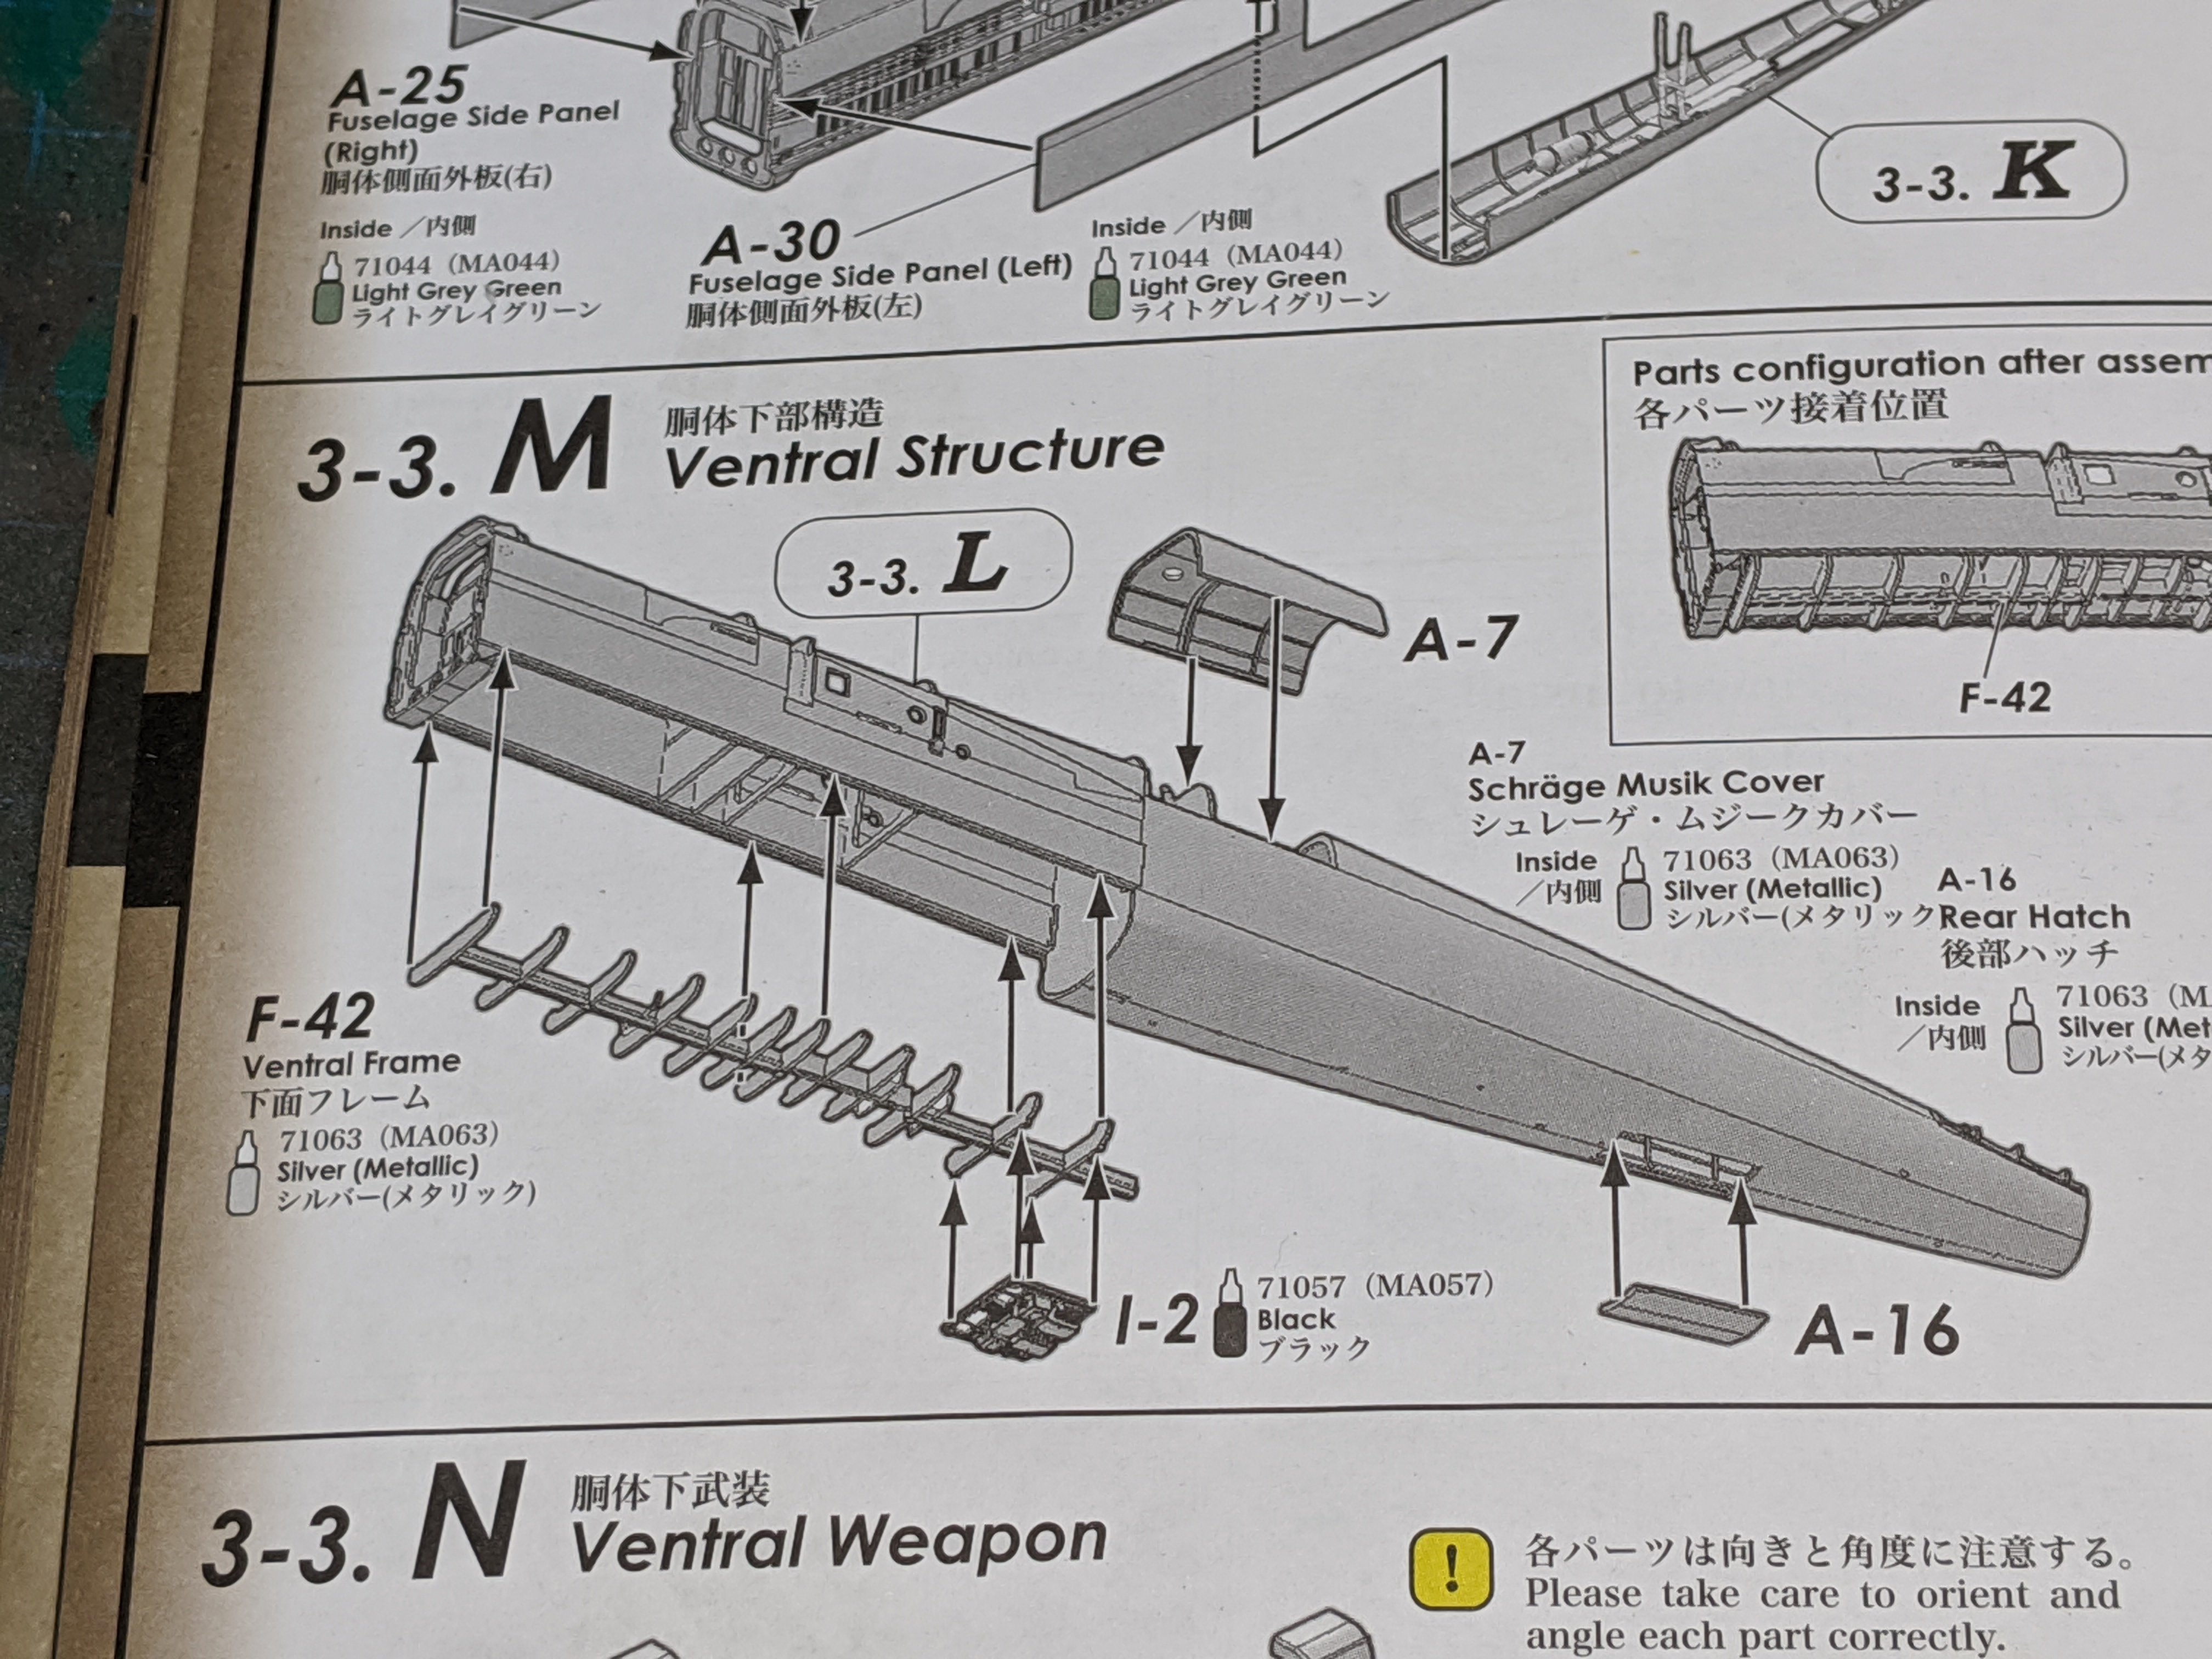
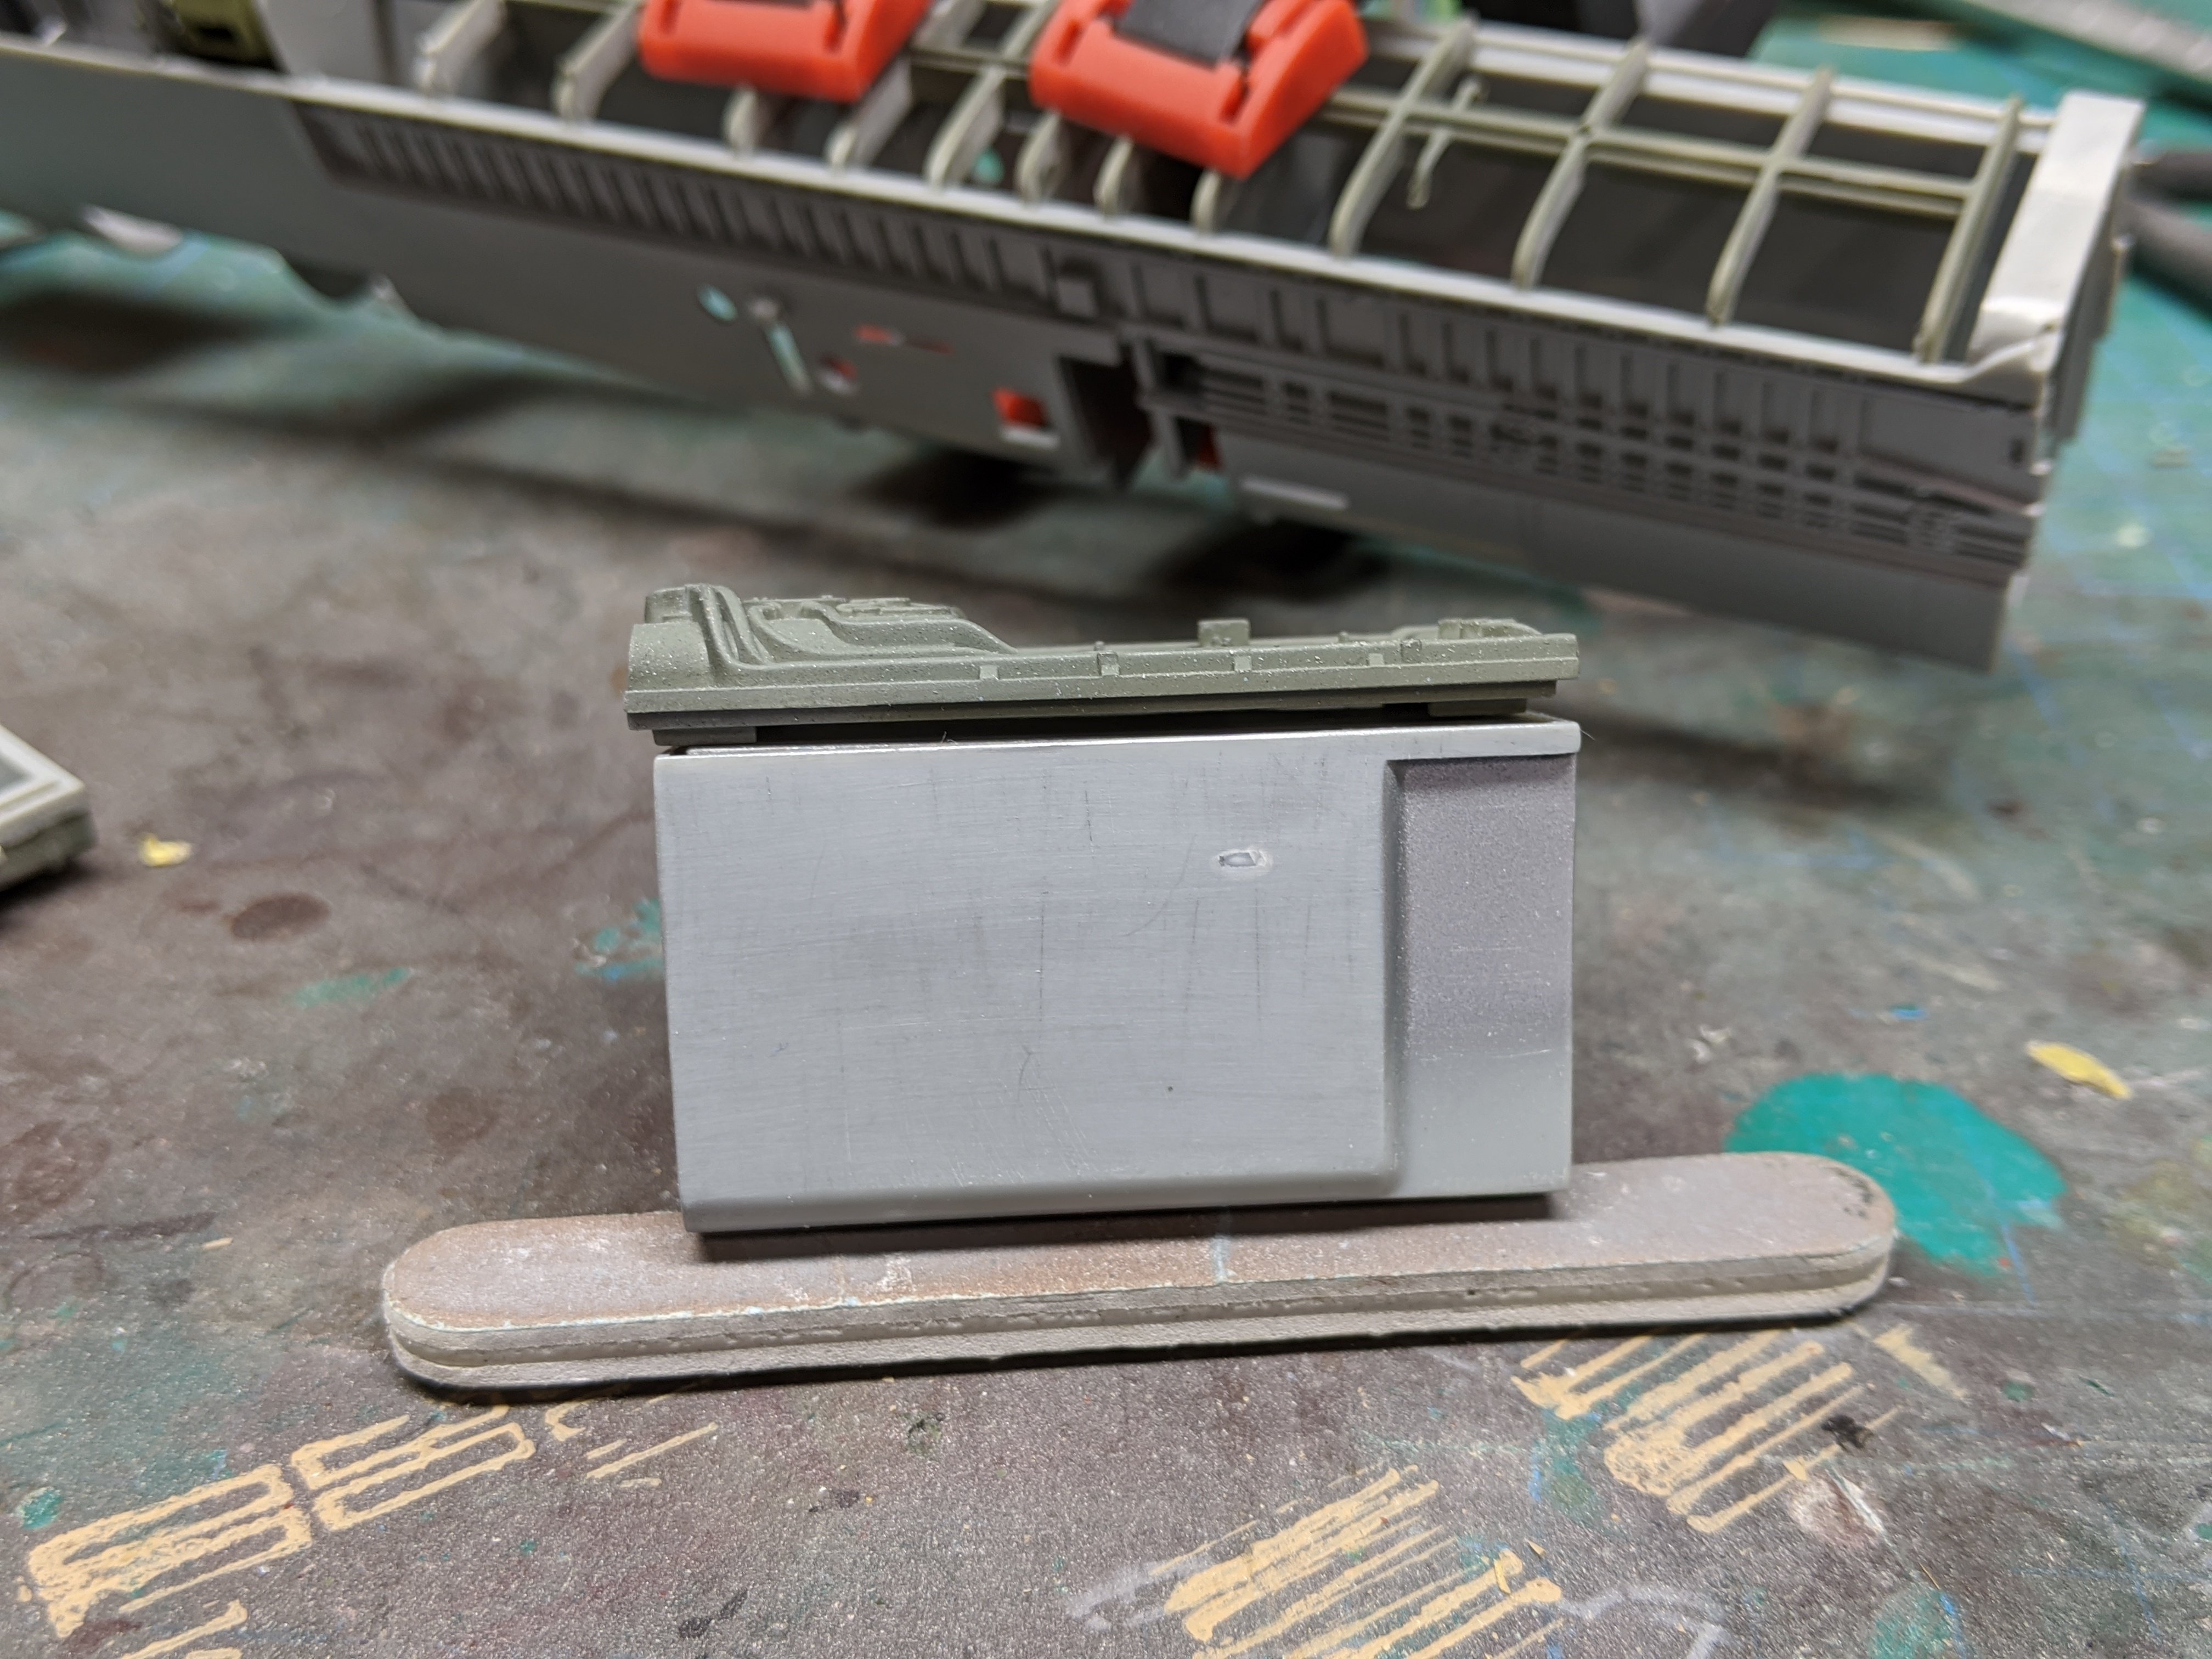
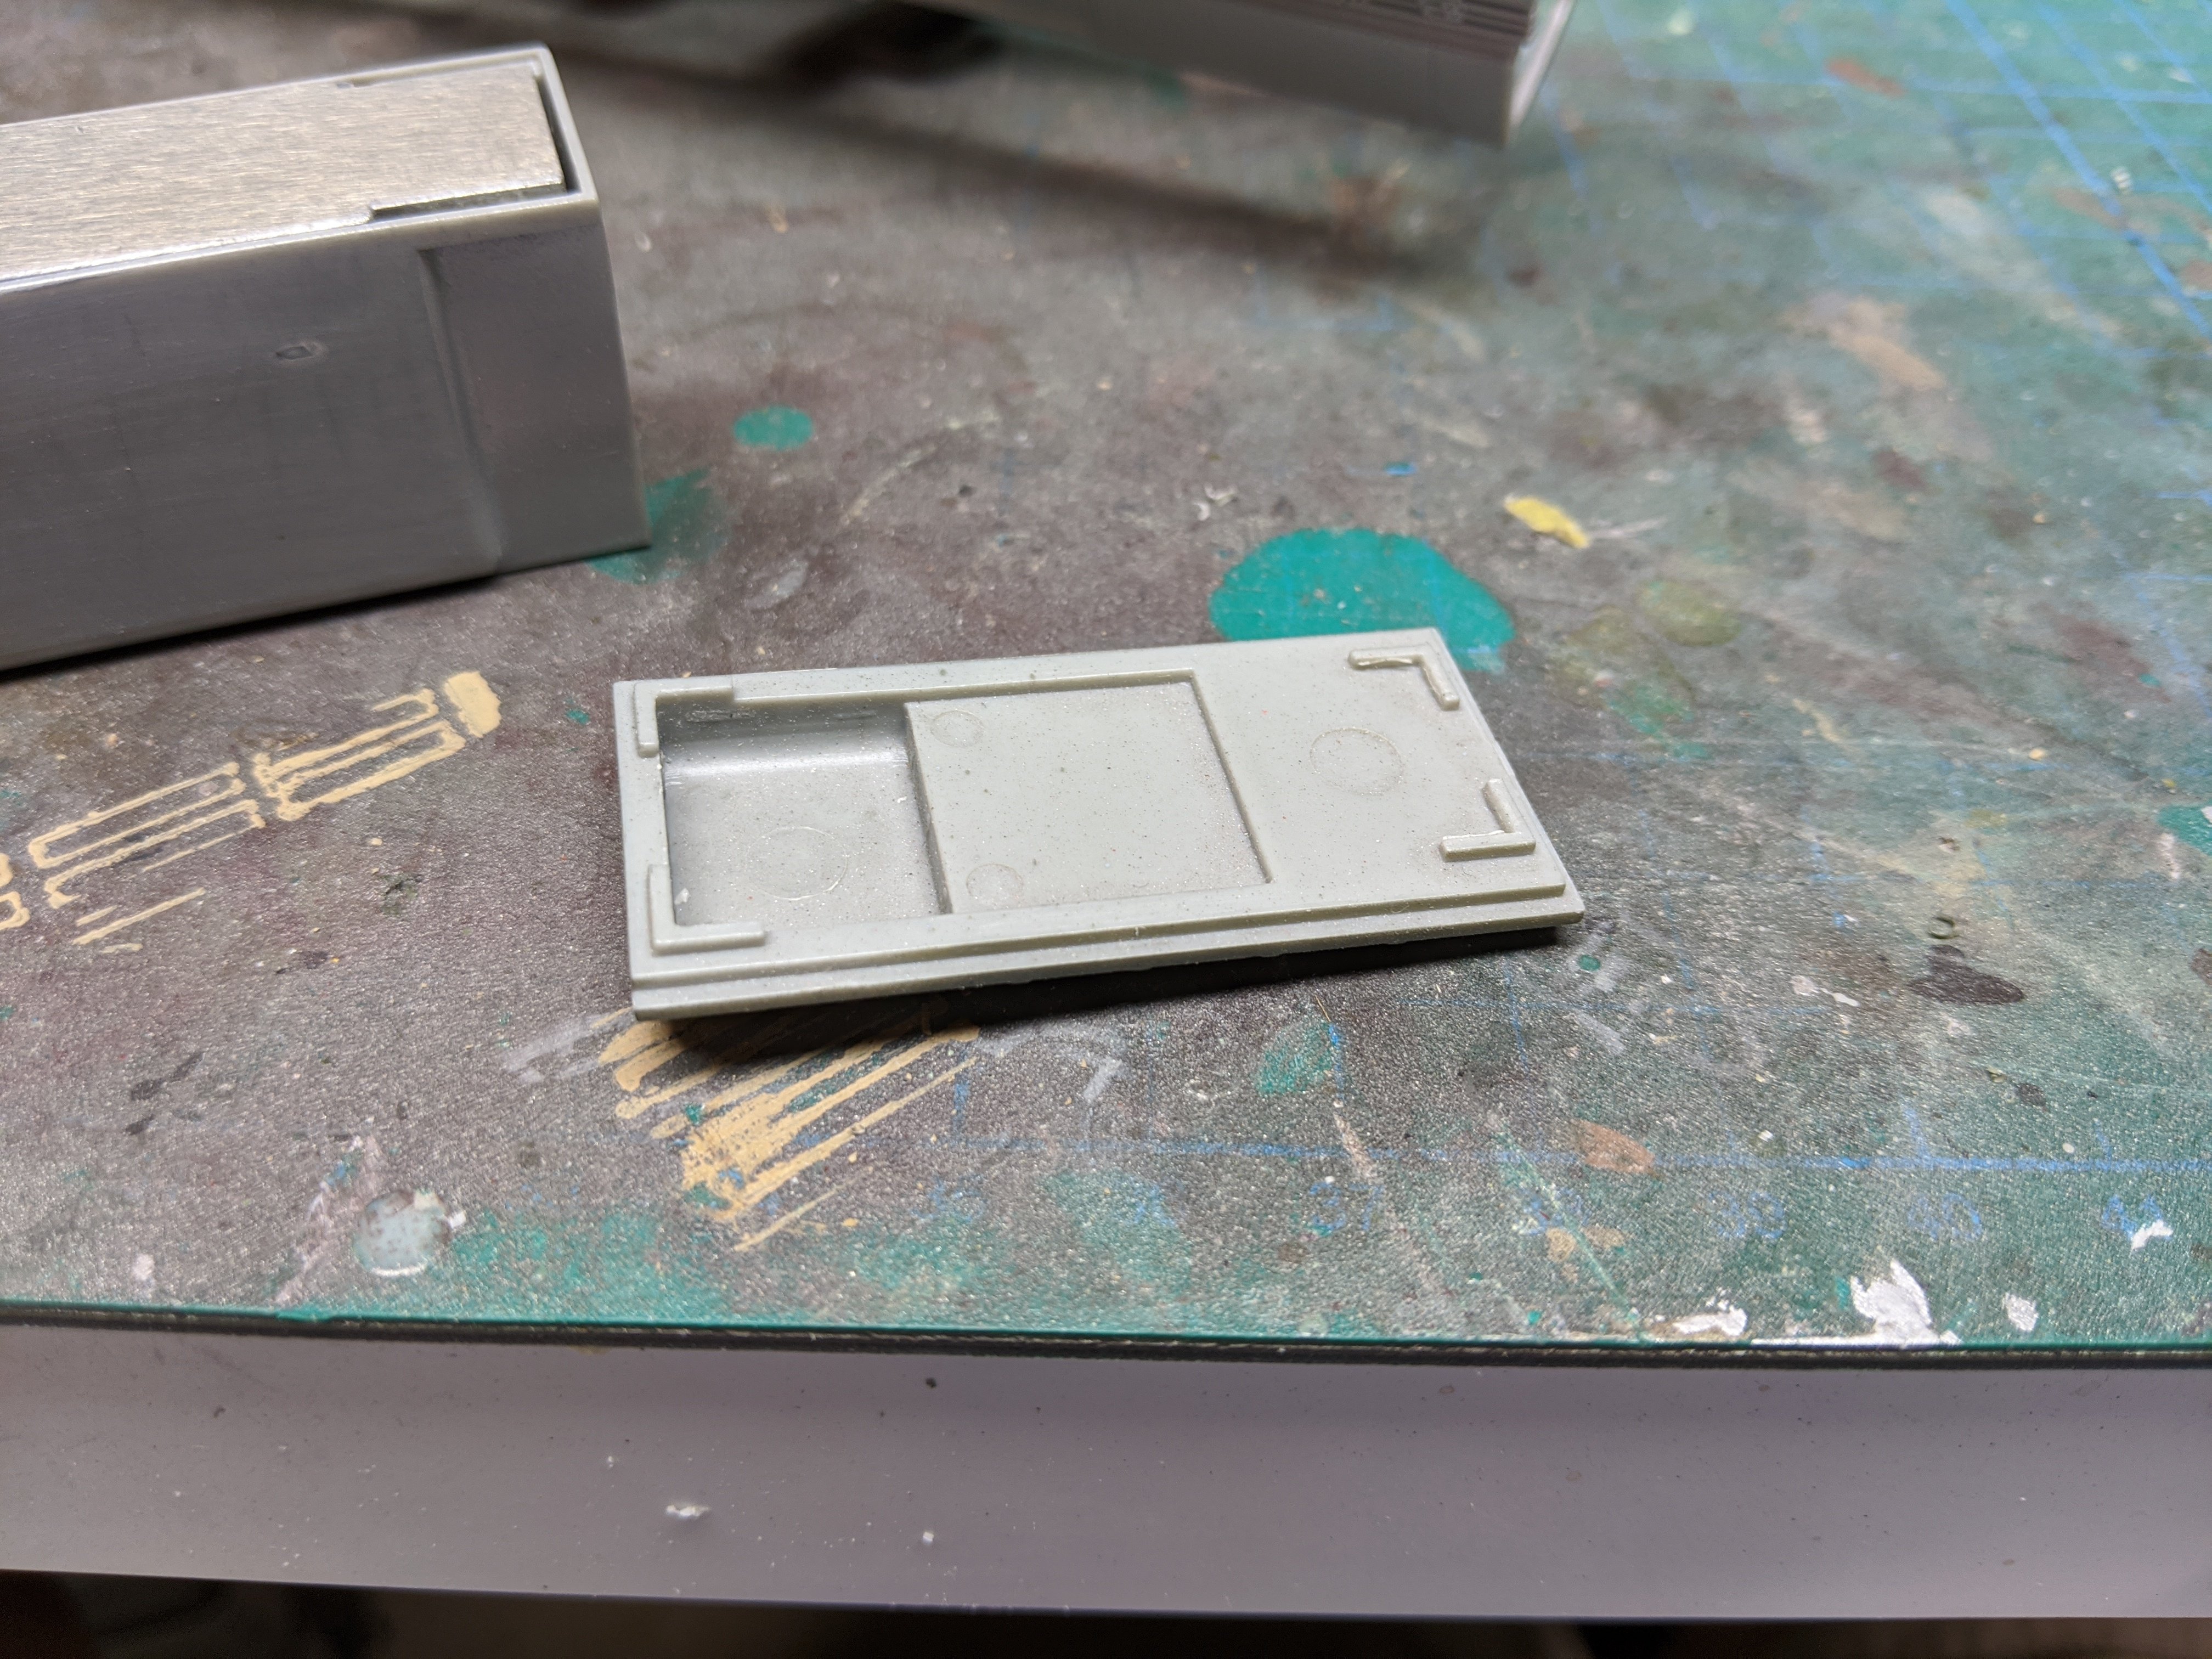
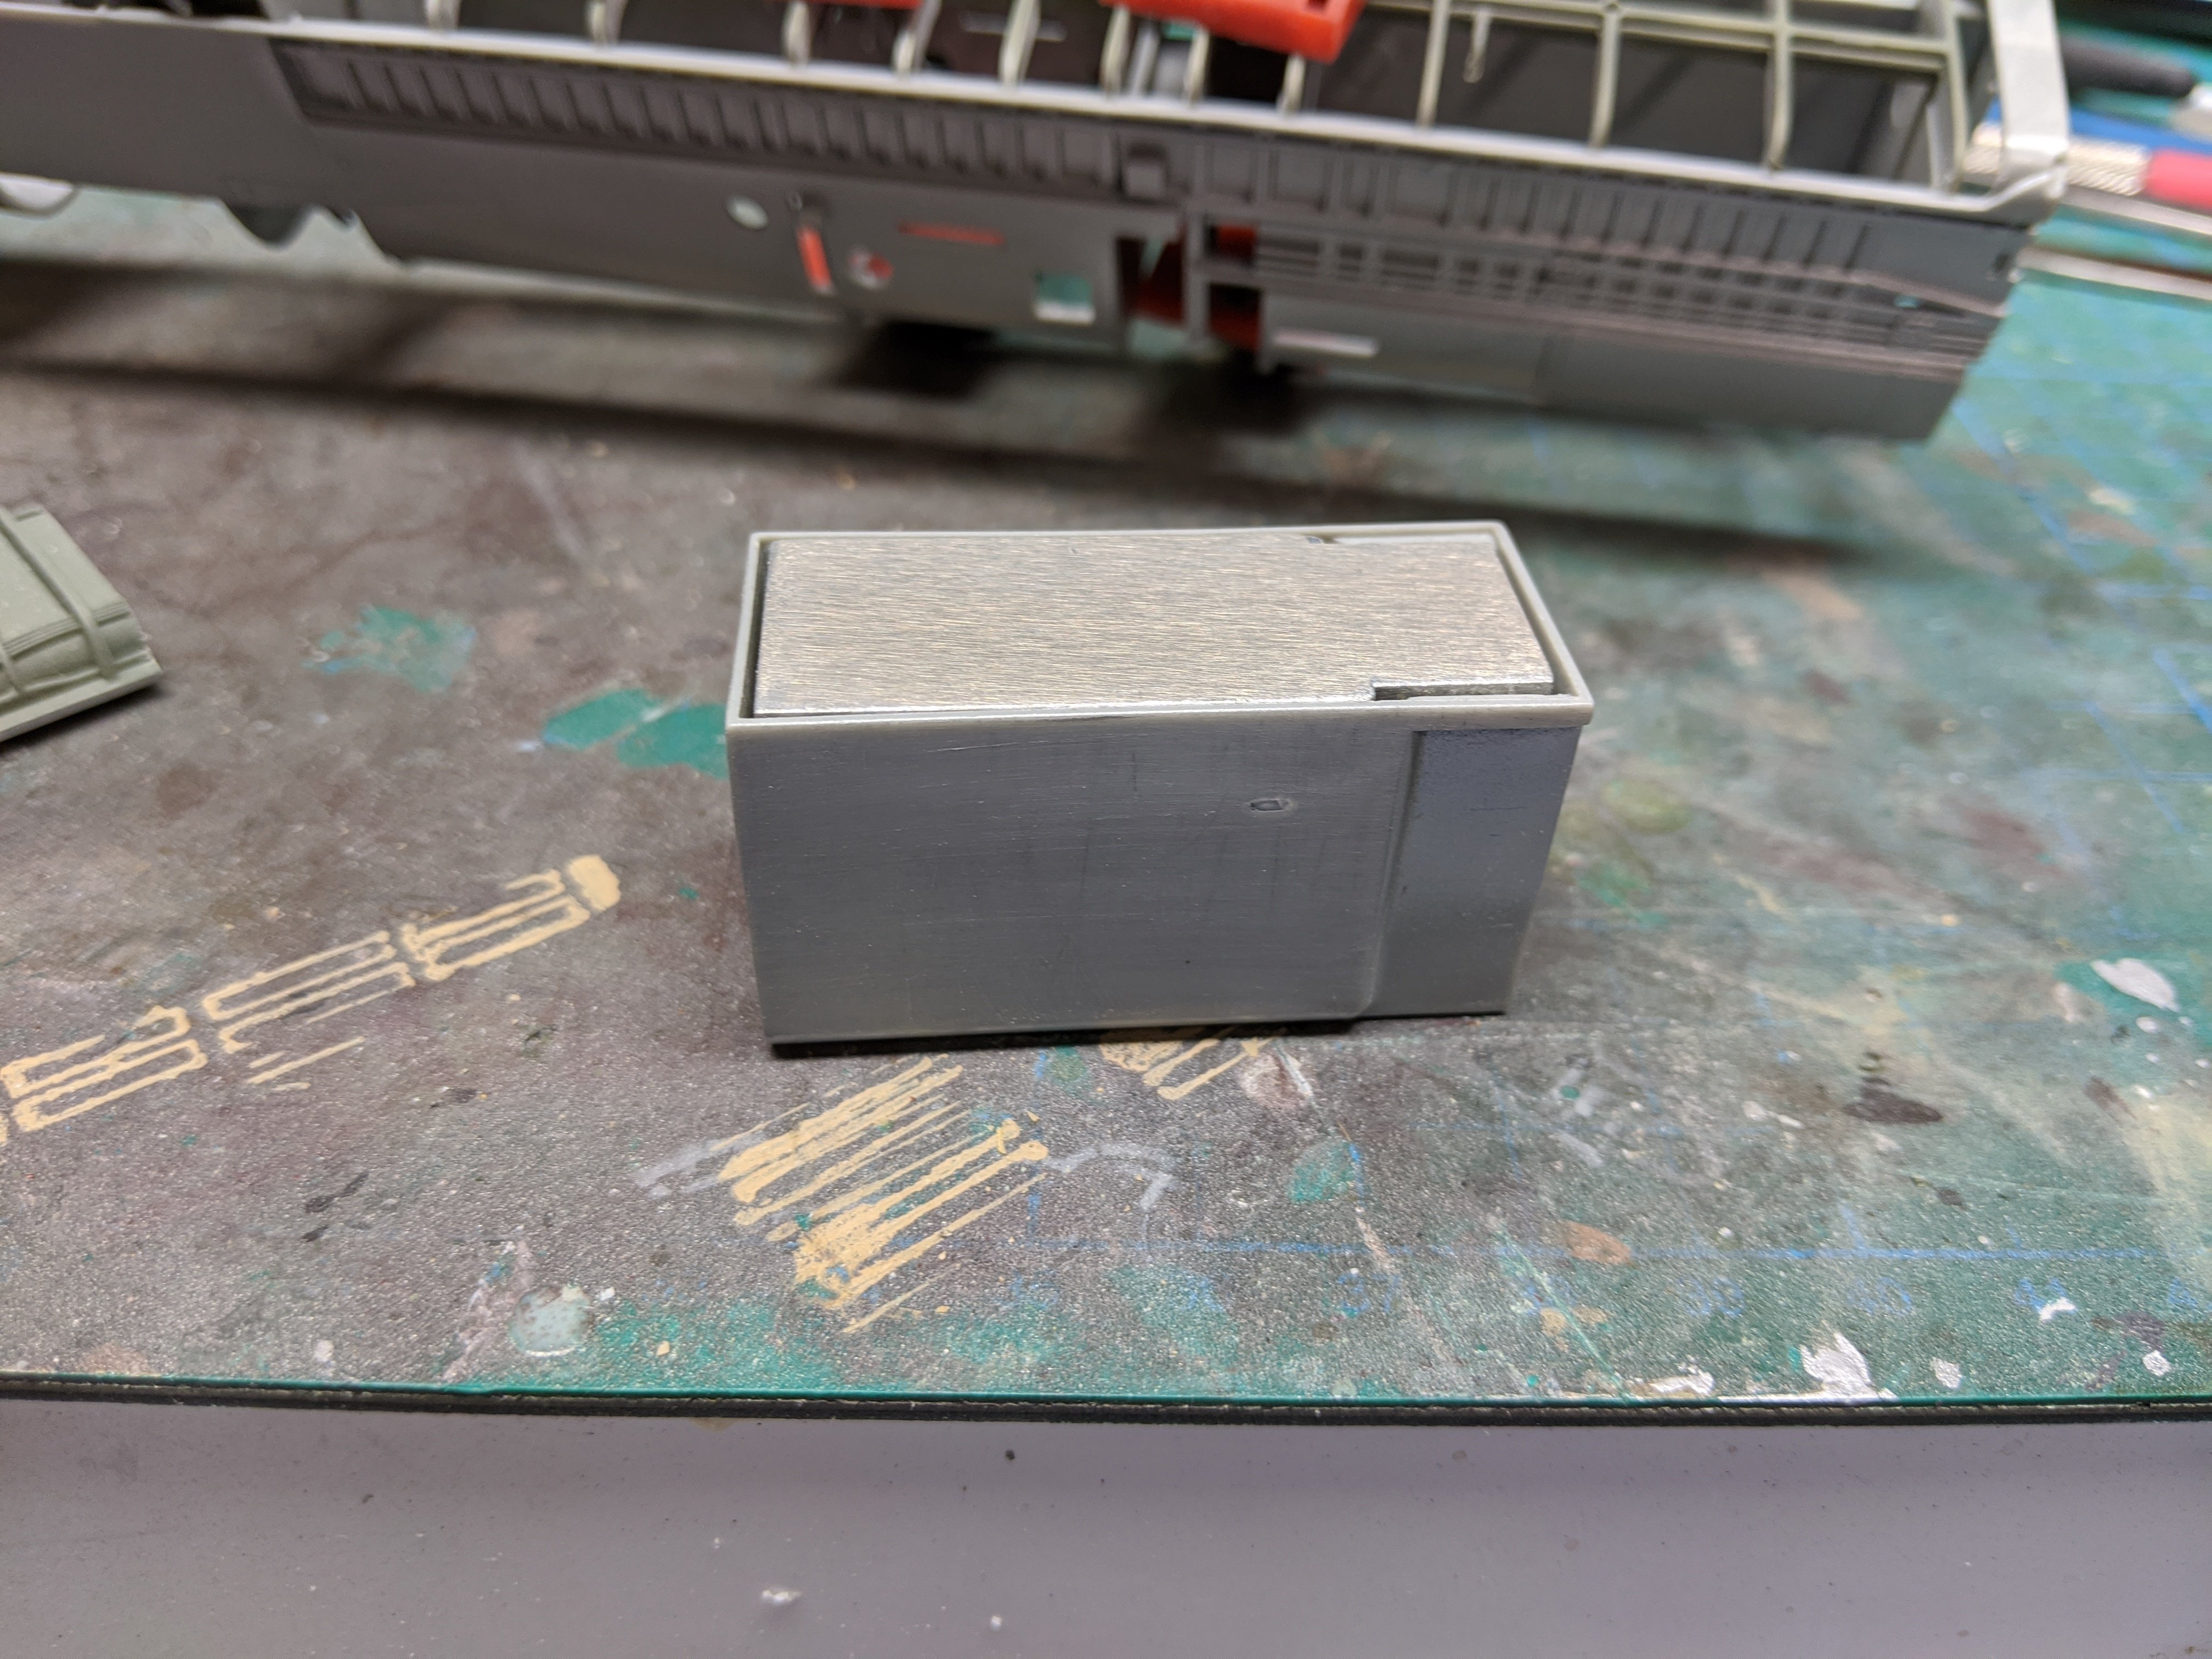
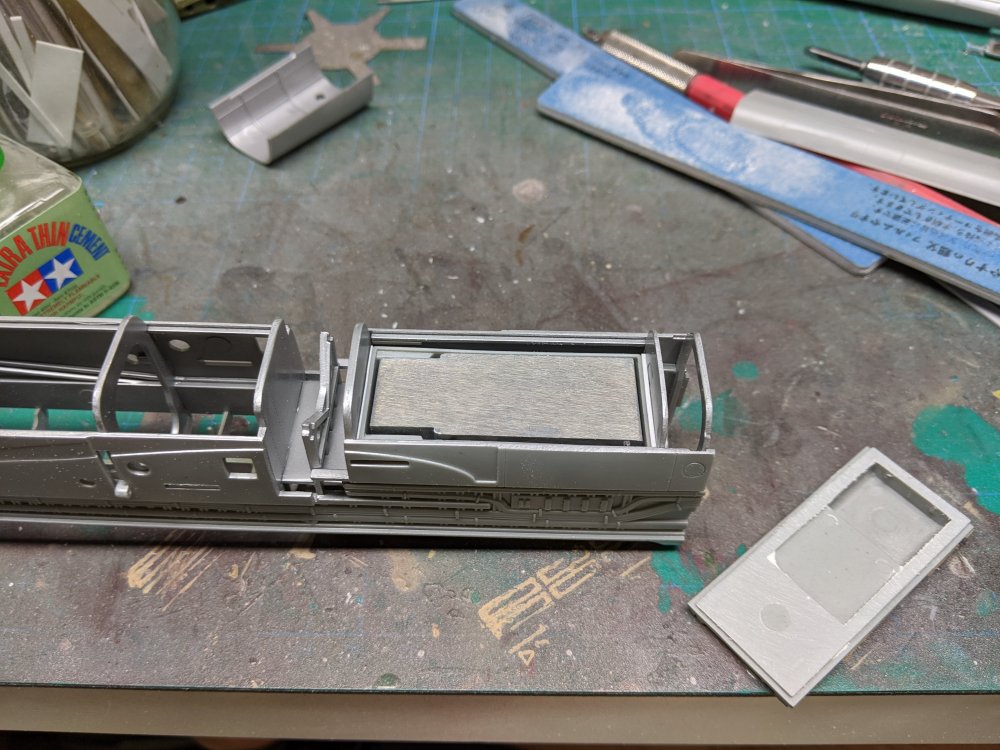
Ok, I found a somewhat simple fix for the slightly too tall counter weight. Shave the inside of part F42 that sits directly below the forward tank. It's easiest to do this before you install it. Otherwise just use a scraper and scrape the inside edges down. Remove the fit tabs and sand flat the bottom of the tank cover. I then added some appropriate thickness shins to either end of the tank to hold it in place between the two bulkheads. Test fit to make sure you have enough clearance so that the tank cover fits correctly along with the upper panels. With the tank cover in place, you won't see the gap around the top lip of it and the tank. From below, the spaces between the tank and the bulkheads and fuselage sides are again too thin and dark to see anything. The shims keep the tanks from moving back and forth and let you glue it into position without the tank cover. The upper spine should now fit correctly without any gaps. Hope that makes sense. Carl


-
There's a new Mach 1 coming. And not an electric/hybrid either.
- 2,036 replies
-
- 3
-
-
- car related stuff
- anything about cars
- (and 6 more)
-
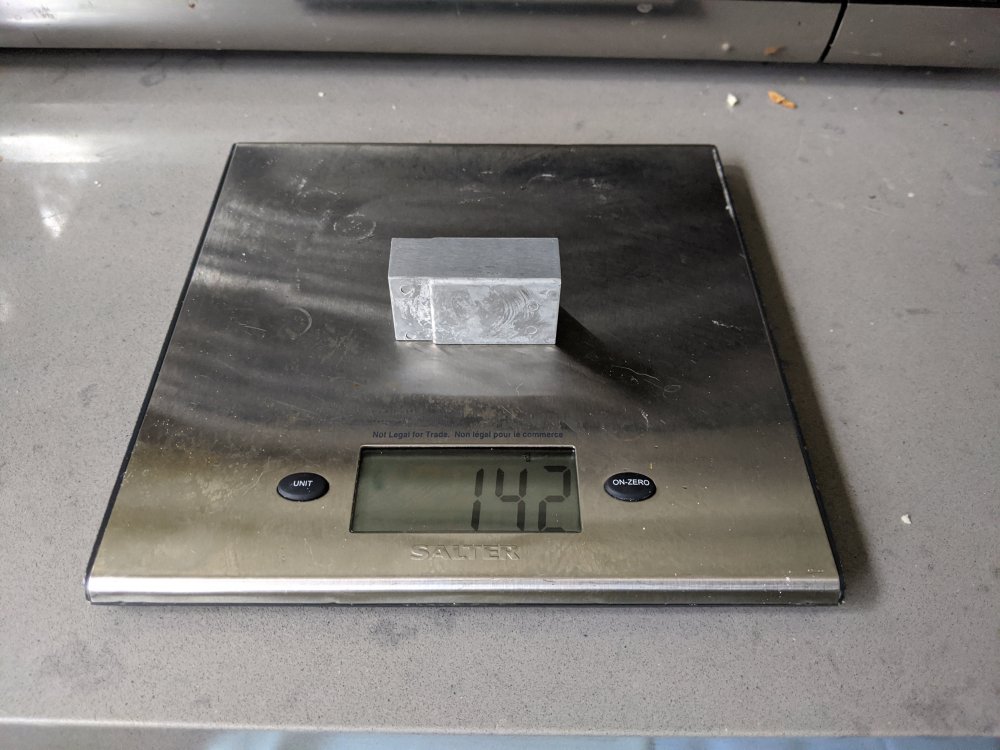
Dennis, I weighed the cast weight that ZM gives you. Hopefully with it just behind the cockpit, it'll be enough to keep the model from being a tail sitter.
-
What is on your bench right now ? Share a picture :)
BlrwestSiR replied to Martinnfb's topic in Modelling Discussion
Been meaning to ask Martin. Which conversion did you use for the 262? Carl -
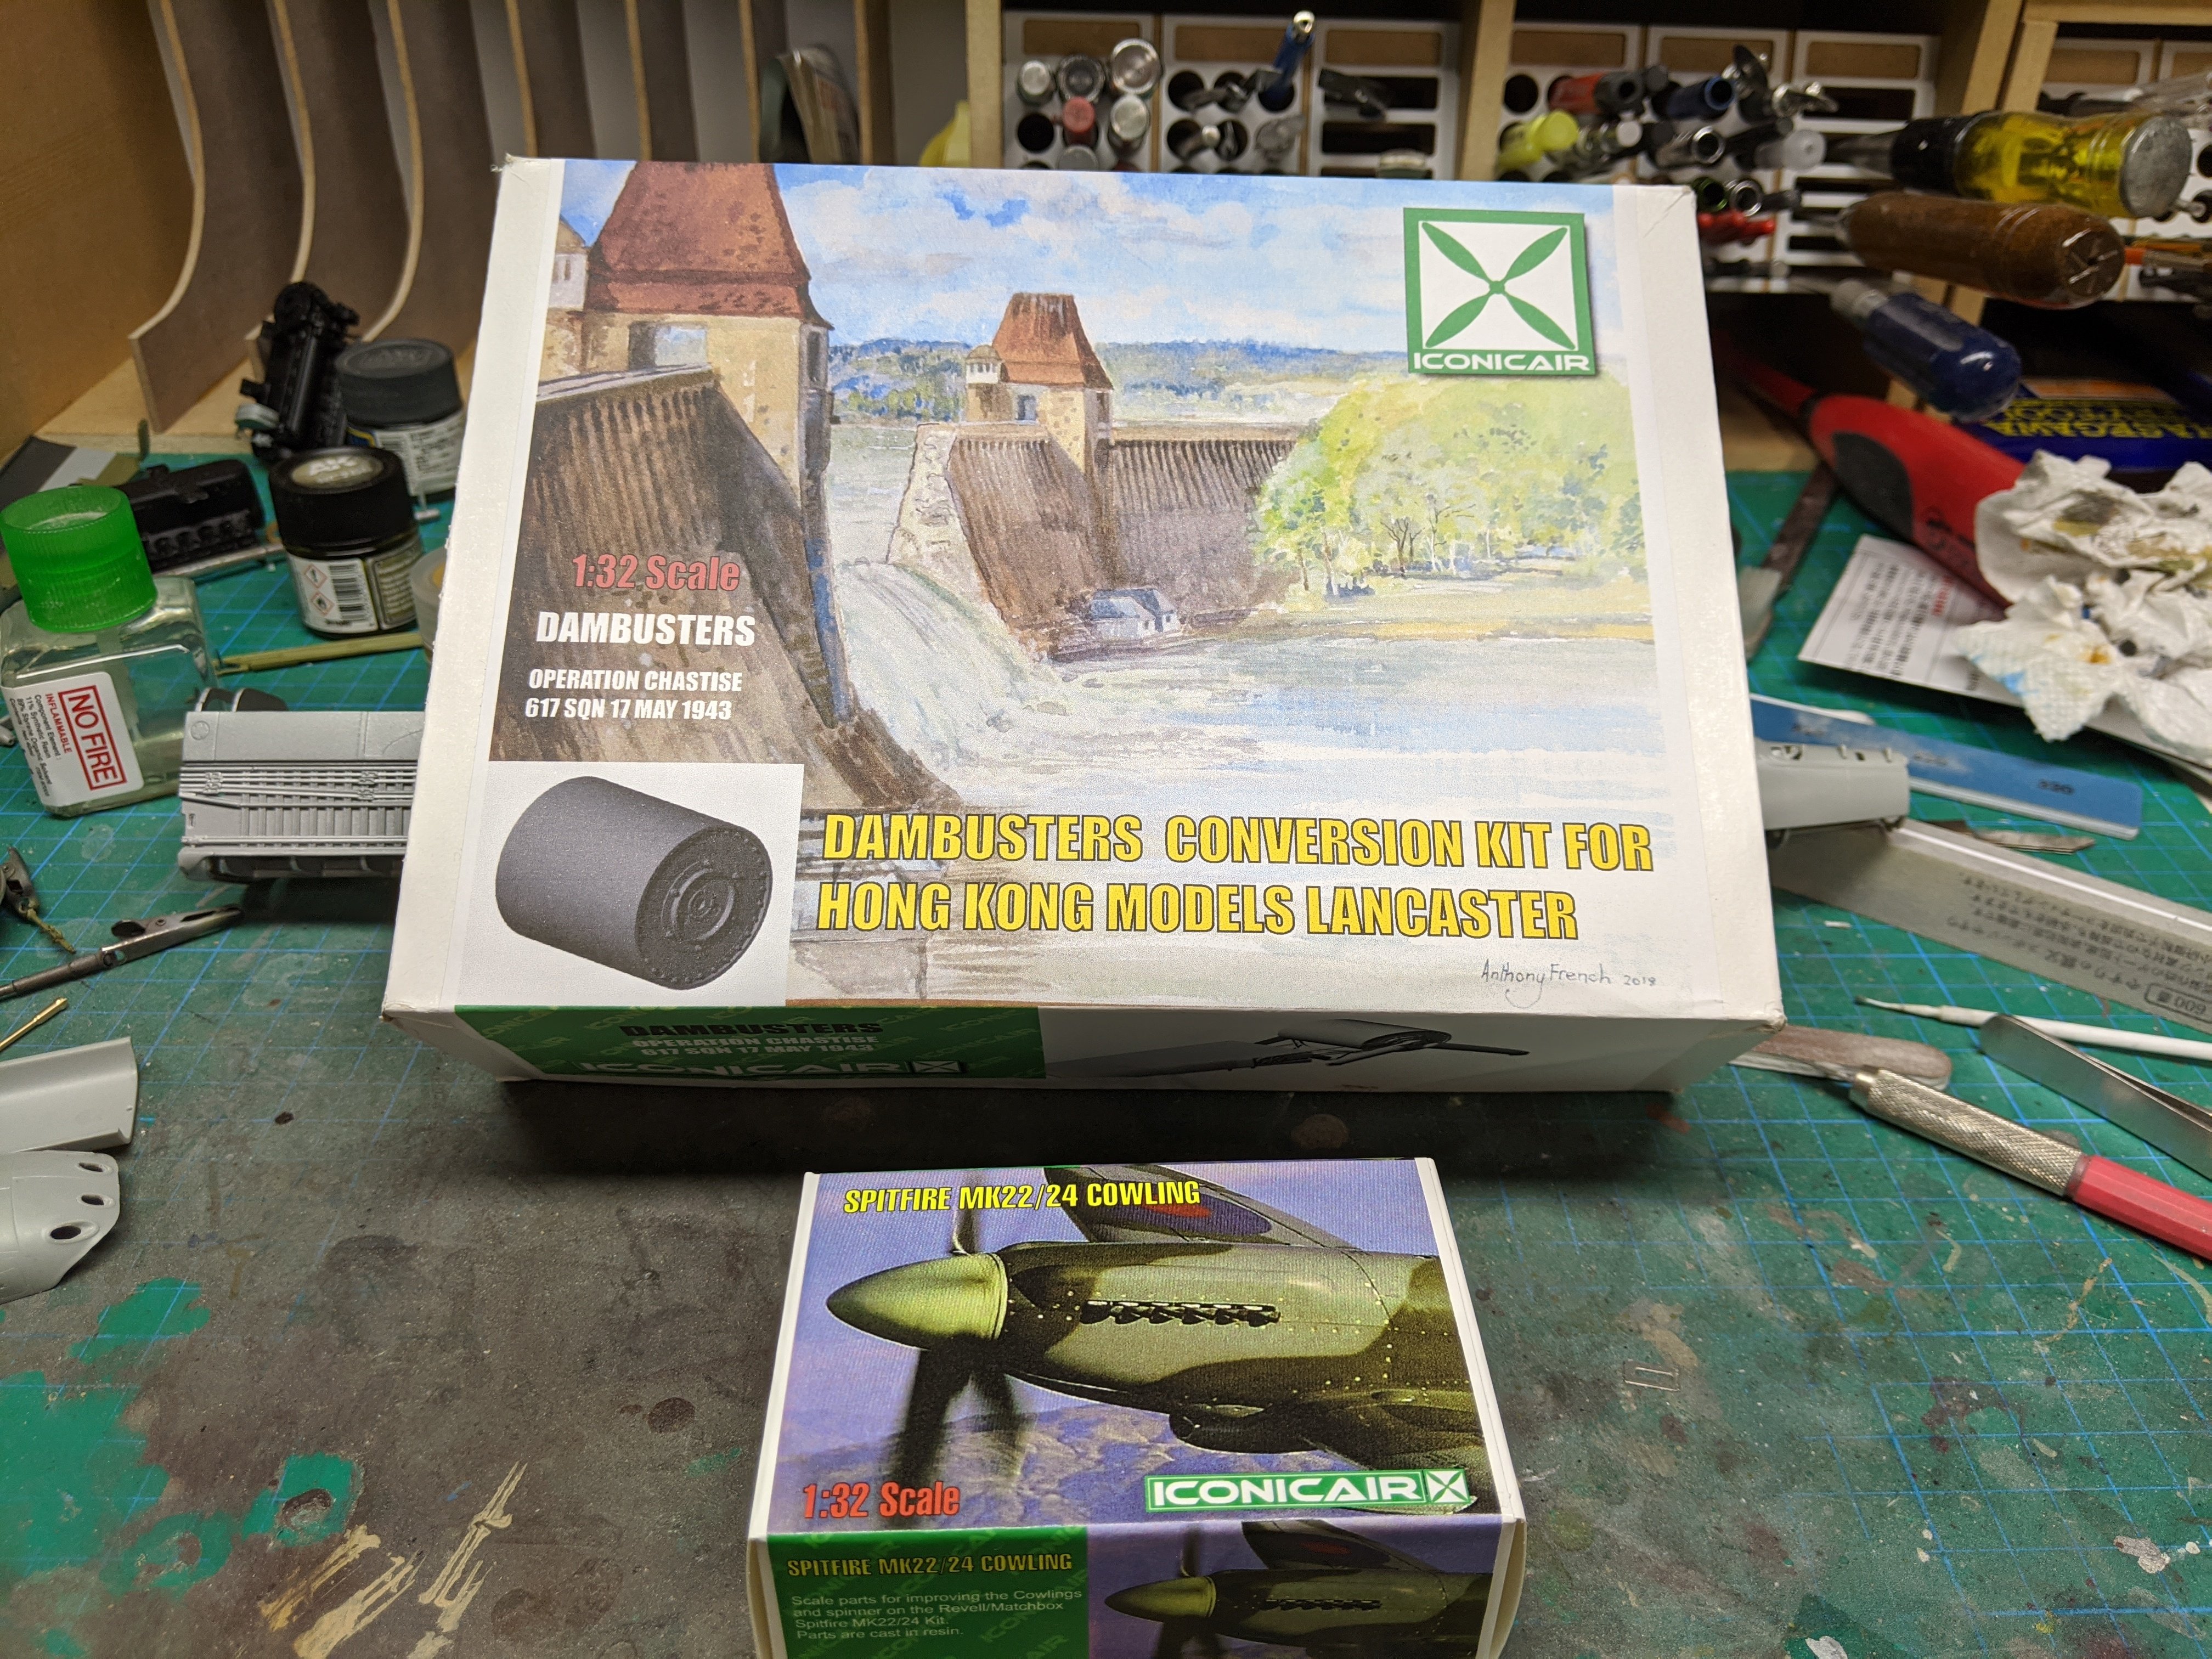
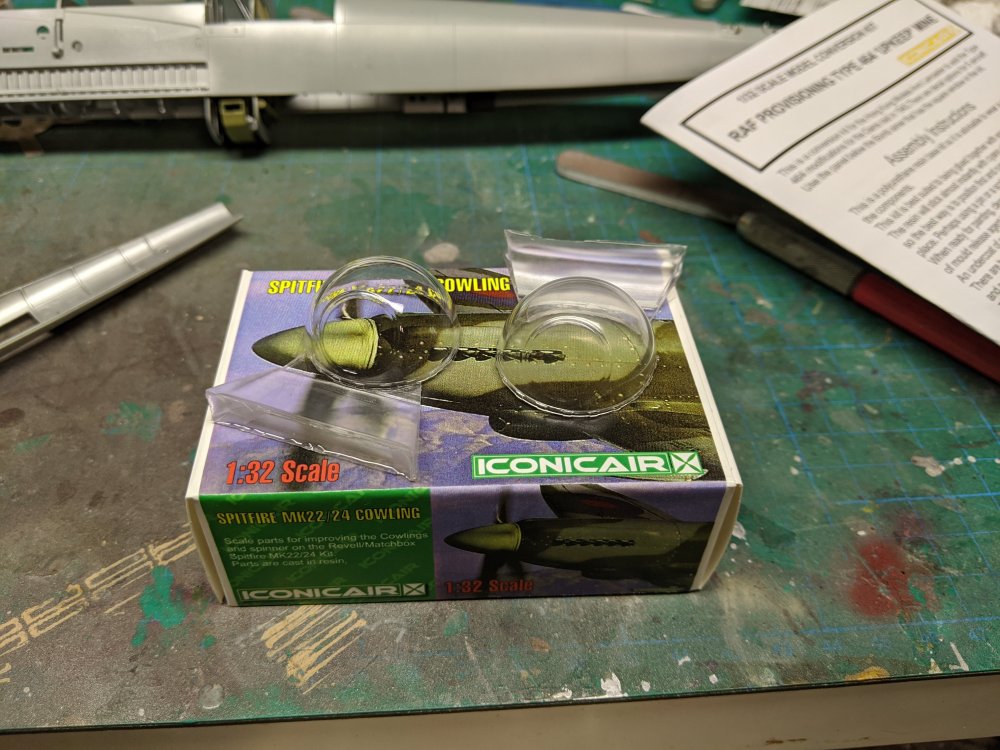
I got my order from Iconicair today. I ordered a pair of the Lancaster nose blisters. One of them is crystal clear and the other is almost as good. Really impressed with them. The other items are a Griffon Bose correction set and a Dambusters conversion set. The HK Dambusters Lanc is sold out in Canada and since I have two of the regular Lanc kits, Graham's set made sense to me. Carl

-
Fantastic looking turntable Rob. A neighbour had one that was around 500lbs. The weight was supposed to counteract the torque from the turntable's rotation as he explained it to me. No idea how but it looked cool nonetheless.
-
So I'm not the only one. Thankfully there's an easy fix so I'll cover that once I get there. I'm leaving it out for the moment so the fuselage is a bit easier to handle.
-
Tamiya P-51D, easy bake & shake.
BlrwestSiR replied to 1to1scale's topic in LSM 1/35 and Larger Work In Progress
That's great to hear about the Xtreme Metal paints as I bought some for my CF-104 build. Thanks for letting us know about the need for a primer as I usually skip that part. Carl -
Bill, nice to see what it looks like. I've got two of them on the way but everything I read says overseas shipments to Canada are completely screwed up.
-
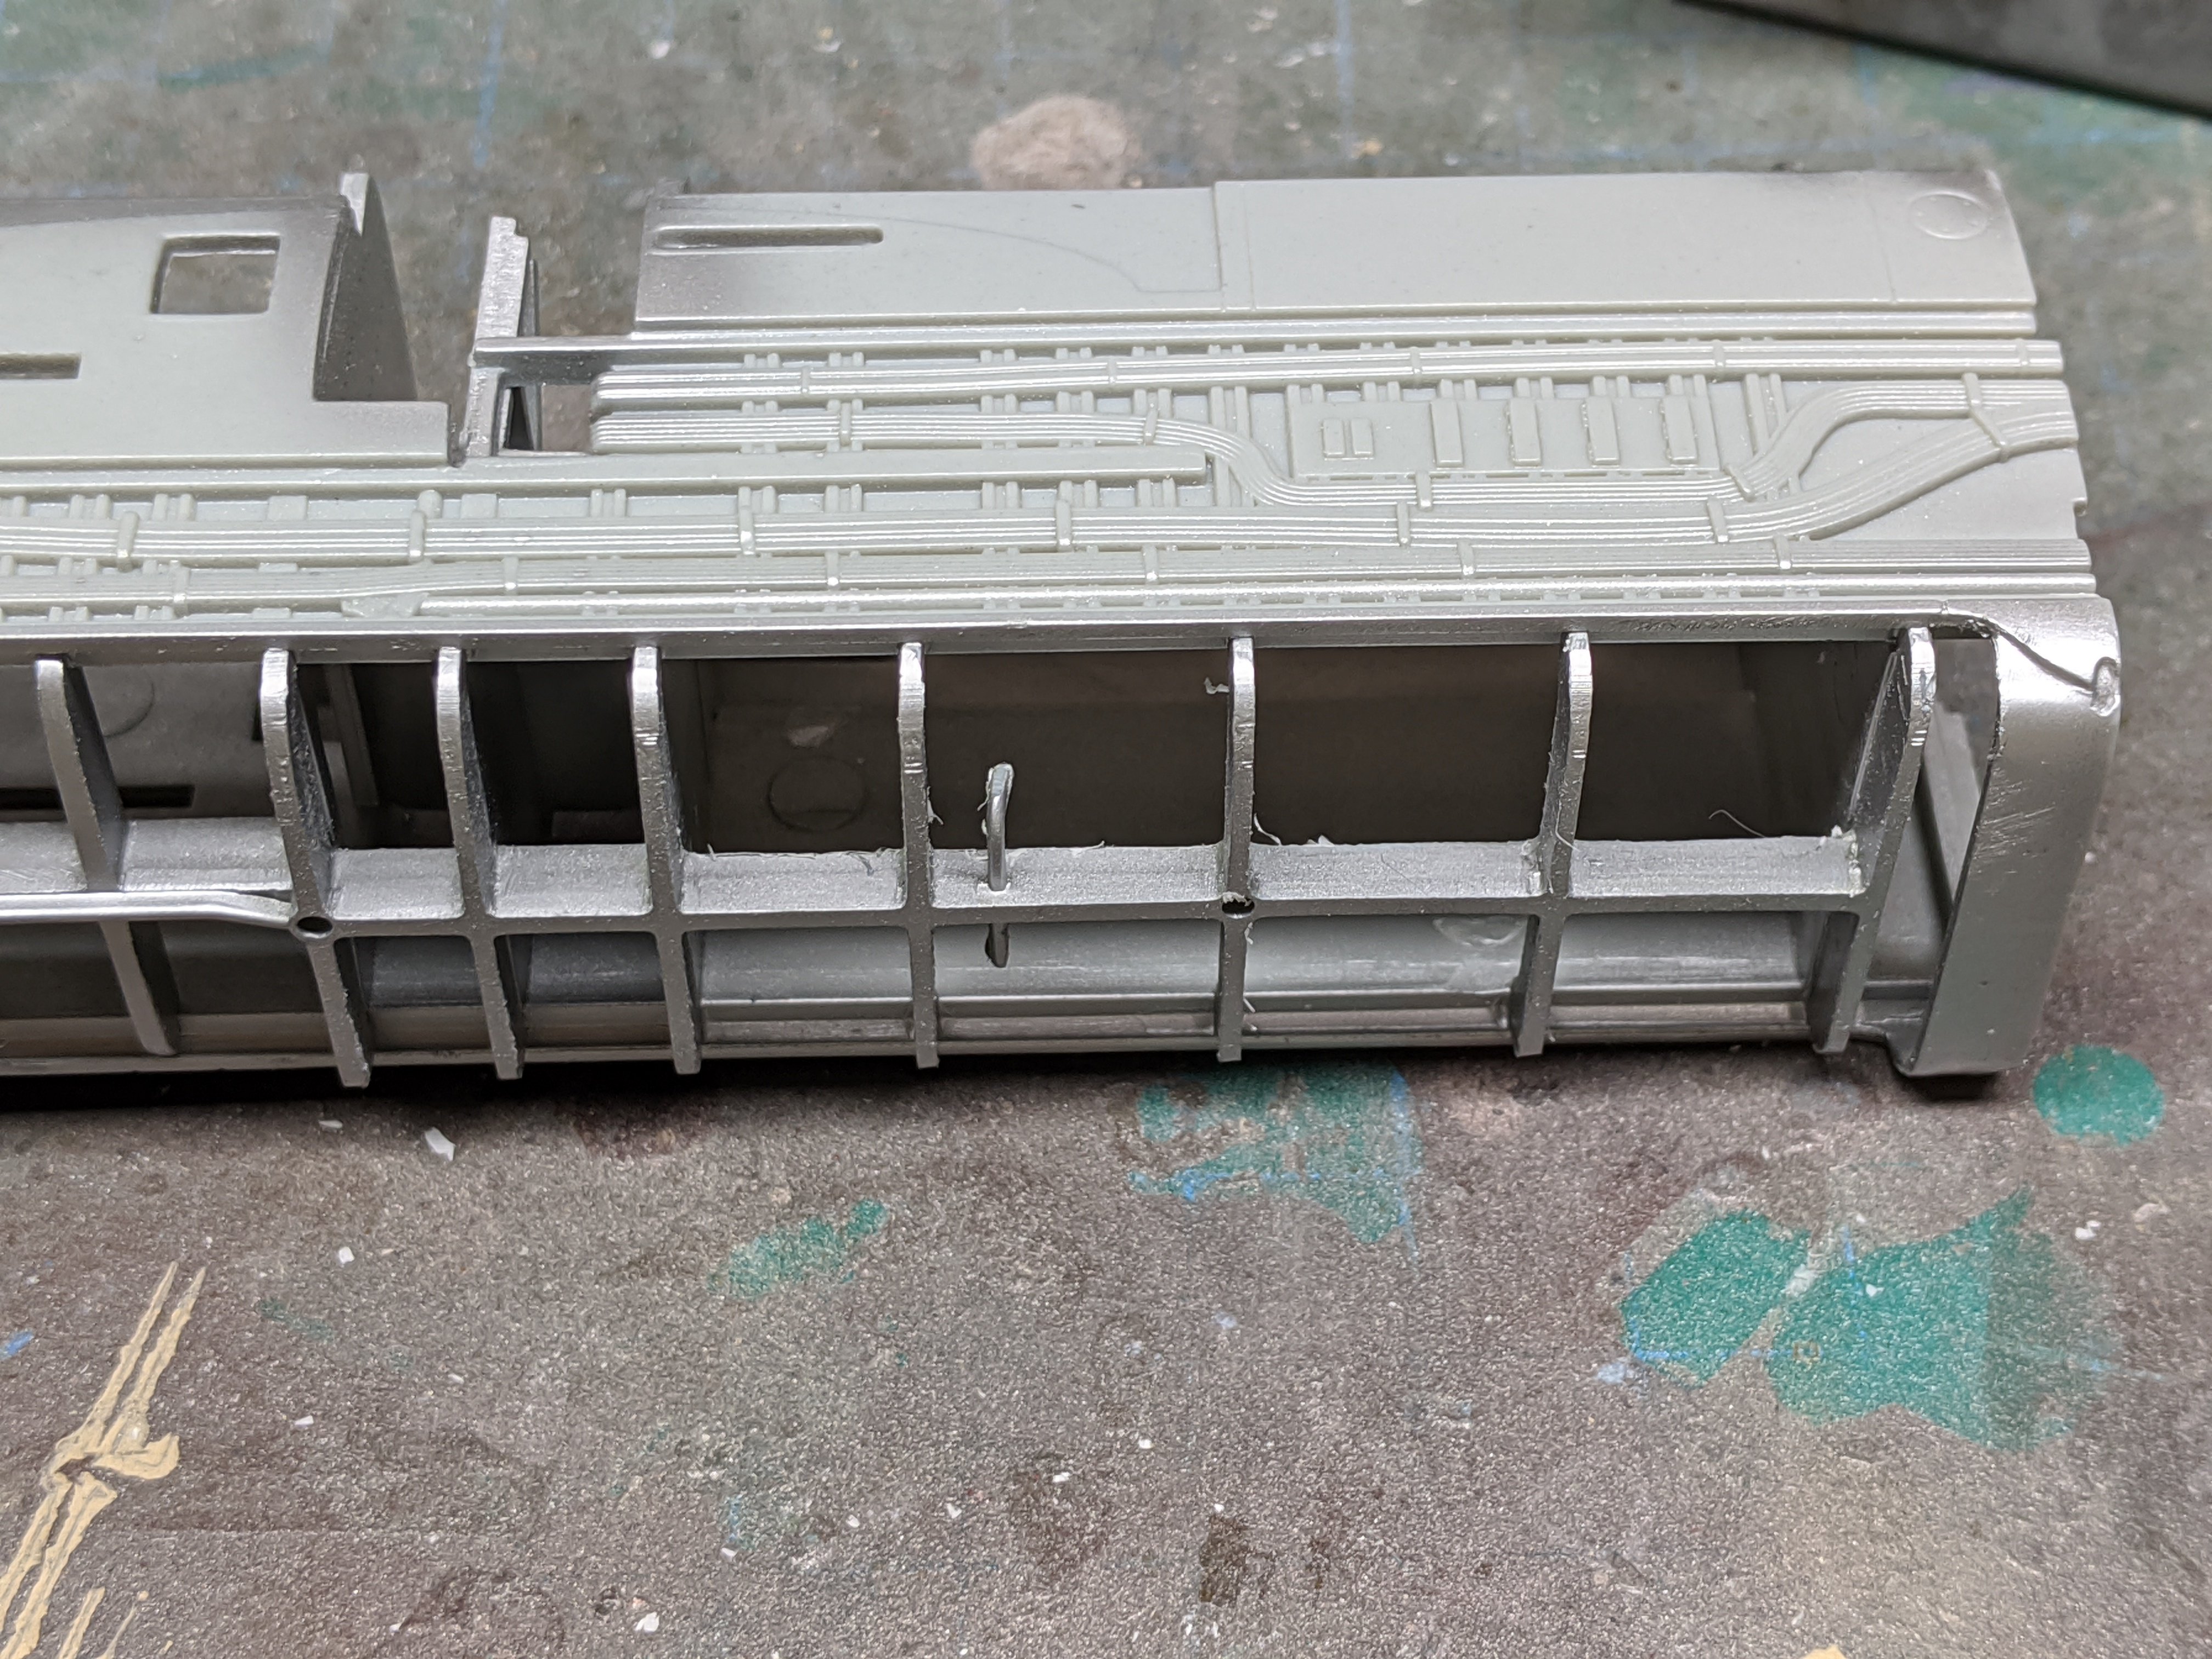
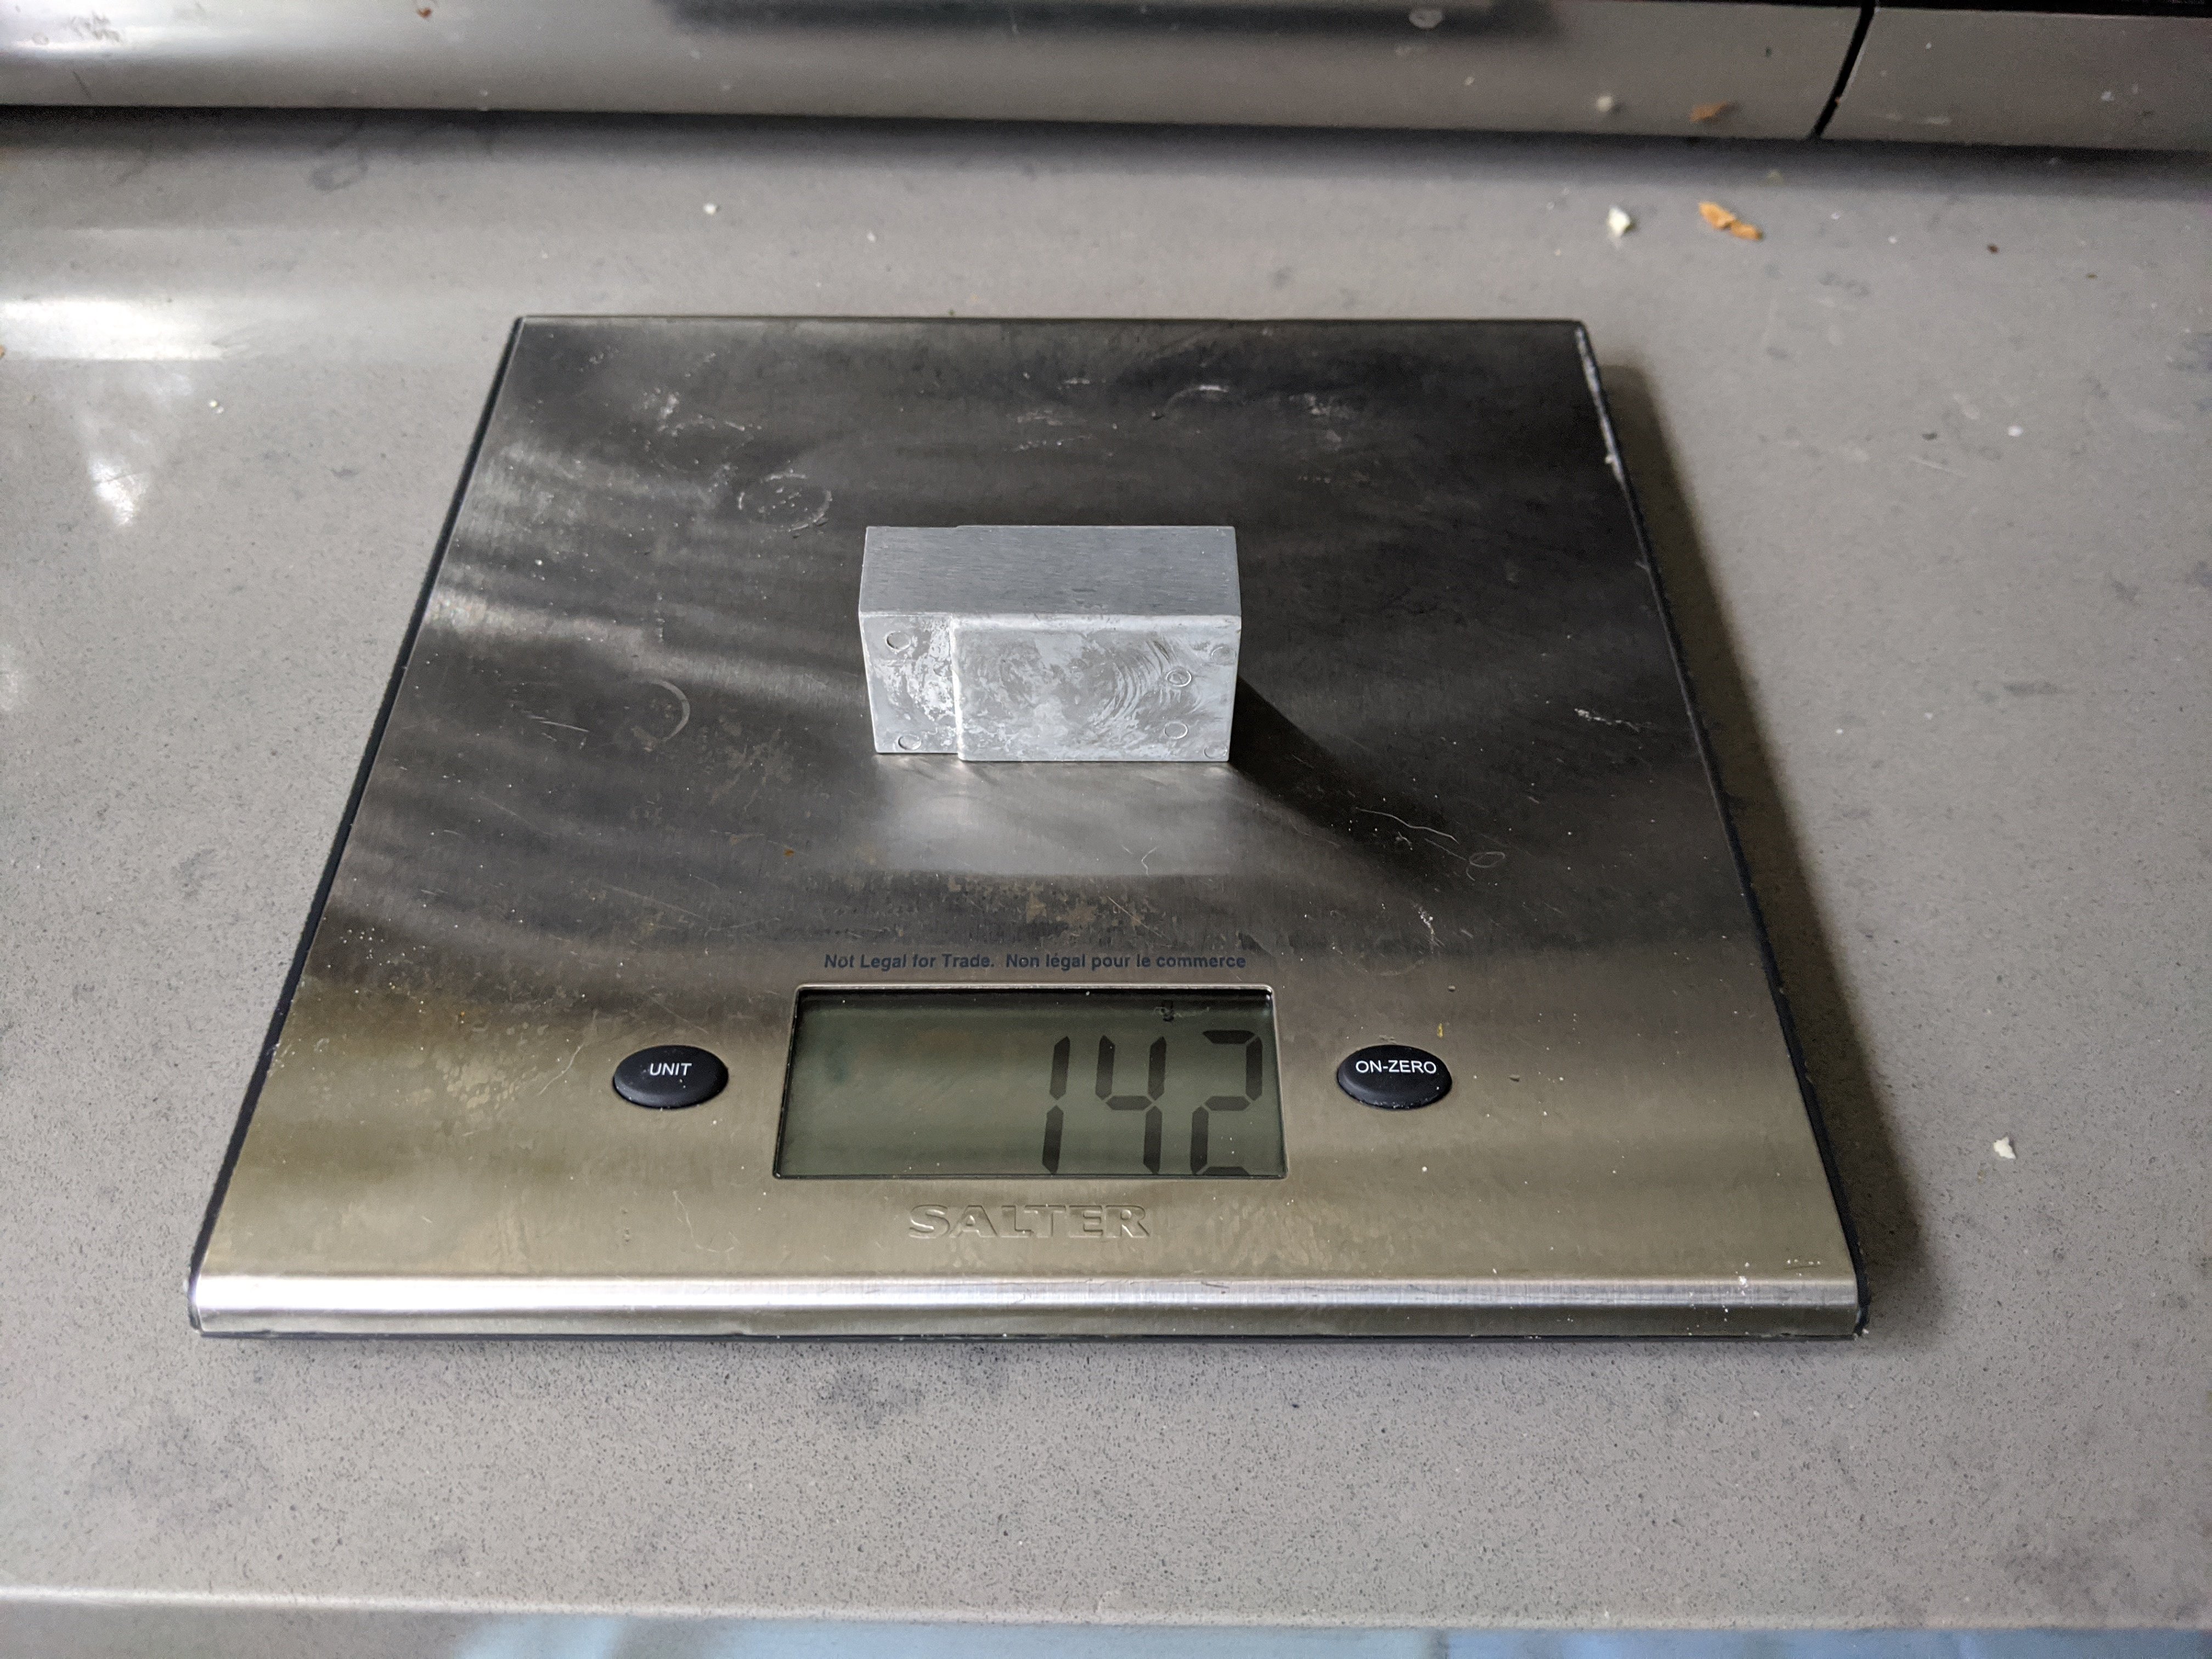
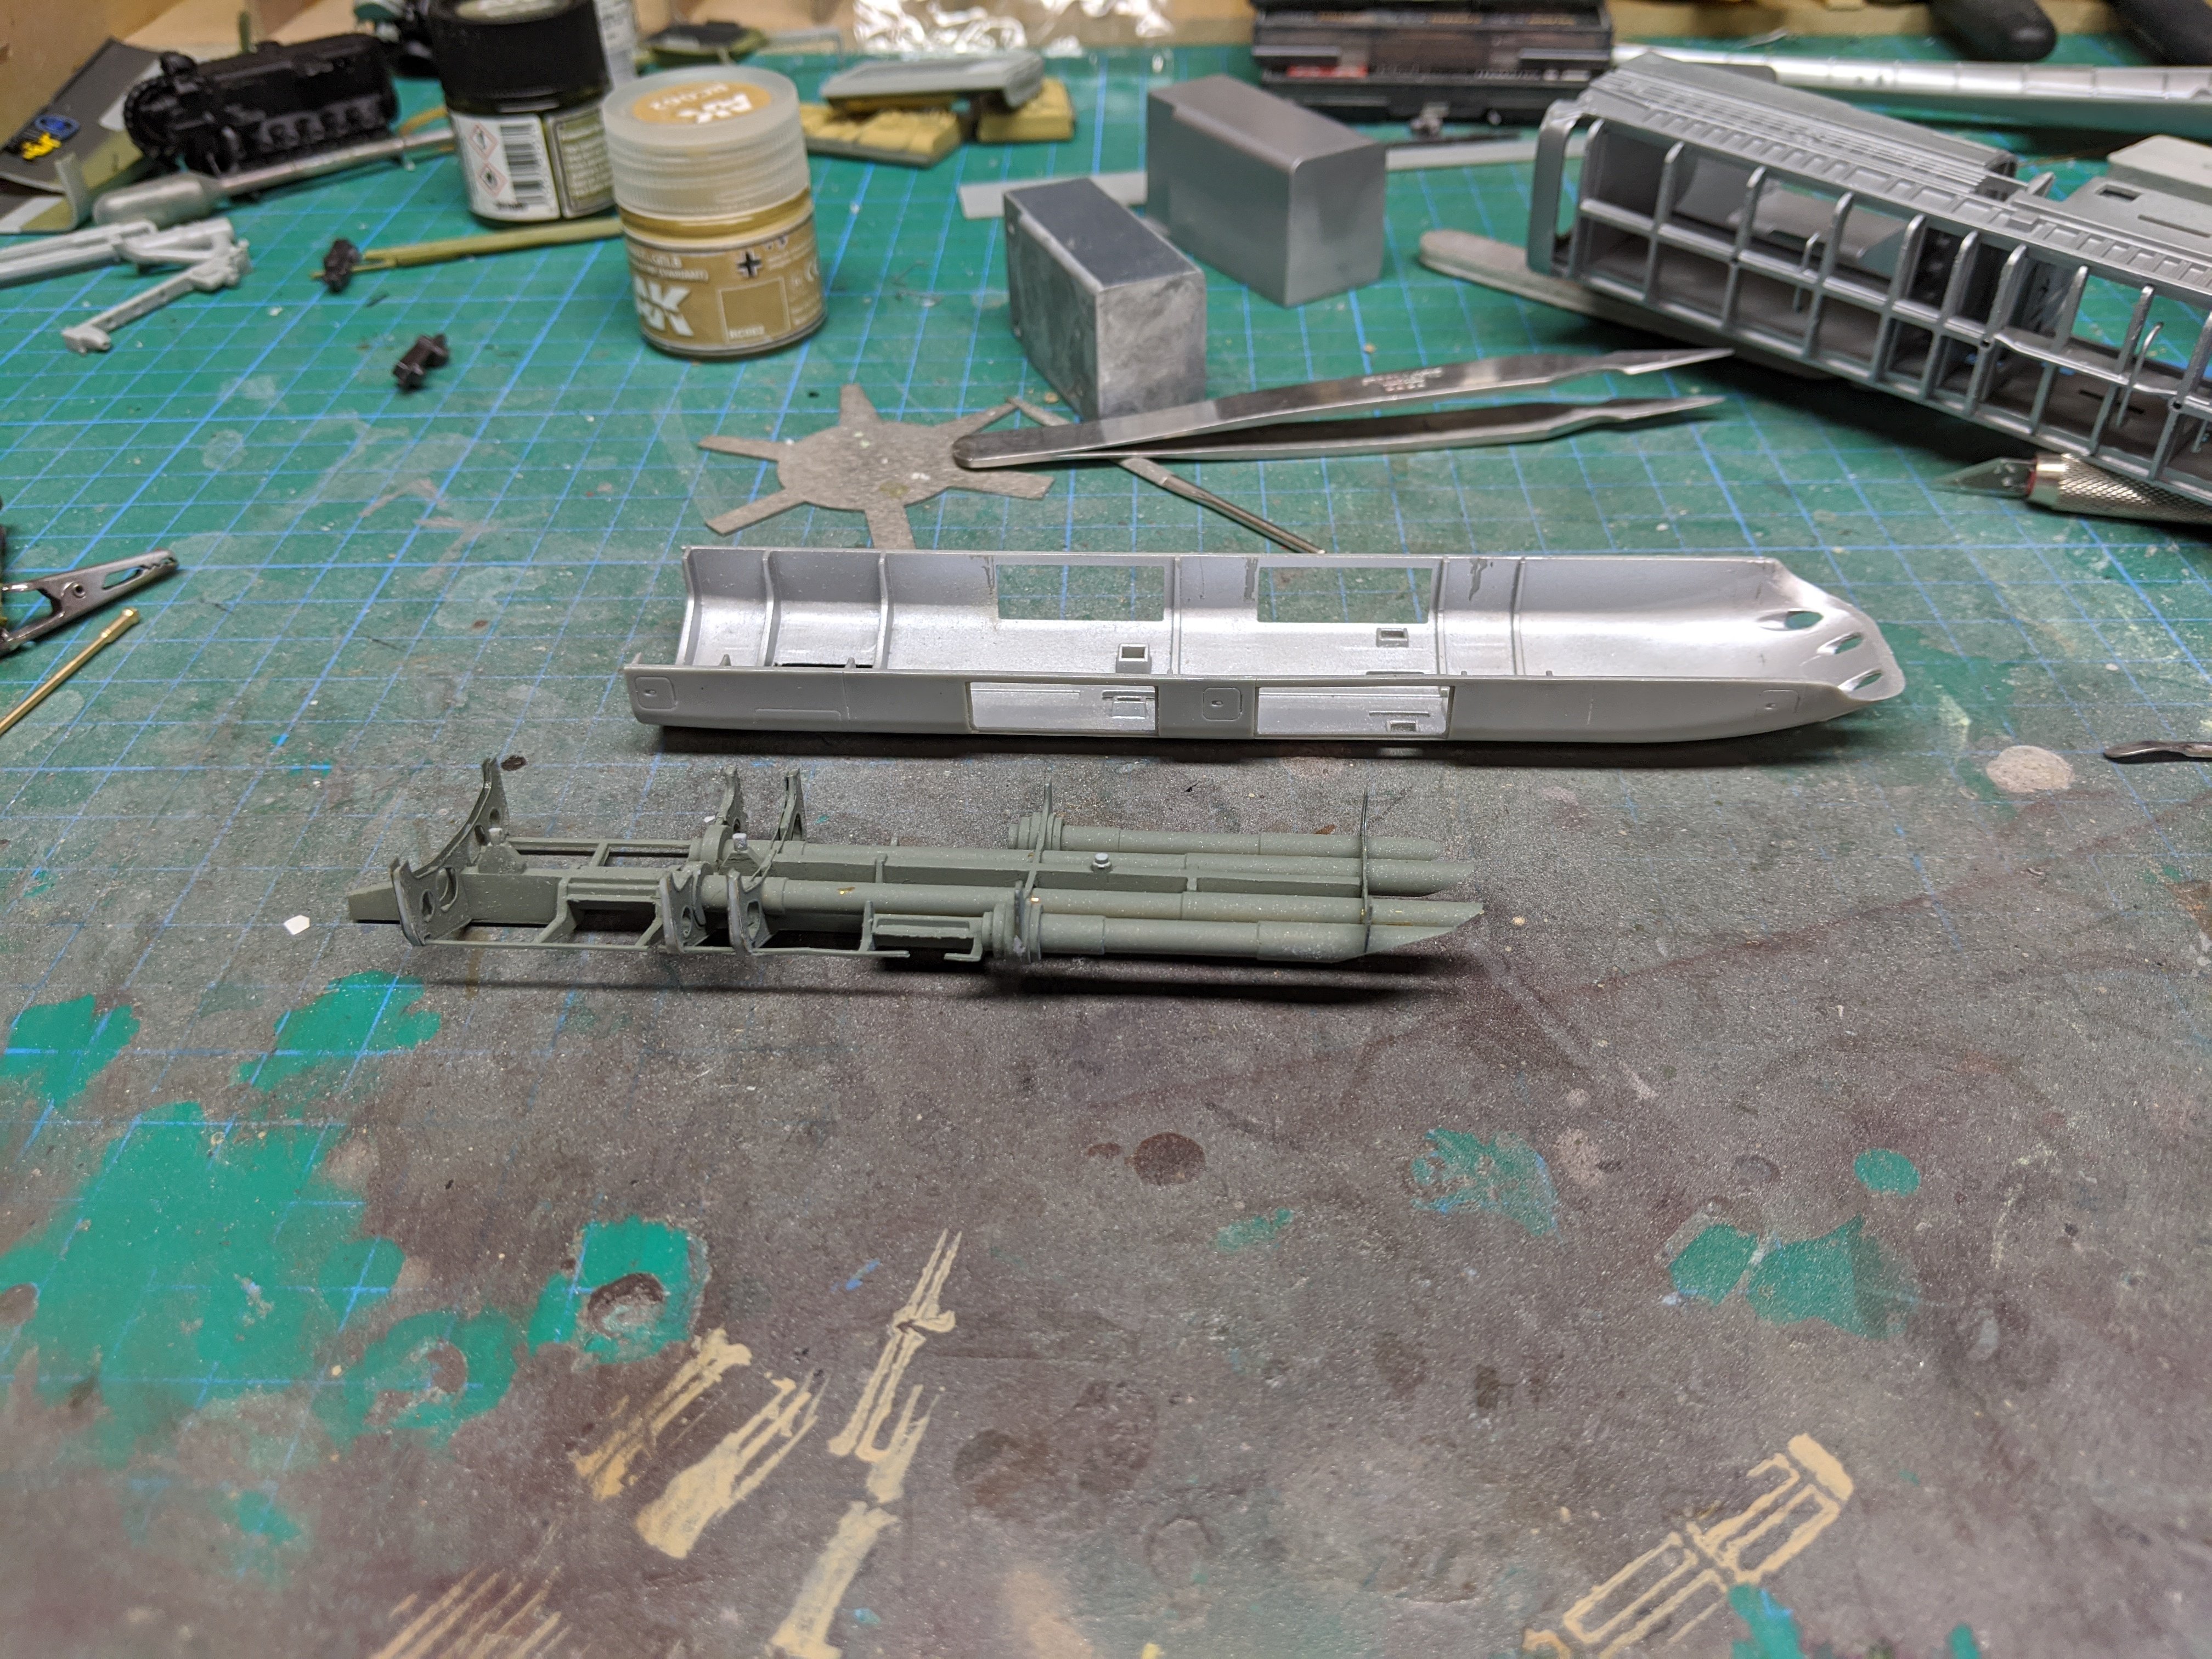
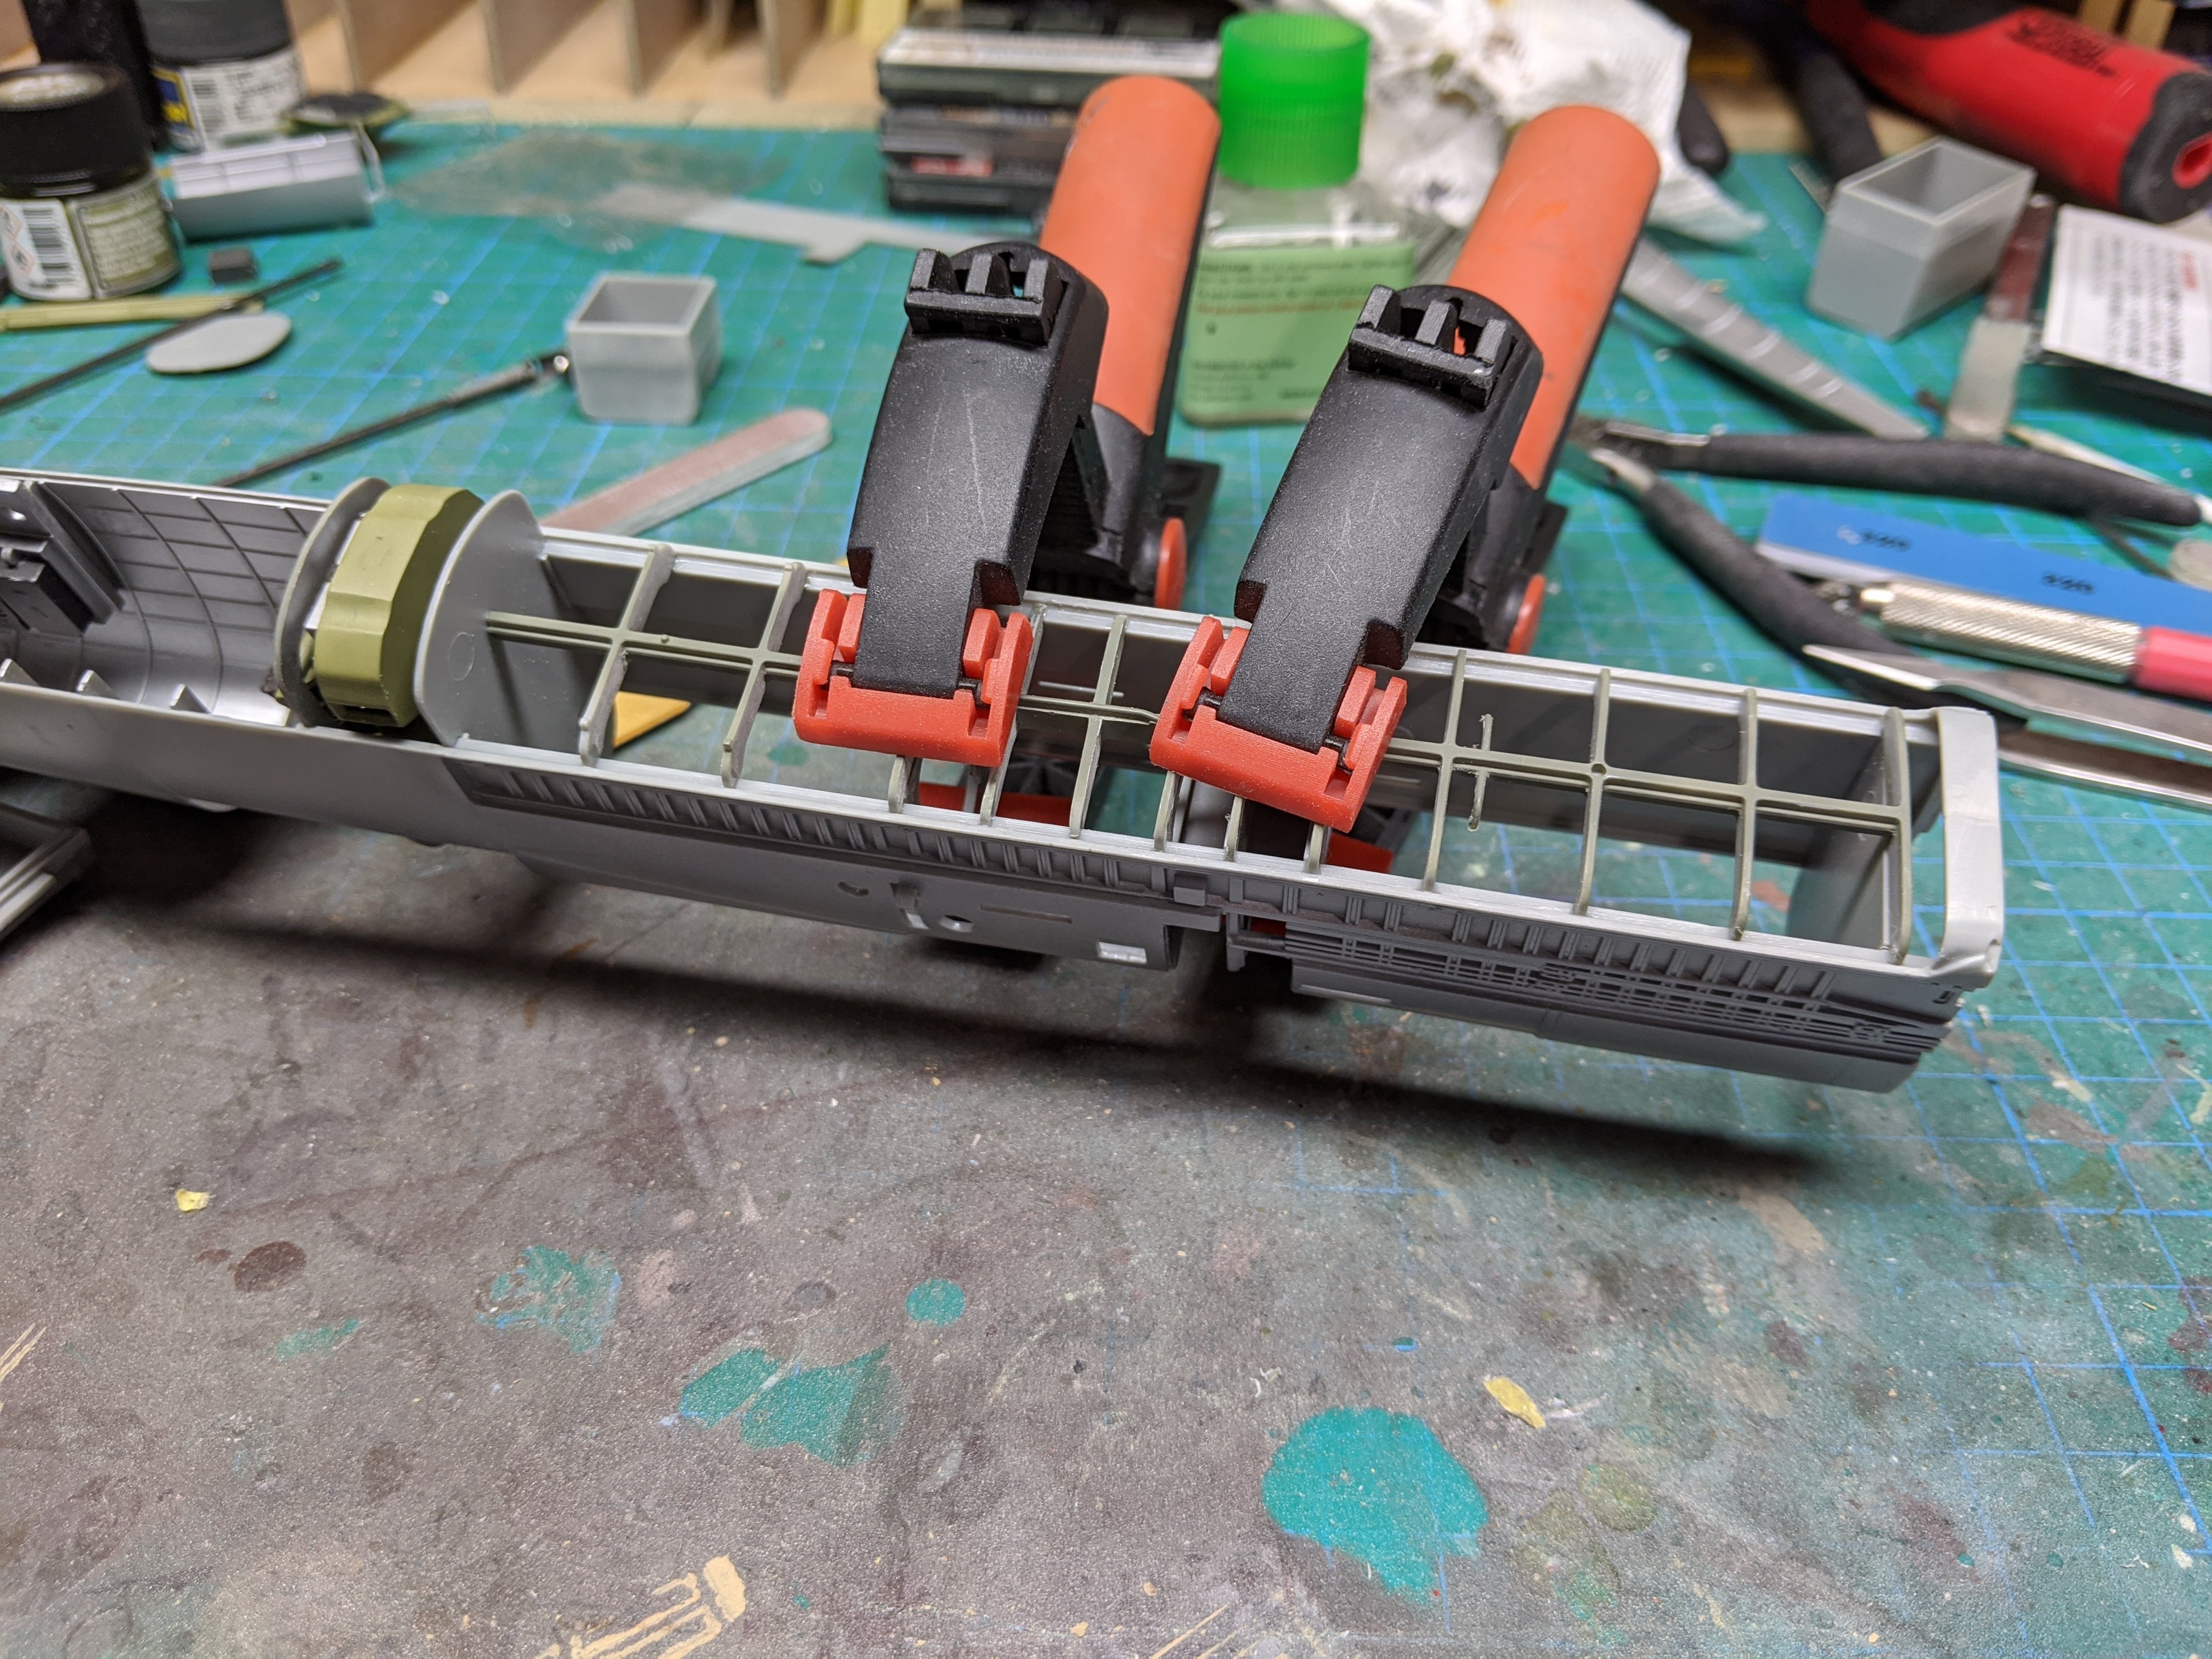
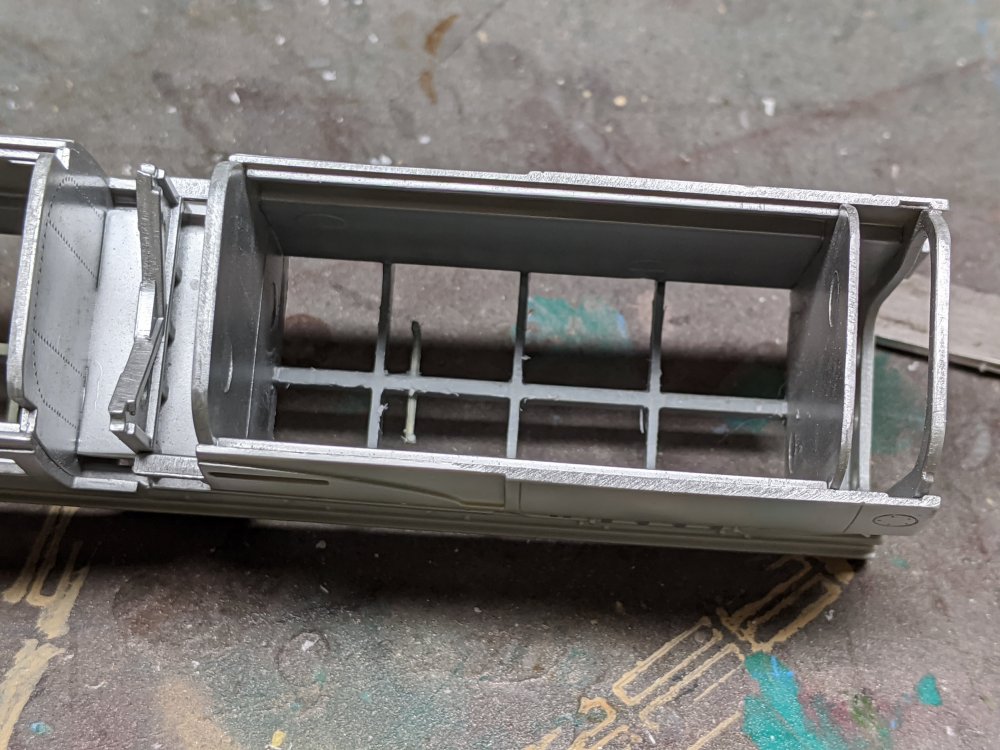
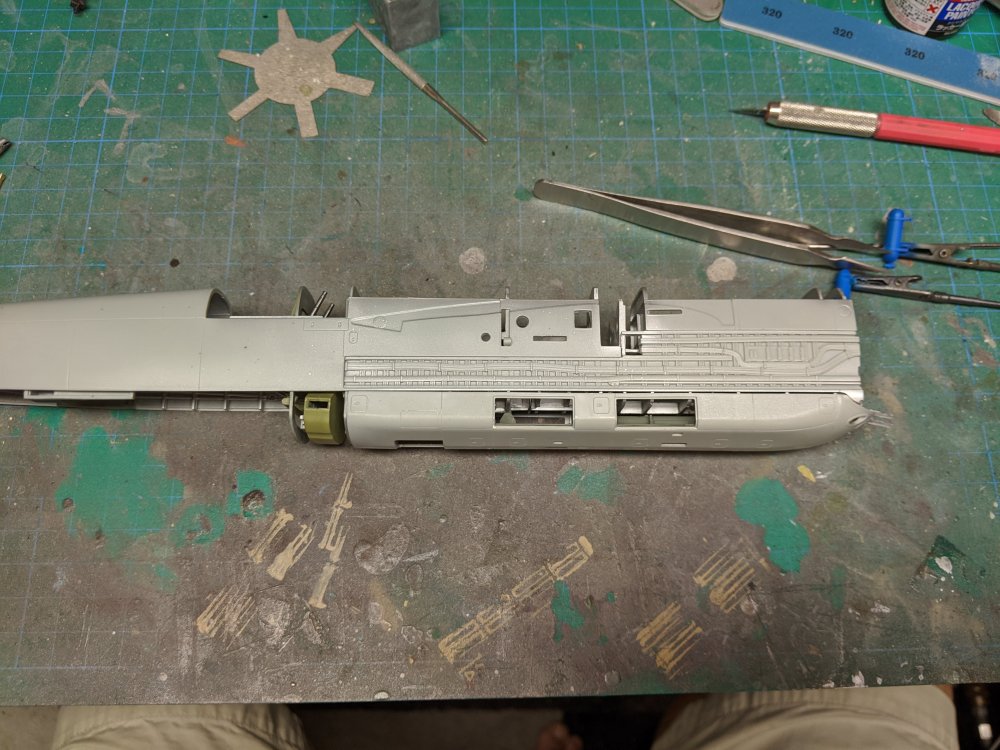
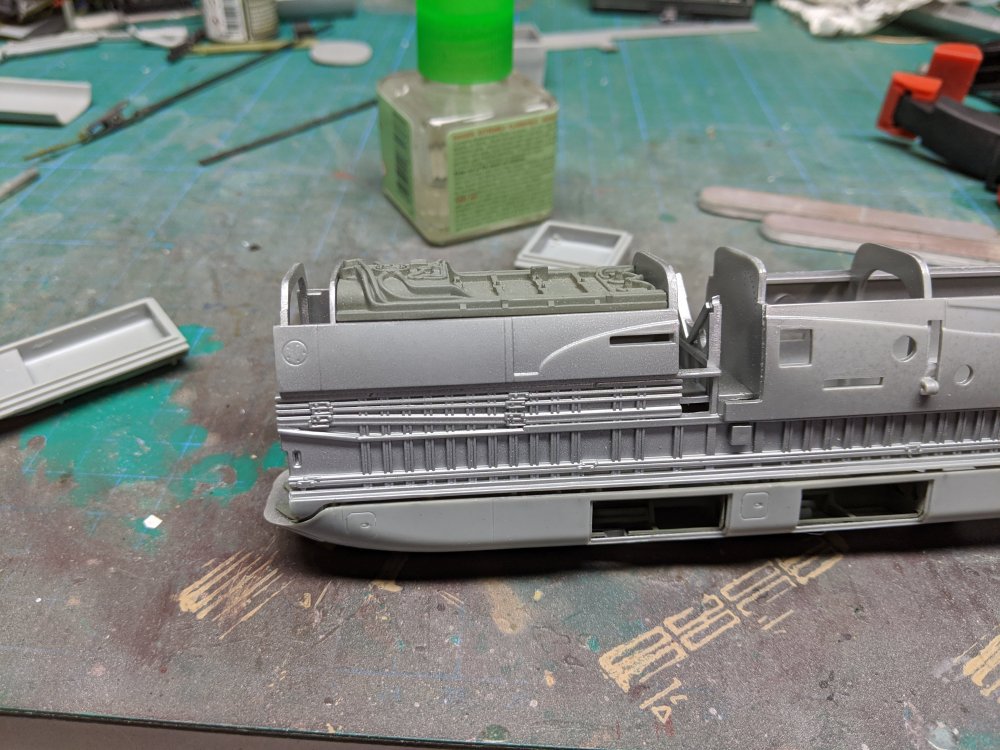
I ran into my first problem on the build. ZM give you a counterweight that goes inside the forward fuselage tank. For some reason, the cover plate won't fit. It fits perfectly without the weight in place. I thought it might be the placement guides on the bottom but nope, the weight itself is too tall. Looks like they didn't machine enough off the top of the weight. There's enough room under the cover plate that I won't bother joining the two together. Since no else had mentioned this issue, I'm figuring it's a one off. Meantime, I started work on the lower fuselage. The rear section had an internal walkway that will be visible from the topside so I painted that with a wood pattern. Unfortunately the wood graining came out a bit on the light side. I then fitted the lower ribs. This goes above the ventral gun pack. After installation, it confirmed something I was concerned about. I had added the ZM PE details and brass blast tubes to the gun pack. They create just enough interference that the gun pack doesn't sit flush. Leaving the guts out, everything fits perfectly. With the framework and blast tubes in, there's a slight gap around the front and about 1/2 way down each side. I might be able to clamp it or I can leave it removable and live with the gap. Another option is leave the internals out and display them separately.


-
Hopefully I'll be able to still make Vegas next year. Carl
-
What is on your bench right now ? Share a picture :)
BlrwestSiR replied to Martinnfb's topic in Modelling Discussion
Trying to get a decent gloss finish is the biggest challenge. Preferably one without dust or hair in it too. It's kind of fun building a model of something we own so give it a shot Phil. So far, these are the models of some of the cars I've owned that I can find: - 1991 Honda Beat by Aoshima - 1988 EF Civic by Aoshima - 2000 EK Civic by Revell - 2002 EP Civic by Fujimi - 2006, 2008, 2009 FD Civic by Interallied and Hasbro. That last one is a Transformer. Just need to find a 1997 Dodge Caravan, 2011 Scion XB and and 2009 Honda FIT/Jazz and I'll have a model of every car I've owned. So far. Carl