


BlrwestSiR
-
Posts
9,163 -
Joined
-
Last visited
Content Type
Profiles
Forums
Events
Gallery
Everything posted by BlrwestSiR
-
Not a kit you see built that often so this should be good to see. You could always do the one seen in Fast and Furious 7.
-
That works for me nicely. I'm just waiting on missiles from Reskit to arrive and then I can finish the build. Thanks Martin!
-
See some of you tomorrow!
-
I'm in Chicago visiting family. We spent an hour sheltering during a tornado warning. So much fun. The paint is really coming along there Scott.
-
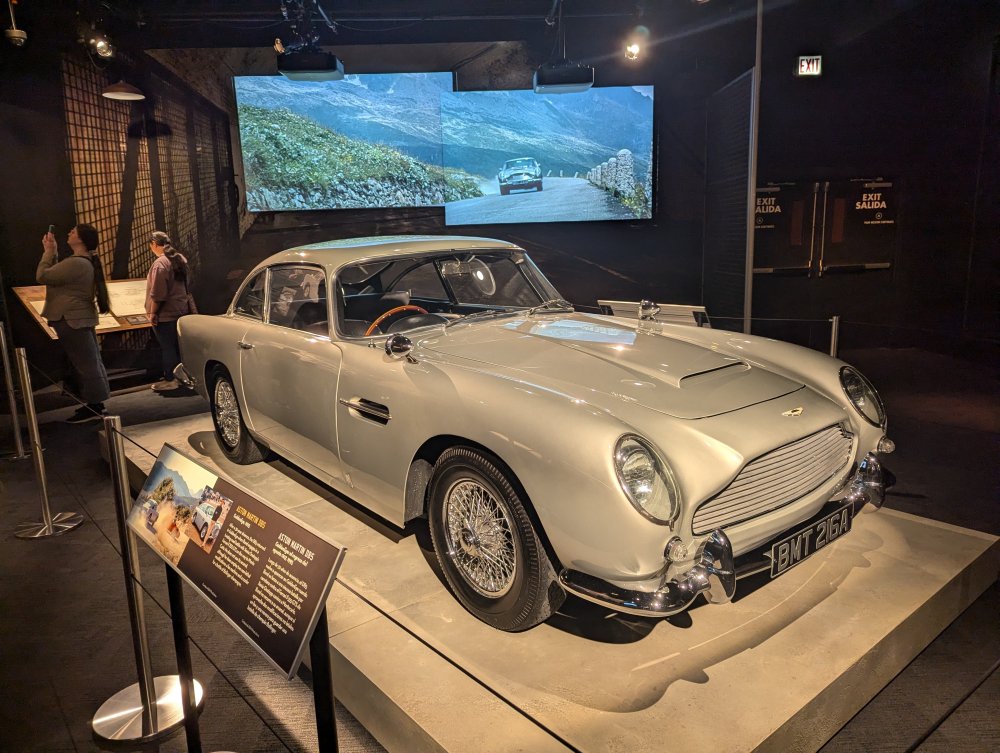
Saw a nice Aston Martin display today. The DBS needed a bit of bodywork though. The Vantage had the optional winter package which would be handy for Canada. Finally there was a really old one in silver.


- 2,036 replies
-
- 6
-

-

-
- car related stuff
- anything about cars
- (and 6 more)
-
Brave man!
-
Glad to hear you managed to avoid a full blown heat stroke. I've been out in some of the heat the past few days up here working on a client's house. I ended up spreading the work over a few days as I was getting wiped out. The Cutlass is looking good under paint.
-
Looks nice and shiny to me.
- 2,036 replies
-
- 2
-
-
-
- car related stuff
- anything about cars
- (and 6 more)
-
 She's starting to look the business there Chris. Nice to have her on her feet too.
 -
Great to see you back at the bench Hubert. That's quite the journey to get back to it. The boundary layer vanes look to be quite the job but you're got a great if tedious solution to it. Carl
-
Eduard Bf-109E RFI
BlrwestSiR replied to JohnB's topic in LSM 1/32 and Larger Aircraft Ready for Inspection
Great looking 109. Awesome and unique camo scheme too. Thanks for doing the paint colour chart too. -
Cobra Coupe - Le Mans - Model Factory Hiro 1/12
BlrwestSiR replied to DocRob's topic in LSM 1/35 and Larger Work In Progress
This will be great to watch. Another kit I'd love to have. -
That is so me yelling at the kids.
-
Eduard 1/32 Bf-109E re-start
BlrwestSiR replied to JohnB's topic in LSM 1/35 and Larger Work In Progress
Nice paintwork there John. Can't believe youre onto decals already. -
Fiat 500/600 build Topic
BlrwestSiR replied to FullArmor's topic in LSM 1/35 and Larger Work In Progress
The leather looks very good to me as does the rest of the interior. -
What is on your bench right now ? Share a picture :)
BlrwestSiR replied to Martinnfb's topic in Modelling Discussion
I haven't much time at the bench over the last few days but I did manage to get a pearl coat onto the front of the LUV. It's probably hard to see in the pics but it definitely has a subtle pearl finish.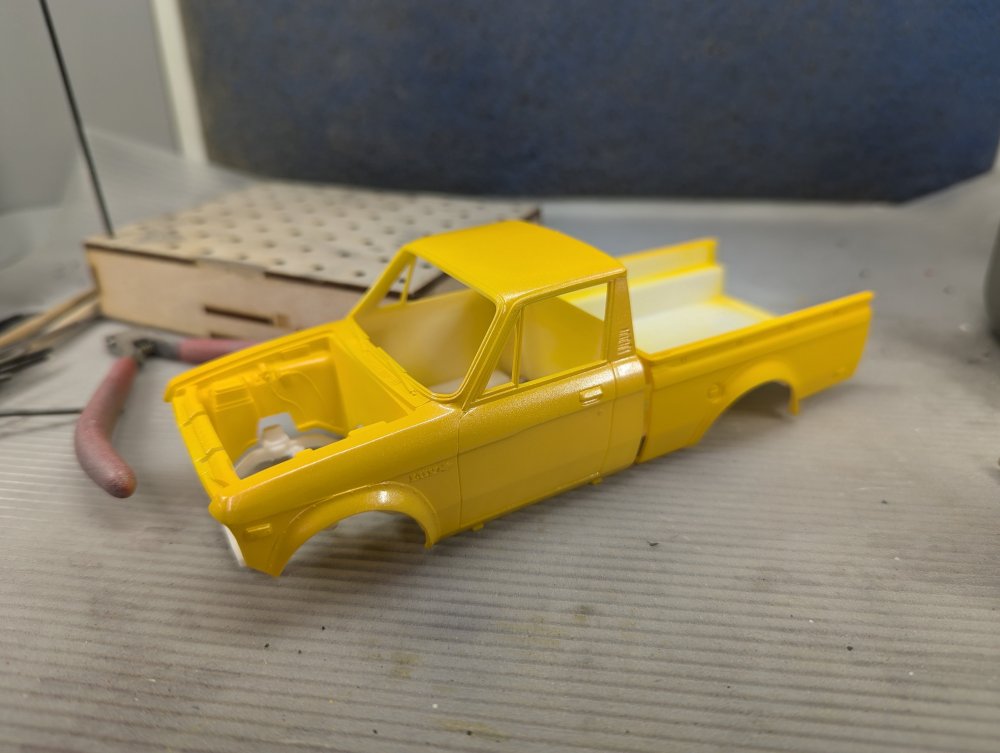
-
These days I do the same. Having learned the hard way, it only makes sense. Same with the kits that have a full engine option. Nine times out of ten, I build what's needed and don't bother with the rest. The Border Lancs are nice in that they give you the dummy engine for that very reason. Then there's the time savings involved.
-
Chris, like the others have said look after your mom first. We can all wait a bit more for your masterpiece. For the gear, the main legs use a screw through the leg and into the wheel. Just drill a slightly small hole in the resin wheel and screw it in place. You can add some slow CA to get a better hold if you want. On the nose, I use a brass rod to replace the screw. Cut one long enough to go through the leg that sticks out on either side wide enough to mount the wheels. This time drill a hole the same size as the rod. Hope that helps.
-
What is on your bench right now ? Share a picture :)
BlrwestSiR replied to Martinnfb's topic in Modelling Discussion
Usually it is. She does get upset if I move around too much. -
McLaren MP4/6 Ayrton Senna Fujimi 1/20
BlrwestSiR replied to DocRob's topic in LSM 1/35 and Larger Work In Progress
That's extremely disappointing with regards to the gap. I'd be one to leave the body off and showcase the work you've done on the engine and chassis. -
It certainly was. I had just about every bit of AM made for the kits, plus a bunch of scratch built work. A couple times I wonder if I over reacted but hindsight is 20/20 as they say. Martin yelled at me (in a friendly way) when he found out what I'd done. But as the minion in Holy Grail said,: "it's only a model!"
-
Tim, it's very tempting and I did consider that option. But I'm still not sure I'm up to another try at the kit. The first two I started ended up binned when I fell down the rabbit hole of continuously adding details to them and then it felt like it was never going to end.
-
What is on your bench right now ? Share a picture :)
BlrwestSiR replied to Martinnfb's topic in Modelling Discussion
Fantastic setup there Hubert. Nice to see other folks' bench spaces. The Colombia looks great too. Lovely job on the restoration. Carl -
Thanks for the heads-up Scott.but you're right, they won't ship to Canada. At that price I would have taken another crack at a 1/32 B-25. Third time's the charm right?
-
Story of my life.


