GusMac
-
Posts
2,978 -
Joined
-
Last visited
Content Type
Profiles
Forums
Events
Gallery
Everything posted by GusMac
-
Ah, nice. I can imagine a Halifax cockpit could cause a bit of domestic discord! By safe, I take it you mean all radium dials, etc have been decontaminated. Interestingly we now use Radium-223 as a treatment for patients with prostate cancer.
-
Wow, very nice Cees. Is this for the museum you assist at?
-

MH 60 s Knighthawk Academy 1/35
GusMac replied to shark64's topic in LSM 1/35 and Larger Work In Progress
Superb! -
Very cool Danny. Another 'head' for the cabinet! My Russian is non-existent but all the extras look a real bonus.
-
Think it must be your internet Rob as the pictures look fine to me. Don't worry Rich, that sort of work area looks very familiar!
-
Stringbag - A Modeller guide to the art of WWI Aircraft
GusMac replied to Fran's topic in Tools, Books & Misc.
Now we know why Jeroen went so quiet on here for a while! Lovely presentation with the 'period' fonts and type-setting and great builds. I've always felt intimidated by the rigging, etc on WnW kits but this might be what persuades me to bite the bullet. Thanks for the great review Fran. -
Thanks Rob, the old Amazon wish list pays off occasionally. I've never built the Eduard one but it gets great reviews.
-
Nice to hear from you again Jeroen, thought you'd gone MIA! Happy New Year.
-
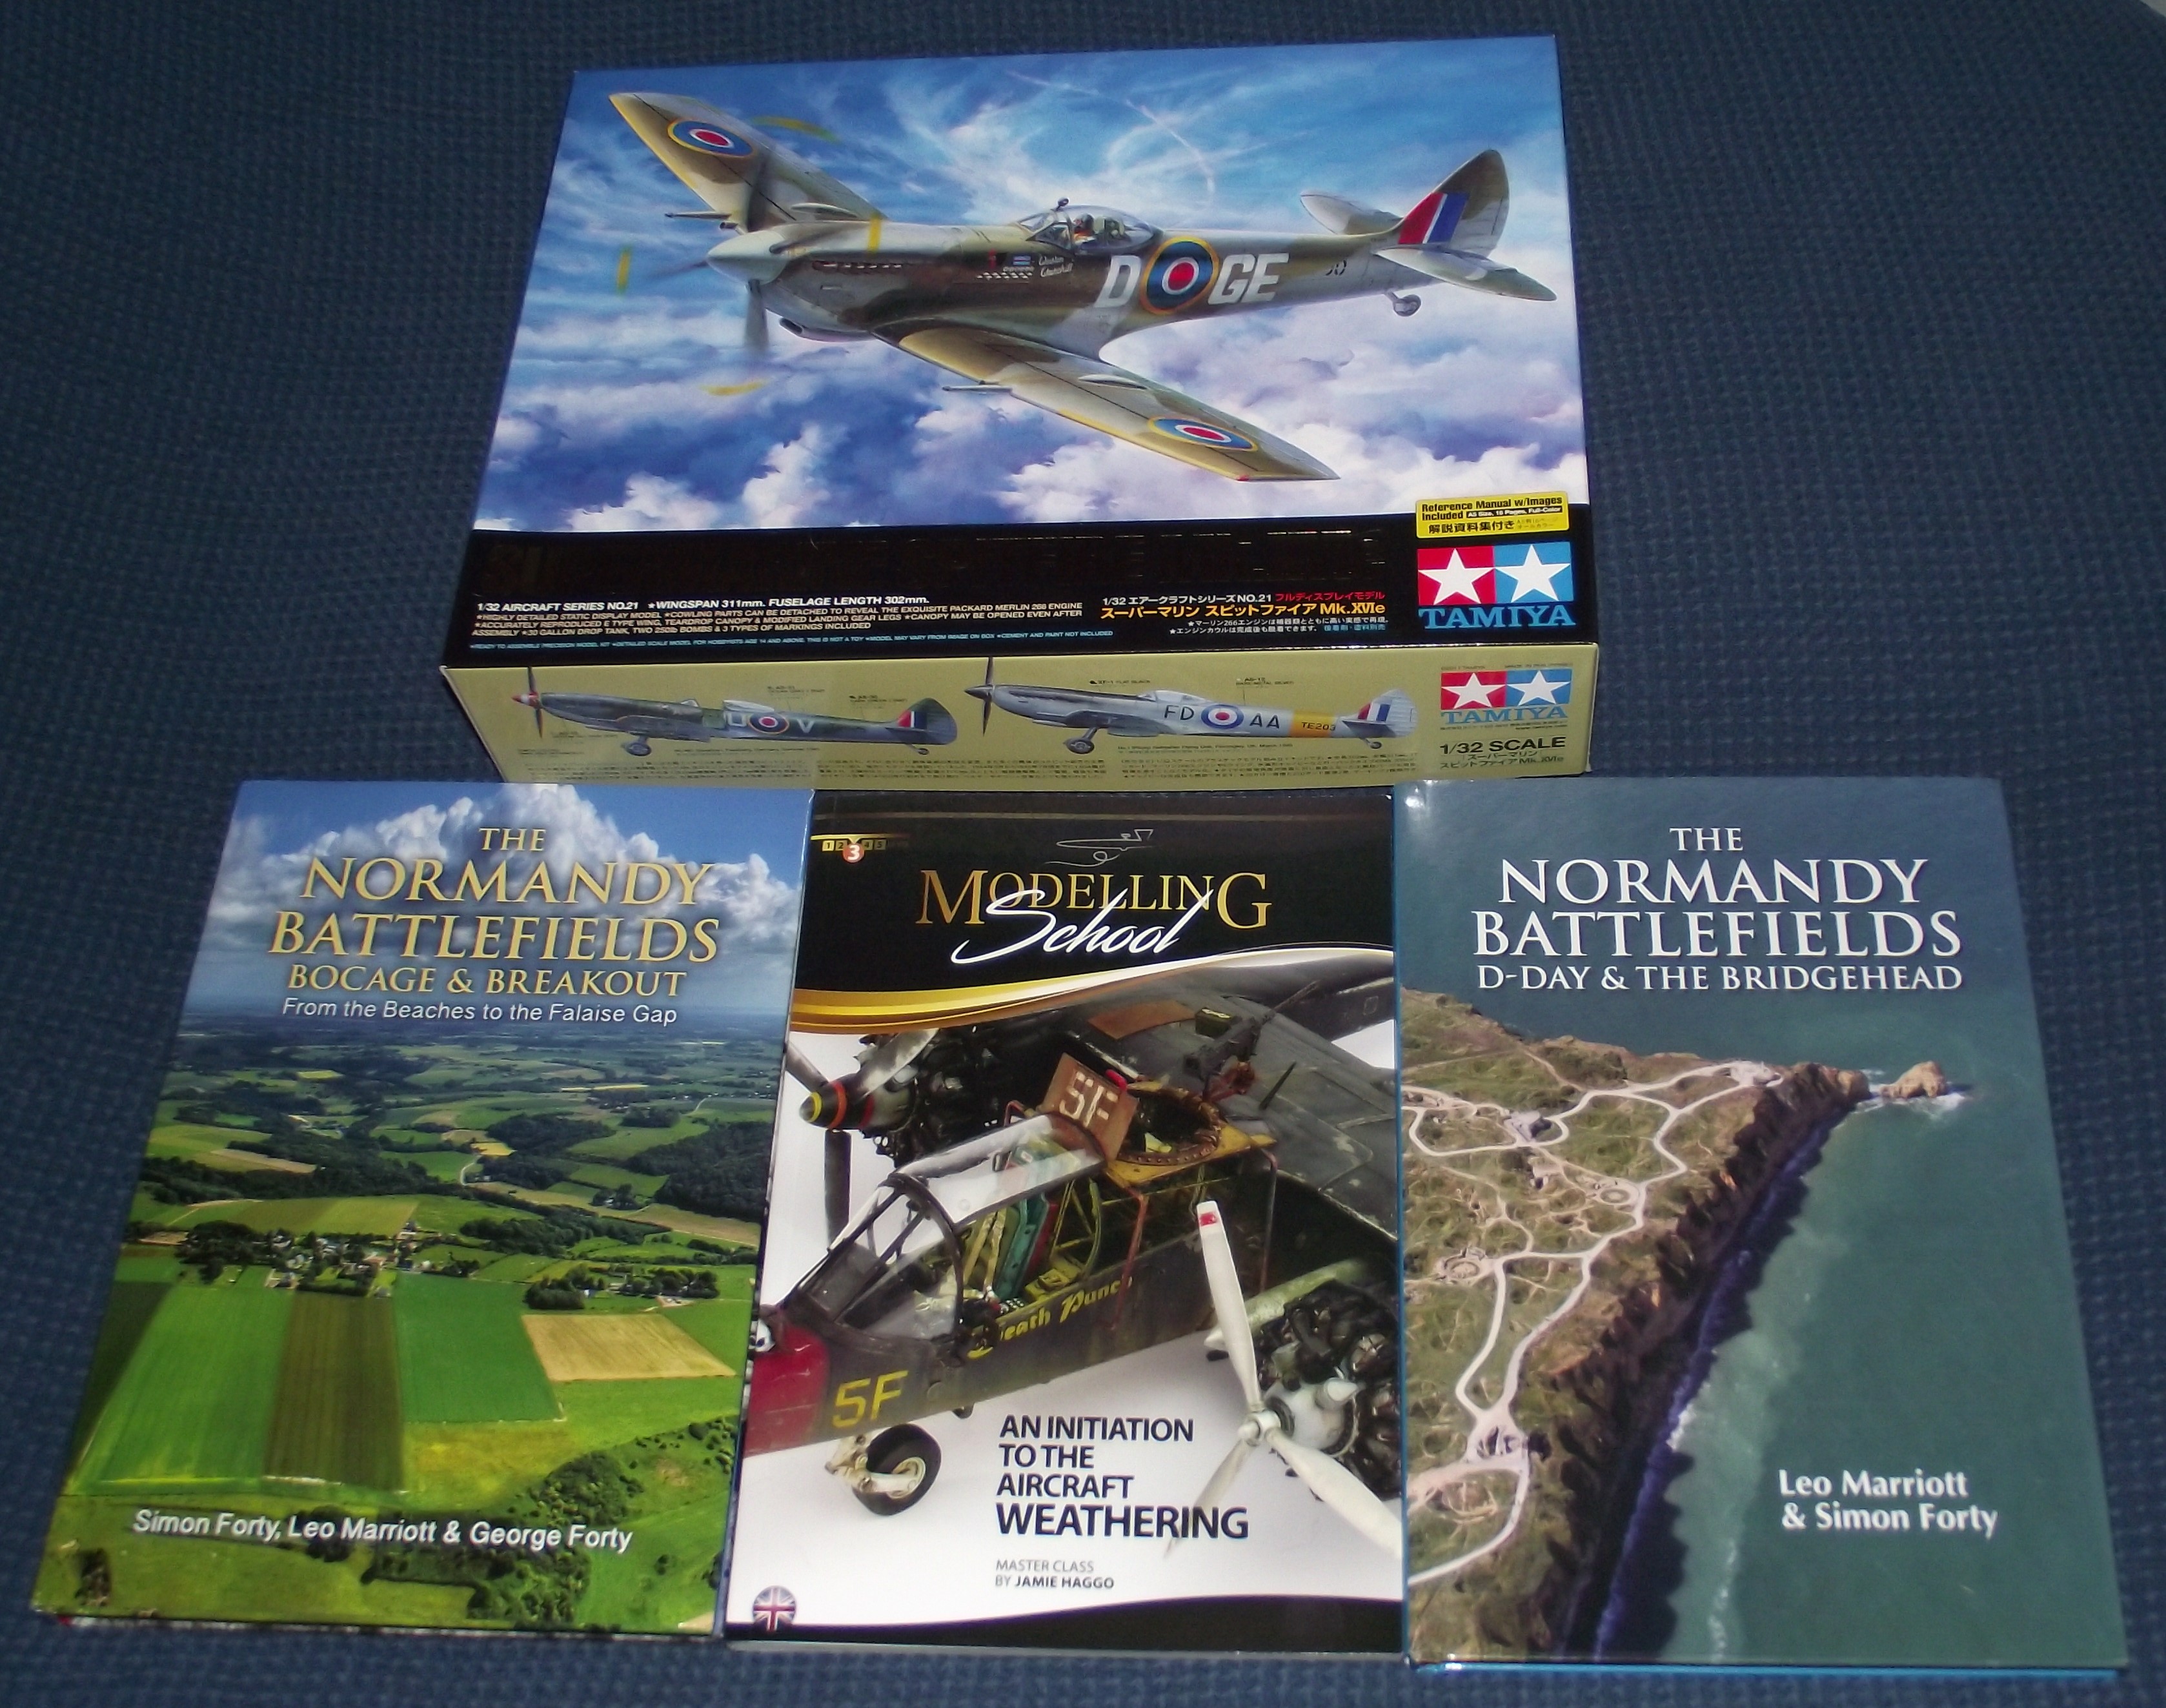
So, it's taken me a little while to post this but here are my modelling related presents from my wife and kids I've always preferred the bubble top Spits (I know I'm weird!) so I'm looking forward to that one as much as anything as it'll be easier to handle than the jets I've done recently. Haven't made much progress on the books but on an initial glance they look great. Cheers, Gus

-
Caterpillar D9 "Bulldozer" - 1:35, based on Meng Models
GusMac replied to elmarriachi's topic in Non LSM 'WIP
Wonderful work again Micha, the weathering is absolutely spot on. -
Well if you get them all Barry it would save you wallpapering ever again. Do fancy the Liberator though, so I hope they do it justice.
-
I can see the pics fine Rich. Batteries look great and you'll always know they're there!
-
Looks nice. Wish somebody would do a Kfir in 32nd scale.
-
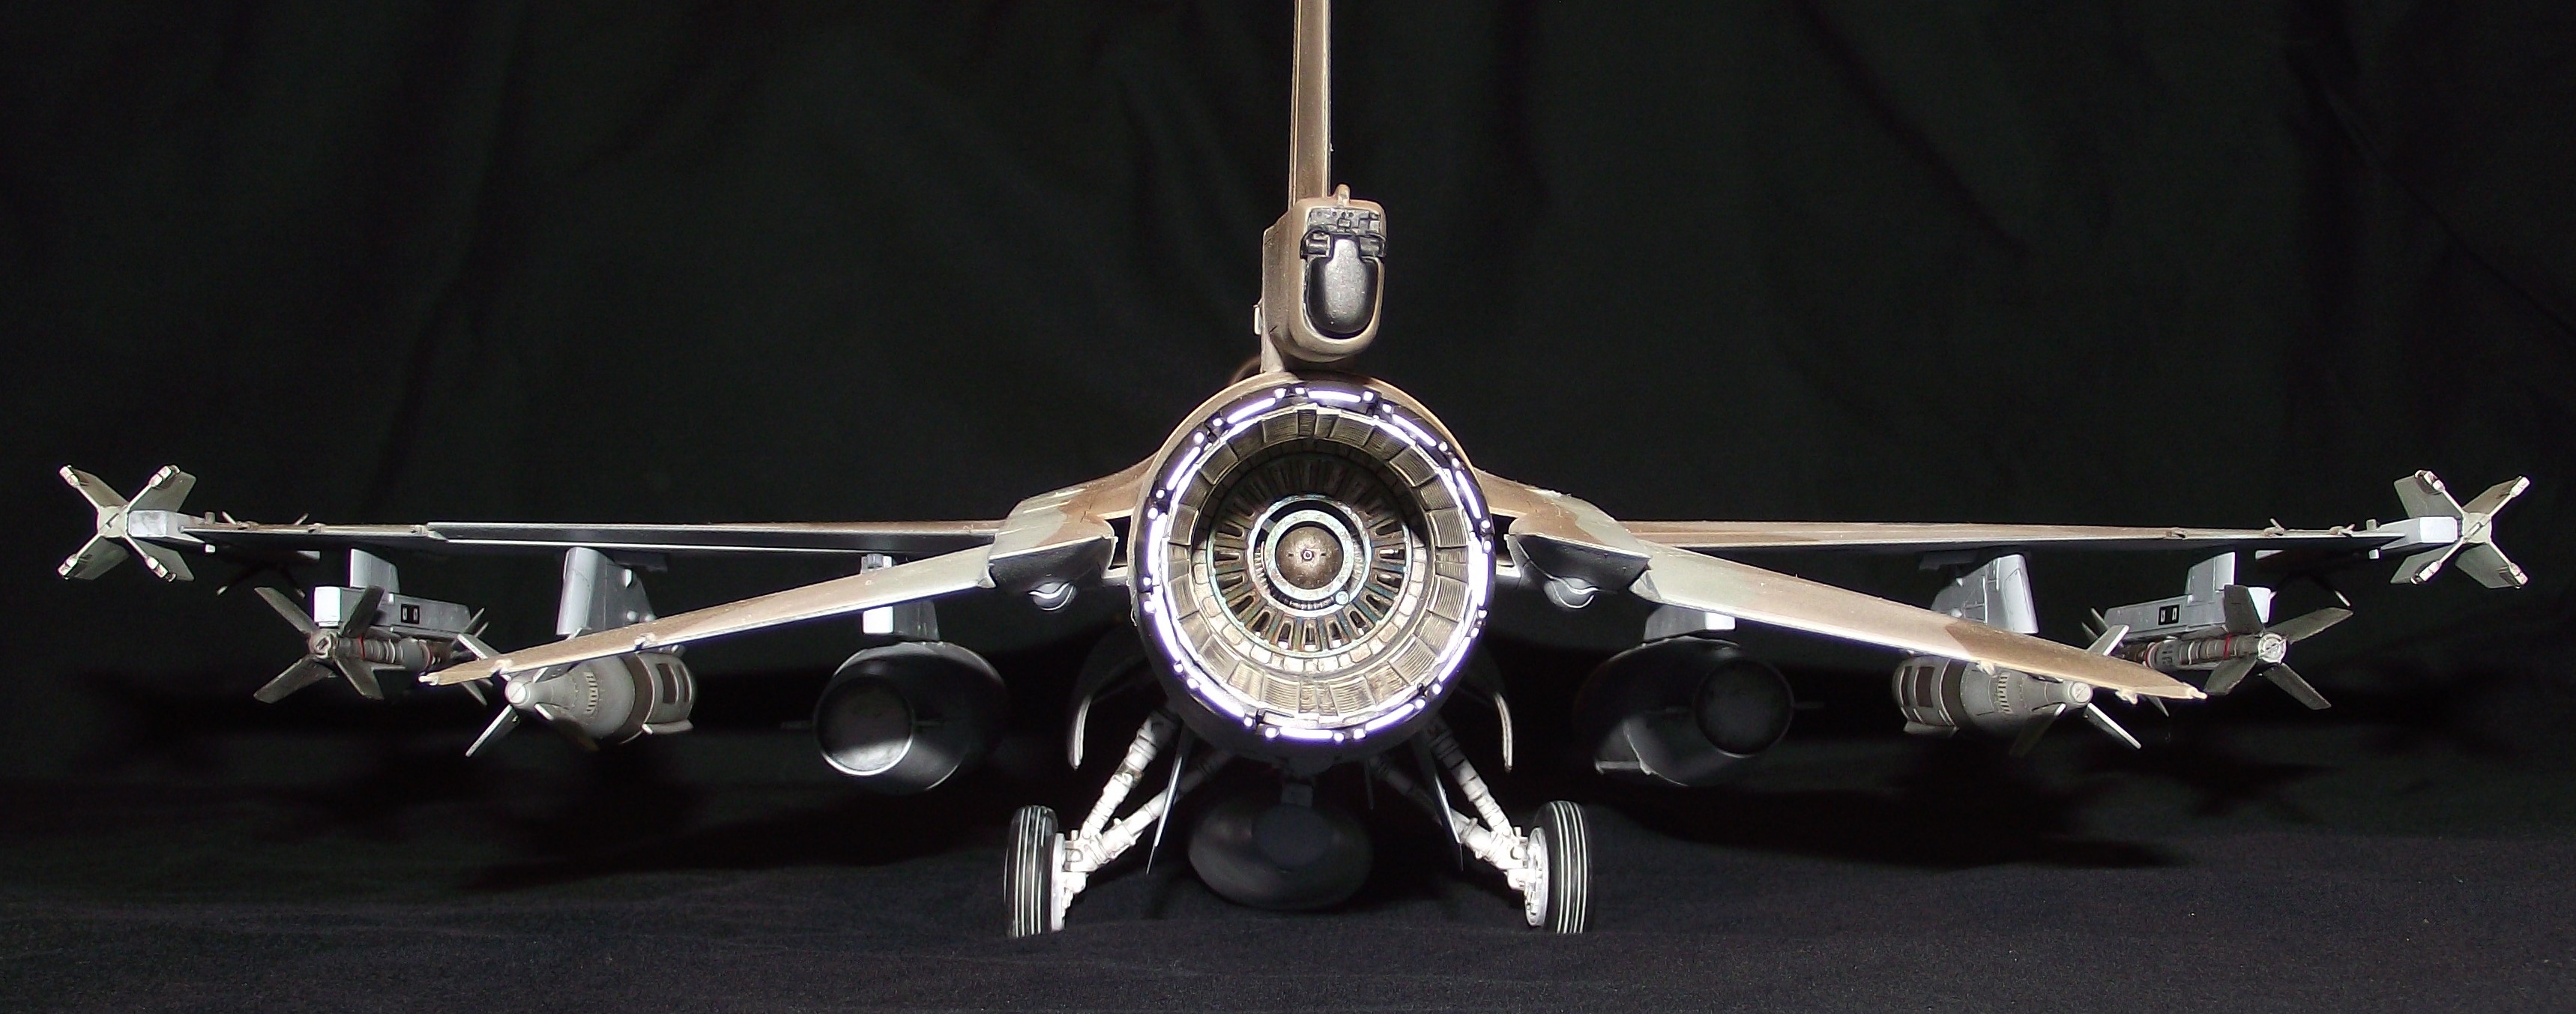
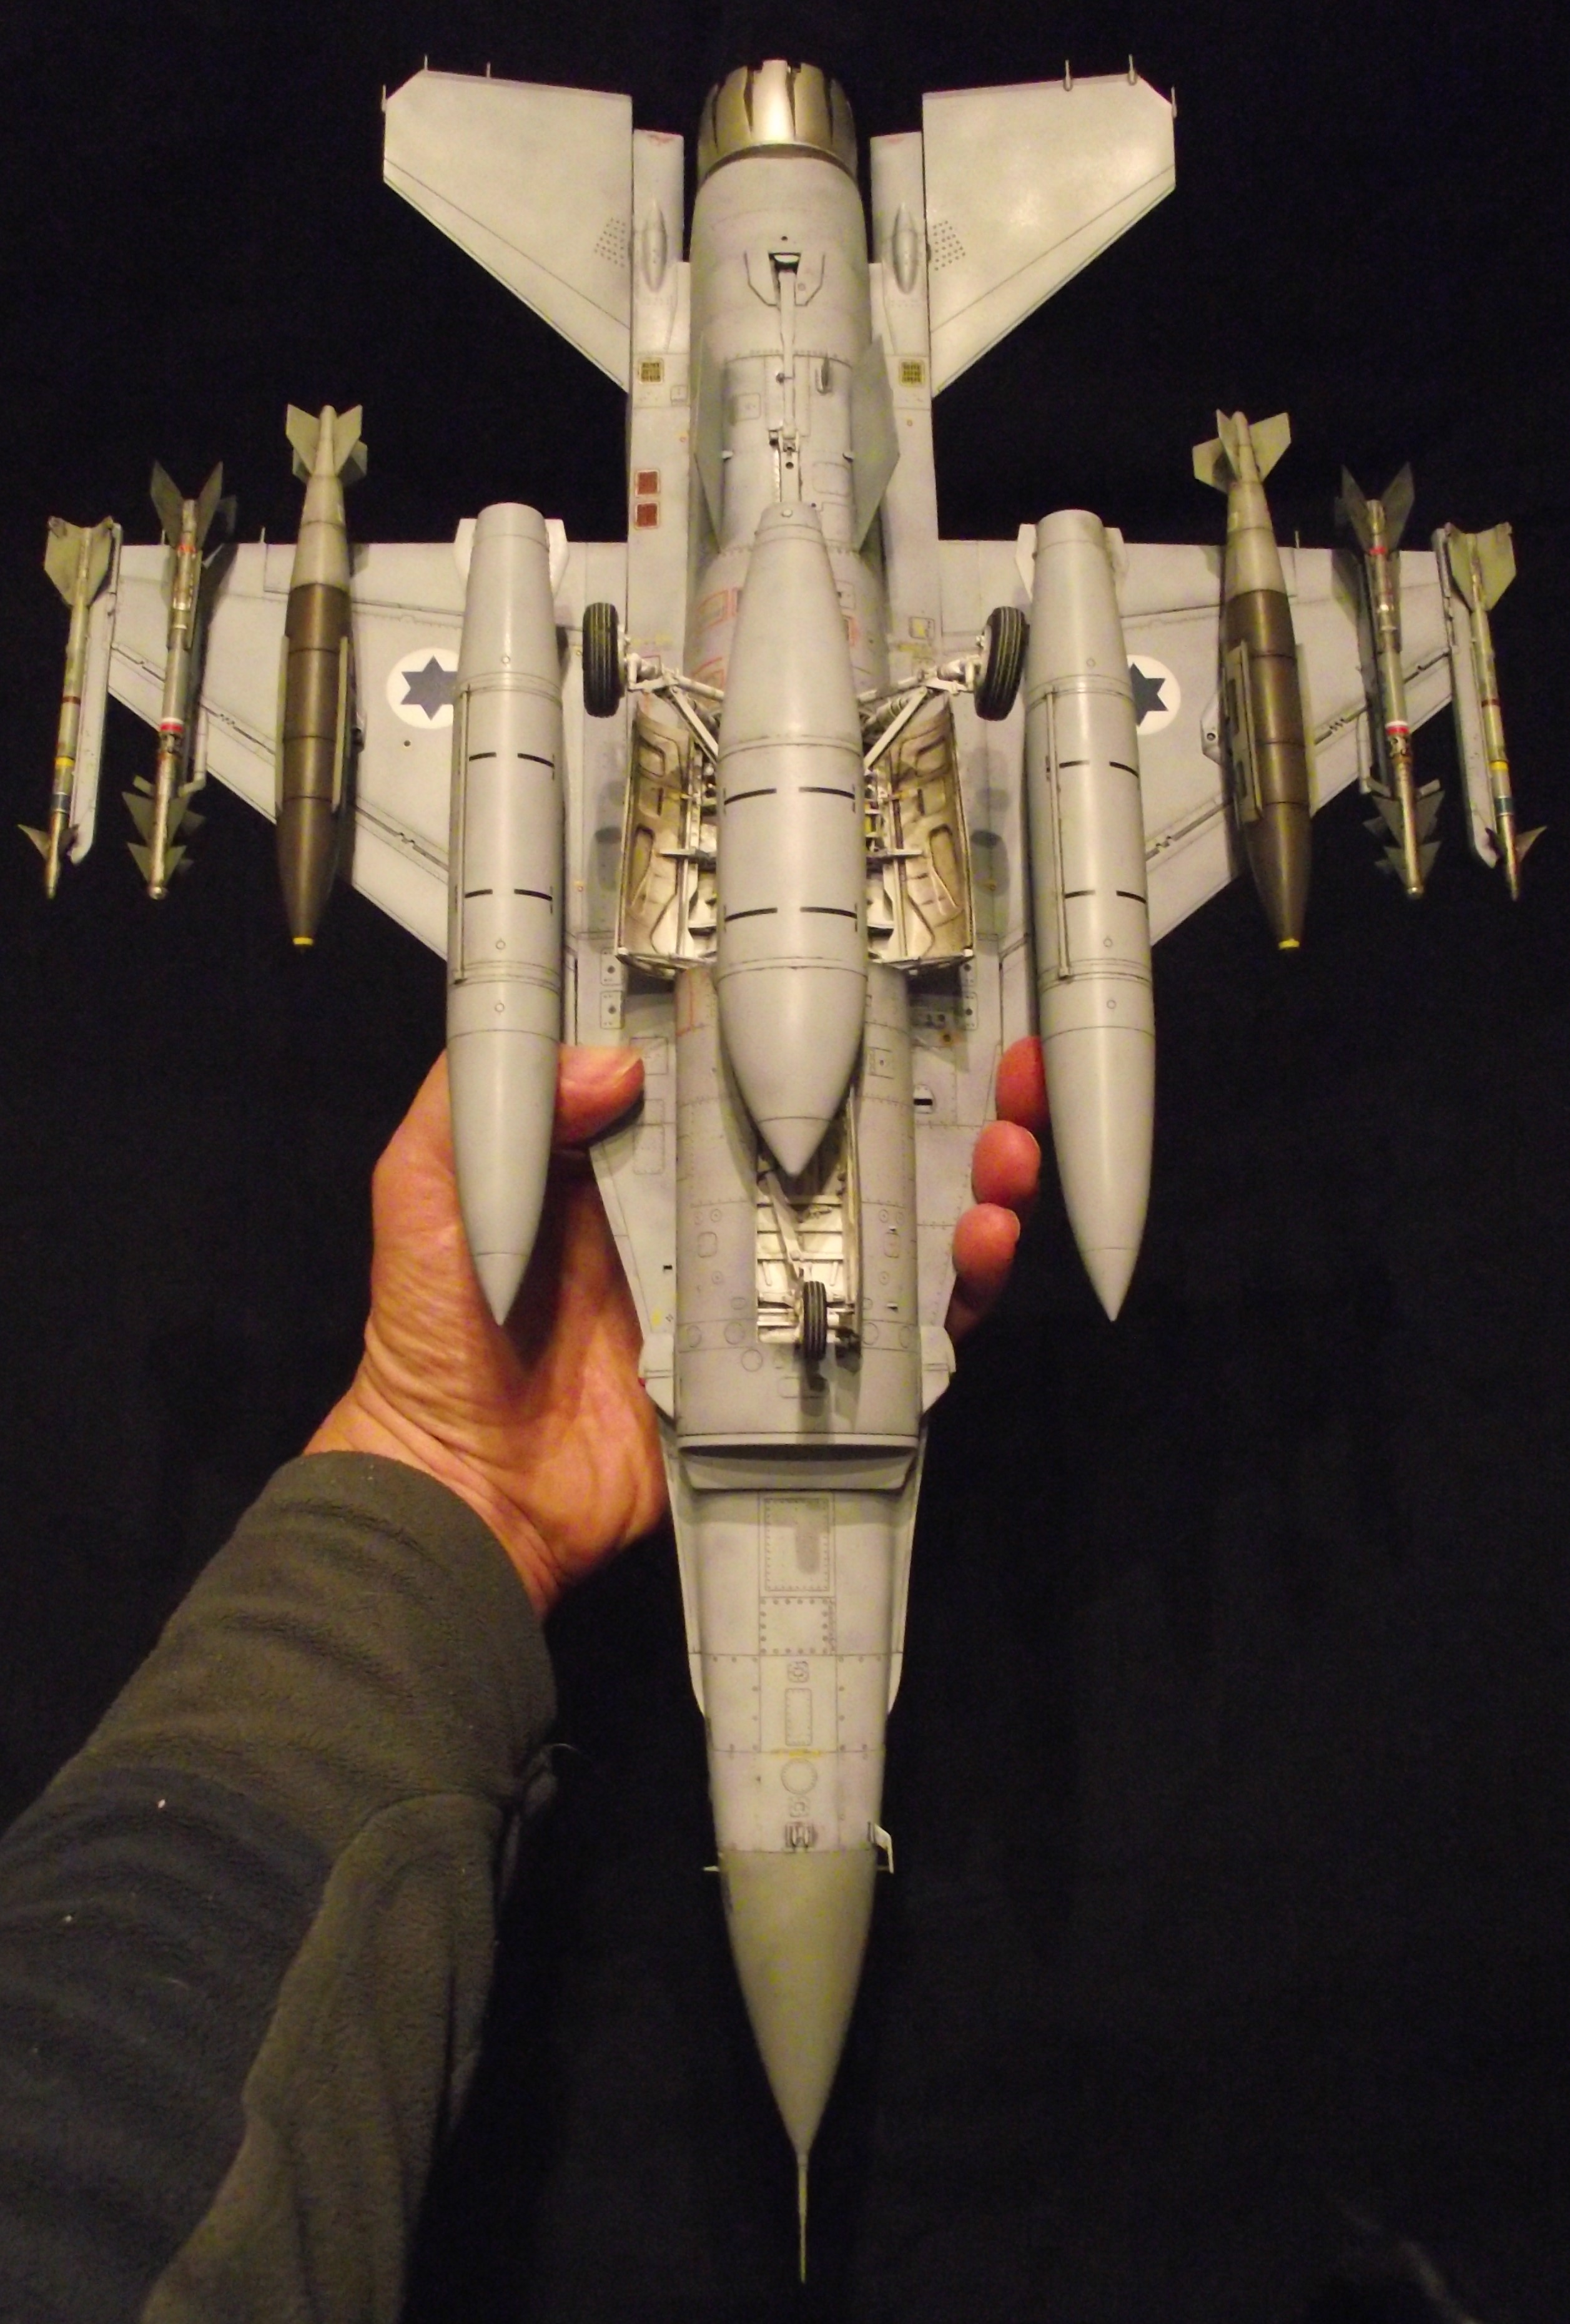
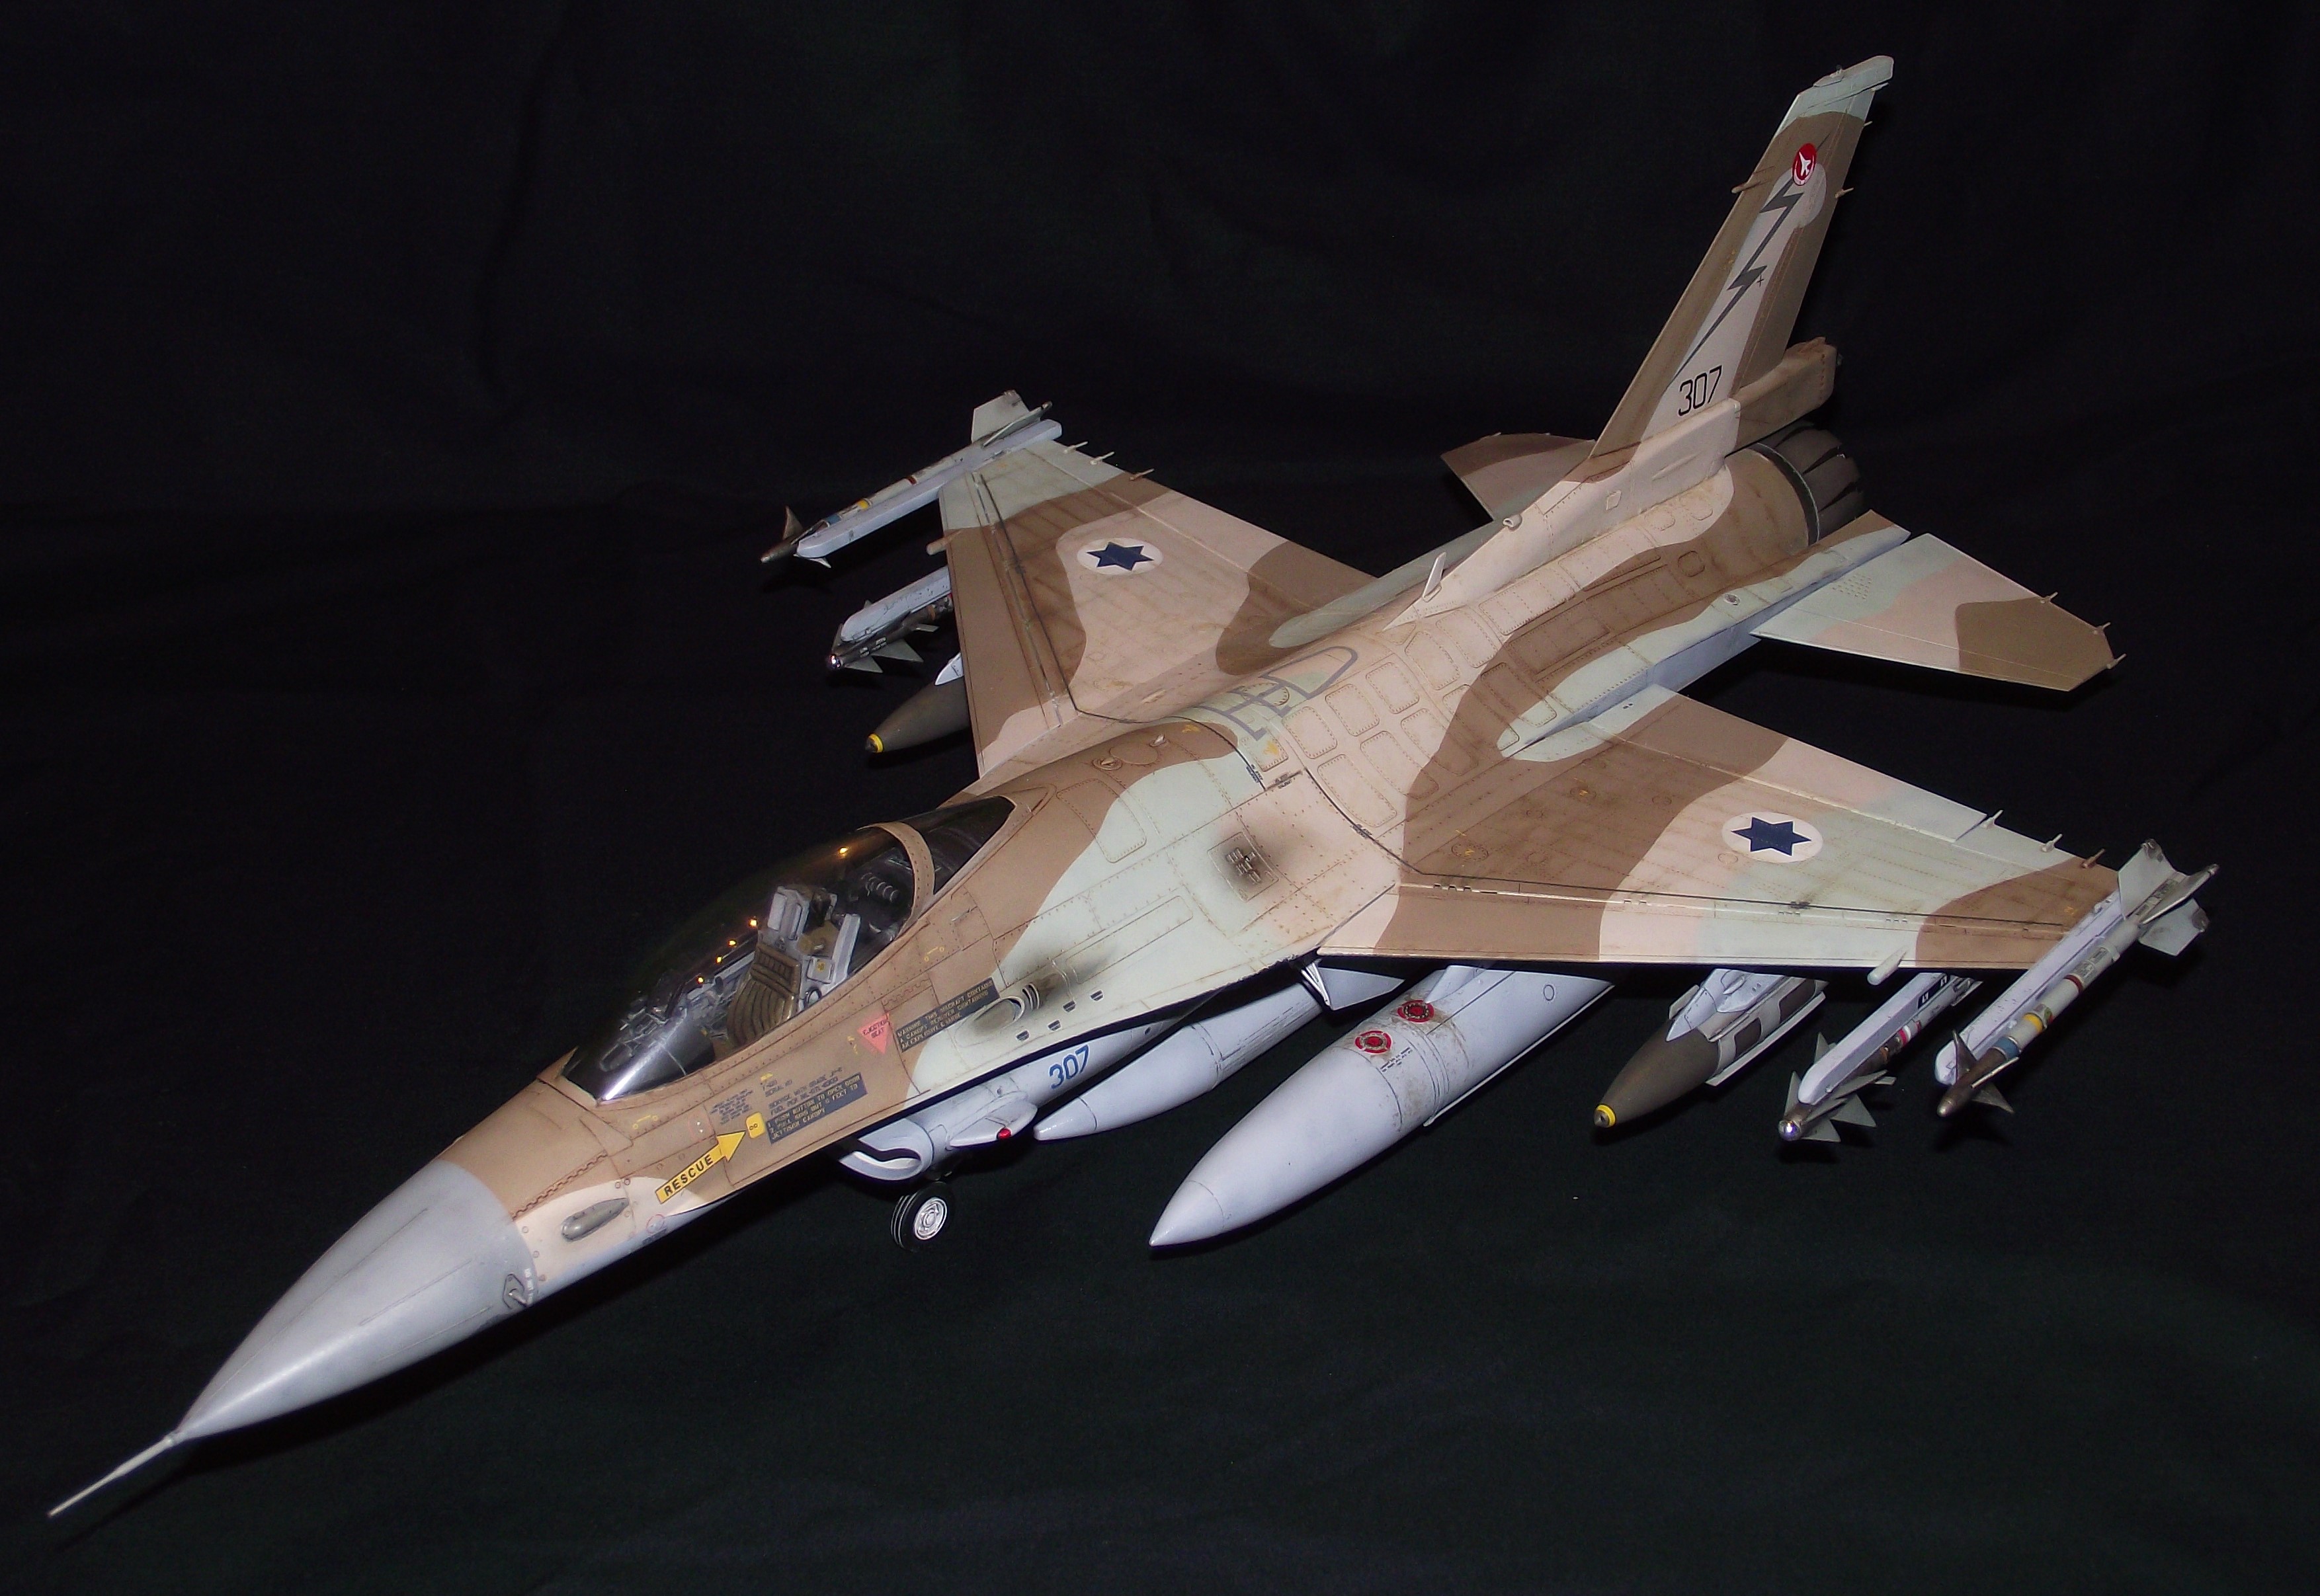
Tamiya F-16C IDF Barak
GusMac replied to GusMac's topic in LSM 1/32 and Larger Aircraft Ready for Inspection
Thanks Darren. Yeah, my display cabinet is the Malsjo from Ikea and it's pretty sizeable but this and the F-15 fill an entire shelf. Need to start doing some smaller WWII subjects so I can fit more in! -
Tamiya F-16C IDF Barak
GusMac replied to GusMac's topic in LSM 1/32 and Larger Aircraft Ready for Inspection
Thanks guys and thanks for pointing out that wheel Rob. I realised I hadn't glued the tyres in place and that one had slipped. Now fixed. -
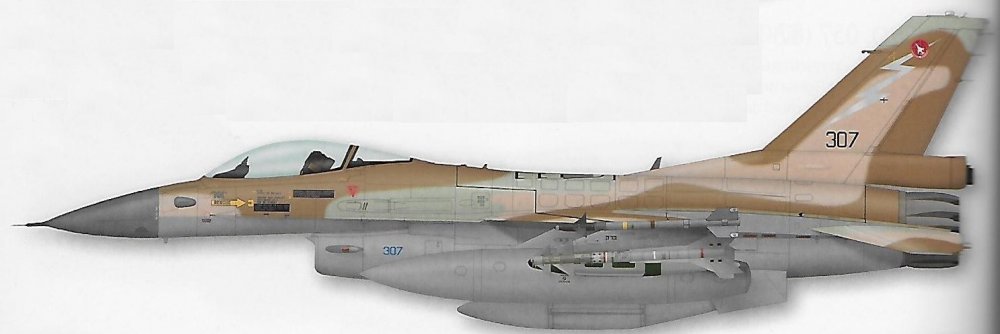
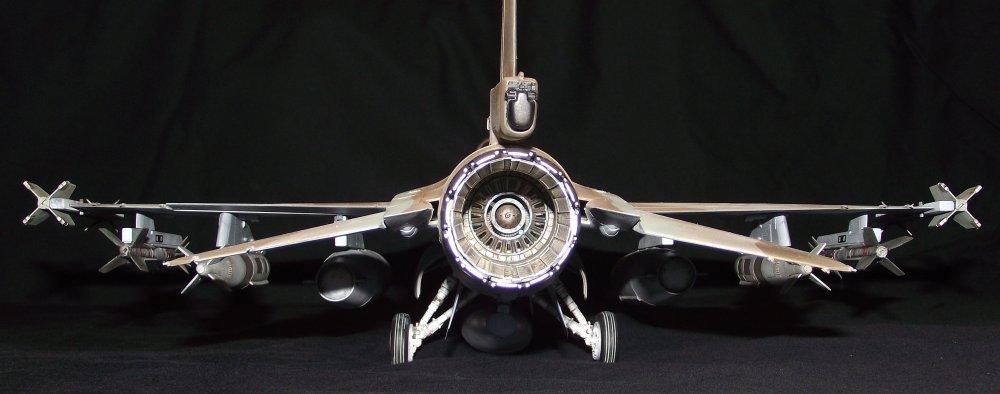
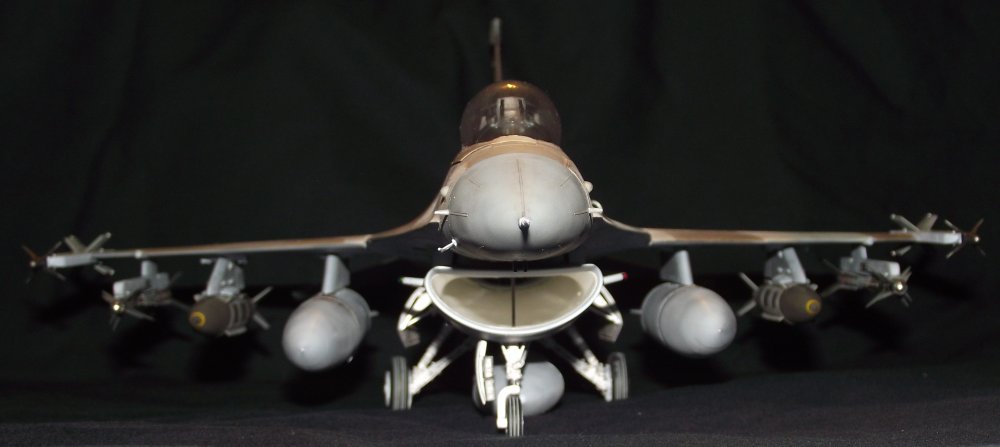
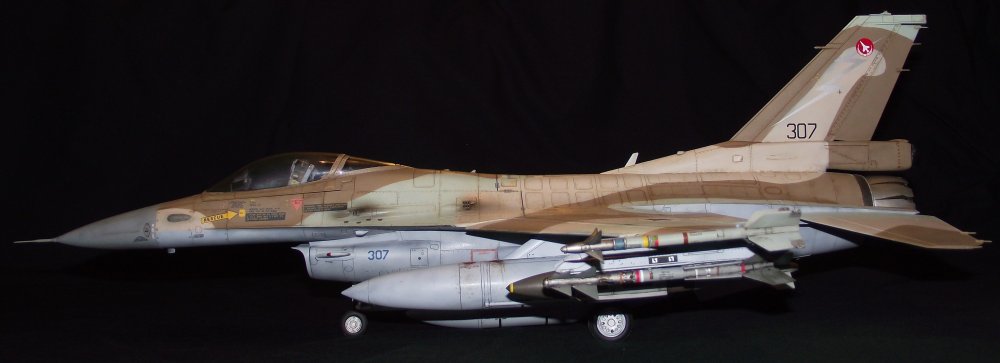
Quick blast to get this finished before the holidays. My wife's Xmas nights out have made for good bench time to get this completed. Aircraft I was basing this on was 307 from the First Fighter squadron from the early 2000s. Not perfect but close enough for me. Out of the box but with PWMP tail fairing from J-P van Regenmortel and Isracast Python 4s. Paints are in the main the Ammo Desert Aircraft set with Tamiya acrylics for detail and weapons. Weathering with Ammo panel line washes and filters, etc. Sorry about the hand! As always, comments, critiques, etc welcome.


-
Okay, I'm calling this done. Haven't managed to post any updates recently as life has taken over for a variety of reasons but it's been finished in fits and starts as my means of maintaining my sanity. I'll post some more pictures in the Finished area. Next project won't start until the New Year.

-
German F-104G in-flight JaboG 34 ' Allgau'
GusMac replied to a topic in LSM 1/35 and Larger Work In Progress
How much weight do the lights add Danny? Just wondered for the size of the acrylic rod you'll need to support it. -
Looks very good Danny.
-
Nice haul Danny. I'm intrigued to see how the lighting works out. Icarus decals do some nice Greek SLUF schemes. I just picked some up off eBay very reasonably.
-
Yet another Tamiya Corsair Birdcage 1/32
GusMac replied to spliffsecond's topic in LSM 1/35 and Larger Work In Progress
Looks great. Nice subtle effect. -
Yeah, I agree Danny, each to their own. My reason for using the Gunze is that it's actually easier to get hold of here than IPA!?! Well if you mean isopropyl rather than India Pale Ale! It gets drunk pronto. I do always wear a respirator with it. Cheers, Gus
-
Shiiiinyyyy!
-
I'd agree about the Future Danny but I happily thin Tamiya acrylics with Mr Levelling Thinner and have had no issues to date.
-
Airfix hawker typhoon Mk.1B 1/24
GusMac replied to coolboxx's topic in LSM 1/35 and Larger Work In Progress
Wonderful finish Darren. When I get round to mine I'll be happy if it's half as good.