Peterpools Posted December 2, 2022 Share Posted December 2, 2022 WOW Fantastic build - and she looks so good. 1 1 Link to comment Share on other sites More sharing options...
HubertB Posted December 2, 2022 Share Posted December 2, 2022 With Peter and Carl : great job 👍 ! Comparing your model with the reference pics you posted, you could even have gone heavier on the white exhaust stains. Although these special bombers may have seen less use than the workhorses you used as illustration … Hubert 3 Link to comment Share on other sites More sharing options...
Craigyboy Posted December 2, 2022 Author Share Posted December 2, 2022 9 minutes ago, HubertB said: With Peter and Carl : great job 👍 ! Comparing your model with the reference pics you posted, you could even have gone heavier on the white exhaust stains. Although these special bombers may have seen less use than the workhorses you used as illustration … Hubert I agree totally, and I am tempted Hubert, and I may yet do it underneath. Like many of us though, my biggest weakness(and greatest danger) is knowing when to stop!🤣 when the wings are on permanently and oil & fuel staining is done I'll have another look and just maybe....... 2 Link to comment Share on other sites More sharing options...
Bomber_County Posted December 3, 2022 Share Posted December 3, 2022 Absolutely stunning congrats, you must enter this into a competition, would get my vote very time…… 1 Link to comment Share on other sites More sharing options...
crazypoet Posted December 5, 2022 Share Posted December 5, 2022 Just catching up on this - you’re giving a master class here 💯 this is a *gorgeous* build! 1 Link to comment Share on other sites More sharing options...
Craigyboy Posted December 7, 2022 Author Share Posted December 7, 2022 On 12/5/2022 at 7:22 PM, crazypoet said: Just catching up on this - you’re giving a master class here 💯 this is a *gorgeous* build! Thank you! 3 Link to comment Share on other sites More sharing options...
harv Posted December 15, 2022 Share Posted December 15, 2022 On 12/7/2022 at 2:28 PM, Craigyboy said: Thank you! Me too !....harv 1 Link to comment Share on other sites More sharing options...
Peterpools Posted December 17, 2022 Share Posted December 17, 2022 Same here 1 Link to comment Share on other sites More sharing options...
Sasha As Posted December 25, 2022 Share Posted December 25, 2022 Good job! 1 Link to comment Share on other sites More sharing options...
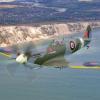
Craigyboy Posted July 11, 2023 Author Share Posted July 11, 2023 Well, it's been a while! The gentleman who commissioned this beast has had his extension built and his model room is ready to be furnished so I can take the Lancaster out from its wings off storage in my cupboard and finally get to making the diorama it's going to sit on. First up, accuracy. Open the can of worms and shoot me down in flames but I've done a bit of digging and as I'm sure many of you know, Scampton was a grass airfield until Autumn 1943. The question is were there any frying pan type hard standings around before then? I've found a couple of diagrams from local authority documents which show the airfield in 1939 with a grass runway and all the buildings down the bottom corner. The only hardstanding appears to be around the C hangers and offices with no hard perimeter track either so I've decided to do a concrete/ grass split diorama for a bit of variety Using a black 20mm thick foam insulation board with a perfect texture for concrete, the first stage was to split what will be grass form the concrete. It didn't need to be circular as there's no frying pan hard standing. The concrete blocks were, apparently 10' x 20' which equates to 190 x 95 mm so this was marked out using a rounded end pencil to give the expansion gaps in the concrete. Also at this point, I marked in some random cracks. Next It was spray a lighter shade of grey than the base polystyrene in a swirly pattern to begin to get some variance. The same again with a lighter shade of grey and less swirliness and finally a blend coat of white with a drop of black in there to bring it all together. After that, the expansion gaps were carefully filled in along with the cracks. Any over paint can be blended into the exterior to create a stained look which often happens with concrete wherever water collects. I need to add a few flecks of black and white paint by flicking and then some oil stains and it'll be on with the grass. The spitfire is totally out of scale, I just wanted to see how it looked. It's going on an all grass base. As ever thanks for looking and see you for the grass shortly 3 1 Link to comment Share on other sites More sharing options...
Craigyboy Posted July 31, 2023 Author Share Posted July 31, 2023 On with the grass. Straightforward enough really. As I stated on my recently completed Spitfire build, I use WWS grasses and their layering system which means the whole lot can be done in about 10 mins. Apply the basing glue then sprinkle 2mm basing grass through the static applicator. Spray the layering glue over this then add the grasses of your choice, remembering to respray with layering glue when you switch grasses. Results are good with a few clumps of spring/summer flowers here and there. And so here she is. I've knocked up some chocks and included the 12"(30cm) rule to give some idea of how big the damn thing is. The rest of the photos will be going onto a RFS post shortly and I've just realised I haven't painted the prop tips yet. Soon rectified. Thanks for looking as ever 5 Link to comment Share on other sites More sharing options...
BlrwestSiR Posted July 31, 2023 Share Posted July 31, 2023 Excellent base there Craig. Thanks for the step by step on how you did it. 1 Link to comment Share on other sites More sharing options...
shark64 Posted July 31, 2023 Share Posted July 31, 2023 I like the base a lot 1 1 Link to comment Share on other sites More sharing options...
Craigyboy Posted August 3, 2023 Author Share Posted August 3, 2023 Prop tips painted, everything done. The link to the RFI page is HERE Thanks to everyone who took the time to look, comment and advise. Much appreciated. 1 Link to comment Share on other sites More sharing options...
FullArmor Posted September 15, 2023 Share Posted September 15, 2023 On 9/11/2022 at 11:32 PM, BlrwestSiR said: Here you go. These ones are made by Galaxy Hobby and are 3mm in width and are 400, 600 and 800 grit. Where can i get these? Please share a link. Link to comment Share on other sites More sharing options...
BlrwestSiR Posted September 15, 2023 Share Posted September 15, 2023 4 hours ago, FullArmor said: Where can i get these? Please share a link. I got them from Hobbyeasy. Hopefully this link works. If not, search under grinding pen. https://www.hobbyeasy.com/cgi-bin/i8_user_page.cgi?a=advance_search_result&page_size=20&page_number=1&keyword=Grinding+pen&category_code=TOOL Link to comment Share on other sites More sharing options...
Irishman1 Posted September 16, 2023 Share Posted September 16, 2023 Oh my hood!! Different level here!! Link to comment Share on other sites More sharing options...
Craigyboy Posted September 16, 2023 Author Share Posted September 16, 2023 46 minutes ago, Irishman1 said: Oh my hood!! Different level here!! Thank you! 🙏 Link to comment Share on other sites More sharing options...
PanzerWomble Posted September 17, 2023 Share Posted September 17, 2023 It is a cracking build . 👍The base is a scorcher too . As I'm sure you know ,Gibsons plane ED932 was delivered for the factory on 30th April so only on strength for two weeks before the raid (16th May) , your weathering is bang on for that short period & the large number of practice ops . Despite surviving the war it was scrapped in 1947 .....incredible sacrilege . +1 on WWS grass, its great to use . Hairspray works as well as their layering glue You can spray the whole 9 yards in matt lacquer as well , the stuff is pretty versatile . Link to comment Share on other sites More sharing options...
Craigyboy Posted September 18, 2023 Author Share Posted September 18, 2023 9 hours ago, PanzerWomble said: It is a cracking build . 👍The base is a scorcher too . As I'm sure you know ,Gibsons plane ED932 was delivered for the factory on 30th April so only on strength for two weeks before the raid (16th May) , your weathering is bang on for that short period & the large number of practice ops . Despite surviving the war it was scrapped in 1947 .....incredible sacrilege . +1 on WWS grass, its great to use . Hairspray works as well as their layering glue You can spray the whole 9 yards in matt lacquer as well , the stuff is pretty versatile . Thanks, and thanks for the hairspray tip! Easier than watering down their base glue. JU88 A1 next so probably a concrete base but I'll sneak a bit of grass in somewhere😄 1 Link to comment Share on other sites More sharing options...

Recommended Posts
Create an account or sign in to comment
You need to be a member in order to leave a comment
Create an account
Sign up for a new account in our community. It's easy!
Register a new accountSign in
Already have an account? Sign in here.
Sign In Now