DocRob
-
Posts
5,909 -
Joined
-
Last visited
Content Type
Profiles
Forums
Events
Gallery
Everything posted by DocRob
-

Why can't I post Photobucket pics?
DocRob replied to NOVAModeler's topic in Problems? Suggestions? Tell us!
Hi CG, if others don't see your PB-pictures you have posted somewhere, you have to update your account to a "500 Plus Plan" or use another source. If you don't see PB-pictures published by others, there is nothing you can do. It is up to the others to pay 400 bucks per anno or get rid of that annoying Company. maybe the more recent entries in that thread are helpful. Cheers Rob -
Hasegawa J2M3 Raiden - In Between Build
DocRob replied to DocRob's topic in LSM 1/35 and Larger Work In Progress
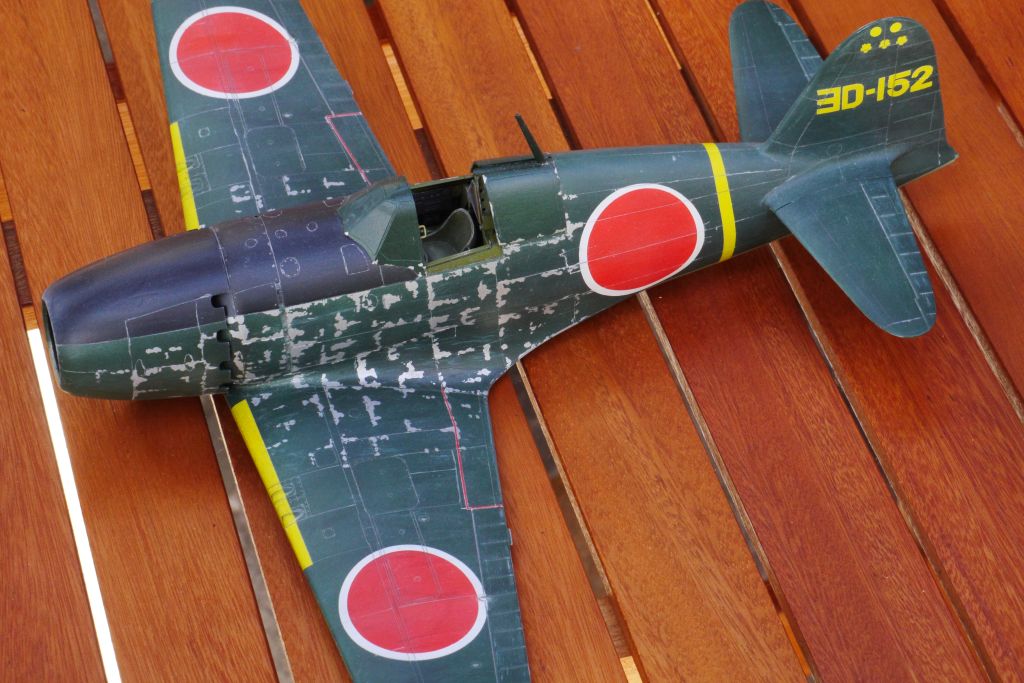
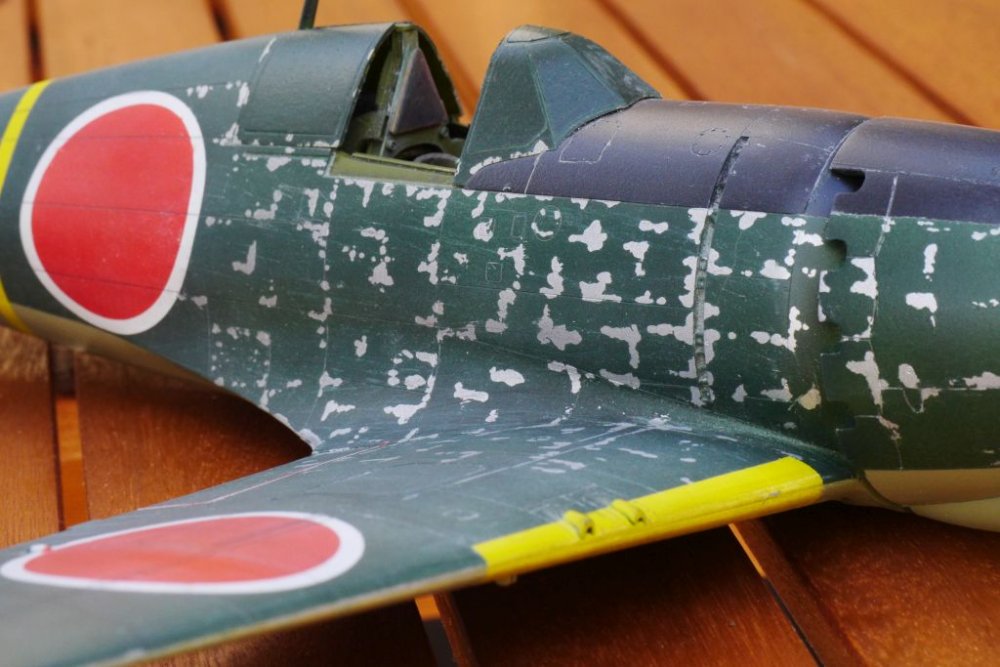
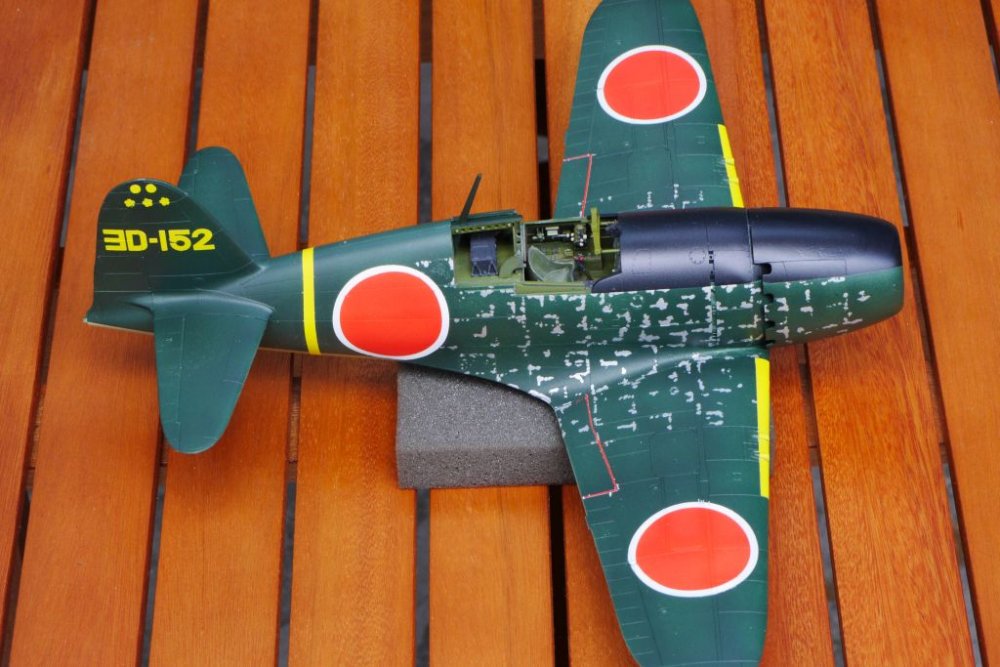
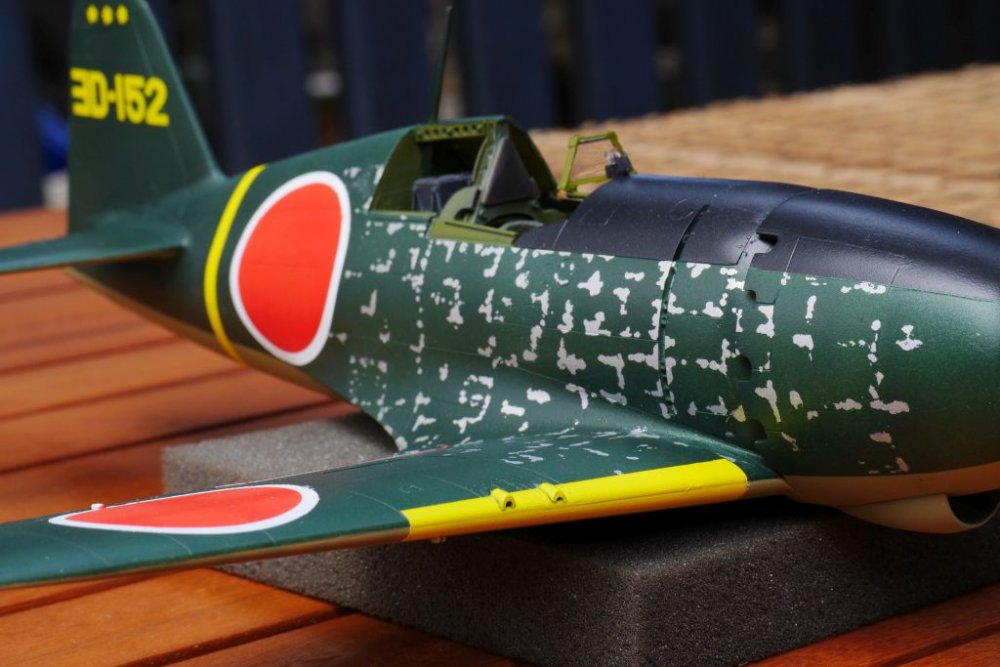
Hi Mates, the next step is making a new kit looking like a worn warhorse, always a lot of fun. I scratched, penciled, crayoned, rubbed on and off again and got this: I'm not sure about the next steps. First will be a coat of Future to seel the done work and to apply the few decals. My inital plan was to work on the fuselage with yellow oils to enhance the "stressed surface" effect. I will loose a little of the "bare metal" effect doing this. I will take a nap about that. Anny suggestions or ideas are very welcome. Cheers Rob
-
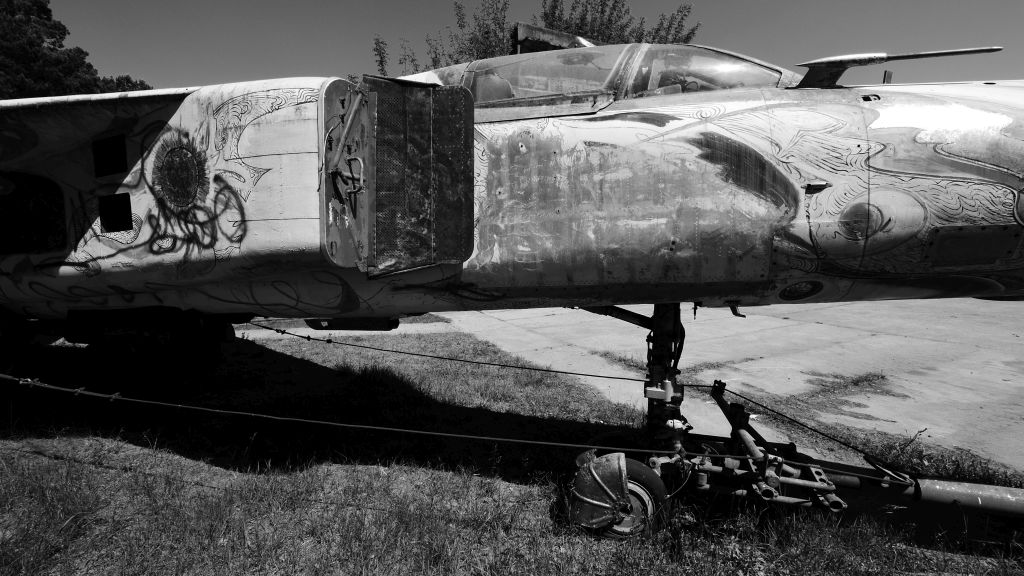
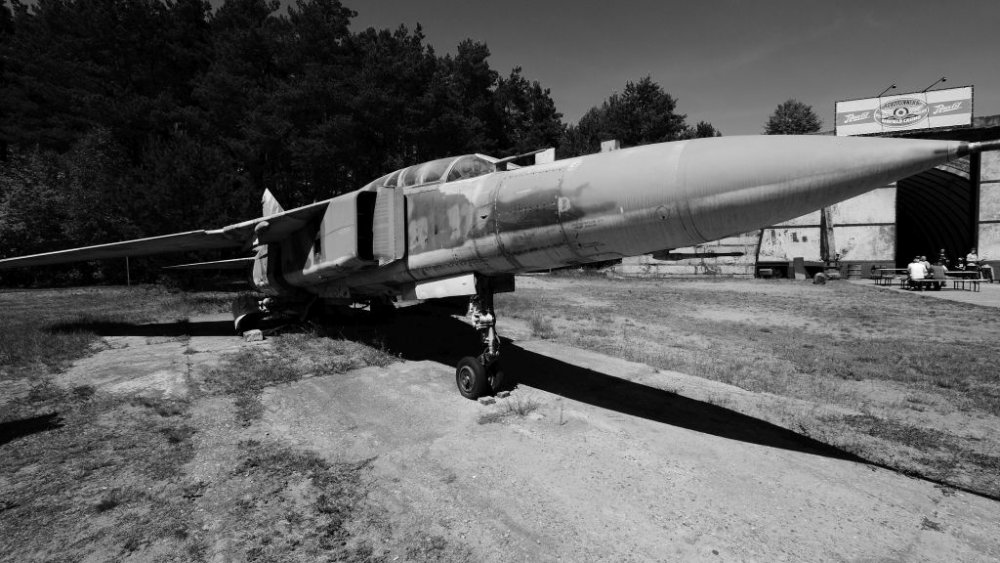
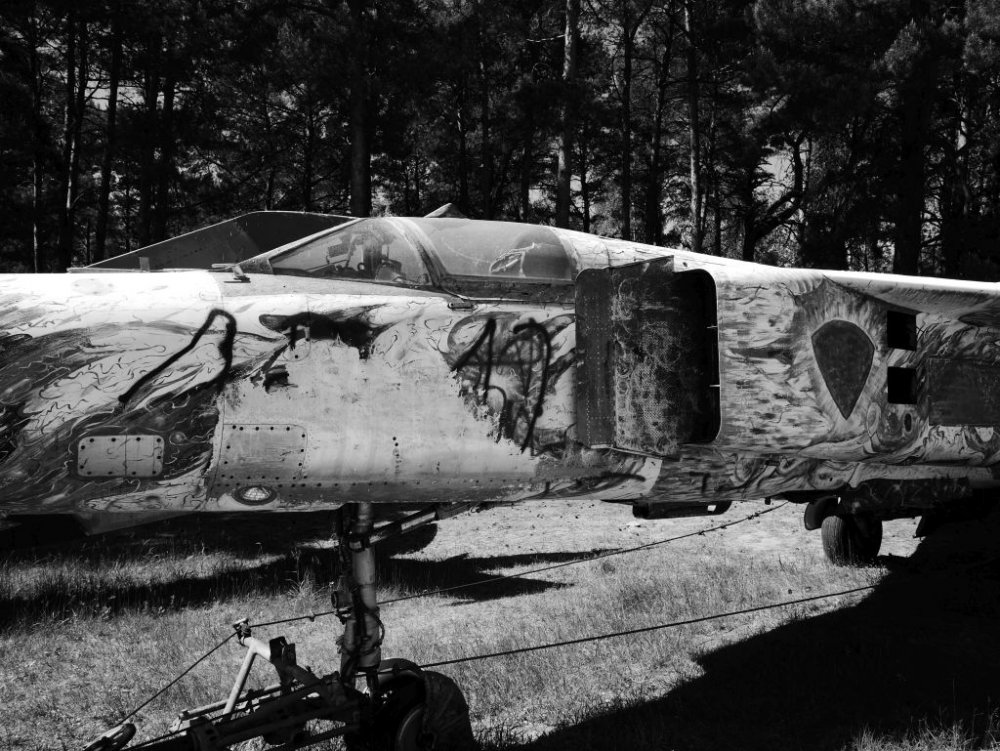
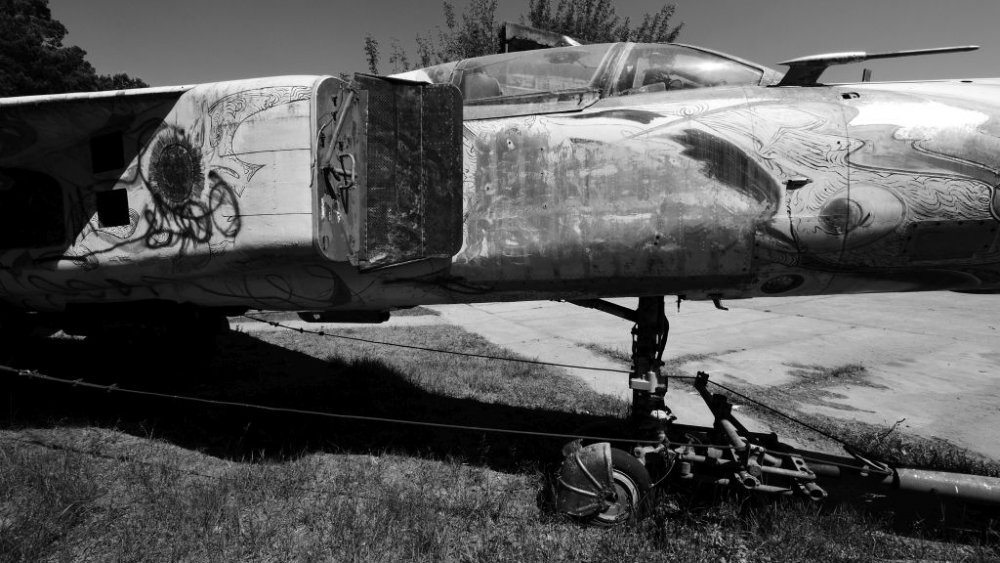
Thanks Danny, the photos where taken by me two years ago at a place called Luftfahrtmuseum Finowfurt 50km north of my old hometown Berlin. It is an abandoned airfield, which was used through the Second World War. Later it was a base used by the German Democratic Republic. Since 1991 it was transformed as a museum. Since I'm from West Berlin there was no access for me to that airfield before it became a museum (and the wall went down) . It was my first visit there and they have some really interesting planes on show, some of them in let's call it suboptimal condition, like that Flogger. Some more pics are to be found in my threat (and I will add some more later): Link to the Museum: http://www.luftfahrtmuseum-finowfurt.de/ Cheers Rob
-
Don't drink and fly, Danny at least the goat cheese won't be a problem, but where to go with the pips in that crammed pit ? It looks so well used, like some pilot lived in it for several years. I love this torqouise color. The guy who invented that must have had a few beers to many either . If u stay with the used look, I have something for you. Cheers Rob
-
Kawanishi N1K2-J Shindei Kai (George)
DocRob replied to Jorge Márquez's topic in LSM 1/35 and Larger Work In Progress
Hola Jorge, good to see some japanese birds around here. Nice work on the cockpit and the engine. There are many similarities between the Shinden Kai and my actual build the Raiden constructionwise. They obviously share a lot of components. Have fun with your build and I'm courious to see further steps, especially the paintjob. Hasta Pronto Don Roberto -
Hi Danny, I'm sorry to hear about your fate. Sometimes real life gets between us and modelling and there is no more capacity and time for a hobby in such difficult times. Some years ago I had a very hard time personally and modelling helped me a little to got through that. Our hobby is time consuming and needs to focus on. The latter helps me to get my mind free again, after irritating phases in life. It is just a Hobby no more, no less, but a hobby might have implications in other (more important) parts of life. I solved all the subjects I had by that time and now I'm happy and satisfied with my life. Maybe modelling kept me focused in finding solutions by that time. Good to see you back at the bench. Cheers Rob
-
Hasegawa J2M3 Raiden - In Between Build
DocRob replied to DocRob's topic in LSM 1/35 and Larger Work In Progress
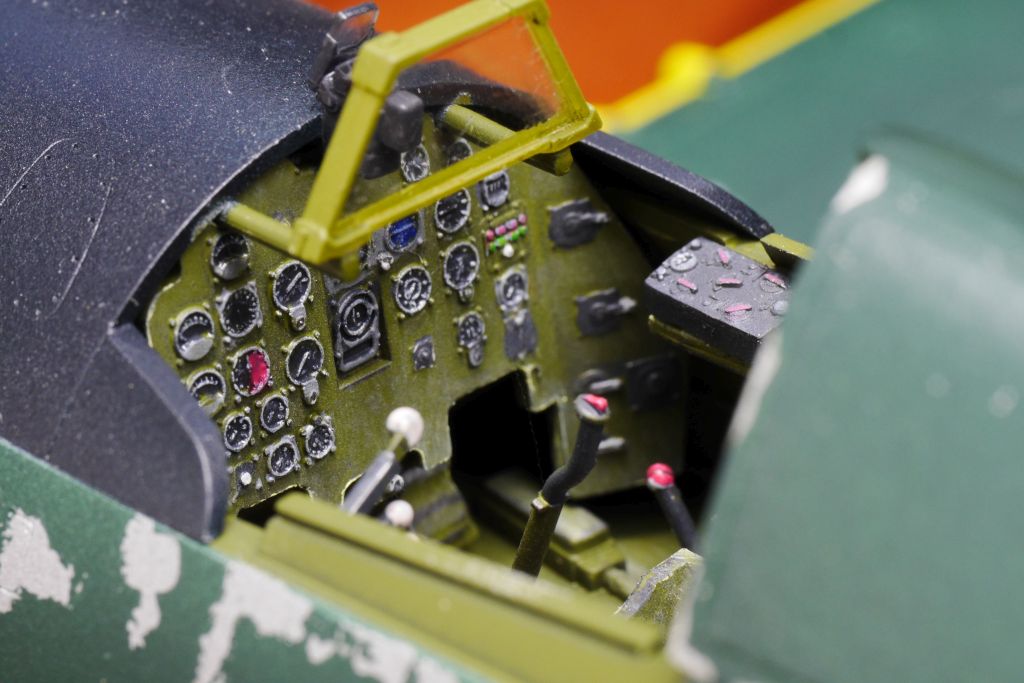
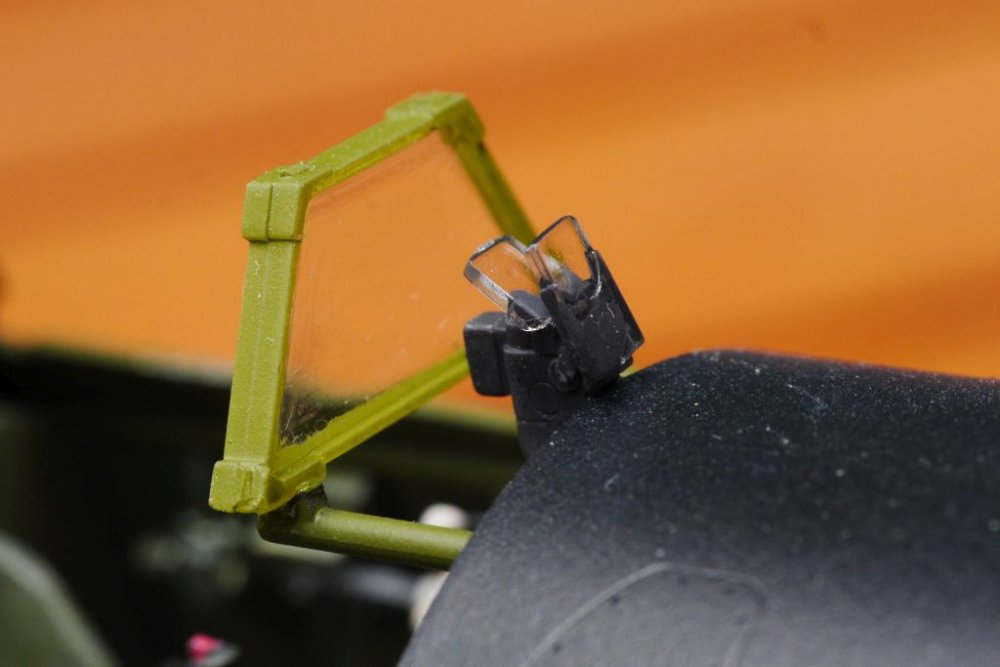
Some more pics. The cockpit is unmasked and recieved some details like visors and armored glass and handles. Everything is ready now for intensifying and sharpen the chipping. Cheers Rob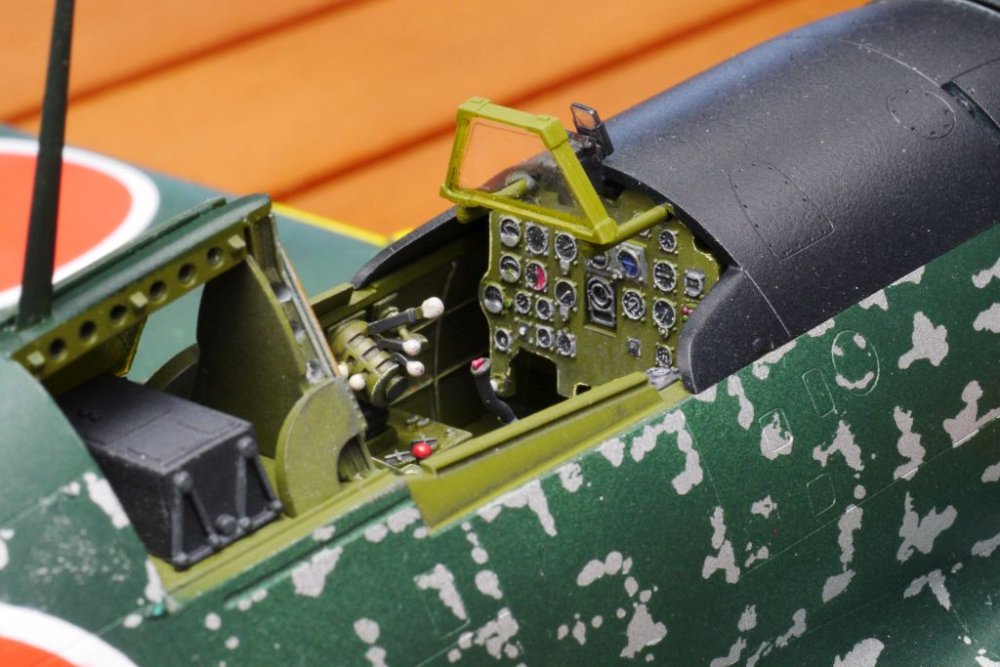

-
The "PIKE" S077 - ex-Seehund - Bronco 1:35
DocRob replied to Pepper-Mint's topic in LSM 1/35 and Larger Work In Progress
I saw the advertisment for TWM and thought that must be your "Seehund". Chapeau you found a nice place to show your incredibly painted and weathered partly yellow submarine . Cheers Rob -
Hasegawa J2M3 Raiden - In Between Build
DocRob replied to DocRob's topic in LSM 1/35 and Larger Work In Progress
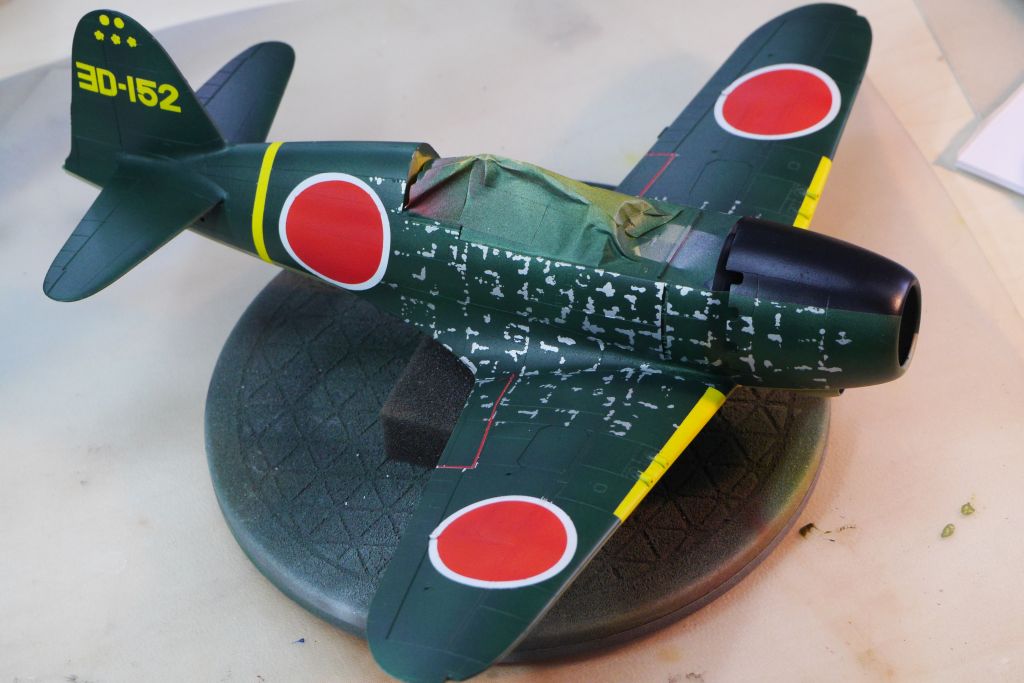
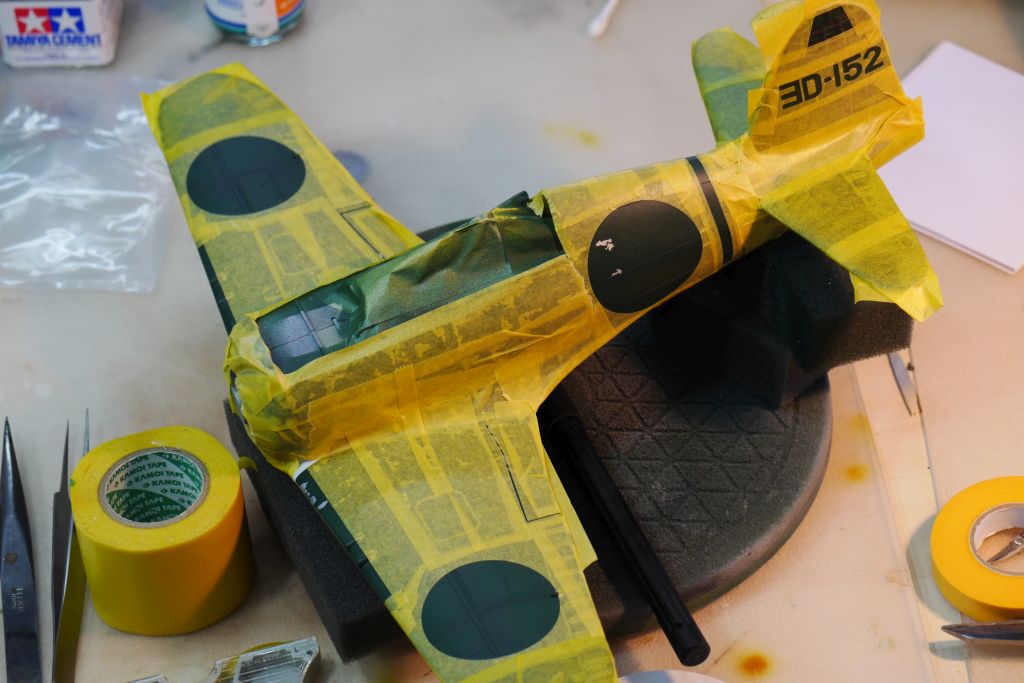
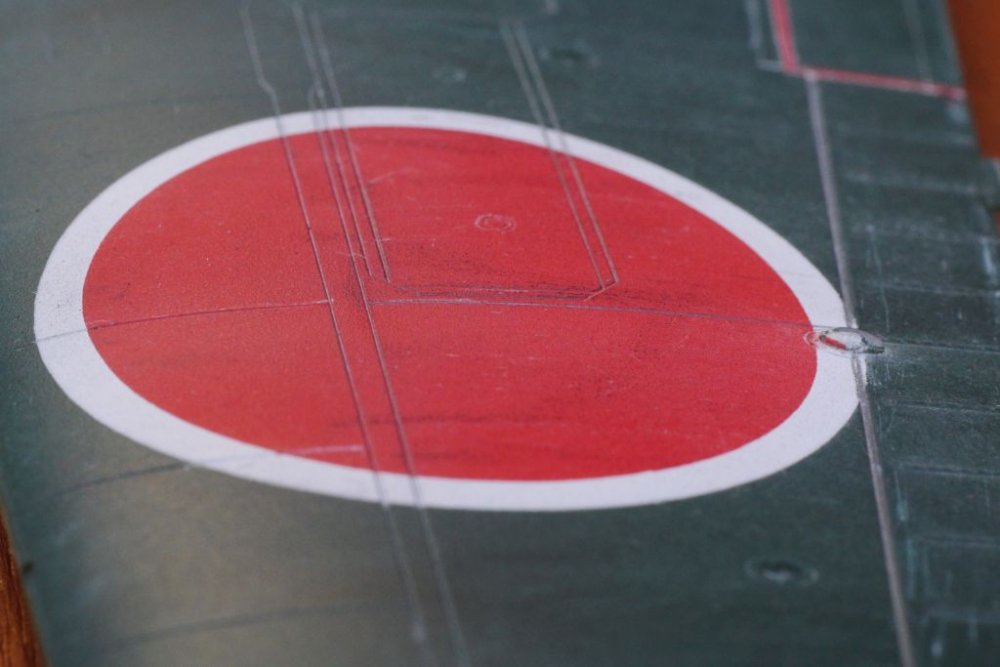
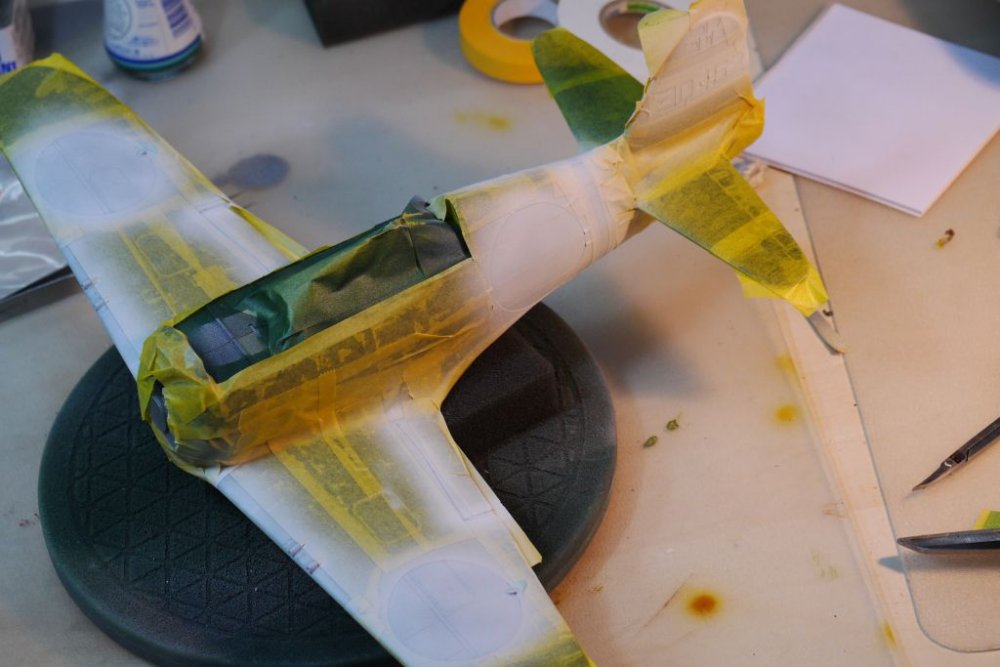
Yeah Ozzie, these Maketar Masks are really nice to work with. It is Kabuki (similar to Tamiya Tape) paperesque material which dosen't stretch, which is good and the reason I chose these and not the vinyl type masks. Yellow an red sprayed and covered well due to the white priming, no clogging issues here, phew. Does it go more ugly than that? So it's about time for a Striptease, always an anxious and positively nervos moment of anticipation and YES, I'm satisfied with the result. It is hard to see on theese photos, but I used different shades of red on the spars to enhance the volume effect. Working with masks is always a lot more work than appliying decals, but I prefer it that way, because I have much more control in the process (specially on a not much stenciled plane like the Raiden). Next up is the assembly of the main components (the cowling is not crash bended ) and the painting of the Spinner, which I forgot . Cheers Rob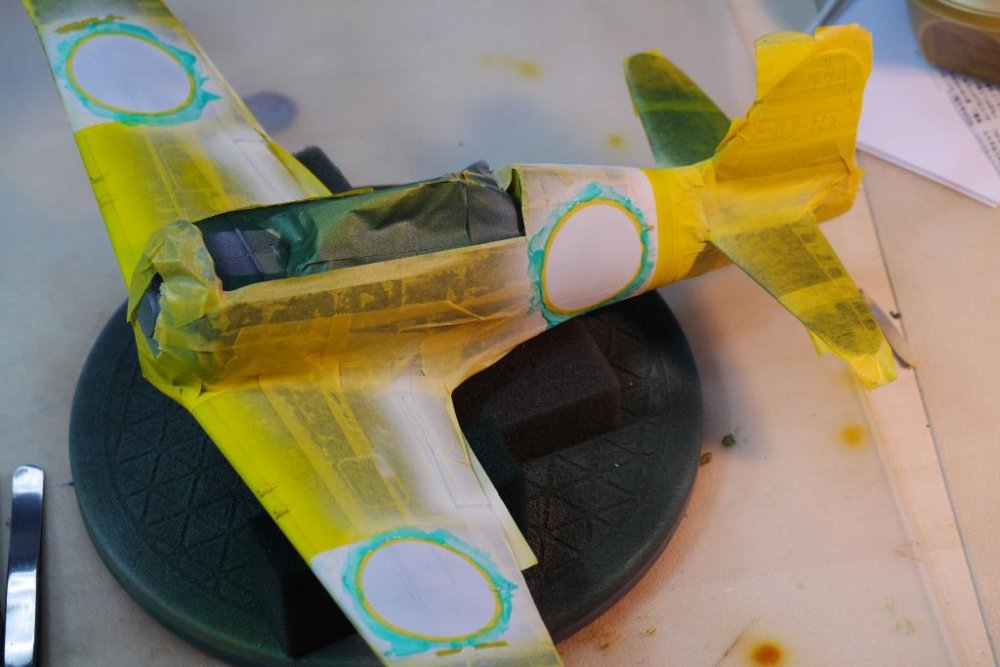

-
Nice takeoff. It is good to see that not the whole world is spinning around pre colored Photoetch. Your paintjob gives a nice feel for depth, subtle and tonal balanced. Cheers Rob
-
King Tiger build in an Army tent
DocRob replied to Padubon's topic in LSM 1/35 and Larger Work In Progress
Best wishes from the other side of the Atlantic, get well soon. I learned in your Tiger-field build that there are no real obstacles for you to finish a model, did I mention the left hand by the way..., just joking . I hope you recover fast and completely. Cheers Rob -
Hasegawa J2M3 Raiden - In Between Build
DocRob replied to DocRob's topic in LSM 1/35 and Larger Work In Progress
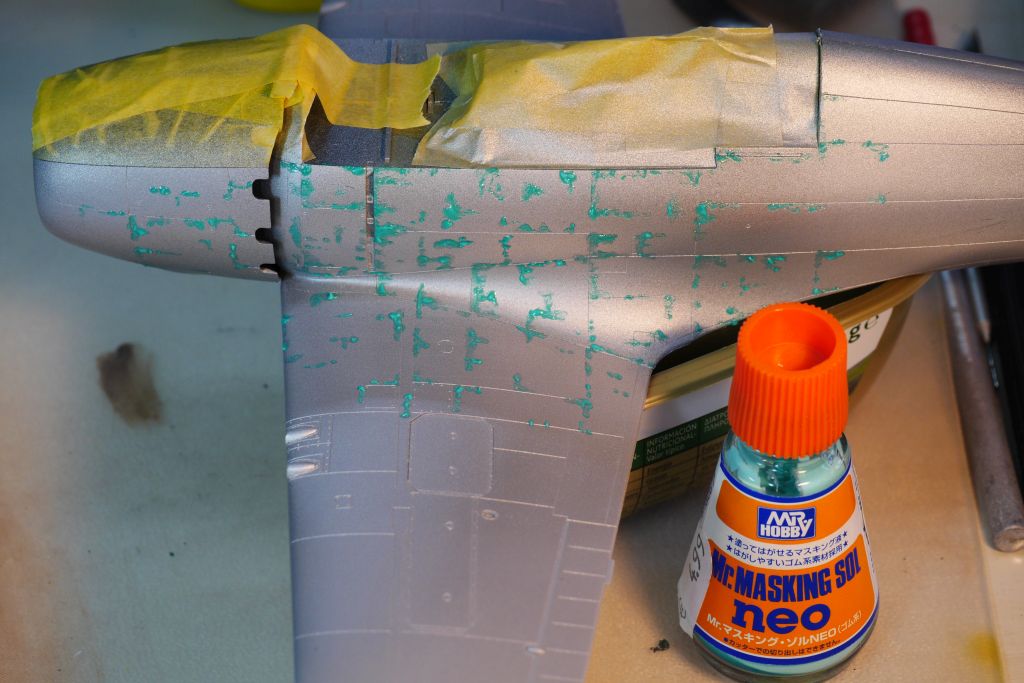
Hi Ozzy, thanks for your kind words. A nice collection of subjects you have to choose from for your next adventure. I will finish "Red Star 47" for the Resin-GB next or maybe a 109 Emil with a lot of Resin I started some month ago. Back to the masking, predominant subject of my days right now. For the first stage of chipping on the Raiden beast I used Mr. Masking Sol Neo, which is pretty thick and easy to peel off. You have to be really carefull while applying because it tends to get a little blotchy. I used a very fine stiff brush and a sharpenend toothpick. On my Corsair build I used Microscales Micro Mask, which I chose because it is thinner and more fluid, meaning it is easier to apply on fine detailed parts. This way it worked, but peelin off the stuff proved to be a nightmare, because it sticks like hell. I will not use that stuff again. Speaking of Masks, the beast is clothed in Maketar precut masks. And dressed to paint (I'm a coward with overspraying) Finally some color, white for the Rondels and priming for the following red and yellow. I always have my troubles with white, red and yellow. Theese colors tend to clog in my airbrush much more than others. For the white I used Tamiyas flat white, which was horrible in every degree of thinning. Then I switched to a Scale 75 white which was slightly easier to handle. For red and yellow I will use my 0,4 mm Airbrush, not the usual 0,2 mm nozzled one. Cheers Rob

-
Hasegawa J2M3 Raiden - In Between Build
DocRob replied to DocRob's topic in LSM 1/35 and Larger Work In Progress
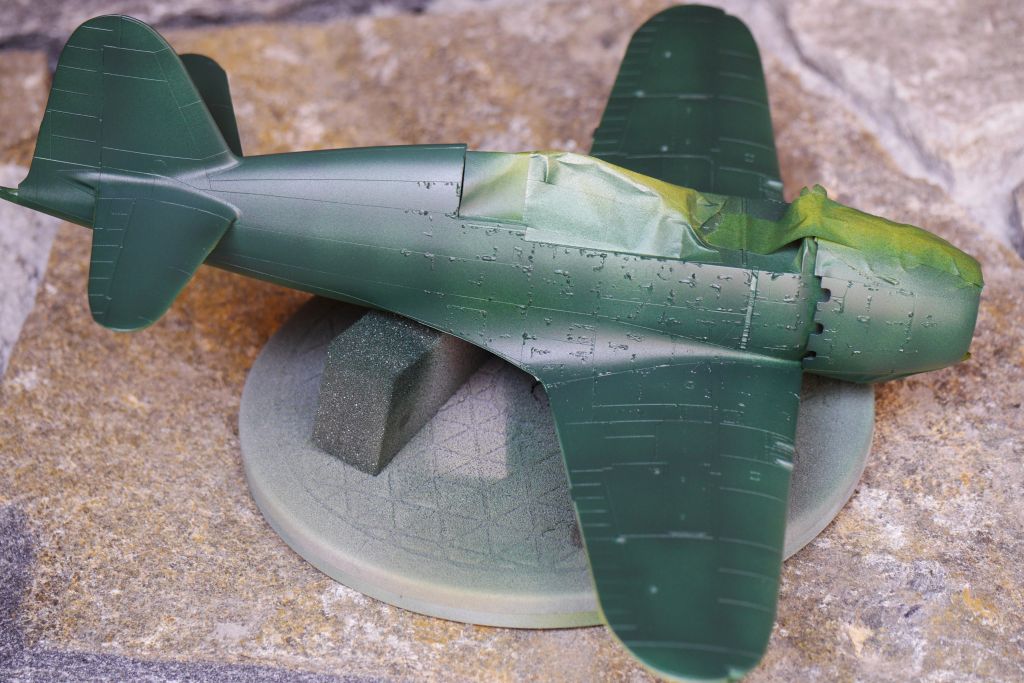
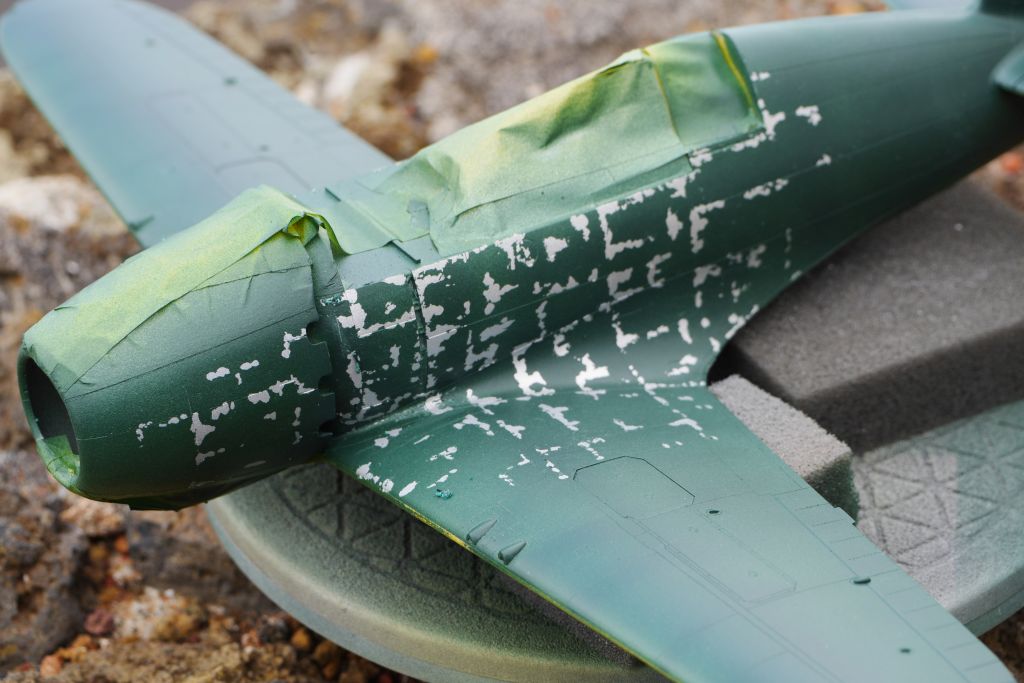
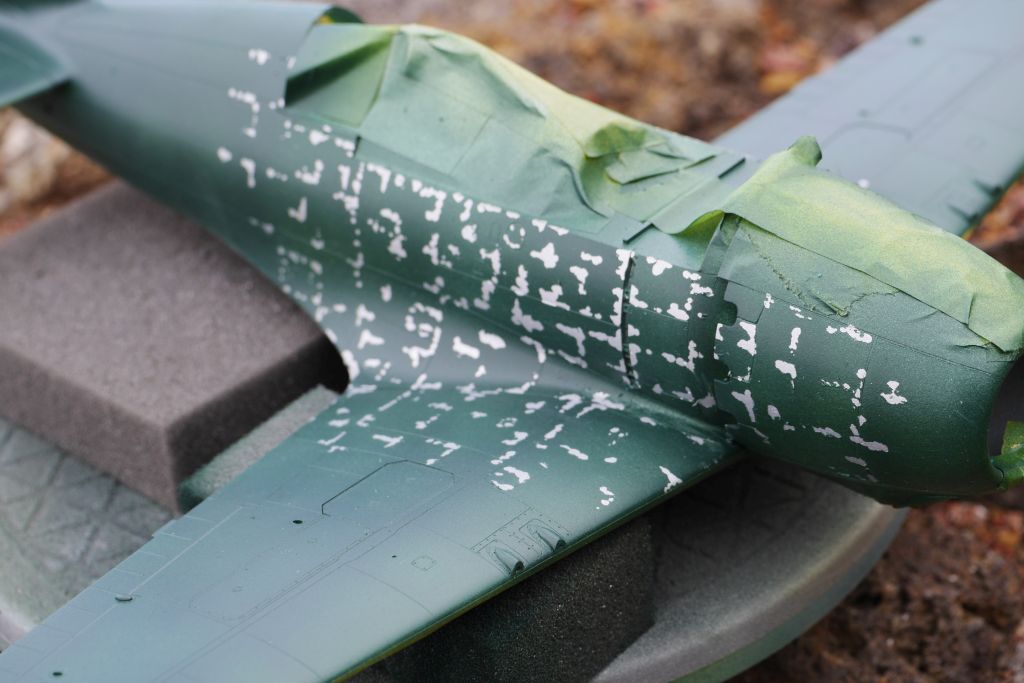
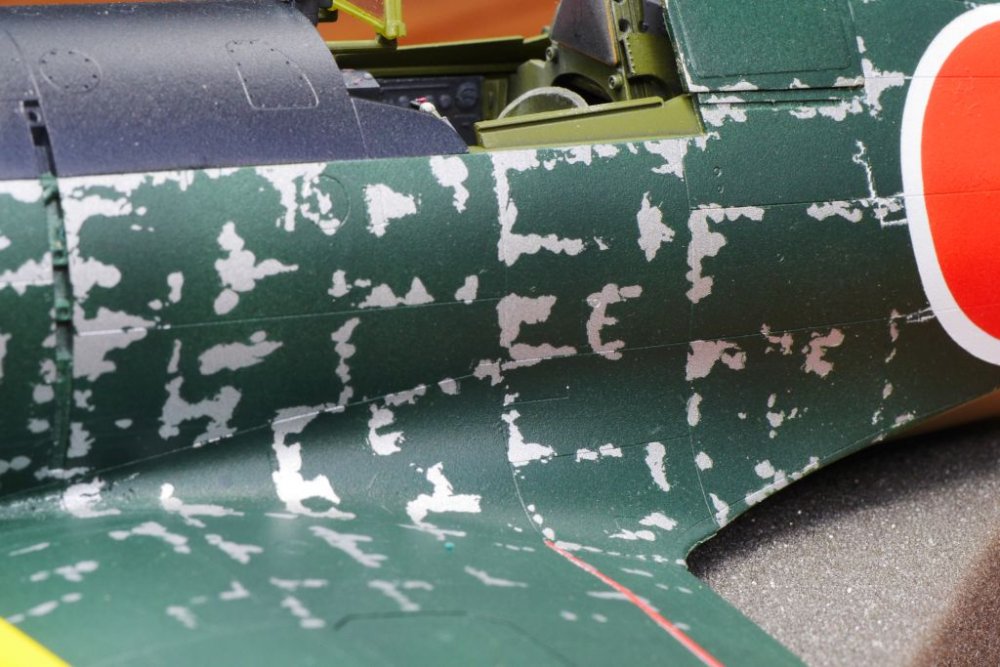
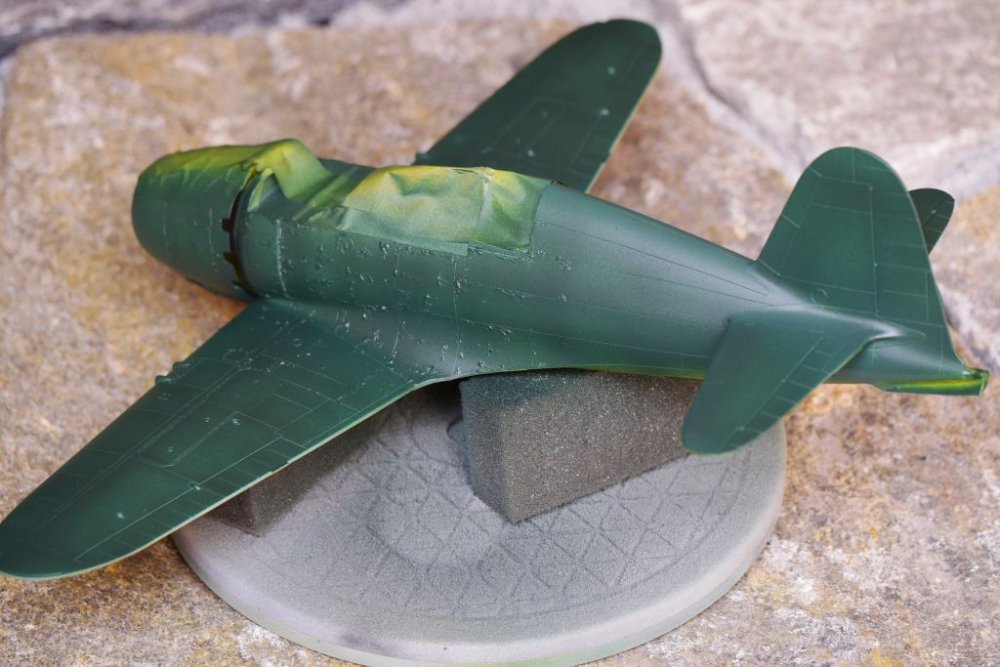
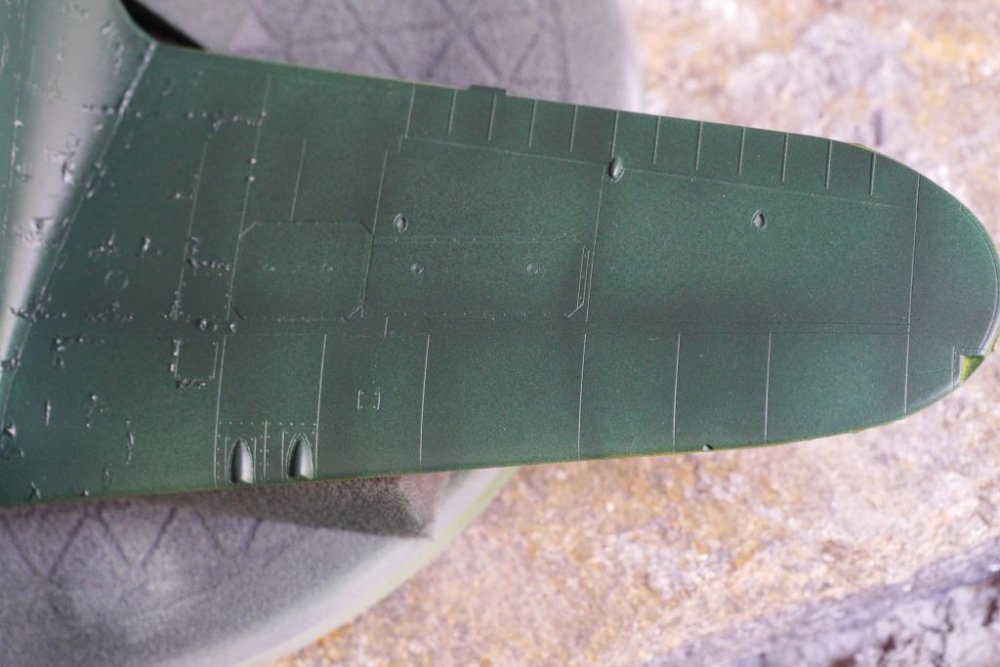
Hola Companeros, After masking the lower side of the plane I started to paint the upper side with AK 2063: D1 "Deep Green Black". I decieded against preshading in the very last minute and applied very thin layers of thinned color, pure, mixed with "Amber Grey" and "Anti Glare Blue Black" for Volume effect (I always try to mix colors of the same brand when possible to reduce the risk of bad awakenings while spraying). The AK colors again showed their quality in not beeing to opaque and beeing perfect for fine layering. Brushing them thickly is not what they are made for, which suited me perfect. Don't worry, the bumps are no failure of me or my airbrush, it's Liquid Mask, I applied before to achieve the first rough layer of chipping. So lets peel off that ugly stuff. That got me a nice worn look with a "stressed" surface on imaginary spars. I like the effect as a good starting point for further chipping. But next I will paint the markings to blend them in perfectly. Stay tuned if you like this build, next up is bright colors Cheers Rob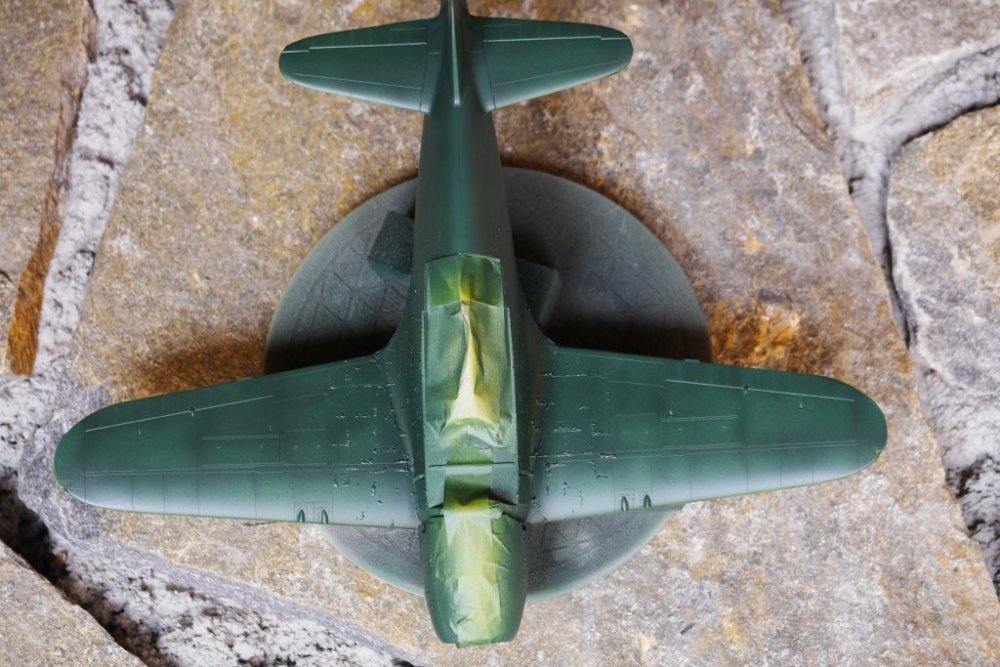


-
Hasegawa J2M3 Raiden - In Between Build
DocRob replied to DocRob's topic in LSM 1/35 and Larger Work In Progress
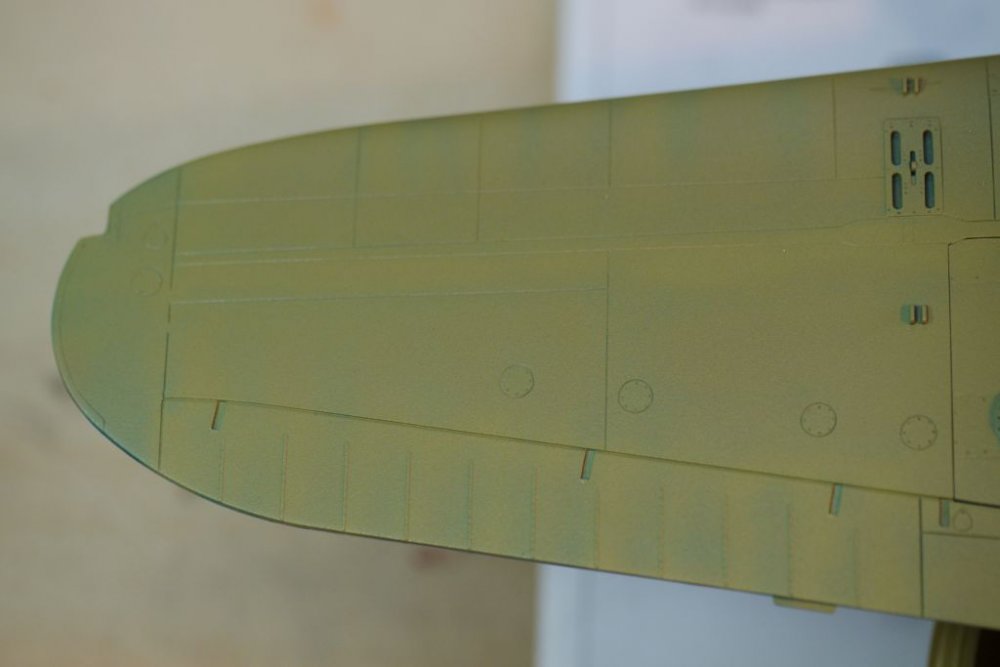
Buenos Dias Senhores, my painting schedule got a little out of hand, because of fiestas on the island and this "#+*#"- Photobucket issue. My Photobucket is history and the fiestas are over, so back to something completely different - the workbench. I started with my first multicolor preshading and I have to admit that the result looks a little weird. I don't like to be over subtle with preshading because the final paintjob includes many staight borders and clearly seperated colour fields like insignia or bands around the fuselage, so what is shining through gives the impression of irregular wear. It is hard to see on theese photos, but the multi color preshading created some volume for the following paintjob. I used AK-Interactive's AK 2062: J3 SP (Amber Grey) which sprayed prettty well, finely, smooth and not too opaque (good for controlled preshading effect), without clogging and nearly without thinner. The tone is greenish, but as I'm no expert on IJN colors it is fine to me, but the only Raiden I have seen in Cino CA was painted in a light grey tone. Cheers Rob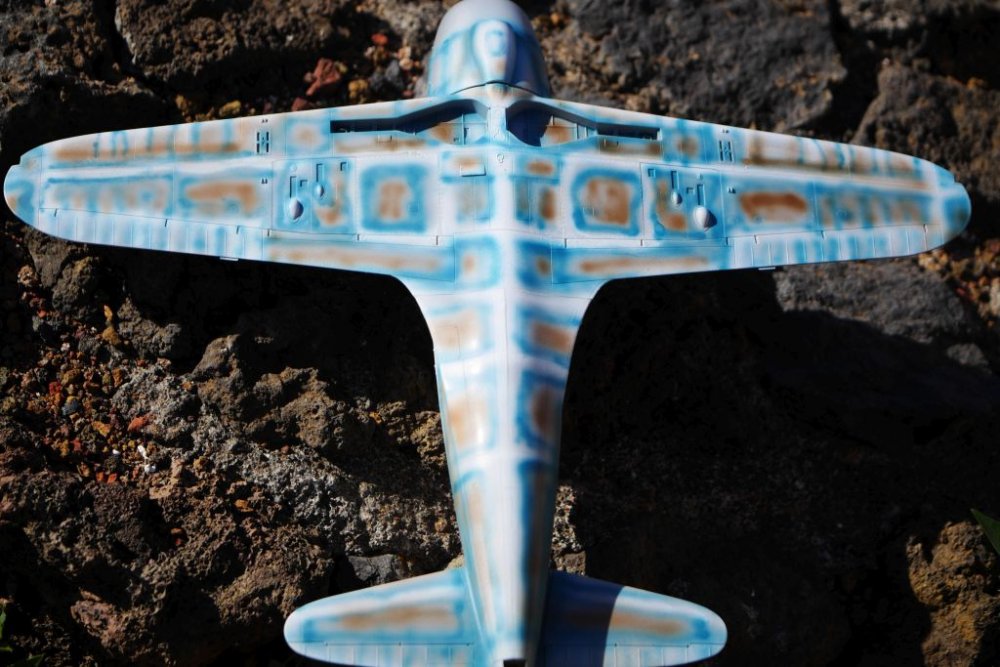

-
Hasegawa J2M3 Raiden - In Between Build
DocRob replied to DocRob's topic in LSM 1/35 and Larger Work In Progress
Thank you mikester, I will continue with or without pictures -
Thanks Darren, I will try that, I always thought that there will be a direct connection to my harddisk that way, stupid me . Cheers Rob
-
Hi Darren, thanks for your answer and suggetion. For me there is one question left, how do you utilize LSM-picture-hosting if I may ask. The good thing in hosting "inside" LSM is, that it is obviously not third party anymore . Changing to another service might get you into the same trouble happeneing now with PB sooner or later. When they are smelling blood... Cheers Rob
-
Houston, I (We) have a problem, Since today instead of my Photobucket hosted pictures I only see this: To enable 3rd Party hosting I would have to upgrade PB to this: "Plus 500 Plan: 500 GB of Storage and unlimited bandwidth for $399.99 / Year. The Plus 500 Plan allows for unlimited image linking and unlimited 3rd party image hosting. Read more: http://photobucket.com/terms#ixzz4lU6SmARU" I will not do that, I use PB exclusively for that forum and as I have a small bandwith on my island net, switching to annother service and reloading the pictures is not an option. My thoughts about the behaviour and conduct of PB I will keep to myself in the moment, but maybe words like blackmail will escape my venom filled mouth later. So for the moment I'm frustrated and out. Any suggestions are welcome Cheers Rob
-
MH 60 s Knighthawk Academy 1/35
DocRob replied to shark64's topic in LSM 1/35 and Larger Work In Progress
The Pale Riders, at least most of them have their shades or goggles down for the sun to come up on them . Great work shark and by that I mean your whole project which I enjoy more and more to follow. Cheers Rob -
Hasegawa J2M3 Raiden - In Between Build
DocRob replied to DocRob's topic in LSM 1/35 and Larger Work In Progress
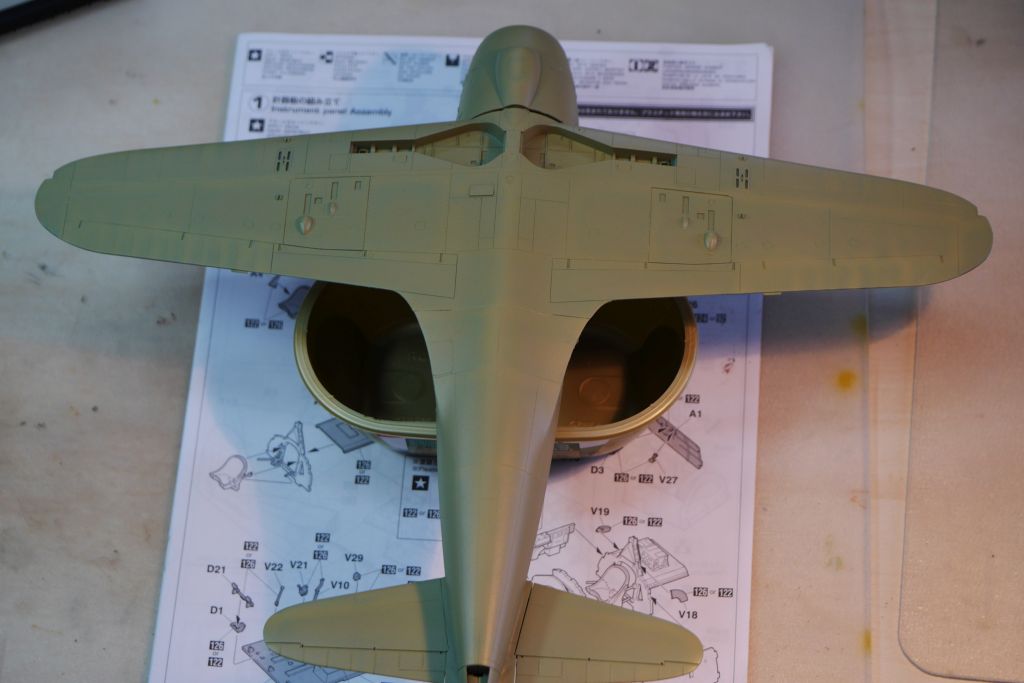
Yeah Ozzy, the Raiden does look mean. First there was the huge engine and it's cowling and then the rest of the bird was designed and attached . The result is a really hefty plane, but not without elegance in it's streamlined shape. I bet the pilots loved the spacious cockpits of theese radial engine fighters as they seem larger than some of their flats in Japan. Cheers Rob -
Your Mossie is a true beauty and a nice color scheme for a change, congrats. Cheers Rob
-
Iconicair Supermarine Spiteful
DocRob replied to JeroenPeters's topic in LSM 1/35 and Larger Work In Progress
Nice legs, a little bit skinny to my taste . There is another strange thing about your build. The picture of the wednesday post showed just one wing attached, there was still a little hope left. In the last picture there are two mounted wings, the series is broken, what happened to your wingless approach ? Cheers Rob -
Hasegawa J2M3 Raiden - In Between Build
DocRob replied to DocRob's topic in LSM 1/35 and Larger Work In Progress
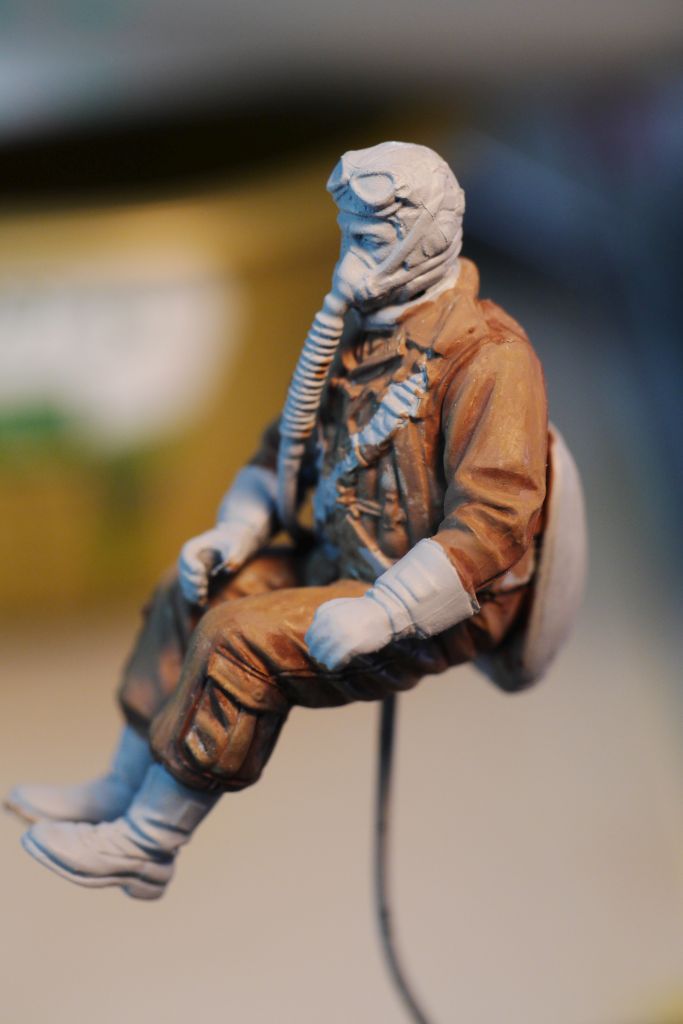
No comments on the best chipping method? Then I have to rely on my own method thinking . I will try to do the base chipping with liquid mask dabbed onto the silver primed fuselage and wings with a fine stiff brush. I try to empasis the spars and seamlines to do so, as to achieve a stressed surface effect. I deceided against the hairspray method, because I'm afraid of peeling to much paint of when masking with tape for later stages of painting. Raiden with goose skin: First paint for the pilot: Cheers Rob

-
Hola Drevelia, welcome to the LSM-Community. That is a real statement you posted there. Great attention to detail and perfect finish and execution on a setting, which is truly large scale. I can imagine the amount of work you put into this scene, and the result is very convincing. Who is producing these figures by the way, they don't look like Dragon ones? Keep on rolling Rob
-
Seeking info on 1/32 Mosquito Aftermarket offerings
DocRob replied to Michaelscarborough's topic in Modelling Discussion
Hi Michael, what is new considering the AM-Situation of the Mossie? All your WNW-birds have been older . I decieded for my build to stay with the provided wheels as they are looking great built right out of the box. I will use the HGW Wet transfers No. 232011 for the stenciling as I have not the best of expierience using Tamiya decals (Corsair) and some Aires 60lb Rockets No. 320064 For the Insignia, Codes and Cockpit I will use Maketar Masks No. 60326. There will be a heavy dose of Brassin (Gun Bay, Nose Guns and Exhausts). The kit engines are ok for me, so no Brassin there. Last but not least some Fabric belts and some Cockpit Placards (I'm not sure if I use them) from Eduard and that is it for my build. Hope that helps after so many WNW builds. Cheers Rob