DocRob
-
Posts
7,054 -
Joined
-
Last visited
Content Type
Profiles
Forums
Events
Gallery
Everything posted by DocRob
-

Your colour and marking preference?
DocRob replied to Sir Desmond Glazebrook's topic in General Discussion
British Razzle-Dazzle schemes to me, be it on an airframe or on a ship. Cheers Rob -
Thanks Harv, good to know that there will be no big lump of melted plastic in the end . Thanks Hubert, to seal the process in a plastic bag is a good idea. Get rid of the chrome and then put it back on with lots of effort . Cheers Rob
-
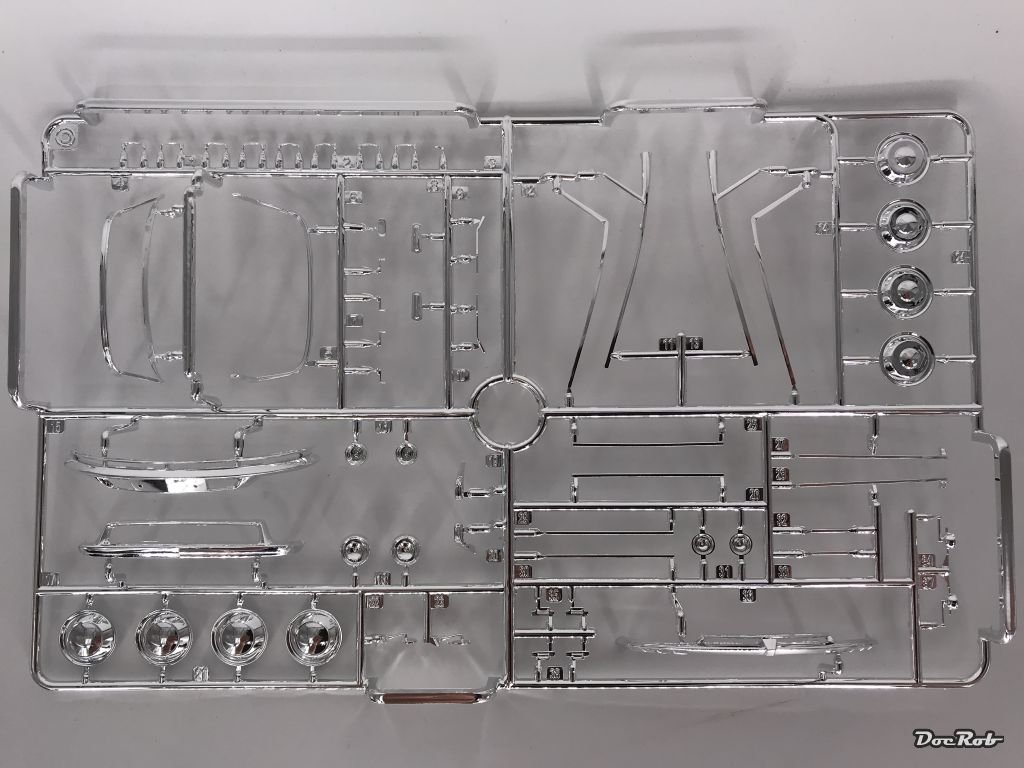
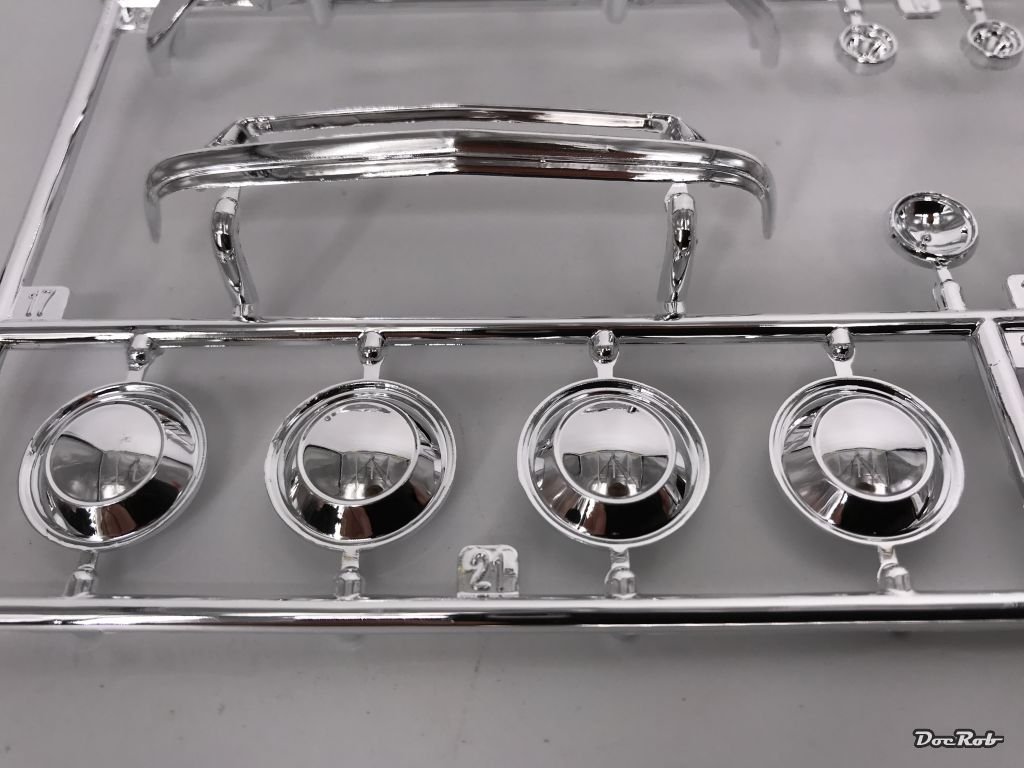
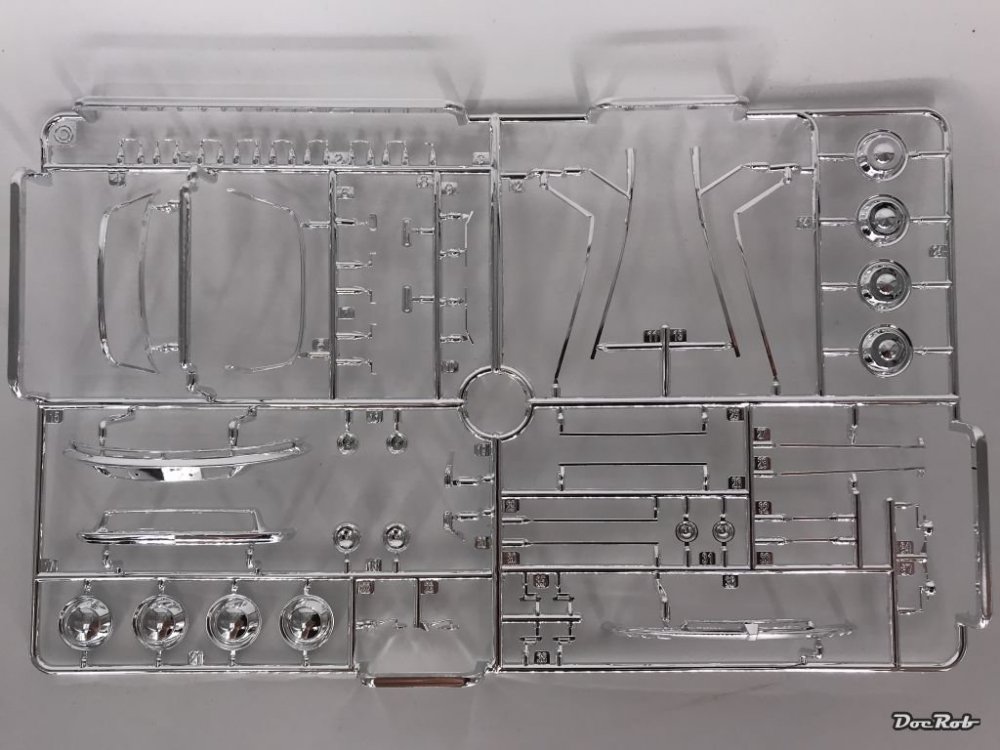
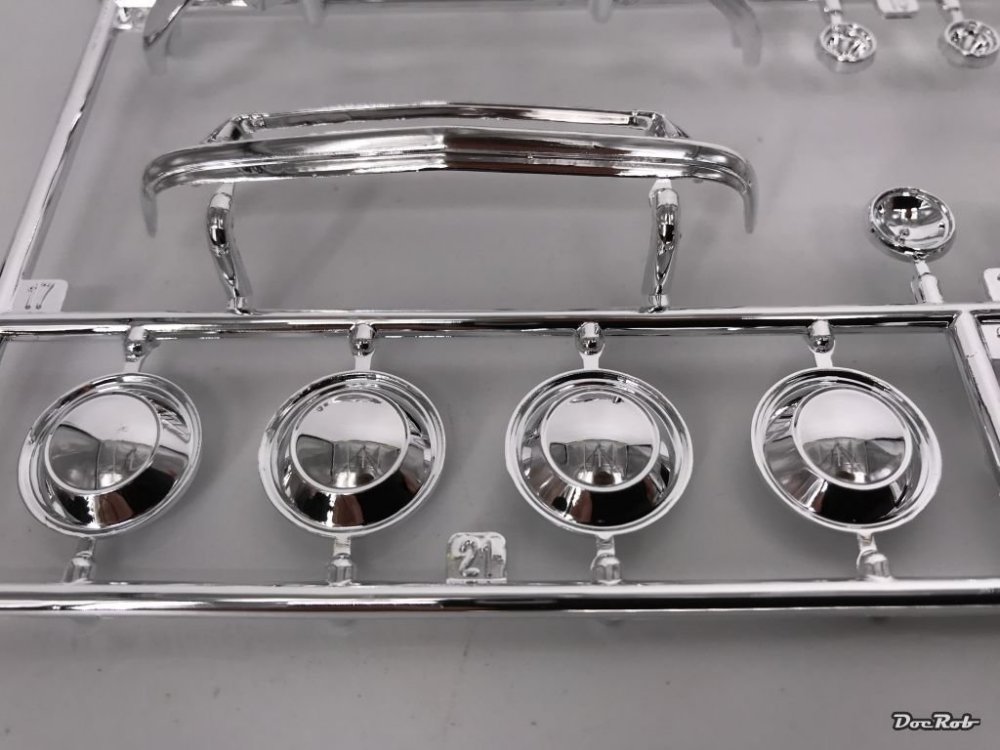
Today the correos (mail) brought me this beauty. As always the arrival of new stuff leads to questions - it's a forum, right . I'm not decided about how to tackle the Goddess. Used and worn or new and shiny. The all deciding question is how to handle the chrome parts. The plating looks to be very decent at first sight and Ebbro tried to leave the connectors to the sprue in places which are mostly hidden. I don't have much expertise in car models, the last one was an old 1/35 Mercedes Benz for my Iraq dio, but this had no chrome parts and I worked with Bare Metal foil to get the effect. Does one of you have some golden tips about removing chrome plating properly without destroying the plastic. I read about oven cleaner, but does that clean the hidden corners? Cheers Rob

-
Never heard of that bird, but can't wait to see you doing some big plane magic again. Cheers Rob
-
Hi Ron, 0,5 mm *32 = 16 mm, sounds not to bad. I will try that stuff and report. To me it is right if it looks right. Cheers Rob This looks like 16mm to me minimum
-
Some time ago a member here pointed to that sie https://anyz.io/. They have braided lines and also resin spark plugs. I never tried them but on my next shopping tour I will buy some of their stuff and try it. Cheers Rob
-
Good to see you progressing with the Corsair. I always like workaround and yours to avoid stenciling is great, just make it Greek . I like the heavy weathering and specially the idea of the different looking tanks. Cheers Rob
-
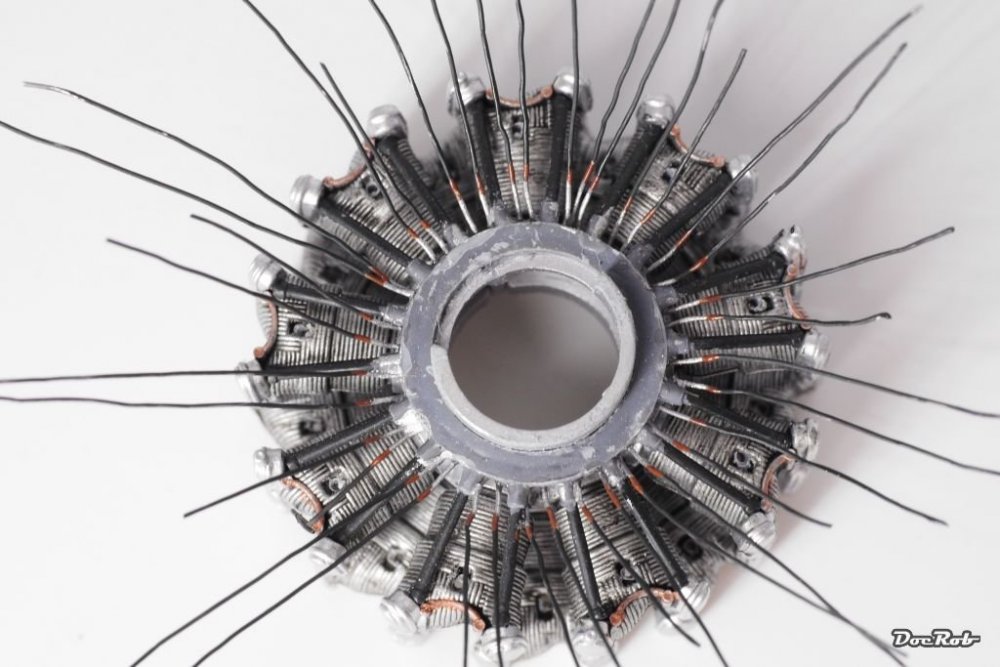
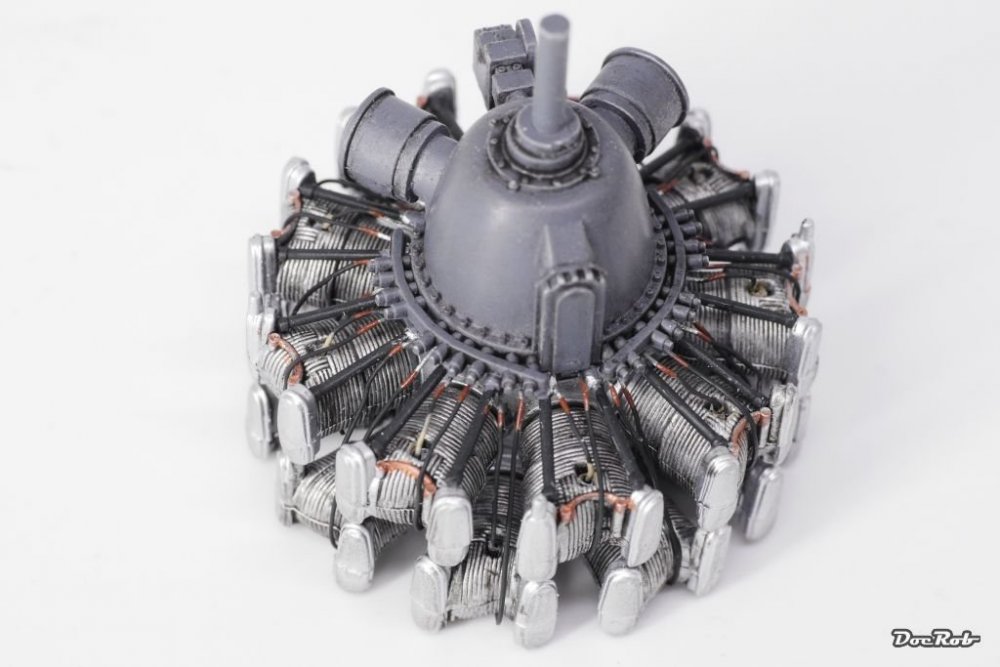
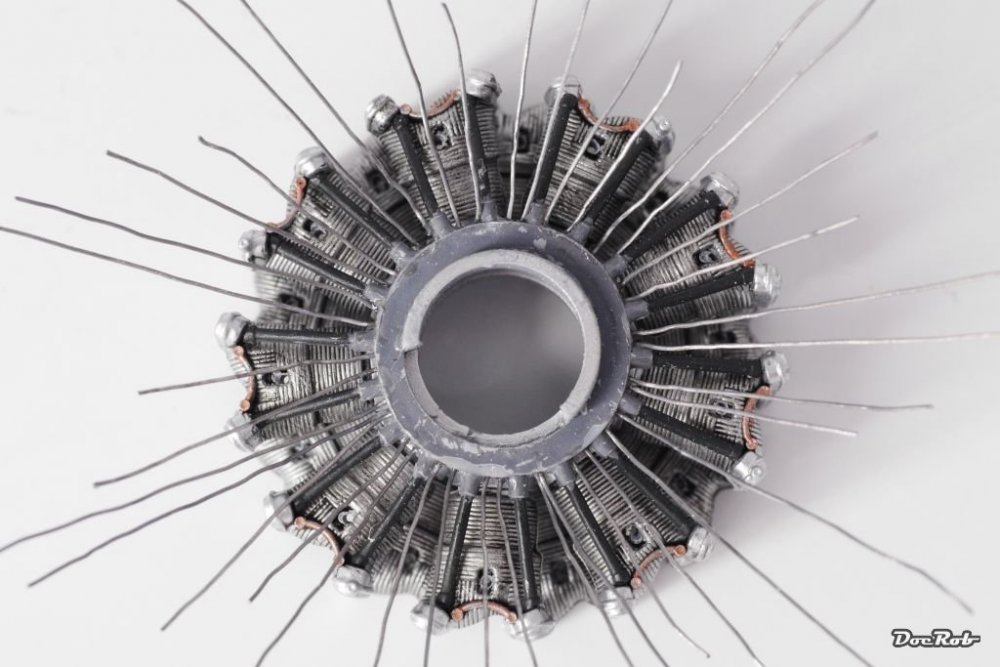
I use lead wire made by Plusmodel. It has a 0,3 mm diameter, is very easy to bend and strong enough to stay in place. I use a 0,4 mm drill for the holes and CA to fix everything. To simulate connectors and spark plugs, I use small amounts of white glue. The easy bending lead allows to pre paint the wires stretched out, before installing them. Cheers Rob
-
Thanks for your experiences Ernie, some parts of my upper conribution got lost while saving. The bad results I had with Vallejo black primer (went tar like in the airbrush), like Hubert mentioned and with several acrylic colours from Scale 75 and Lifecolour. Luckily without two exceptions I tried to mix these colours with Mr. Leveling Thinner in a test jar, because cleaning the airbrush will take time swearing and will get you to the edge of swapping to another hobby like knitting, e.g. Cheers Rob
-
Thanks, that is good to know. Cheers Rob
-
I tend to disagree, after many praises I bought a bottle and tried with different Colours, mostly to the effect, that it turned my airbrush in a glue like mess, which took me, like Hubert said, a lot of time to clean. That happened with Vallejo Primer, Acrylic colours of Scale 75 and Lifecolour. Without problems it worked with some Ak-Colours (no Real Colours) and AK Primer. So far the messy part clearly outweights the benefit to me, but I will test and document futher, because if the stuff works the results are great. Cheers Rob
-
RCAF Lanc 10MP. This really is a group effort
DocRob replied to Clunkmeister's topic in LSM 1/35 and Larger Work In Progress
Yessir, there sure is and you find it on the main page under 'LSM Completed Work' and then you have the options for air- or landbased objects. If it is a non LS of M build you find the section a little bit less prominent under 'Non LSM-builds' way down. There is a section called 'Non LSM, WIP and completed' Feel welcomed to show us your work Cheers Rob -
Maybe just a corrective for the national economy when passing pedestrian crossings . Cheers Rob
-
Yes Gus, the DS/ID had a hydro pneumatic suspension, but the late models of the predecessor C15 had it also and that was in the 50's. What I always loved about the DS is the package of innovative design in a mass market product, combined with so many technically inventions, I guess never have been implemented in a single car. The DS could drive on three wheels, thanks to the suspension system (ask De Gaulle what he was thinking about it, after escaping an armed ambush on three wheels in a DS). Fifteen years ago Mercedes Benz advertised their 'new' headlights, which followed the steering as an innovation, a feature which the DS already had in 1967. And then there is the design, a piece of art, French finesse combined with engineering attitude. A car of this kind wouldn't stand a chance in our times. Nobody would dare to put that many innovations on the market, instead Citroen puts some design enhanced new DS models on the streets, which are basically typically new small cars with a little bit of funky attitude. She is called Goddess for a reason Cheers Rob
-
OS2U Kingfisher by Kitty Hawk
DocRob replied to BlrwestSiR's topic in LSM 1/35 and Larger Work In Progress
You are definitely firing up the 'want one' urge with your great build. I love the Kingfisher and am tempted not for the first time. Cheers Rob- 89 replies
-
- 6
-

-
- os2u
- kingfisher
- (and 2 more)
-
RCAF Lanc 10MP. This really is a group effort
DocRob replied to Clunkmeister's topic in LSM 1/35 and Larger Work In Progress
That's what thousands of blind Russians tend to say Cheers Rob -
In the morning I got reminded, that actually there is a big hole in my stash and I forgot about temporarily. I always dreamt about buying a Citroen DS in real live, but for different reasons it never happened and now on my tiny island a Goddess would not be of much use. Lots of stuff to transport and lots of off road driving are not the perfect terrain for a DS. As a kit I eyed for years at the 1/16 Heller offering, but not liking Heller kits very much and the kit being a DS-19, I waited and waited, till I saw the Ebbro offering. Two minutes ago I ordered one, but are not entirely sure about the finish. It might end up newish or, preferred at the moment as a Hippie mobile with a girl and a guitar sitting in the grass in front of a worn DS. Cheers Rob Pictures are for discussion only
-
What is on your bench right now ? Share a picture :)
DocRob replied to Martinnfb's topic in Modelling Discussion
Looking nice, but Sunday, with all the weathering still to do, but why not, it's still more than 24 hours Cheers Rob -
RCAF Lanc 10MP. This really is a group effort
DocRob replied to Clunkmeister's topic in LSM 1/35 and Larger Work In Progress
Yeah, I use that stuff too for cleaning my airbrush Cheers Rob -
RCAF Lanc 10MP. This really is a group effort
DocRob replied to Clunkmeister's topic in LSM 1/35 and Larger Work In Progress
As a cocktail addict I have to say lets try , but I will though without the masses of ice in it, enough to sink the Titanic. With chilled ingredients and chilled glasses, it will be all right. The temperatures should vary of course, because it makes layering easier. Love that Monkey 47 in the background. Cheers Rob -
RCAF Lanc 10MP. This really is a group effort
DocRob replied to Clunkmeister's topic in LSM 1/35 and Larger Work In Progress
I alwas trrryyy tooo get theeese, but after a looong nught, I got unly yellow, purple and orange ones, hick, and a big hangover. Thanks Ryan Cheers (I mean it) Rob -
1/32 Connie Edwards Ha-1112 Buchon
DocRob replied to JeroenPeters's topic in LSM 1/35 and Larger Work In Progress
Whohow, that pit looks great, like it has been in a barn for some decades. You are the new master of 'worn and grumpy' Cheers Rob -
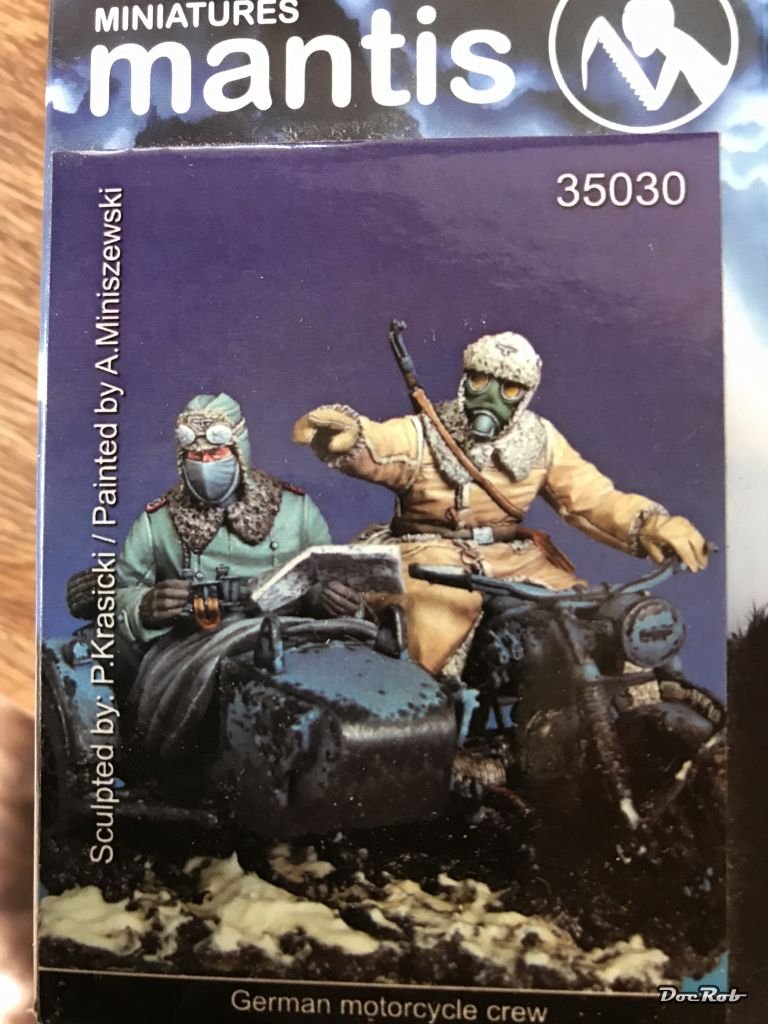
Actually there are no real holes in my stash, it will by far last longer than me specially considering my slow pace while building. The HPH Walrus is a maybe, but with full resin builds I tend to go Steam Punk and Sci-Fi with kits from Industria Mechanika and the like. To me it is more about the 'want to have' kits, there are some. A decent 1/32 Spit is on the list, as well as some WNW-kits. In the moment my finger is hovering over the 'buy-button' to get me a Blohm & Voss 141 and a Avenger MK I but these will be in 1/48. Generally, since living on my tiny island, my urge of buying new kits has evaporated a little. Not that there are no temptations, but I reduced buying new stuff a lot, since it was often a substitute satisfactory thing, while working hard and living in the stressful never stopping but nice city of Berlin. I thought the same a while ago and got me those along with a MB BMW kit with etched parts, to build a little vignette with lots of mud and snow.

-
What is on your bench right now ? Share a picture :)
DocRob replied to Martinnfb's topic in Modelling Discussion
Thanks Gus, the fanned backrest gives them a slightly lighter appearance than they really have, They weight around 25 kg each, which is a good thing, given they will be all year round in the garden, even with our heavy Kalima storms. They are indeed very comfortable and you don't need a table to have the drinks close by with these wide armrests. Your Nieuport is looking great, I have to get me one of those and tend to go silver-grey finish too. It would be nice to have a sharper image of your beautiful Tigerhead. Cheers Rob -
As if this Behemoth would need that . Looking all great Gaz, I like the ambush pattern. Will the hull Dunkelgelb receive a brownish filter to match the wheels, or is that on purpose? Is the vent ring around the gun really that shiny on the originals? Cheers Rob