BlrwestSiR
-
Posts
9,197 -
Joined
-
Last visited
Content Type
Profiles
Forums
Events
Gallery
Everything posted by BlrwestSiR
-
Medium well burnt iron?
-
That's quite the prize and extremely generous of you Hubert. Carl
-

What is on your bench right now ? Share a picture :)
BlrwestSiR replied to Martinnfb's topic in Modelling Discussion
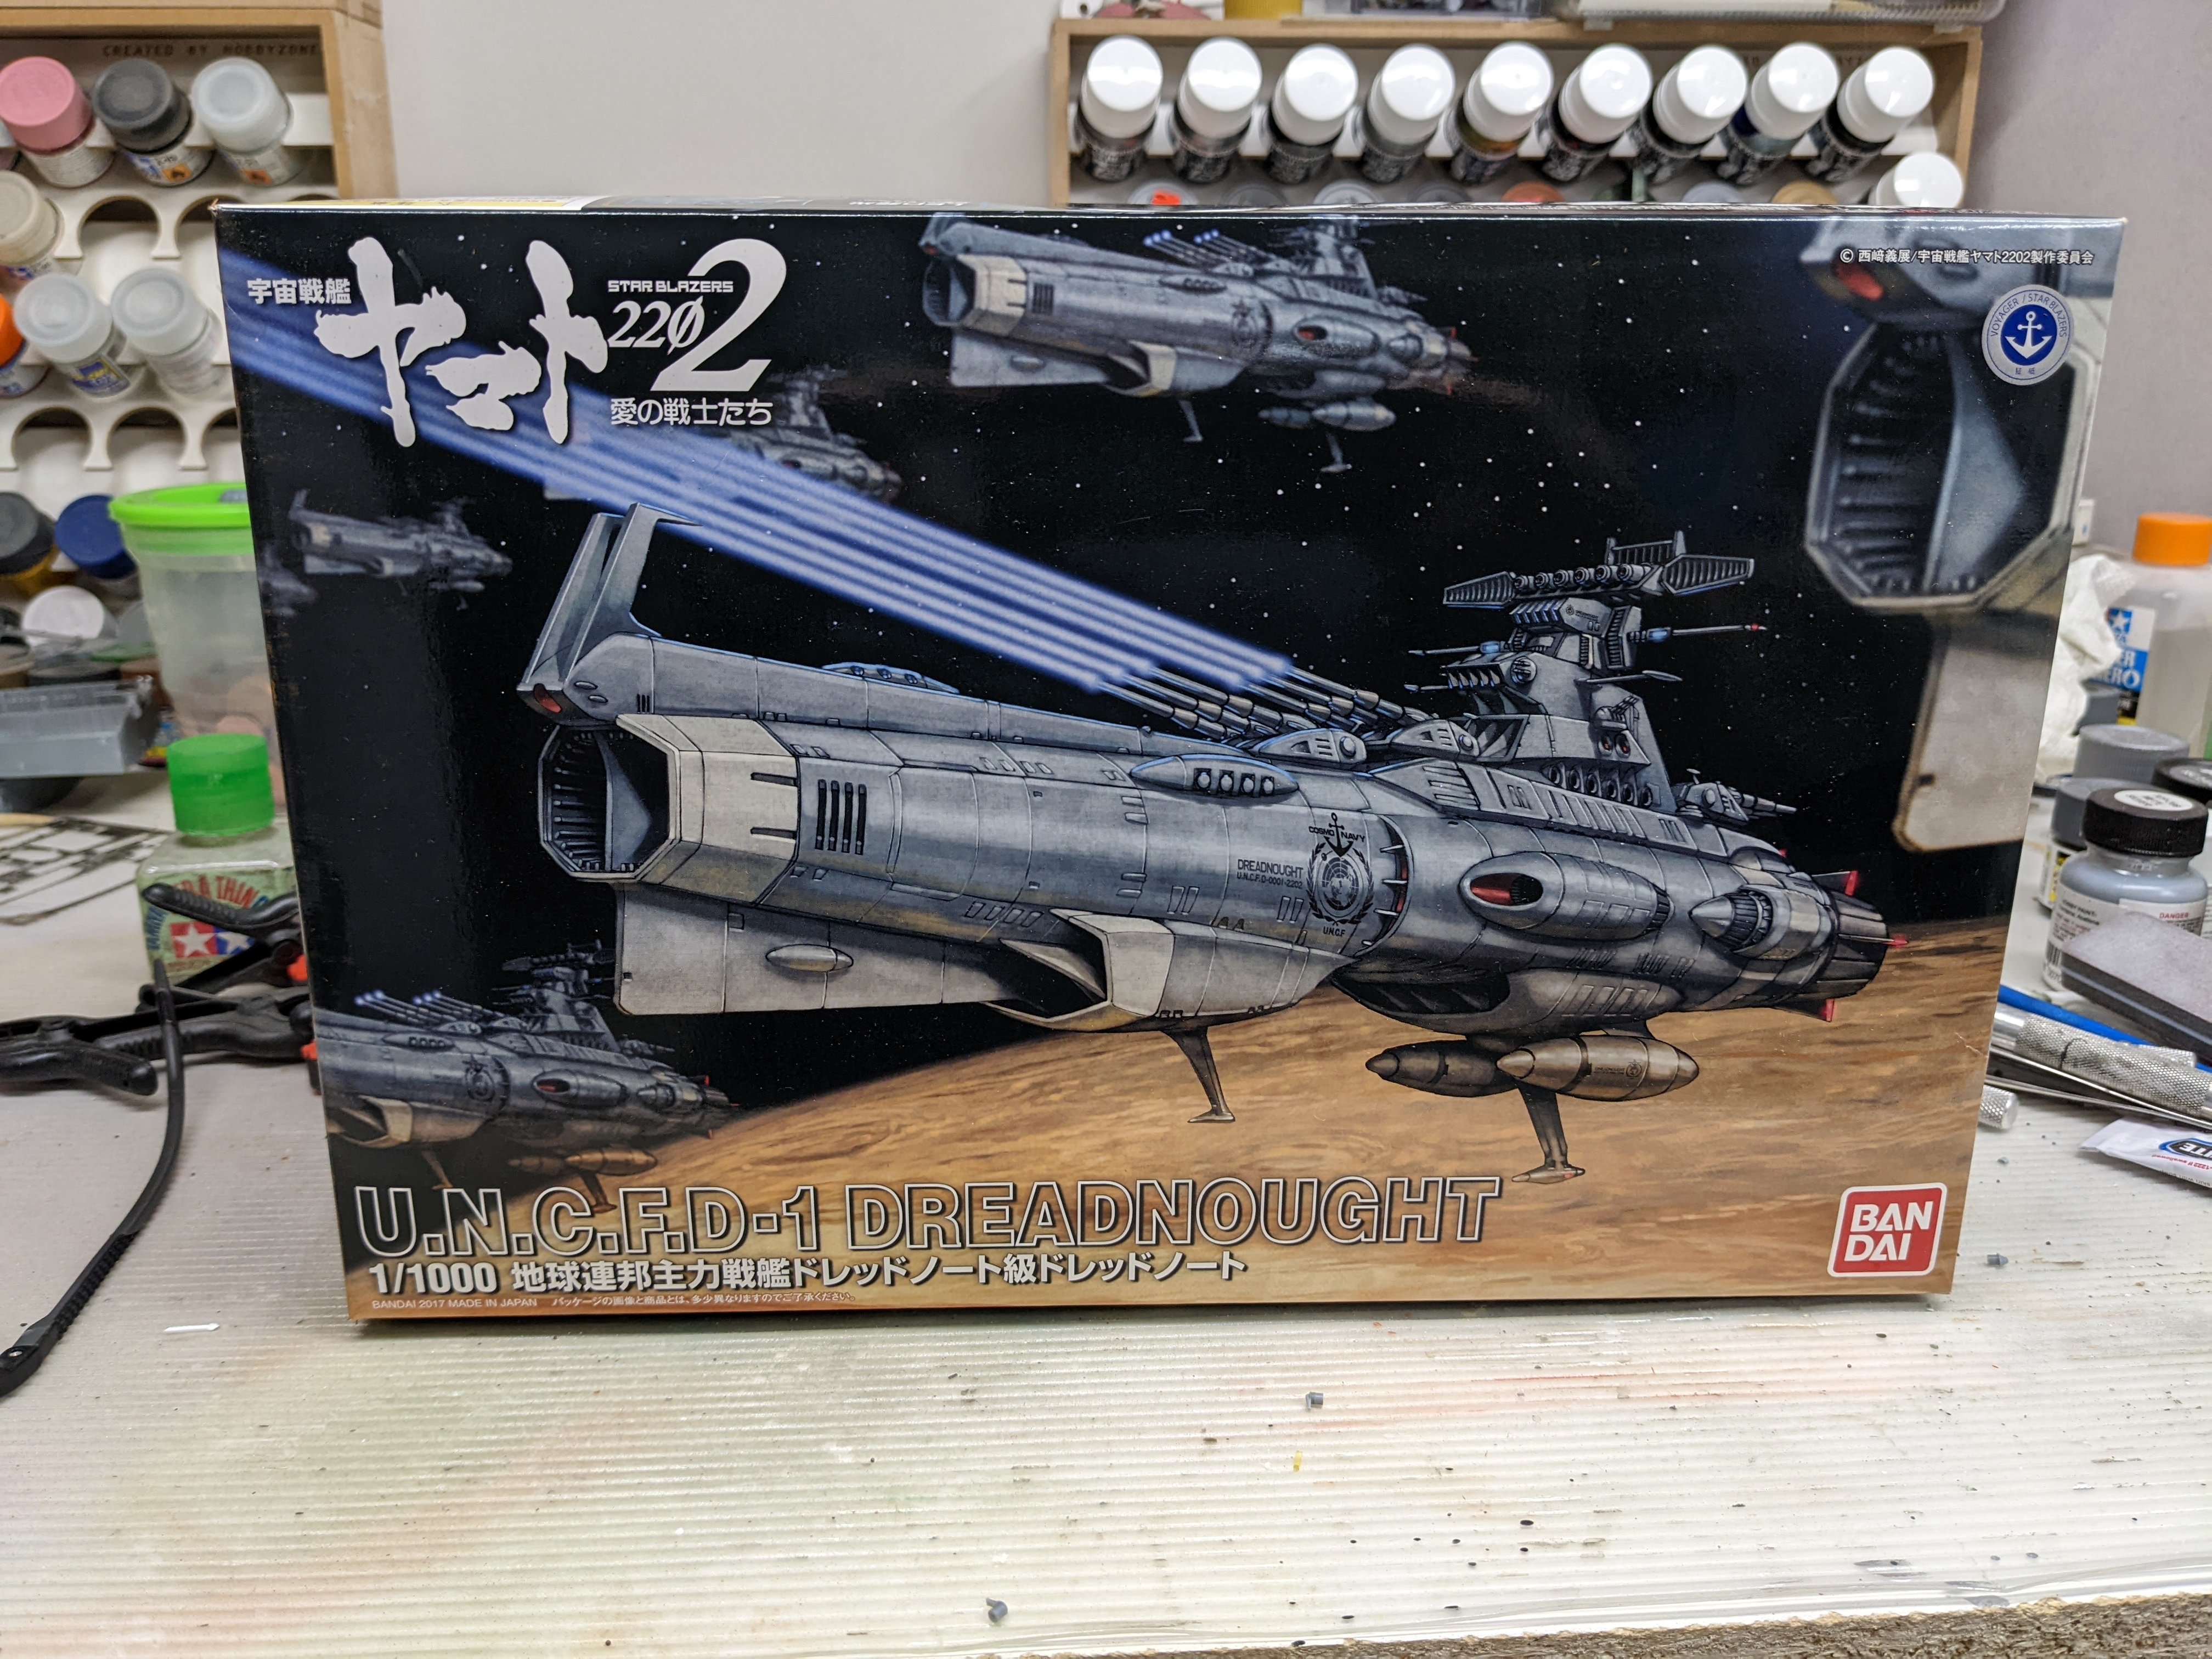
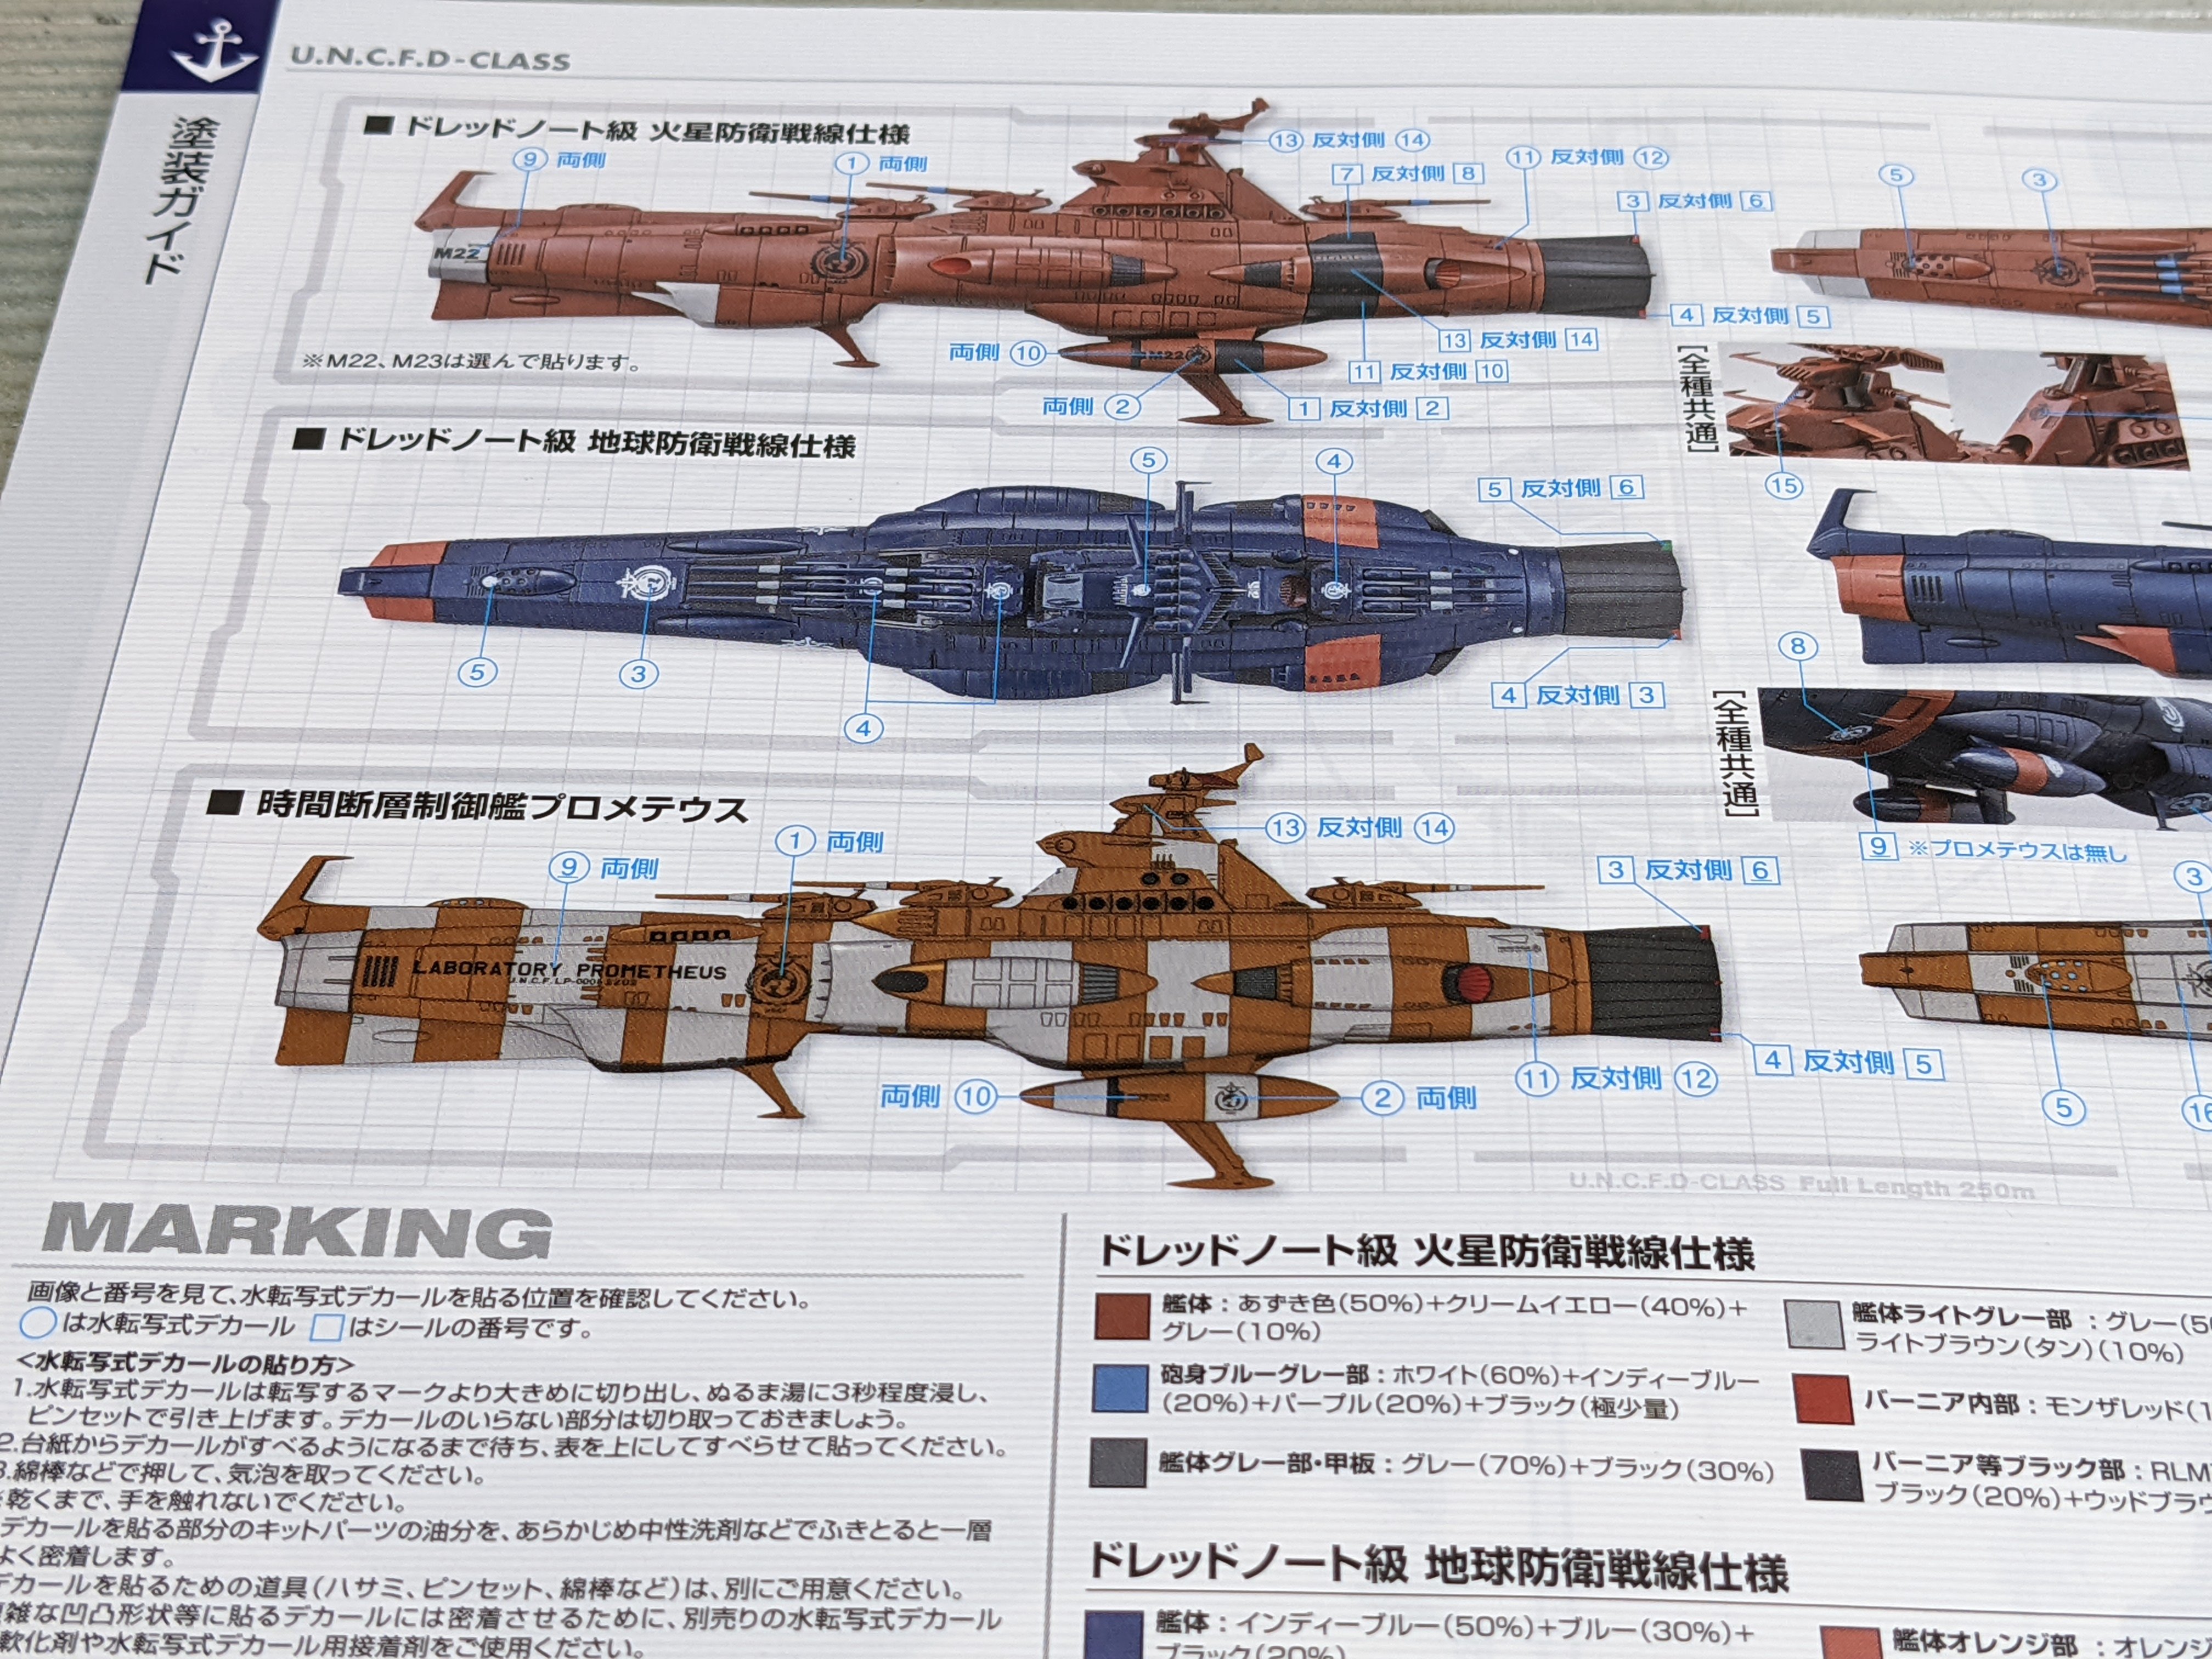
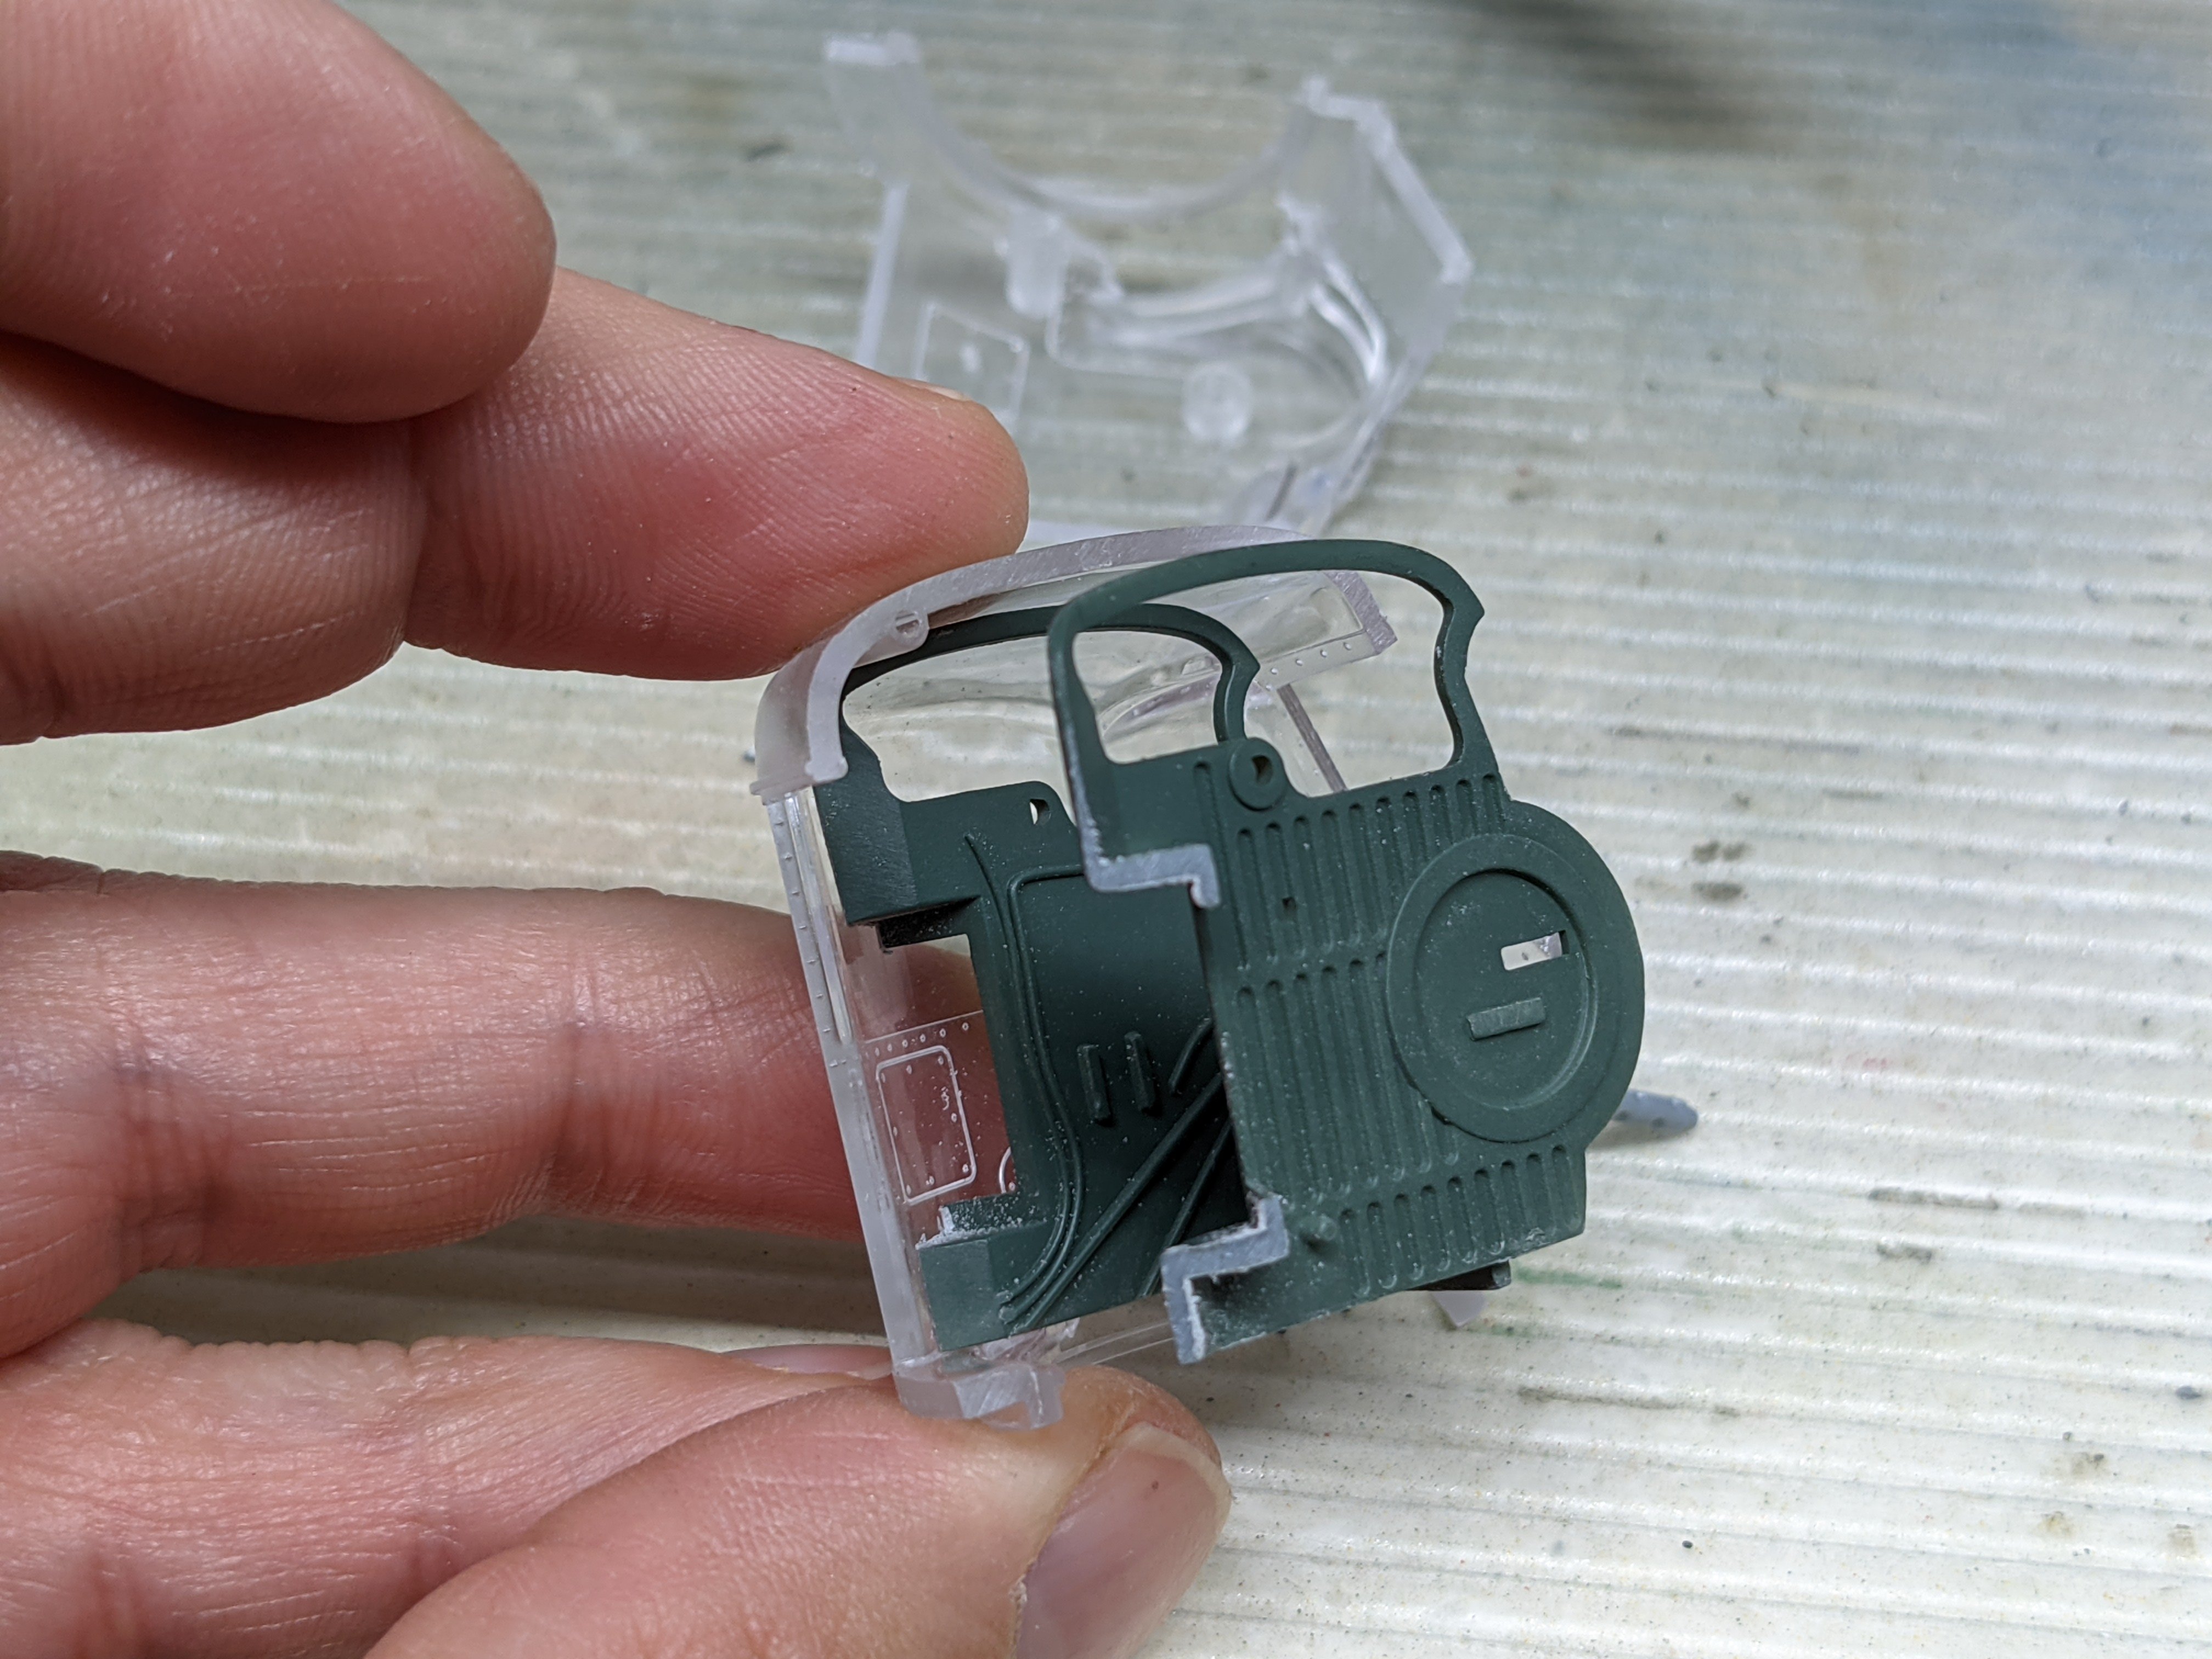
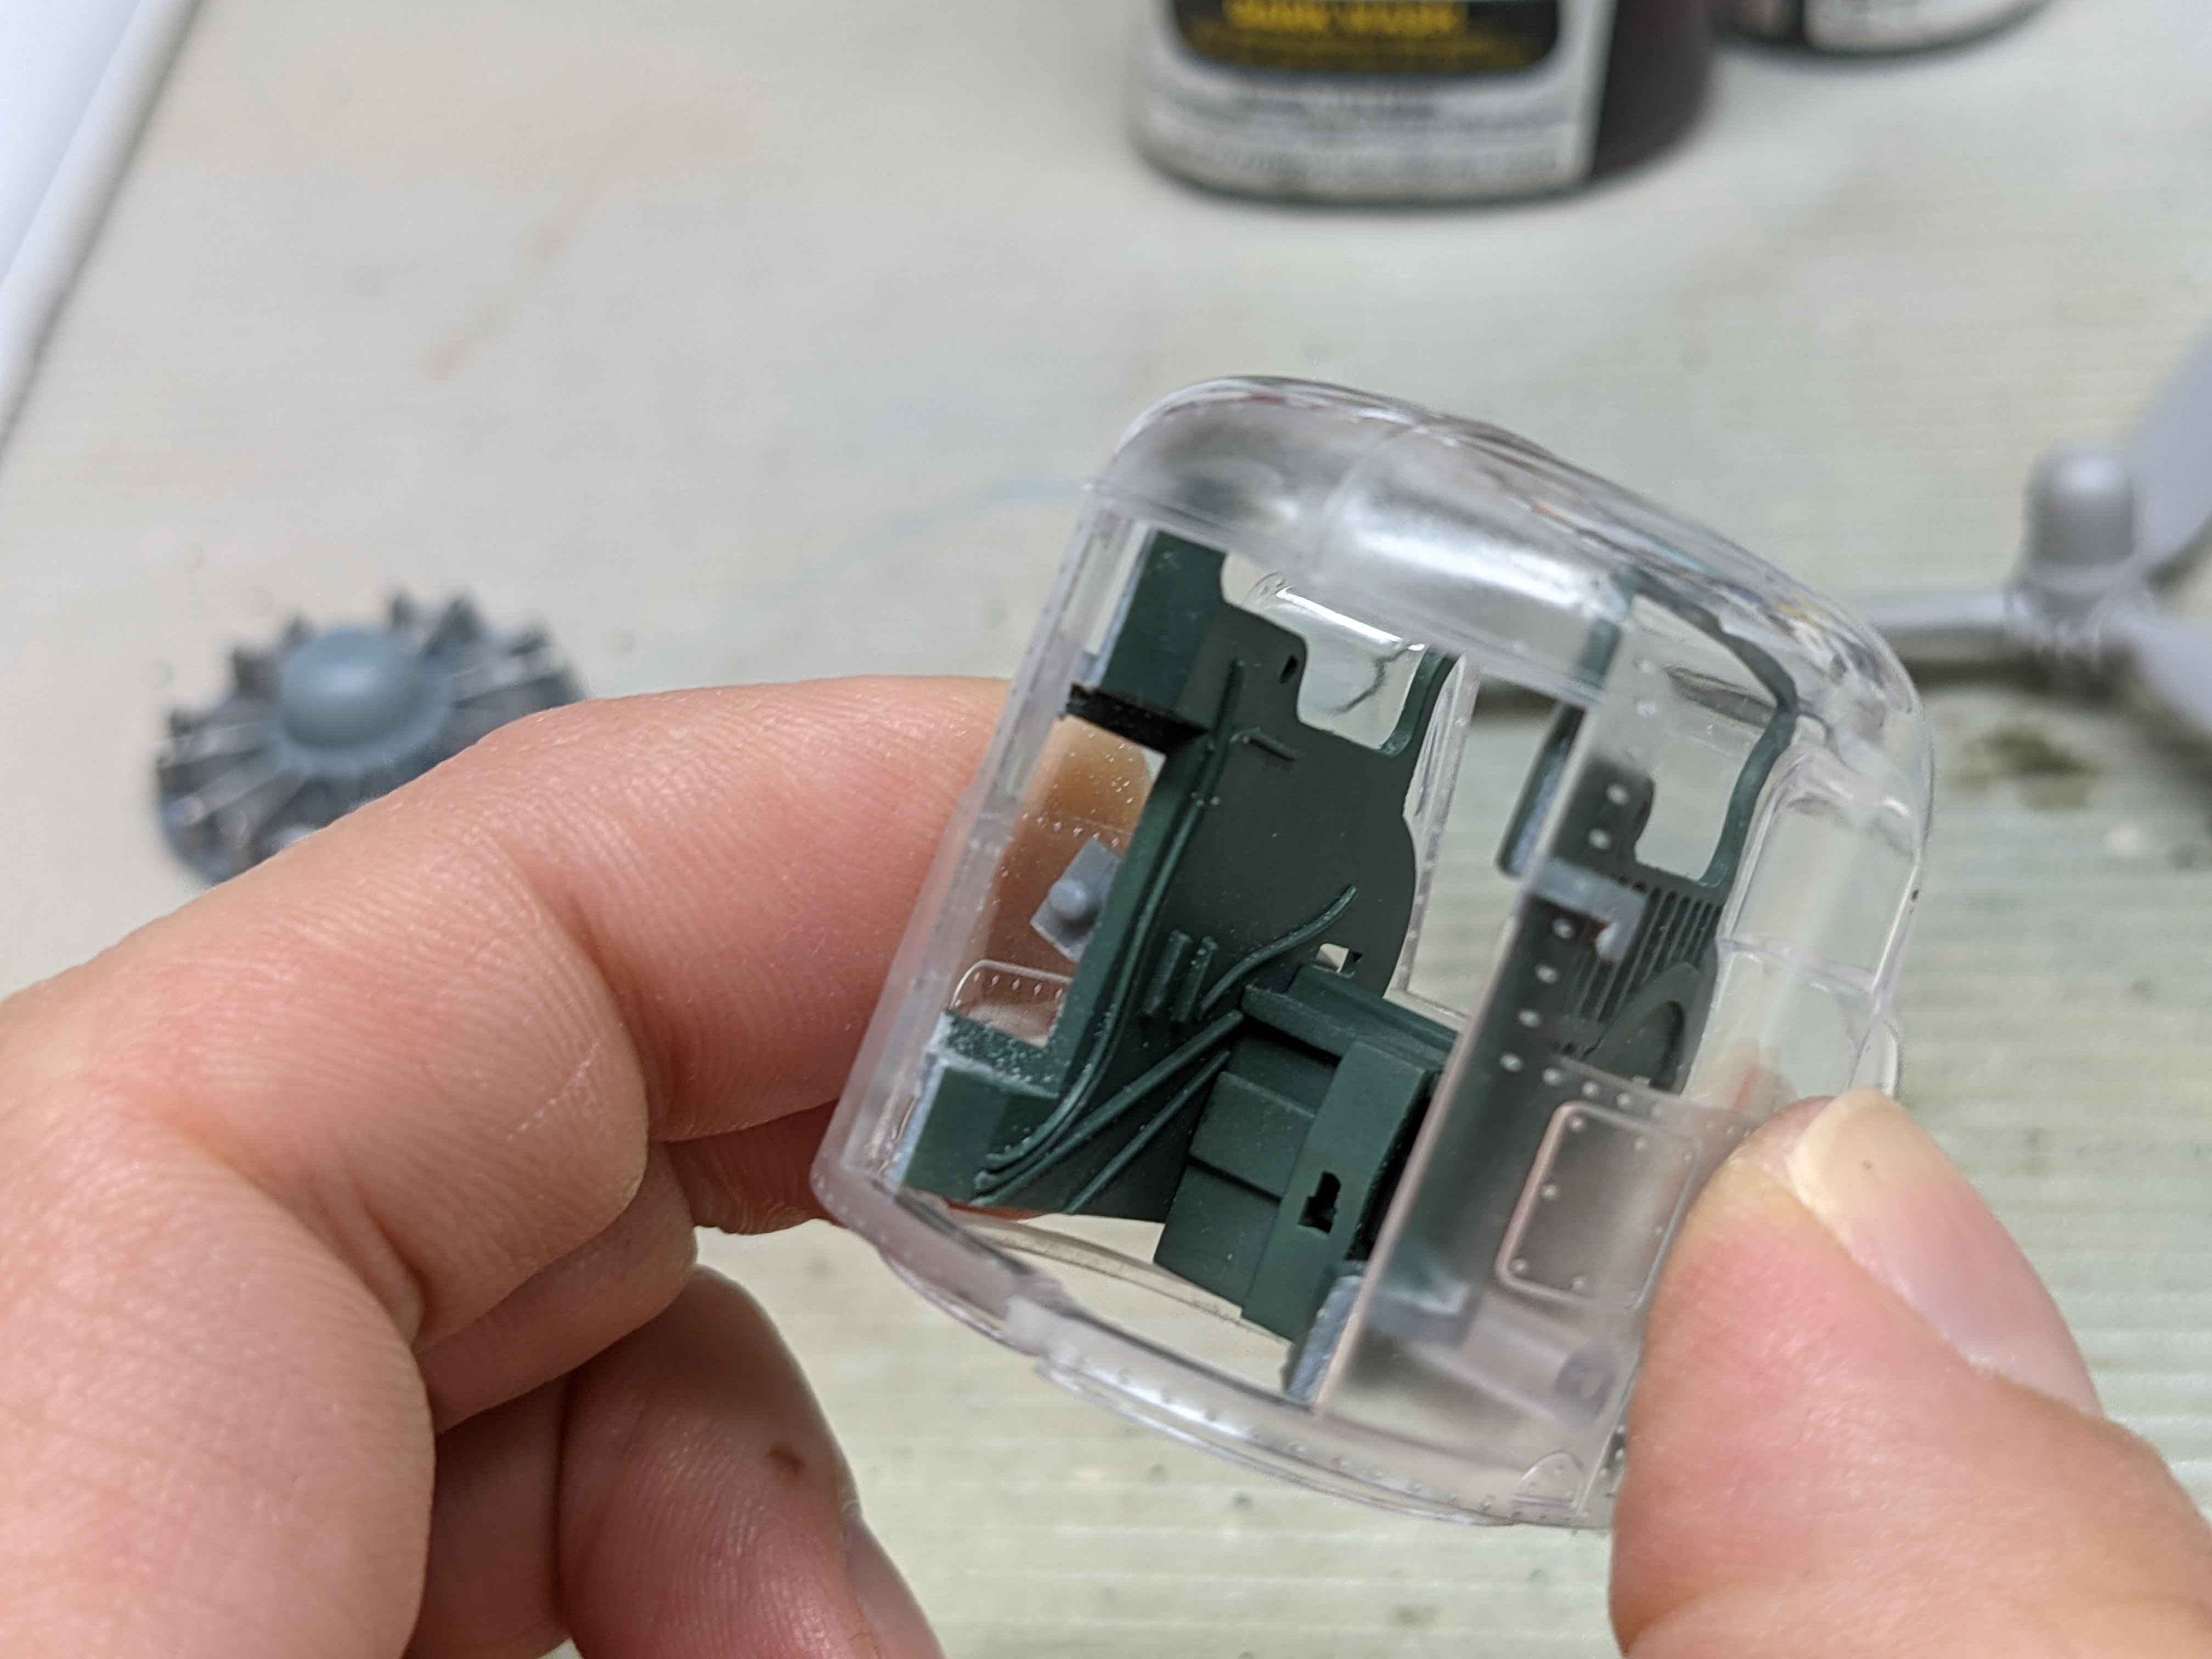
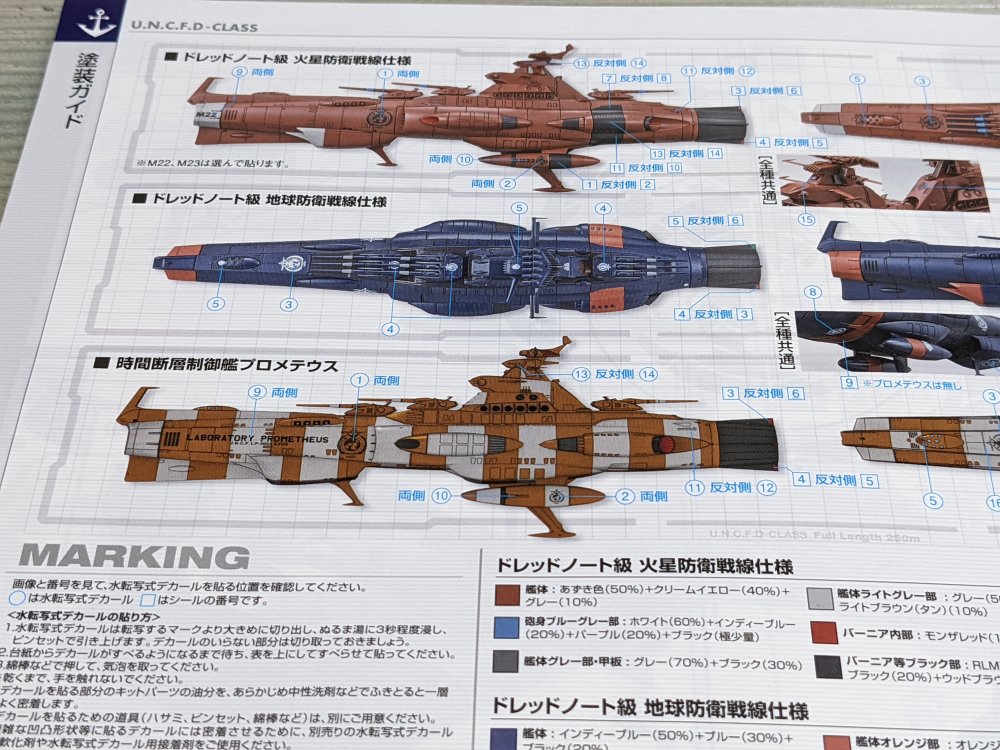
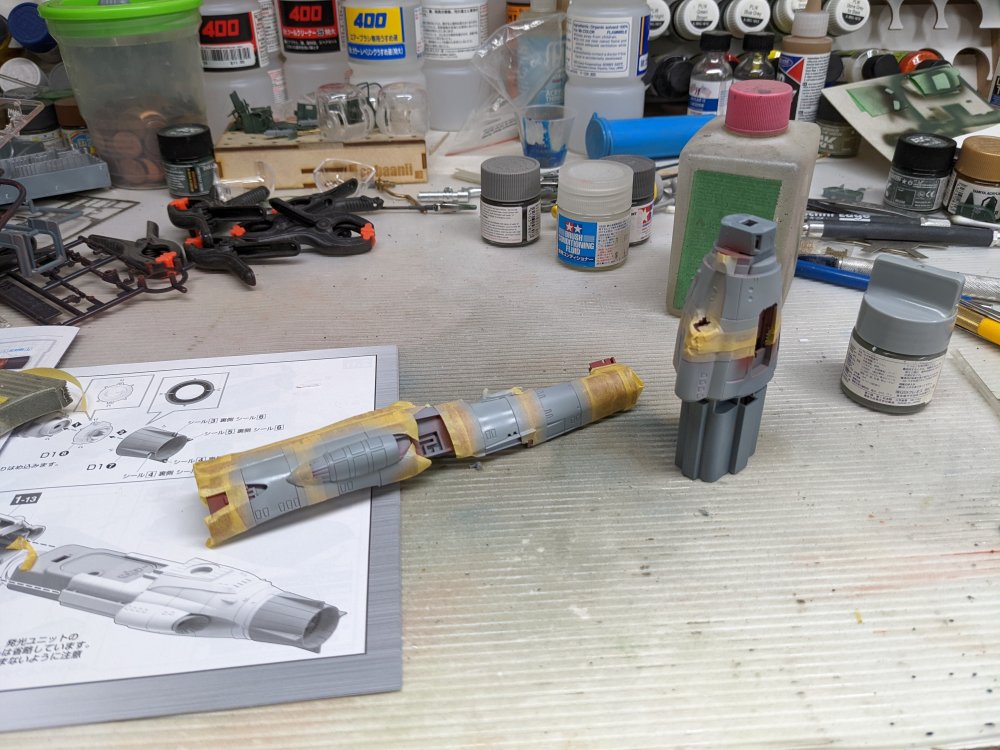
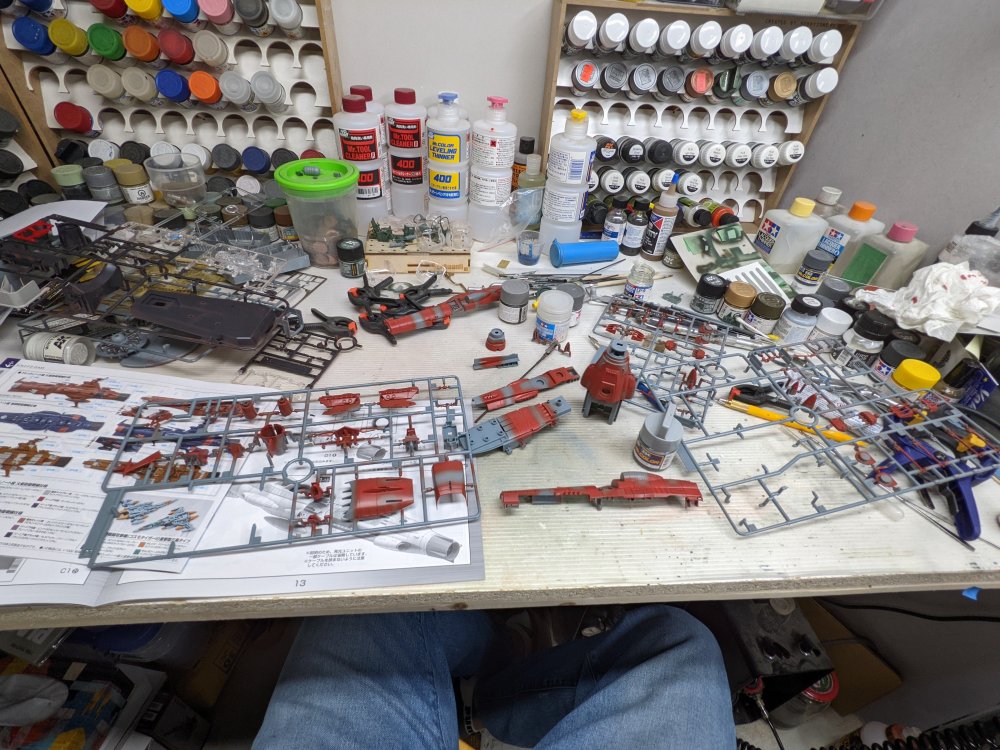
Wanted a quick build so started on a Bandai dreadnought. I'm planning to do the Prometheus.with all the stripes. Started painting on the red bits. And masking off for the grey. I'll see how it went tomorrow.
-
Rye Field M4A3E8 "project"! LOL
BlrwestSiR replied to JohnB's topic in LSM 1/35 and Larger Work In Progress
Looks good. If it's the tracks that are killing your mojo, just get a Dragon Wagon and throw it on the trailer. Done and done. Except for building the Dragon Wagon... -
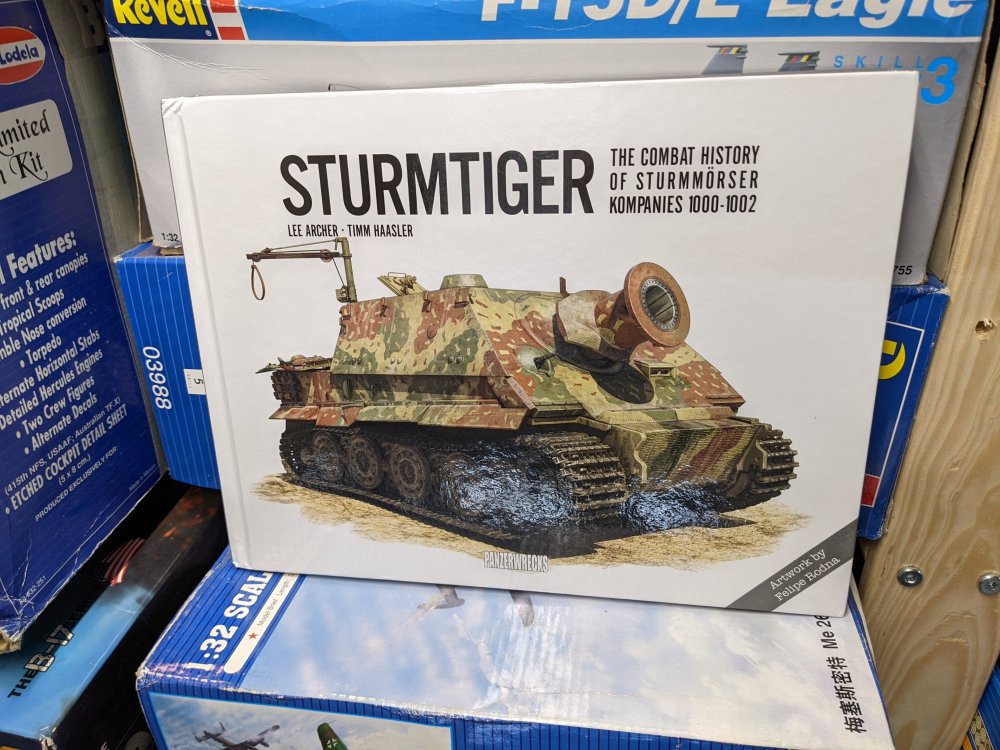
Speaking of German kitties with big guns, I got this in the mail today.
-
At first I thought you're building a Christmas tree to put it under.
-
You're going to like that kit Martin. Although I suspect it'll only take an hour to build and paint based on how long I took to finish it.
-
Revell P-51D Mustang - 2nd time around
BlrwestSiR replied to Peterpools's topic in LSM 1/35 and Larger Work In Progress
Peter, it hadn't crossed my mind that they wouldn't be available in the US. It is strange since they've been here in Canada for at least a couple years now. TBH, I just use Mr Color Leveling thinner as it's about a 1/3 cheaper compared to the Tamiya. Carl -
Revell P-51D Mustang - 2nd time around
BlrwestSiR replied to Peterpools's topic in LSM 1/35 and Larger Work In Progress
Here you go. Ignore the ABS cement. Gunze had an article on their website on how to best use retarders and their Mr Color Leveling thinner. They say they're best with semi-gloss and gloss paints but not with flat ones. Supposedly the longer drying time doesn't makes flat paints more glossy. I found that bit interesting.
-
Just catching up on your build Harv. The floor looks great and there's not much left of the kit fuselage is there? And no, I can never get through a bottle of CA either. Carl
-
Revell P-51D Mustang - 2nd time around
BlrwestSiR replied to Peterpools's topic in LSM 1/35 and Larger Work In Progress
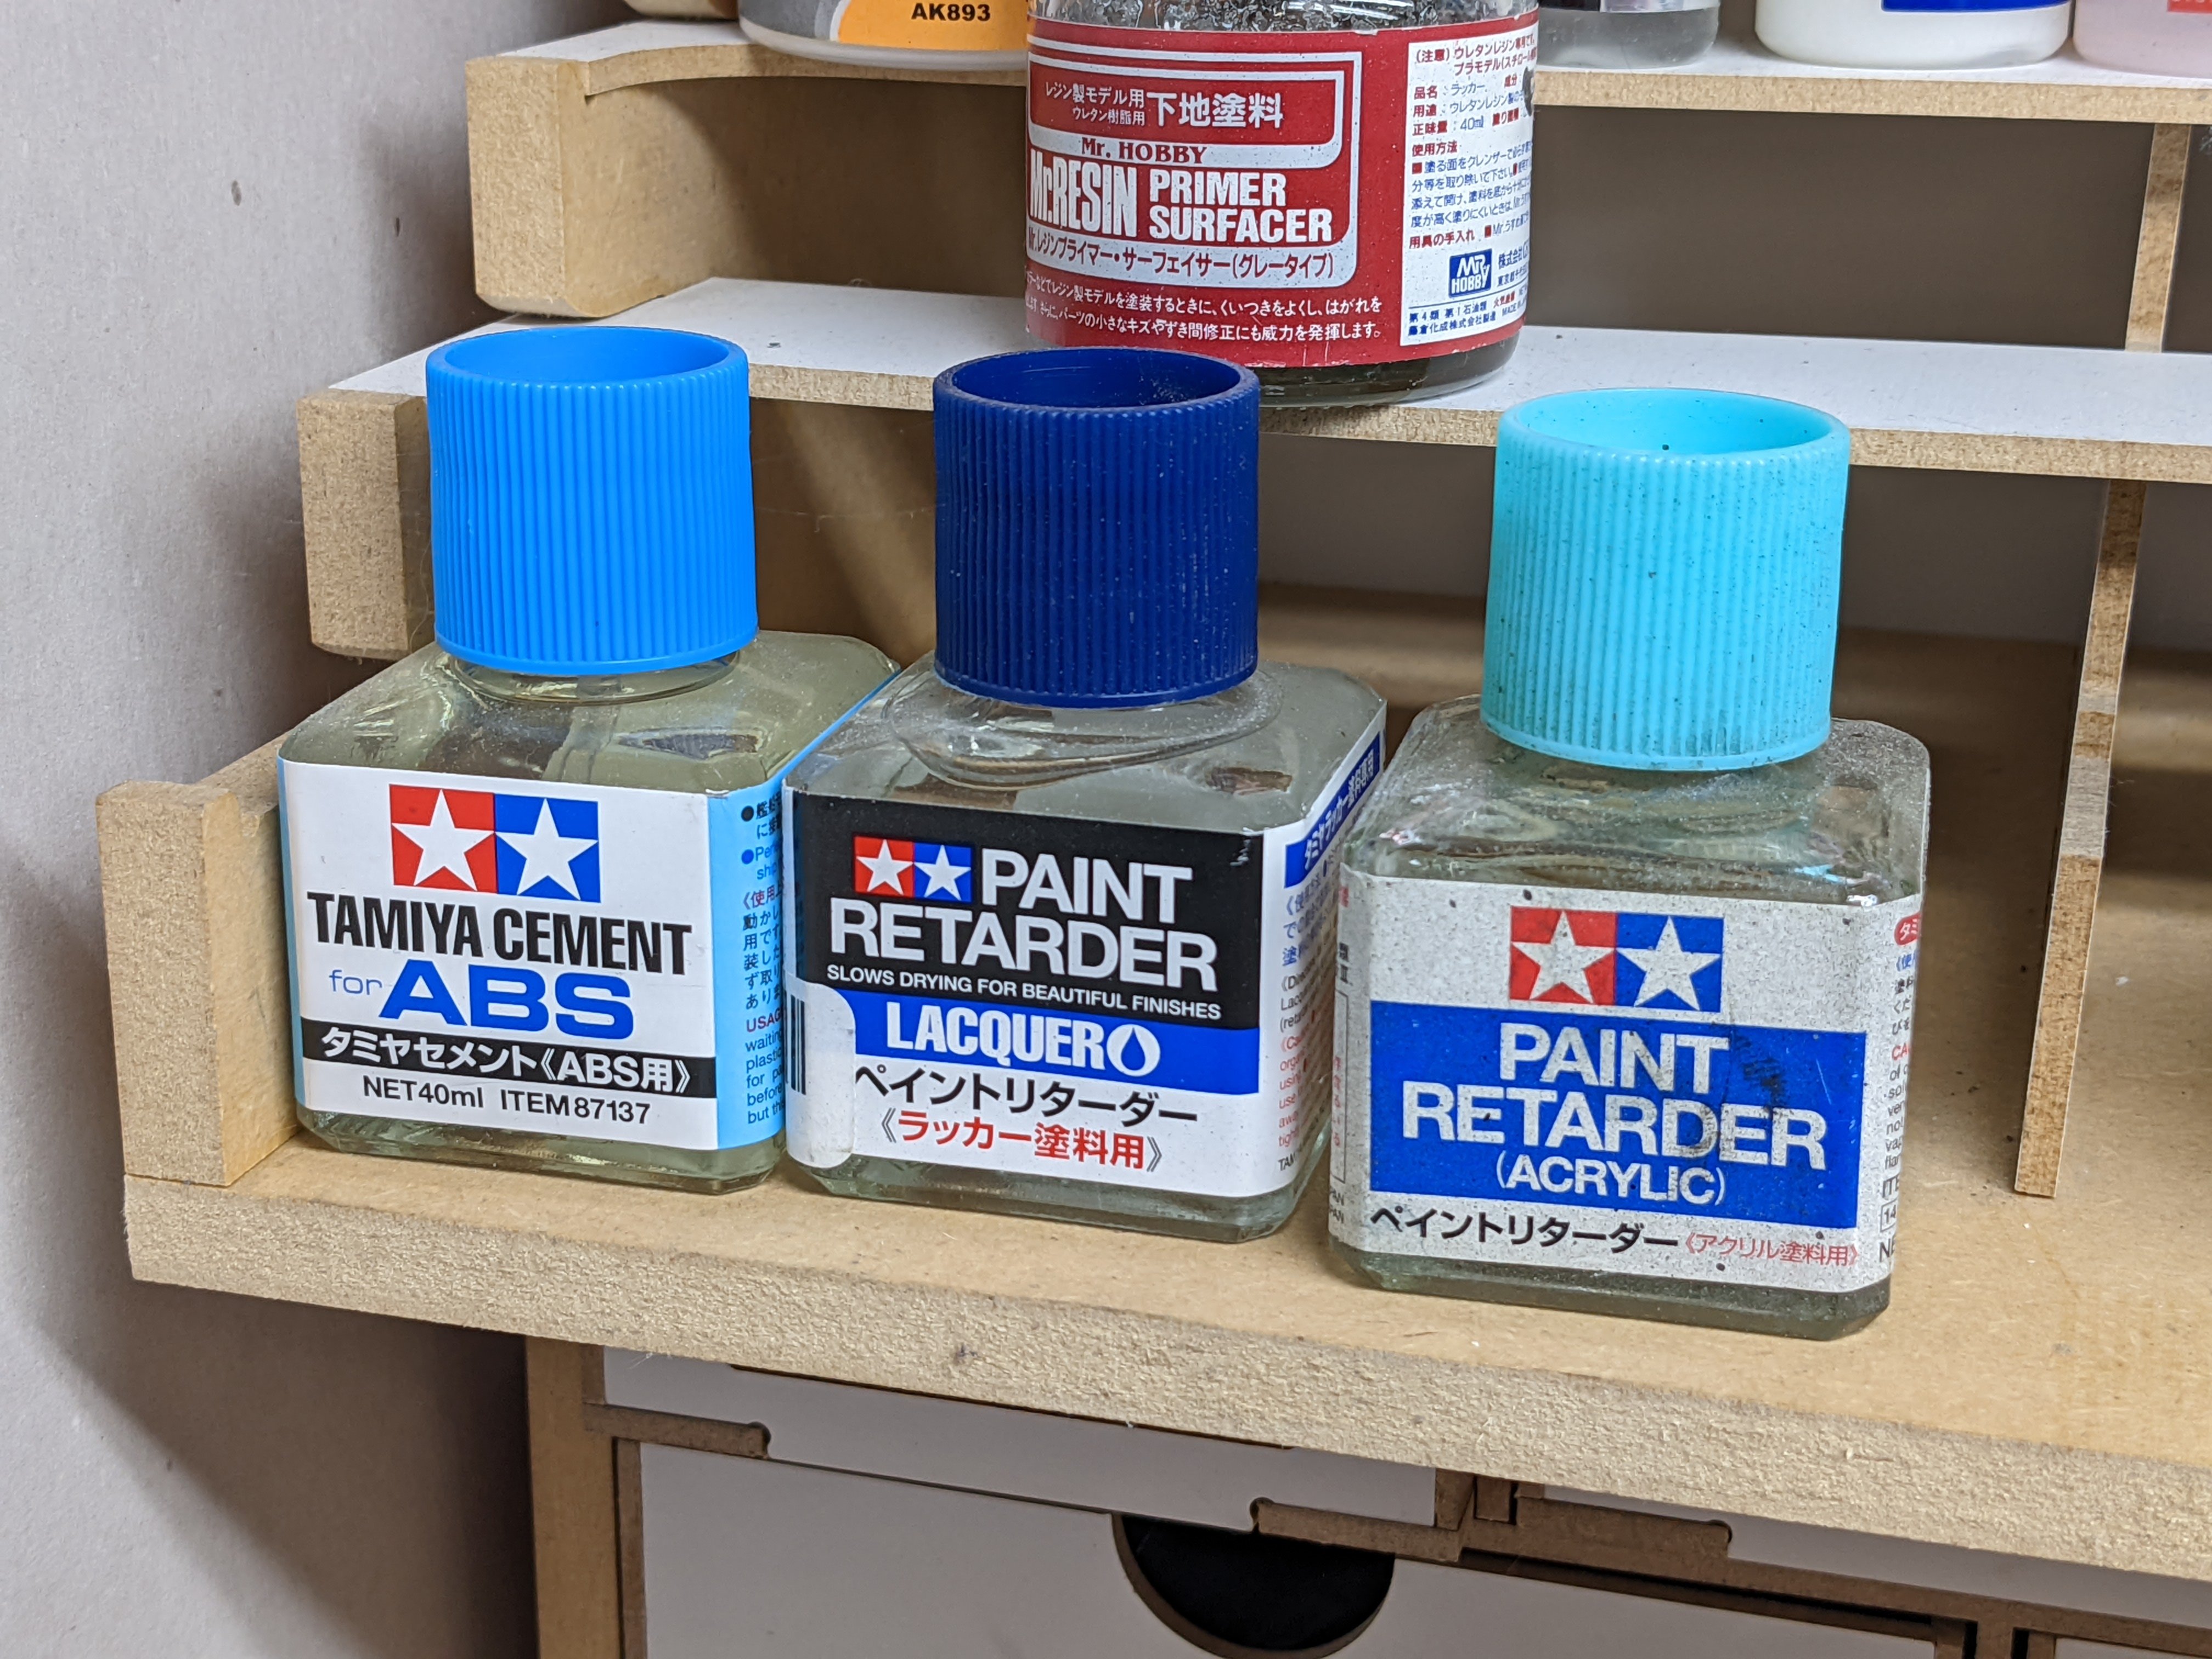
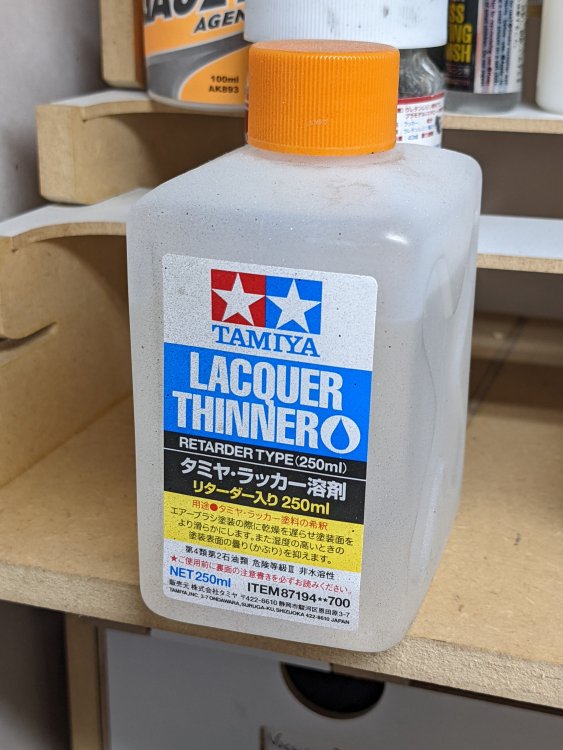
Very nice results there Peter. Nice and smooth. Tamiya make their own retarders. They have two, one for acrylics and one for lacquer. The lacquer one has a dark blue top. They also have a lacquer thinner with the retarder mixed in. It has an orange cap on it. I'll try to post some pics of them when I get home in a bit. The Tamiya lacquer thinner is definitely on the cool side. I've used it to strip paint off model parts including clear bits without it attacking the plastic. I found that it even helps polish bare plastic and have done it a couple times on canopies. Carl -
Trumpeter 1/16 T 72
BlrwestSiR replied to belugawhaleman's topic in LSM 1/35 and Larger Work In Progress
Looks great. All that track cleanup definitely looks to be a bit of a pain. Hopefully it's not too stressful. Carl -
Trumpeter 1/16 T 72
BlrwestSiR replied to belugawhaleman's topic in LSM 1/35 and Larger Work In Progress
So Martin, did you get this to replace the Mustang? I know you were complaining that the 'Stang couldn't handle winter but.... -
Ernie, thanks again for organising the raffle. I'm in for both please. For a gift, I'd like to contribute a $100 USD gift card to the winner's choice of the following online hobby shops: - Sprue Brothers - Hannants - BNA Modelworld. Carl
-
What is on your bench right now ? Share a picture :)
BlrwestSiR replied to Martinnfb's topic in Modelling Discussion
Sue dropped her favourite coffee mug. She found most of the pieces to it. I broke out the epoxy and tried to put Humpty Dumpty back together again. Still missing a couple bits. I told her not to use it anymore except as a pen holder.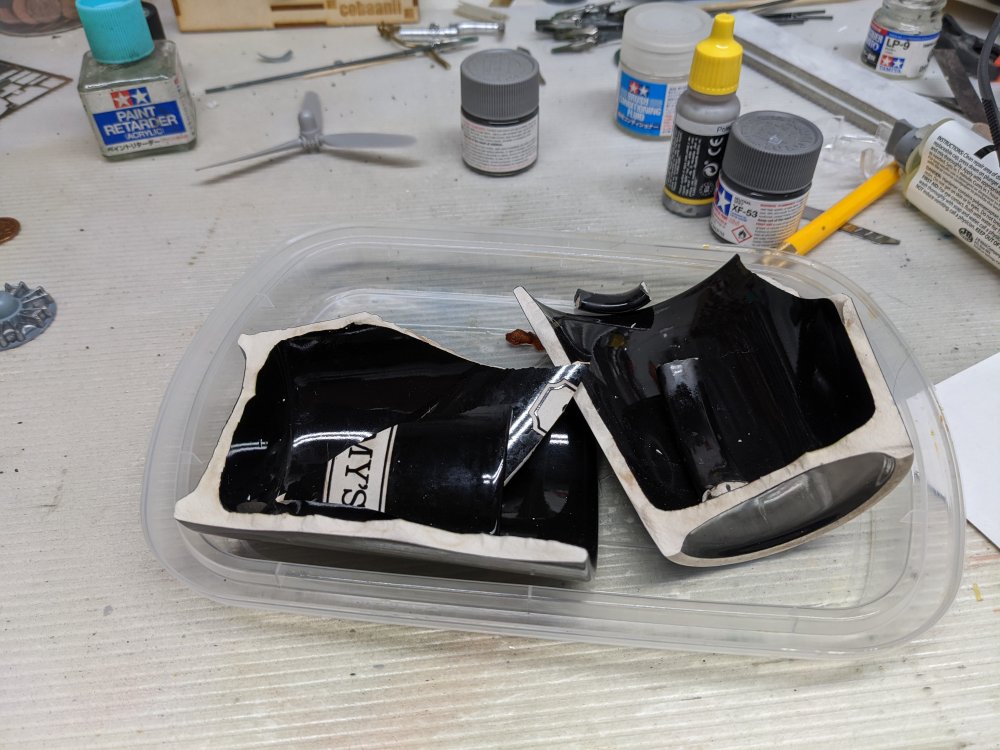

-
RCAF Liberator GR Mk VI
BlrwestSiR replied to BlrwestSiR's topic in LSM 1/35 and Larger Work In Progress
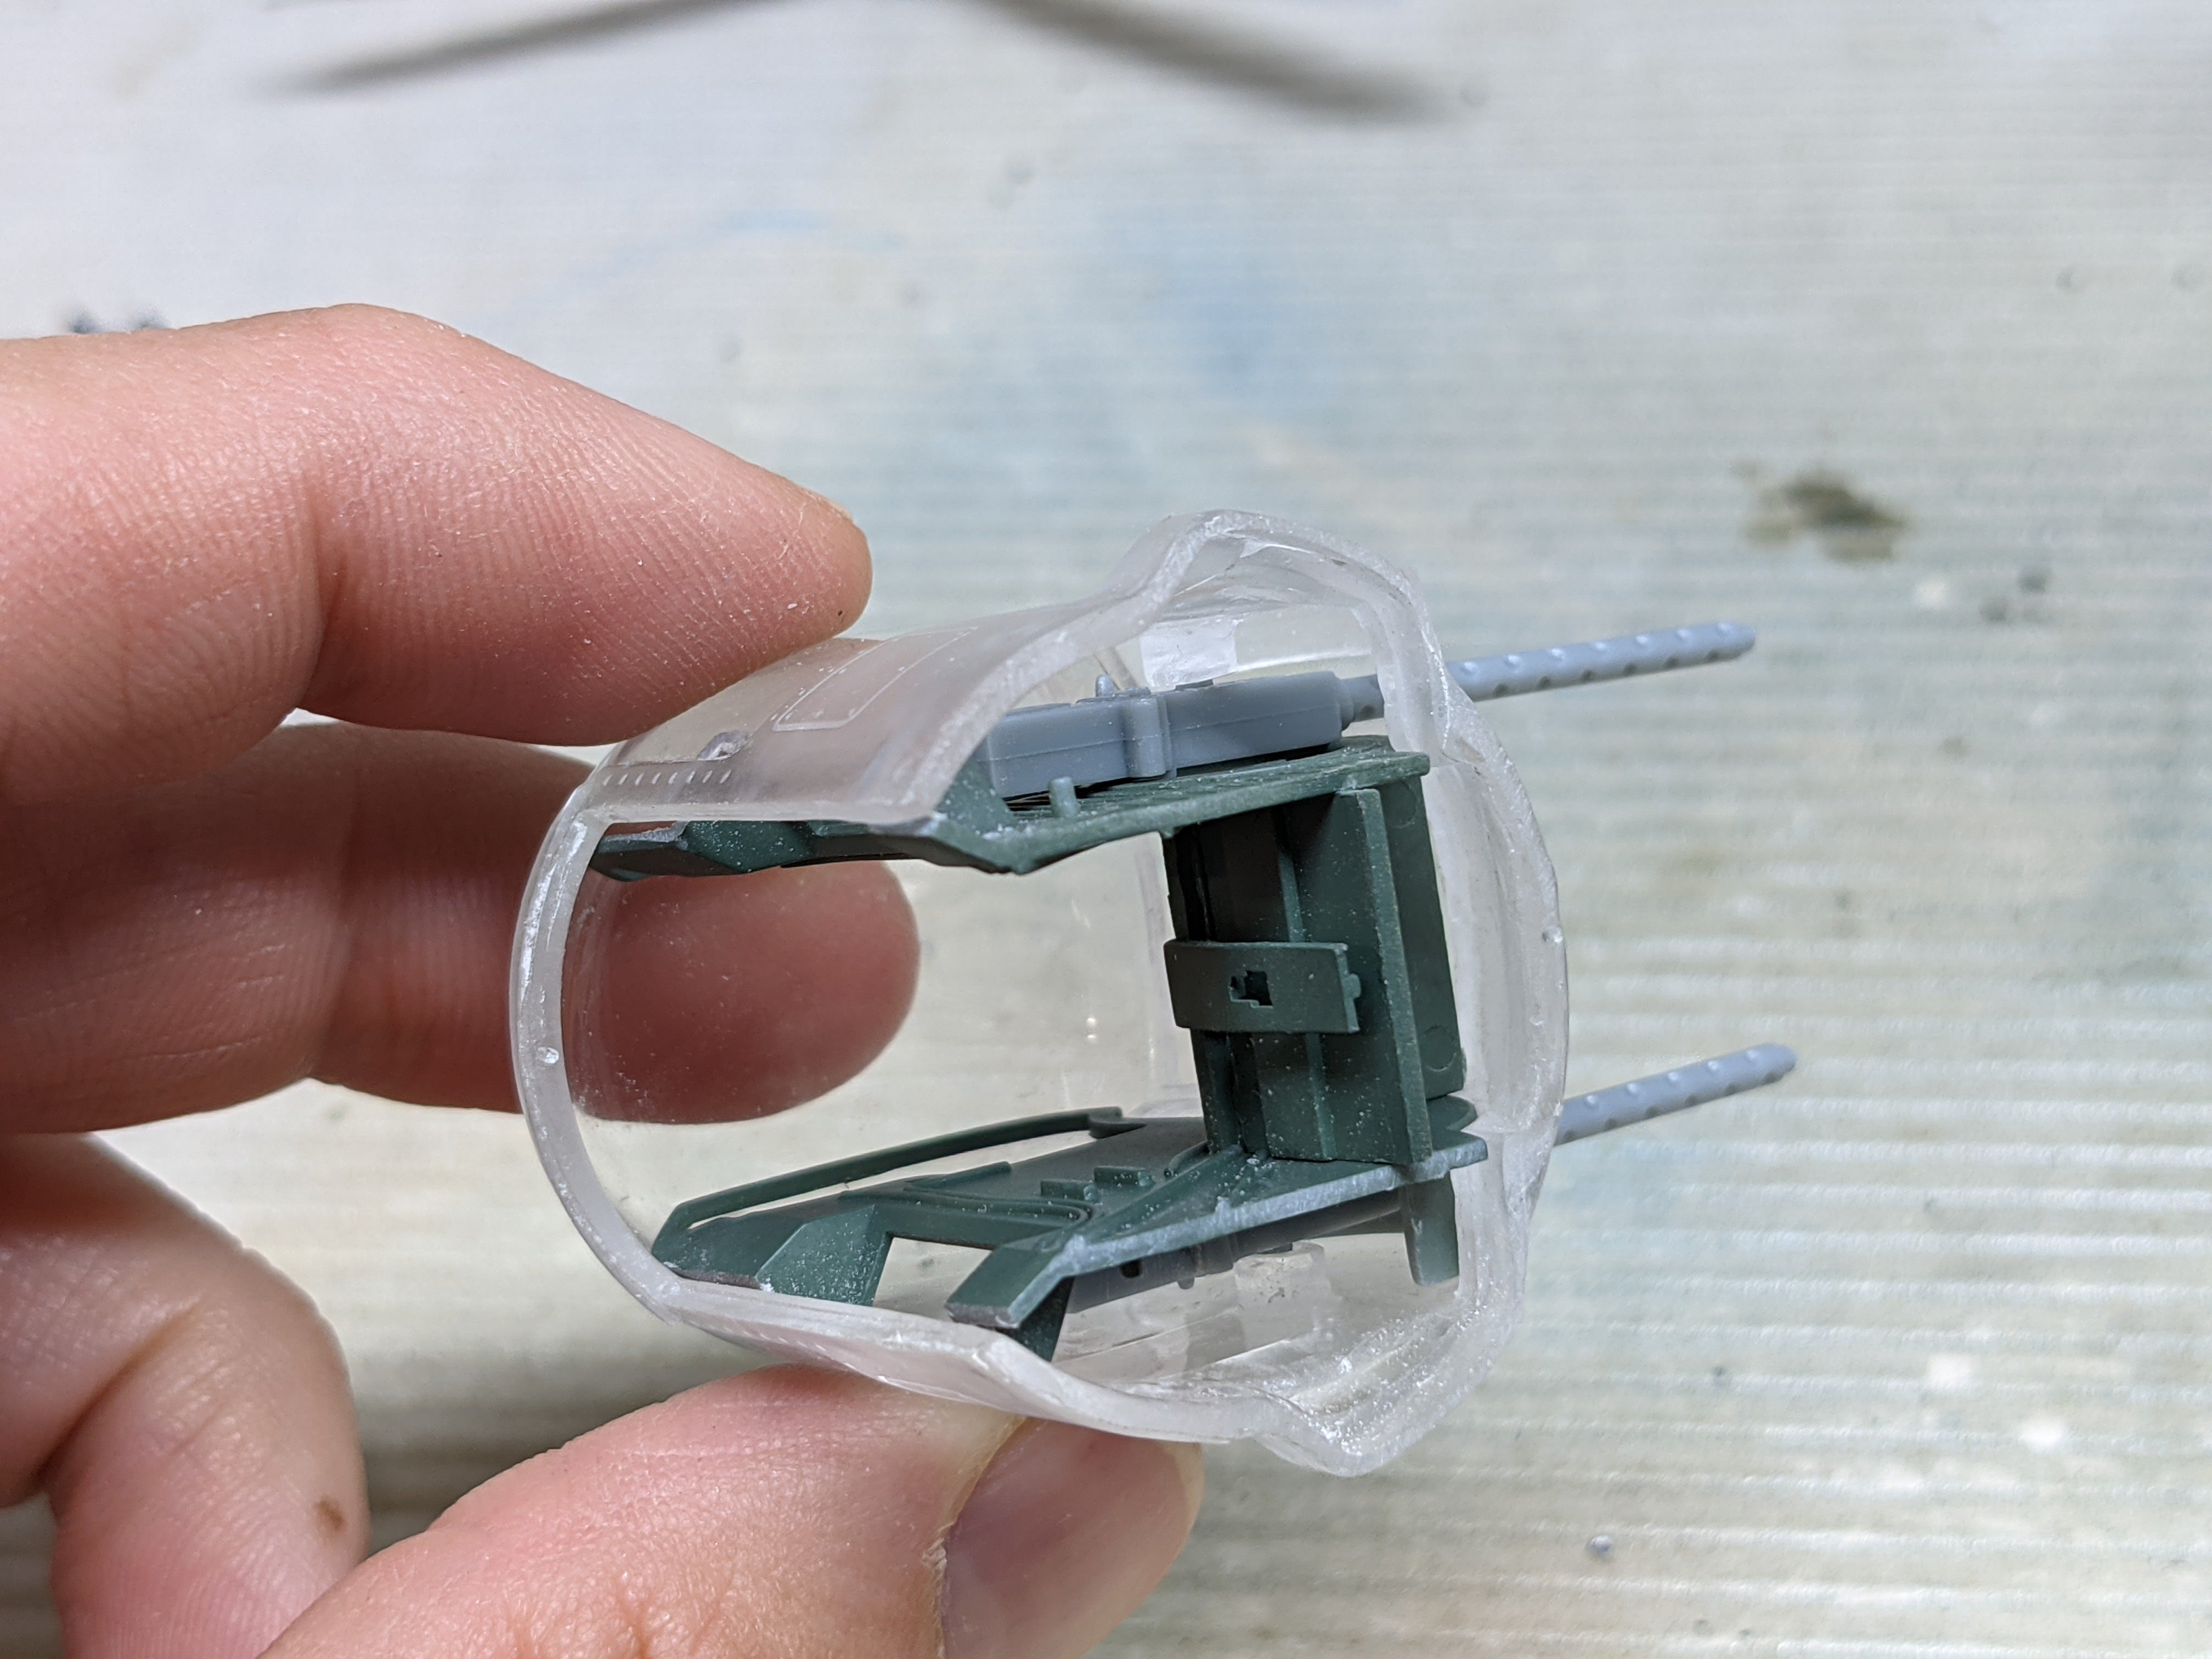
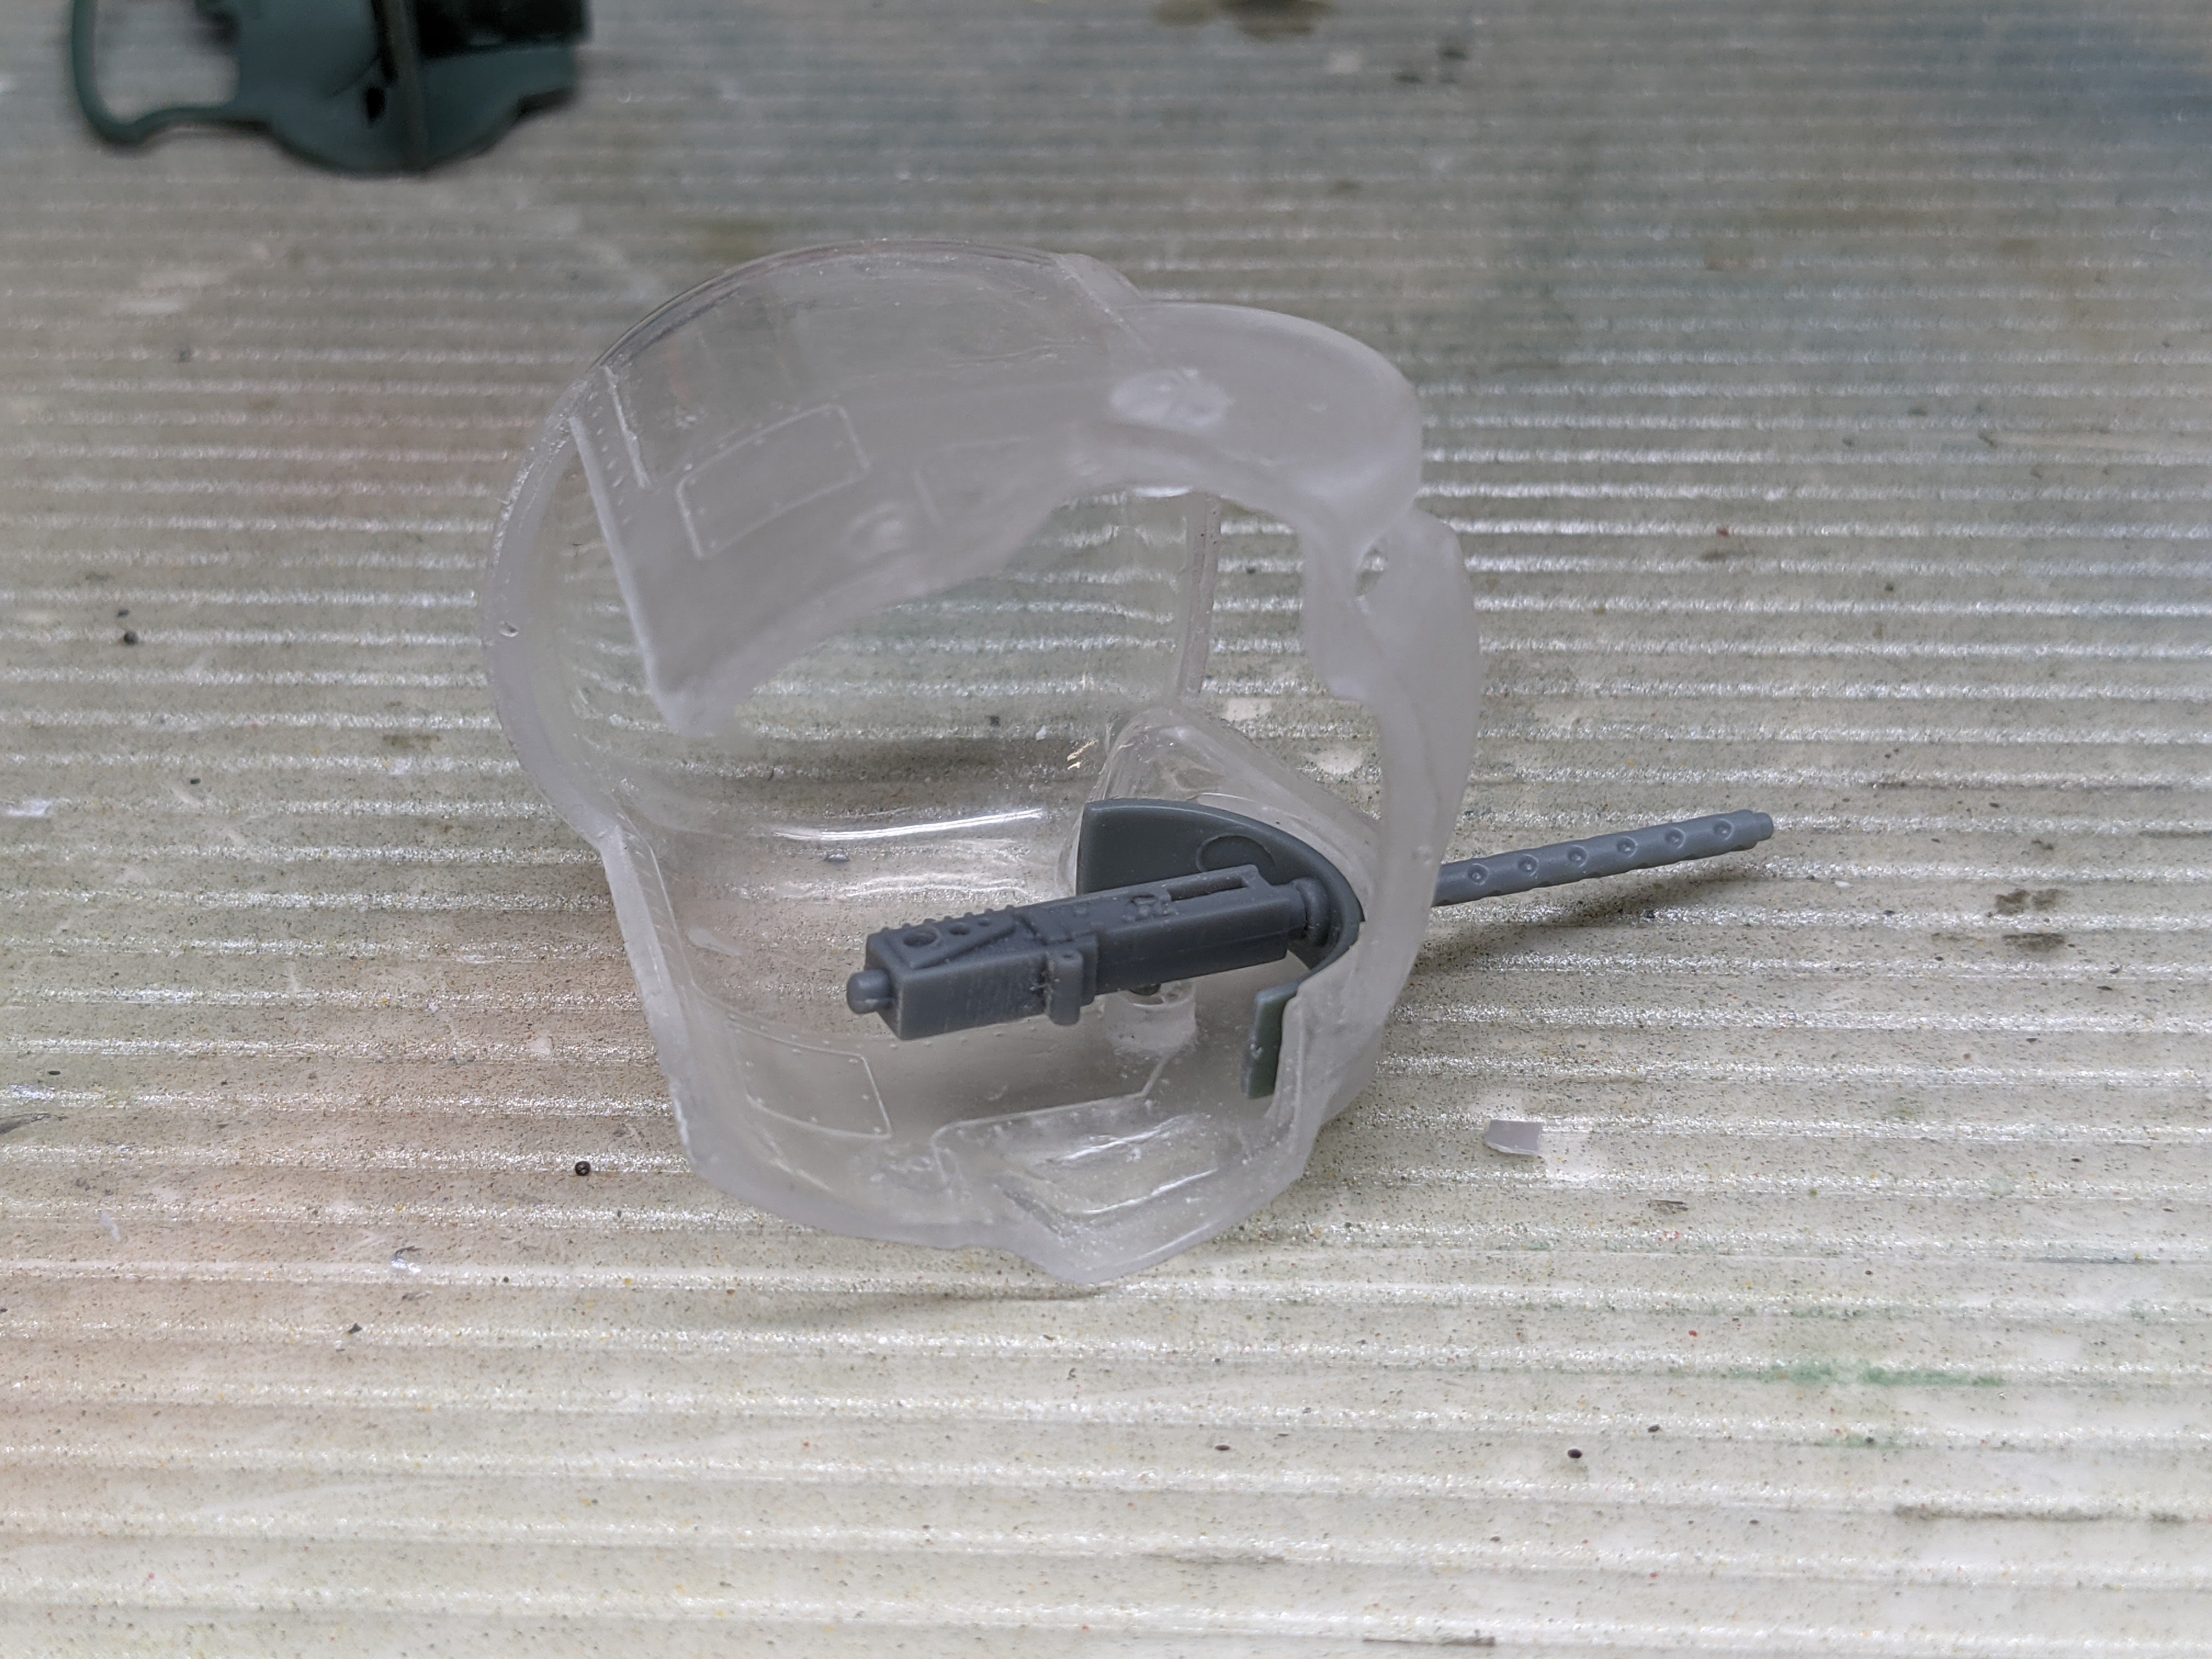
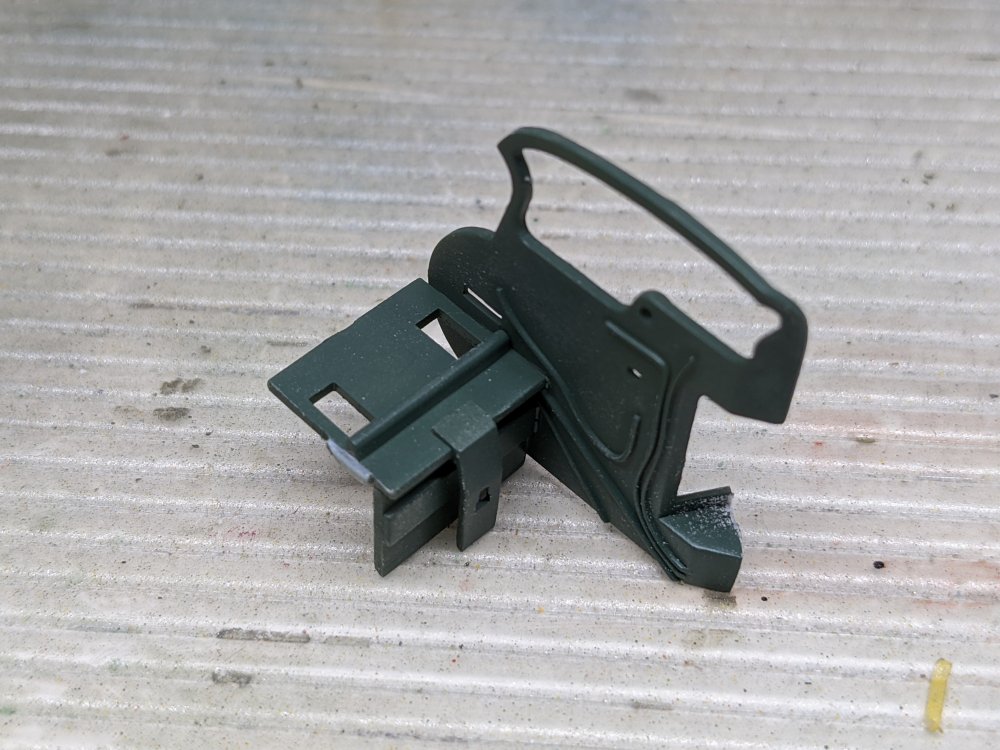
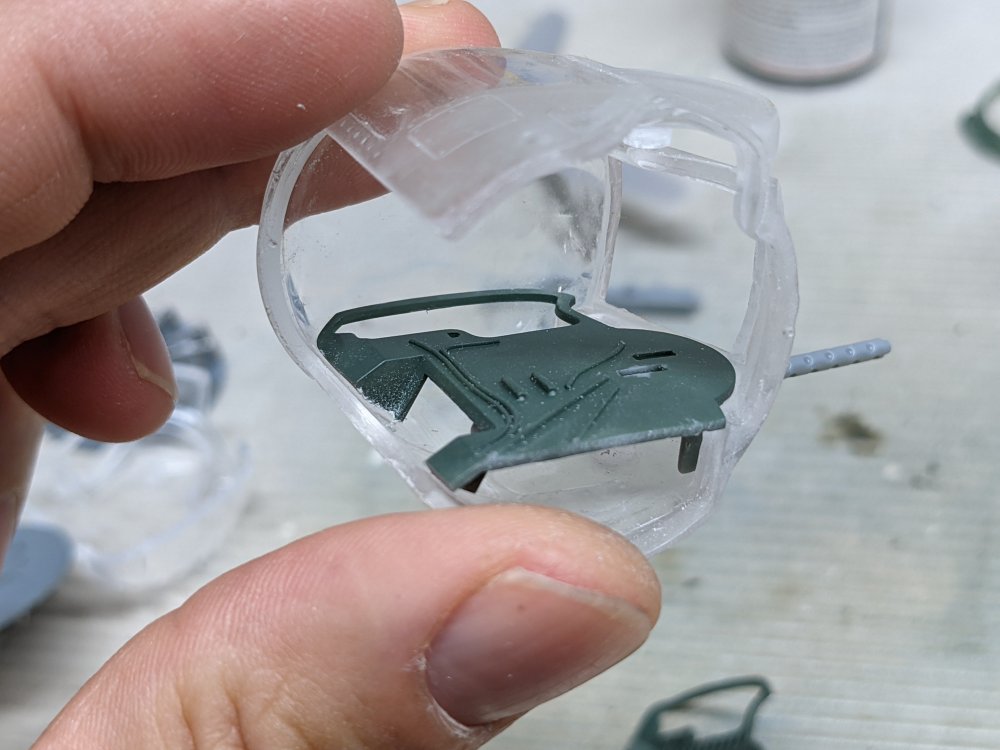
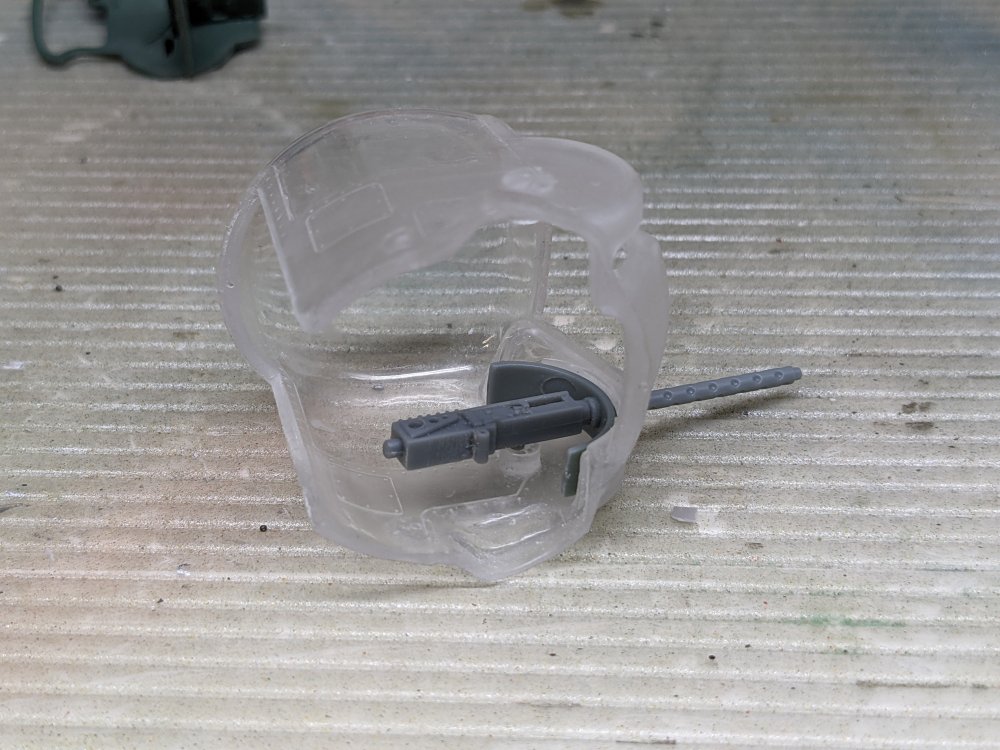
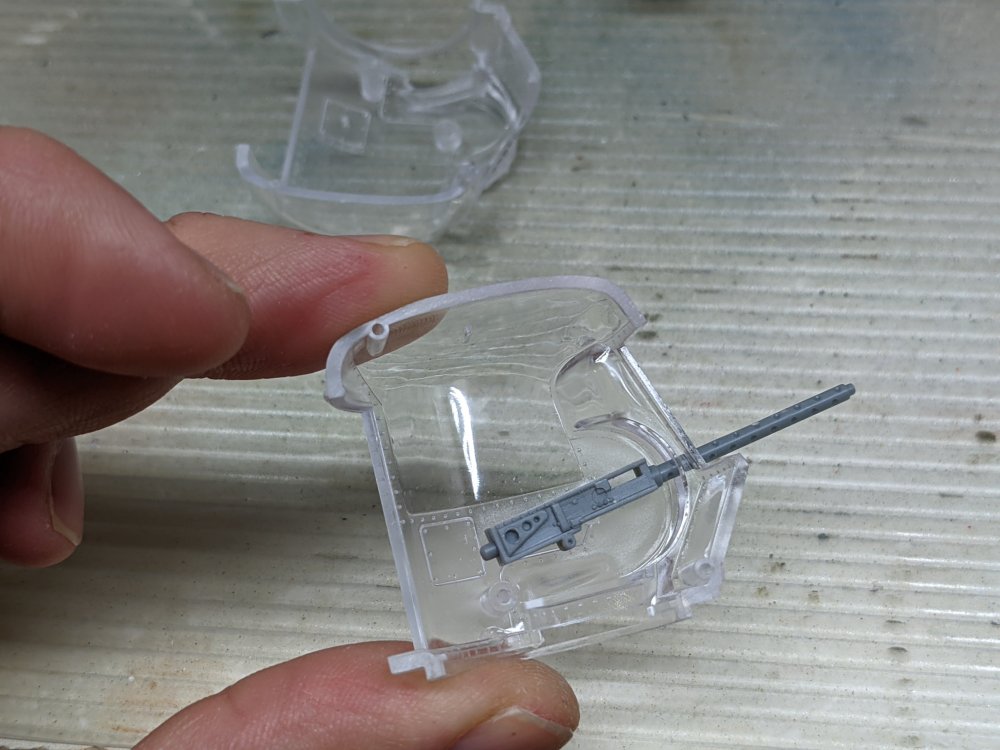
On the Cold War Studio turret, I have to figure out how to get it in and in what order. After some trail and error, here's what I came up with. First, reduce the diameter and length of the pin that mounts the 0.50 to the turret interior. This is trial and error but it's about half as long and a third narrower. Then put the gun in place. I've also added the shield but it's only dry fitted. Trim down the tabs on the inner walls that hold the parts together. I've found almost all the tabs in the kit are way too long and need trimming. I also had to sand back the rear edges of the interior bits. You can see where that is by the bare plastic. Don't glue the halves together. You need to slot them but glue the middle parts (Z8 & Z9) to one side. Insert and position one of the sides in the turret. Add the opposite 0.50 in its place (same as the first one). Then juggle and slip in the second half. Squeezing the rear bits together slightly helps it to slip in. One rear turret. Friction is the only thing holding everything in place at the moment. The nose turret can be inserted from below in one piece as it has a much larger opening.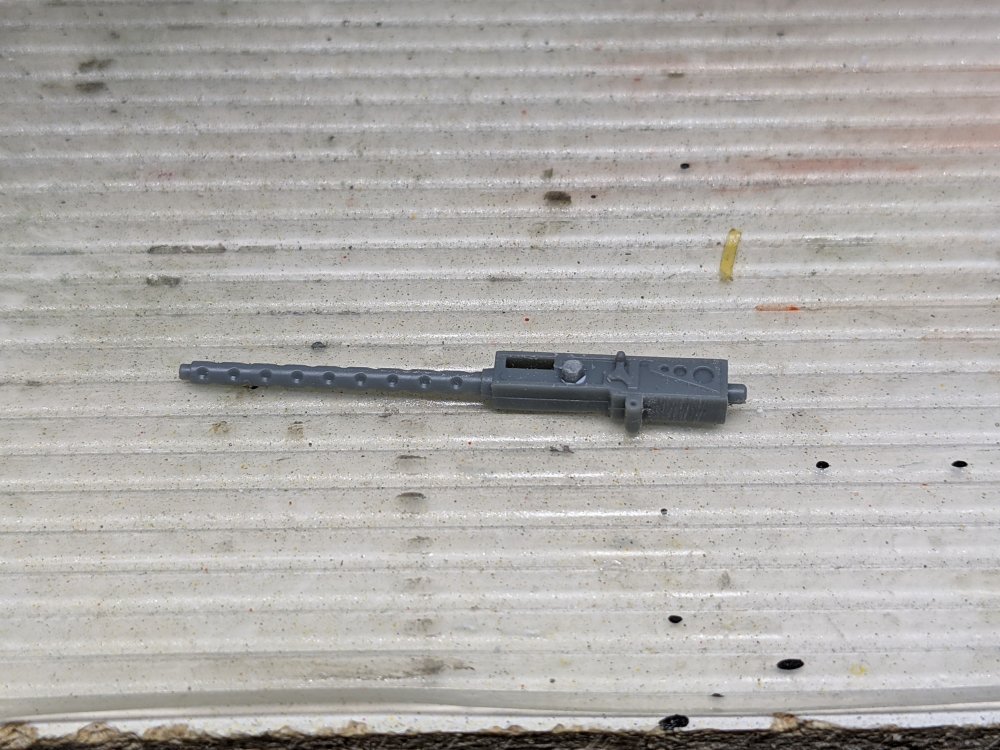


- 227 replies
-
- 10
-

-

-
RCAF Liberator GR Mk VI
BlrwestSiR replied to BlrwestSiR's topic in LSM 1/35 and Larger Work In Progress
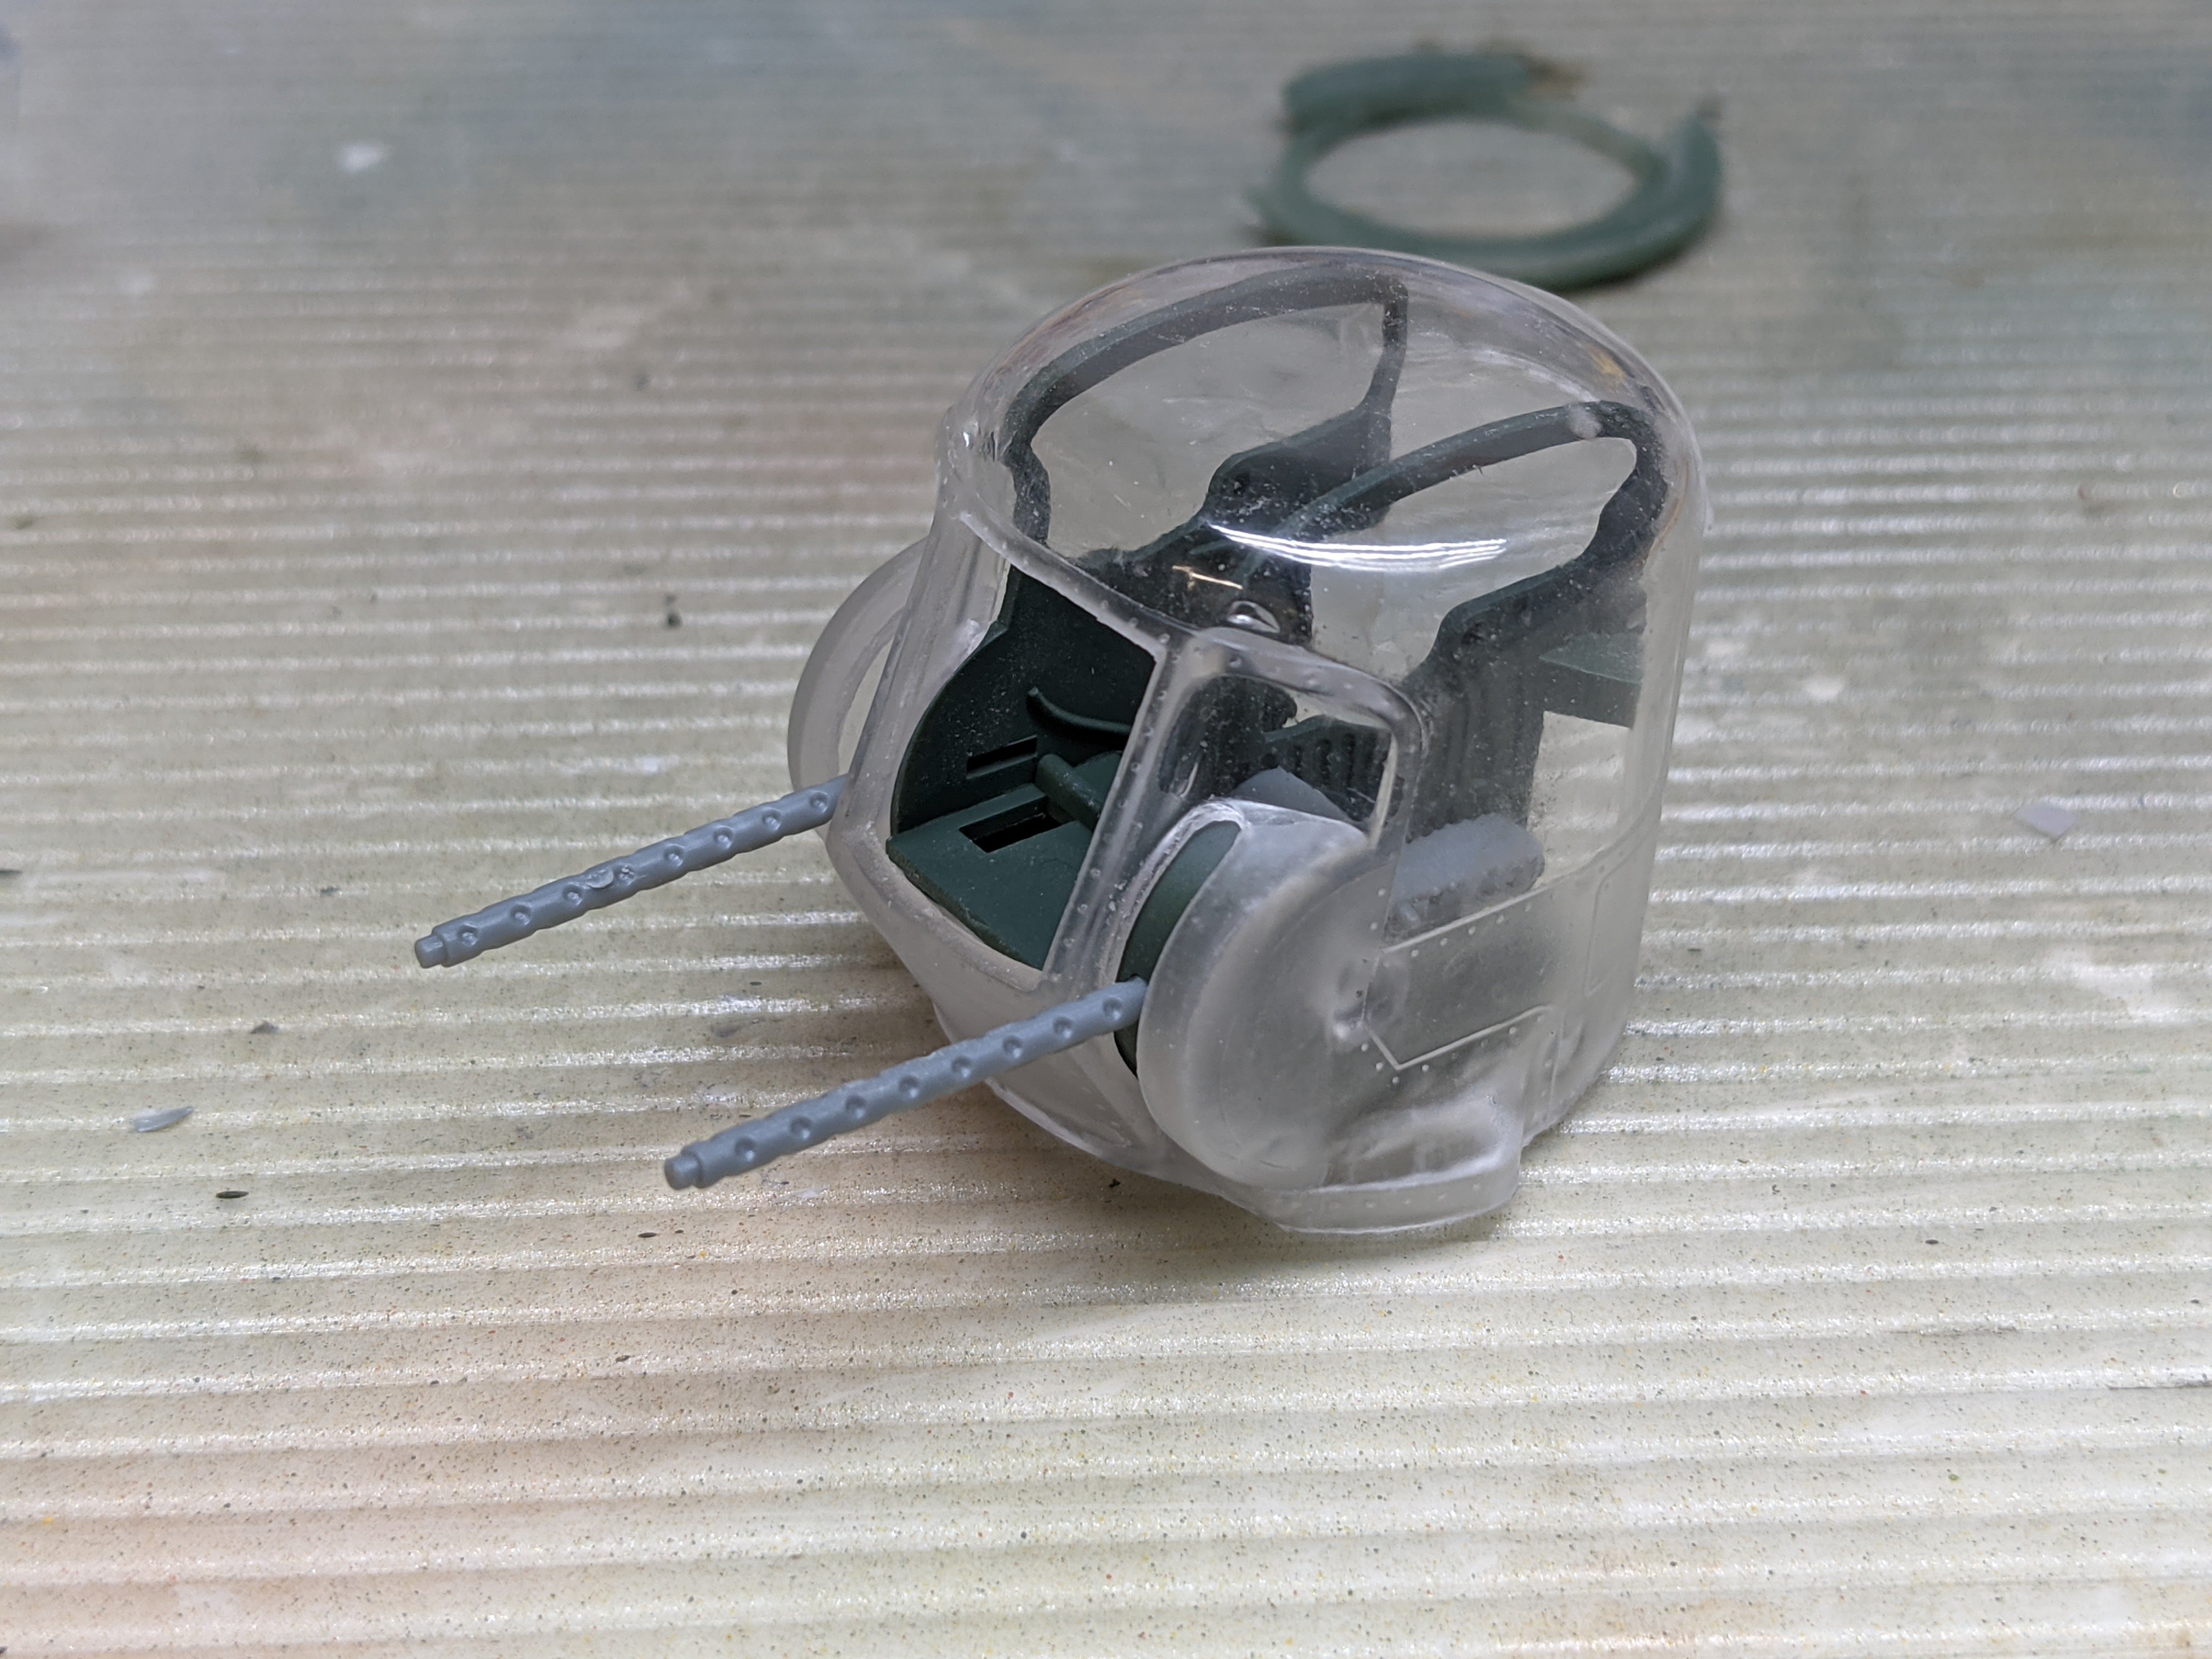
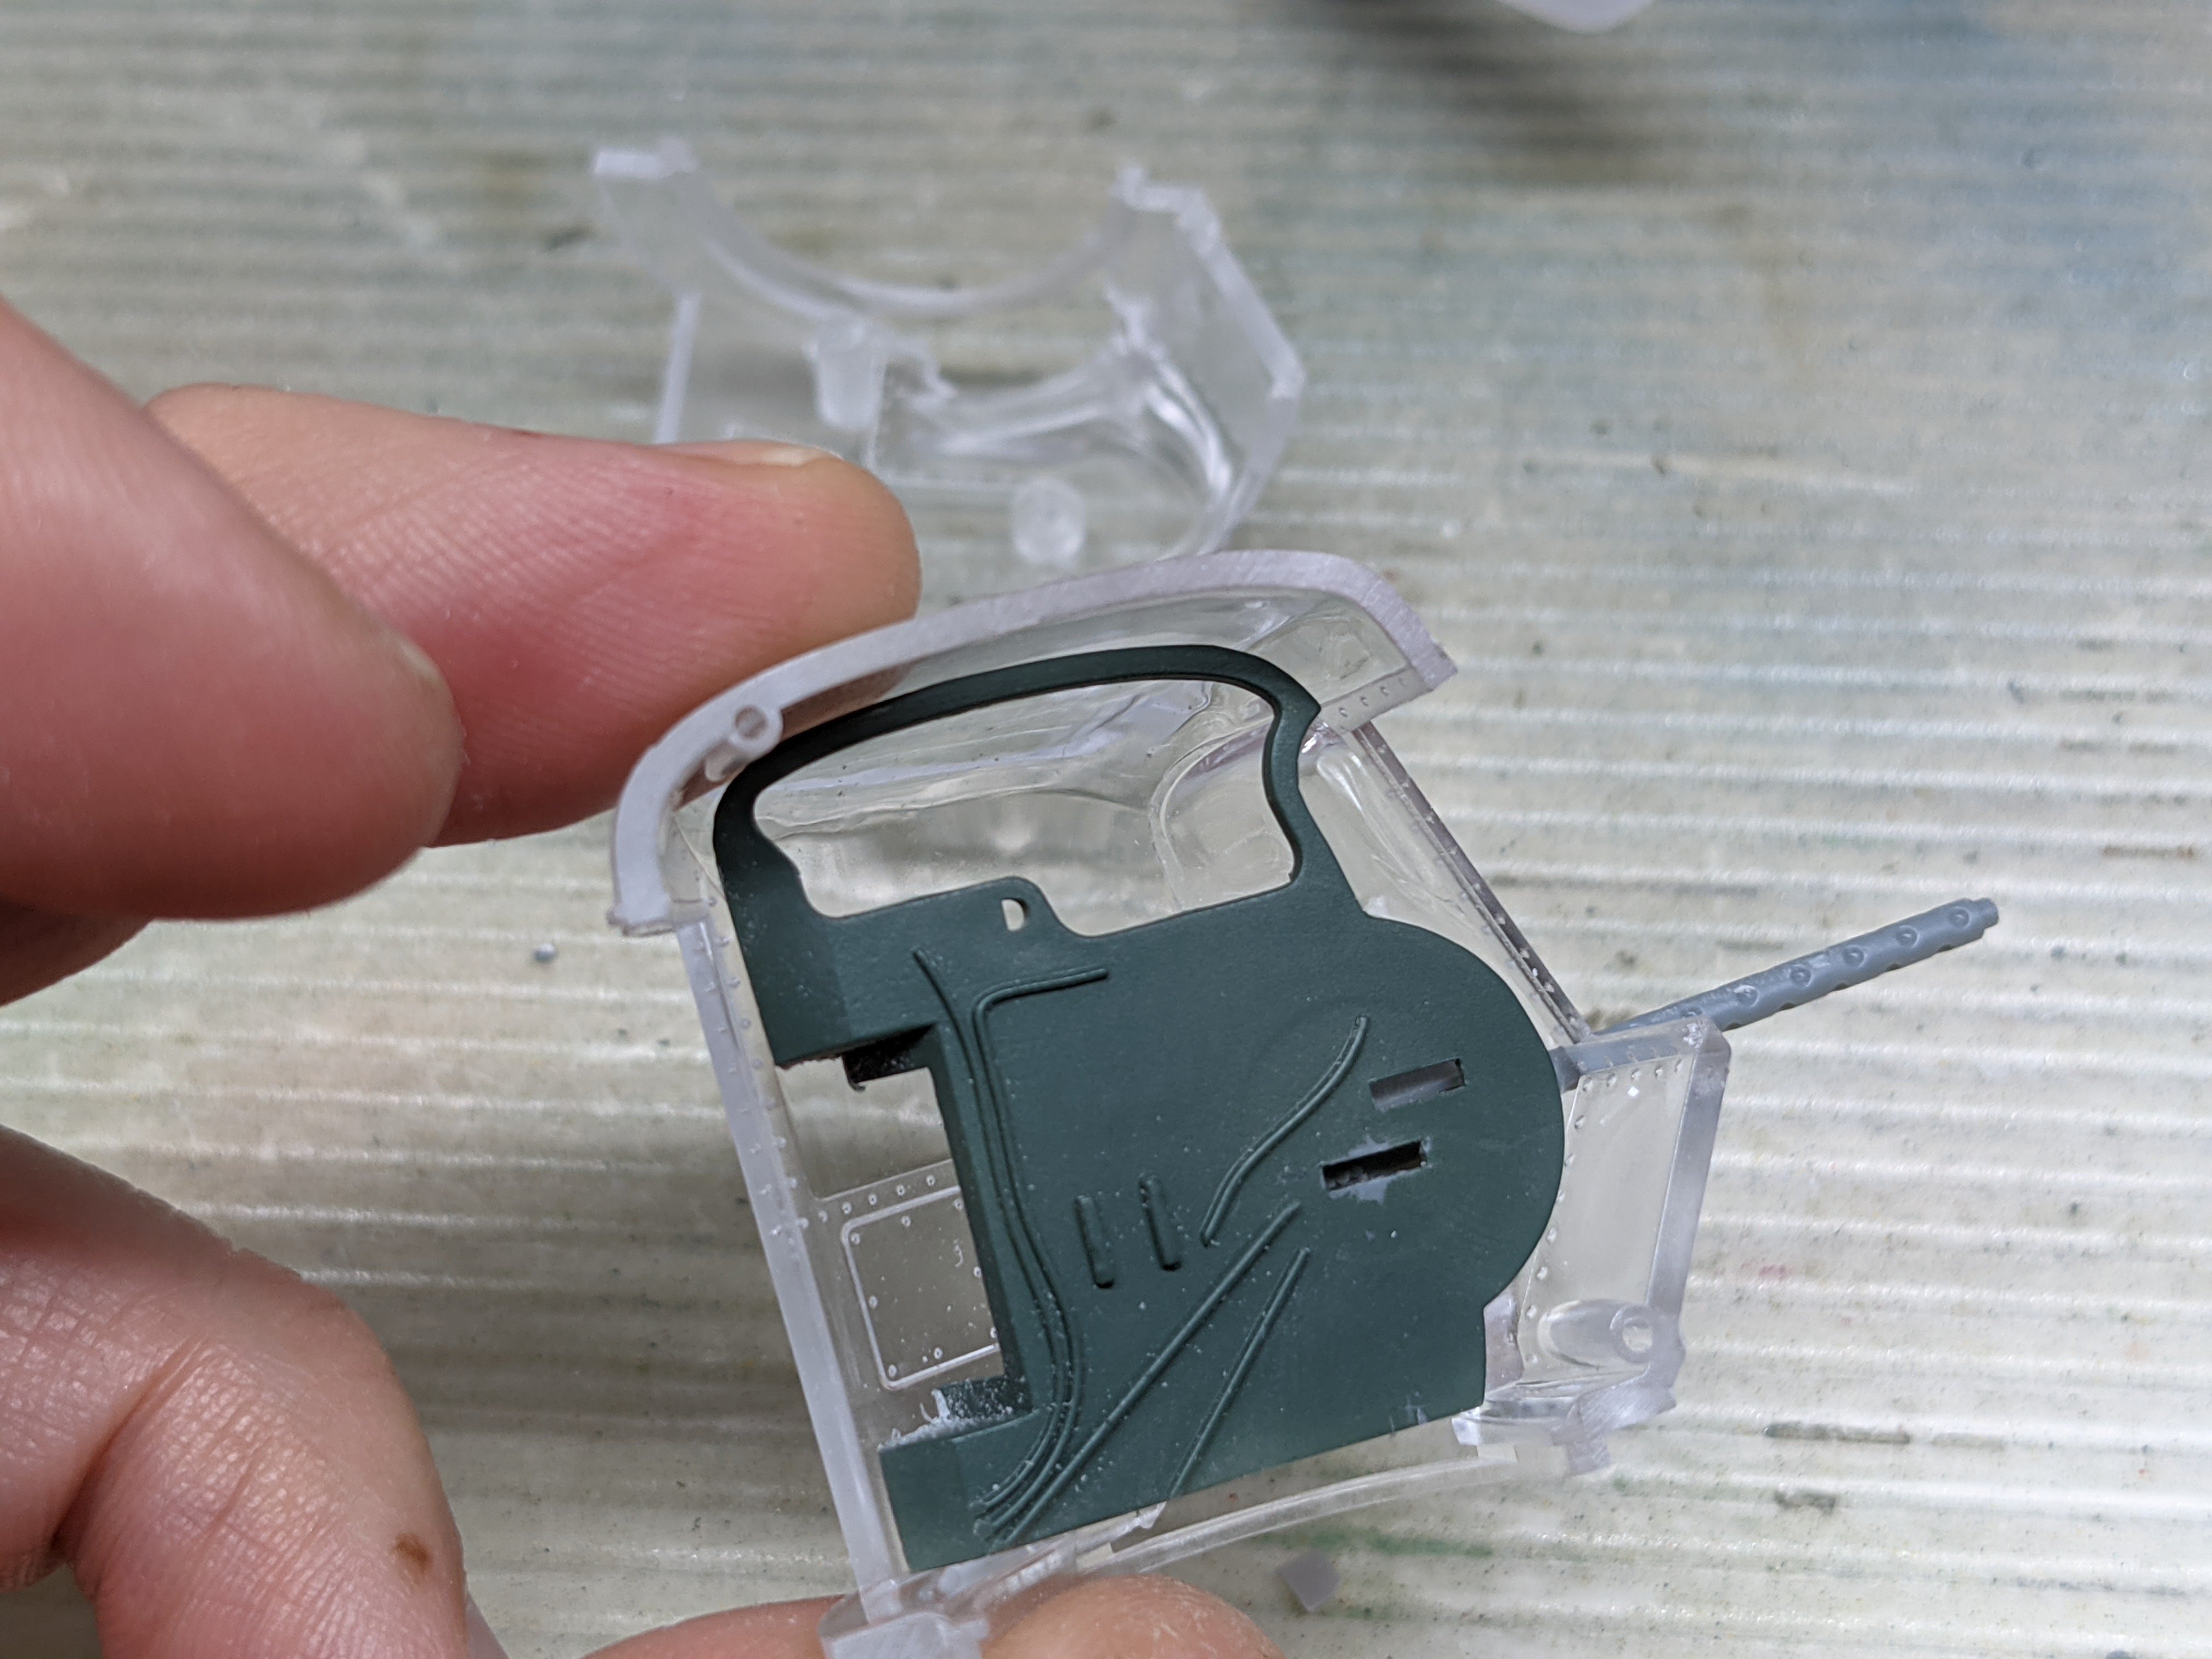
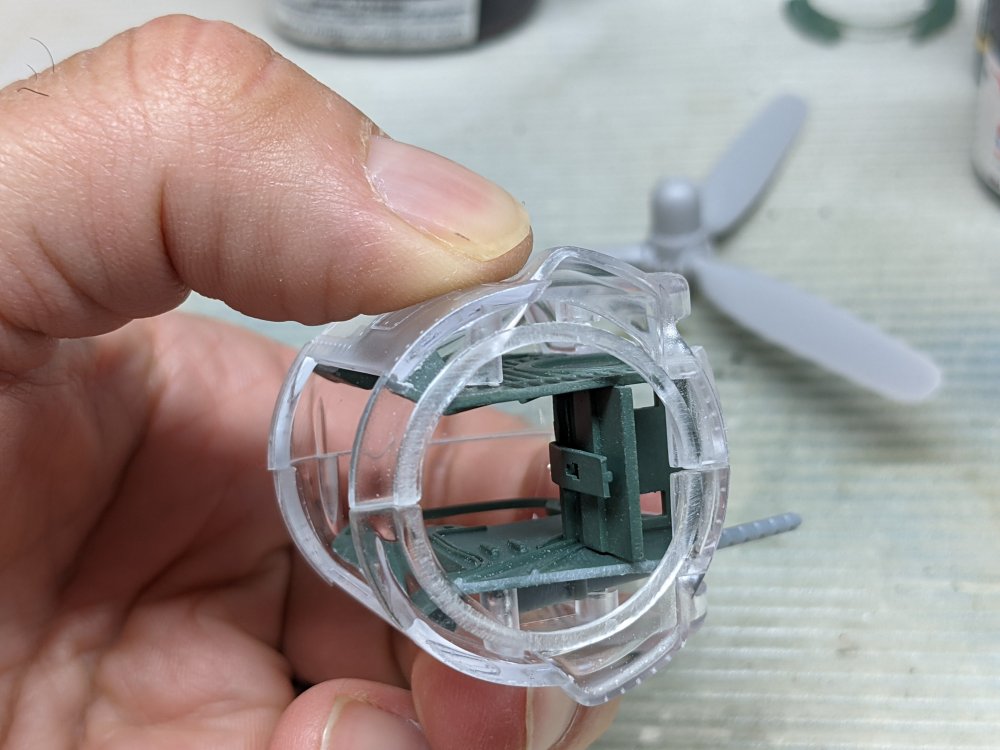
Thanks for the encouragement guys. I appreciate it and it helps keep me going. The engines() are done. The rear faces don't even have cooling vanes moulded into them. Good thing you can't see much of them. Next up was figuring out the turret interiors. At least the rear one anyways. I think one of the reasons HB split the turrets was so they could get the interior into them. Which meant I had to figure out how to get them into a one piece shell. Here's the kit parts inside the rear turret half. And closed up. A bit hard to get through the bottom opening if it's one piece.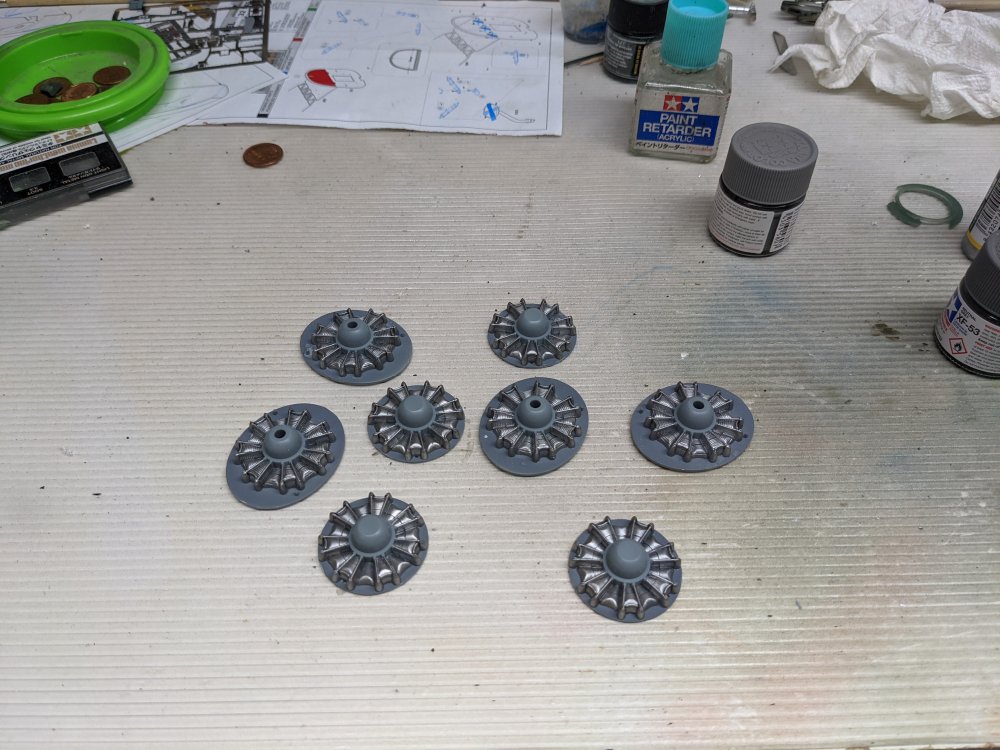


-
Rye Field M4A3E8 "project"! LOL
BlrwestSiR replied to JohnB's topic in LSM 1/35 and Larger Work In Progress
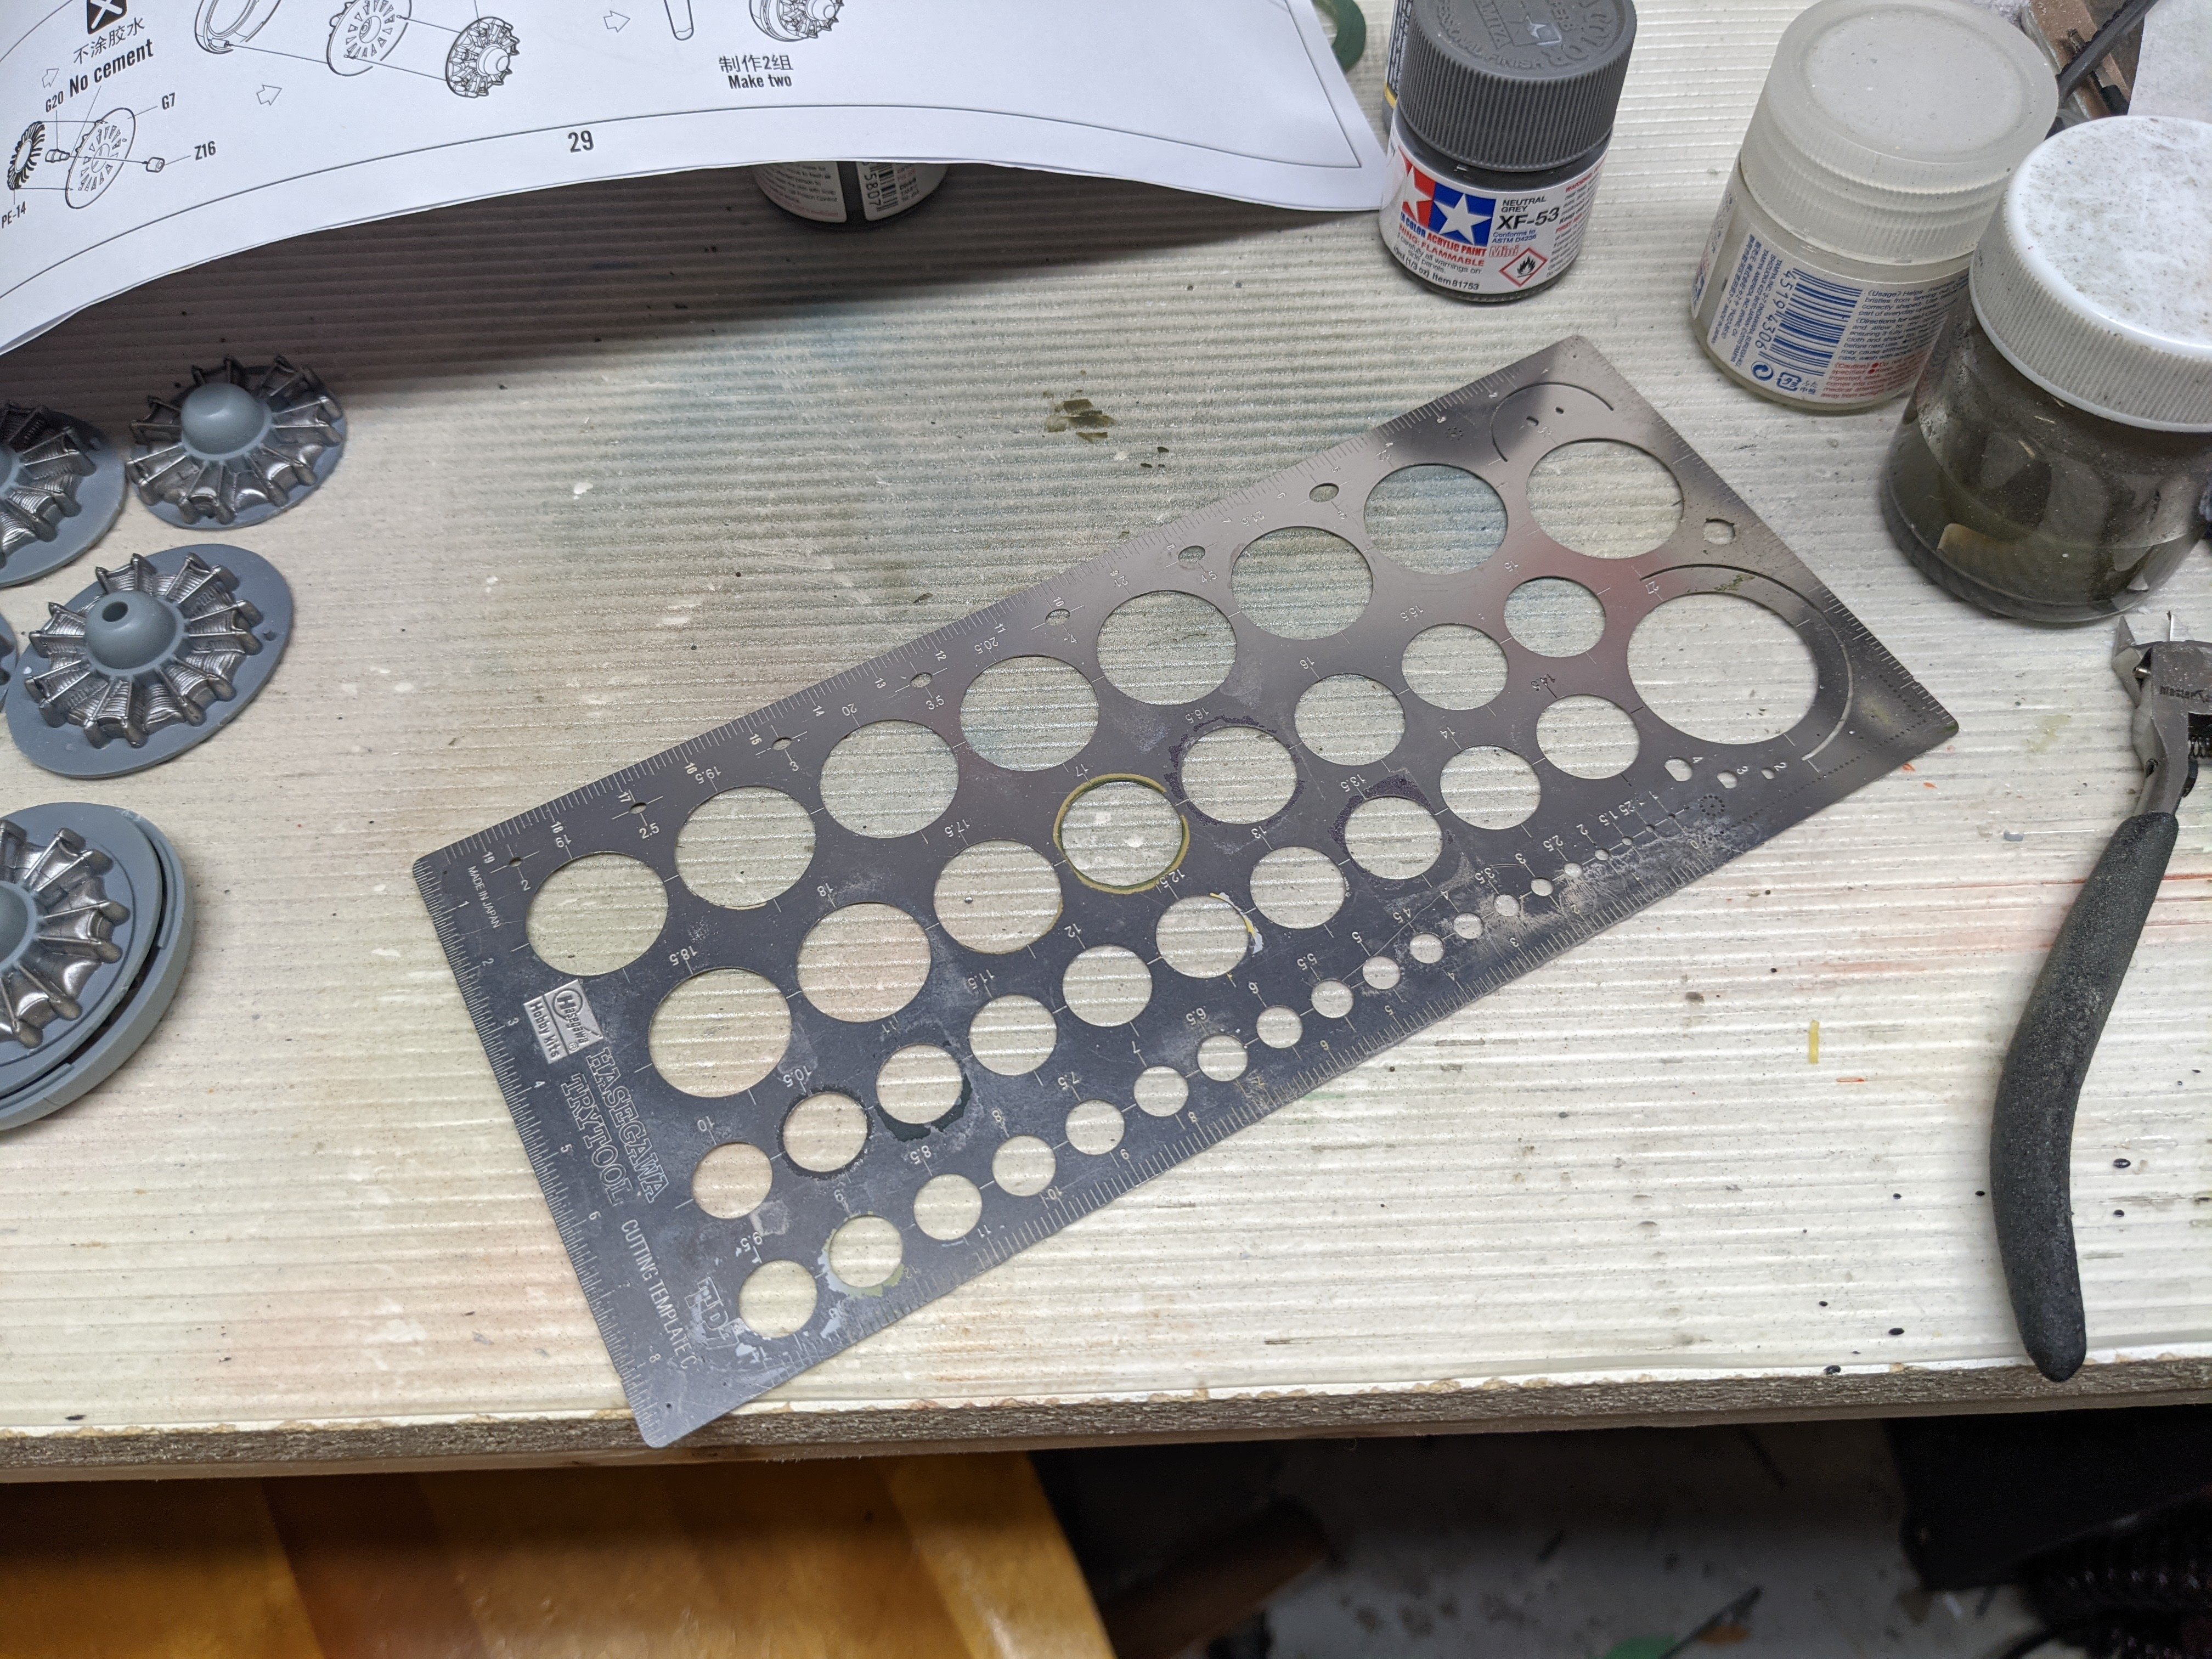
If you have a circle template, here's what I do. After cleaning up any mould seams, I spray the rubber portions on the wheels with rubber black. Once dry I just hold them behind appropriate sized circle on my circle template and spray the wheel colour. The one I use is from Hasegawa and increases in diameter by 0.5mm. And nice work on the Sherman.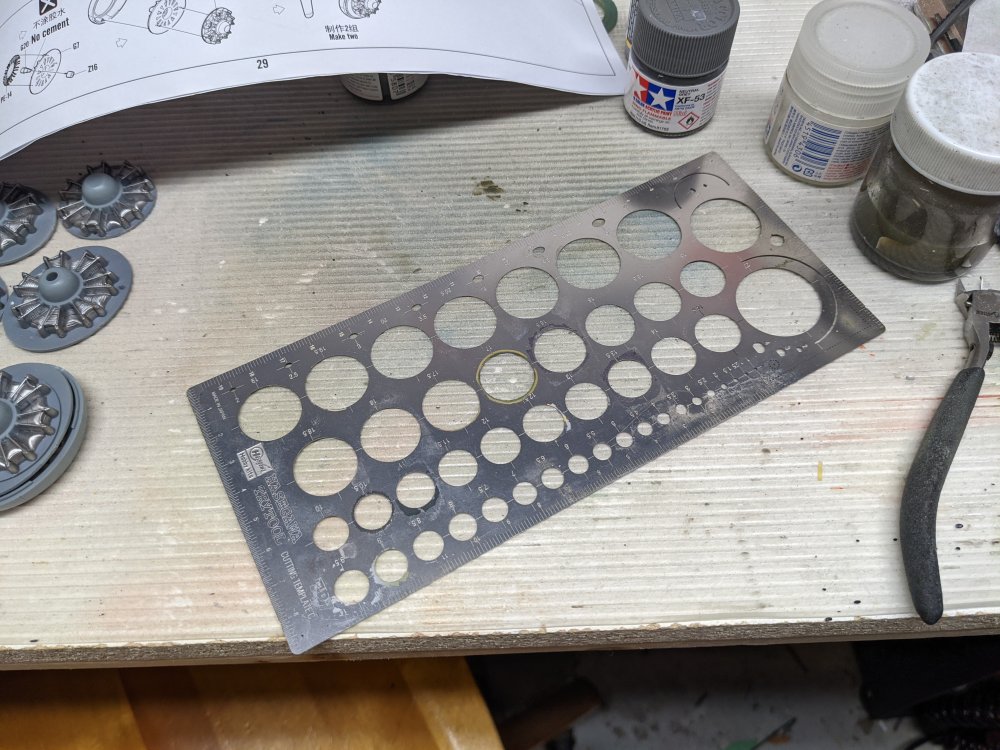
-
I'd be interested in that too
-
I keep looking at the Meng version of that kit which comes with the dozer blade. Like Phil said, where's the GB? I think Harv is going to do a P-47 soon. Bubbletop or razorback?
-
I just finished reading Leviathan Wakes and about to start the second in these series called Caliban's War. They're by James S.A. Corey and are the basis for The Expanse tv show.
-
Revell P-51D Mustang - 2nd time around
BlrwestSiR replied to Peterpools's topic in LSM 1/35 and Larger Work In Progress
Looks very nice there Peter. I wonder if the ammo doors weren't painted which would explain their different shade. The wings were puttied which is why they got painted but I don't think the ammo doors were. Carl -
What is on your bench right now ? Share a picture :)
BlrwestSiR replied to Martinnfb's topic in Modelling Discussion
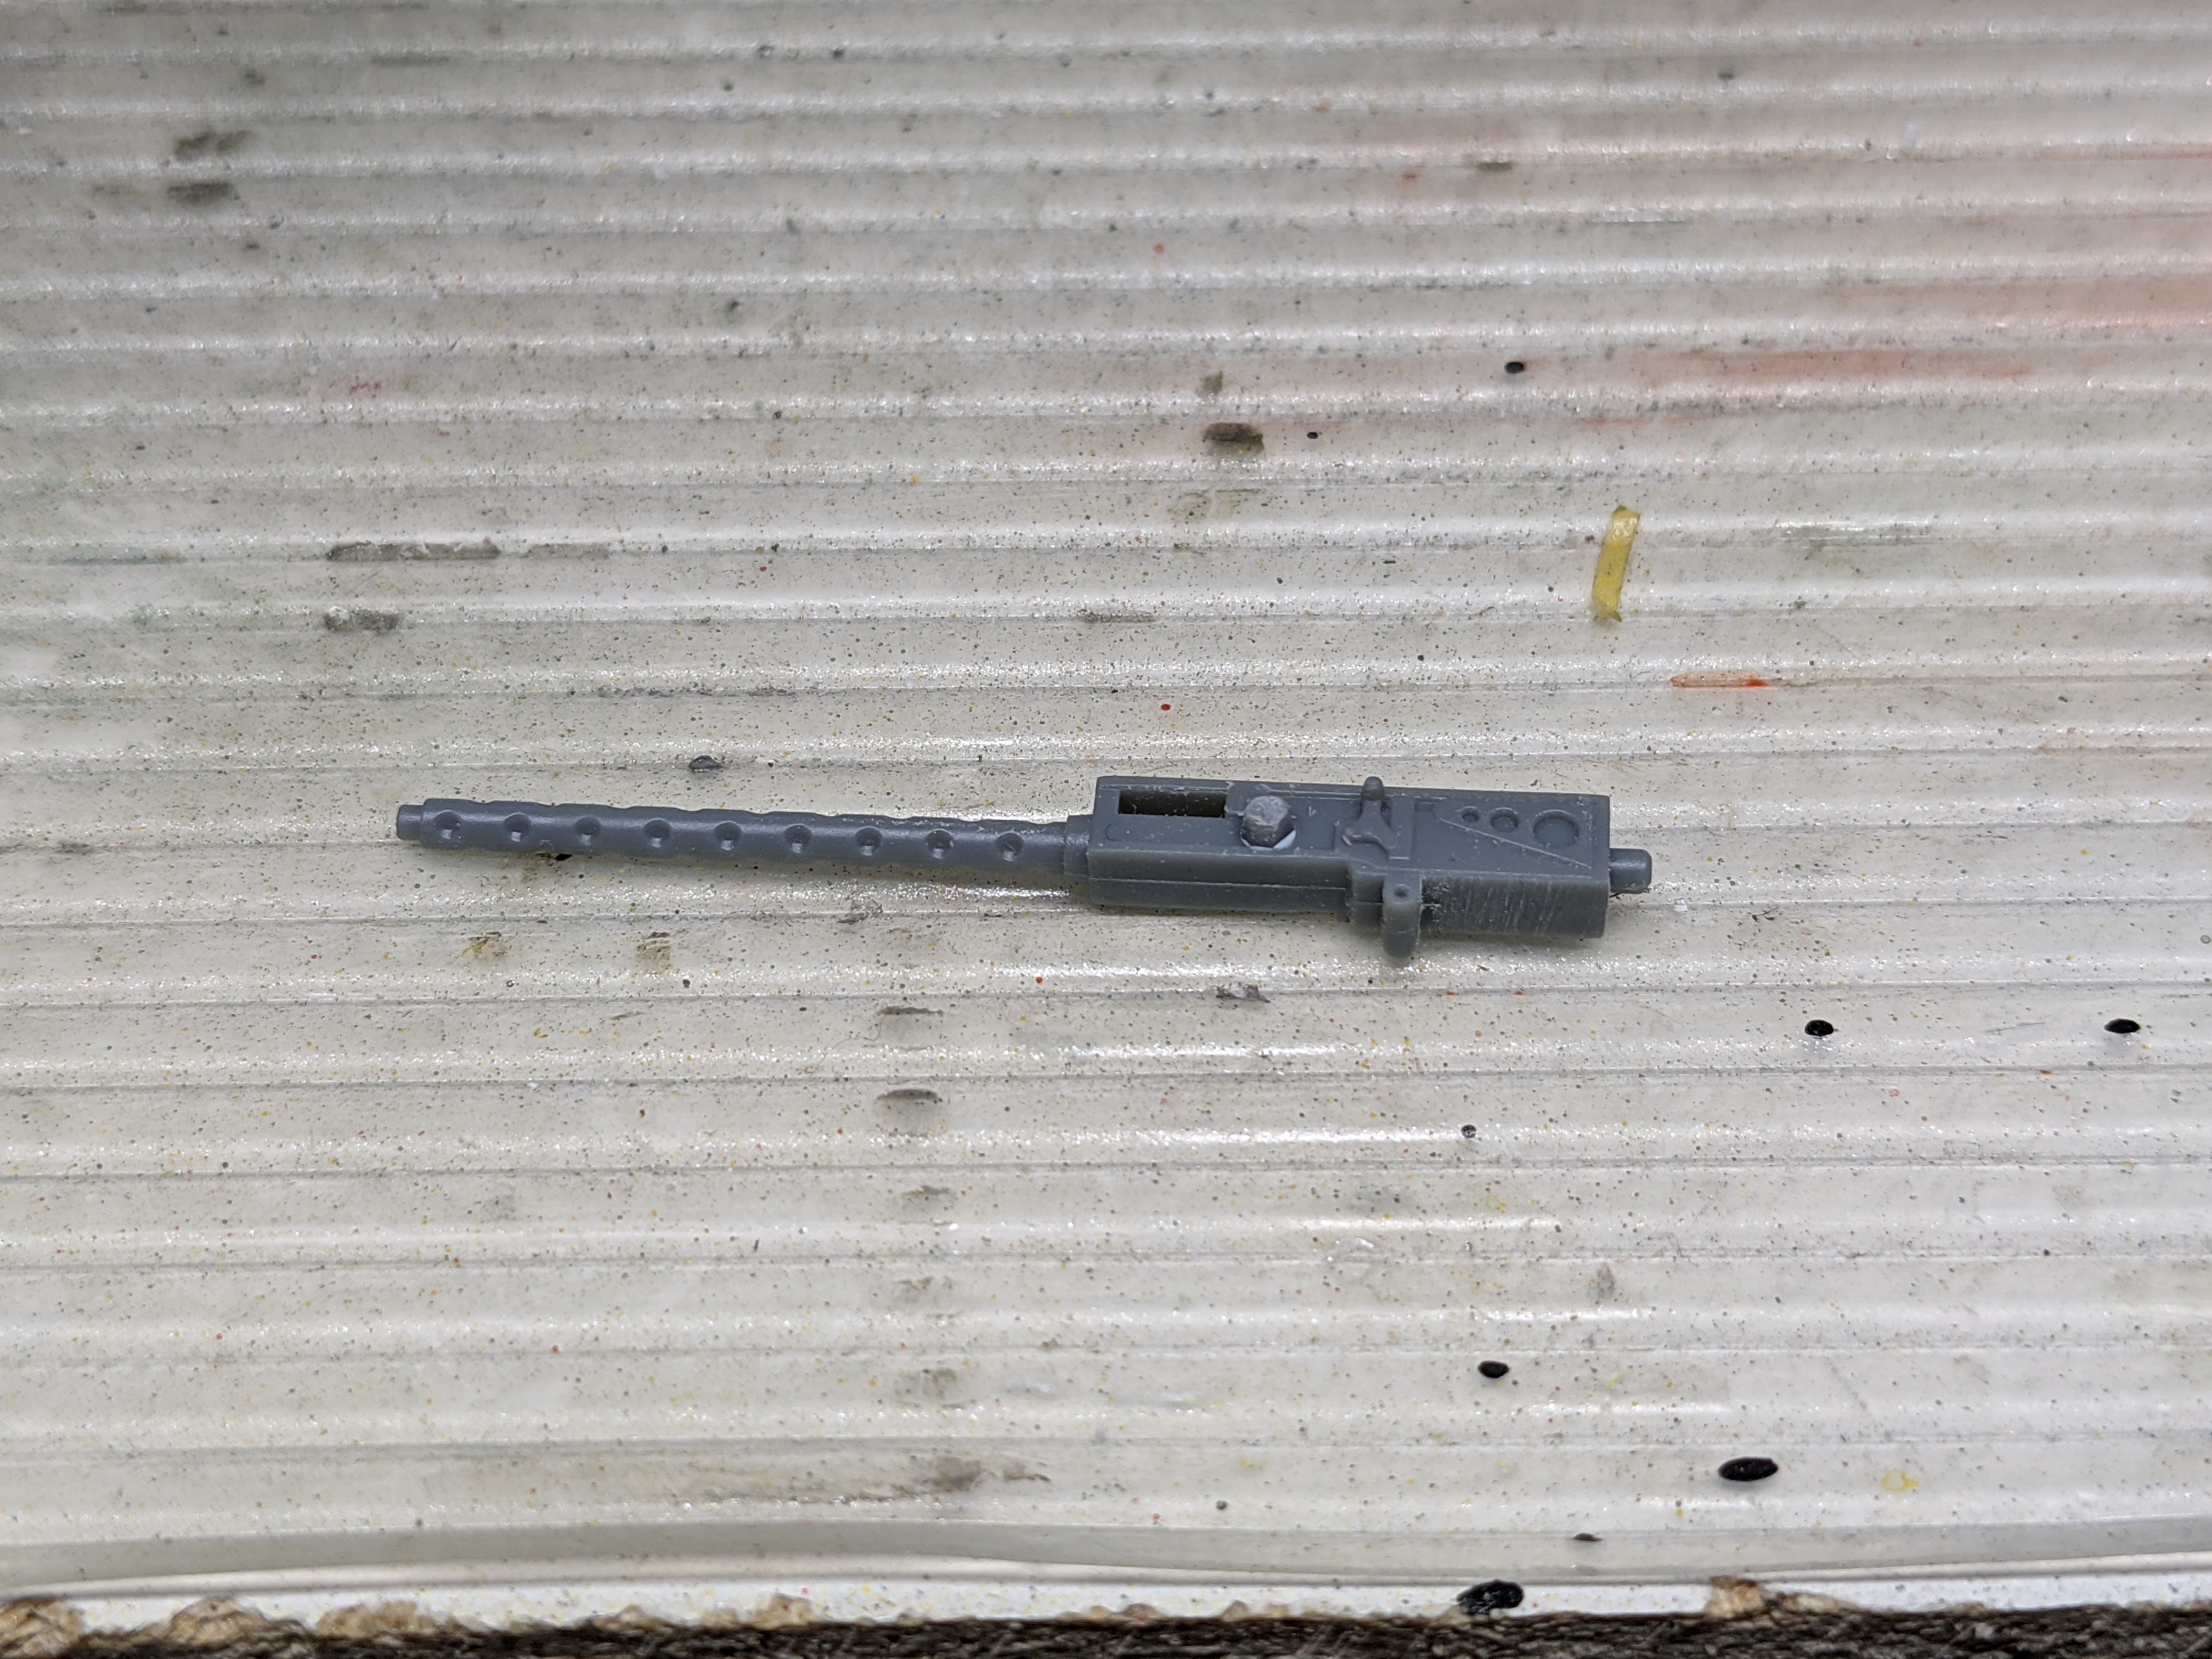
That's not a barrel, that's a telephone pole! Otherwise it looks great. Can't believe you only started it last week. Carl -
RCAF Liberator GR Mk VI
BlrwestSiR replied to BlrwestSiR's topic in LSM 1/35 and Larger Work In Progress
Martin, I briefly considered binning it but decided I had to at least give it a shot at fixing it. I've already binned too many multi engine bombers for one reason or another. -
Rye Field M4A3E8 "project"! LOL
BlrwestSiR replied to JohnB's topic in LSM 1/35 and Larger Work In Progress
The Asuka Shermans are considered to be some of the best Sherman kits in terms of accuracy and detail and without a lot of small fussy bits. Some folks feel the recent Rye Field kits have topped them but only barely. They go together really well without any hiccups. Even the included rubber band tracks are nicely done. Unfortunately their HVSS kits don't have rubber band tracks, just the individual link ones. The only annoying/gimmicky bit is the working suspension. They use soft rubber pads to cushion the swingarms. Some versions have a plastic spacer you can use to get rid of that "feature" and build it fixed. I used pieces of sprue cut to the right height to do the same thing. Tamiya thought they were good enough that they even re-boxed a couple. Those are silly money on the collectors markets. I've build three so far and have another three to go Carl