BlrwestSiR
-
Posts
9,197 -
Joined
-
Last visited
Content Type
Profiles
Forums
Events
Gallery
Everything posted by BlrwestSiR
-
I wonder if it was because they felt that the .303 round being smaller and lighter, they could carry more rounds of ammo for the same weight versus .50 cal. The same sort of argument of 7.62 vs 5.56 that came later on. I'd also read somewhere that the RAF had a massive stockpile of .303 ammo and wanted to use it up before buying something else. Maybe a combo of the the two? Carl
-

What is on your bench right now ? Share a picture :)
BlrwestSiR replied to Martinnfb's topic in Modelling Discussion
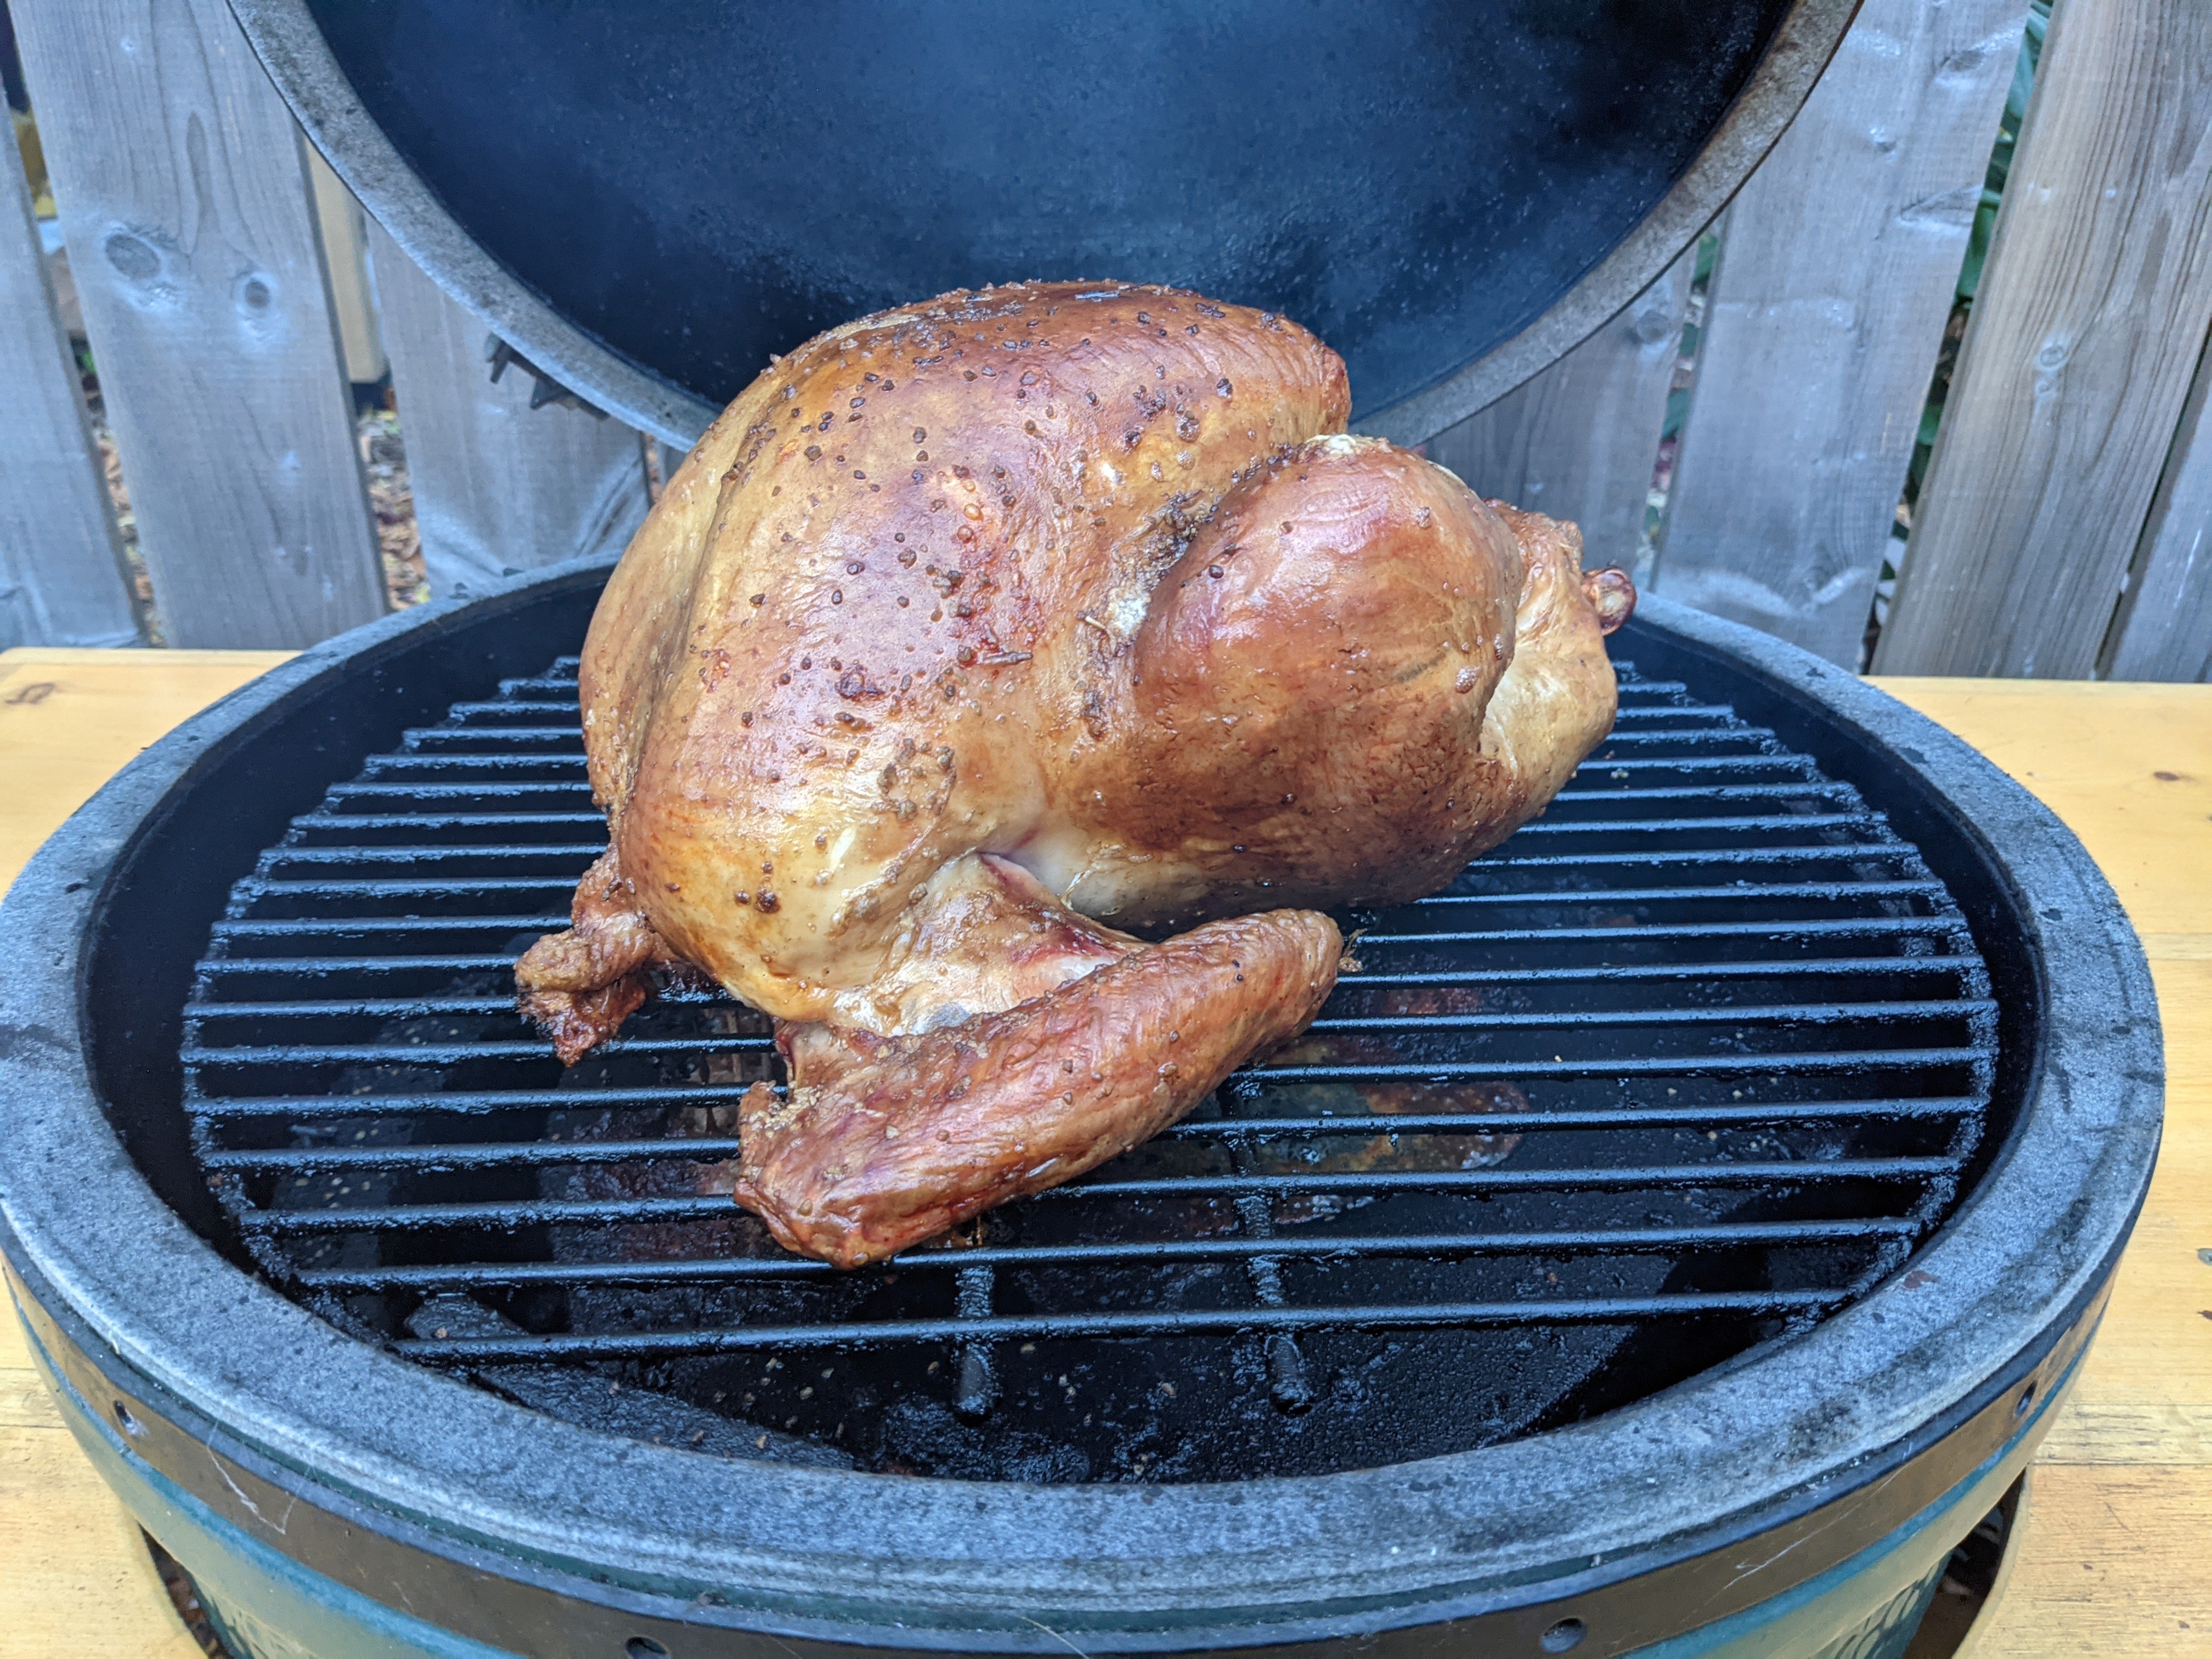
Nowhere near Thanksgiving here (that was back at the beginning of October for us Canucks) but all this turkey talk made me hungry so...
-
Sorry to hear about that Hubert. Glad to hear you're both getting better. There's too many vulnerable folks in either mine or Sue's extended family for us to skip out on the flu shot every year. I ended up getting the flu shot, shingles, pneumonia and my Covid booster shot within a couple weeks of each other earlier in the month. My arms were sore especially after the shingles shot but not as much as it was from the IV when I had my heart scare right after. Carl
-
Ernie, any thoughts to what markings you'll do yours in? I broke down and sold one of my mountain bikes to pick one up. Don't worry, I still got another 4 so I'm not without wheels. I'm leaning towards R for Ropey which I have custom masks for. I've got the Belcher's Bits decal sheet and was thinking of the wartime VR-A but that has bulged bomb bay doors. Carl
-
Rye Field M4A3E8 "project"! LOL
BlrwestSiR replied to JohnB's topic in LSM 1/35 and Larger Work In Progress
Looks great there John. I think you need to stick to planes as you're making the regular armour builders here look bad. Carl -
So a question for the Aussies here, is this really a mode of transportation in your country? https://driving.ca/auto-news/crashes/australian-man-gets-cooled-off-by-cops-for-driving-motorized-cooler
- 2,036 replies
-
- 2
-

-

-
- car related stuff
- anything about cars
- (and 6 more)
-
At least there won't be crumbs stuck in them.
- 2,036 replies
-
- 3
-
-
- car related stuff
- anything about cars
- (and 6 more)
-
What is on your bench right now ? Share a picture :)
BlrwestSiR replied to Martinnfb's topic in Modelling Discussion
You guys are making me hungry!!! Carl -
RCAF Liberator GR Mk VI
BlrwestSiR replied to BlrwestSiR's topic in LSM 1/35 and Larger Work In Progress
Thanks Harv! -
RCAF Liberator GR Mk VI
BlrwestSiR replied to BlrwestSiR's topic in LSM 1/35 and Larger Work In Progress
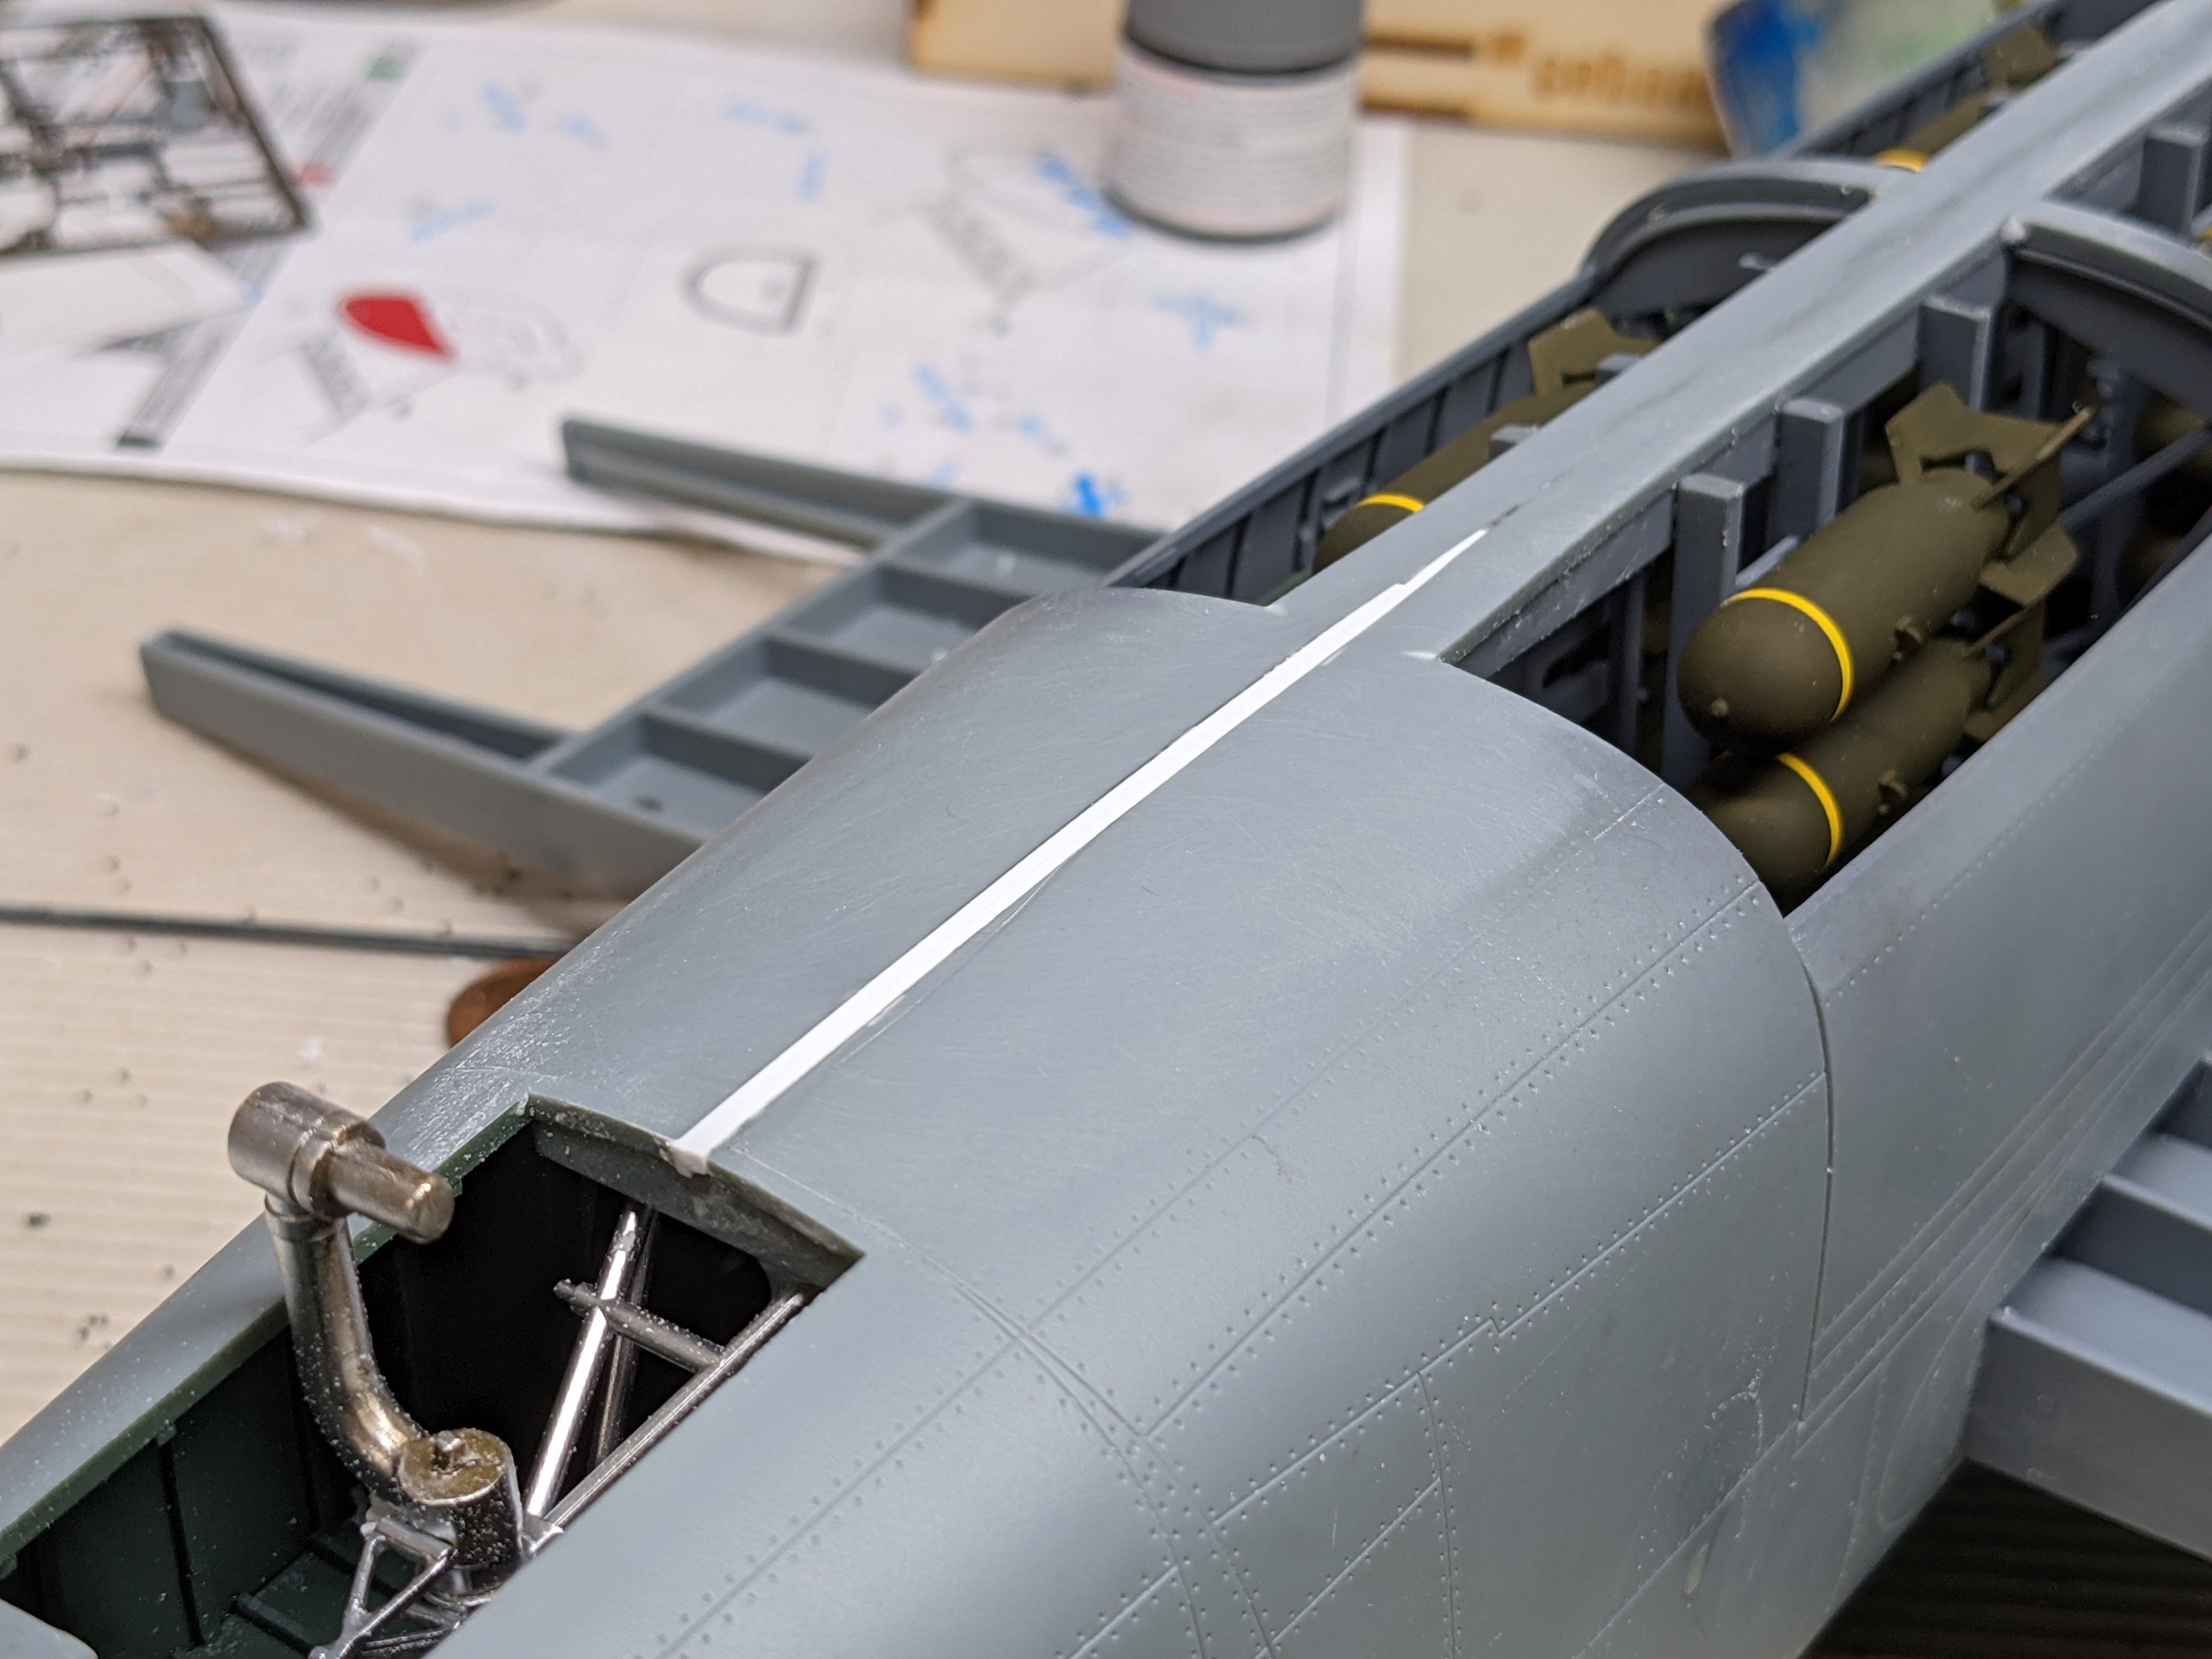
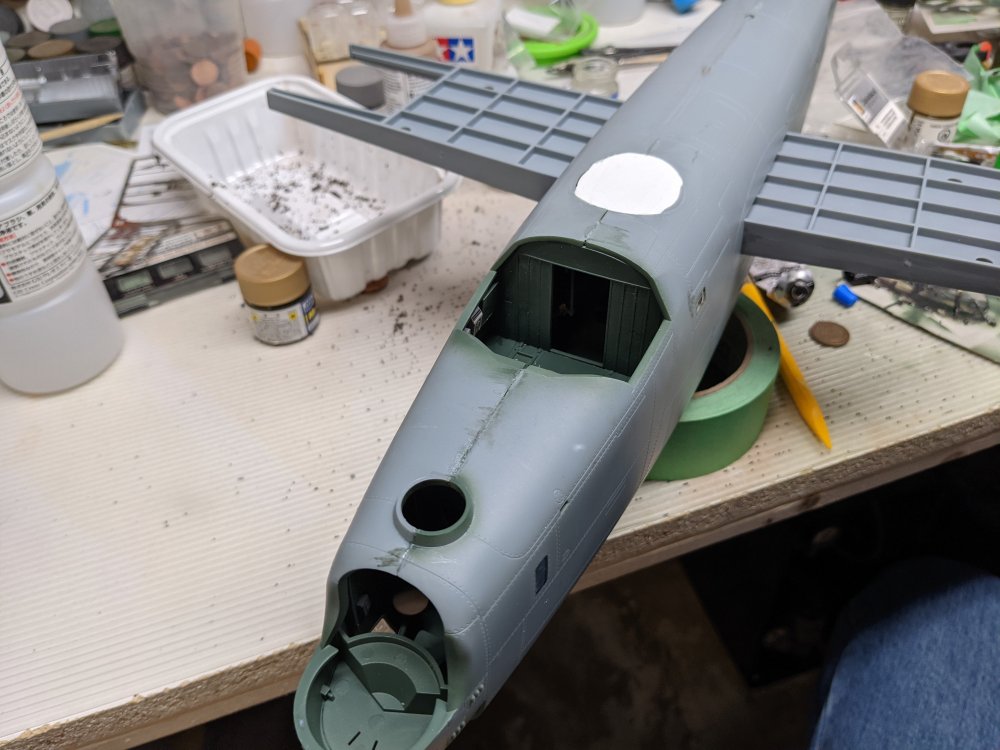
So here's the lower fuselage gap. With some strip styrene glued in place. Reinforced with CA and most of the gaps now filled and sanded to shape. Lots of panel lines to be restored but it went better than I thought it might. The topside is done too. Just a bit of filling around the nose.


- 227 replies
-
- 11
-

-

-
RCAF Liberator GR Mk VI
BlrwestSiR replied to BlrwestSiR's topic in LSM 1/35 and Larger Work In Progress
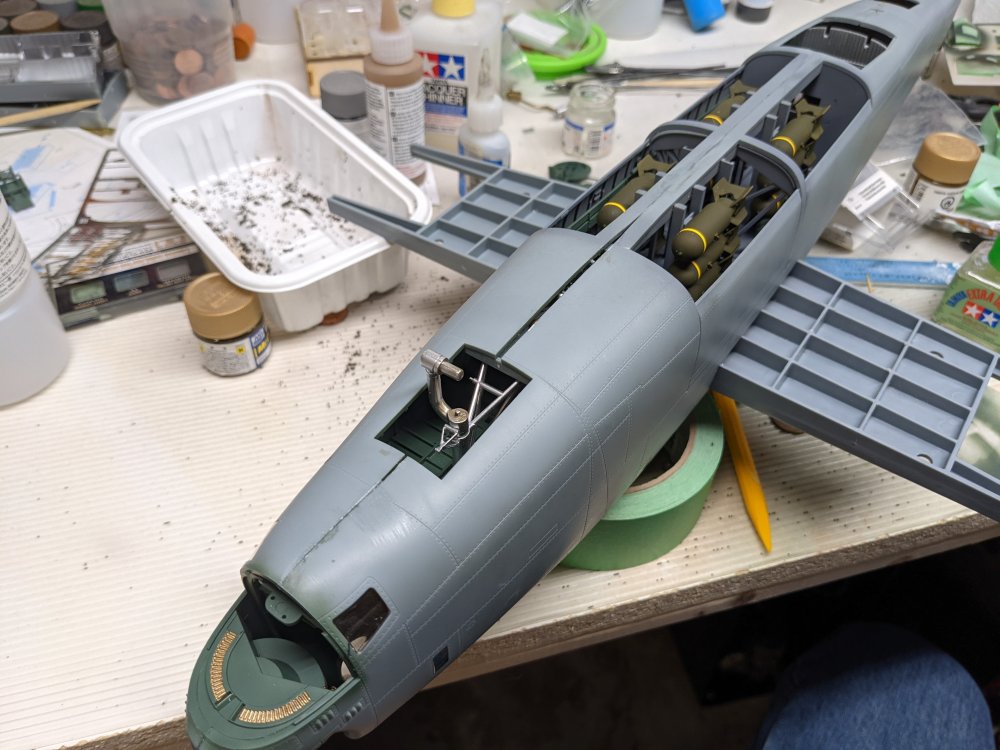
The problem was I no longer have access to the Liquid Gravity as it's trapped between the fuselage and the false wall I put in the nose gear bay. I thought I had enough space but didn't take into account the ribs moulded into the fuselage interior. I hadn't noticed them until I was gluing the two halves together. Thanks Peter. I filled the gap with strip styrene glued in place with cement. I then filled the remaining gaps with thin CA to add some further bonding strength. I hope. -
RCAF Liberator GR Mk VI
BlrwestSiR replied to BlrwestSiR's topic in LSM 1/35 and Larger Work In Progress
Well, I took the tape and clamps off this afternoon. There's definitely going to a bit of filler needed. Especially on the underside. Could've been worse I guess. I'm going to let it set up a bit more and tackle the seams in a day or so.

-
RCAF Liberator GR Mk VI
BlrwestSiR replied to BlrwestSiR's topic in LSM 1/35 and Larger Work In Progress
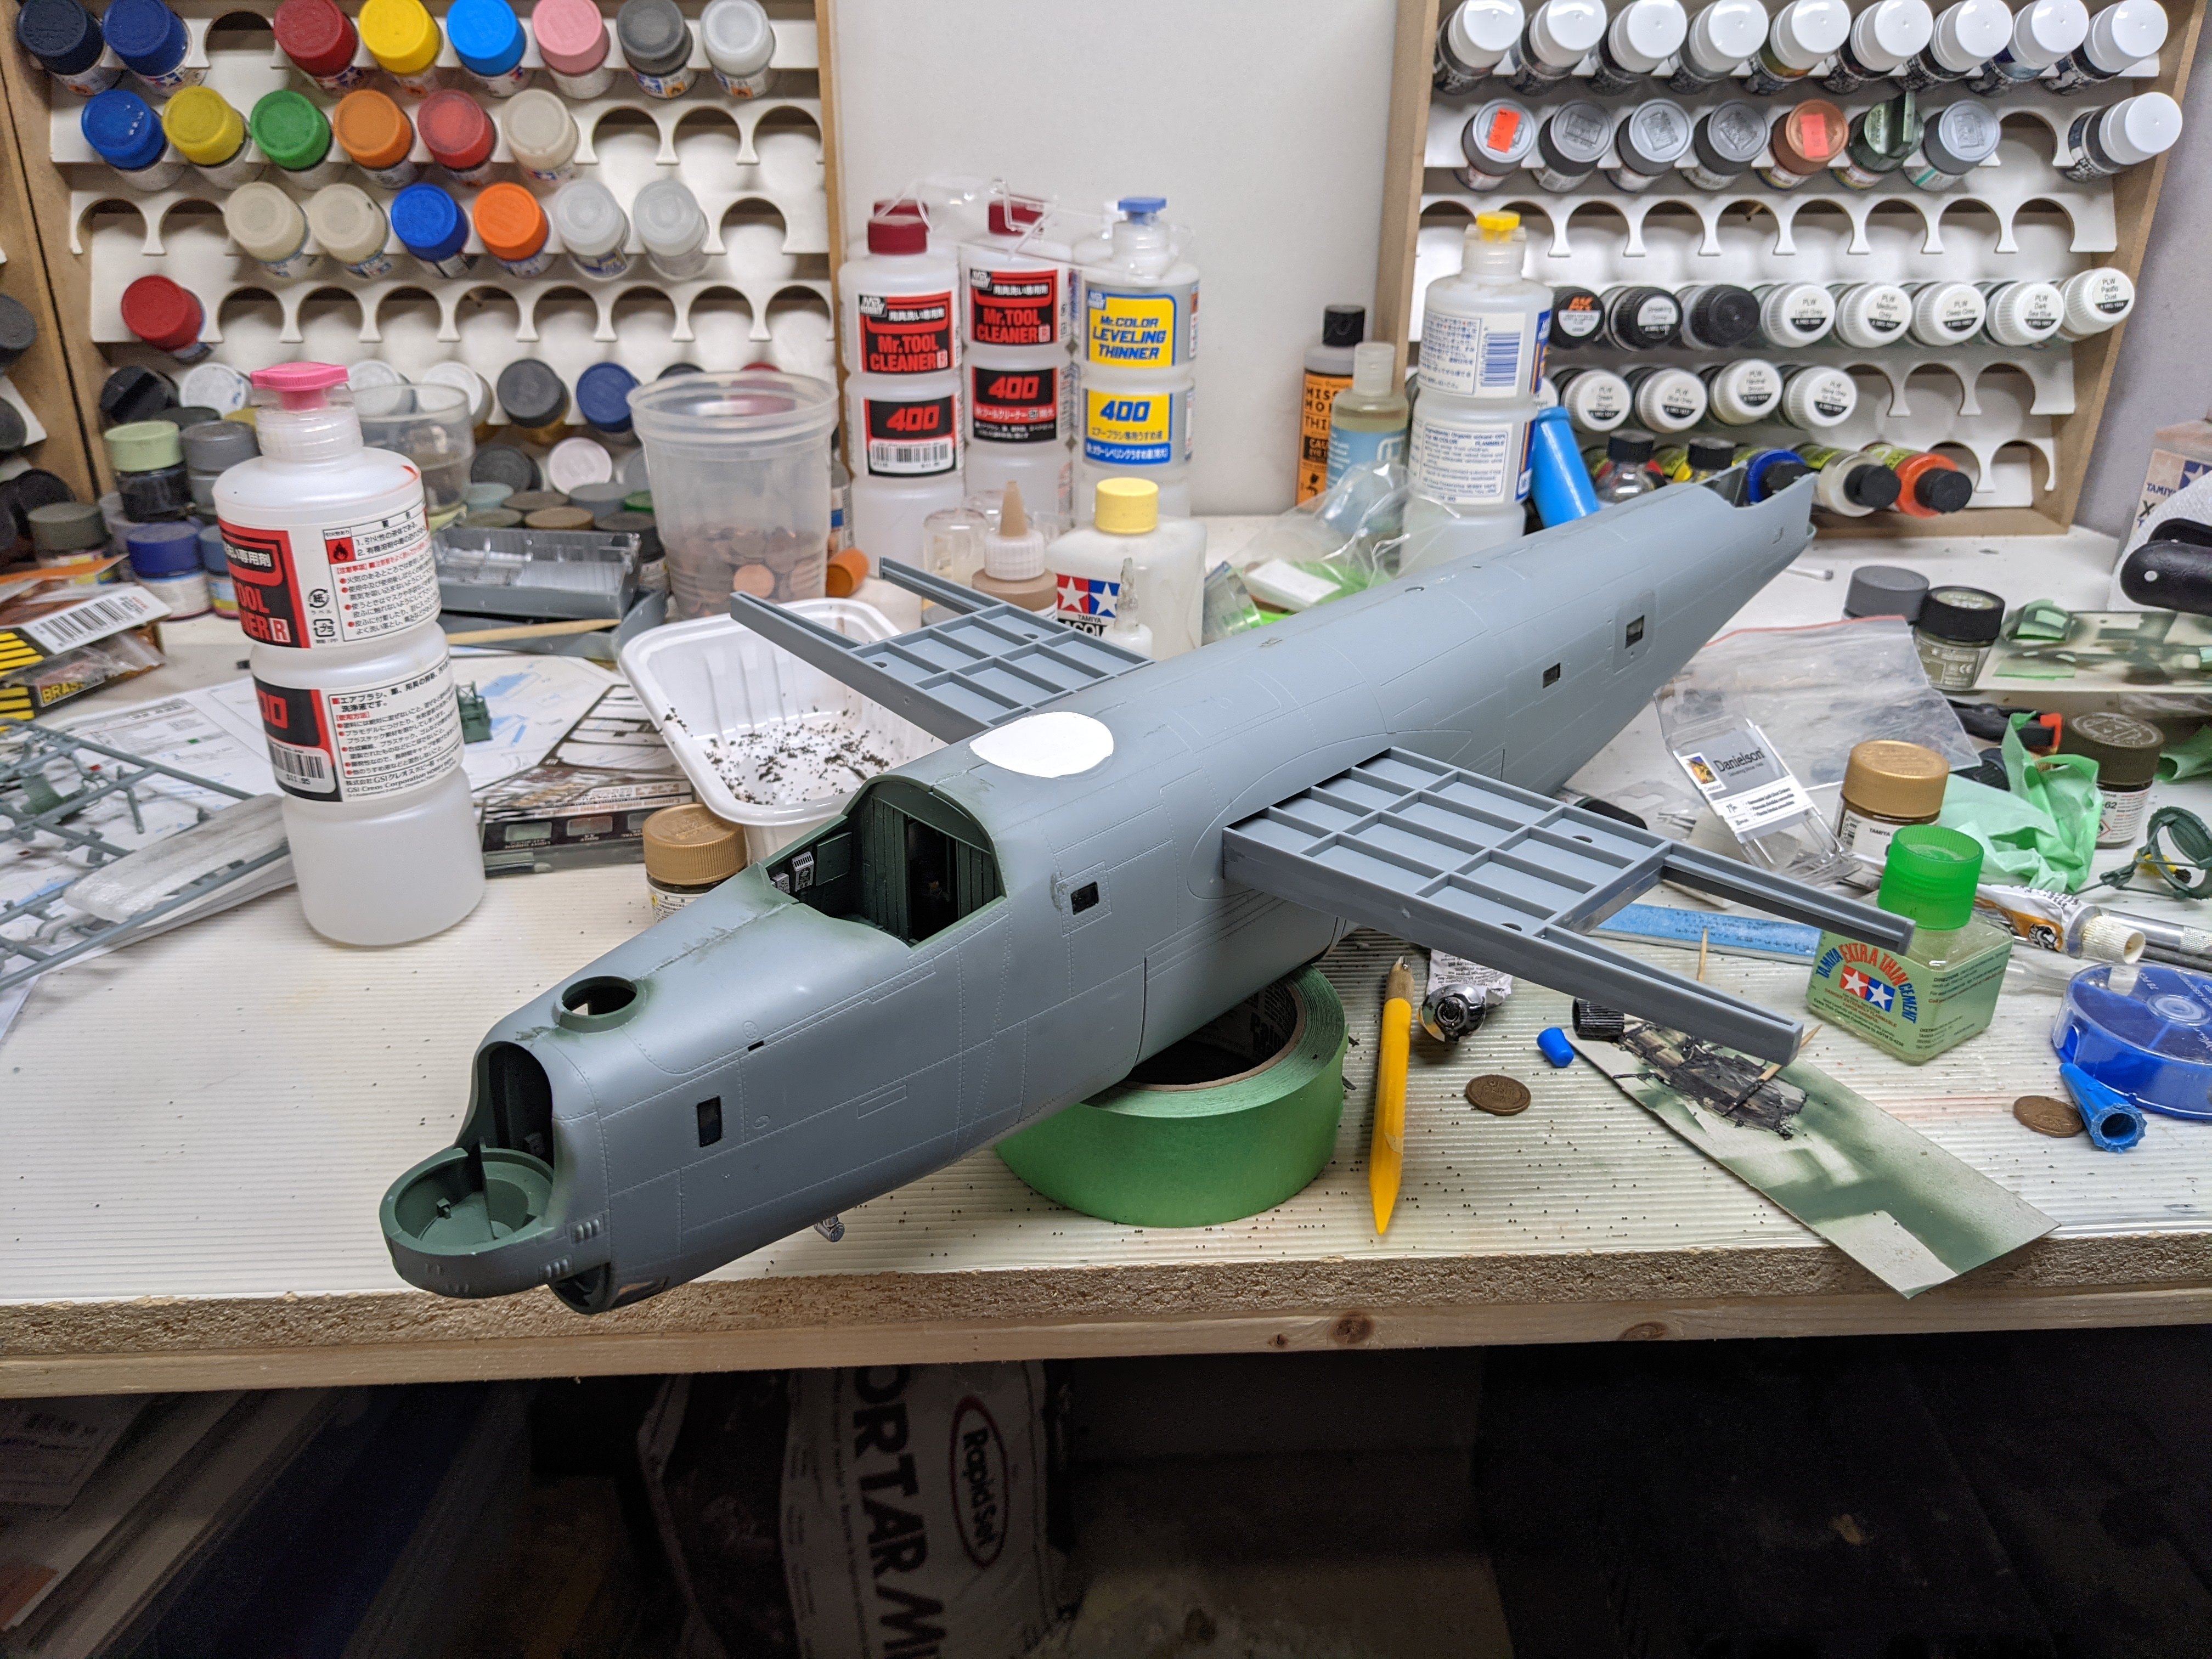
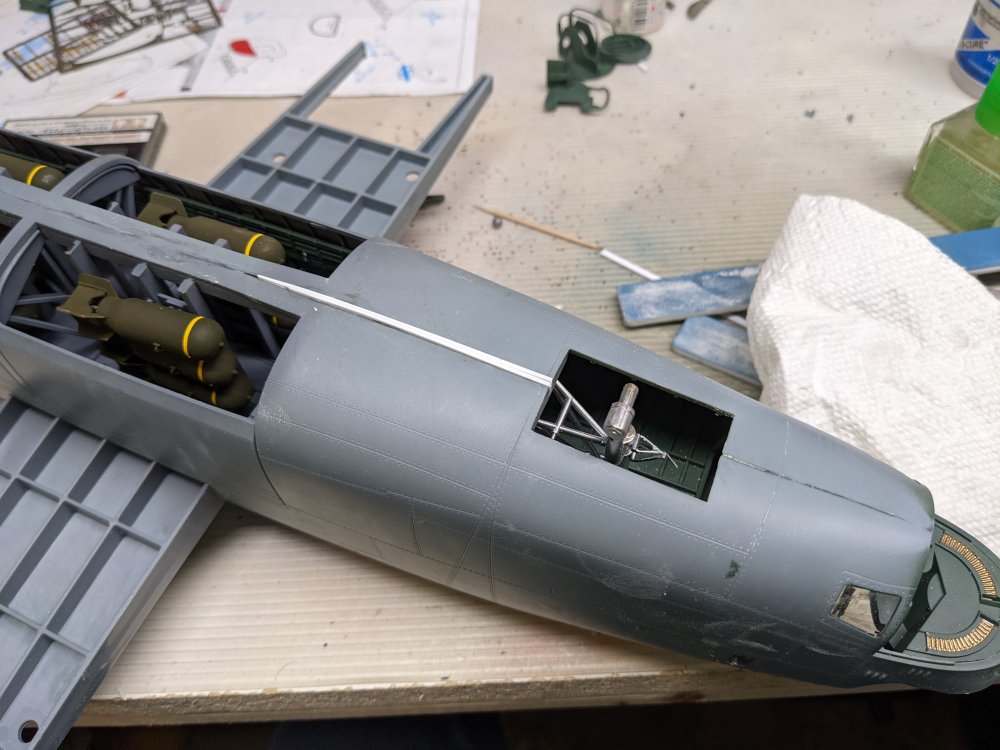
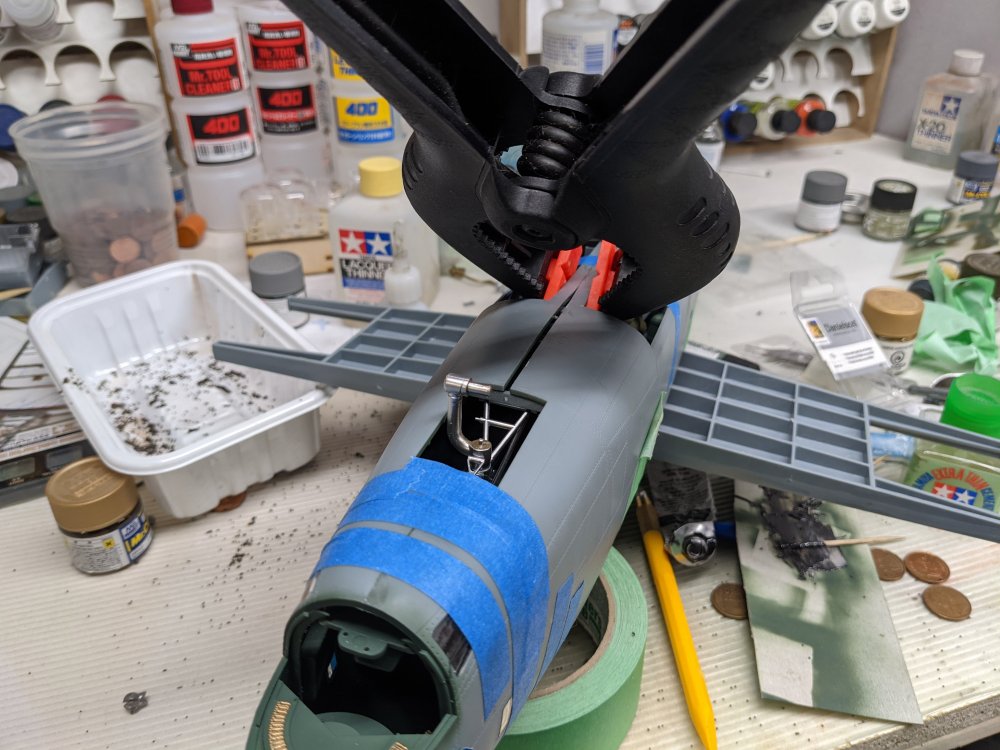
Thanks guys! Definitely get the turrets if you decide to get this kit. Hit a milestone and a bit of a rock too in the build. I added the remaining nose weight to the fuselage. Then I noticed that I hadn't glued the cockpit floor to the fuselage. So the Liquid Gravity not only started to leak out but also jammed in the gap between the floor and the fuselage. Which meant the fuselage no longer closed up... So after some grinding of the fuselage interior, thankfully where it won't be seen, I got the two halves together. At least on the topside... As you can probably tell by the size of that clamp, I'm not getting it any closer. Thankfully the nose section meets or I'd have a really problem with the canopy and nose glass.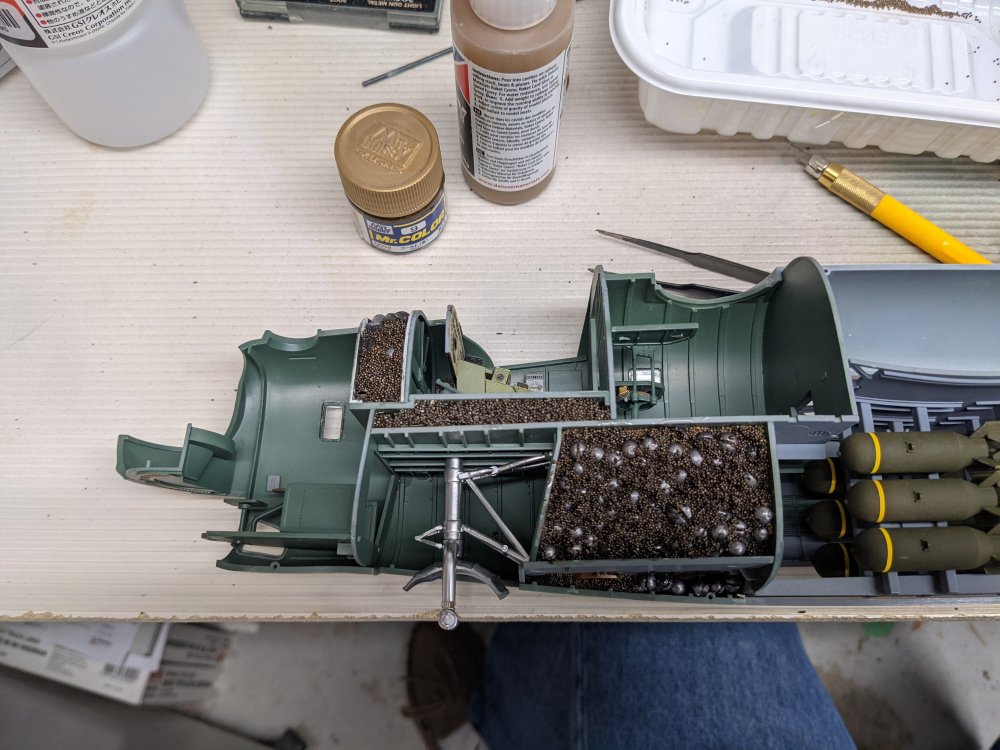
-
What is on your bench right now ? Share a picture :)
BlrwestSiR replied to Martinnfb's topic in Modelling Discussion
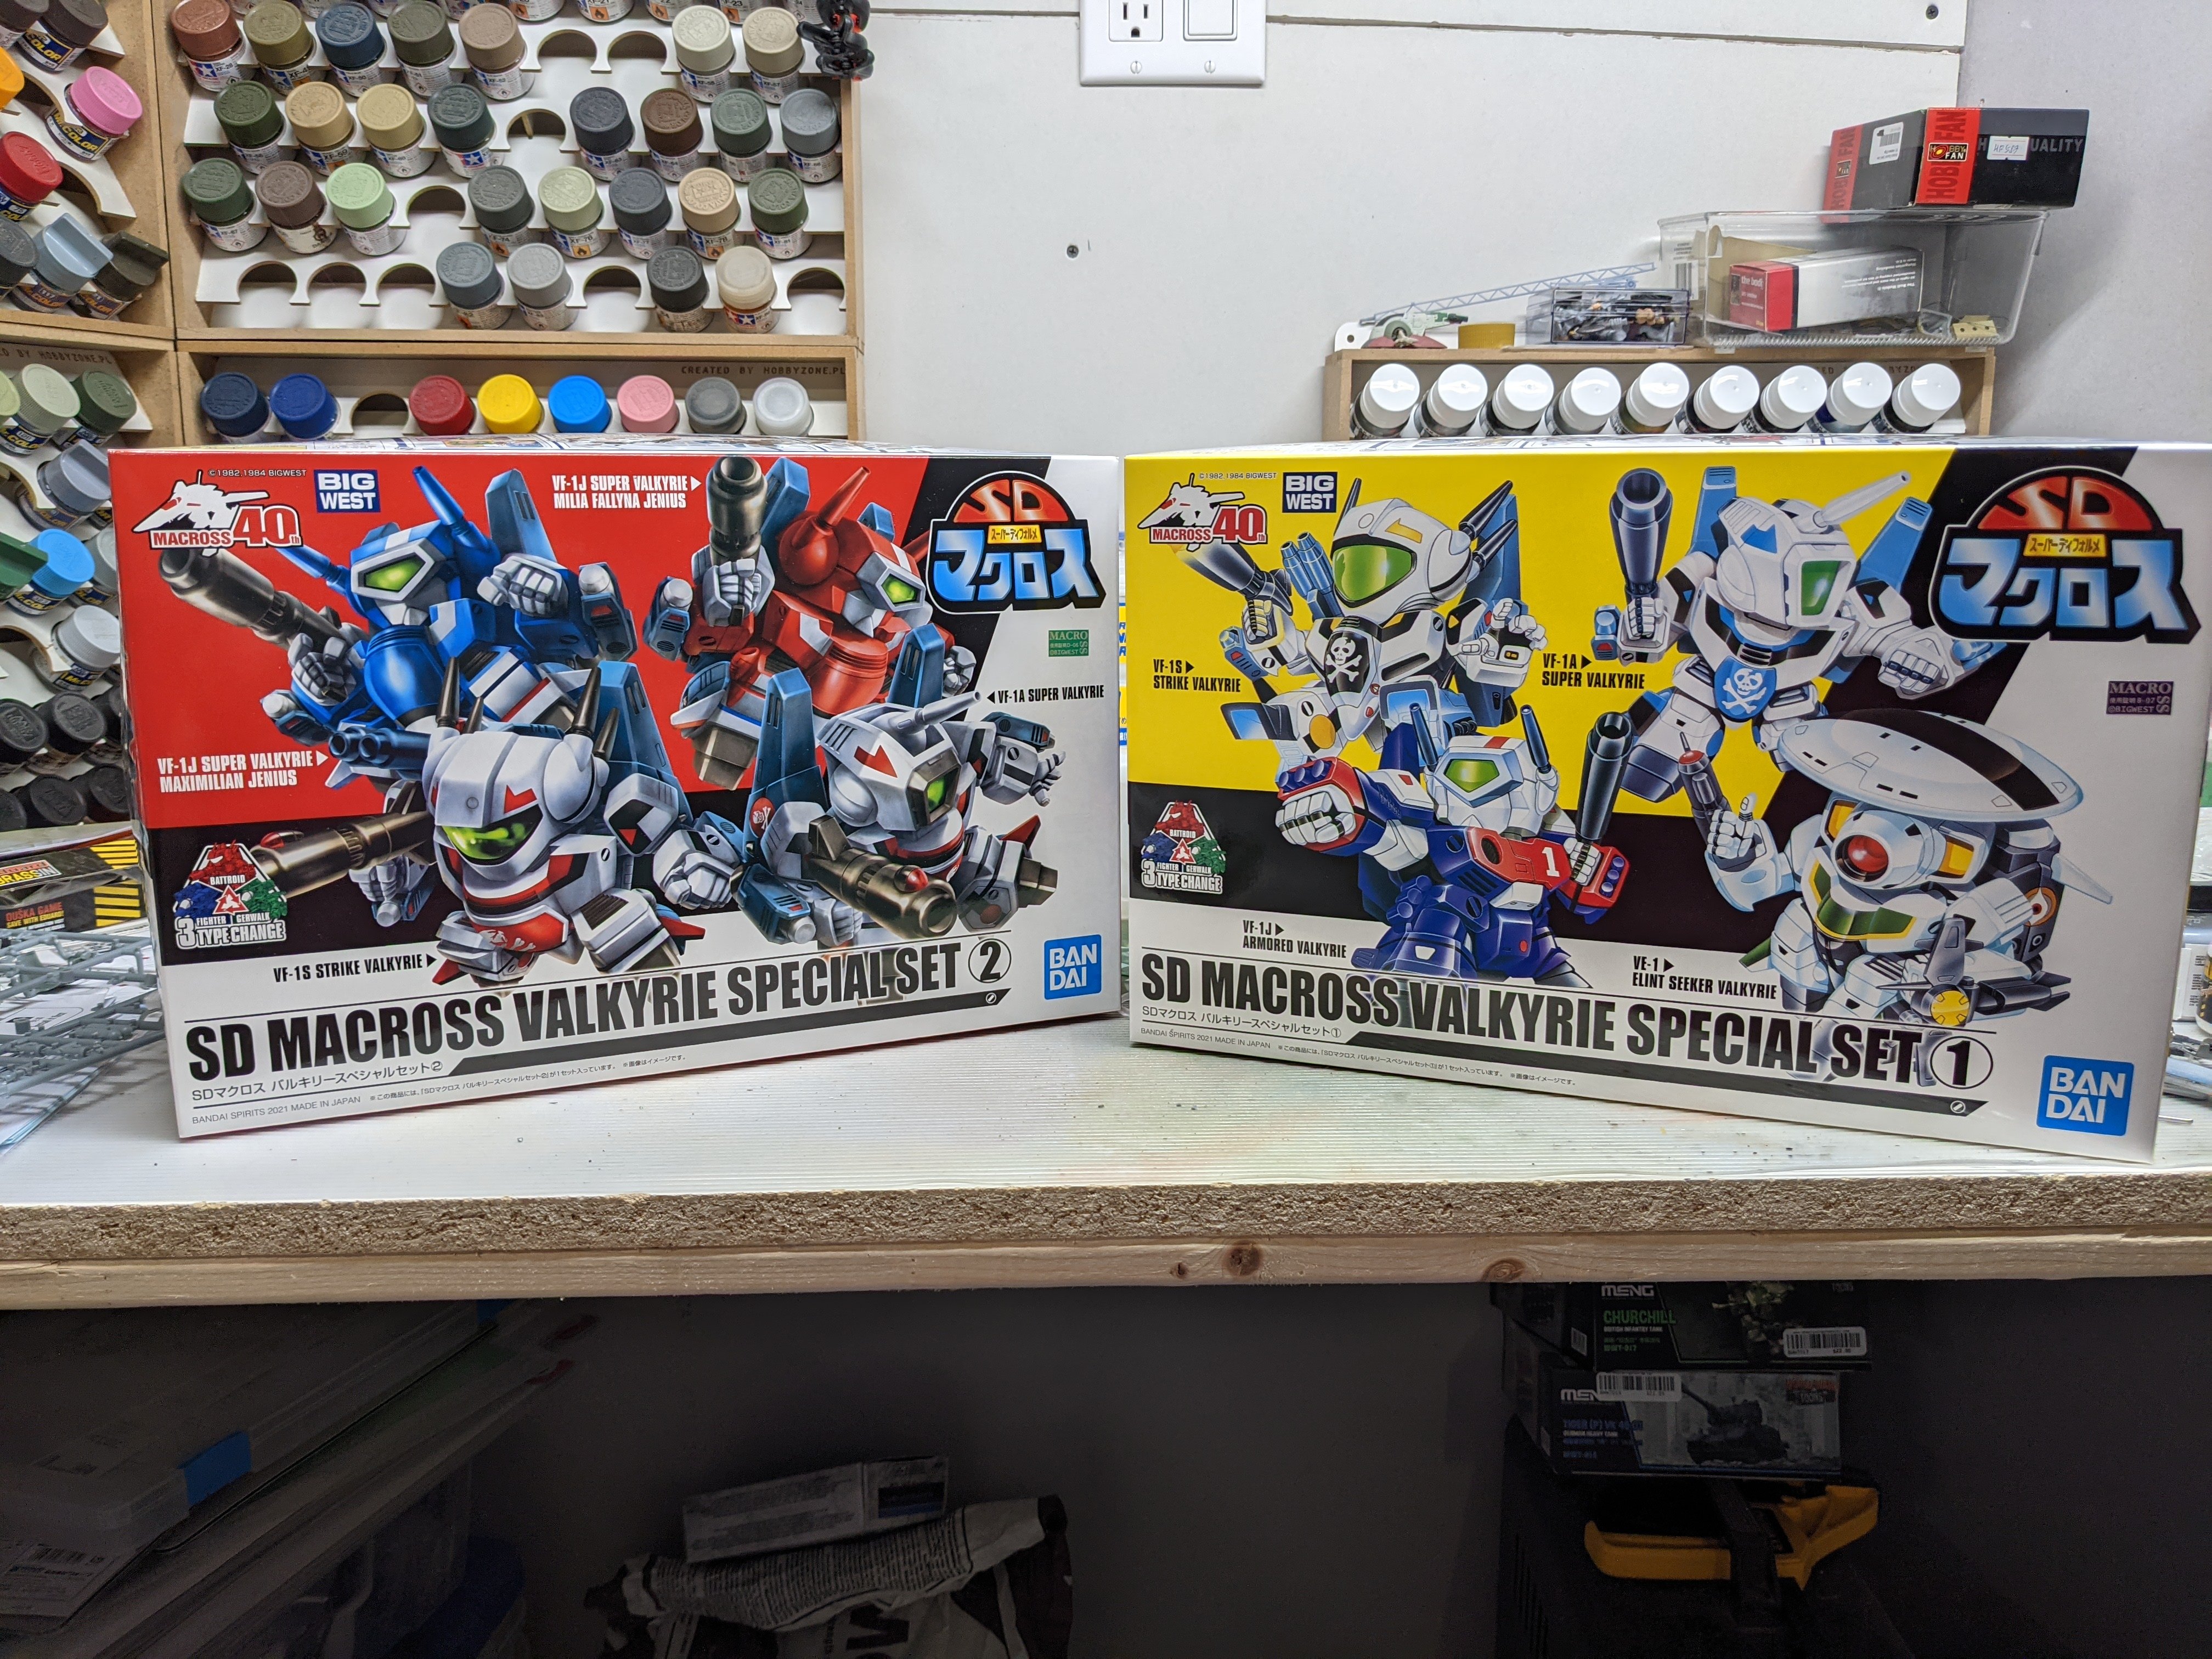
Heresy!!! The pilot's name is Hikaro Ichijo and it's called Macross, not that abomination that was sold to us as Robotech by Harmony Gold. Otherwise it's a nice looking model. I wonder if the 1/60 scale was picked to go with the Yamato/Arcadia figures. MAcross: Do you Remember Love is still my favourite anime film. Carl -
Cool! I see it's got cameras in the conversion as the old Alley Cat set didn't.
-
Some Macross goodies. I figured they were like a 4 in 1 kit where you picked which option you wanted but nope. There's one of each version in the box so 8 in total.

-
What is on your bench right now ? Share a picture :)
BlrwestSiR replied to Martinnfb's topic in Modelling Discussion
Looking at the instructions, it seems to be a very simple conversion too. Not a lot of cutting to do. -
RCAF Liberator GR Mk VI
BlrwestSiR replied to BlrwestSiR's topic in LSM 1/35 and Larger Work In Progress
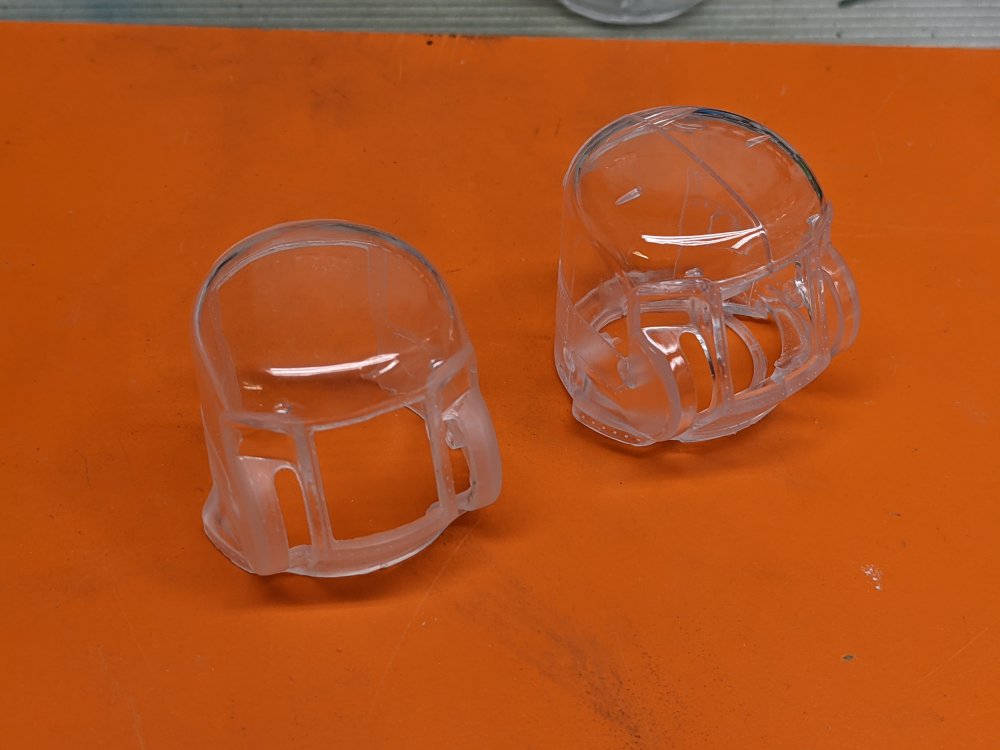
Peter, the kit turrets are split through the middle, clear section. The early ones were also completely frosted. I got the revised ones in kit but they still have that large seam and locator pins on them. The Cold War Studio nose is on the right and the tail one is on the left. Both are one piece so don't have that join line or the locator pins. Otherwise they're a copy of the kit turrets with the same details. -
RCAF Liberator GR Mk VI
BlrwestSiR replied to BlrwestSiR's topic in LSM 1/35 and Larger Work In Progress
Peter, I have no idea to be honest. I was looking at building a new display case using a pair of Ikea Detolf cases for the glass but I don't think it'll be big enough. -
RCAF Liberator GR Mk VI
BlrwestSiR replied to BlrwestSiR's topic in LSM 1/35 and Larger Work In Progress
In getting the fuselage halves ready to join up, I decided to check the fit of the turrets. Turns out you need to have the base mounted in the fuselage but can leave the turrets for after. Speaking of the turrets, here's a comparison of the Cold War Studio ones compared to the kit ones. The nose turret: The tail turret: Definitely a must buy for the kit.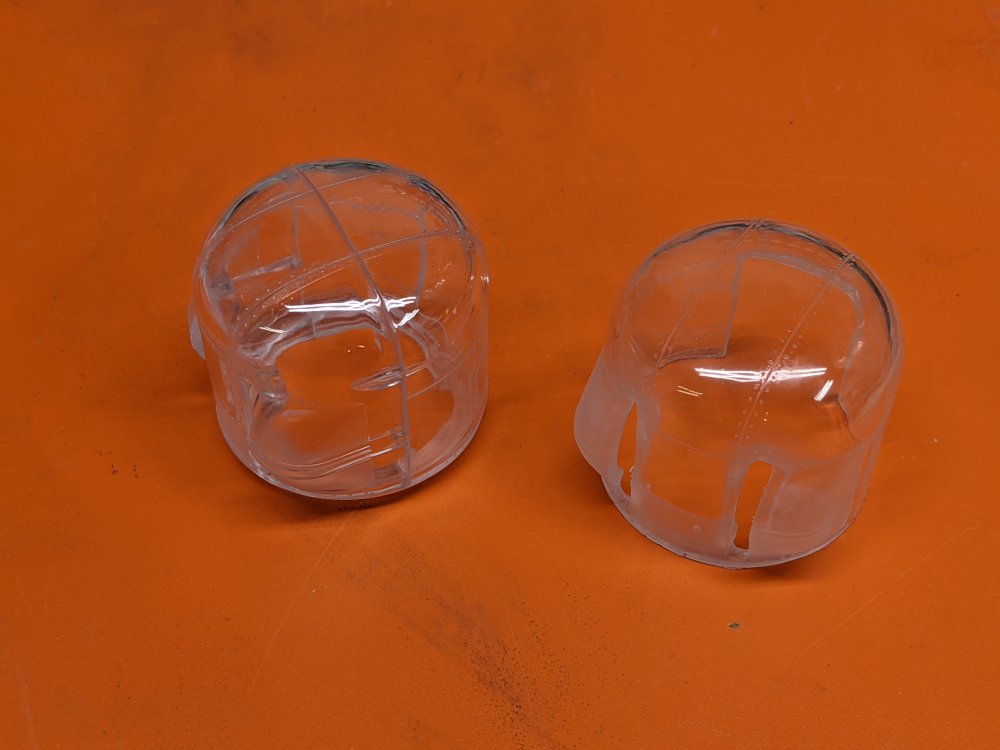
-
RCAF Liberator GR Mk VI
BlrwestSiR replied to BlrwestSiR's topic in LSM 1/35 and Larger Work In Progress
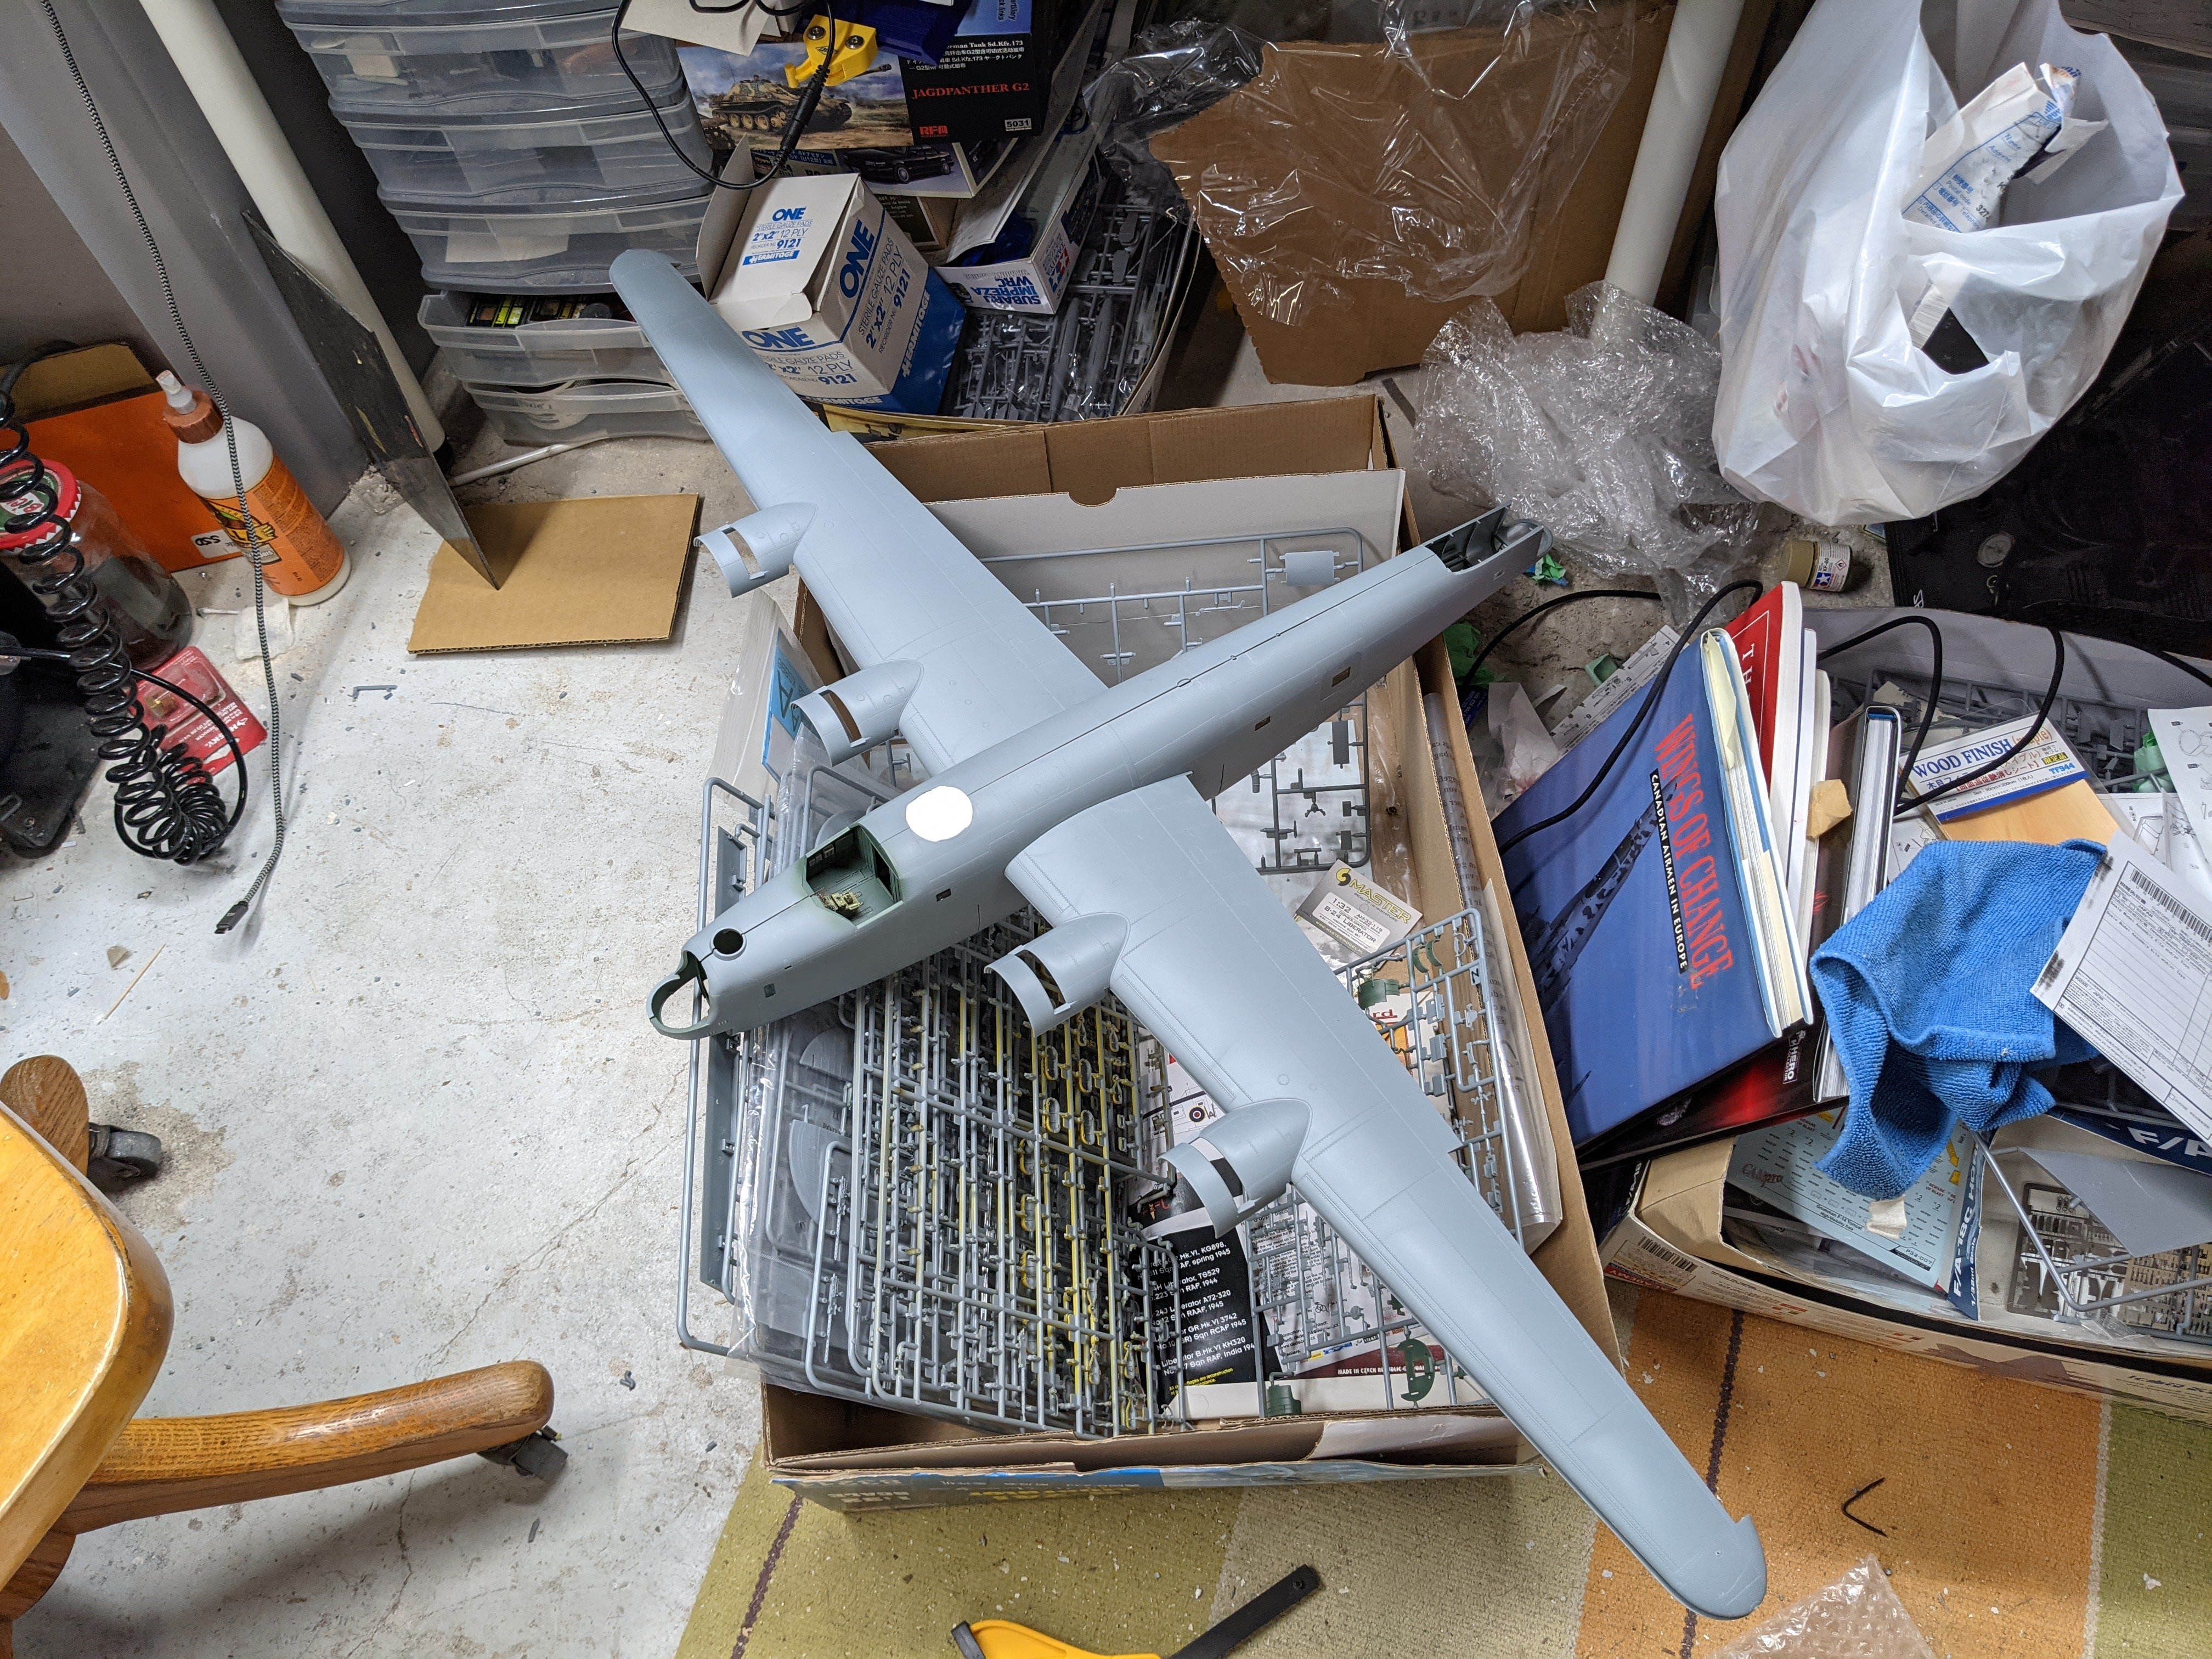
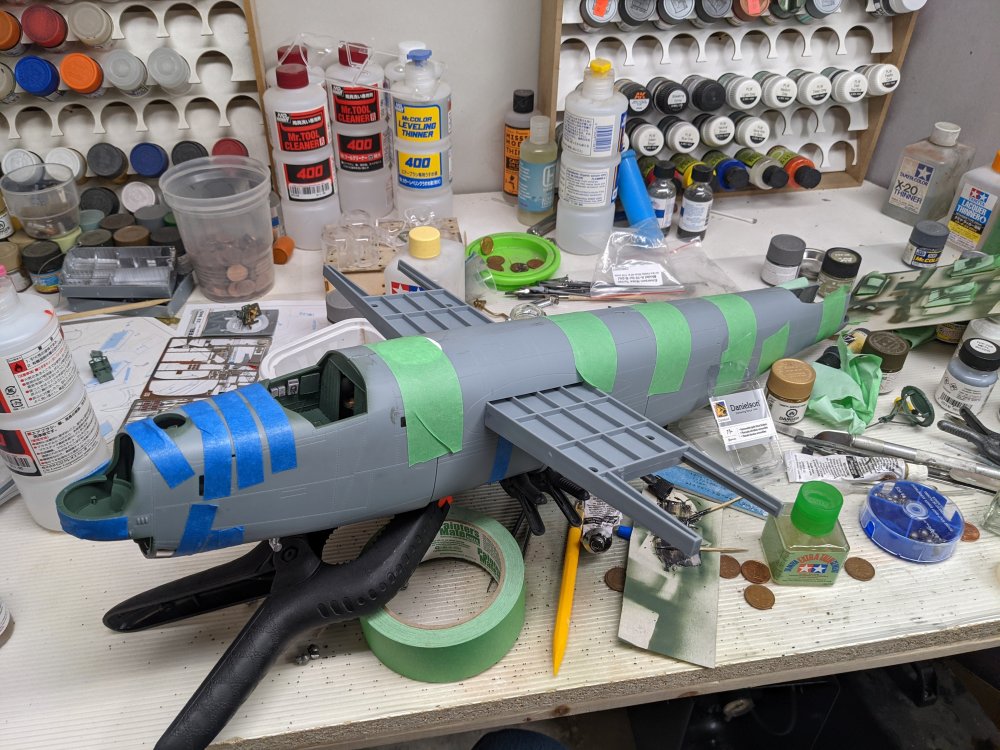
Well, it's big.... Just decided to mock it up and see what I'm getting myself into. Oh boy.
-
What is on your bench right now ? Share a picture :)
BlrwestSiR replied to Martinnfb's topic in Modelling Discussion
Nice progress on the tankette there Rob. Not a bad idea to pause on the Arado and do something less involved. I think that's a Cavalier Mustang. Which would be the only reason for me to get another P-51. -
Rye Field M4A3E8 "project"! LOL
BlrwestSiR replied to JohnB's topic in LSM 1/35 and Larger Work In Progress
Nice start John. That cast metal look on the turret does look good. Carl -
Ernie, glad to hear you're back and that things are mostly on the upswing. It's sad to hear about your mom though. There's been too much news about long term 'care' homes here in Canada and their lack of oversight and accountability. It is quite disappointing and shocking. Carl
-
Guess I'm a heathen for having cut up three Tamiya Spits so far.
- 161 replies
-
- 4
-
-
- greatwallhobby
- italeri
- (and 6 more)