BlrwestSiR
-
Posts
9,207 -
Joined
-
Last visited
Content Type
Profiles
Forums
Events
Gallery
Everything posted by BlrwestSiR
-

Done - F-4EJ Kai Phantom - The Last of it's Kind ZM 1/48
BlrwestSiR replied to DocRob's topic in LSM 1/48 Work in Progress
Nice bikes Rob! Canyon only recently became available in Canada. I forgot my Lynskey 29er which my wife would kill me for since she bought it for my 40th. It's a custom Ti cruiser style single speed with laser etched flames. I've a couple fat bikes too but my fleet is the smallest it's been in a long time. At one point I had 11 bikes in a 800 square ft condo. I jokingly told friends it was so I could have a different bike every day of the week plus some backups. -
Done - F-4EJ Kai Phantom - The Last of it's Kind ZM 1/48
BlrwestSiR replied to DocRob's topic in LSM 1/48 Work in Progress
Those burner cans looks fantastic. Suitably dirty and heat stained. Thanks for the step by step and the surfing info. Mountain biking I can relate to. I've got a '96 Mantis Flying V running XTR along with a '97 Specialized FSR. But my primary ride these days is my Ibis Mojo HD. Full carbon frame and 150mm of suspension travel means I don't feel the bumps anymore. What are you riding? -
Or a Iowa class battleship.
-
For a brief moment, you had me looking at 1/72 kits of F-14s. Then I came to my senses.
-
I've built a couple. Occasionally some very tiny parts but the overall fit and engineering on the ones I've done have been excellent. Parts counts can get a bit insane on some of their full interior kits though.
-
Ooooh nice, a Hetzer.
-
But they take up so much less space than a 1/32 4 engine heavy!!! That's my story and I'm sticking to it! Carl
-
What is on your bench right now ? Share a picture :)
BlrwestSiR replied to Martinnfb's topic in Modelling Discussion
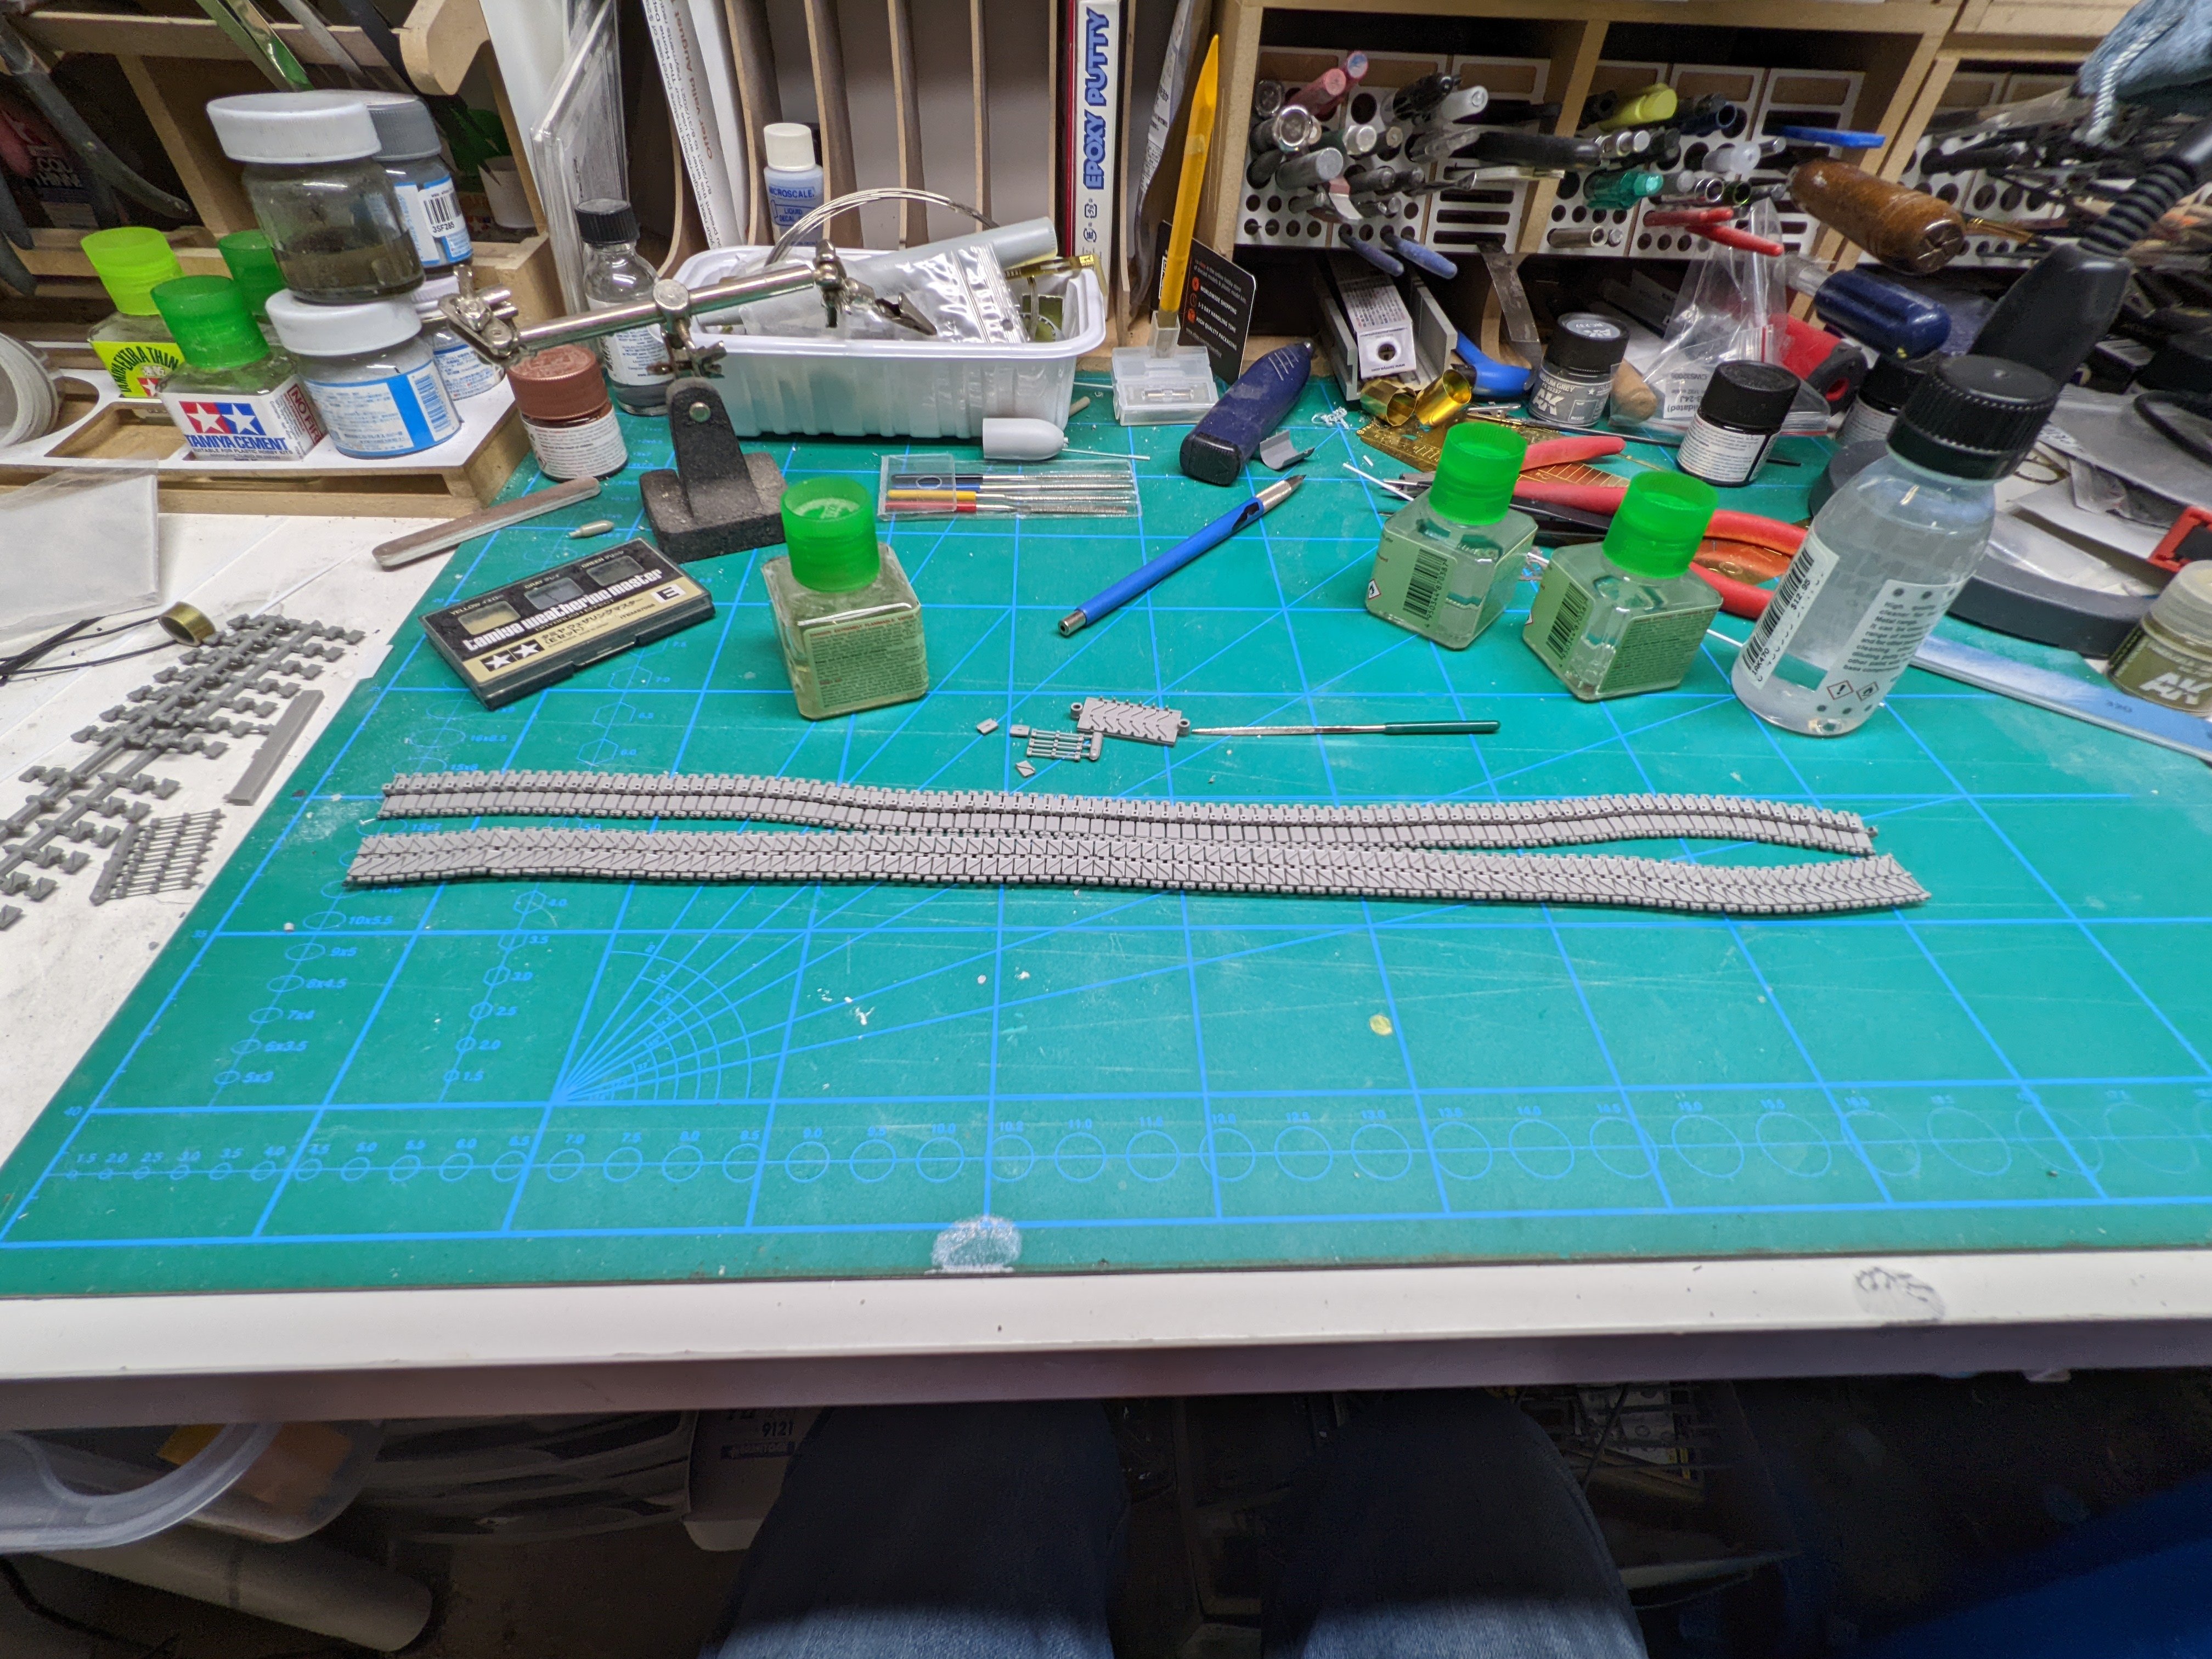
Got the first two sets of tracks done for my T-28. I'm using Rye Field's indie link sets for these. I have two more lengths to go to finish them. Carl
-
There's a new P-47 bubbletop coming out from Miniart. It looks to be up to their usual standards even if it's 1/48. https://miniart-models.com/wp-content/catalogue/2022/index.html?fbclid=IwAR2Cdel6YX5mZO7l55Qz47j5sN5QWMkDtS1aUCZ3tT8MqaJvY71rrm51qQQ
-
What is on your bench right now ? Share a picture :)
BlrwestSiR replied to Martinnfb's topic in Modelling Discussion
It works well on the typically thick Japanese decals. Here's my Millennium Falcon I did using it on the kit decals. Everything not in white is a decal. -
What is on your bench right now ? Share a picture :)
BlrwestSiR replied to Martinnfb's topic in Modelling Discussion
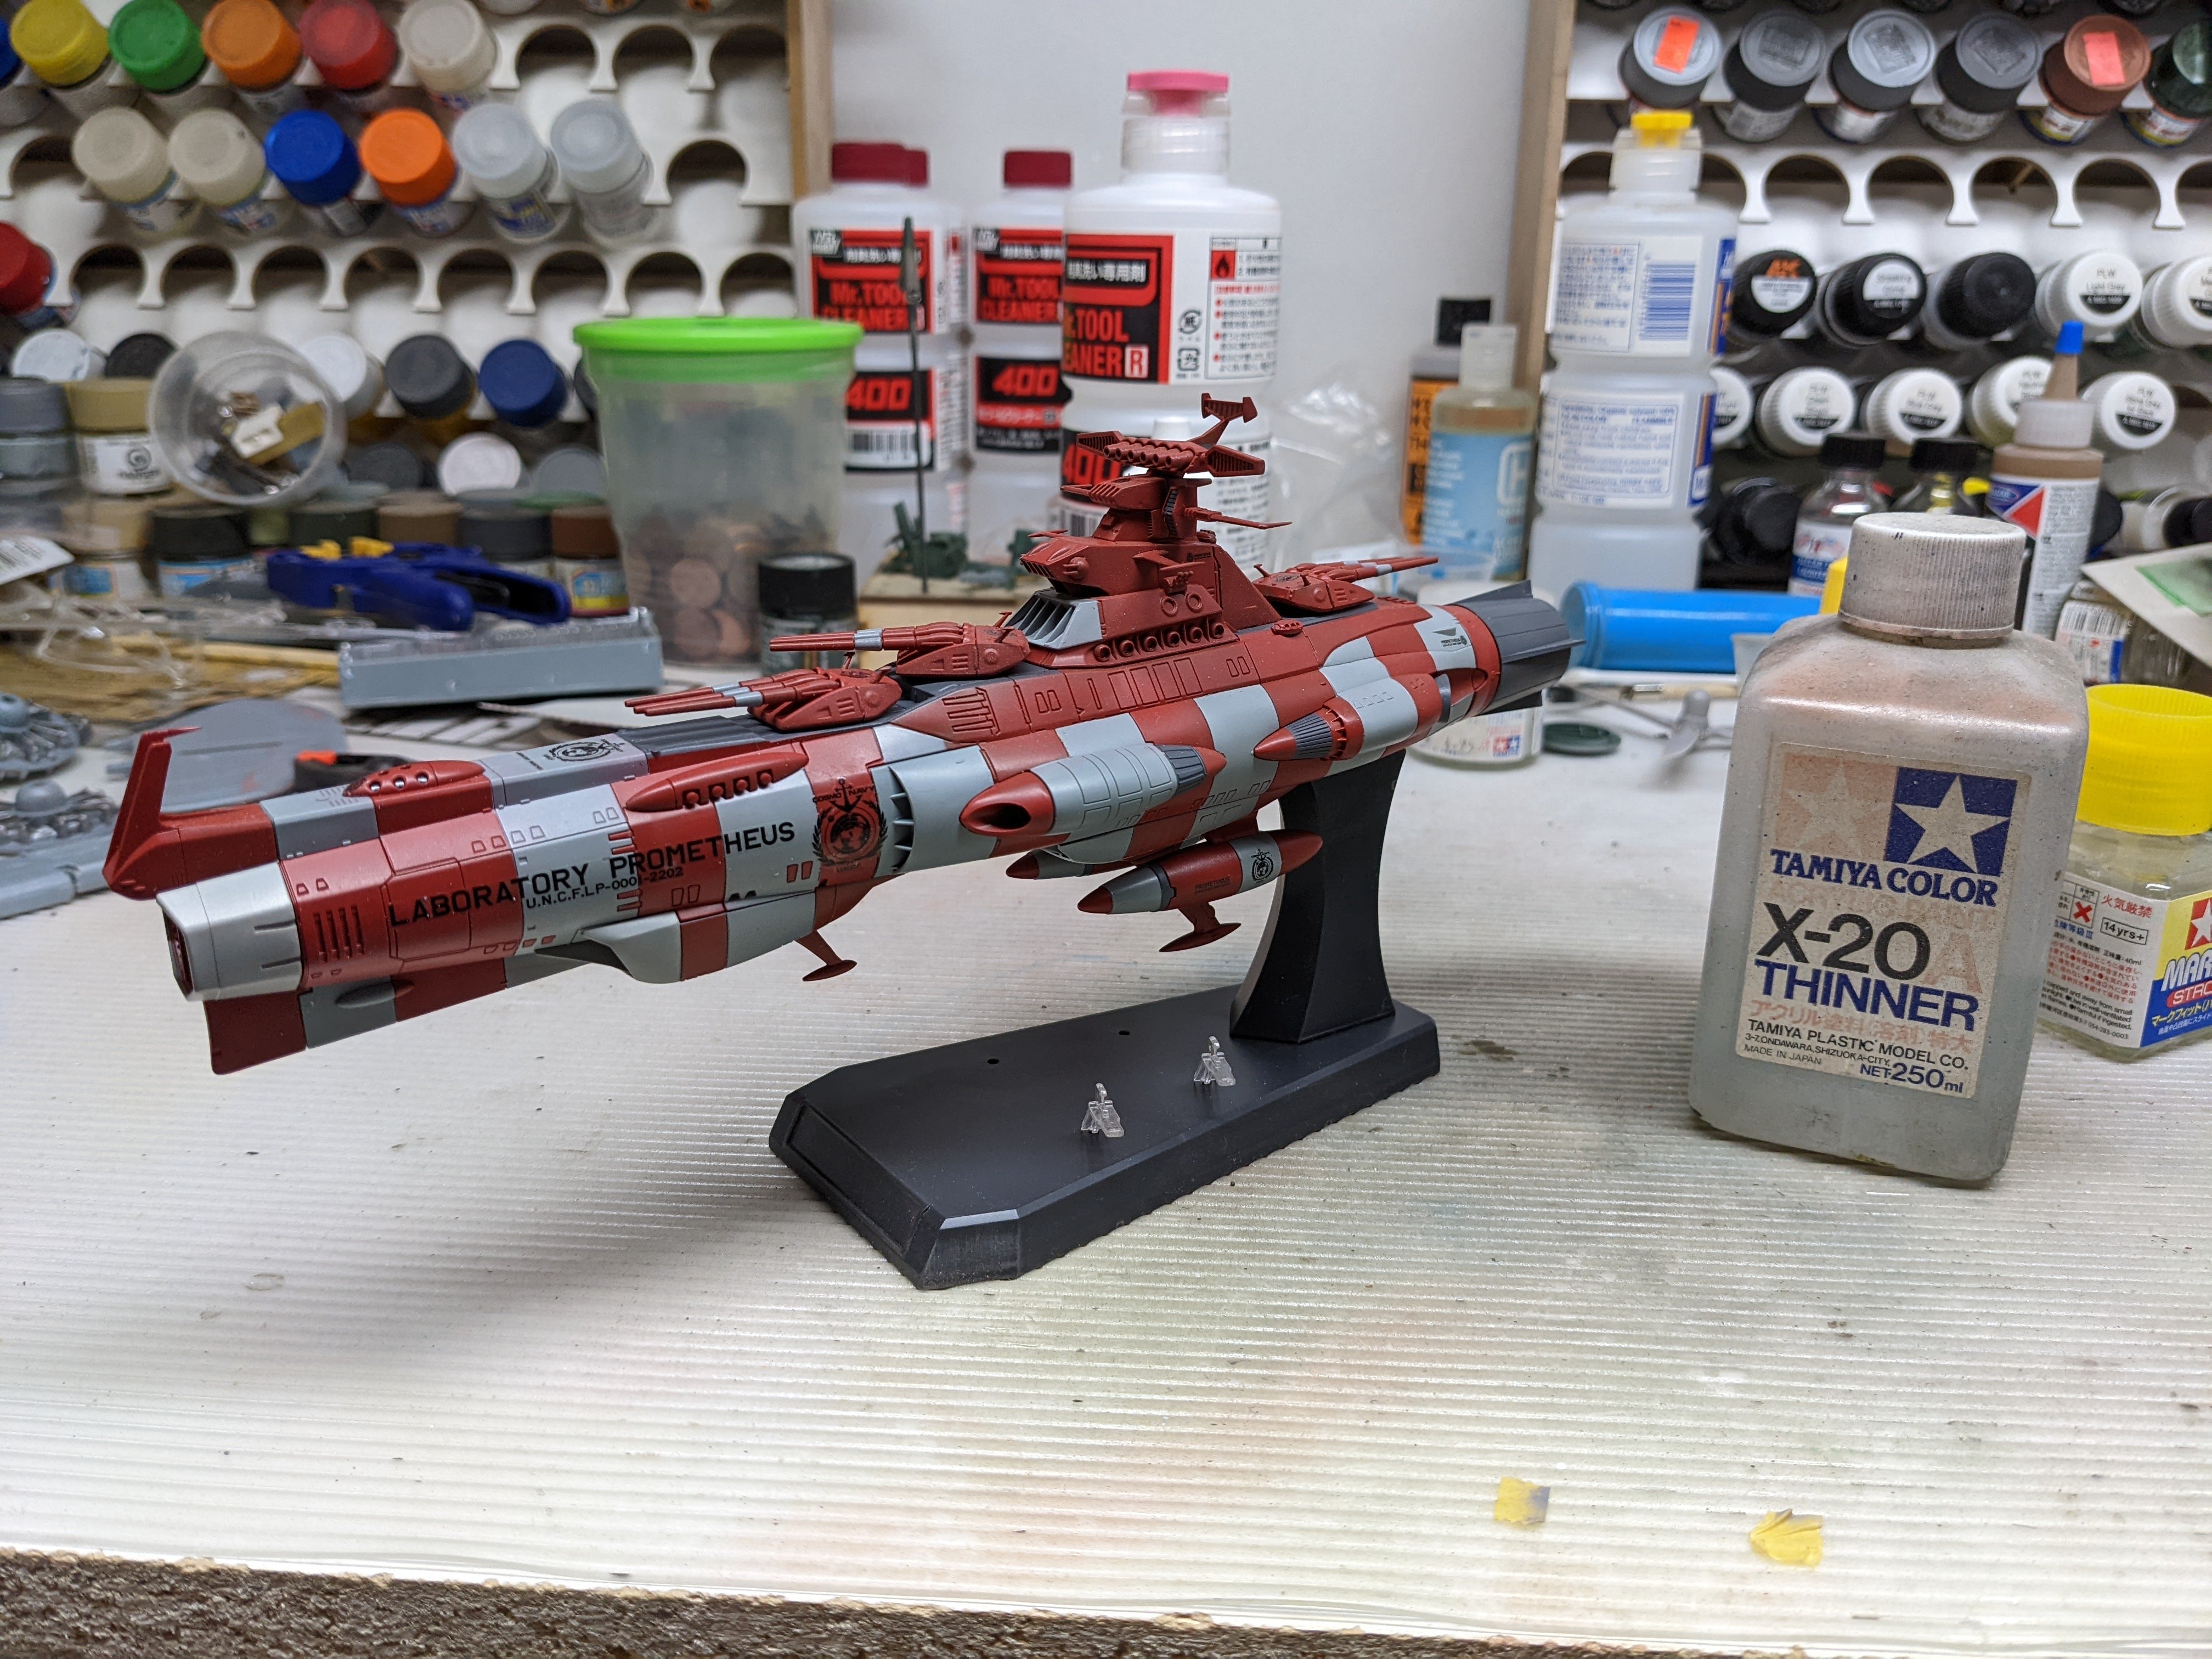
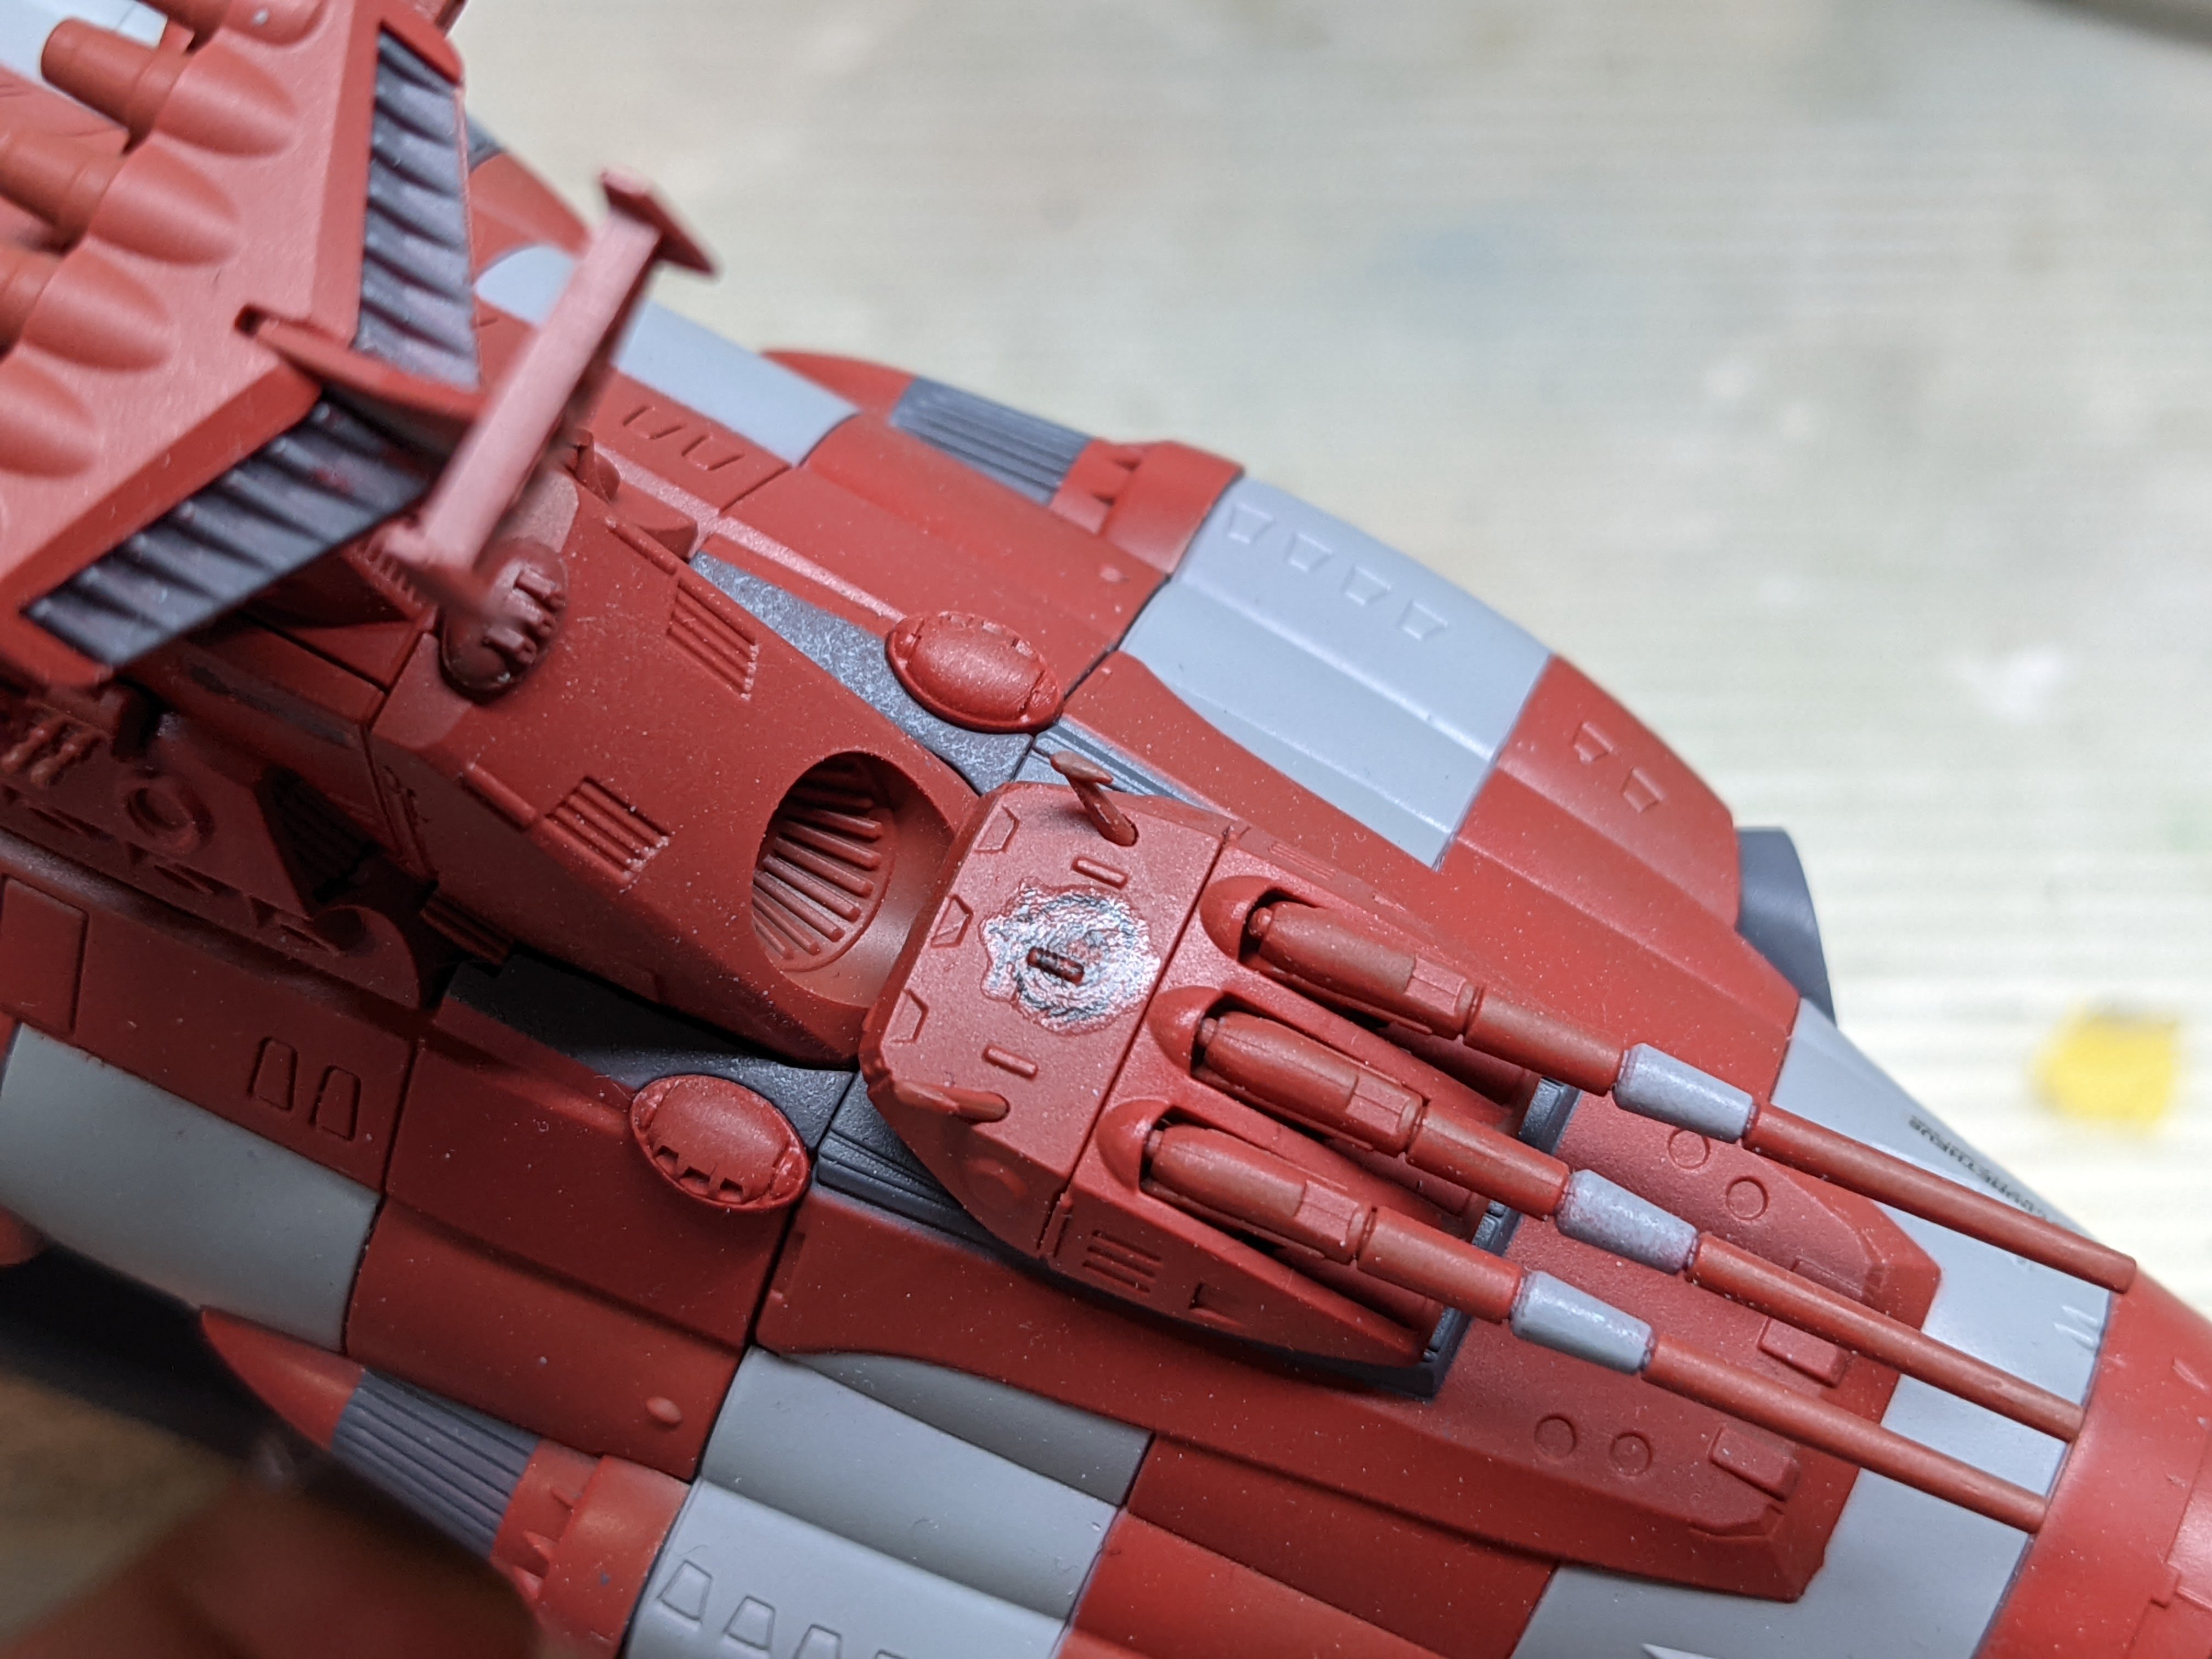
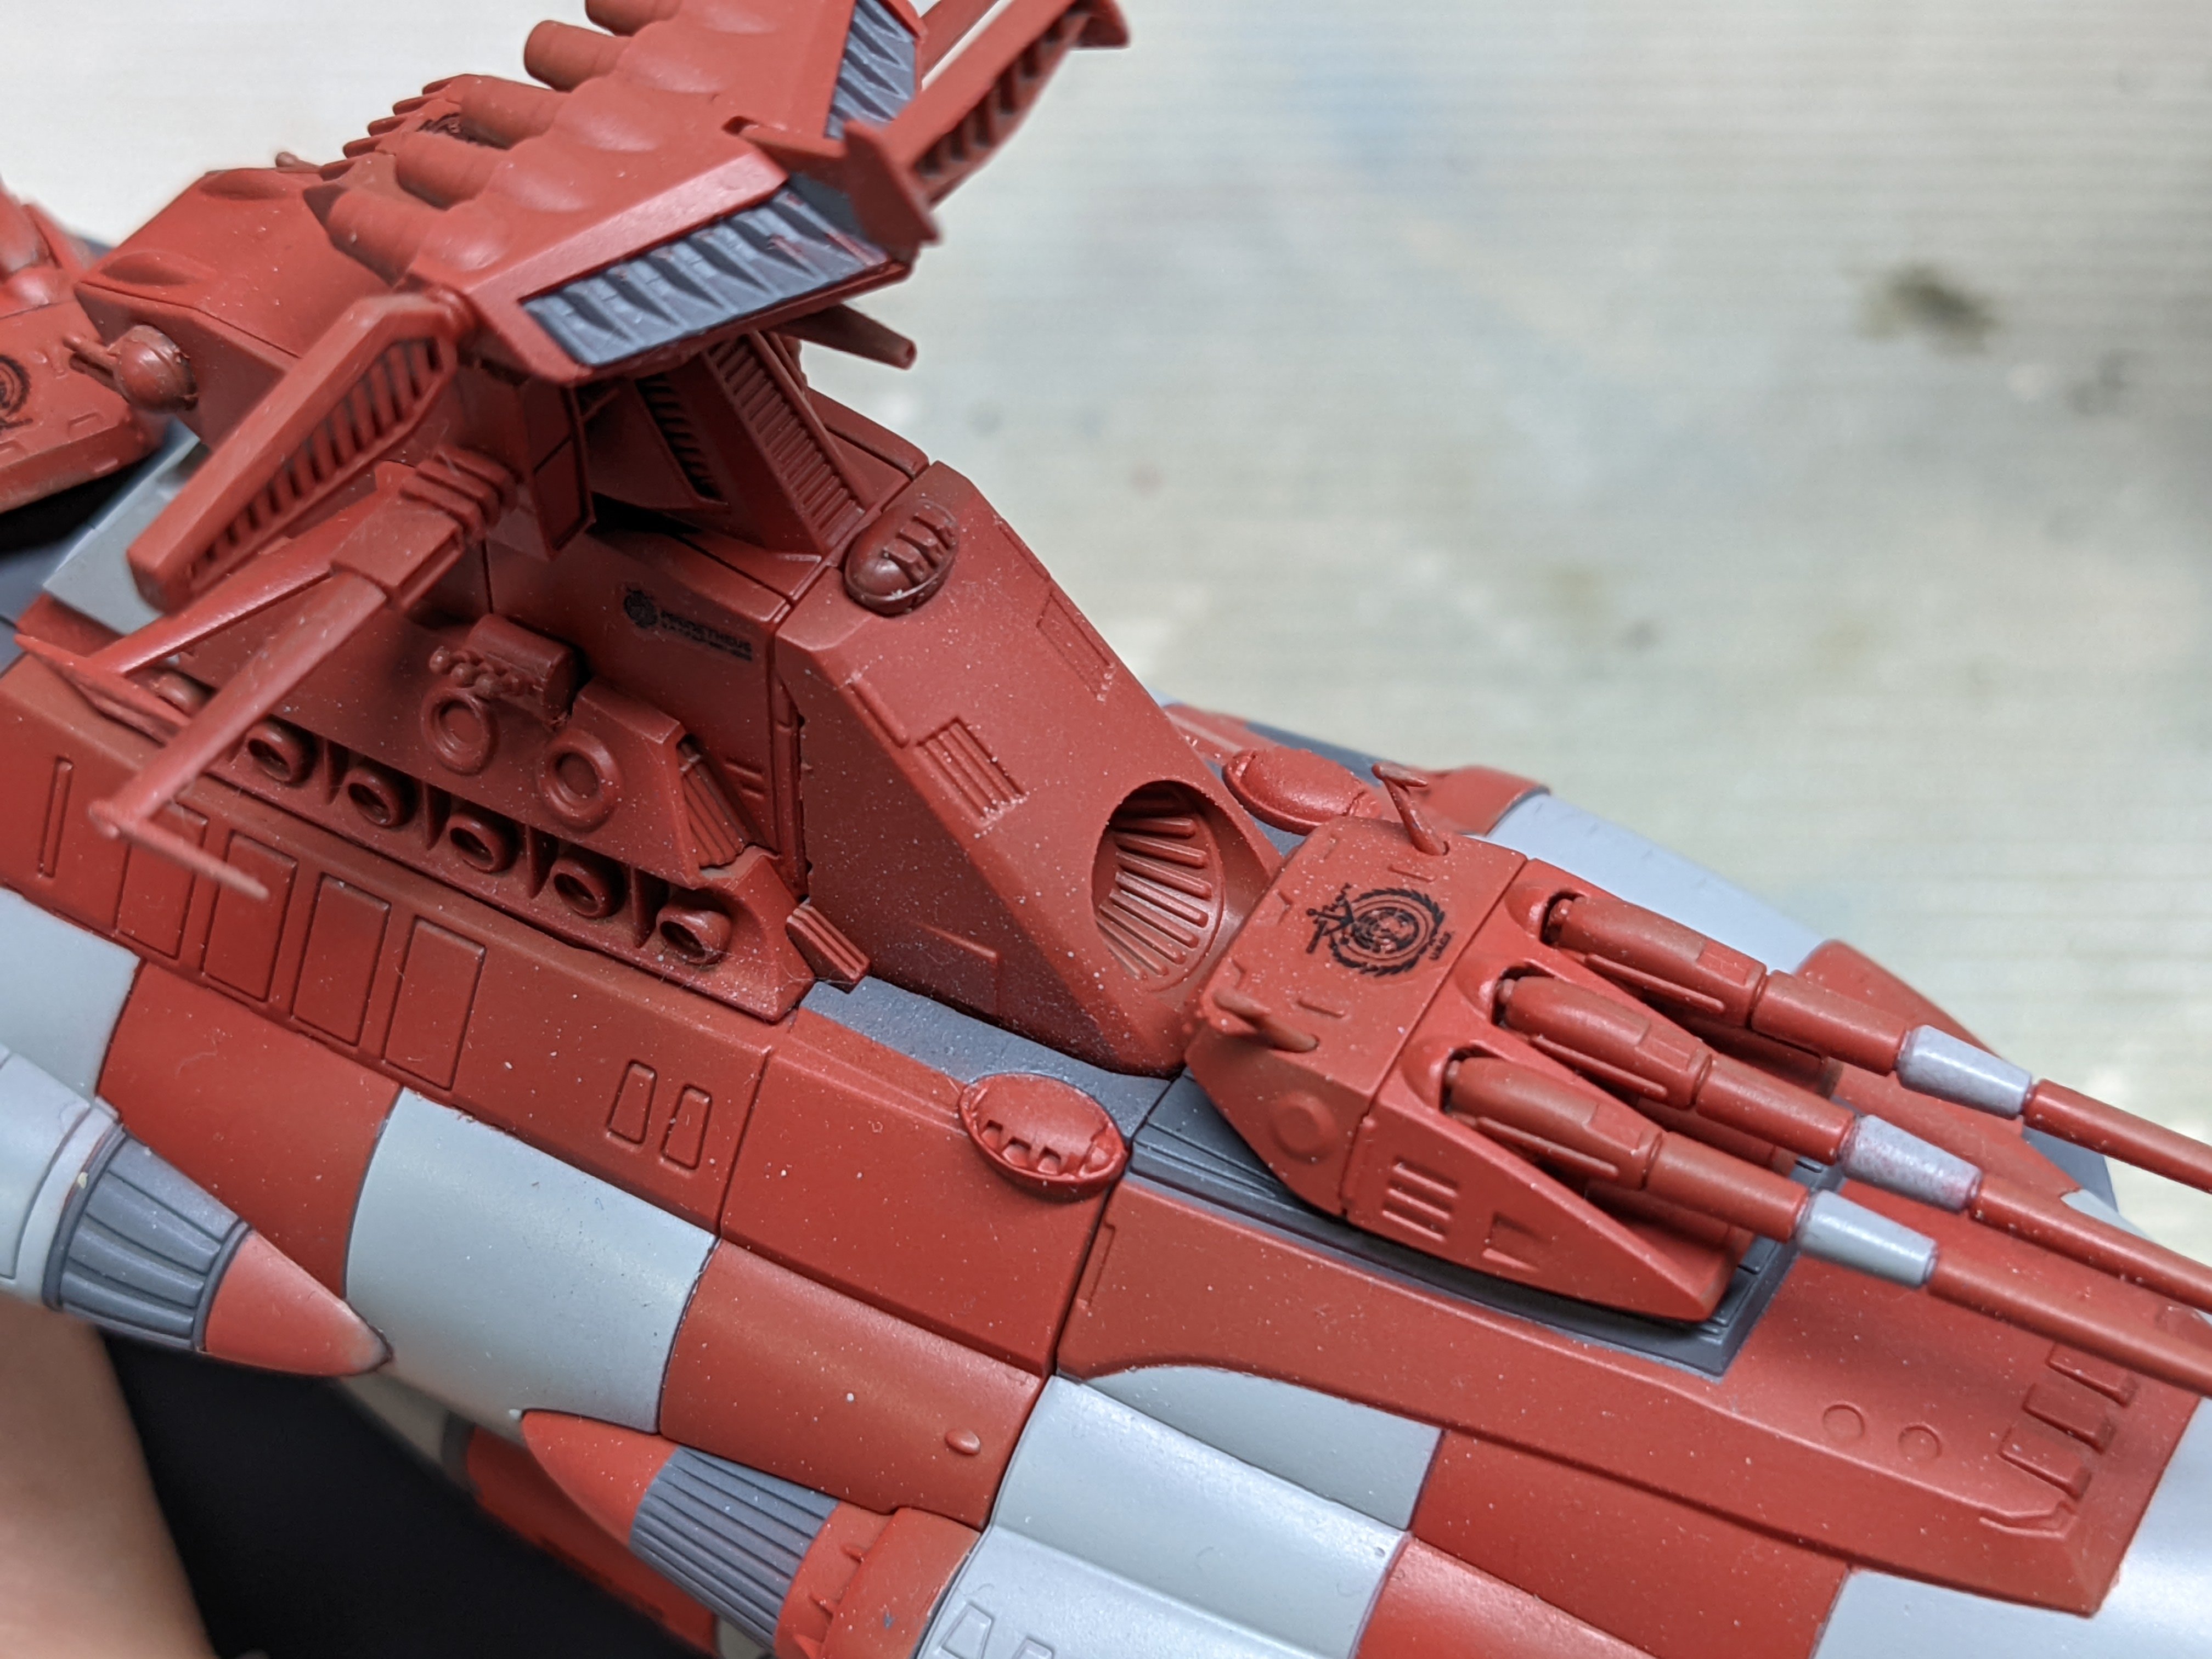
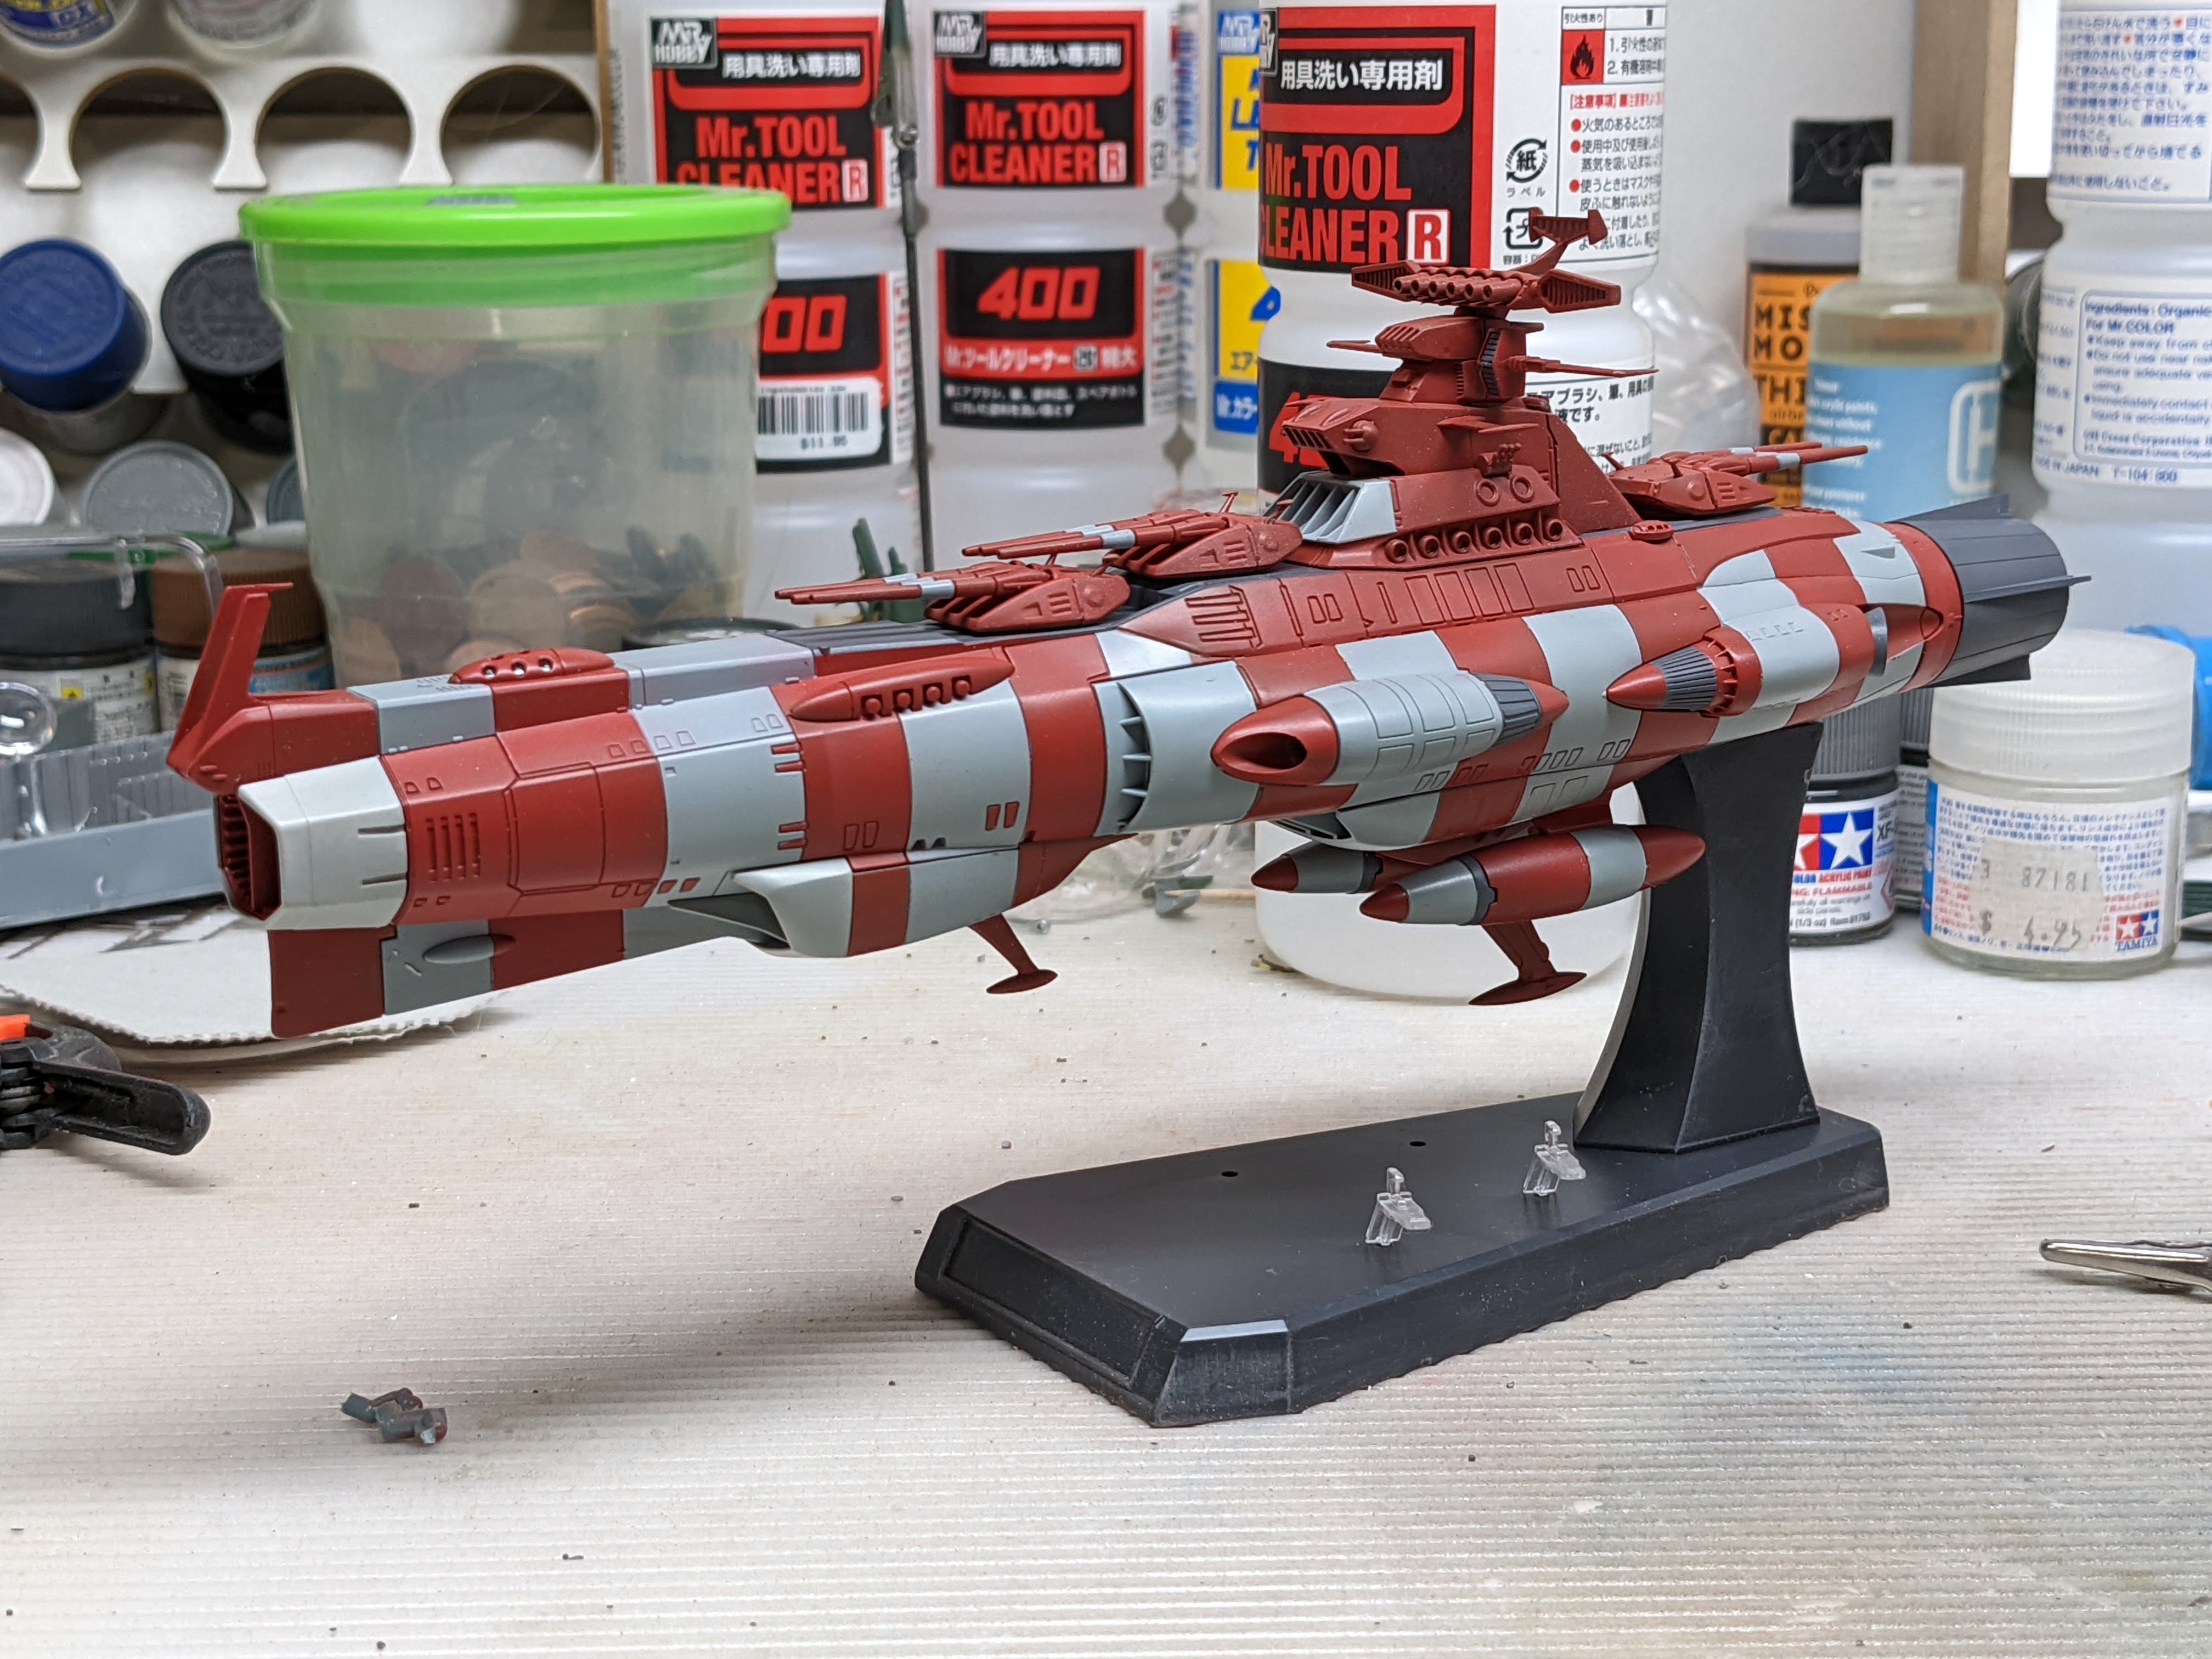
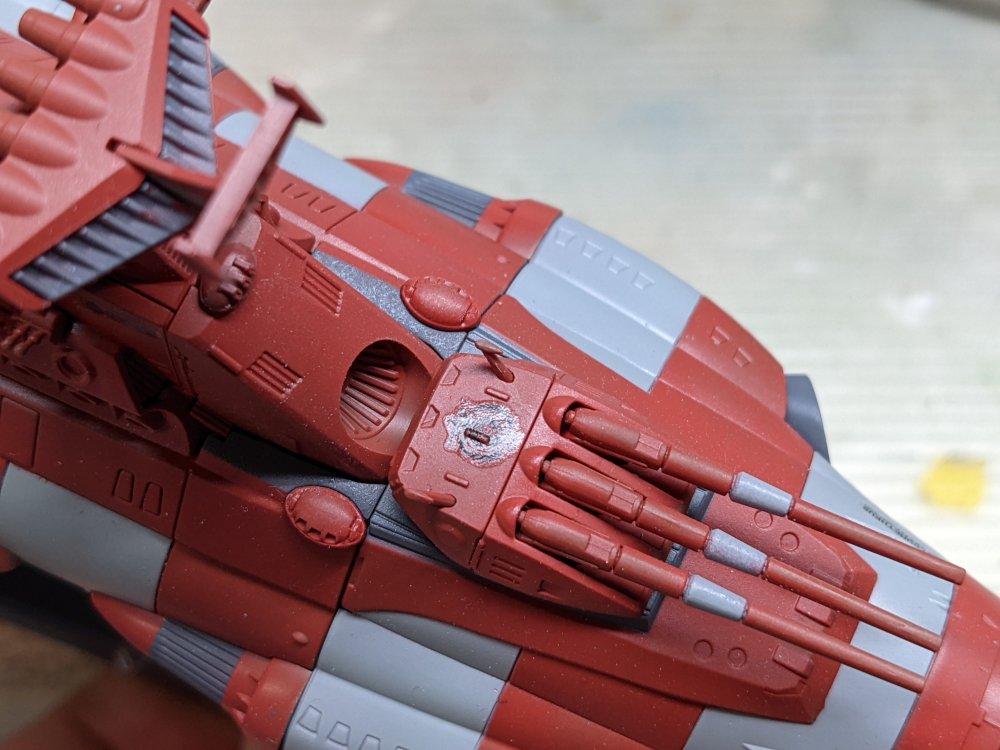
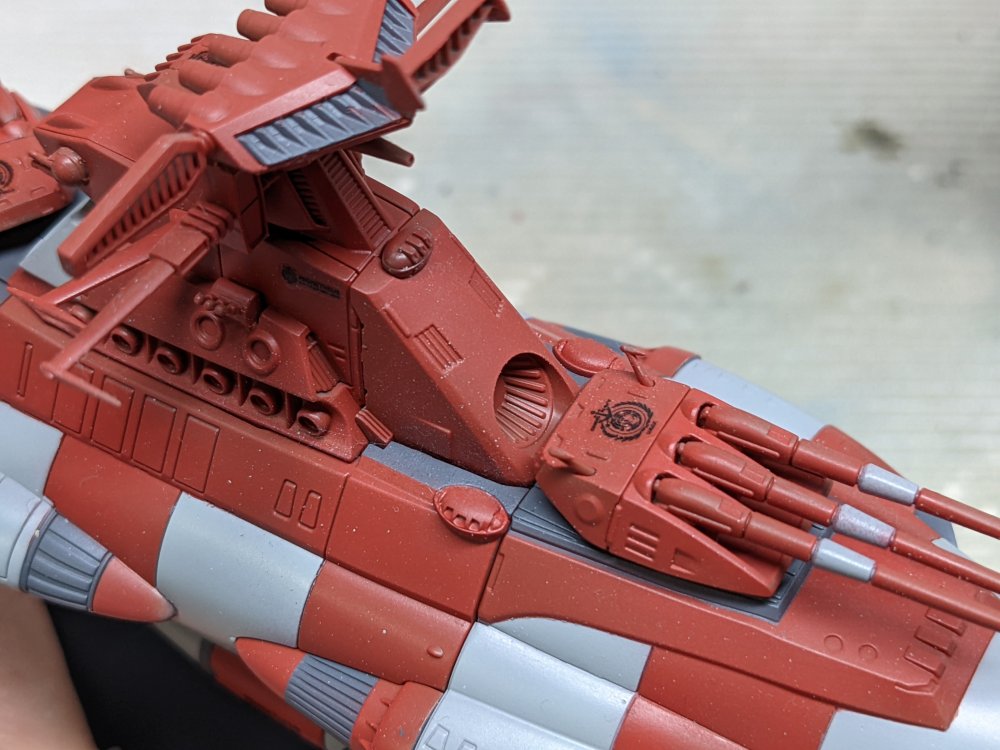
I got the decals onto the Dreadnought but something went very wrong. They didn't stick at all and actually curled up a bit. I decided to use my last resort decal solution on them and it worked. Brush on the Tamiya X-20A thinner, and leave the decals alone. They'll conform to just about anything at that point as you can see here. Close up showing the detail it's confirmed to But don't do it over acrylic paint or you'll have a huge mess.
-
What is on your bench right now ? Share a picture :)
BlrwestSiR replied to Martinnfb's topic in Modelling Discussion
Lovely looking 110 and the figures are going to add a nice touch. Carl -
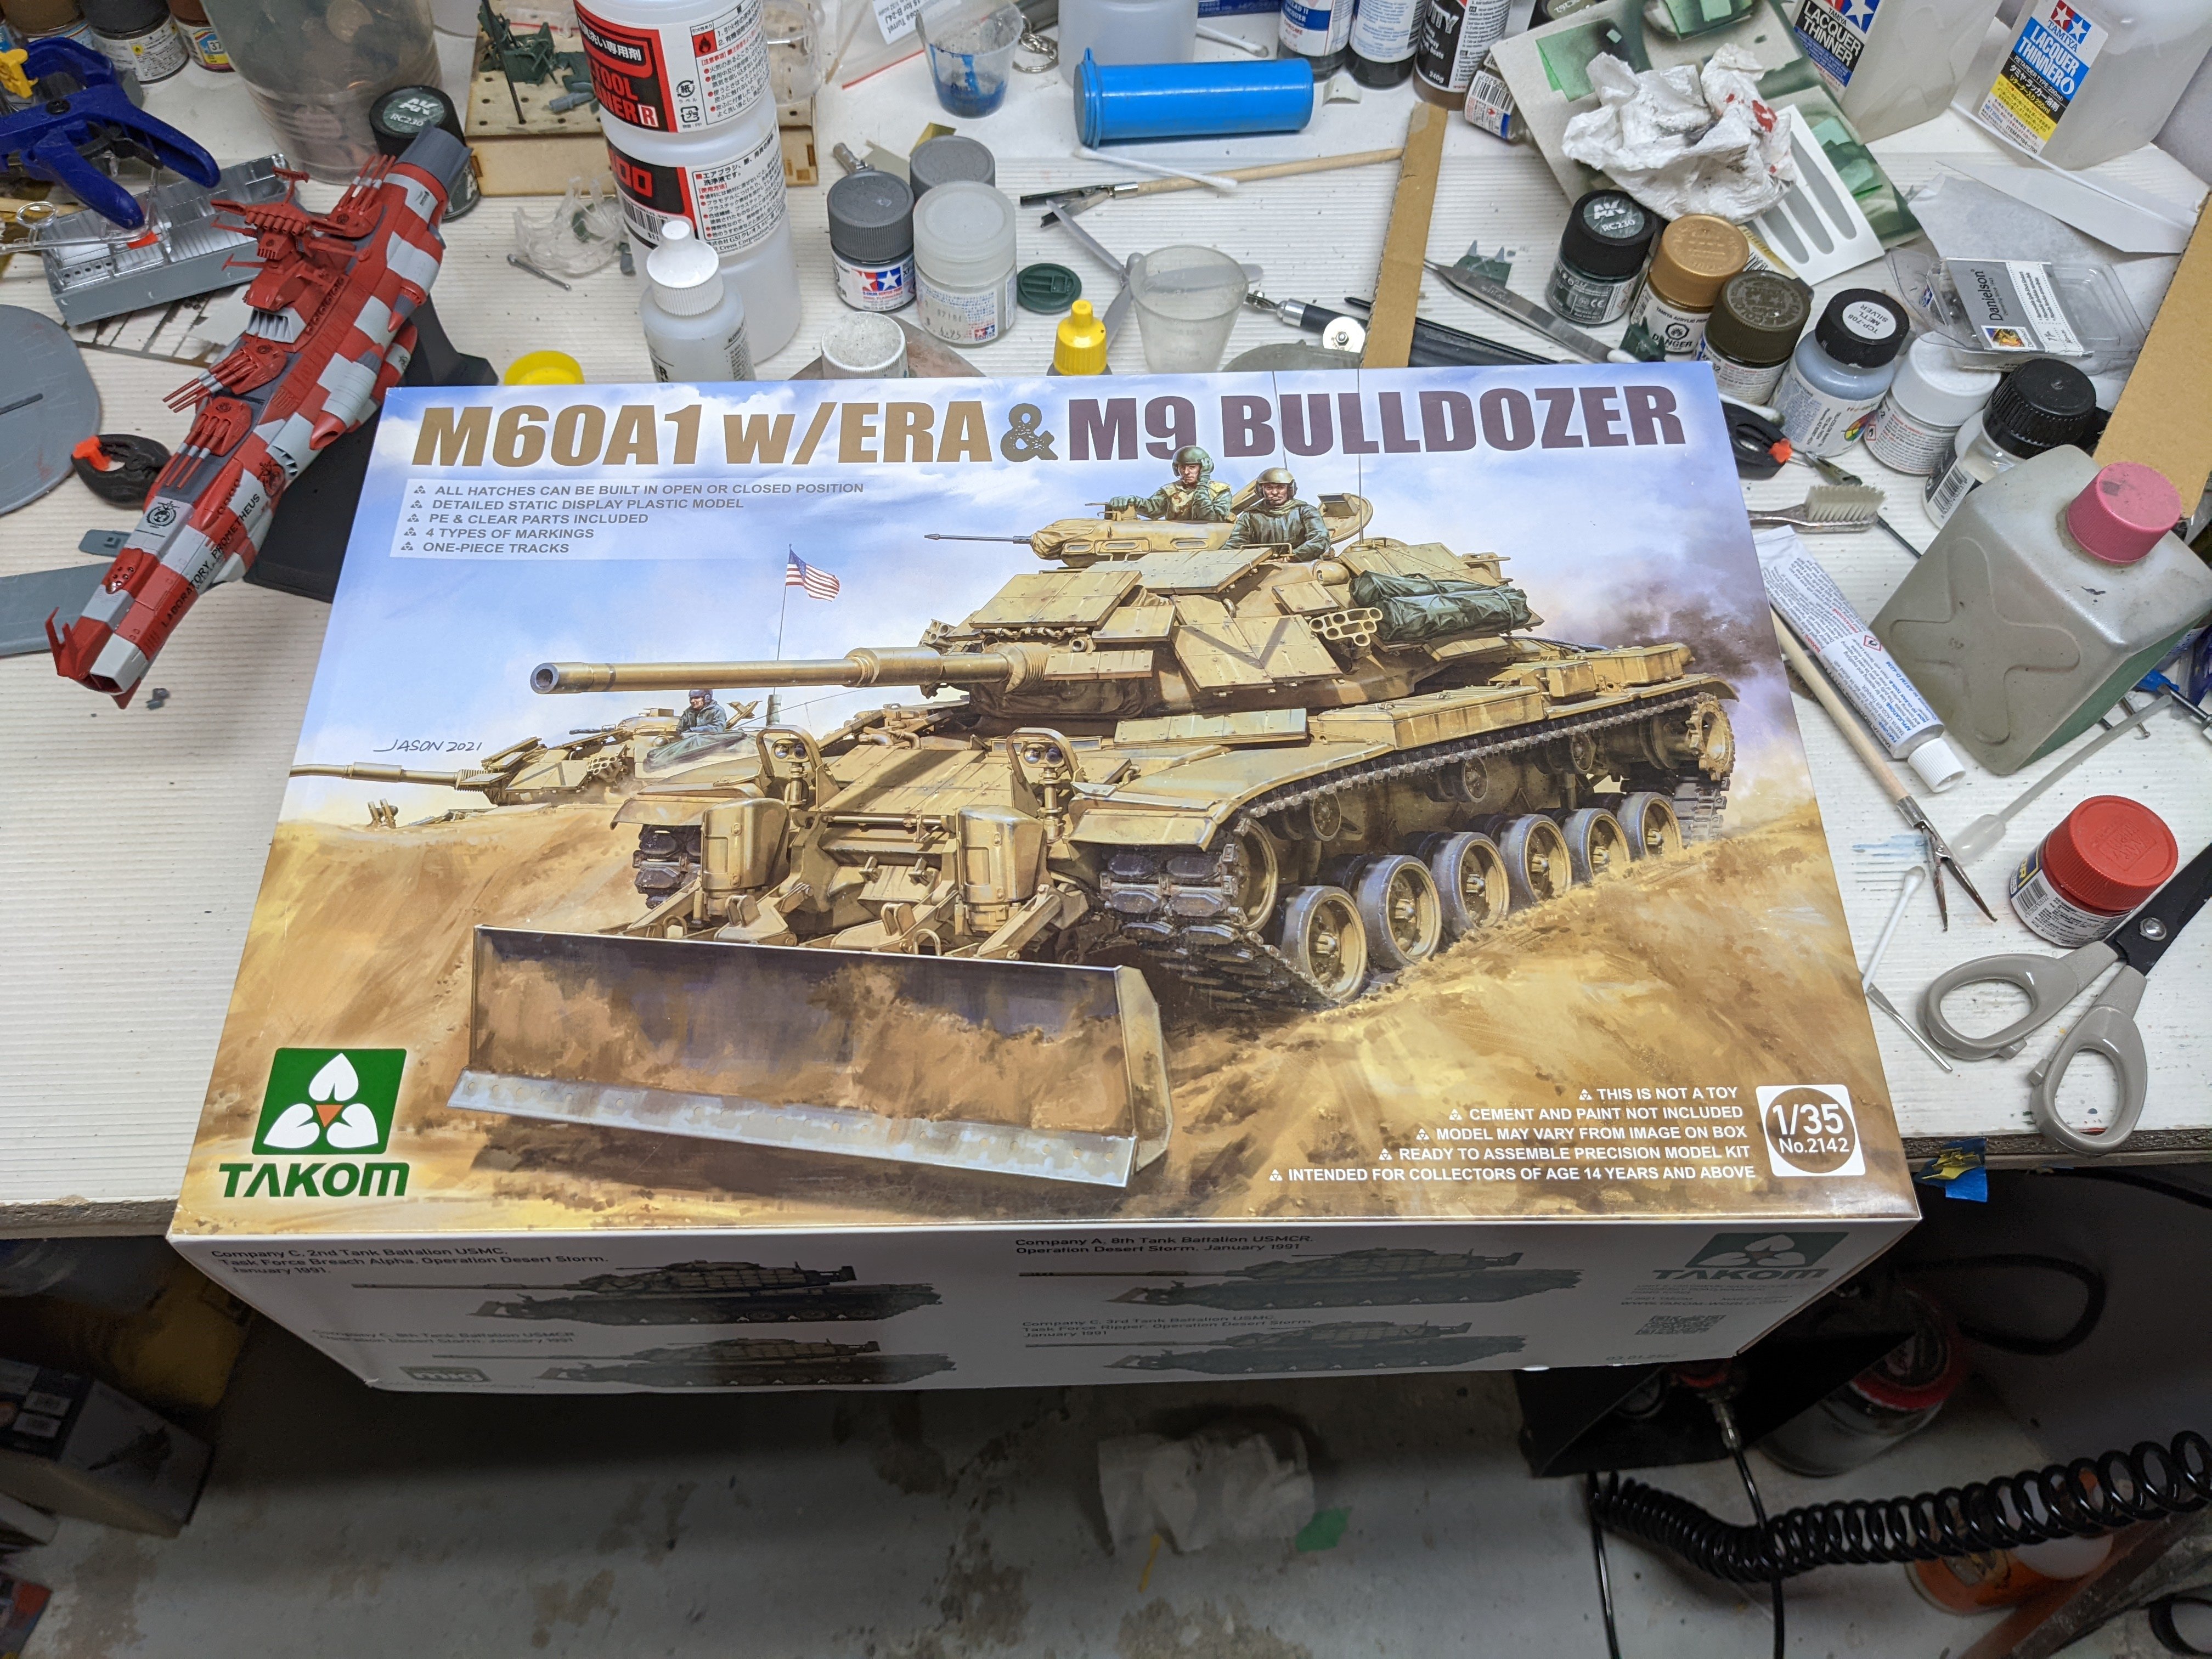
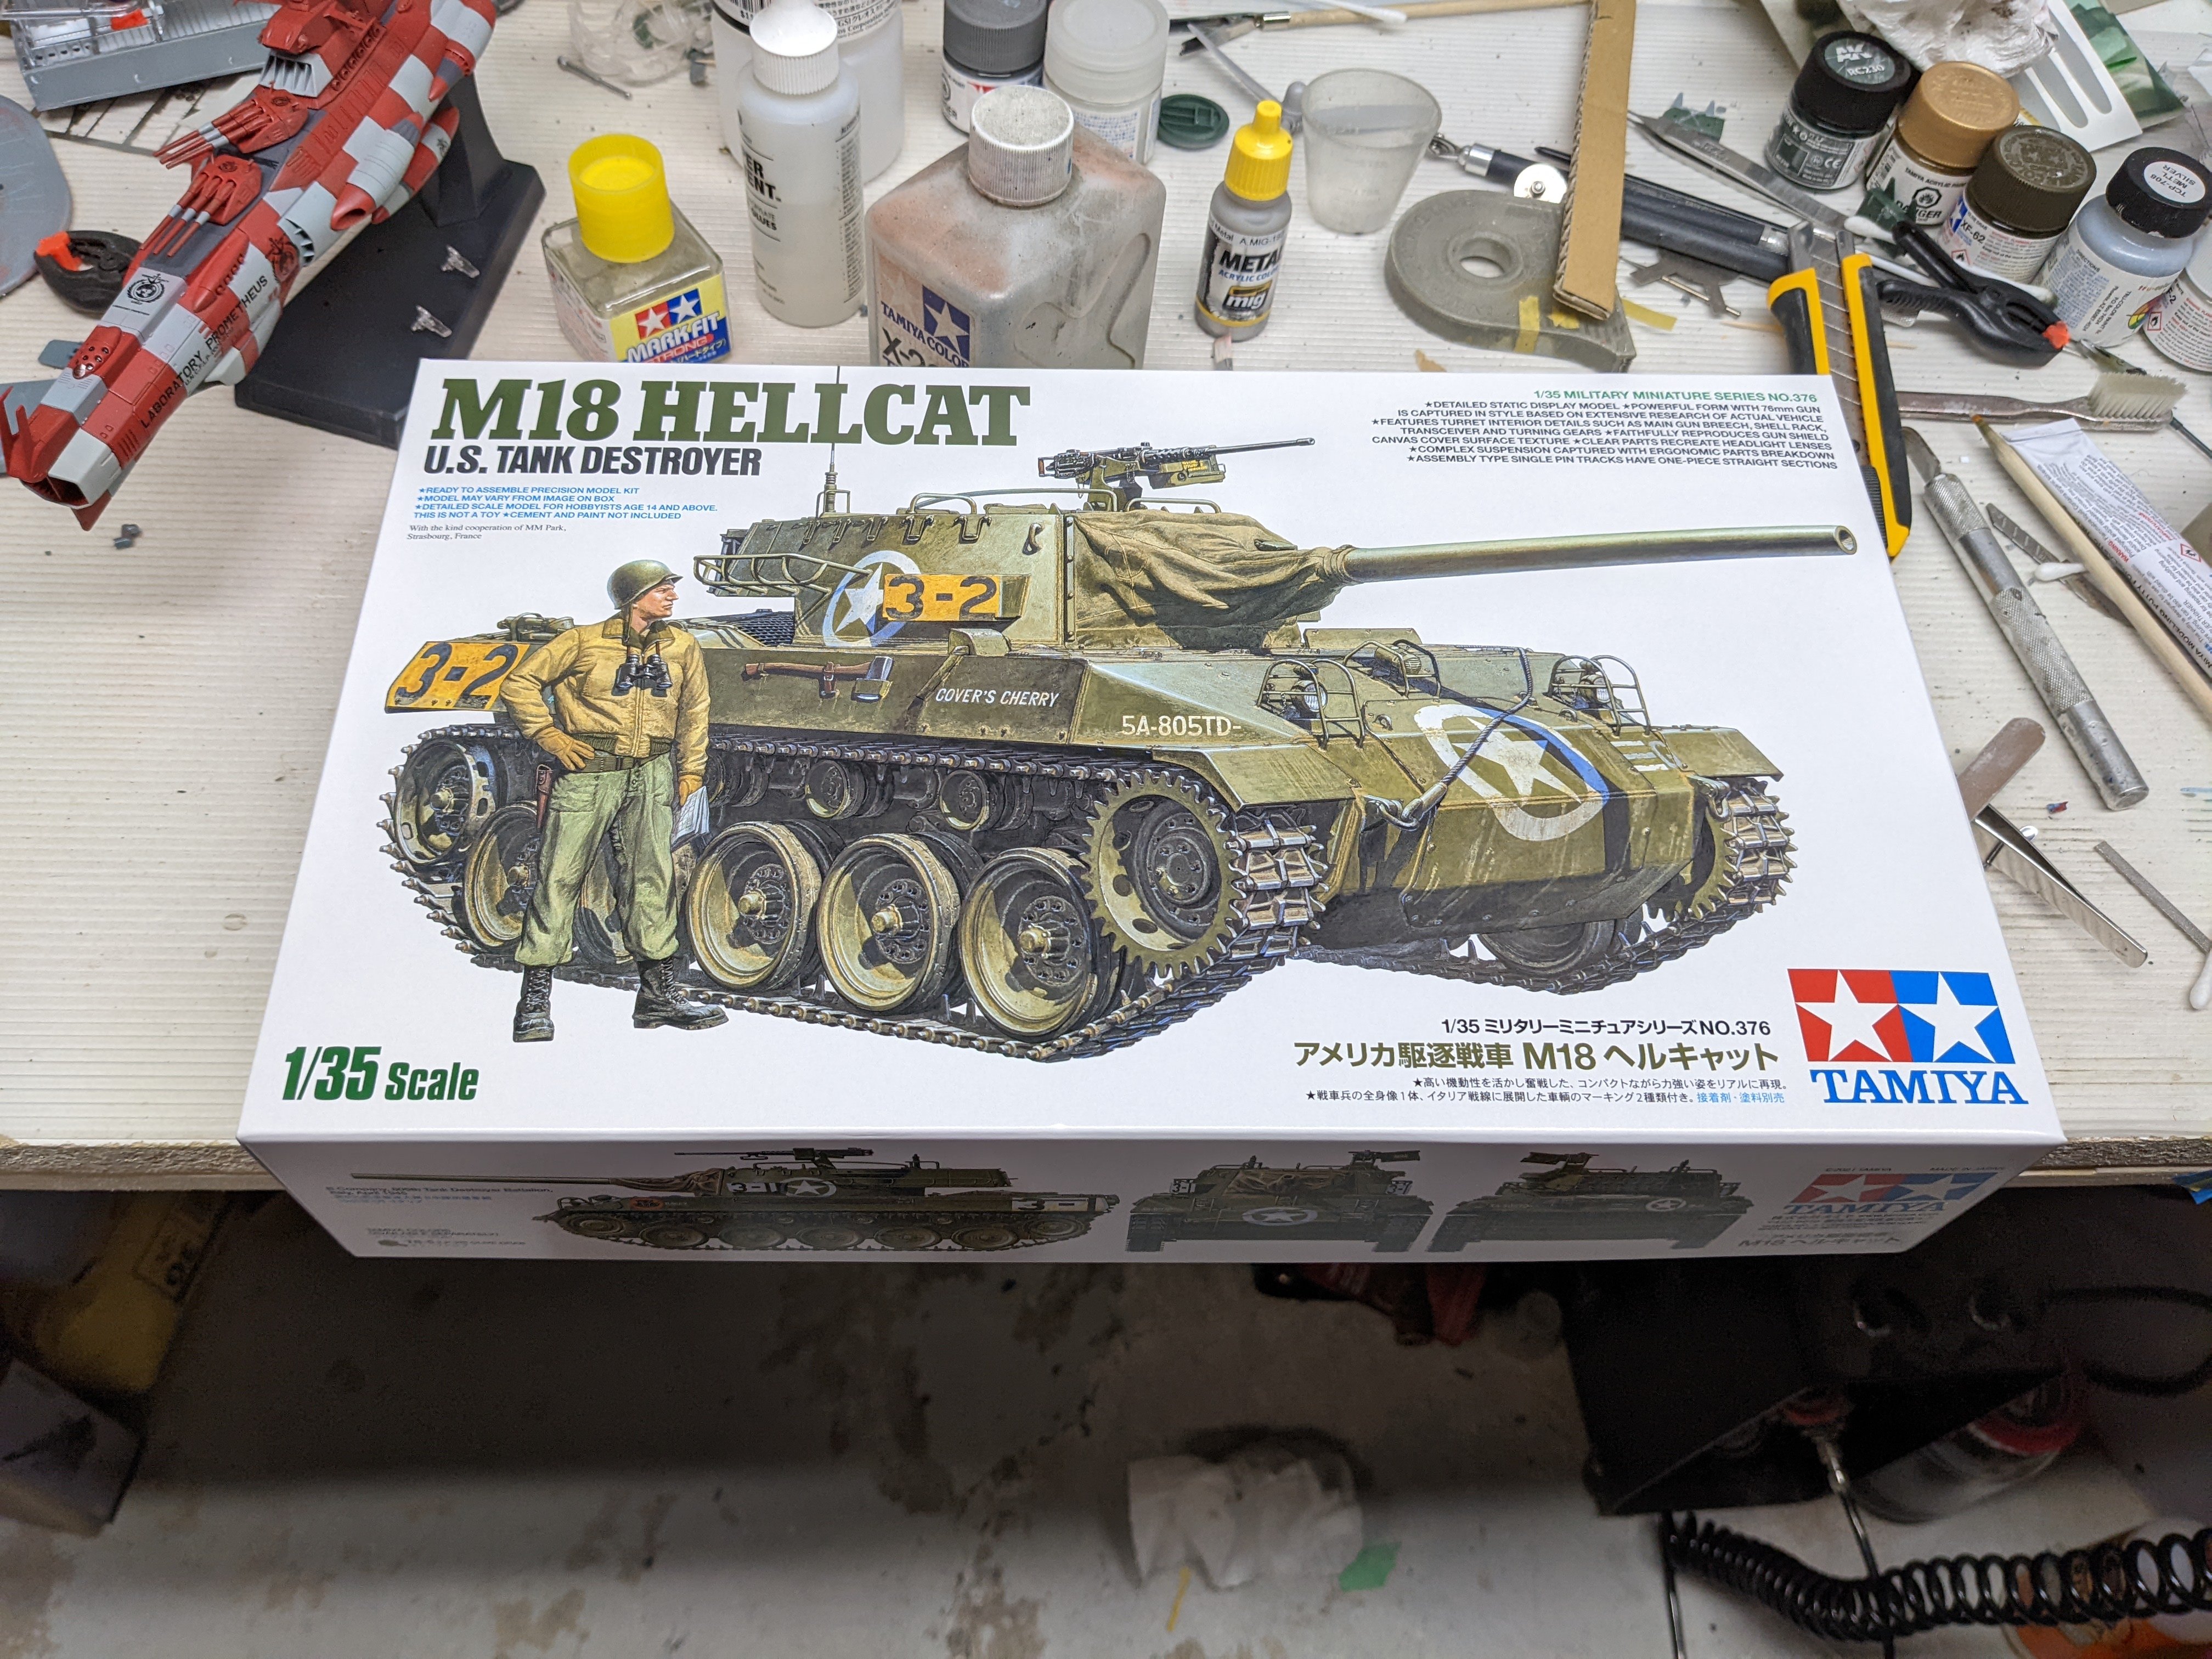
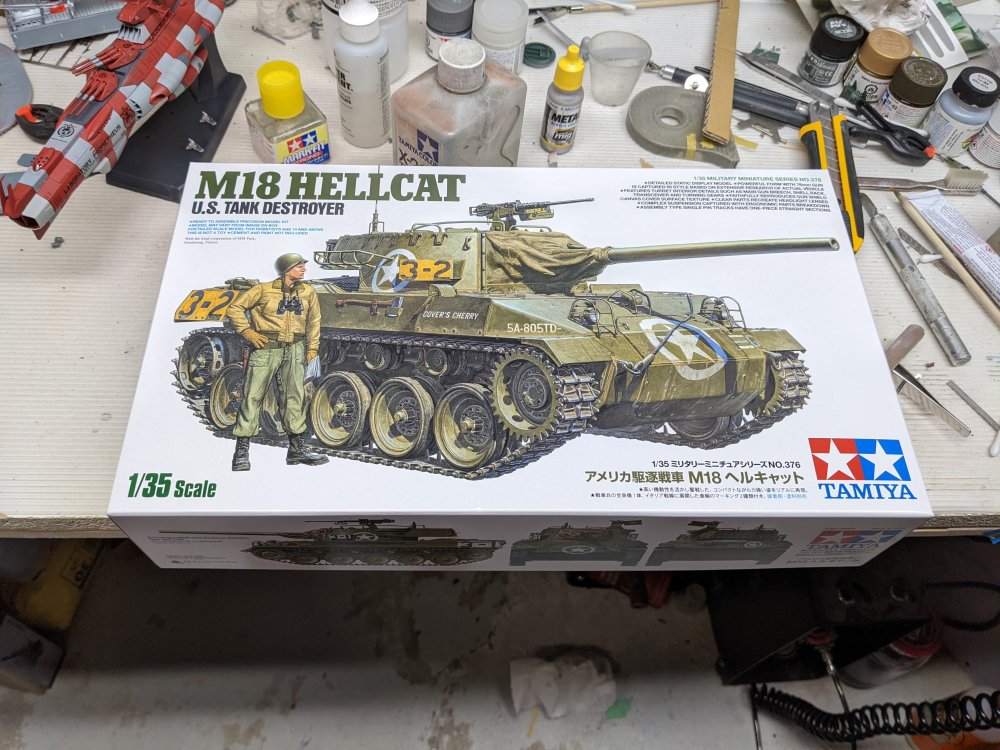
Happy Boxing Day folks! Picked these up at the LHS today. I always thought the Hellcat looked like the sportscar of tanks. I was surprised to see it at the LHS since I don't think it's even out in Japan yet. Another bit of armour but slightly more modern. This should go nicely with the Israeli M60 I have in the stash. Carl

-
Thanks for doing the raffle Ernie. Carl
-
Eesh, what a time to get sick. Get well, rest up and have a merry Christmas. Carl
-
Ernie, just a small change to my gift. Just change it to the online hobby shop of the winner's choice. Thanks and as @GusMac said, no need to rush. Enjoy your day first. Carl
-
Merry Christmas everyone! Carl
-
For you NMF painters... ( you know who you are) SMS Hyperchrome
BlrwestSiR replied to GazzaS's topic in Modelling Discussion
Thanks Gaz! Going to have to check them out. Carl -
Ernie, glad to hear your first kit finally arrived. It's in way better shape than mine. I've got several broken bits in it that I need to contact Jet Mads about. I've heard their customer service is decent so here's hoping. Ernie is the guy who convinced me to: 1)try something with more than one wing 2)rigging and 3) resin The Viggen ticks 2 of the 3 I guess if you count the canards.

-
For you NMF painters... ( you know who you are) SMS Hyperchrome
BlrwestSiR replied to GazzaS's topic in Modelling Discussion
Looks great. Haven't seen it before. Any idea where to get the stuff? Carl -
The best way to bend the wooden tracks is to steam it and then bend it around a form/jig until it sets. To do this, you can make a wood steamer using a length of PVC pipe long enough for the tracks to fit inside. Put the tracks inside the pipe. Place one end over a kettle spout and cap the other end. Slowly boil water in the kettle so that the fills the pipe with steam. Carefully remove the track and clamp it into place around your jig/form and leave it there until it cools and sets. This is commonly used for bending wooden strips used in canoe building so there should be some reference videos available on YouTube etc. Hope that helps. Carl
-
What is on your bench right now ? Share a picture :)
BlrwestSiR replied to Martinnfb's topic in Modelling Discussion
Paint and assembly are now done. Just need to do the decals.
-
It's always great to be able to share the hobby with your kids. I've got part of my bench reserved for the boys so they can build and paint when they want to. Carl
-
Nor should you feed too many to your child. Made that mistake when Findlay was almost 1. Then got to watch his diaper overflow as we were about to get on the plane at Heathrow. Sue was not happy with me.
-
That's a great pic of your friends. Sunny our cat is still trying to figure out if Jimmy is friend or foe.