Wingco57
-
Posts
3,925 -
Joined
-
Last visited
Content Type
Profiles
Forums
Events
Gallery
Everything posted by Wingco57
-

Trumpeter 1/32 A1-J Skyraider
Wingco57 replied to WattsNZ's topic in LSM 1/35 and Larger Work In Progress
Nice and durrty, perhaps not dirty enough? Cheers Cees -
FAA Corsair II
Wingco57 replied to BarryWilliams's topic in LSM 1/32 and Larger Aircraft Ready for Inspection
Nice one Barry, I really like the FAA Corsairs. Very nice that the Tamiya wingtips are solid so they can be clipped. Simple and easy. Cheers Cees -
Blooming PB. Just post your pics via LSM, so we can all enjoy the rest of this fantastic thread. Cheers Cees
-
Saw it at Telford and it's even bigger than I had imagined. But it looks fantastic. Cees
- 185 replies
-
- 2
-

-
- Scratchbuild
- 1/32nd scale
- (and 1 more)
-
I had the same problem on my Tamiya Spit and had to use some aftermarket ones which worked well. Personally I think that Tamiya's decals are the weak part of a fantastic package. But could also be a matter of personal preference. Cheers Cees
-
Hi Mike, that's quite some distance to move, I moved house on Monday and the distance was only about 4 miles and it seemed like an eternity these past weeks for it to finish. And we're still unpacking boxes. Good luck. Cheers Cees
-
Gloster Meteor Mk.III
Wingco57 replied to joeg's topic in LSM 1/32 and Larger Aircraft Ready for Inspection
I like that very much, I am also interested in what you did to the outerwings. Very nice. Cheers Cees -
Hi Tom, Good to see you back on this one. That's a simple but very effective way of representing the rudders. That's what I like the most about scratchbuild projects such as these. How to solve problems and every modeller does it in a different way. Amazing how this Shack is shaping up. Props look very nice too. See you at Telford! Cheers Cees
-
Definitely want one. Thanks Jimbo.
-
Lemkits 1:32 Focke-Wulf P VII "Flitzer"
Wingco57 replied to upor's topic in LSM 1/35 and Larger Work In Progress
Very unusual and nice. Will this be a build here on LSM? Cheers Cees -
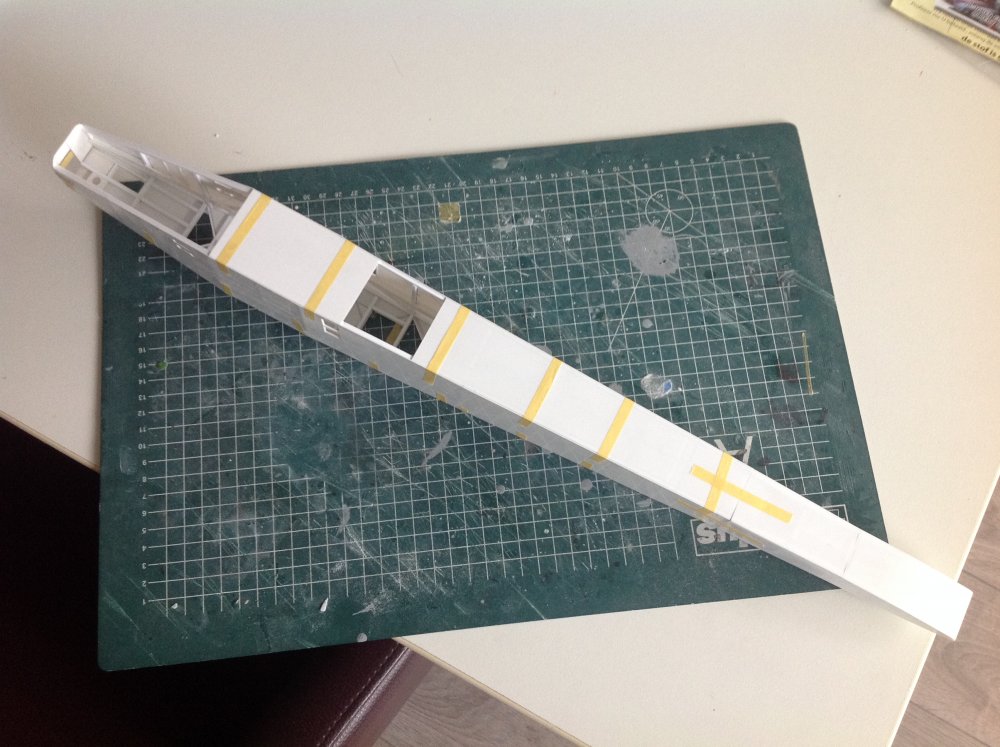
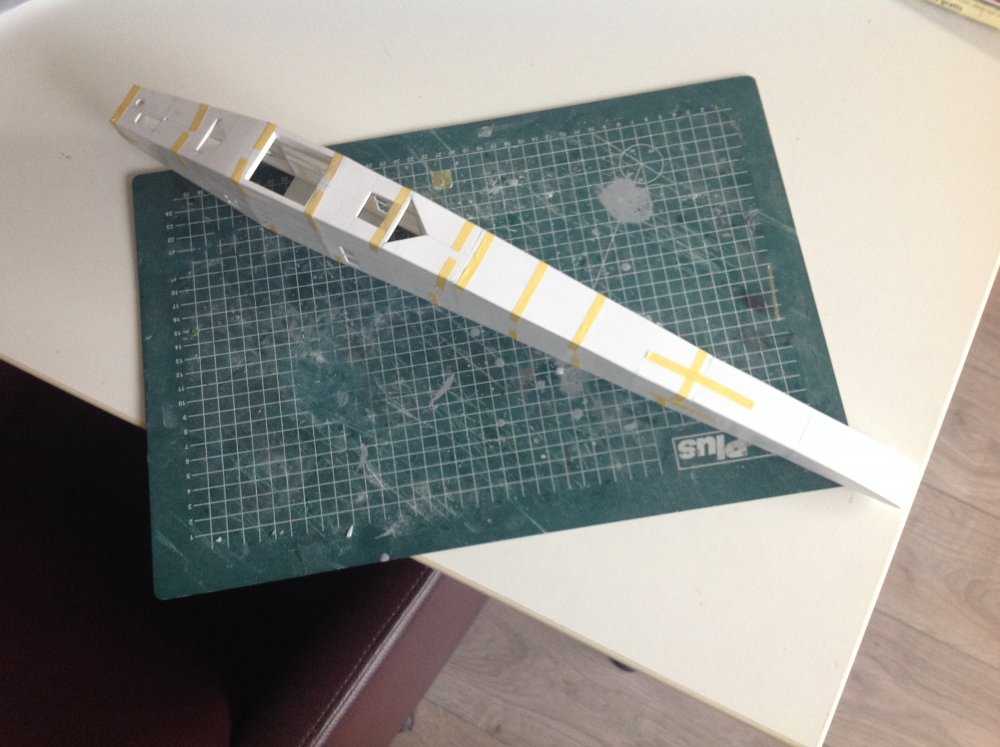
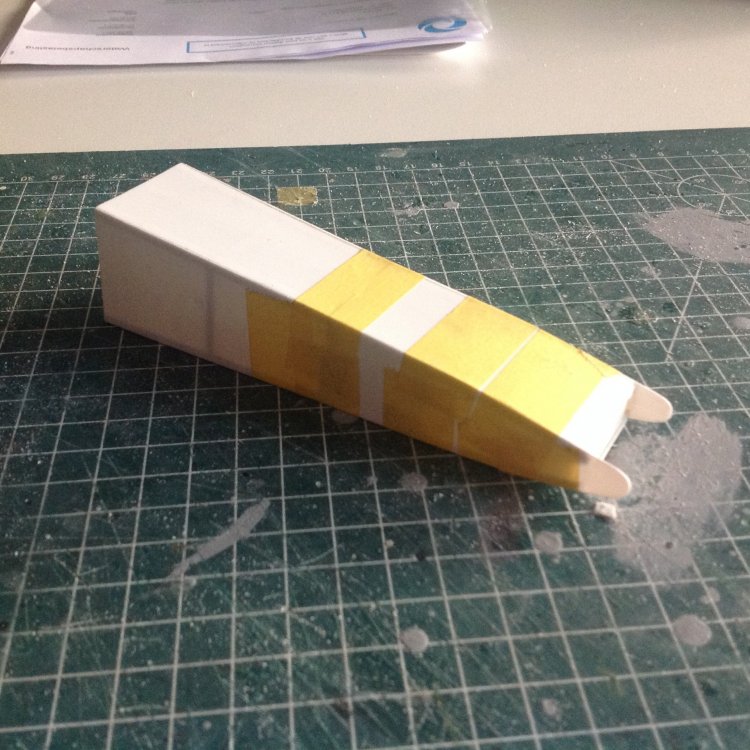
After adding some plastic strip to give more glueing surface I temporarily attached the tailsection to the fuselage with some tape. The fit is very good. I am in the middle of a housemove so no more progress for a week or possibly before Telford. But I am very pleased how this has turned out so far. Cheers Cees

-
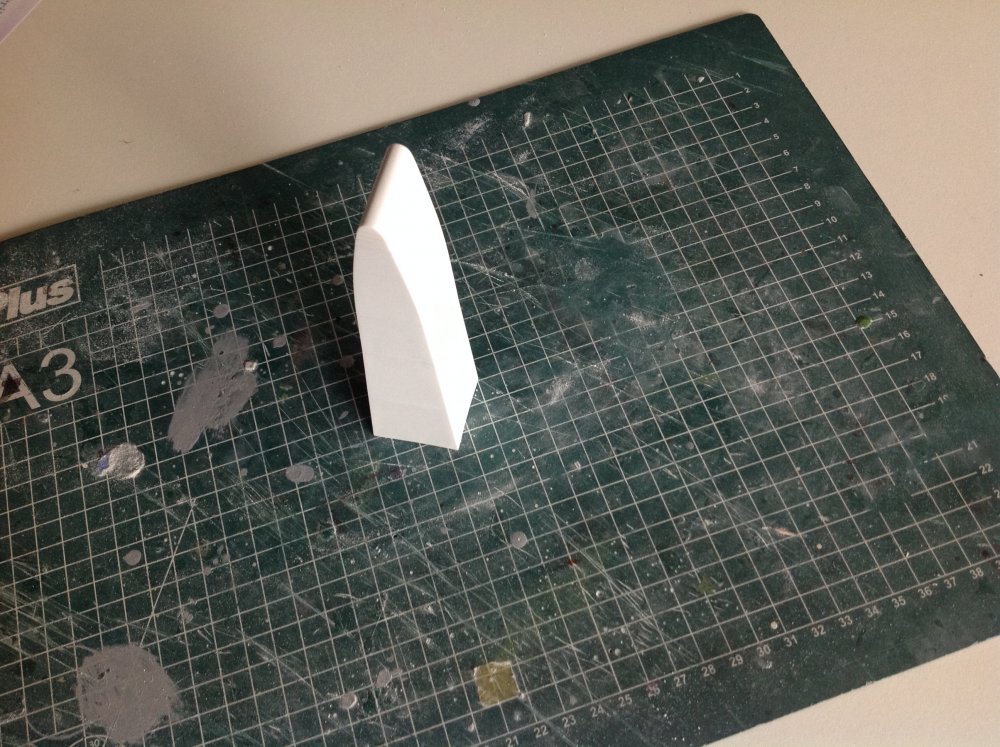
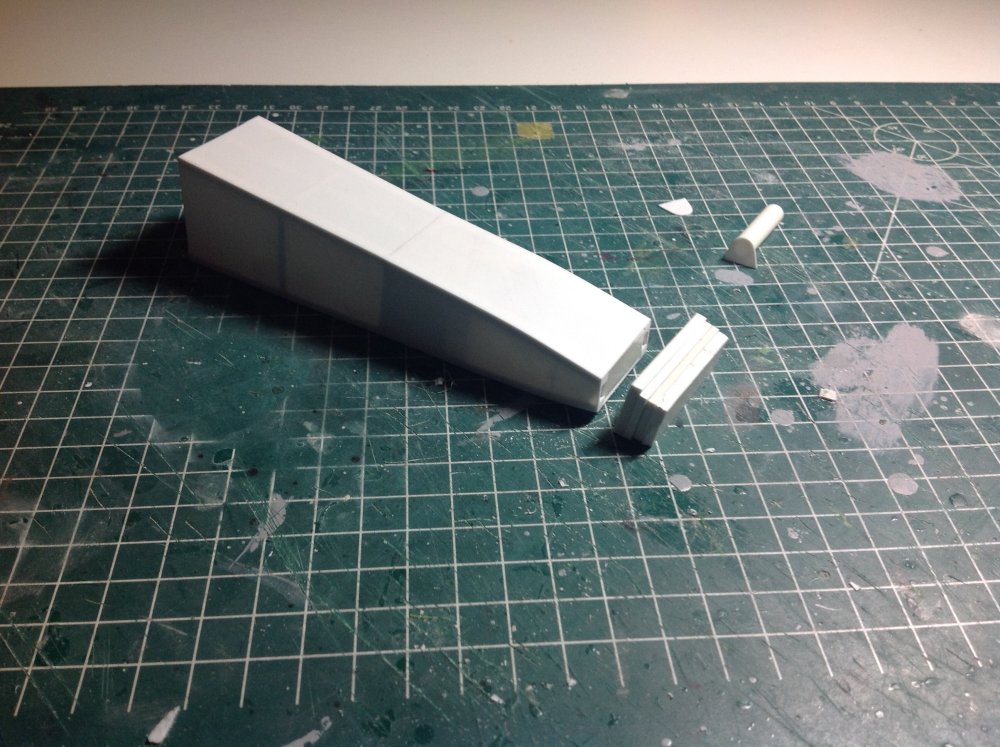
It is Gus, The extreme tail is now finished and looks good. With the laminated plastic there is a chance for gaps so a bit of mr surfacer will be applied to check. But I am very pleased about it. Next is the nose piece which housed the nosegunner. Cheers Cees
-
A Must See Pair of Tempests built by Mila Hraban
Wingco57 replied to petr@specialhobby's topic in Special Hobby
The Mk II is particularly nice. He doesn't seem to be suffering from Tempest burnout. -
Fantastic, what more can I say......... Cheers Cees
-
Airfix hawker typhoon Mk.1B 1/24
Wingco57 replied to coolboxx's topic in LSM 1/35 and Larger Work In Progress
Those RB radiator parts are fantastic, however check the fit of the rear part as on mine it didn't and had to leave it off. Better safe than sorry. Cheers Cees -
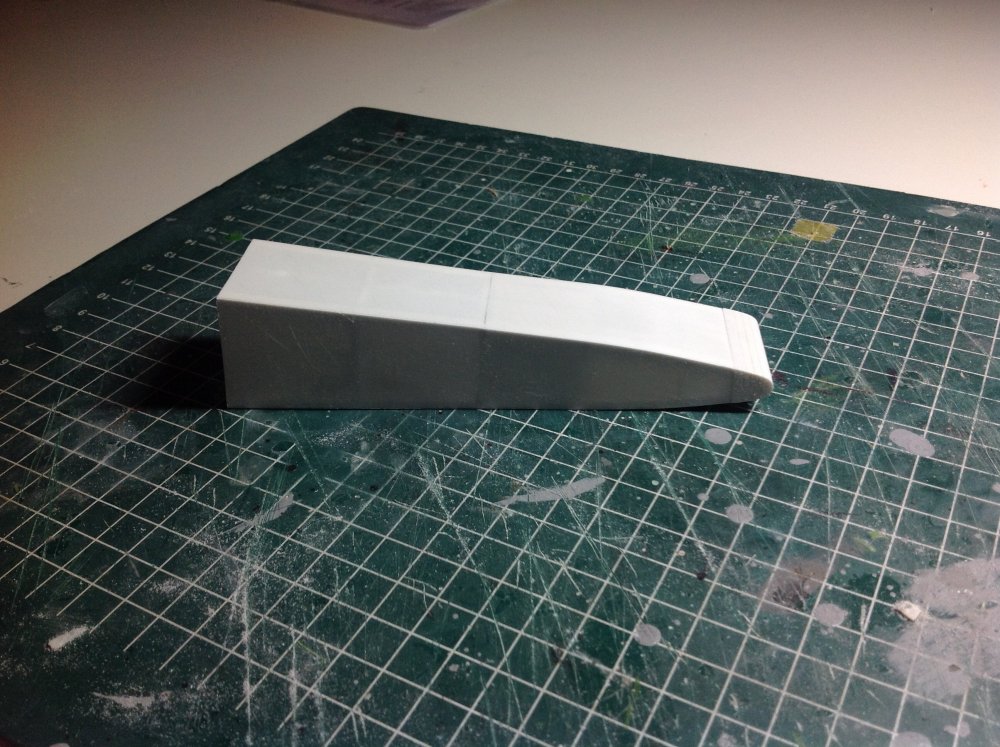
With some elbowgrease (and my trusty sawblade) the shape was roughly carved and then using (from very coarse to increasingly finer) abrasive pads the shape was nearly ready. After glueing to the tail final finishing and polishing is all that is needed to get the desired shape. You can faintly see the laminations. Cheers Cees

-
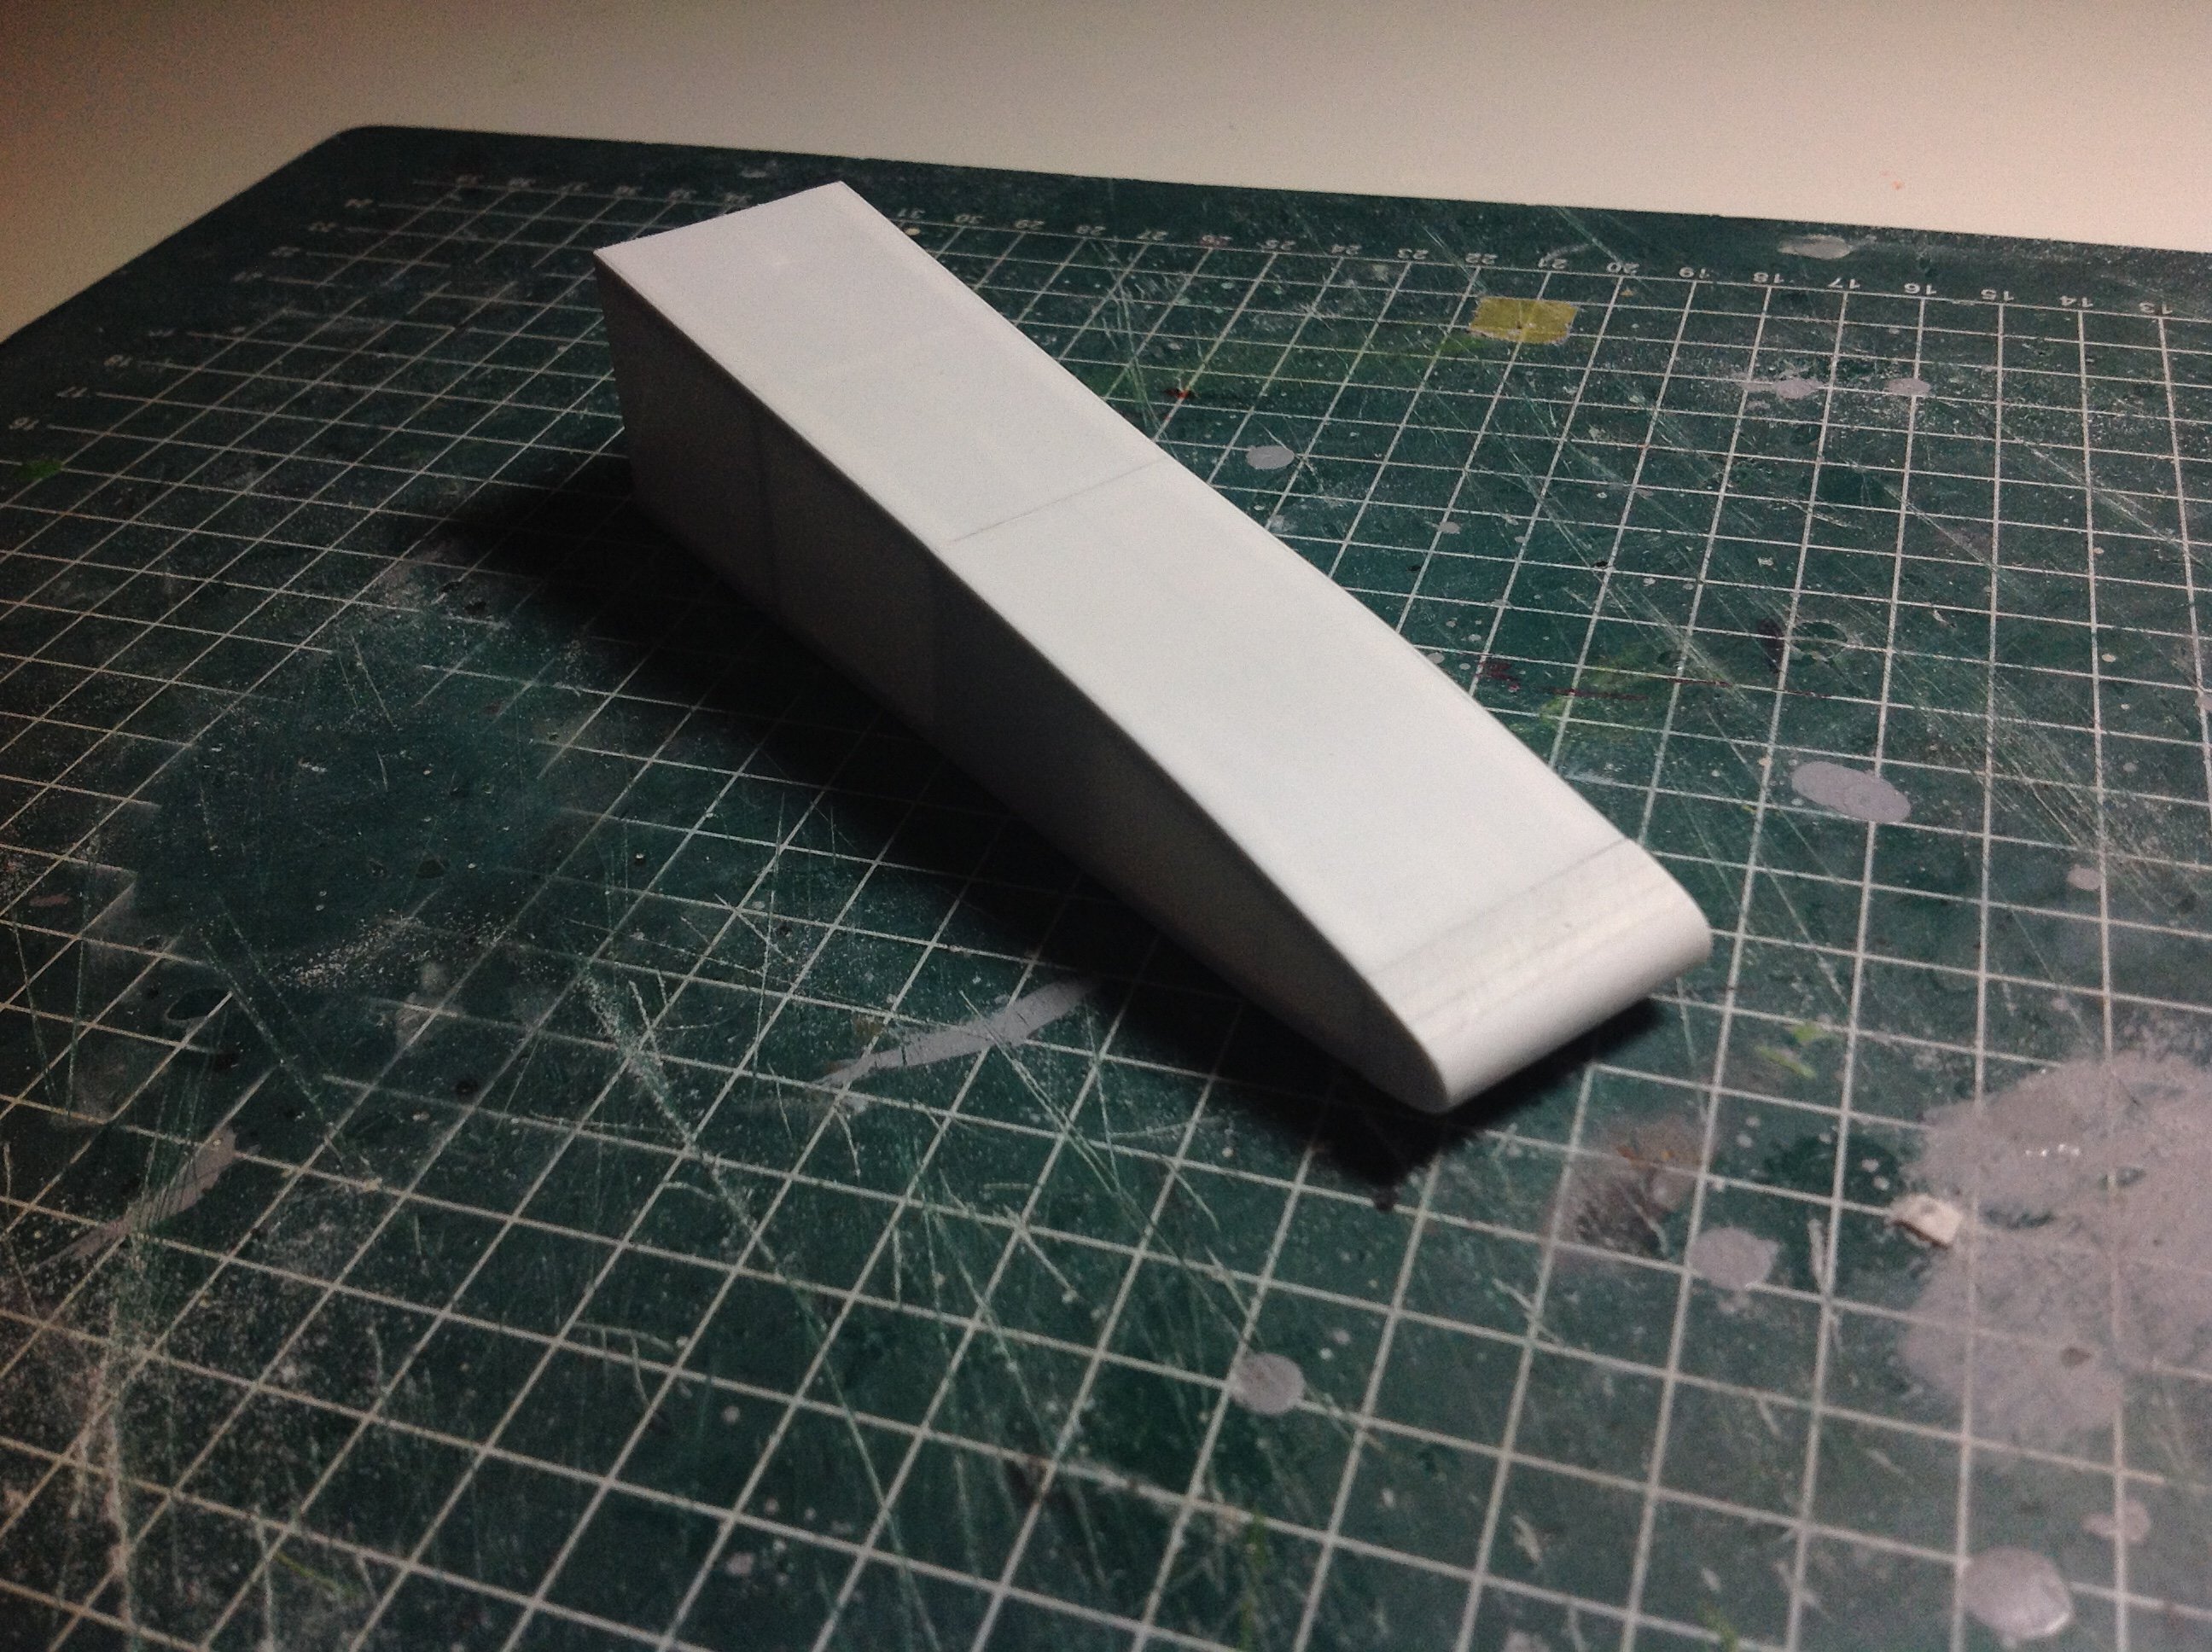
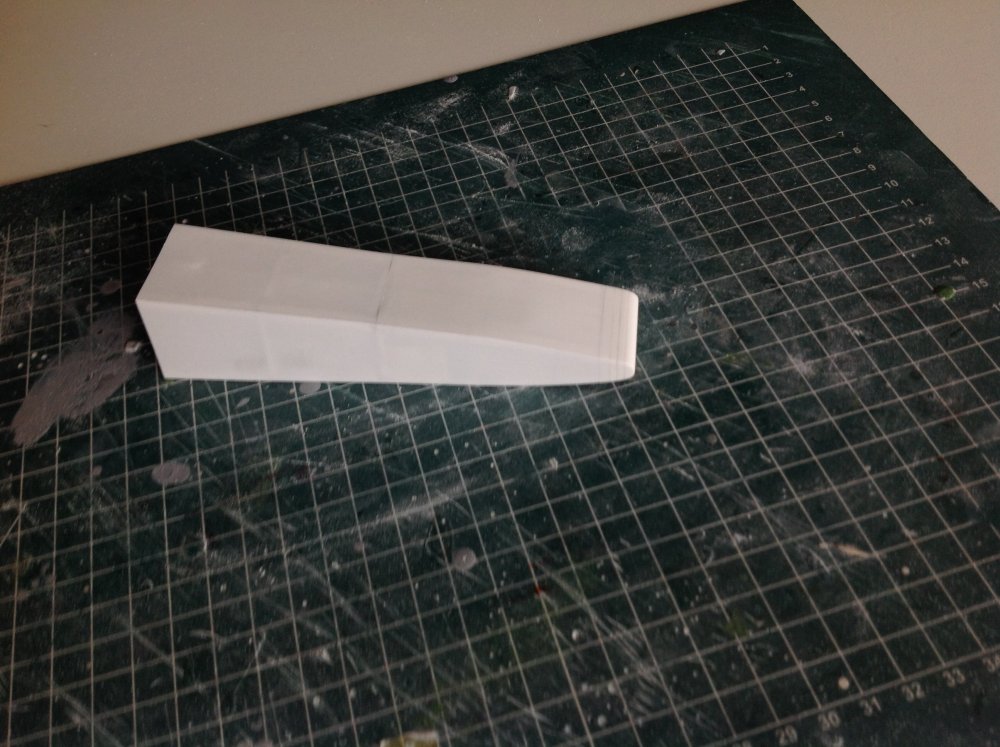
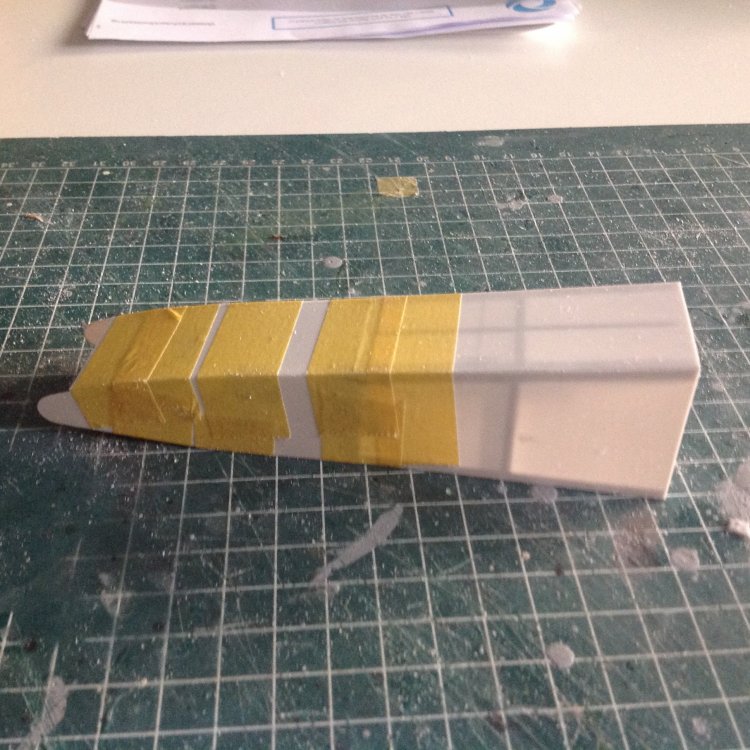
That's my intention, it is very subtle though. Been working on the extreme end of the tail. First I will try laminated plastic that can be sanded while not fitted. I had to cut off the sideparts as they nearly broke off when I tried to fit a thick tubesection to form the extreme end, on the right in the photo. I fear Milliput will make a mess of the thin structure. But that is my plan B too. We are in the middle of a housemove so progress will be low but the plan is to take the model with me to Telford. Cheers Cees
-
You seem to be on a roll. This is coming along nicely. Cheers Cees
-
Any updates Gus?
-
Yes you do!
-
Nice, thanks for clearing that up. Perhaps I was thinking that undercarriage components are usually made of rust resistant steel. Something learned today Cheers Cees
-
Thanks Rick, The difference is subtle but obvious. This set is surely a must have. A great tutorial on how to remove those pesky moulding thingies. I have the Mk V and will certainly invest in this set too. Cees
- 4 replies
-
- 1
-
-
- barracuda studios
- tempest mk.v
- (and 1 more)
-
You made a nice start on this. Not being very current on Japanes types but was the landinggear indeed black? Cheers Cees
-
You have me figuered out And welcome to LSM Jeff, where nutcases roost It has seemed to work, most of the top and bottom area is covered with the extreme tip still to do. I may took on Gus' tip and use Milliput as this is a mall area and easier to be modelled instead of solid plastic. I have also fitted strenghtening panels inside to be able to drill mounting holes for the tailplane and central fin. Hope you like. Cheers Cees
-
Trumpeter 1:32 Grumman Wildcat
Wingco57 replied to Mish's topic in LSM 1/32 and Larger Aircraft Ready for Inspection
Wow, very nice finish. Lovely Wildcat. Cheers Cees