
Kaireckstadt
-
Posts
1,705 -
Joined
-
Last visited
Content Type
Profiles
Forums
Events
Gallery
Everything posted by Kaireckstadt
-

Israeli Mirage III C with Atar9C
Kaireckstadt replied to Kaireckstadt's topic in LSM 1/35 and Larger Work In Progress
I‘ll do my best Hubert! I‘m afraid that this may happen: Enjoy the rest of your holidays. -
Israeli Mirage III C with Atar9C
Kaireckstadt replied to Kaireckstadt's topic in LSM 1/35 and Larger Work In Progress
I‘m really curious to see the phinal phinish on your Phantom! -
Israeli Mirage III C with Atar9C
Kaireckstadt replied to Kaireckstadt's topic in LSM 1/35 and Larger Work In Progress
That’s a nice substitute Hubert! Hope you enjoy your holiday in France! And I also hope to cross the finish-line before you are back to popcorn. How long will you stay in France? Thank you Gary! Much appreciated! Thank you too Craig! Thank you Peter! I‘m closely following your F-4 build. Looking forward to seeing it with the final varnish applied! -
Israeli Mirage III C with Atar9C
Kaireckstadt replied to Kaireckstadt's topic in LSM 1/35 and Larger Work In Progress
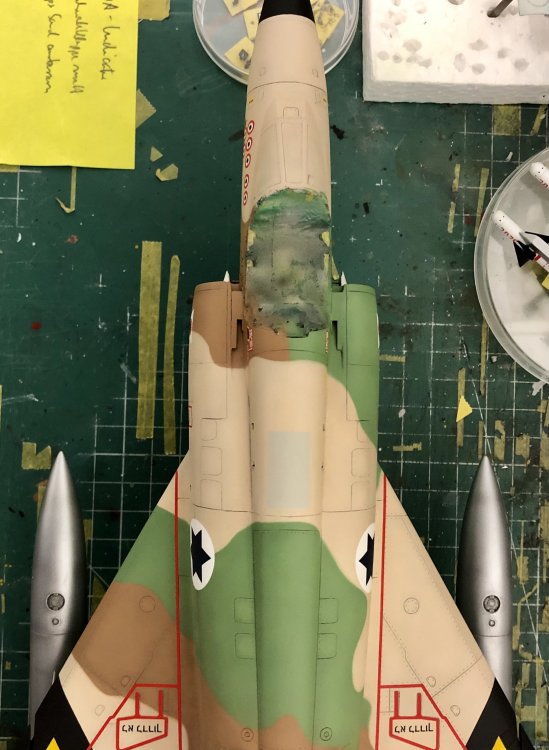
Rob, I‘ve taken a closer look at the foto you mentioned and found another one which indicated to me that maybe it‘s not the part of the ladder which mirrors on the fuselage but seems to be a discoloration. There’s something similar slightly above the first. In addition there is no mirror to be seen on the fuselage of the left part of the ladder. Therefore and due to a lot of fotos I looked at in the web I decided to finish it with a matte cote: What do you think?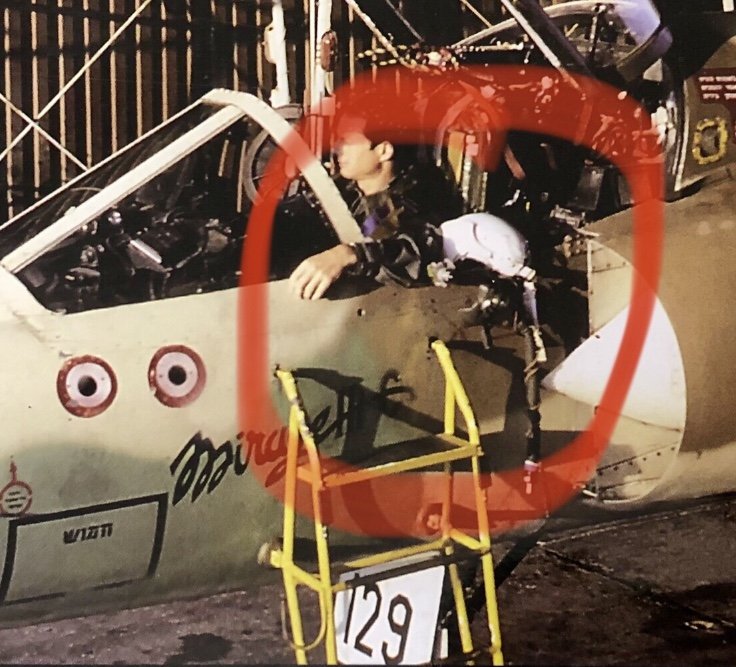
-
Israeli Mirage III C with Atar9C
Kaireckstadt replied to Kaireckstadt's topic in LSM 1/35 and Larger Work In Progress
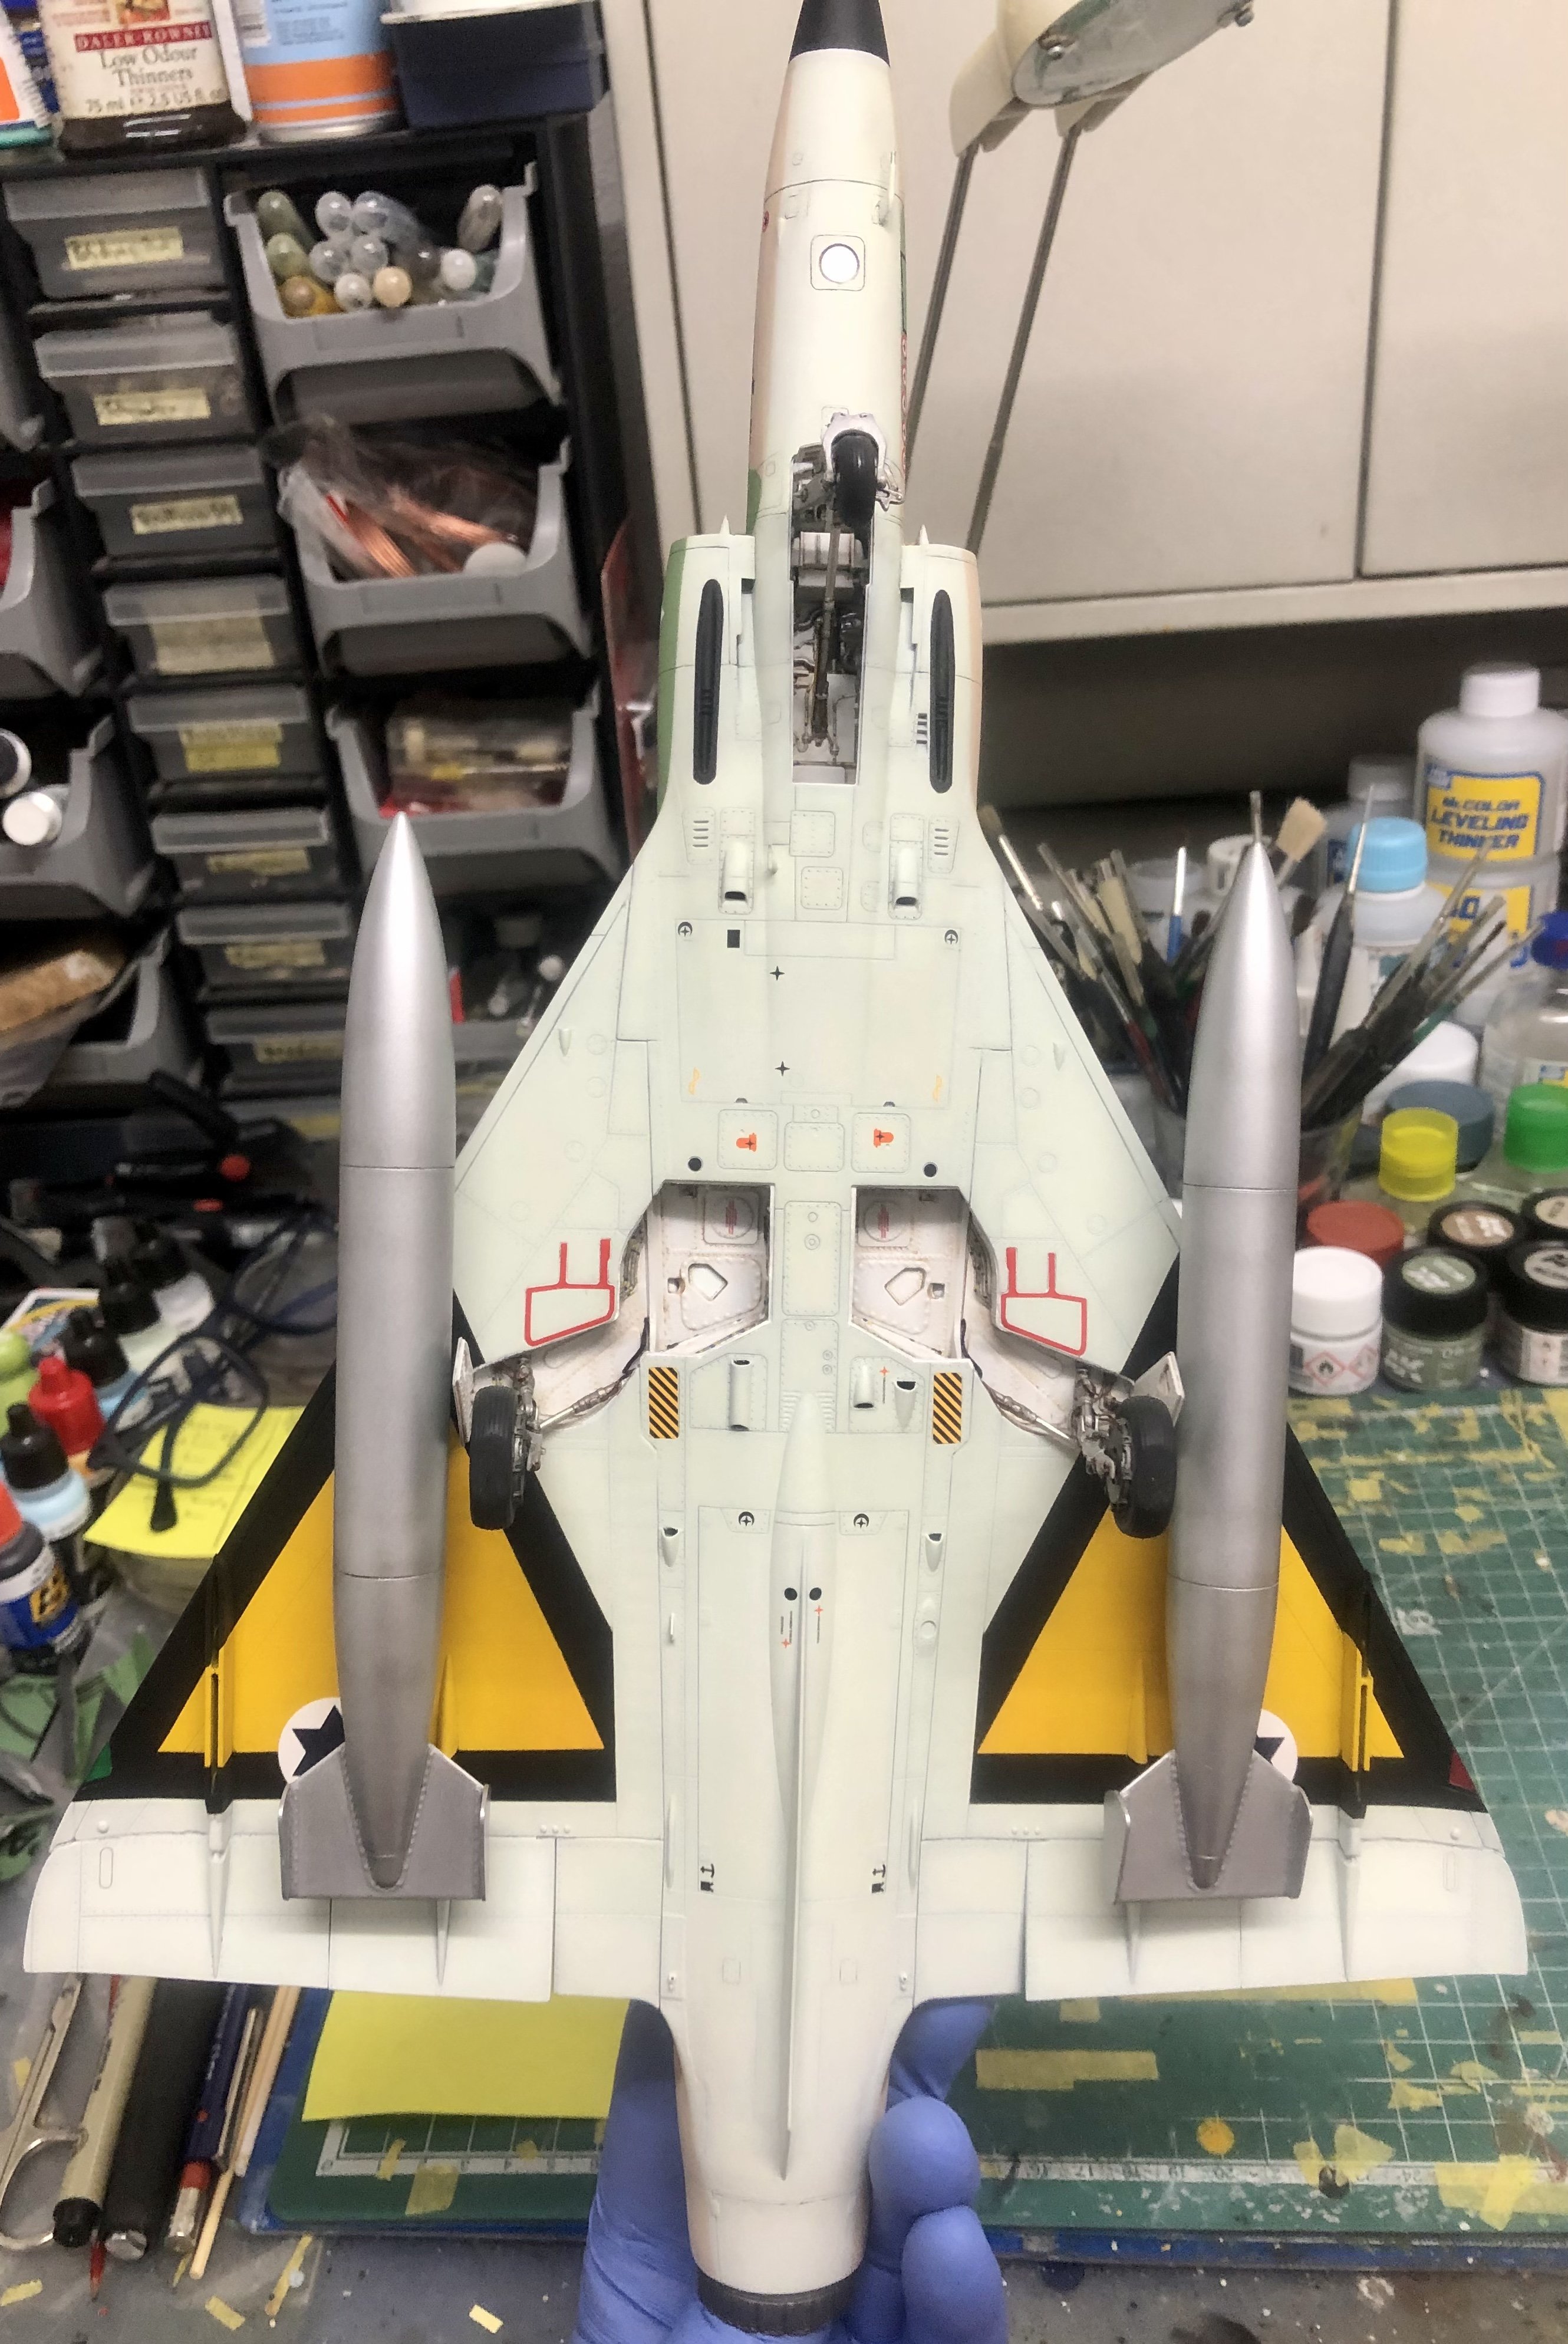
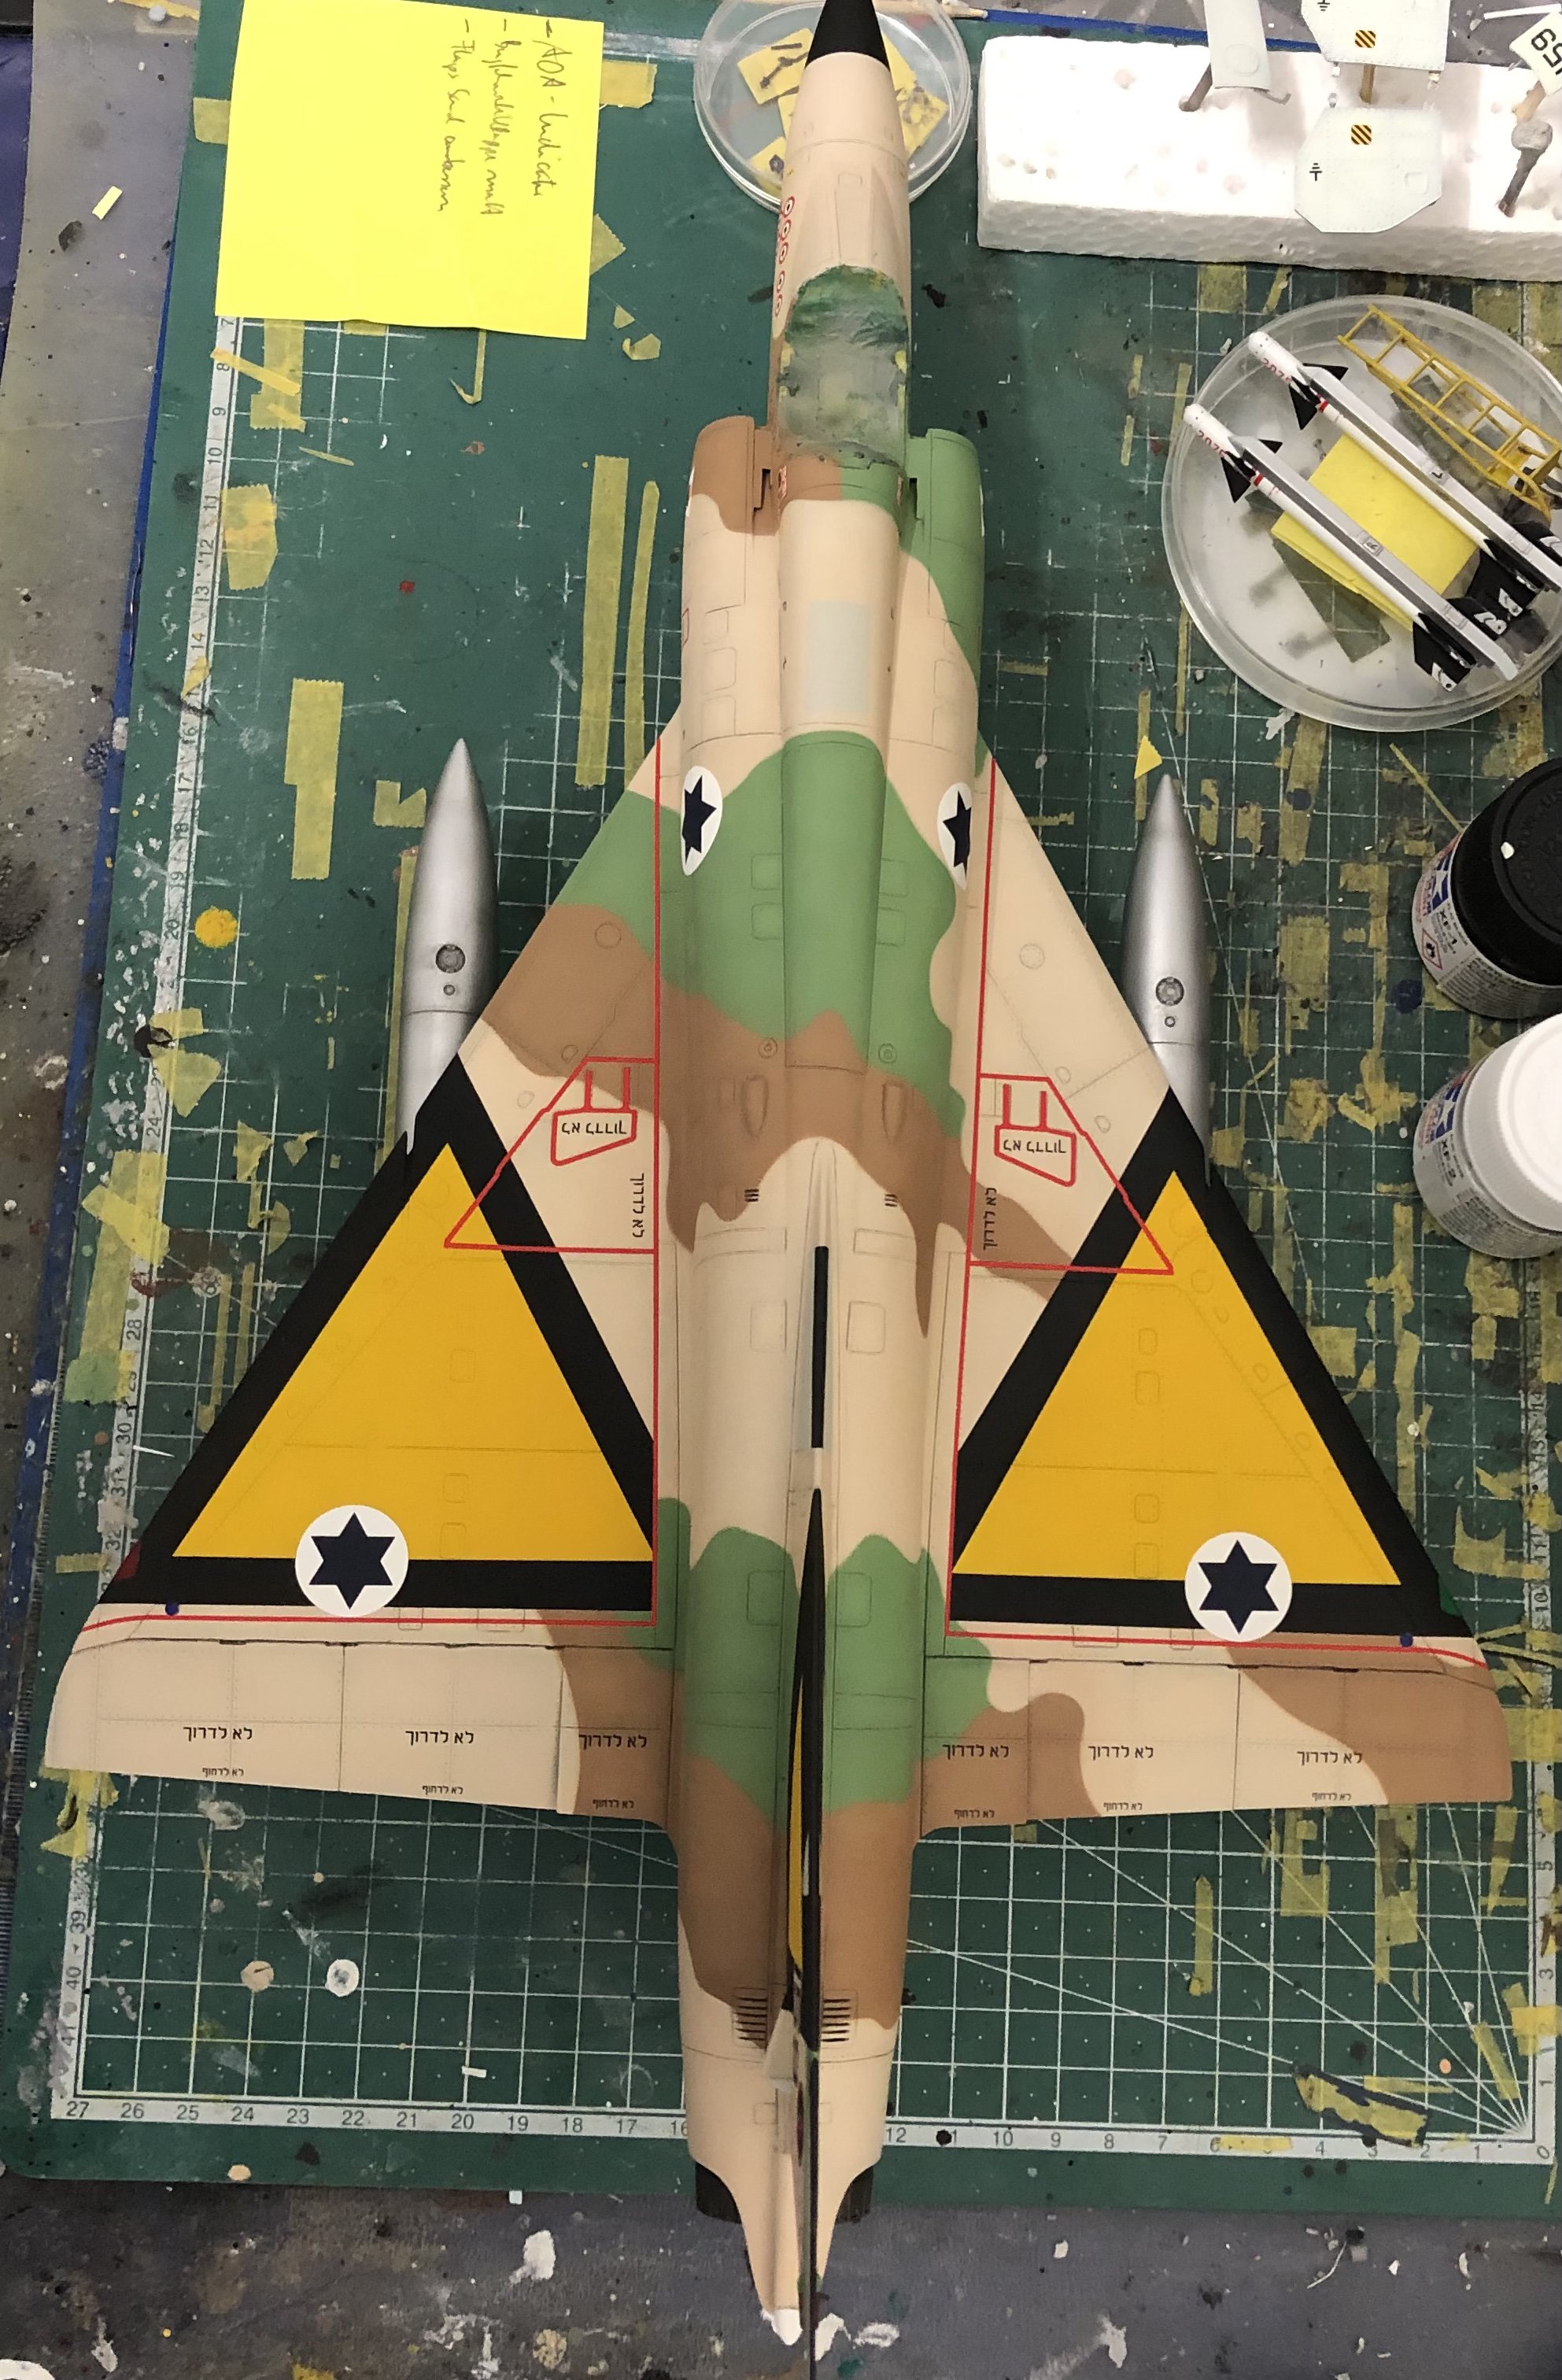
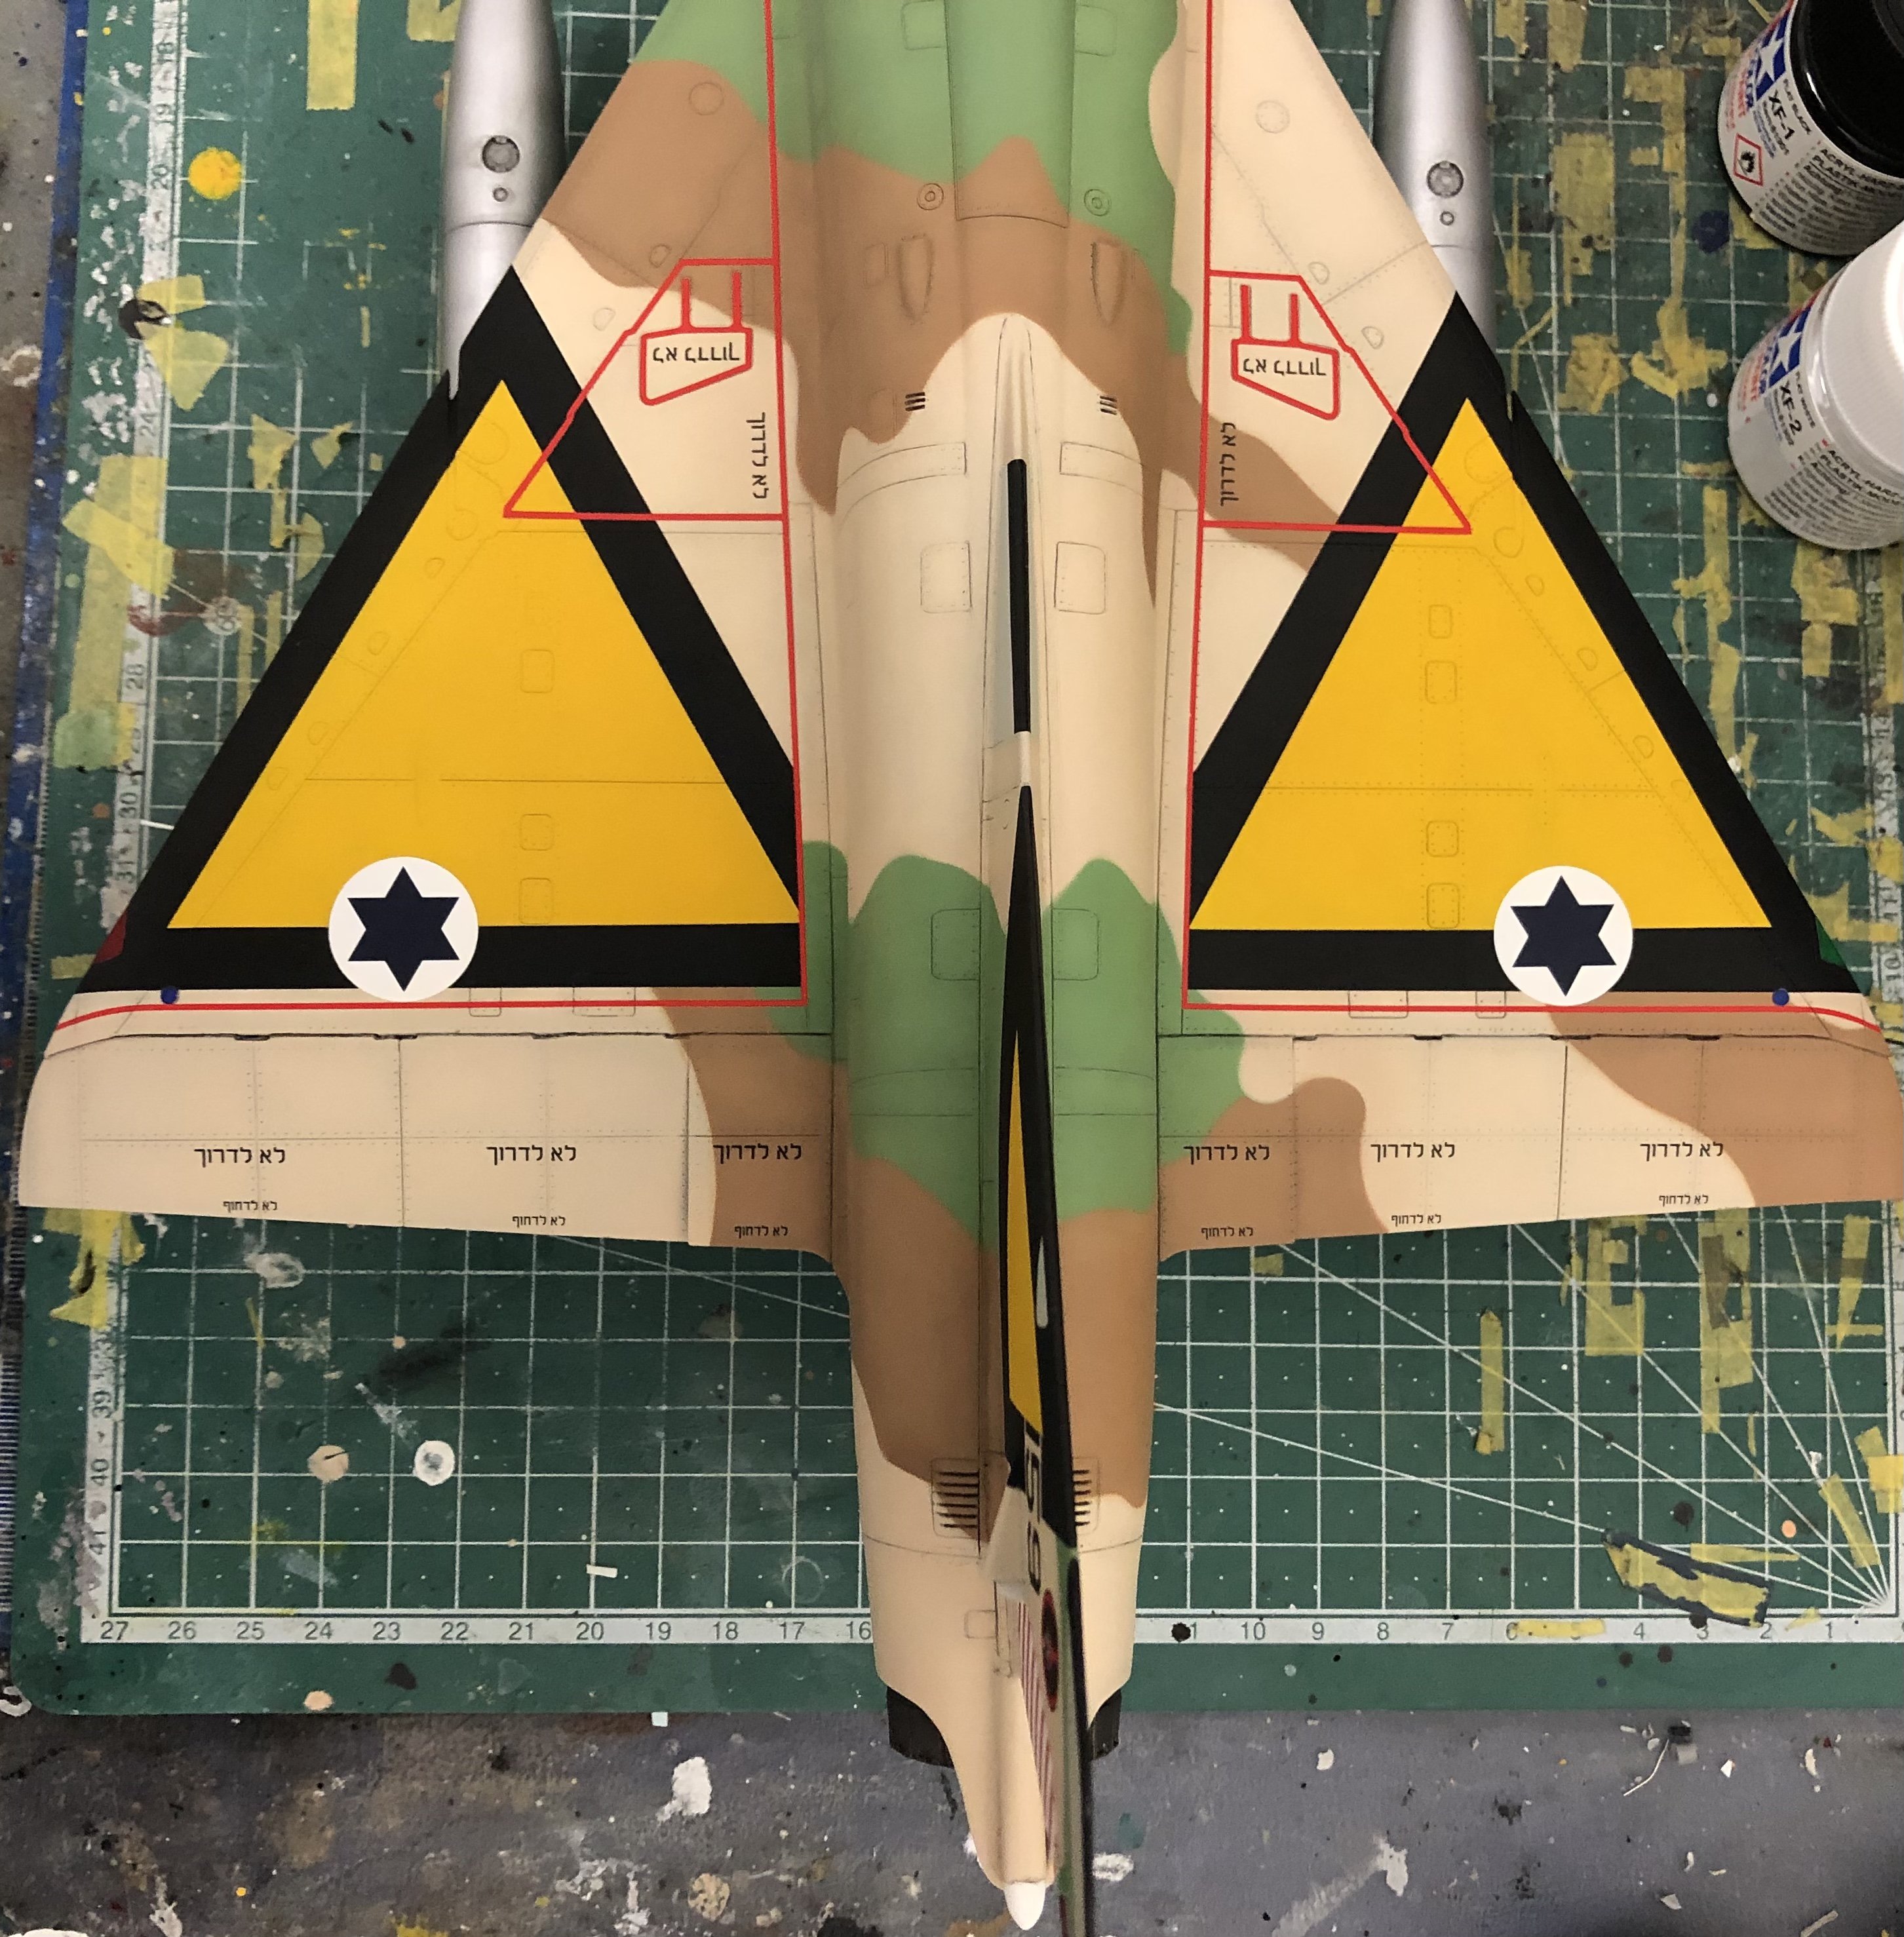
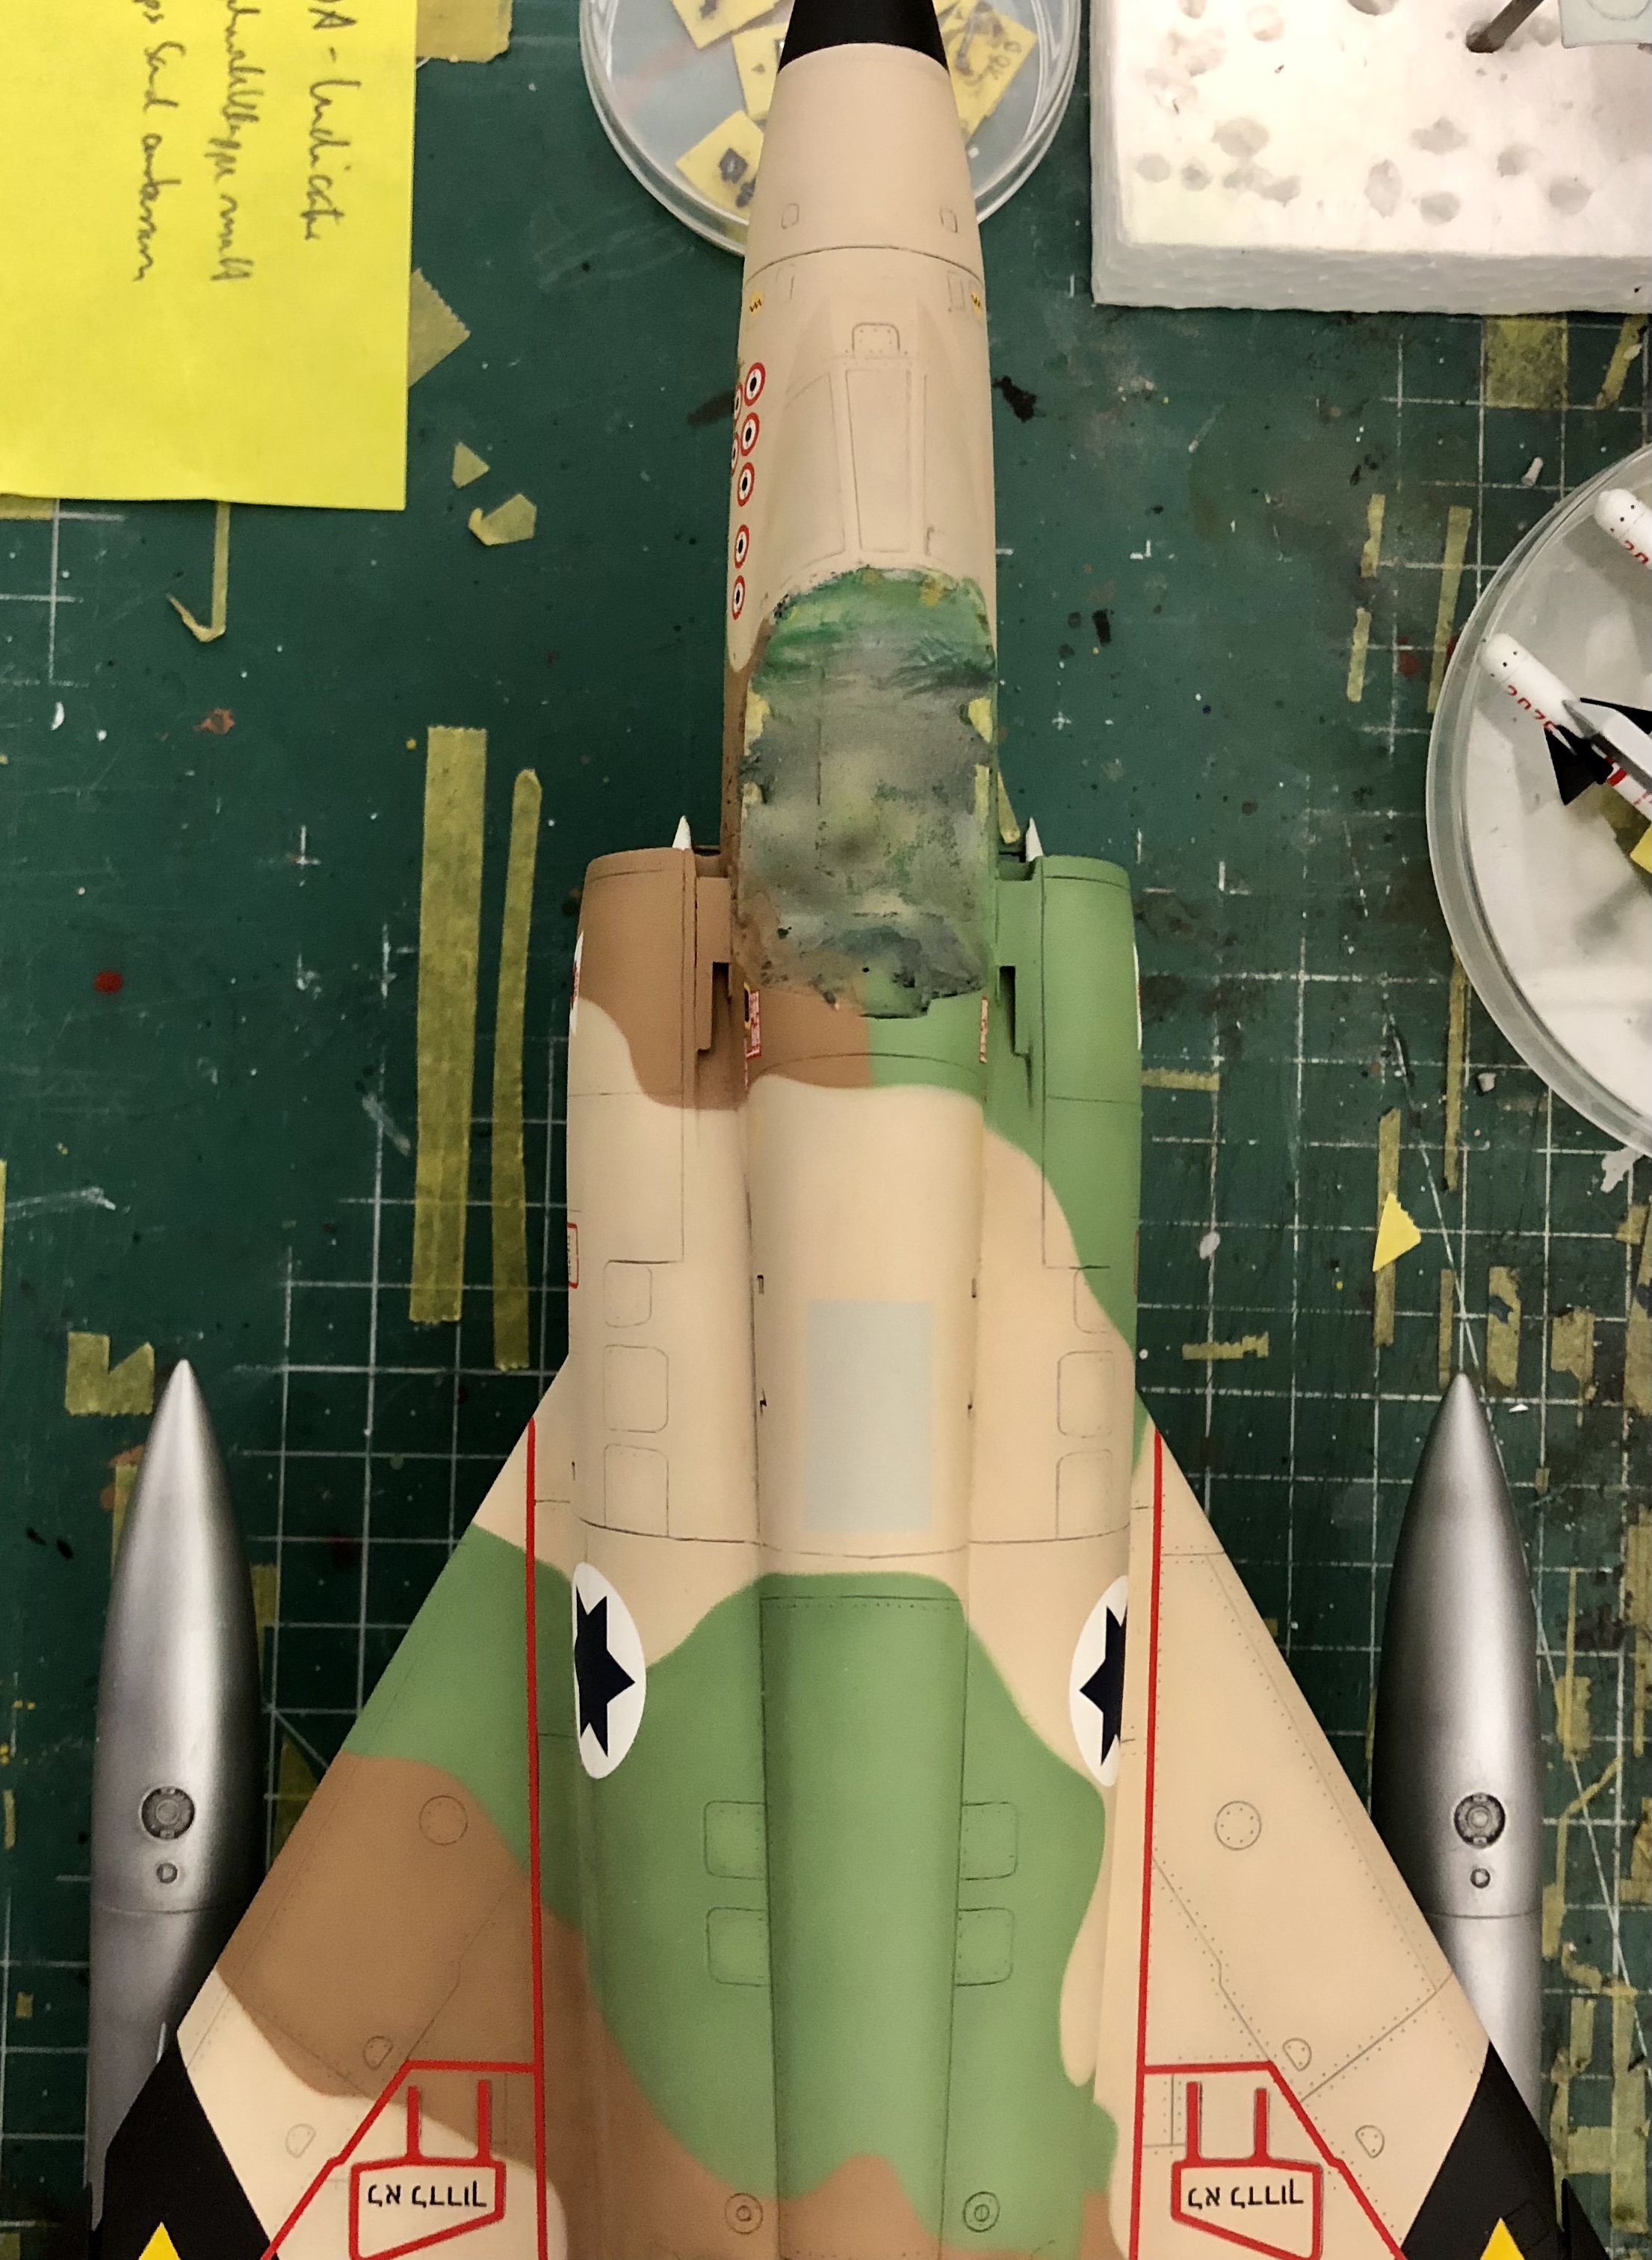
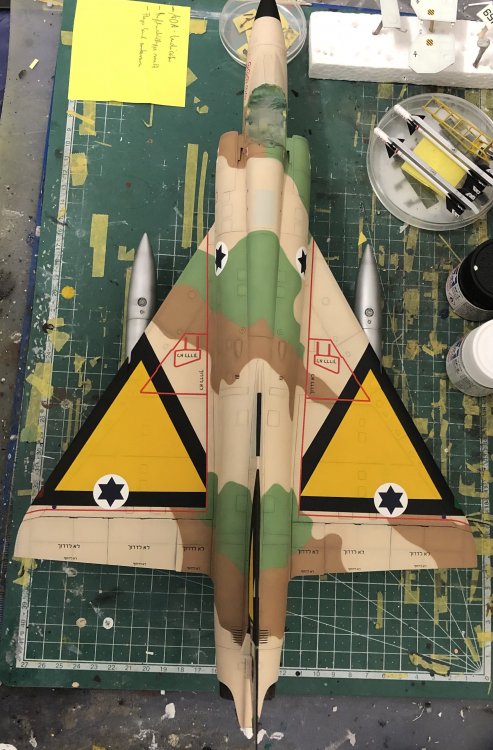
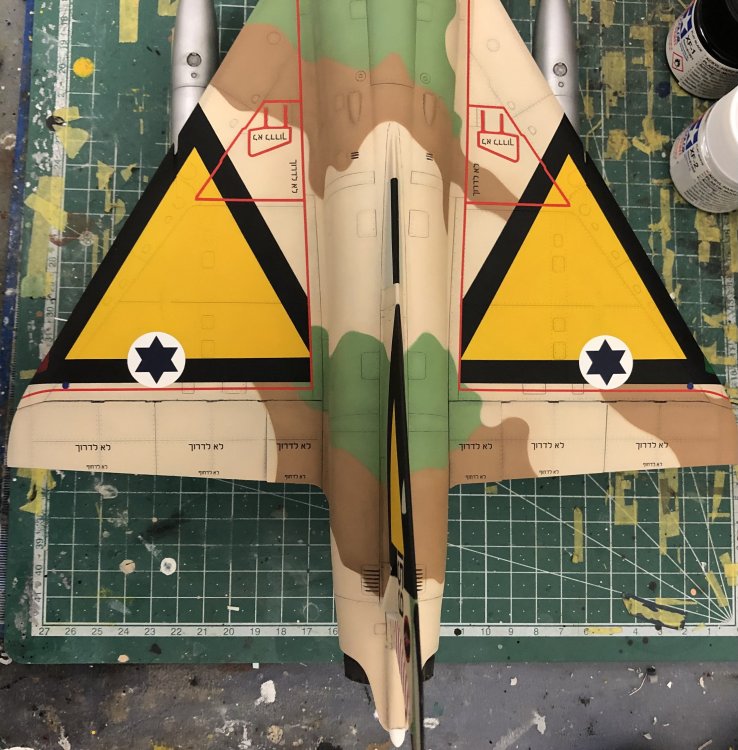
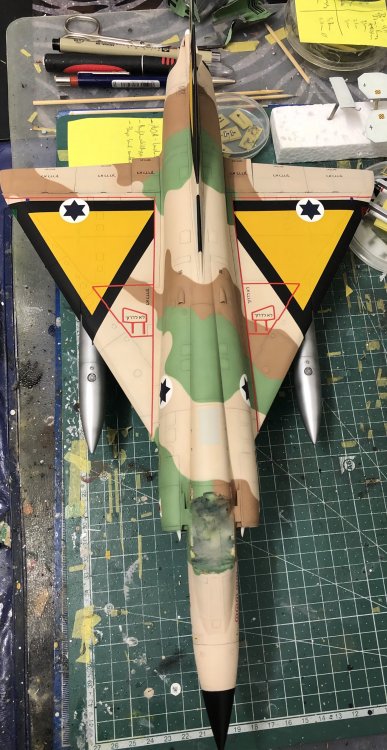
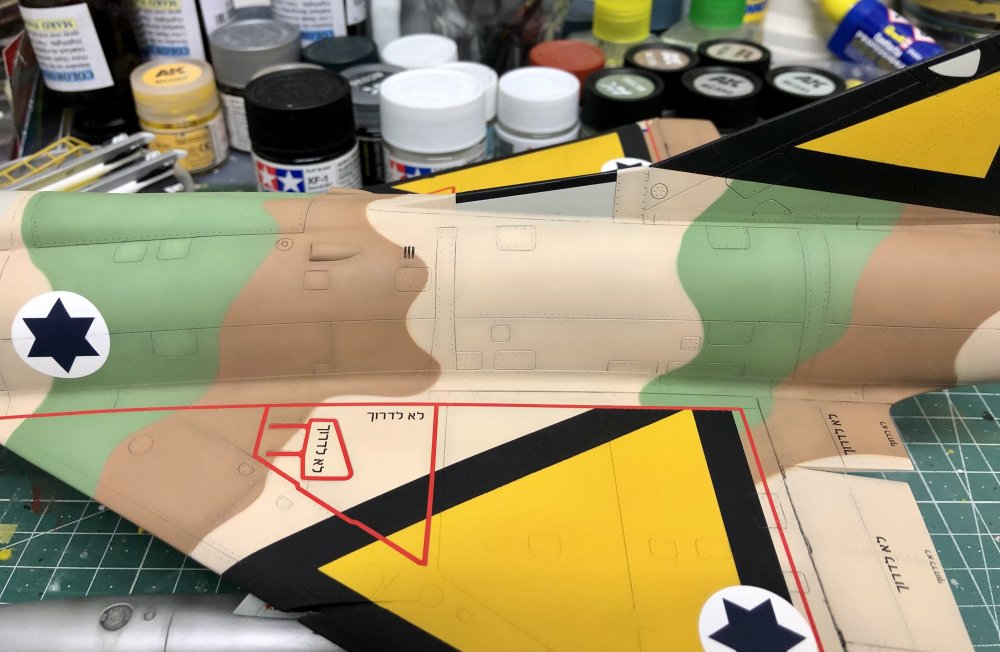
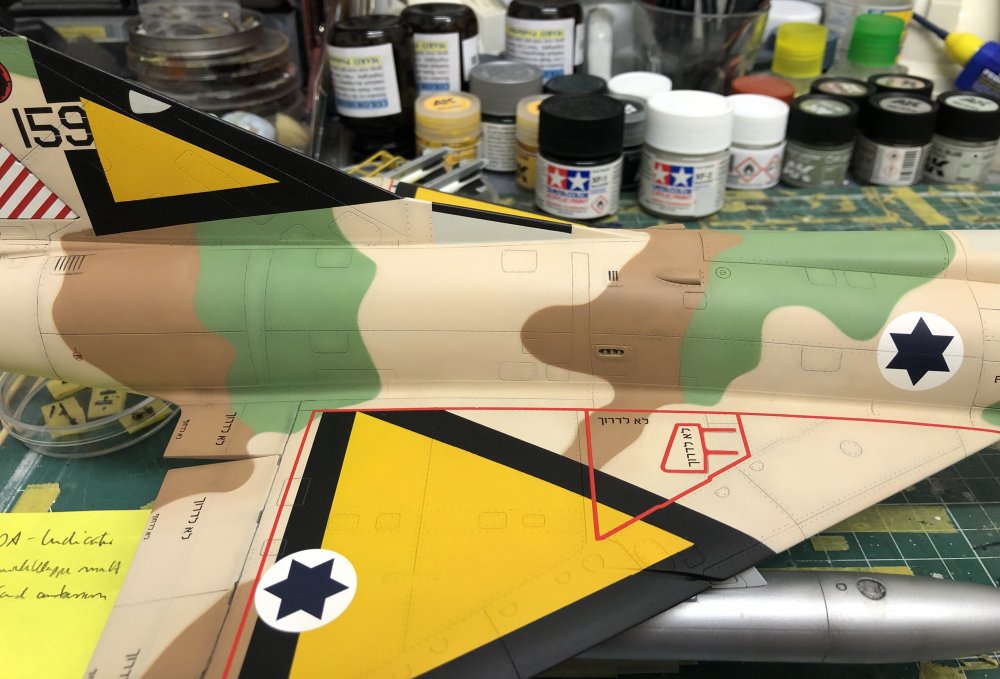
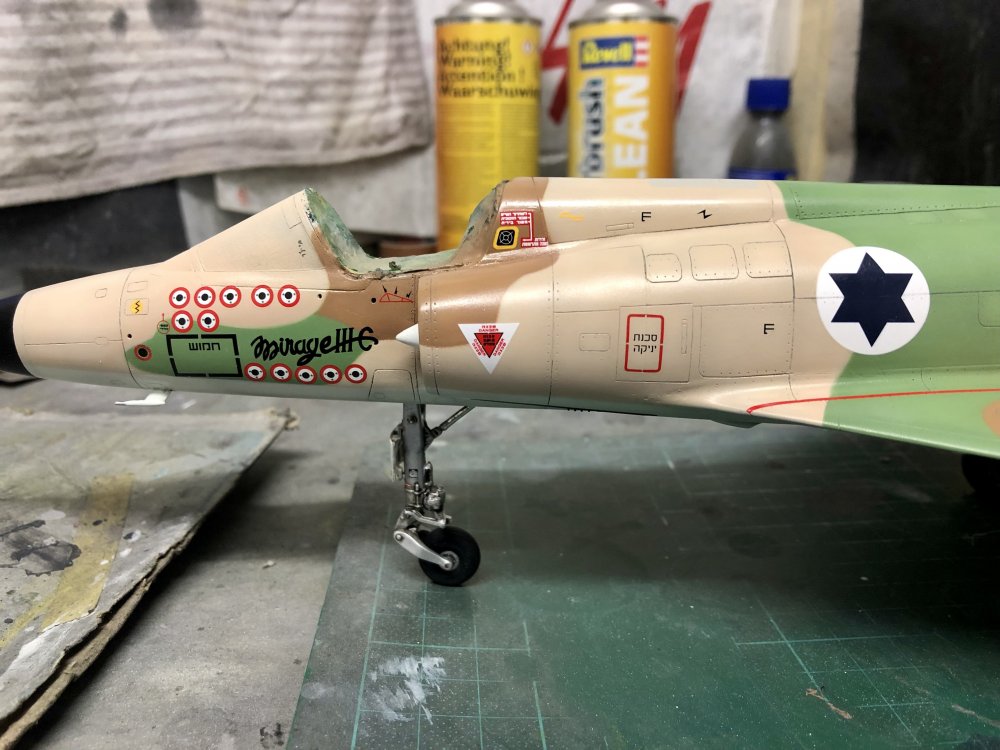
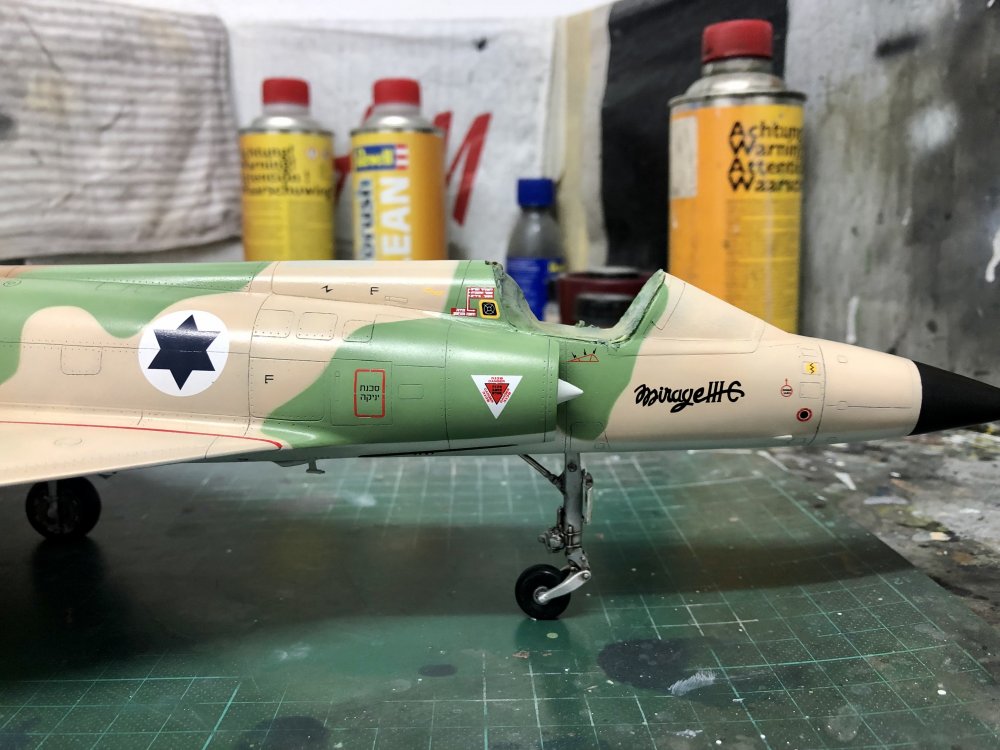
Yesterday I enhanced some of the panellines (mainly on the forward fuselage) which weren’t like the ones visible from the preshading with different kinds of light-grey oilcolor. This creates a more regular appearance of all panellines: Today I finished what I promised: flat varnish applied: 1) Small parts: 2) Lower fuselage (tanks not glued): 3) Fuselage top: I‘m happy since no silvering of the decals occurred. Also a typical effect of the AK-Colors occurred: The real color-tone comes out when flat varnish is applied over them. I did the panellines over the David-stars and some other small panellines with a Faber Castell pencil with a 0,3 mm HB-Pencil lead. I‘ll let the whole thing dry for 48 hours now and then start weathering of the underside and unmasking of the canopy, cockpit and windshield. The end is now really in sight Hubert!


-
Trumpeter P-51B started
Kaireckstadt replied to JohnB's topic in LSM 1/35 and Larger Work In Progress
Very good surgery on the top wings John! Now they look much better and the surface is really smooth. Will look great under a coat of paint. -
Ferrari 330P4 Open top 24Hrs Daytona 1967
Kaireckstadt replied to mark31's topic in LSM 1/35 and Larger Work In Progress
Another 1000 rivets? That’s simply crazy! Be honest Mark: you are building a real Ferrari 330 and copy the pictures into photos of your workplace! -
Two little Brewsters, now a Buddy Build.
Kaireckstadt replied to Clunkmeister's topic in LSM 1/35 and Larger Work In Progress
Fast progress and a flawless build Martin! I‘m looking forward to seeing how you will paint all this, especially the engine. -
Ferrari 330P4 Open top 24Hrs Daytona 1967
Kaireckstadt replied to mark31's topic in LSM 1/35 and Larger Work In Progress
Another 206 rivets? Unbelievable! But looks absolutely stunning! Great progress Mark! Love it! Can‘t wait to see it coming together! -
Great work on the tail surfaces so far. Is there no other possibility than to rebuild them or is it possible to rework the existing ones?
-
1/32 Revell Fw190 F8 converted to G8
Kaireckstadt replied to AlanG's topic in LSM 1/35 and Larger Work In Progress
Nice start on the camouflage! The red stripe around the nose will make it an eyecatcher! Did you spray it with bluetack or did you use flying masks? -
Israeli Mirage III C with Atar9C
Kaireckstadt replied to Kaireckstadt's topic in LSM 1/35 and Larger Work In Progress
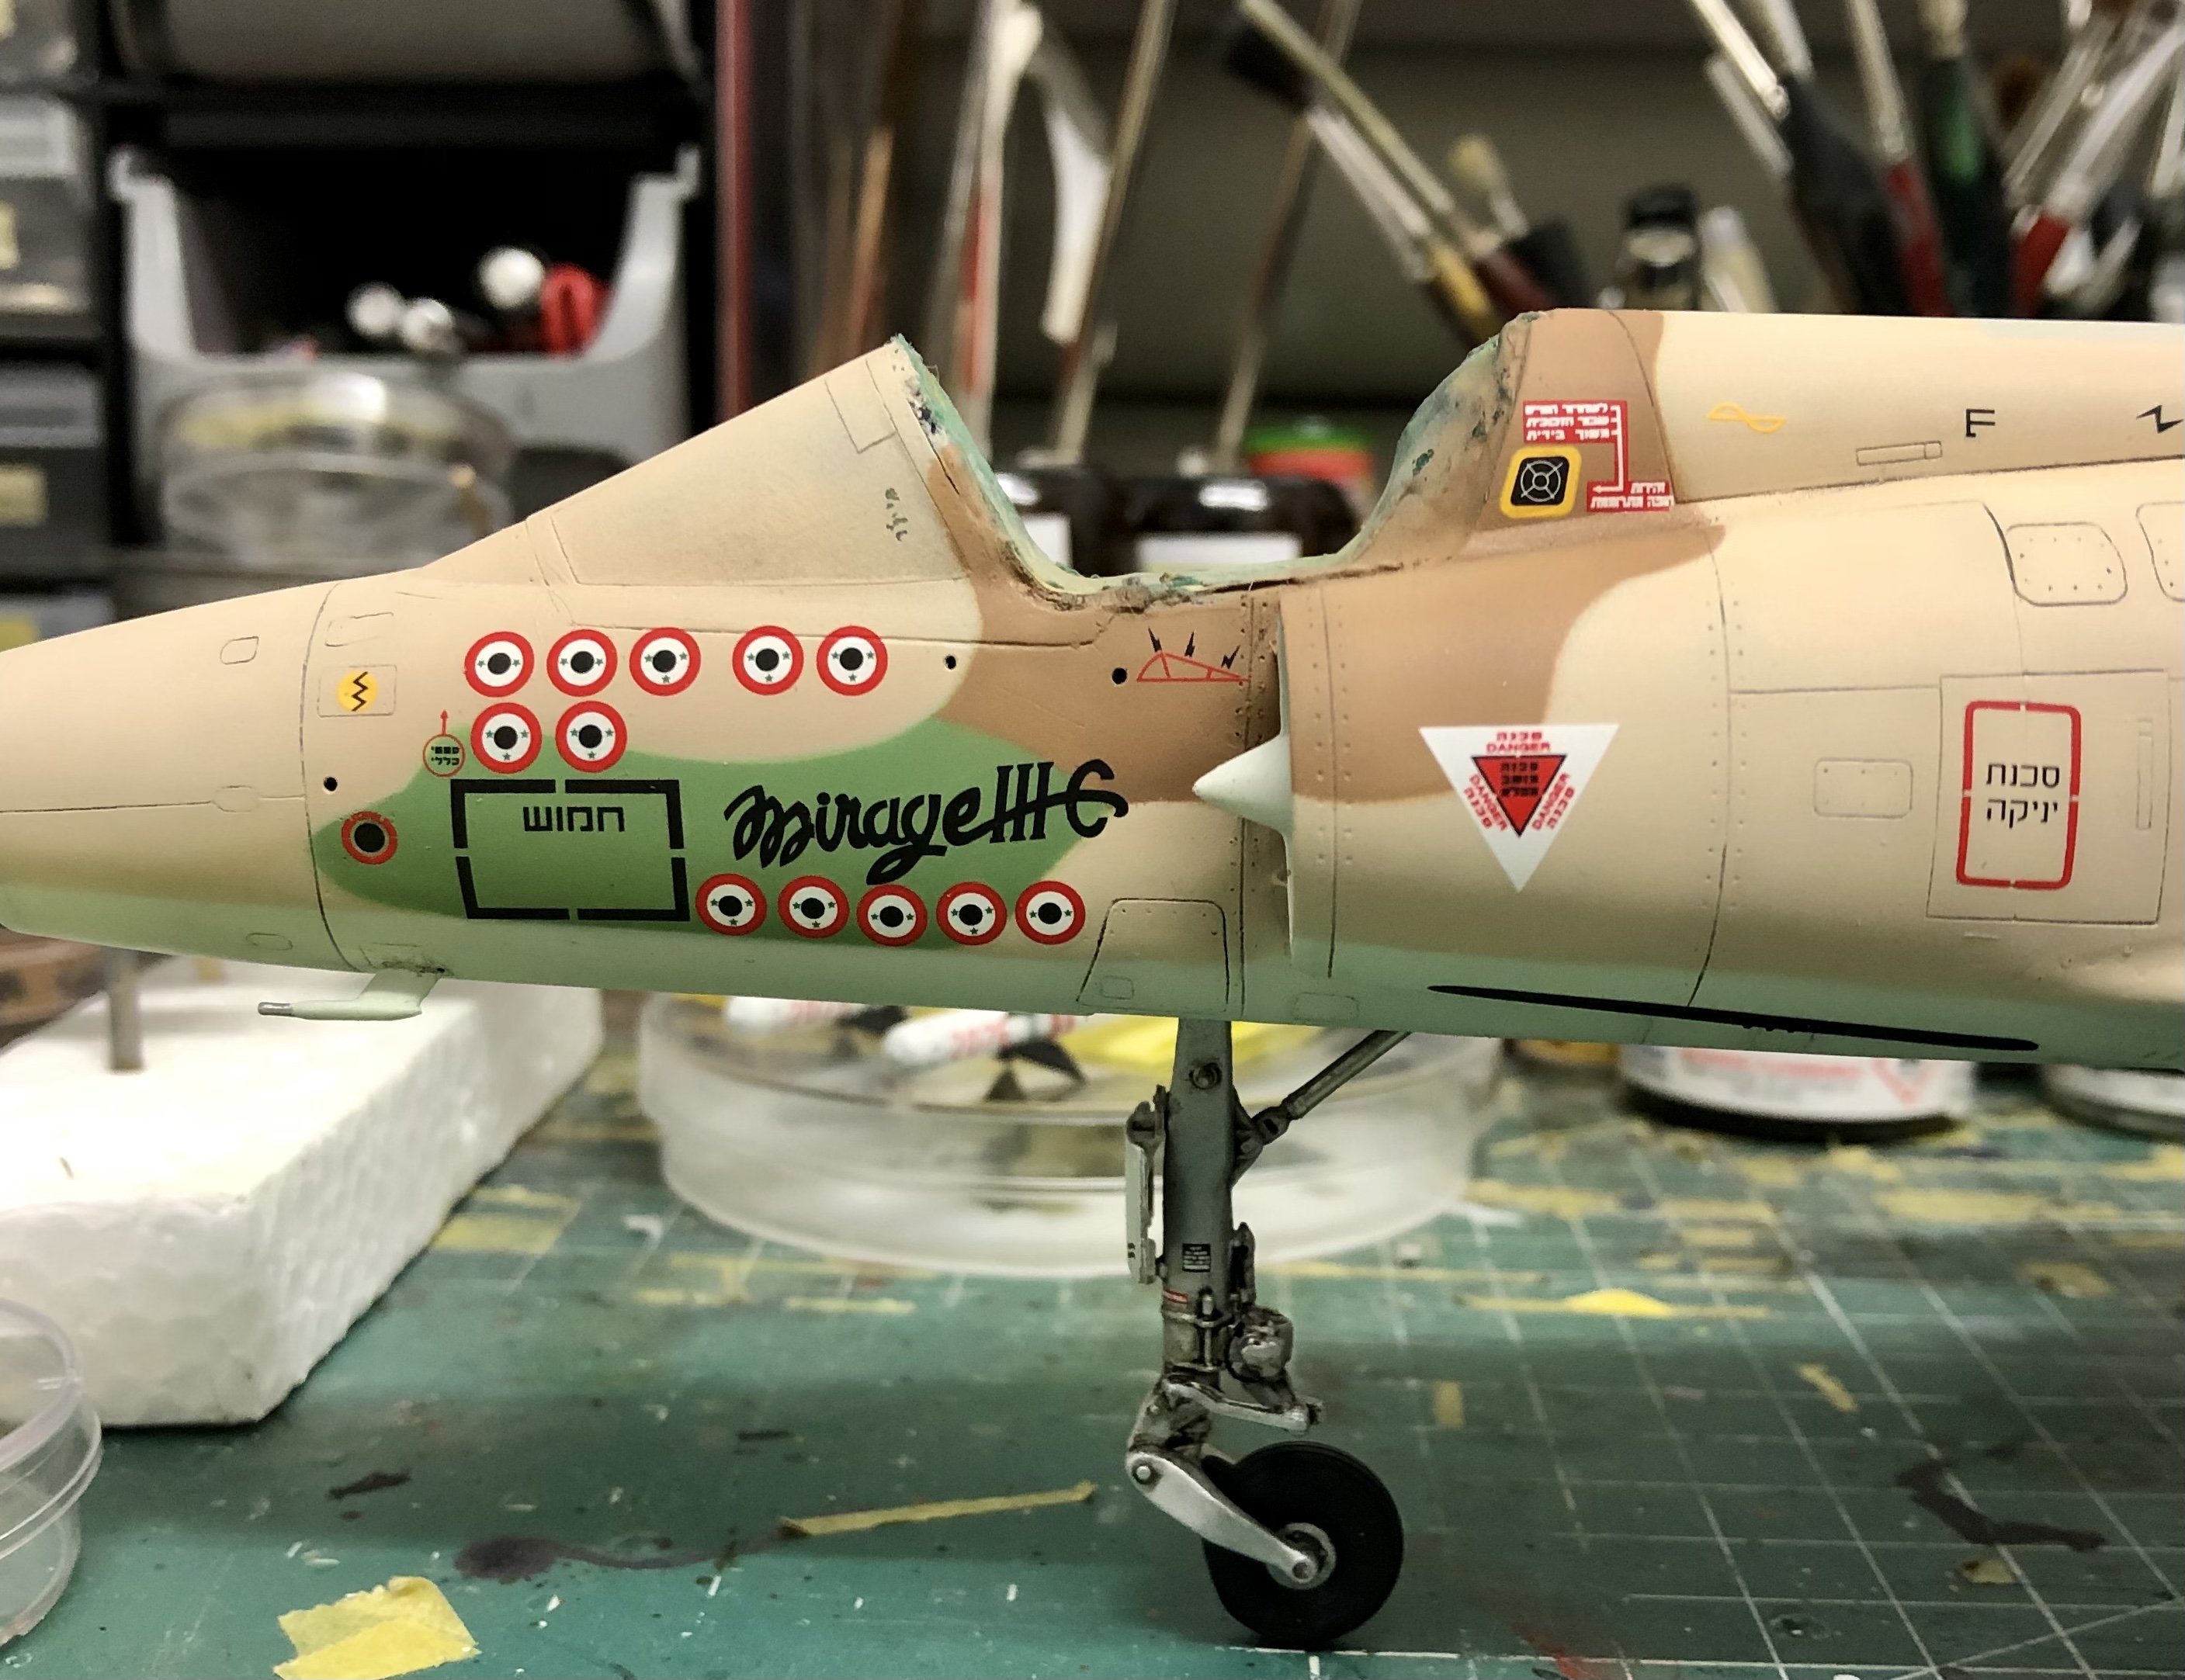
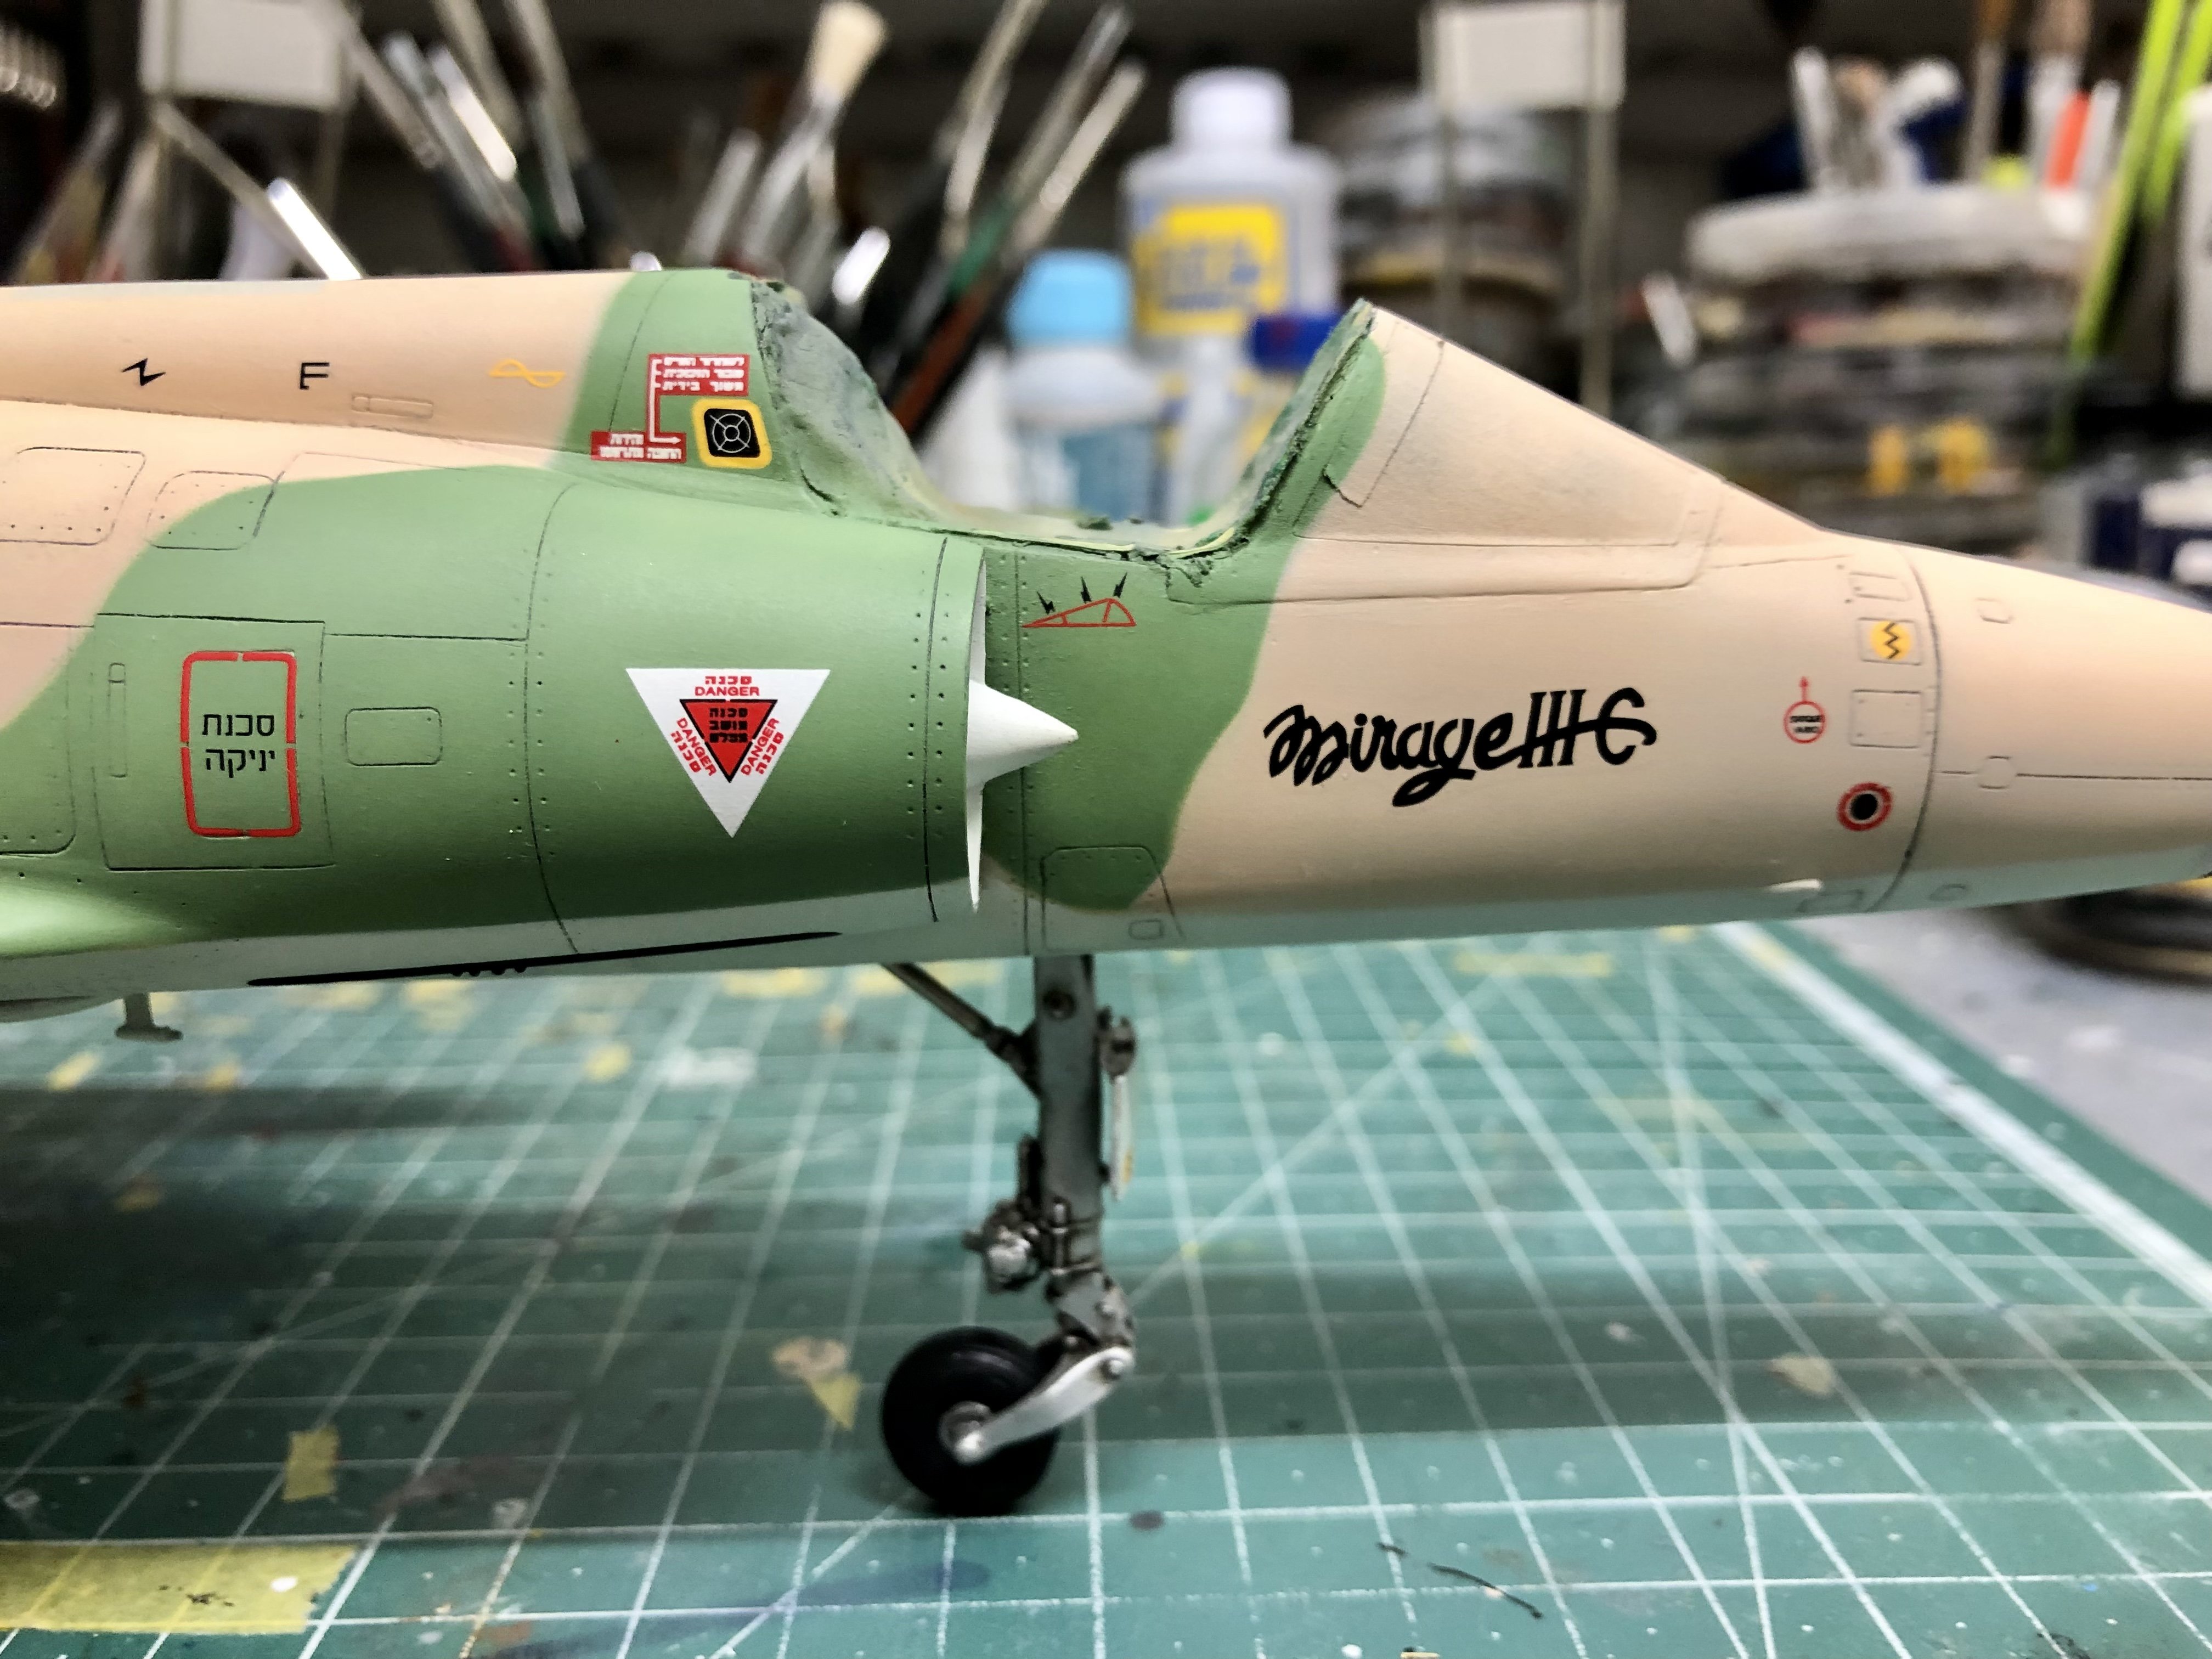
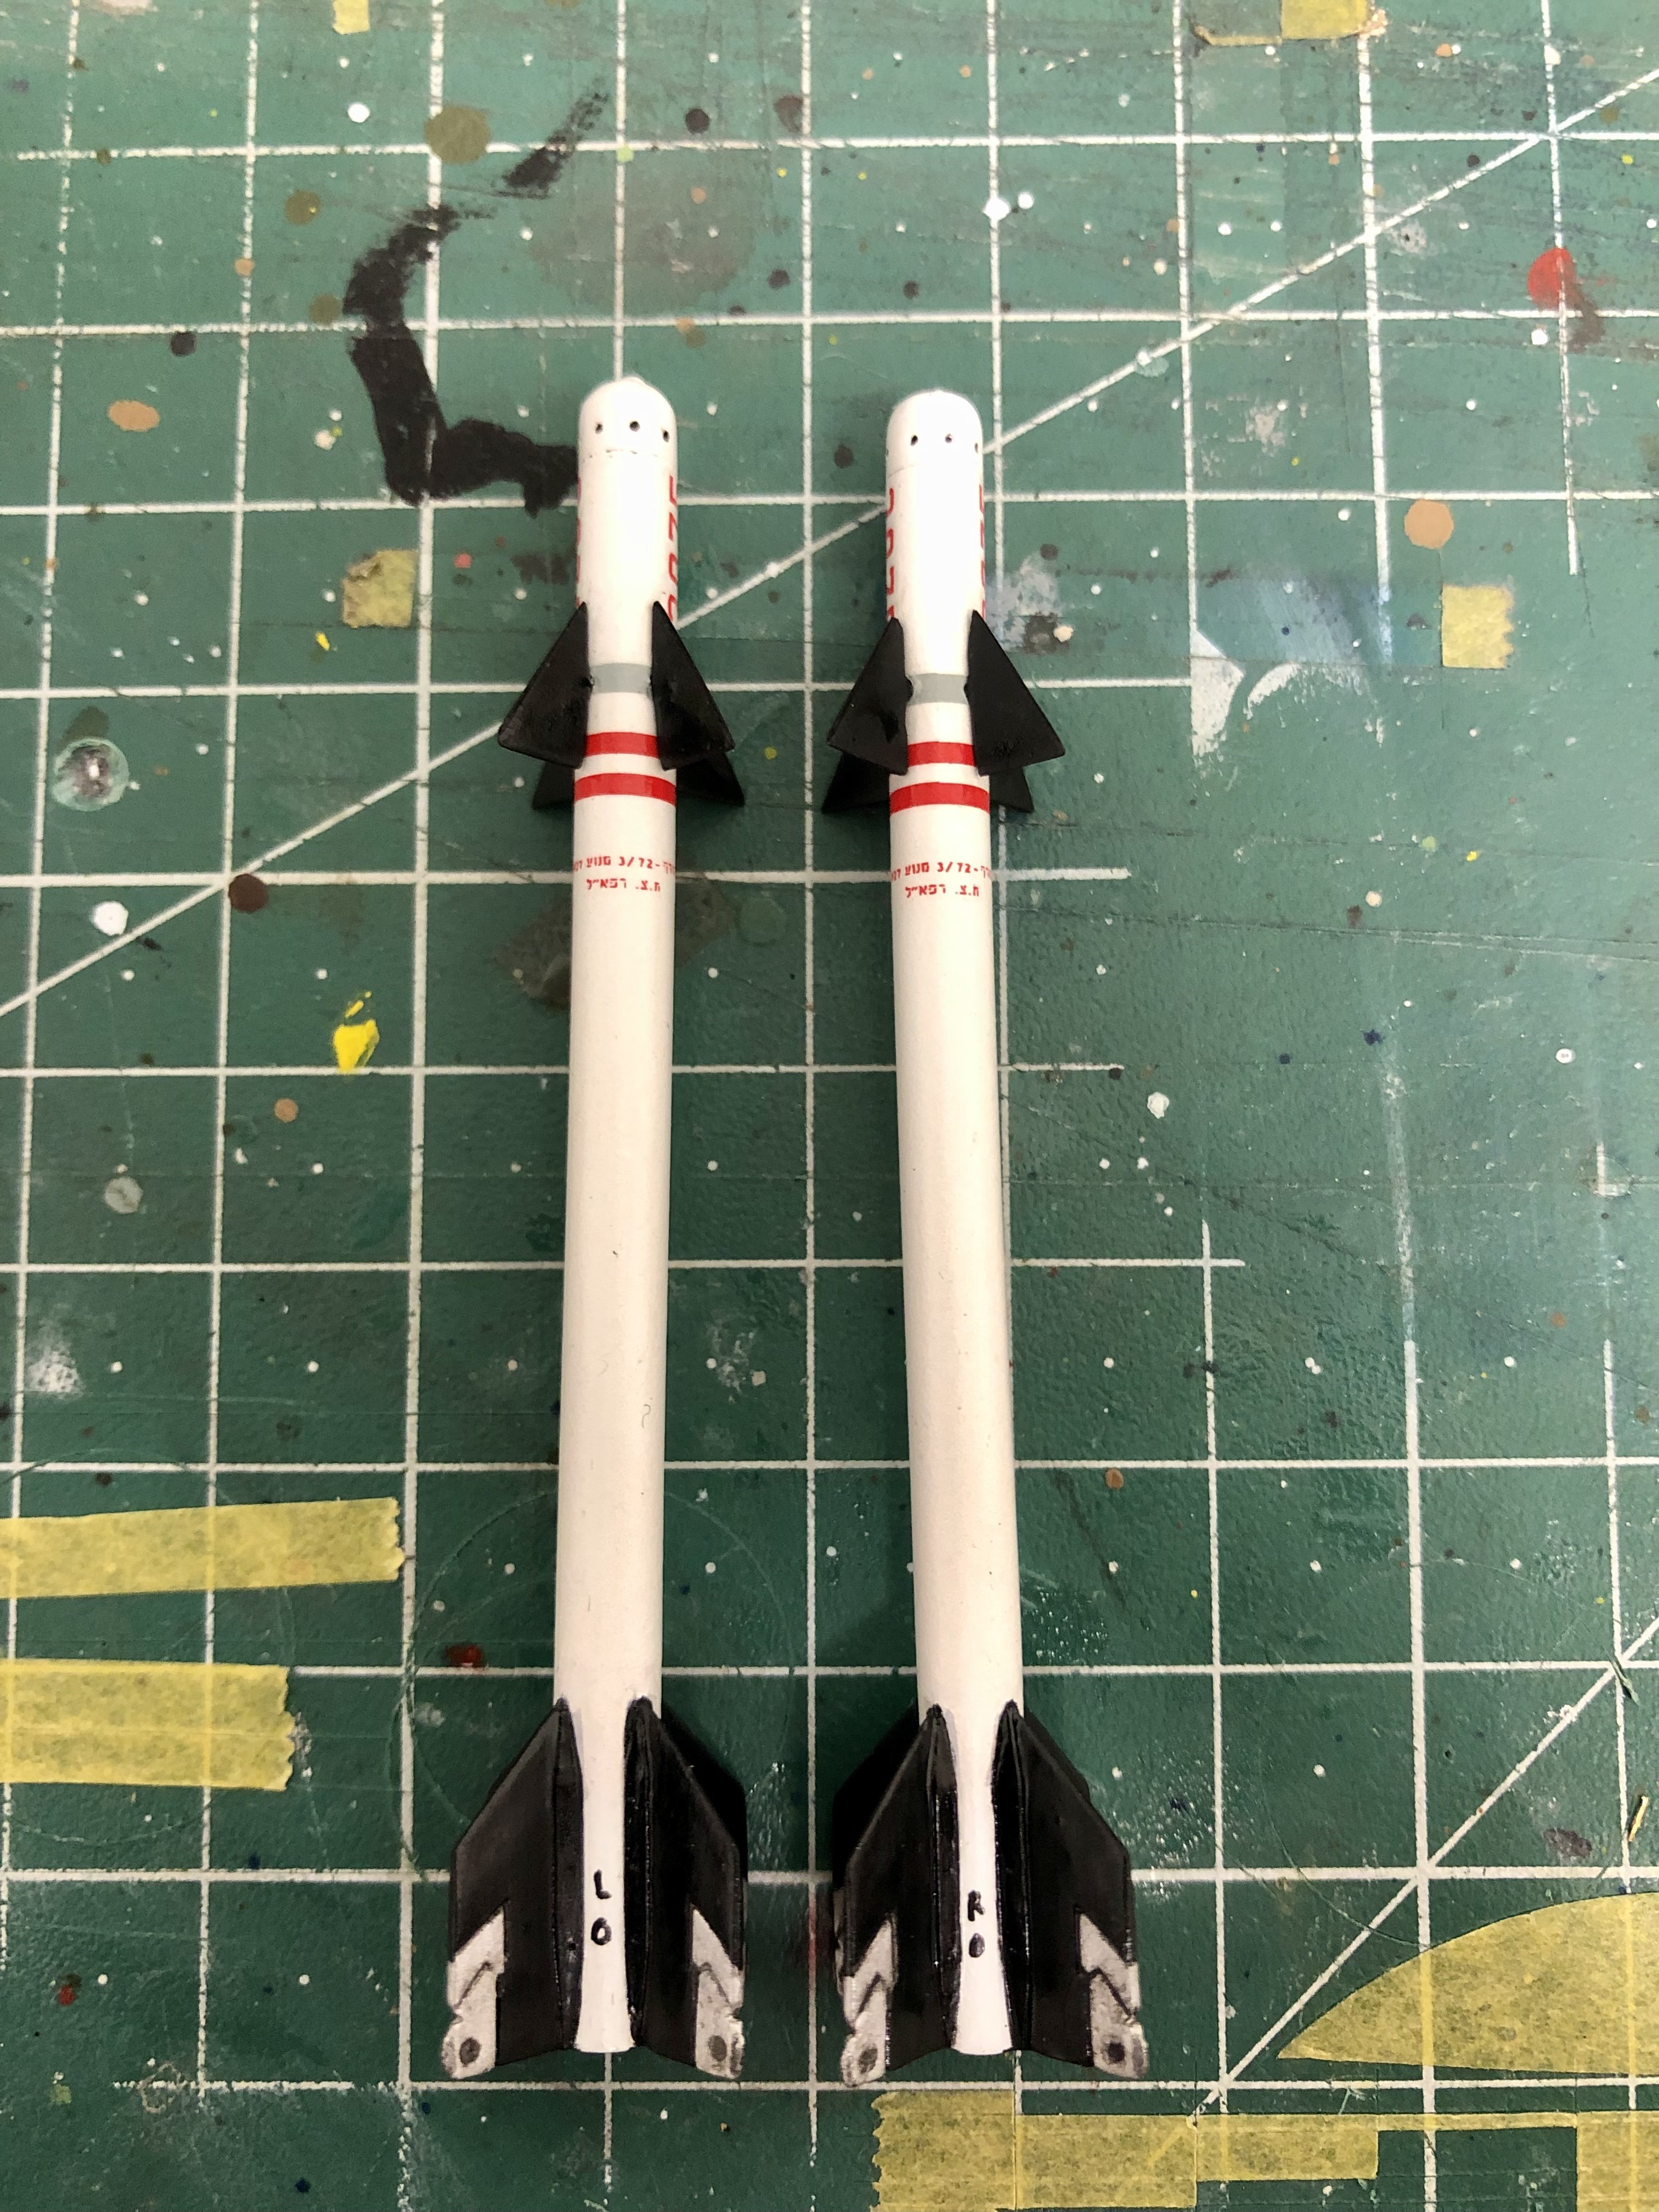
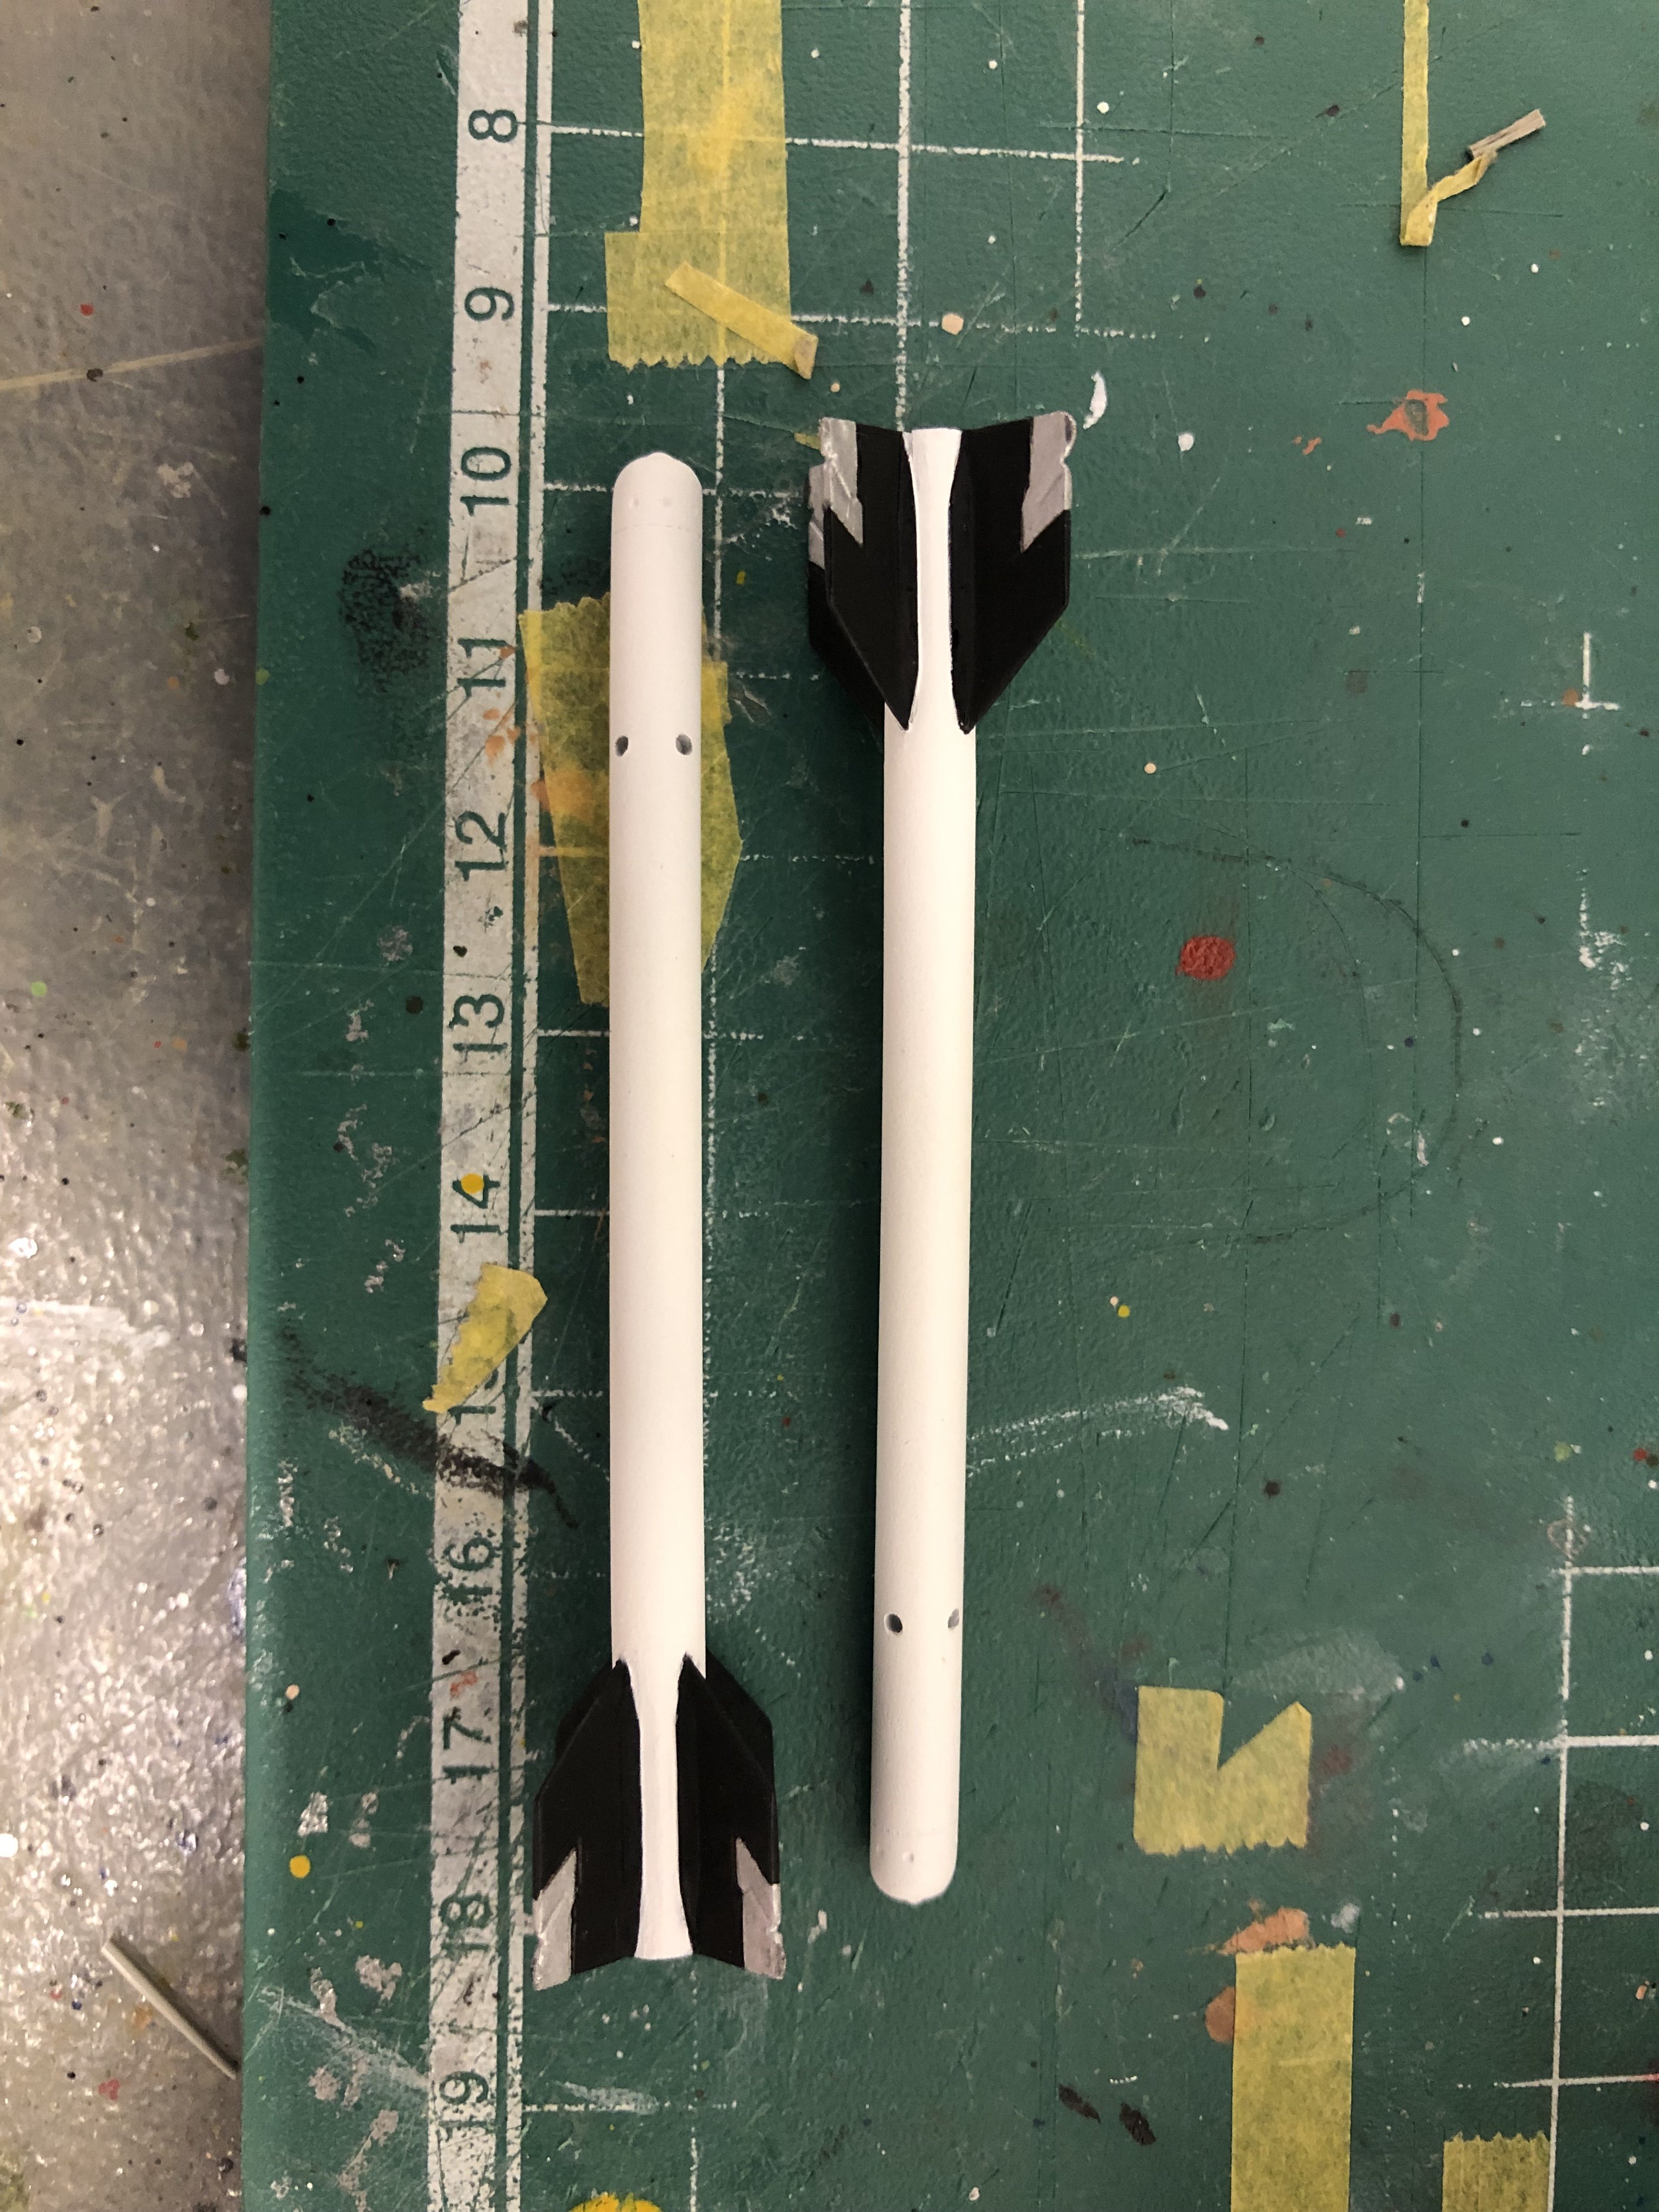
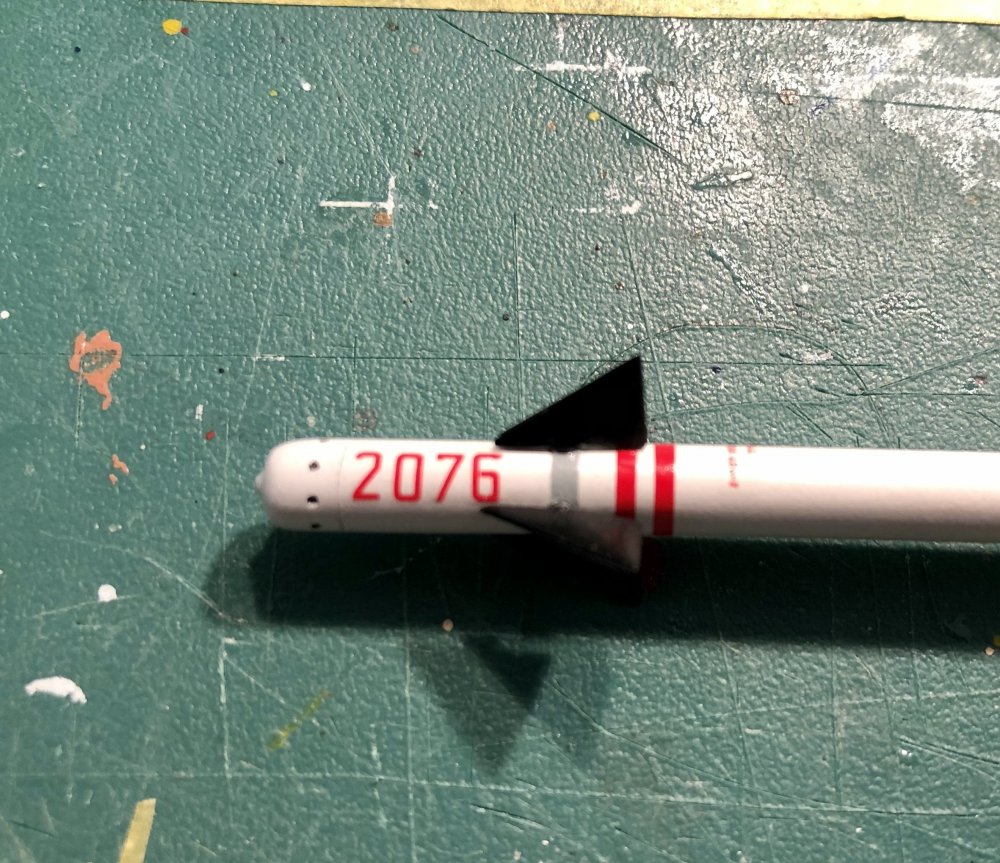
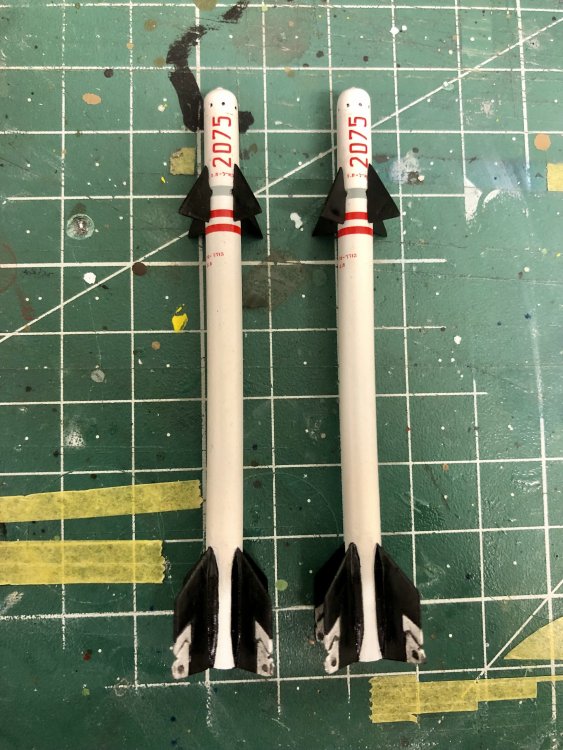
Thanks for your feedback guys! I corrected a mistake I made: both rockets had the same number! But each rocket has its own. Therefore I changed one no. to 2076: I stared today with the application of the flat varnish. Small parts, underside, left side and left wing of the aircraft already finished. I will do the right side and Right wing tonight and then post some pics.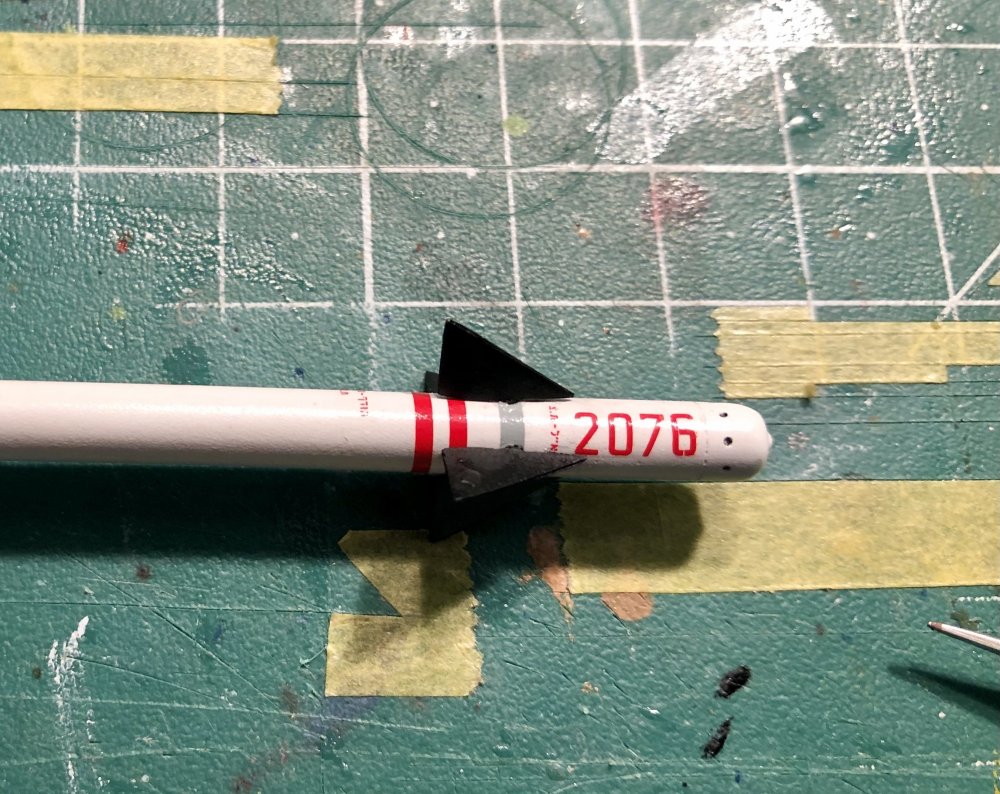
-
I can’t see any pictures!???
-
a D out of a G.... HK's B-17 conversion
Kaireckstadt replied to brahman104's topic in LSM 1/35 and Larger Work In Progress
That’s beyond awesome Craig! Amazing!- 167 replies
-
- 2
-

-
- B-17
- scratch built
- (and 1 more)
-
Israeli Mirage III C with Atar9C
Kaireckstadt replied to Kaireckstadt's topic in LSM 1/35 and Larger Work In Progress
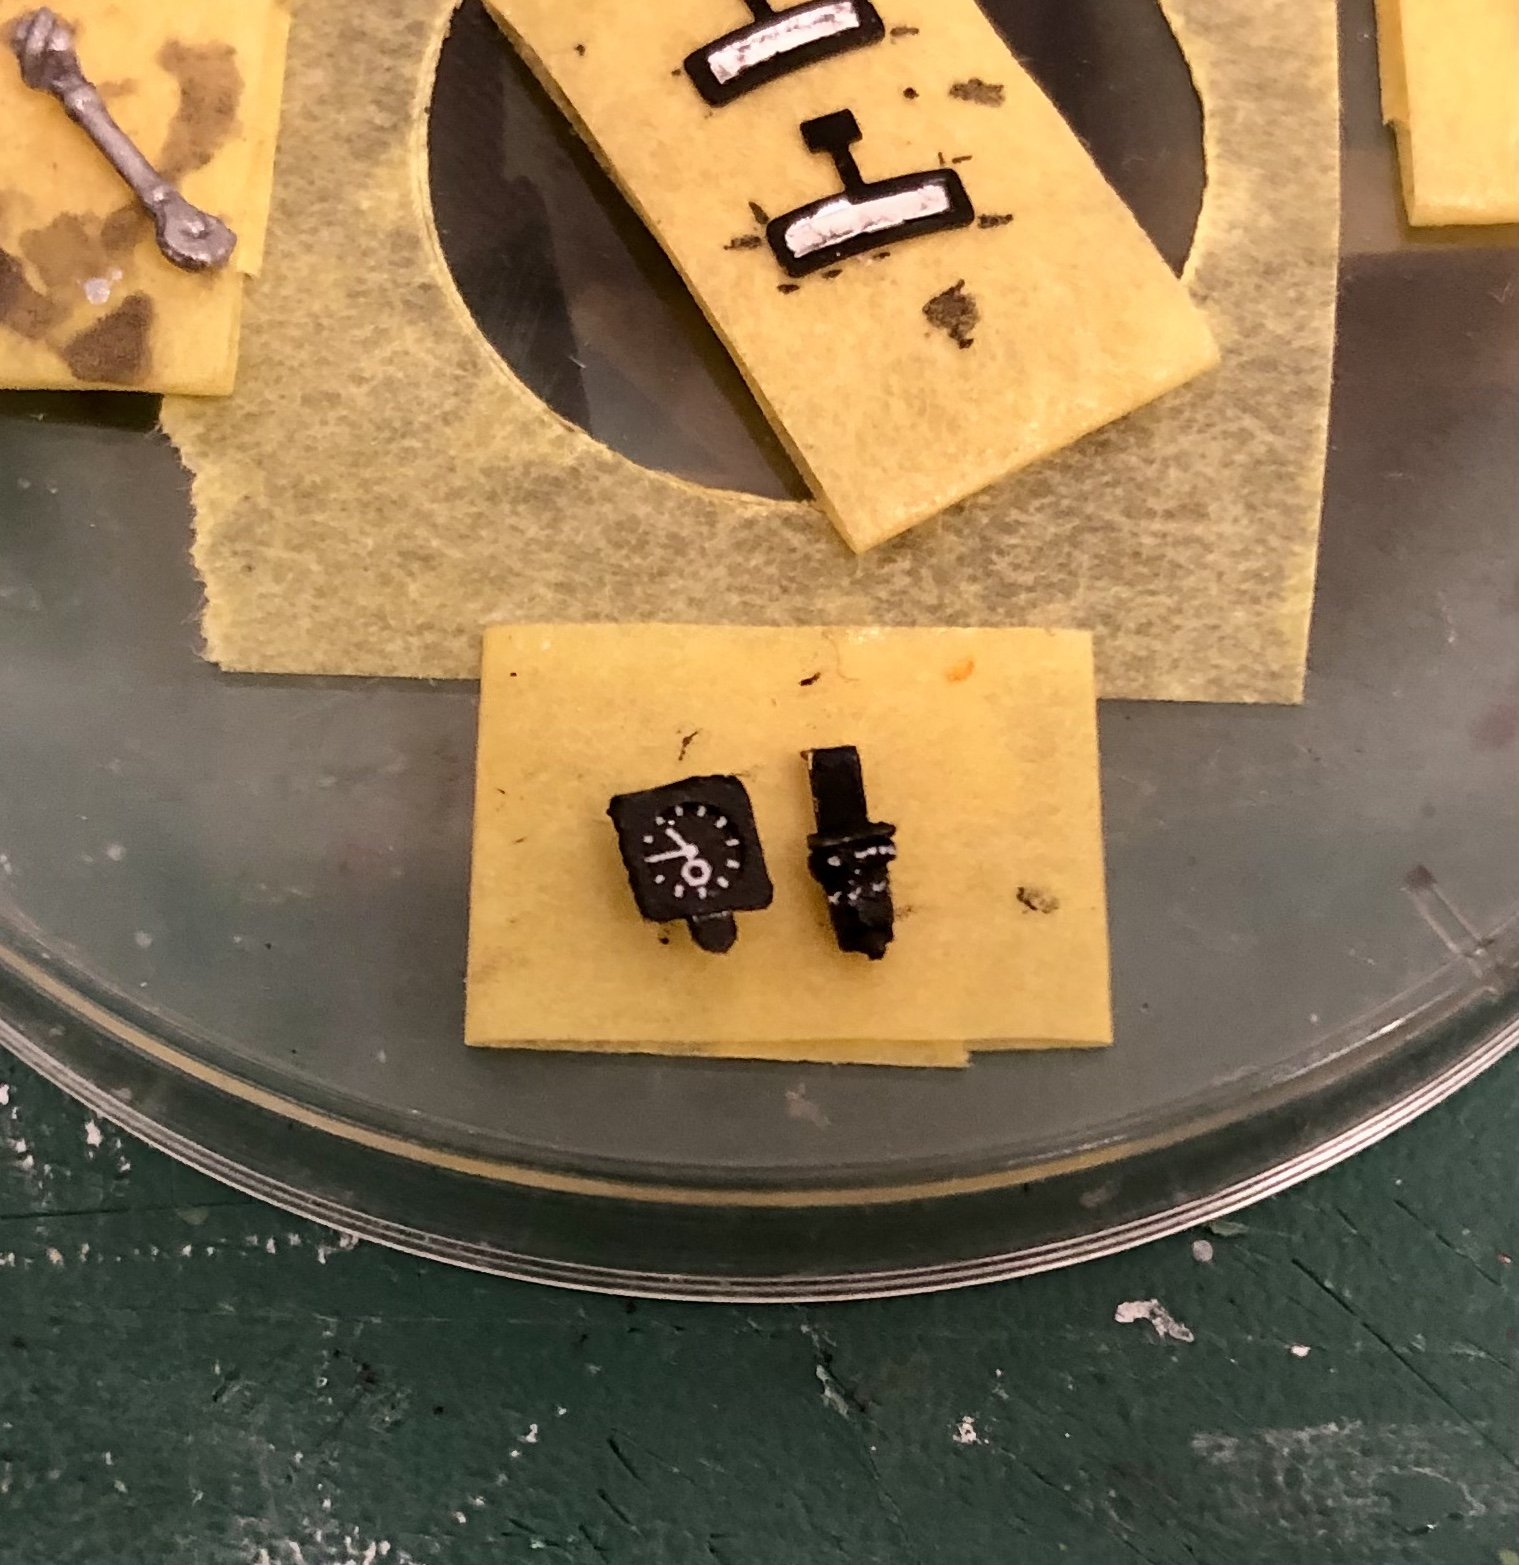
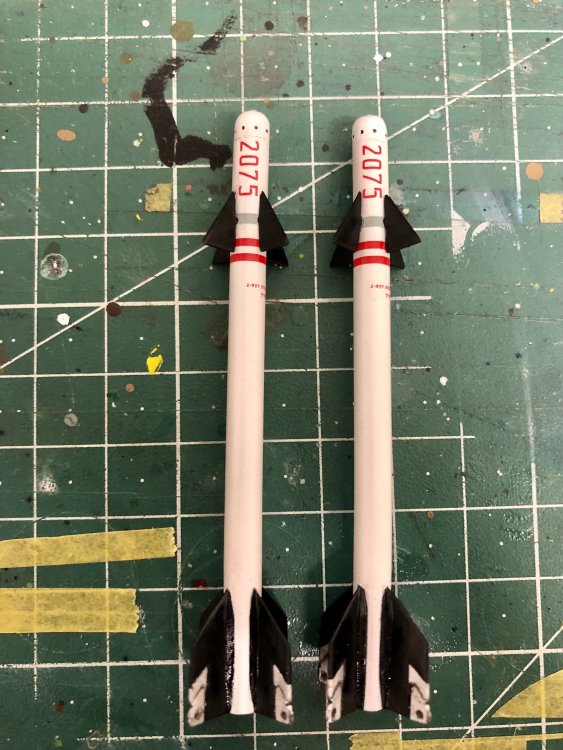
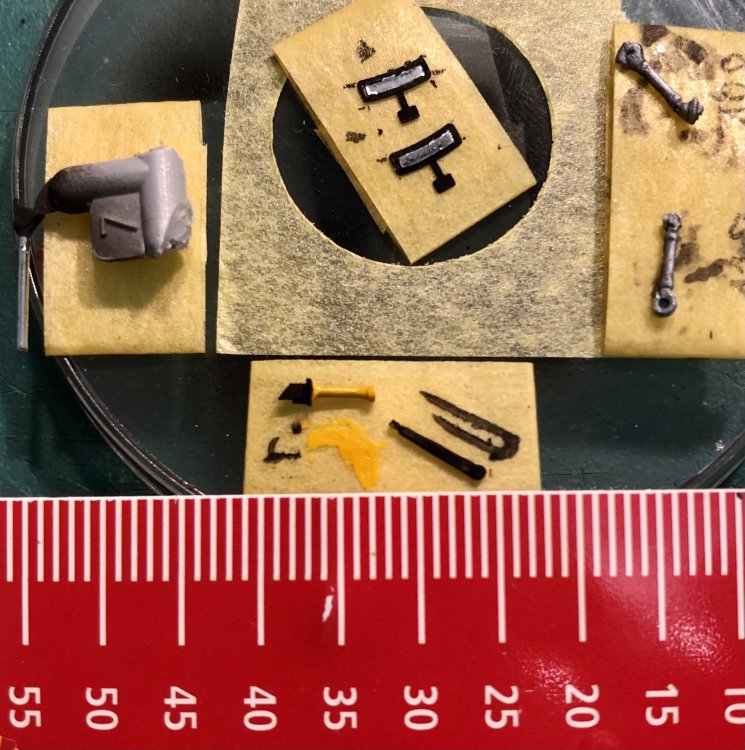
Thanks for your feedback Craig and Mark! Much appreciated! Today I finished the Shafrir2 rockets (11 decals each) and the 2 instruments for the windshield frame: the onboard clock and the spare compass. Also added a housing and cable for the clock. Tonight I will start with the flat varnish.


-
Two little Brewsters, now a Buddy Build.
Kaireckstadt replied to Clunkmeister's topic in LSM 1/35 and Larger Work In Progress
In my eyes the sewing needle is a good idea: just melts the material. But there is a risk that it might be difficult to get it out fast enough. Maybe a test on an old part or clear sprue would be good. -
Israeli Mirage III C with Atar9C
Kaireckstadt replied to Kaireckstadt's topic in LSM 1/35 and Larger Work In Progress
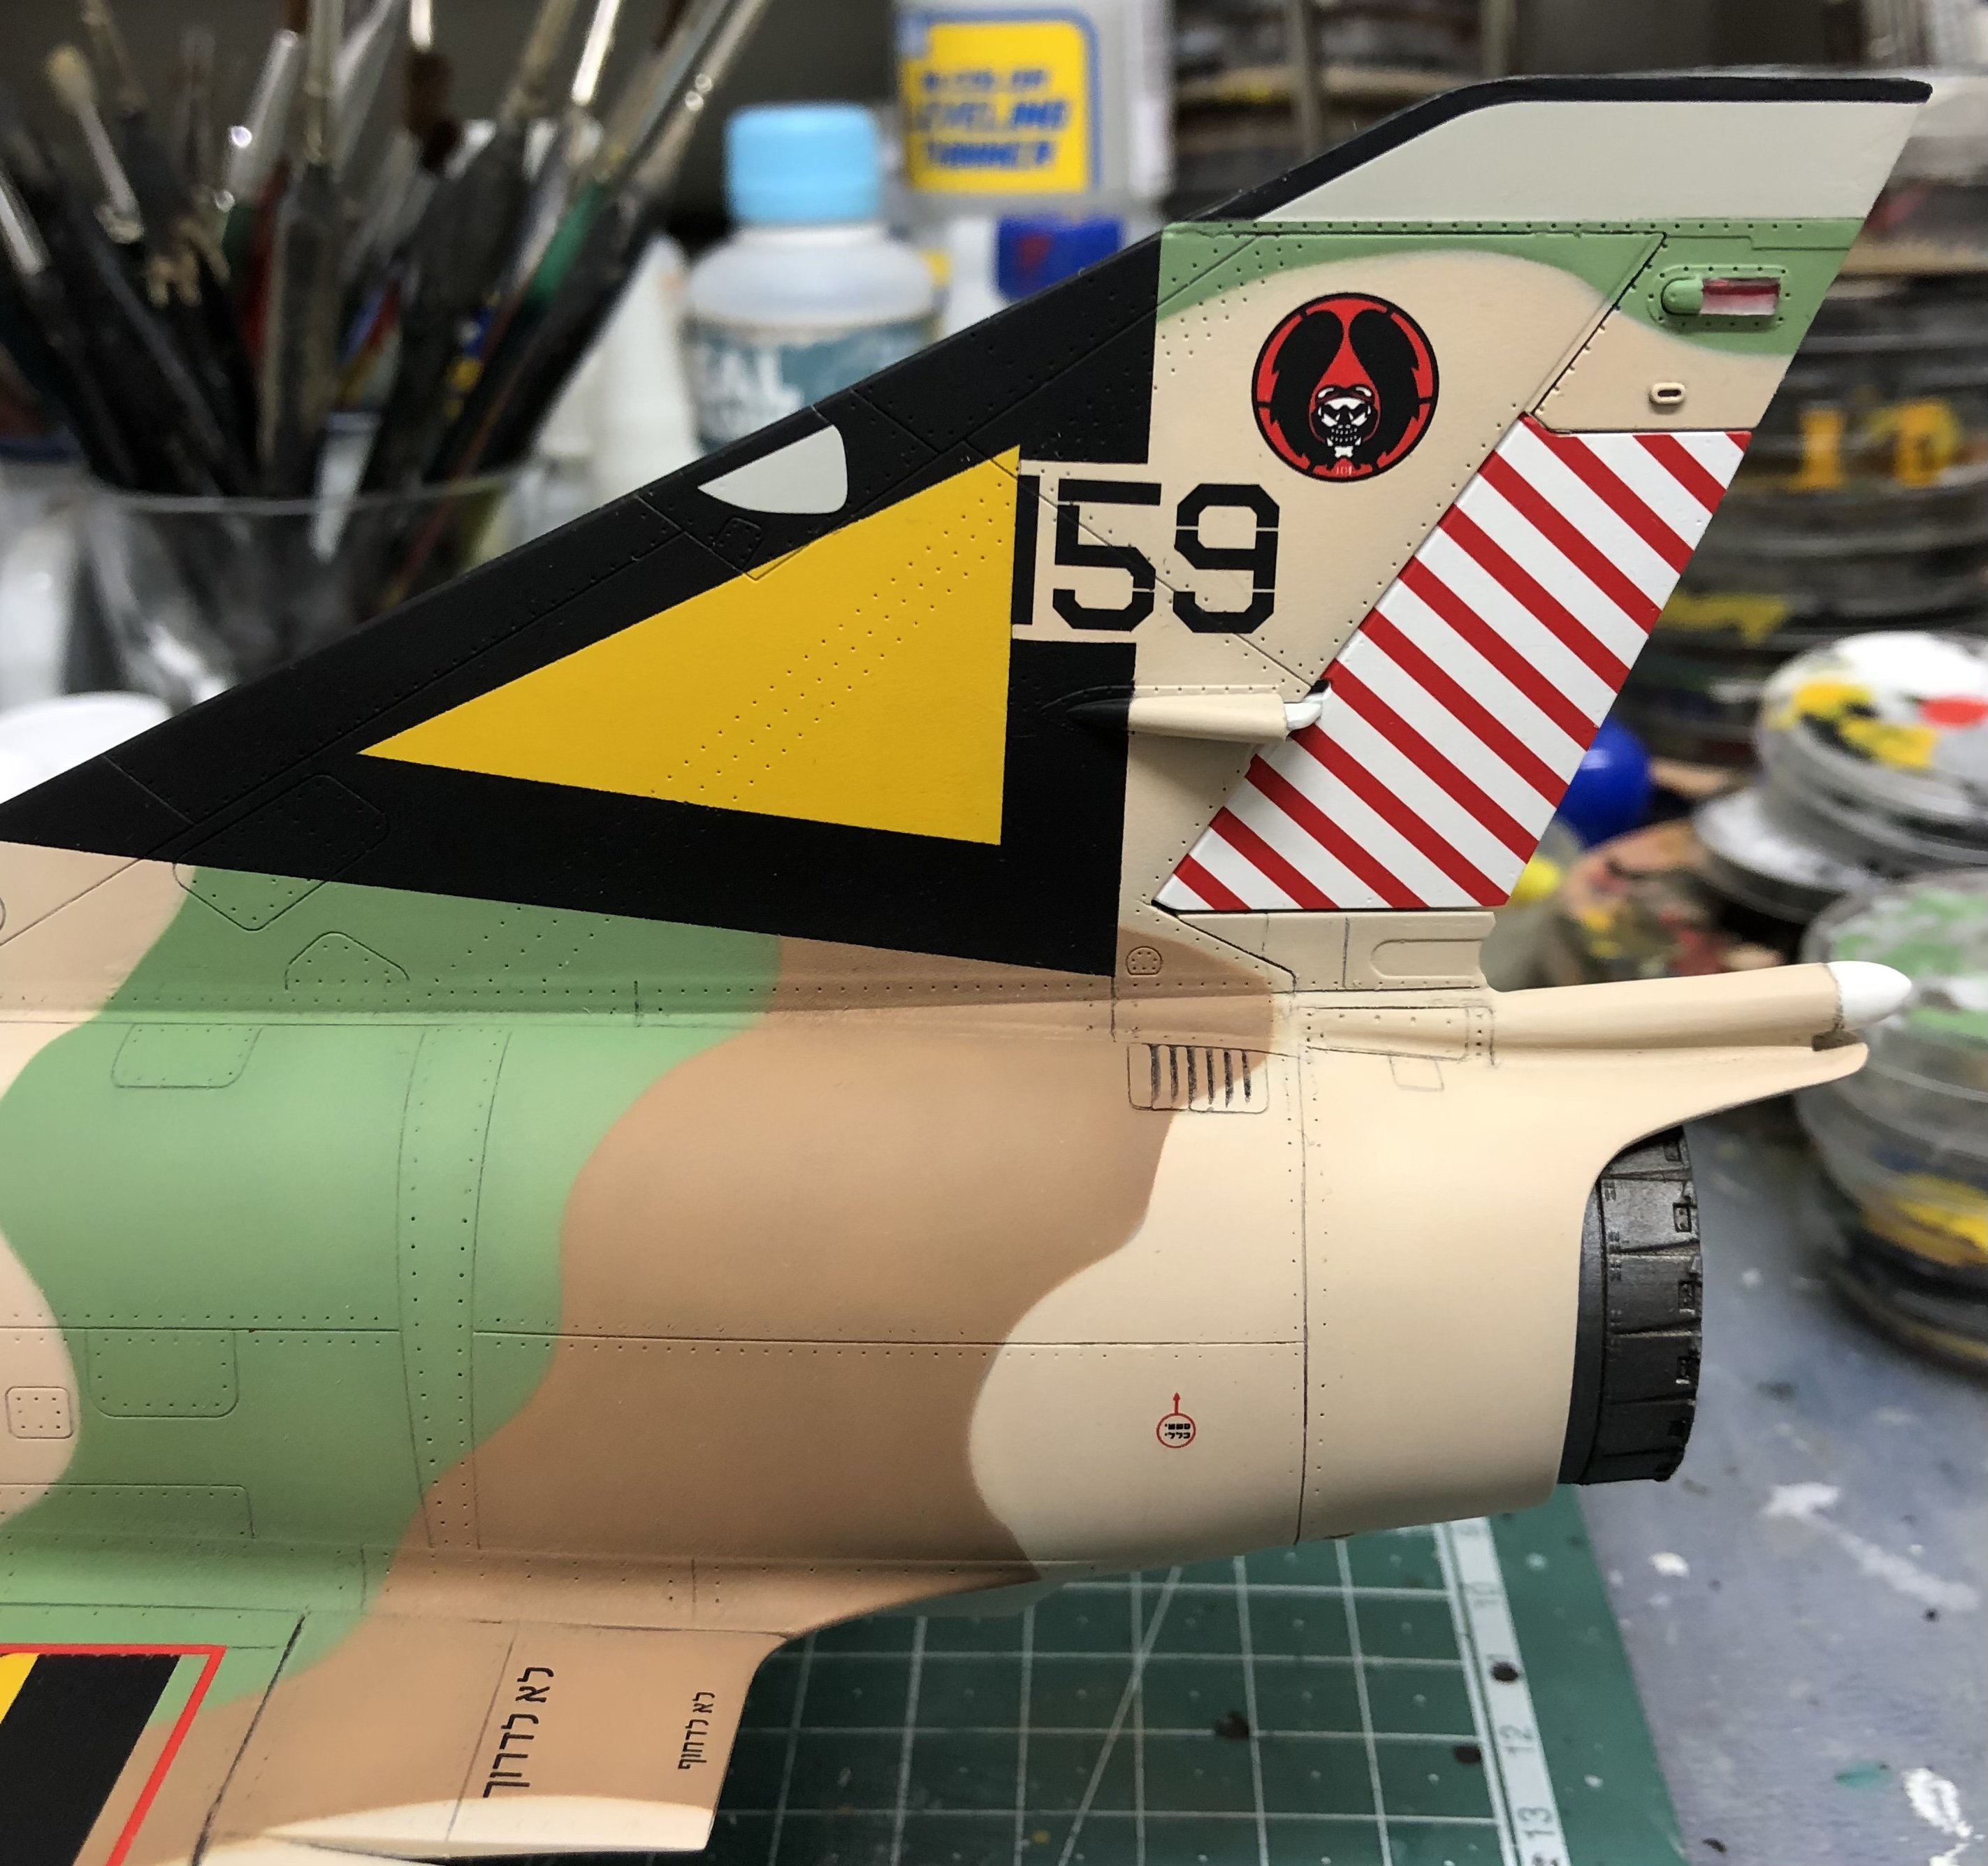
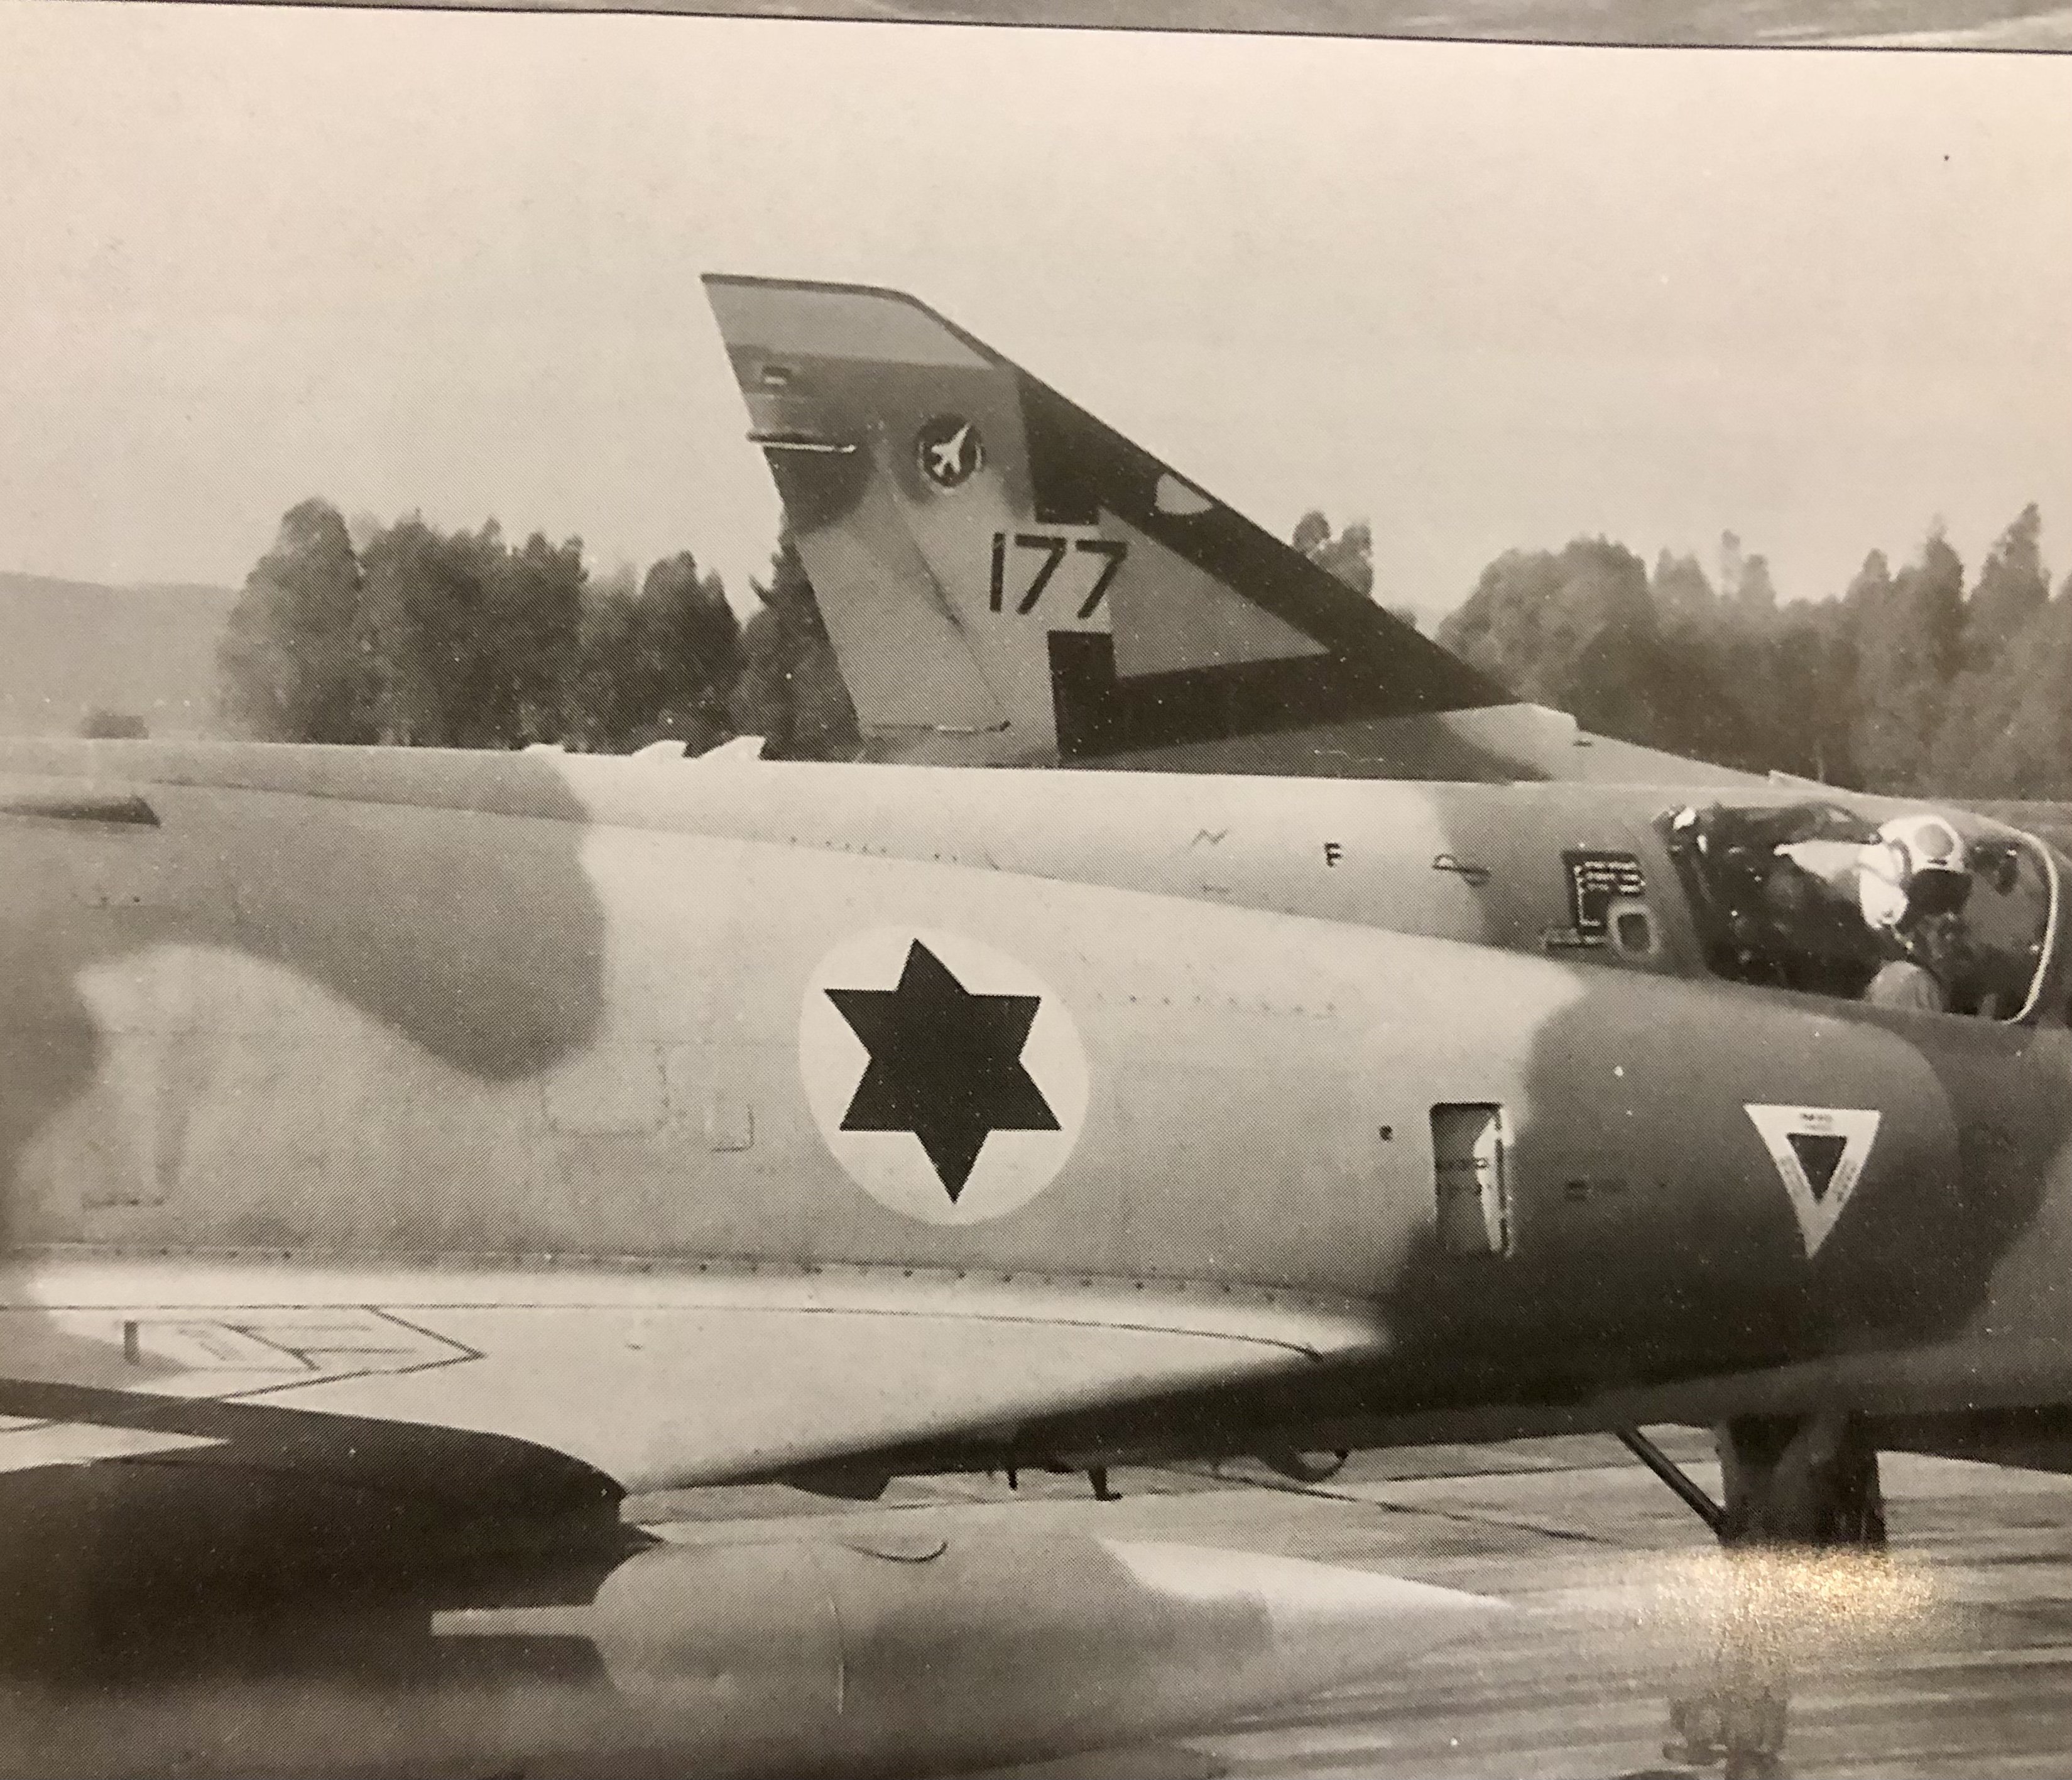
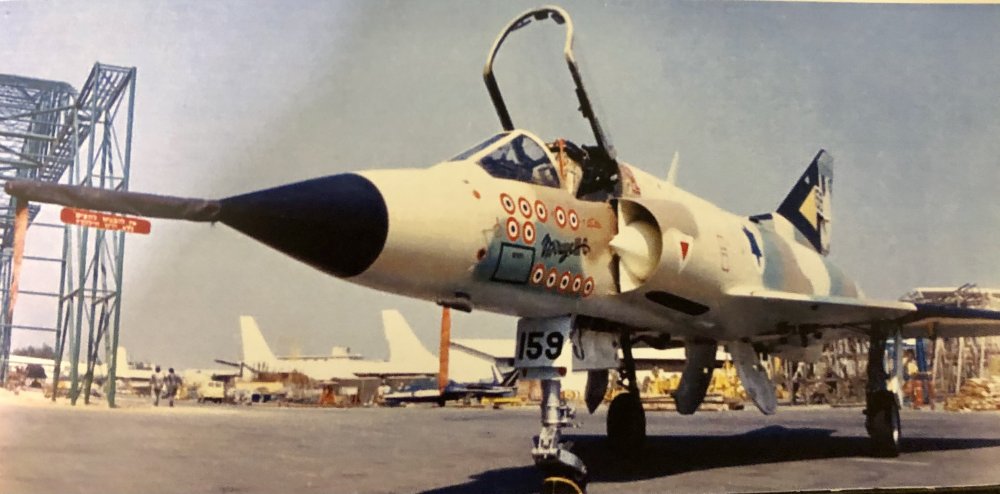
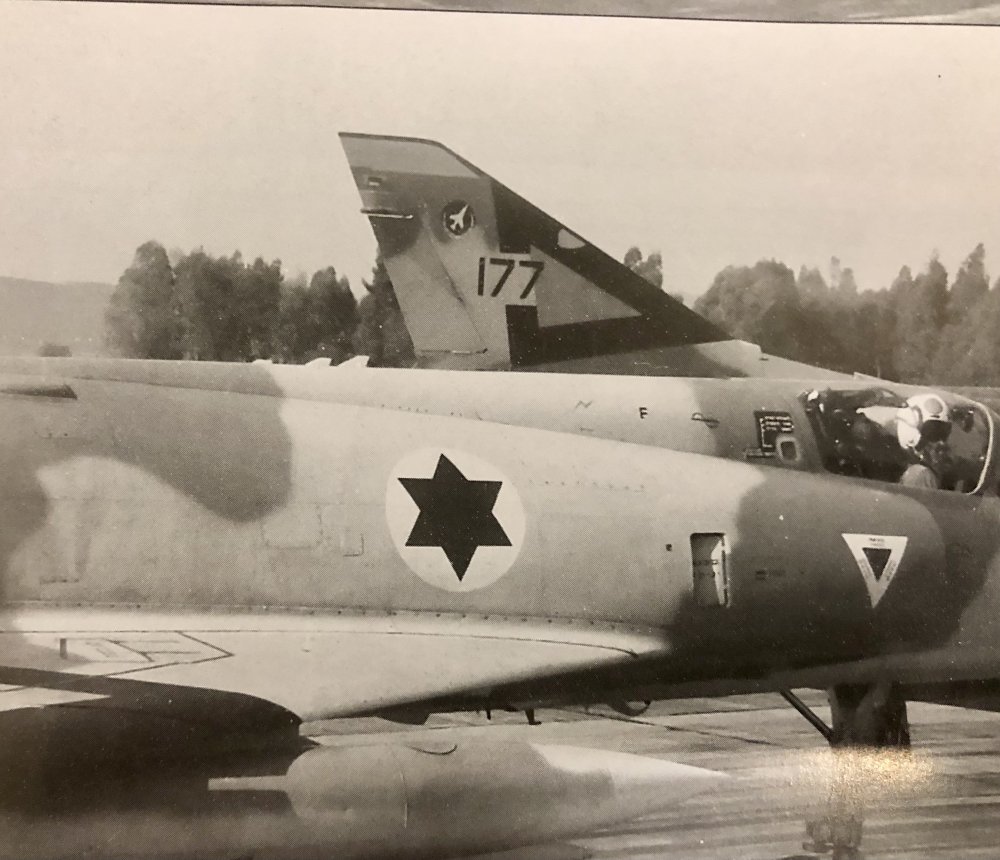
Thank you Peter! I will use Xtracolor flat varnish to achieve a dull surface. On all photos available to me from Israeli Air Force Mirage III with camouflage the color is dull: What do you think and what did you use for your beautiful Kfir?

-
Crane Jane and Maz Man
Kaireckstadt replied to RichO's topic in LSM 1/35 and Larger Work In Progress
+1! simply wow! Kai -
Great build and color modulation John. I love these 3-tone-camouflages and you beautifully captured the look. Colorful eyecatching nose-art!
-
Bronco 1/35 Type XXIII U-boot
Kaireckstadt replied to BlrwestSiR's topic in LSM 1/35 and Larger Work In Progress
That looks absolutely convincing! Can‘t wait to see it finished! -
Israeli Mirage III C with Atar9C
Kaireckstadt replied to Kaireckstadt's topic in LSM 1/35 and Larger Work In Progress
Thanks for your feedback guys! Just 2 more details to prepare for the windshield (included in Eduard/ Italeri!!) and then flat varnish. -
Israeli Mirage III C with Atar9C
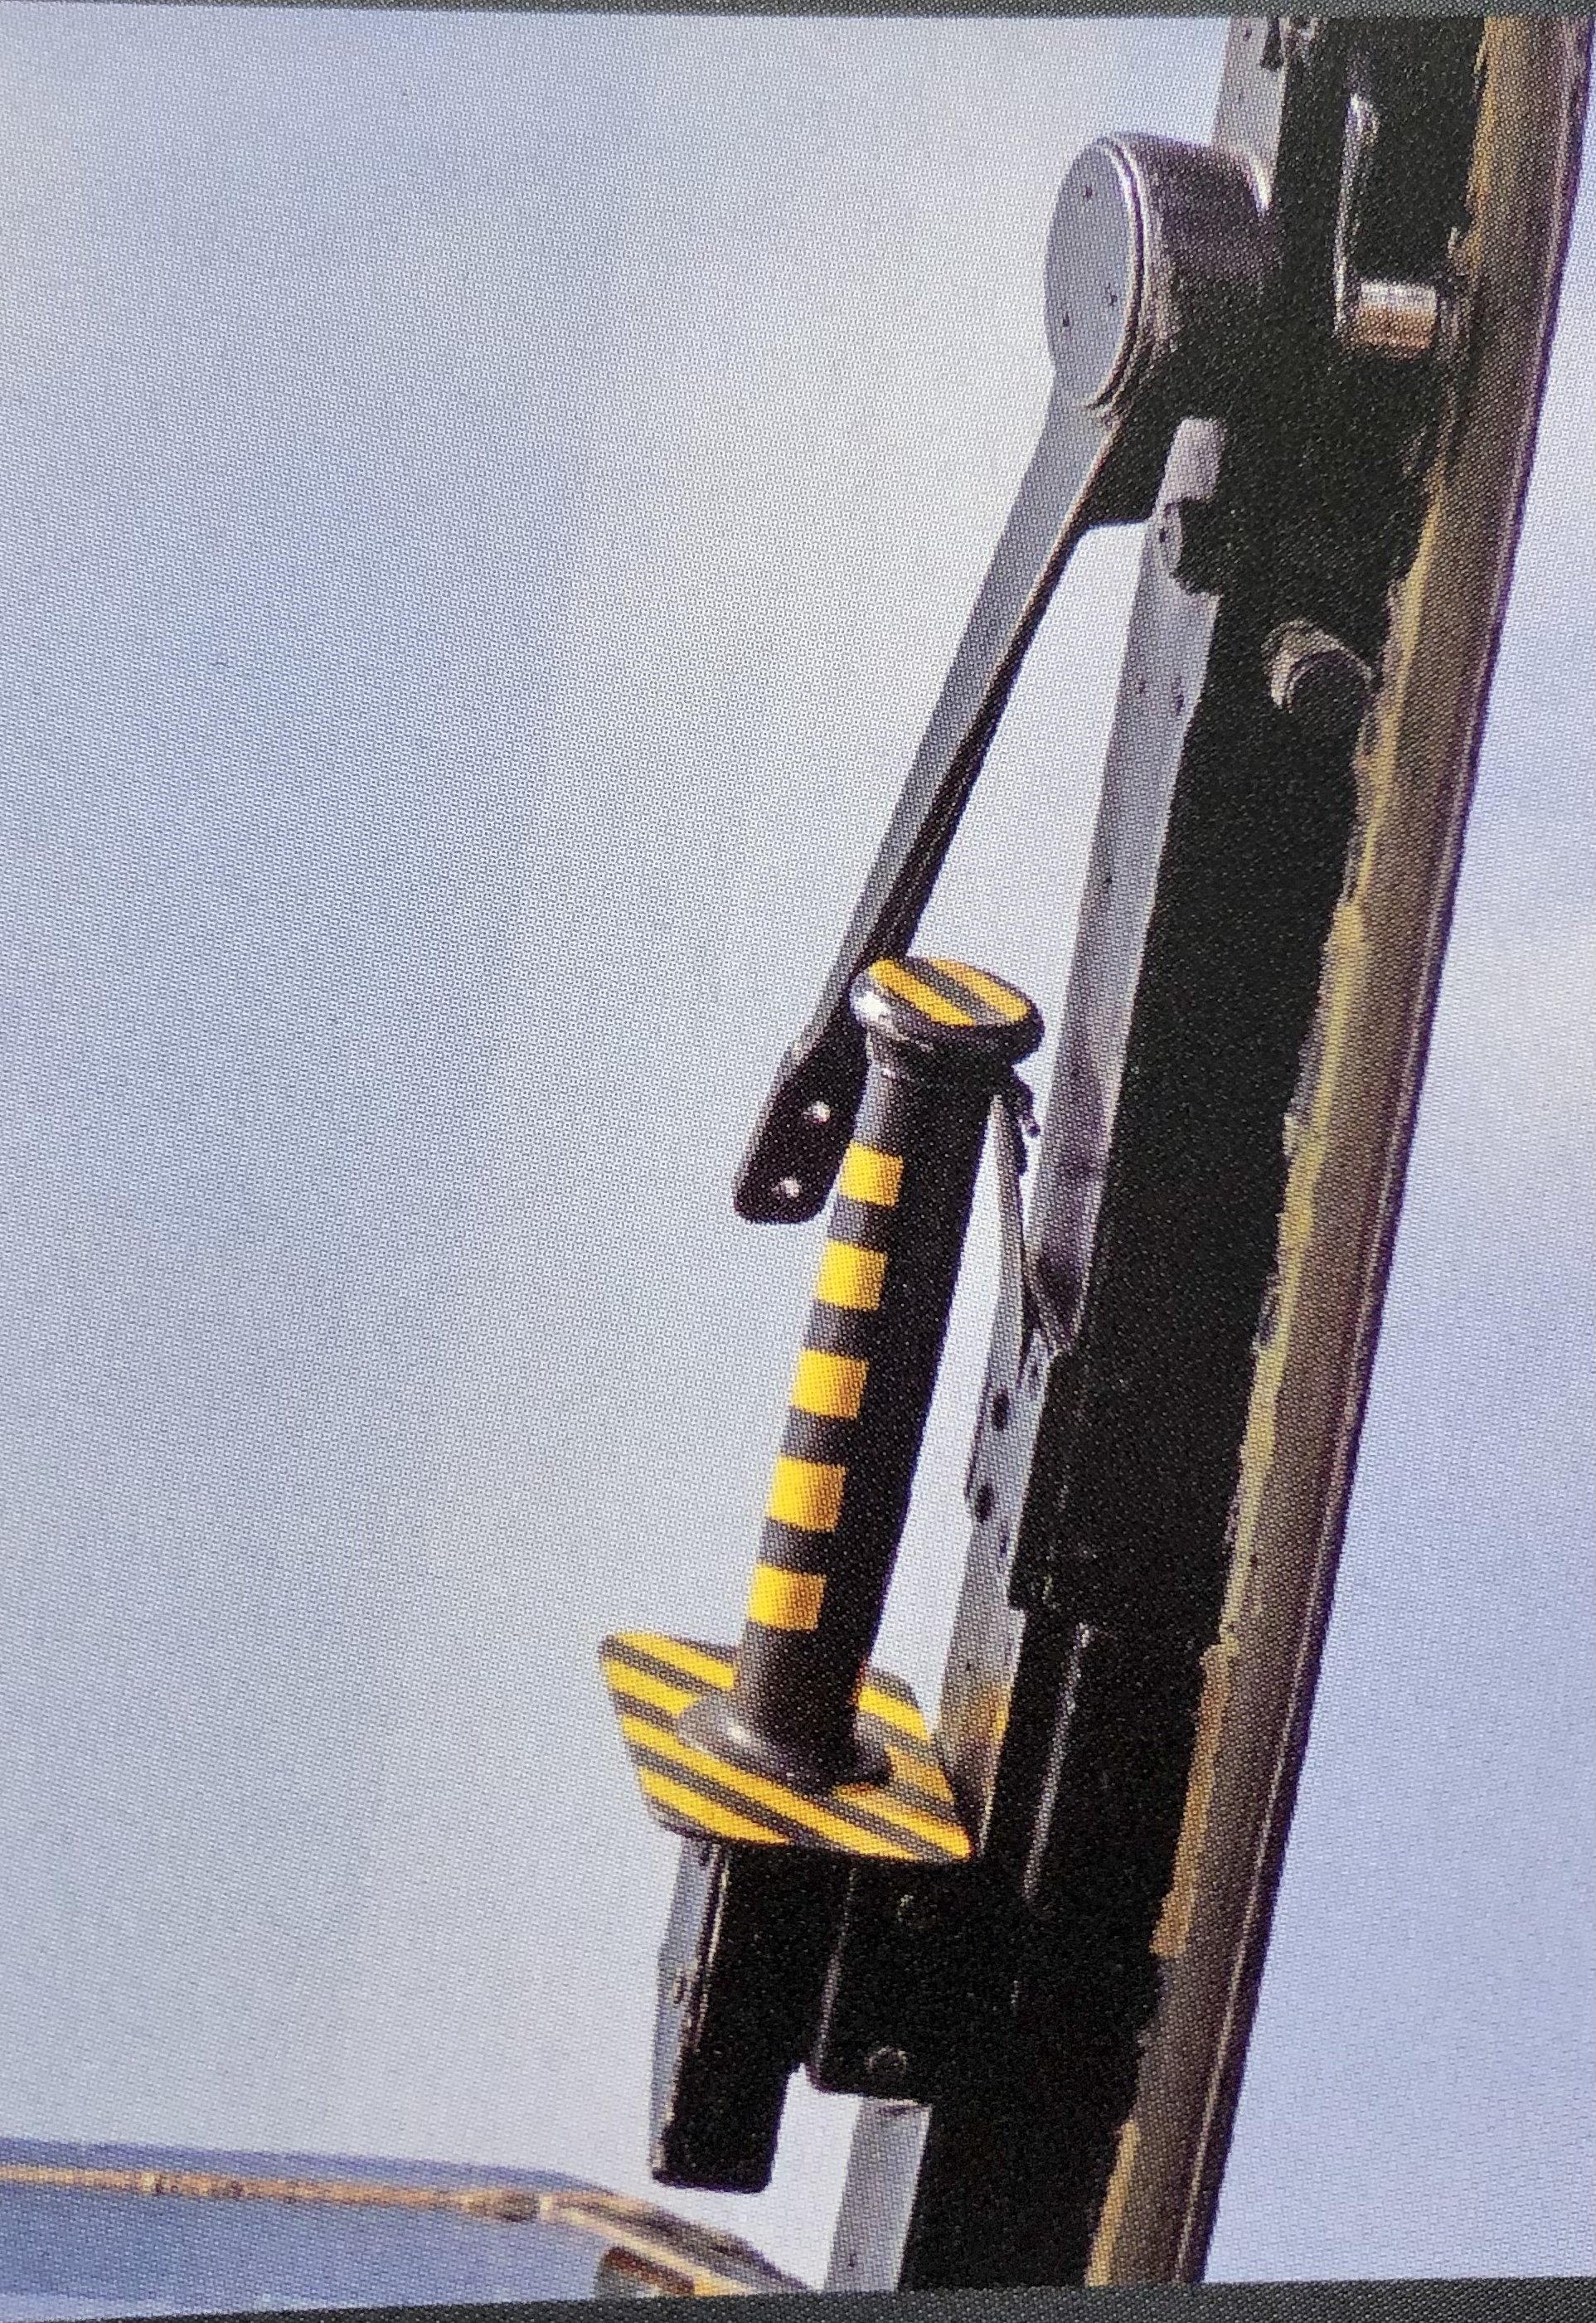
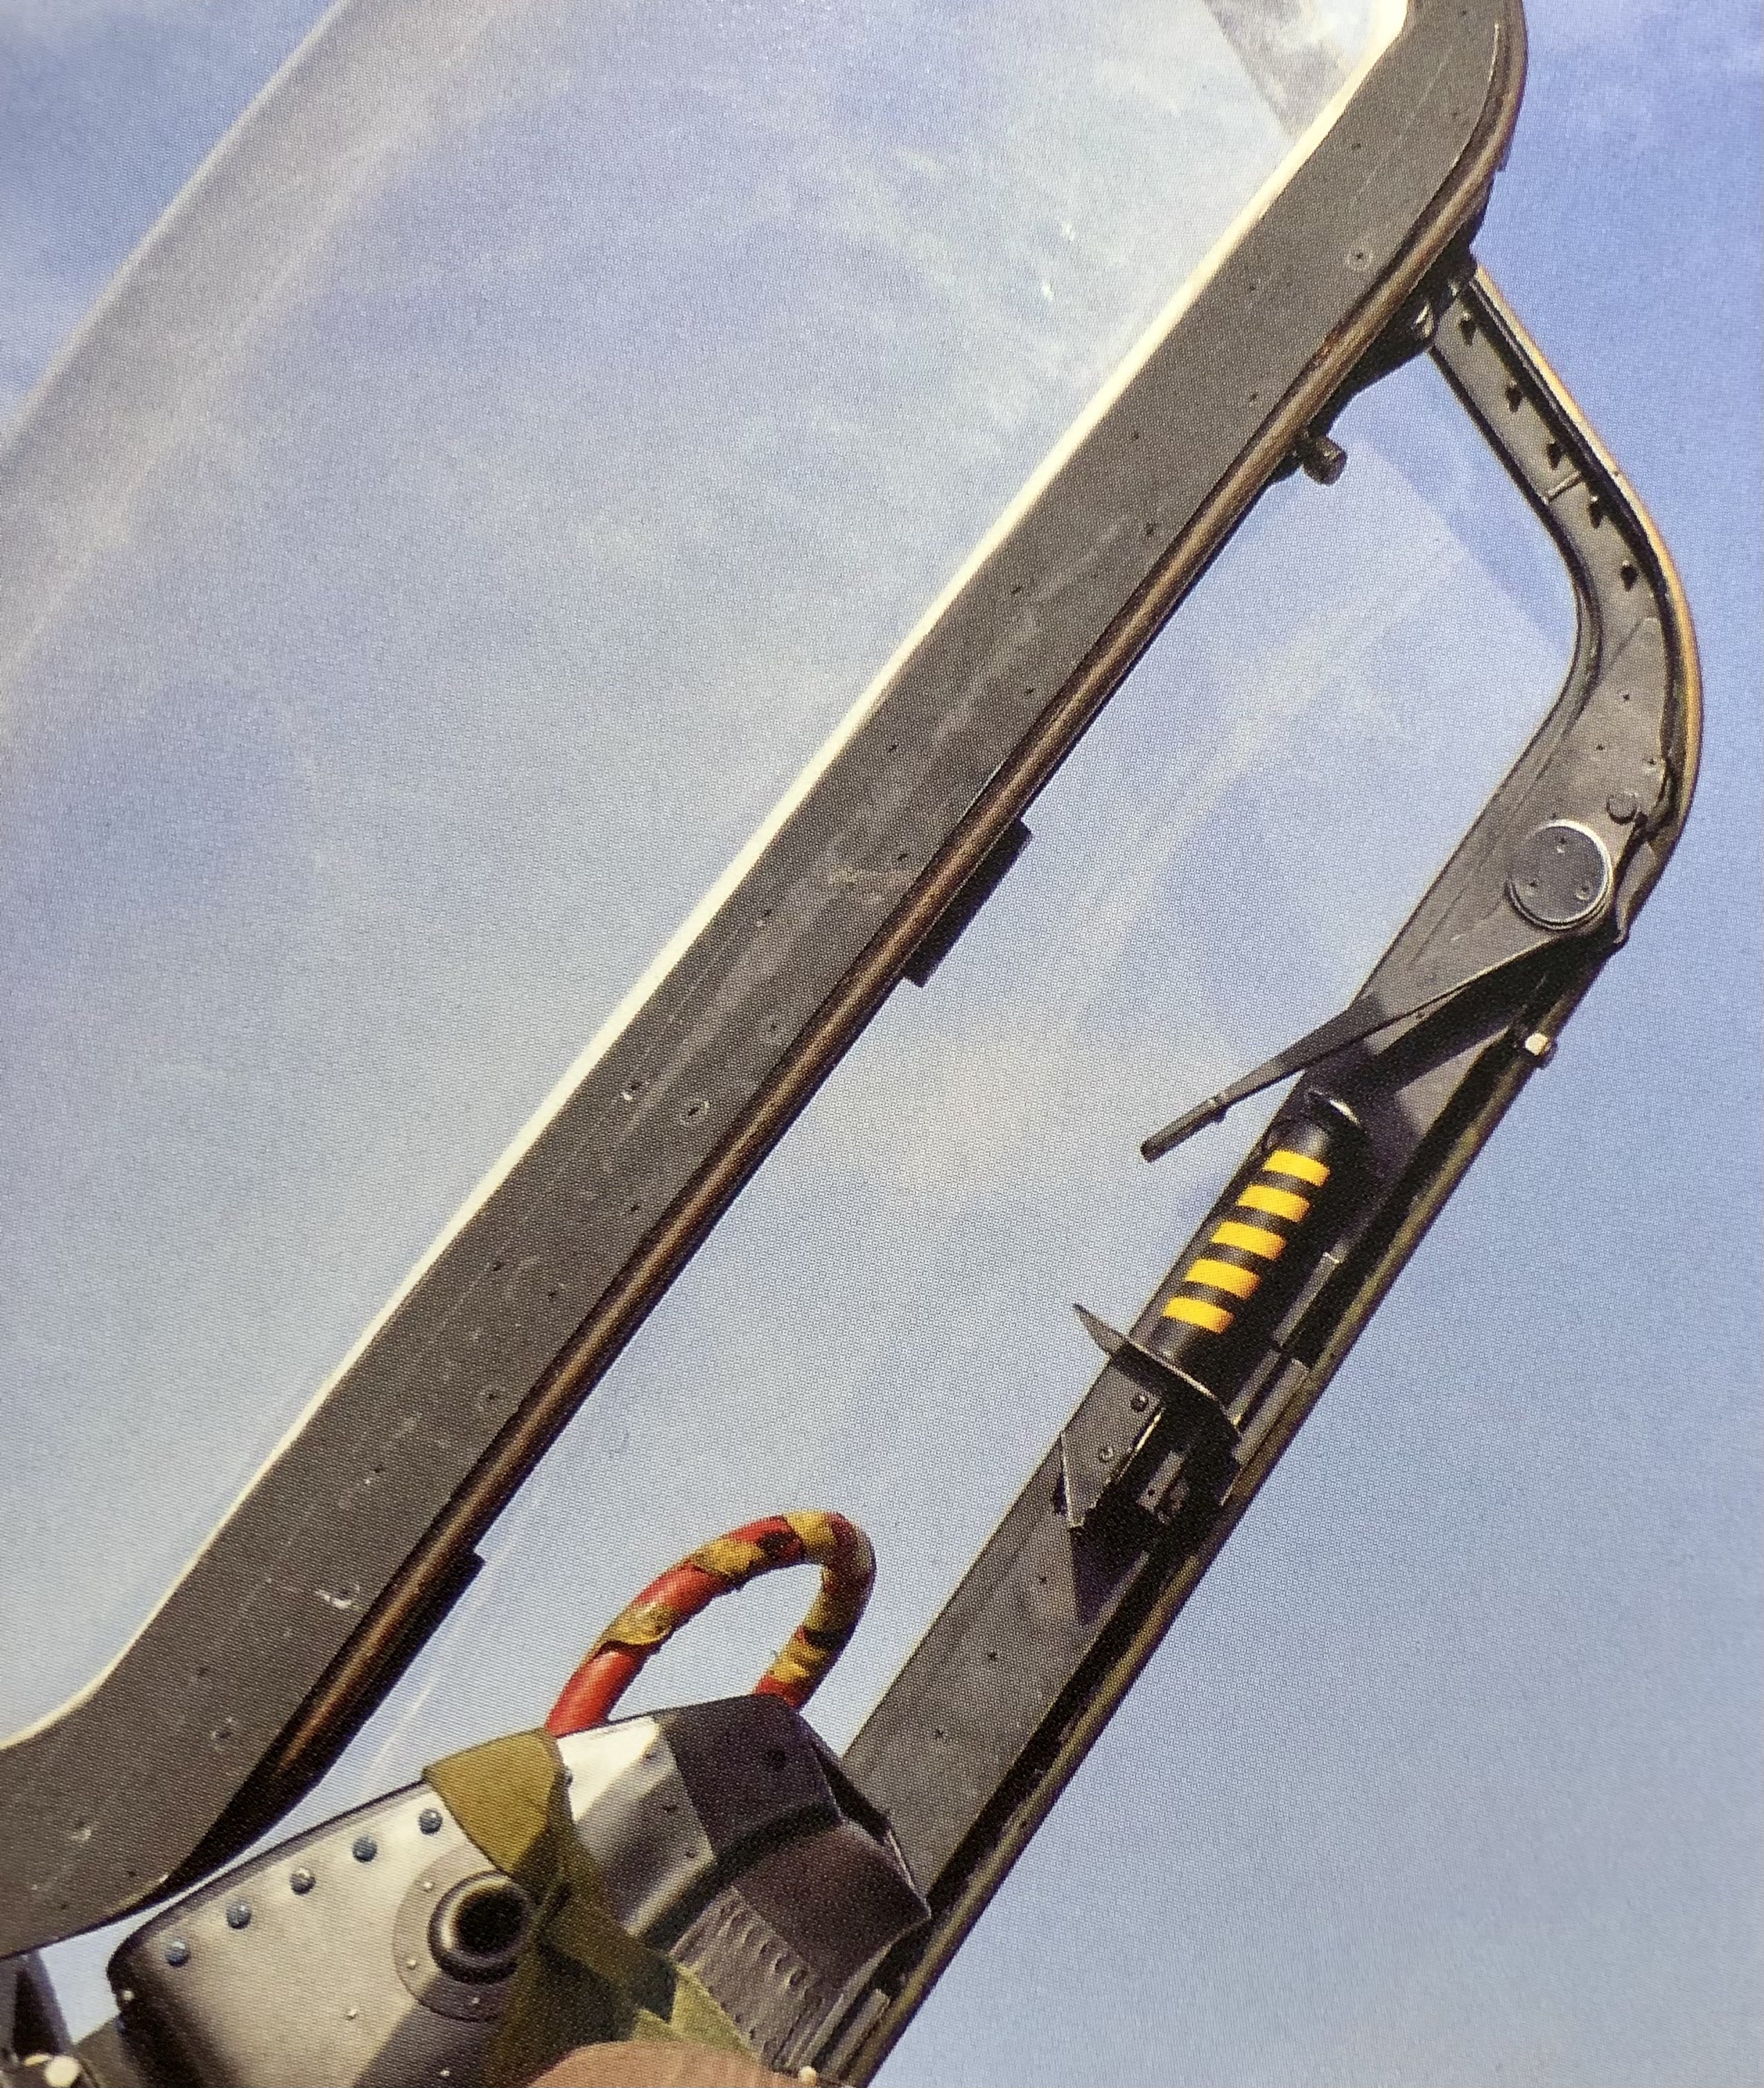
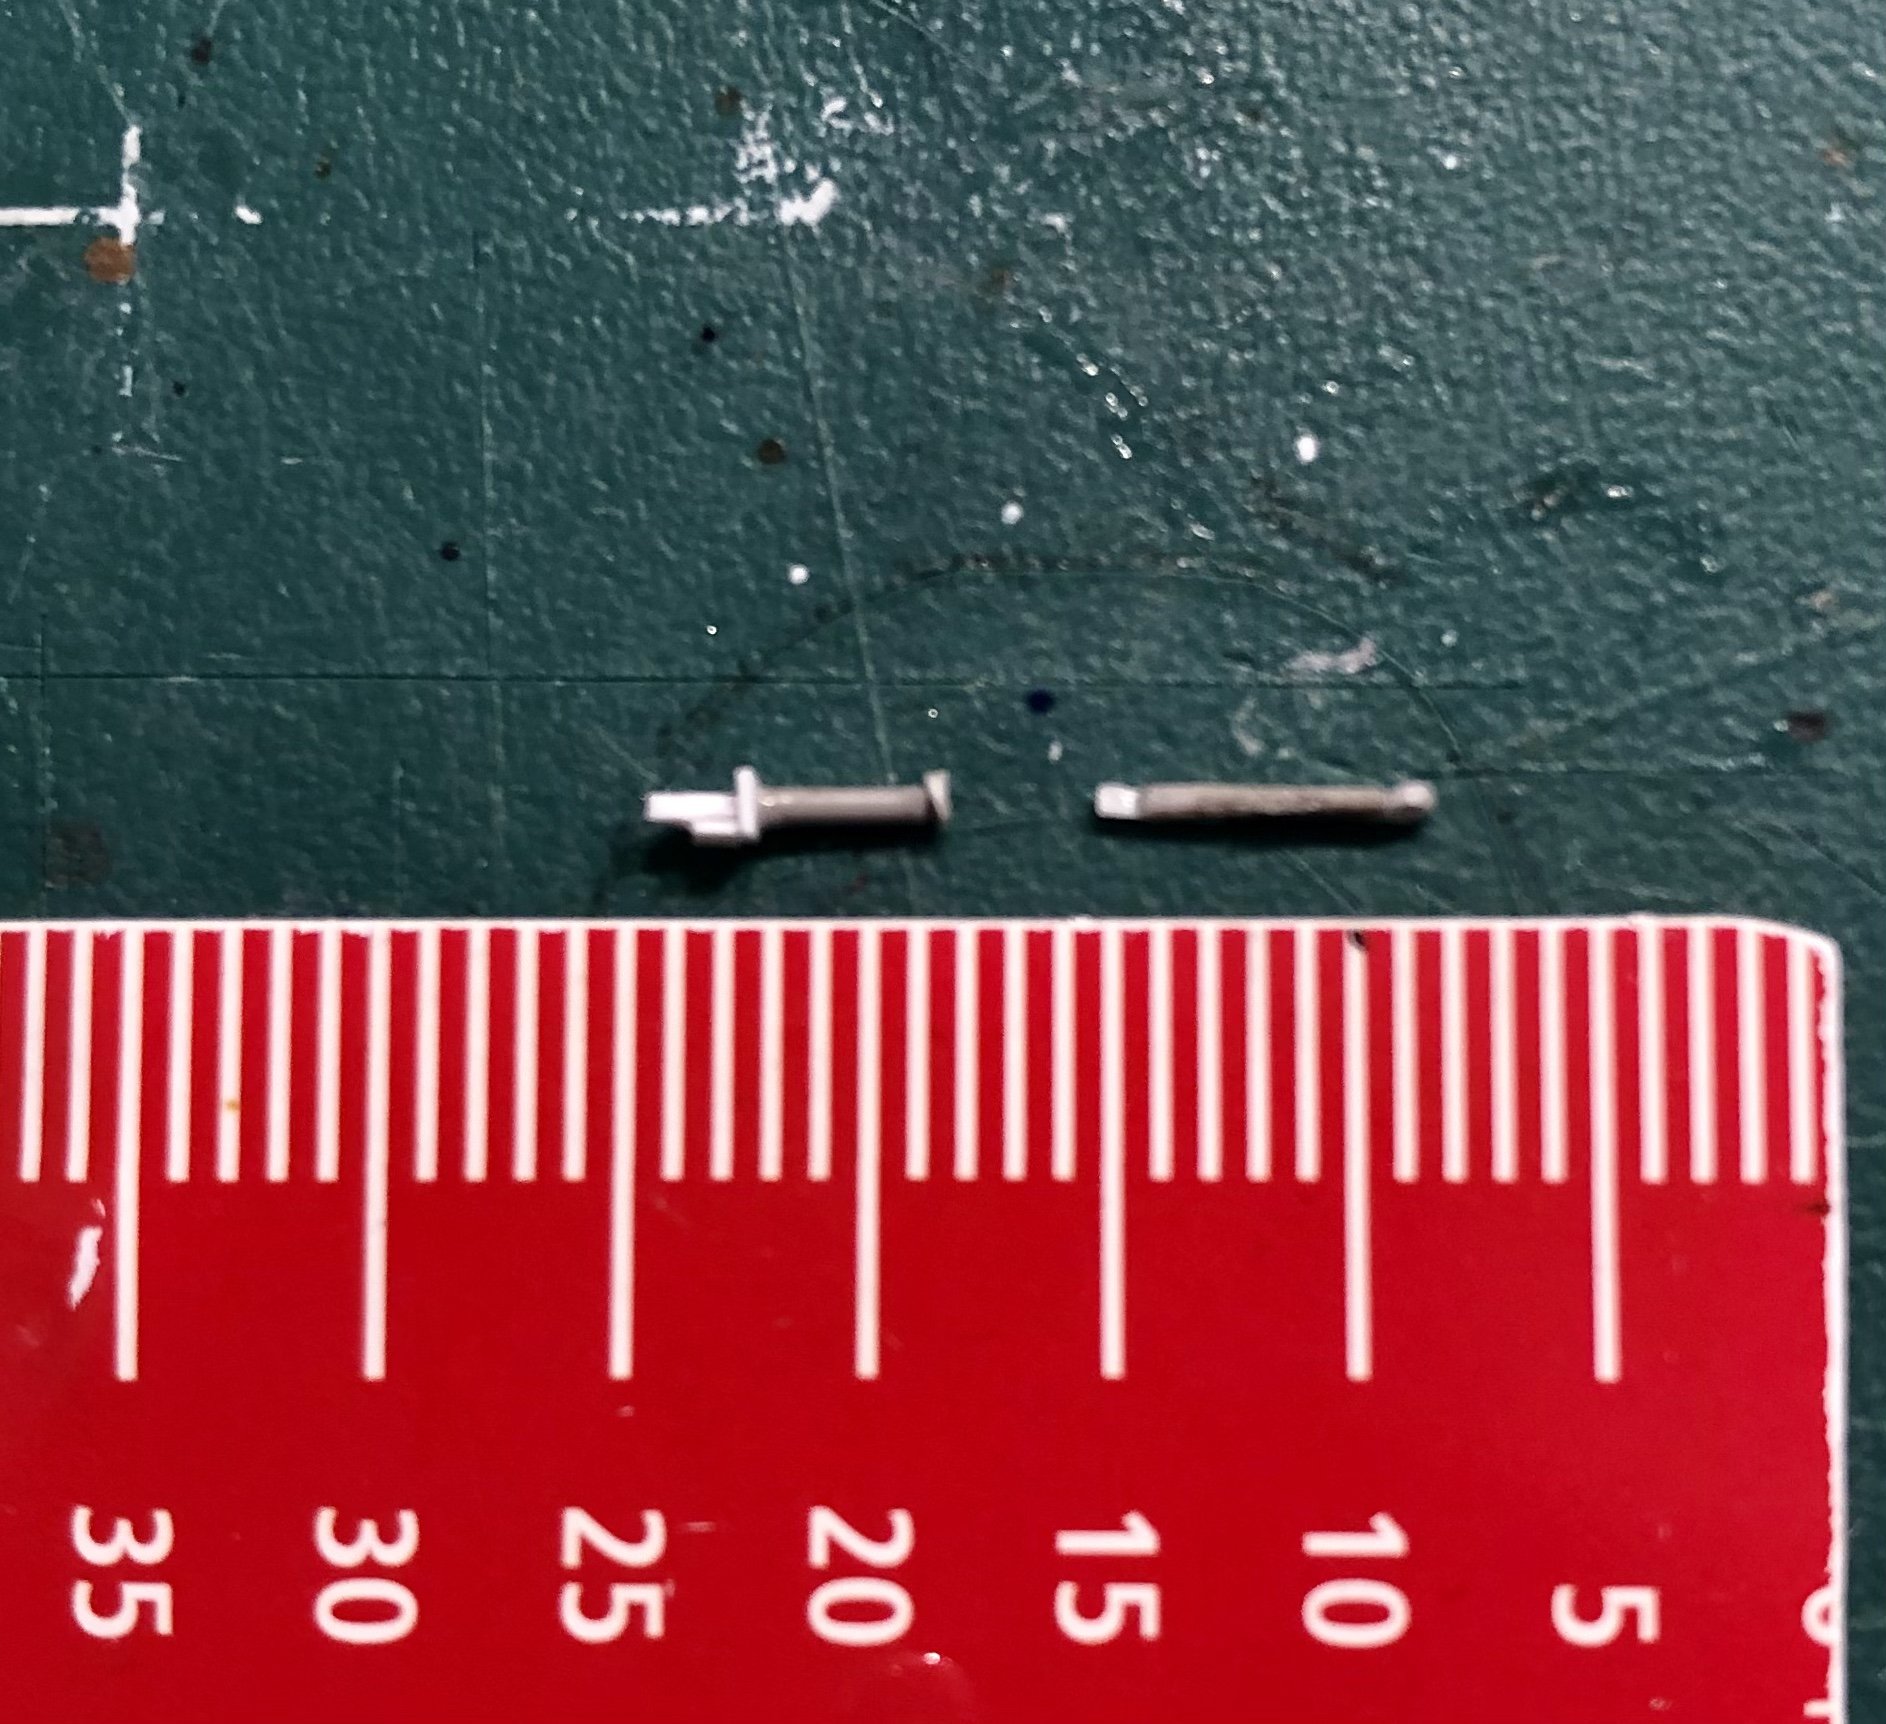
Kaireckstadt replied to Kaireckstadt's topic in LSM 1/35 and Larger Work In Progress
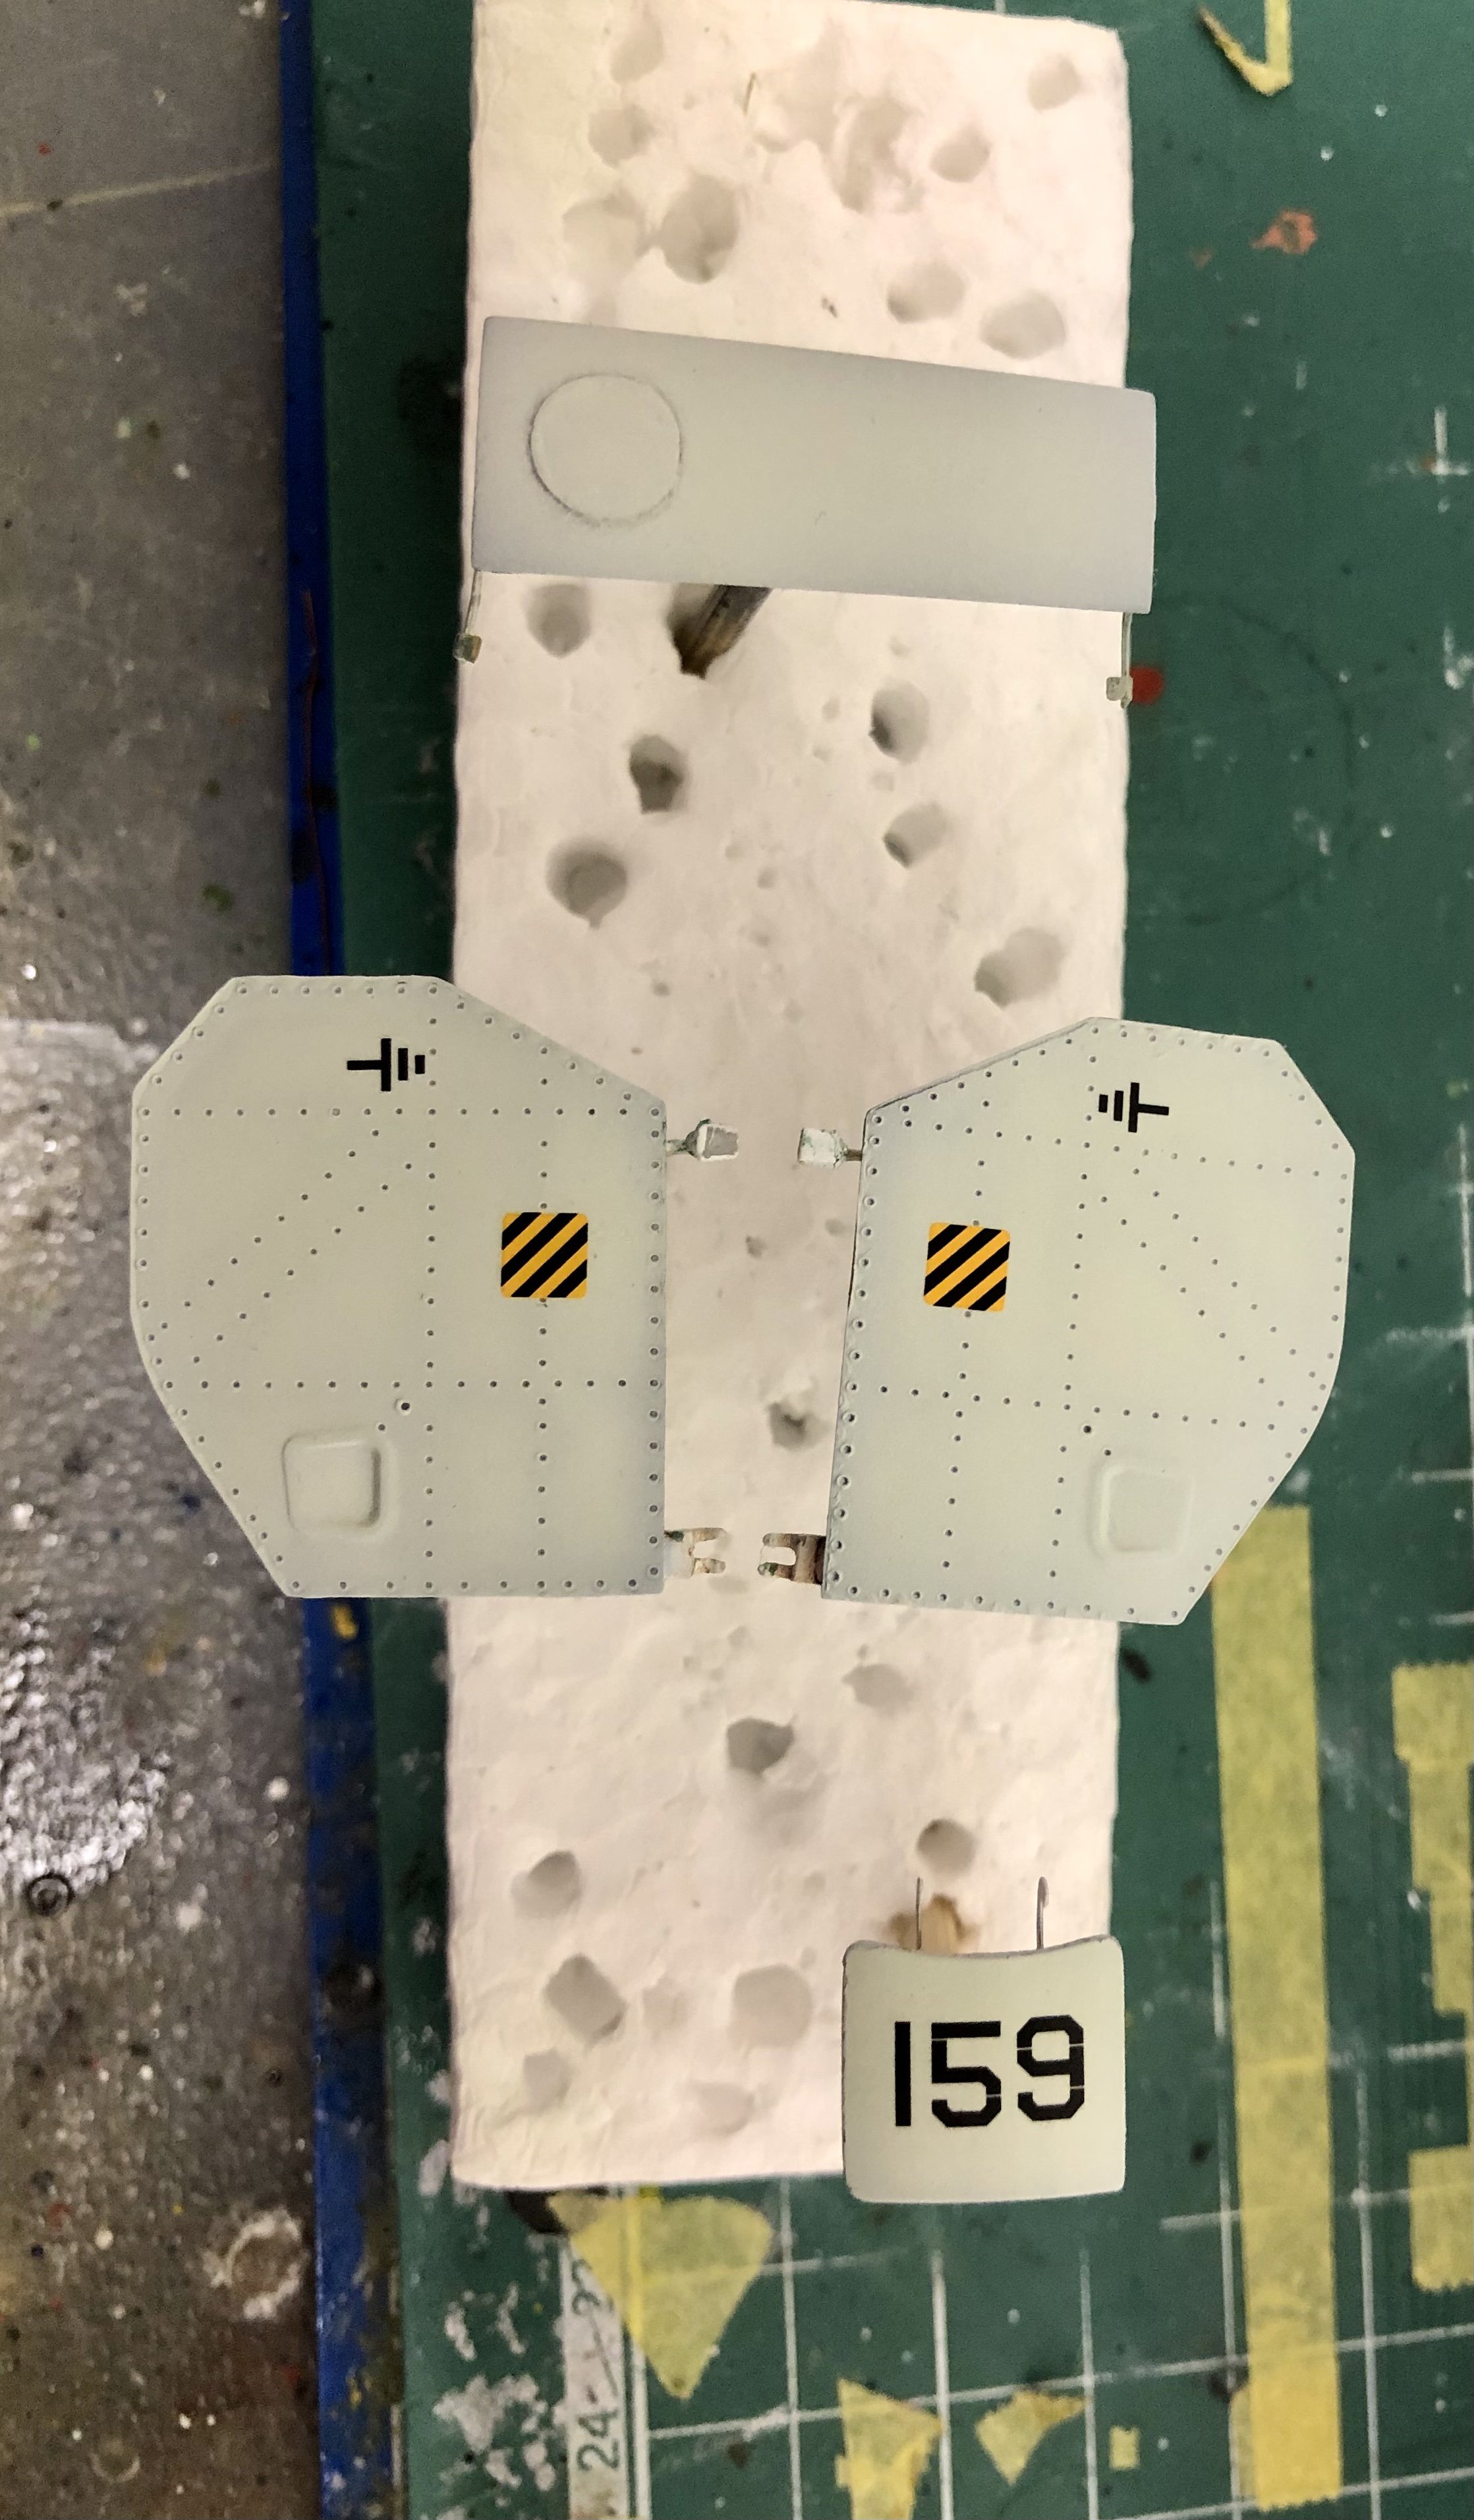
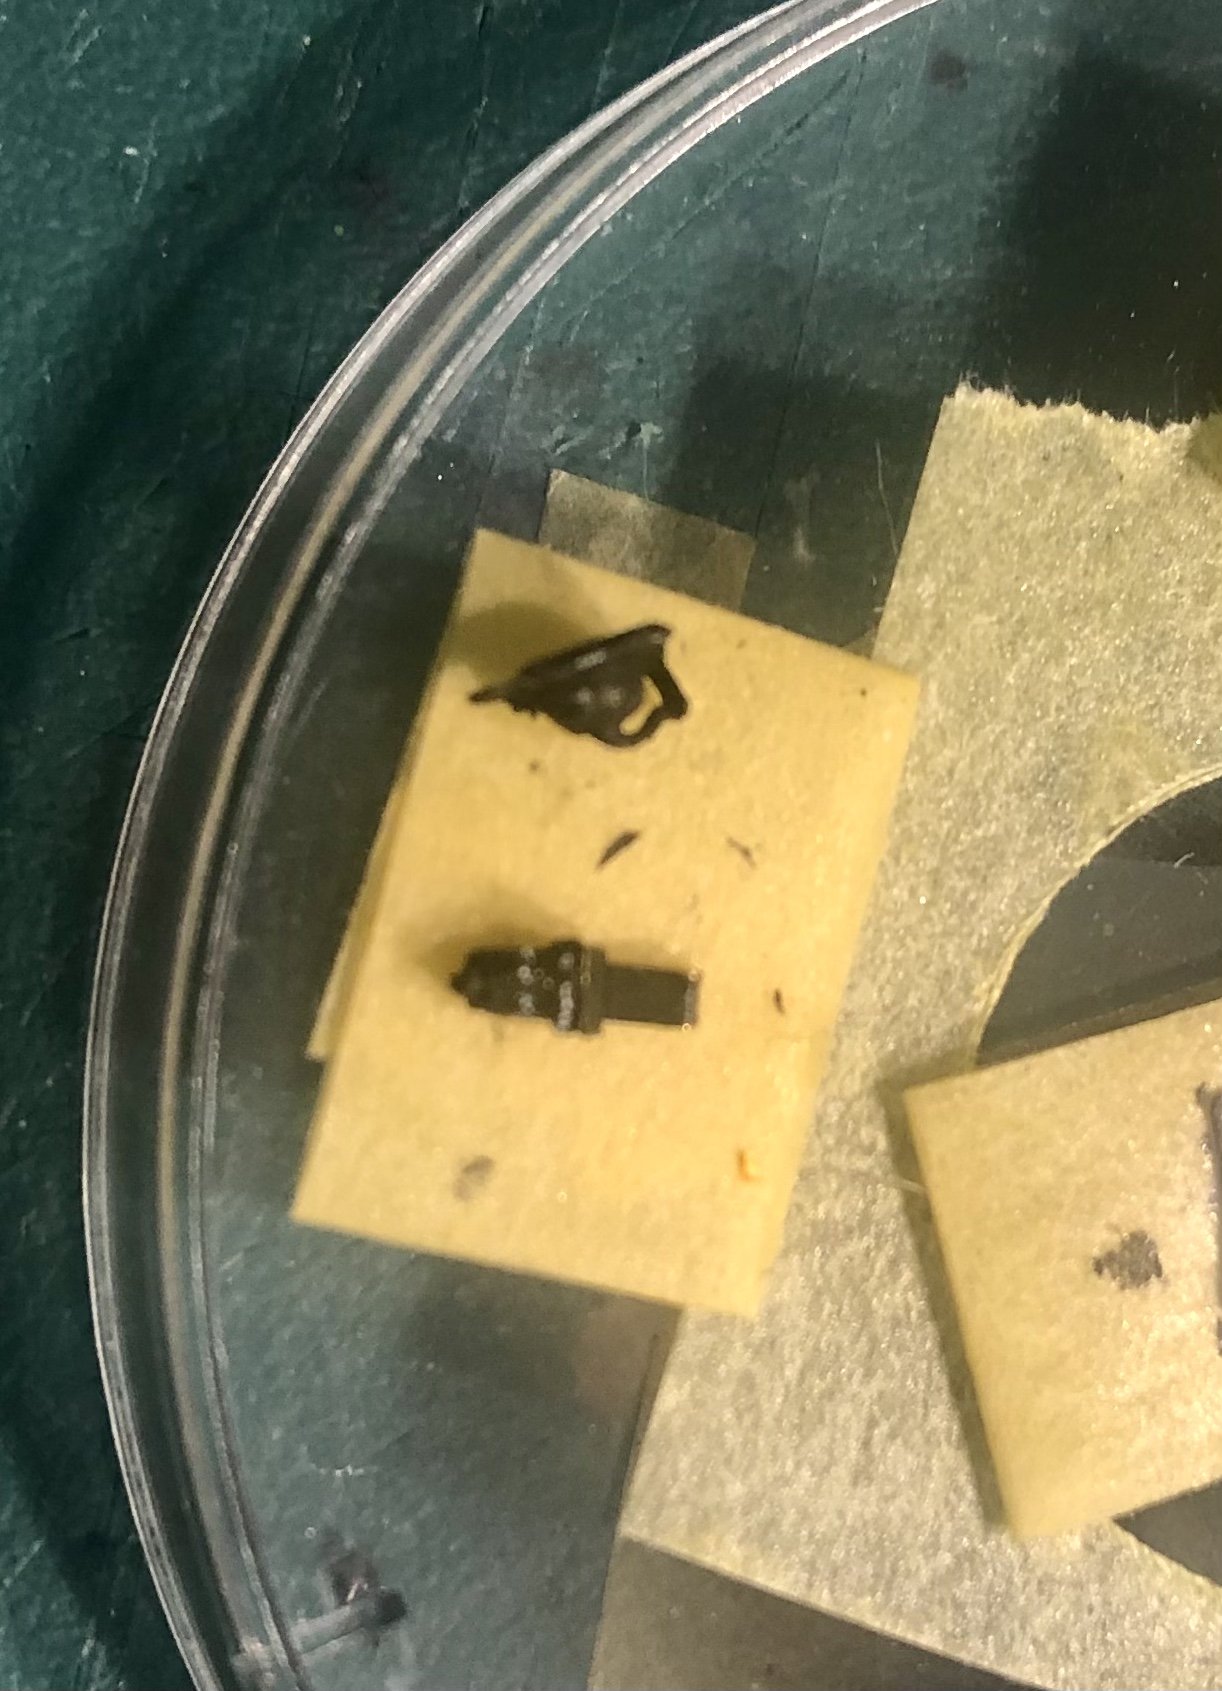
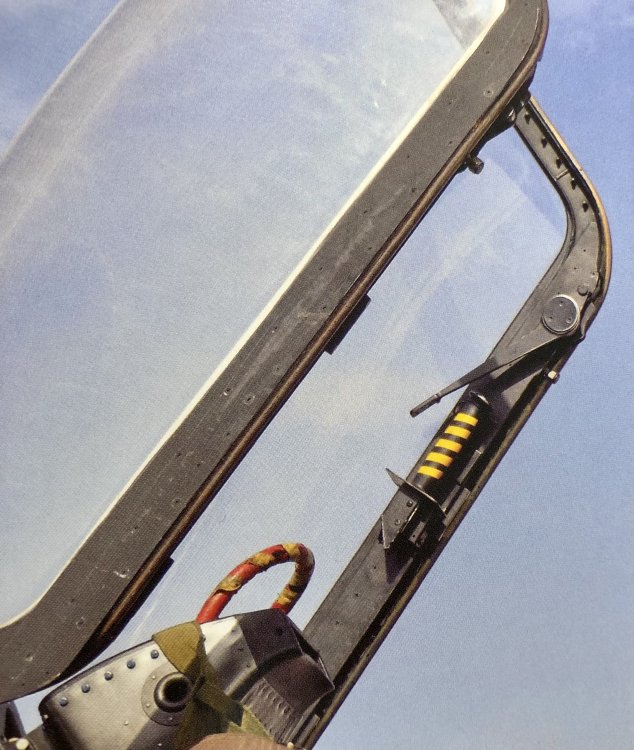
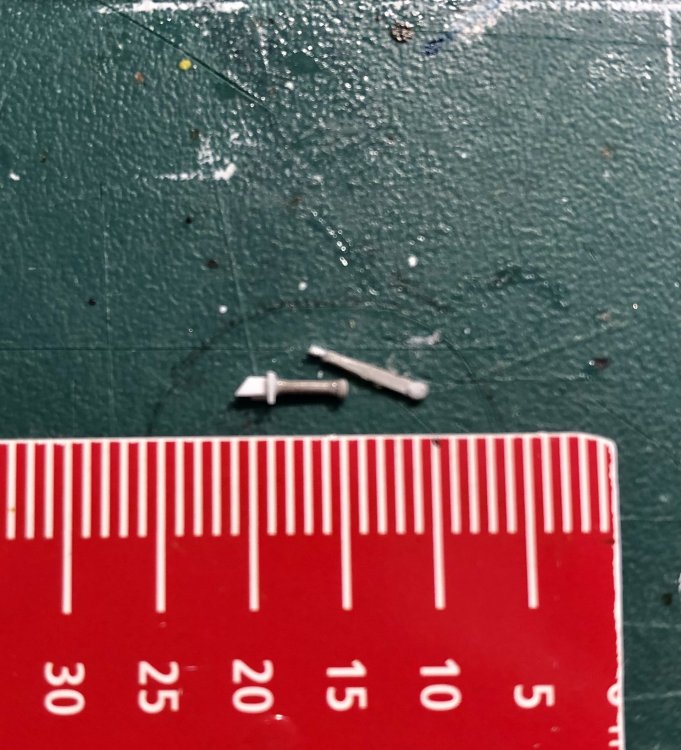
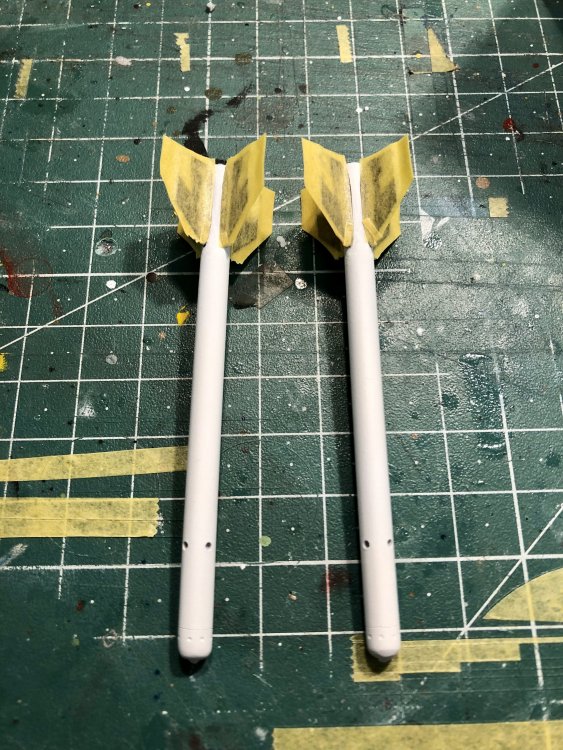
Small update today. Italeri (and Eduard too) managed to forget 2 prominent details in the canopy frame: - the canopy breaker knife - the canopy closing handle I scratched both from evergreen sheet and stretched sprue. The knife consists of 4 parts and the handle of 3: not very big in 32nd scale… from below painting started I also finished the painting of the Shafrir2-Rockets: fins masked ready for clear cote. And the complete build? Still not finished yet Hubert. But 4 days left to finish till the weekend is over


-
Two little Brewsters, now a Buddy Build.
Kaireckstadt replied to Clunkmeister's topic in LSM 1/35 and Larger Work In Progress
Copy Martin and Peter: Looking very good and starting to take shape! -
1/32 Revell Fw190 F8 converted to G8
Kaireckstadt replied to AlanG's topic in LSM 1/35 and Larger Work In Progress
Great to see that you are back to the bench! This will be a unique stunner in the end! Looking forward to seeing your progress. -
Great start with the decals Peter. This will be a stunning livery once finished. Good decision not to apply all stencils. In my eyes in 48th Scale it looks a bit overdone in the end. Keep up with the excellent work!