


HubertB
-
Posts
2,436 -
Joined
-
Last visited
Content Type
Profiles
Forums
Events
Gallery
Everything posted by HubertB
-
I’m in as well, as a giver and receiver. I’ll donate a Valiant Wings « Airframe Album », #4 on the Westland Whirlwind (the twin-engine WWII fighter, not the monstrosity with a rotating egg-beater on the top) and a Mushroom book of the yellow series on the A5M Claude. i will also most likely add a kit, but let me have a look at the stash first. Hubert
-

Zoukei-Mura P51D Mustang SWS No 4.
HubertB replied to Bomber_County's topic in LSM 1/35 and Larger Work In Progress
Looking forward to see your build of this one. It is actually a nice kit, that got shadowed at its launch by the simultaneously-released Tamiya kit. It deserves more attention and praise than it got (and I have one in the stash, that has the bonus of different canopies and props, so easier to make a racer out of it). Hubert -
Well, I'm back at it, after an incredibly long hiatus (during which I got a new house finished, moved and settled into it, reset the workbench, and focused on weathering-out the impact of the Covid-19 pandemic on my business ... so I was busy, sort of, but not on the modelling scene). So back at it in earnest . I have to say the kit is beautiful, with a level of detail that suits my super-detailing syndrome ... but, in fairness I find it unbelievably fiddly sometimes, with vague instructions when it comes to where the (small) parts go exactly, tiny - well even tinier than that - gluing points, where faith is sometimes stronger than anything else to ensure a proper gluing, and the use of tiny PE parts to be folded and glued onto plastic, my definite nemesis ... 1) The wheel spats. The key of this build is to convert it the 1934 Paris Air Show prototype, with wheel spats. Until I was sure I could do those, I was going for a reversible procedure to produce the fairing that wraps around the lower LG legs, where they meet the spats themeselves. Problem is this entalied many trails and errors, and cutout in a middle of a laminated plastic pat, which itself needed some reshaping - at least that's how I felt about it, knowing my references are base on some blurry pics of the P-24 spats. So, I took the plunge and went for a permament mod. No turning back !. The legs are set at a 40° angle to the spats. I shaved 1/2 mm of their end at the wing level; checking I kept the angle correct, than glued a 0.5 mm piece of card cut in the wanted shape for the fairing. Once the joint was fully cured, I built up the shape using Milliput, then filed and sanded the rough to obatin a smooth shape. Sorry, I have not documented the whole process, but that's the end result : And with the finished spats : The main hurdle in this conversion is overcome ! 2) The cockpit IBG's rendition is beautiful, but this is also where the "fiddliness" hits home ... For instance the seat is built using some folded PE frames. But there is no indication of the proper angle between the pan and the back rest, no indication of the angle at which the the lower part that sports the trim-wheel whould be glued to the pan, no proper location points of where the PE frame shoudl be glue to the back-rest and the pan ! You have been warned ! FYI, the seat attaches to the cockpit frame at 2 faintly marked locations, by the axle of the trim-wheel at the bottom, and the end of a plastic tubular part at the top of the backrest. After a few unsuccessfull attempts, the light came to my blurred brain : use a template. So, the distance between the two gluing points on the cockpit frame is 12 mm. After I drilled two holes 12 mm apart in a piece of spare plastic card, I could at last assemble the seat in a way that it will later fit the cockpit ! This is how it looks when in place (and just after that it became unglued - which proved to be a blessing for some additional detailing, to see below) : On this pic, you can also see two more details which needed rework : the control column and the rudder pedals. The rudder pedal is one-piece affair that attaches to the cockpit frame by the same tiny, imprecise gluing points. Needless to say it came loose more than once . When the time to pack everything for the house-move came, the rudder pedal part was clipped in the a "third-hand" crocodile-clip, upside down, while I tried to have it stick at the proper angle to the lower transverse frame of the cokpit which I had cut off for an easier gluing of the rudder pedals to it. Last thing I know they are probably still somewhere in the cavernous hold of the moving truck. They are definitely MIA on my bench ! So I had to redo them from scratch using as a reference the drawings from my old "Plany Modlearskie" issue on the P-11. Again, no in-progress pics, but this is how the new rudder bar looks when n place : The control stick attaches to a tiny two-part PE frame that needs to be folded twice at opposite abgles, then attached to small imprecise blobs on the main cockpit frame, whilst in the same time being glued to a bar that passes below the seat. It is an excellent scale representation of the original layout, but it is a bit ... fiddly (did I mention that I find the kit fiddly at times ? ). Anyway, the folded parts did nor resist the numerous fitting manipulations, as, on top of it, I chose to redo the control bar with a brass rod that was rounder and more rigid than the molded plastic part. So I dedid the articulation part using some brass strip cut from the sides of the kit-supplied PE sheet. The four holes are not really regularly drilled-out compared to the original part, but ir will not be visible anyway in the finished cockpit. I decided to position the levators in the "full down" position, and set the control stick full forward in consequence. I have also added a small PE part that I scratched to represent the attachment point for the gun control cables (here are two guns but three cables - I do not know what the use of the third cable was). The control cables themselves are 0.3 mm lead wires, inserted in tiny 0.5 mm tubes, glued together, and attached at the extremity of the scratched brass piece on the control stick. (And this from the same guy who is complaining about the fiddliness of the IBG details !) And attached to the control stick: Whilst we are talking of my contradictions, let's talk about the pump on the right side of the cockpit. I am not sure if this a priming pump or some kind of hydraulic or tank pressurising pump, more likely the latter ? Anyway it is represented by IBG with the hand shaft of the pump in the "down" position, and with a blob supposed to represent what is in reality a hollow handle. My reference pics show the shaft extended in the "up" position which I find more interesting. So I decided to mod the pump with a new shaft and handle , like this (the squares on my mat are 10x10 mm) : Now remind me who was complaining about the kit being a bit fiddly ? And a last detail I added when the seat became unglued once again. The trim wheel drives a chain that turns a screw in the end of the fuselage to move the stabiliser up or down. The chain has not been represented, not even in PE, by IBG. Whilst I was pondering whether to represent the chain I came with an idea that in the end, IMO, produces a satisfactory fac-simile ... I wound together three strands of fine (0.25 mm) copper wire that I get from an old electric motor, then flattened this cable in my bench vise. This is how it looks when flattened : ...then bent in the shape of the chain : ... and finally glued to the trim wheel on the side of the seat . Tha's all for now. I will soon have to end procrastinating, and get the airbrush out to splash some paint on the assembled cockpit. Hubert.
-
I am not saying there is no resin plug on some parts, but Lukgraph kits are not like HPH ones. They are more in the league of Fisher and Silver Wings, i.e. among the best ones. Hubert
-
They have a metal rod insert. Hubert
-
What is on your bench right now ? Share a picture :)
HubertB replied to Martinnfb's topic in Modelling Discussion
The F-105 (with AM) is - was - one of ultimate fantasy kits. Reason, especially considering my current output, led me to let someone else pick up the challenge . Go for it Fran ! Hubert -
WnW Sopwith 2F.1 ShIps Camel.
HubertB replied to Bomber_County's topic in LSM 1/35 and Larger Work In Progress
As my avatar pic shows, I cannot envision sitting on my bench without my Optivisor screwed on now (and the refracted light draws an elegant mustache on my - handsome, of course - face on top of it ). Go for it, you’ll see a big difference, literally. Hubert -
Cool car in 1:1. I always wished I had something like this ( or maybe slightly heavier like a Leclerc, Abrams or Leopard ) to hold at bay those pesky two-wheelers in Paris traffic ... As this would not be allowed ( did I fantasize about the squiiishhh of one or two Vespas under the tracks ! ), I have resolved to plan B, i.e. avoid driving in and around Paris Very nice work on the kit, btw Hubert
-
Harv, you should also check brengun.cz site. They have some 1/32 Japanese fighters’ wheels. And a reputable name in AM for targets ... Hubert
-
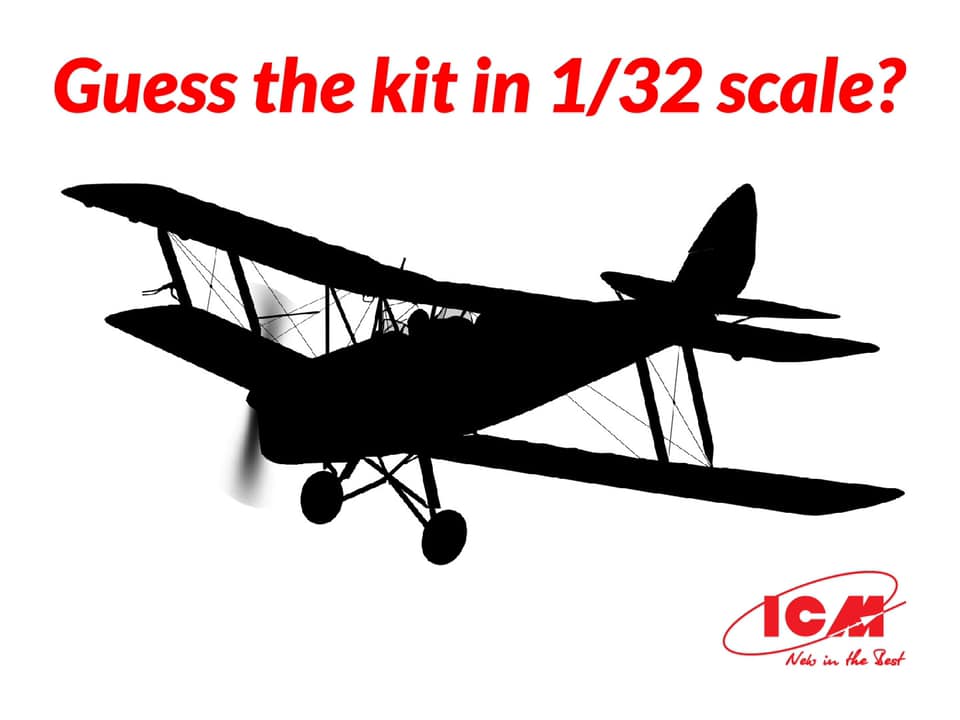
Annnnnnnnd a new 1/32 trainer on the way ! Keep going ICM !
HubertB replied to HubertB's topic in Modelling Discussion
Yes, Gaz, of course. The Tiger Moth ! Hubert -
Annnnnnnnd a new 1/32 trainer on the way ! Keep going ICM !
HubertB replied to HubertB's topic in Modelling Discussion
Or, more likely, civilian for me Hubert -
Well, I am going to be selfish and rejoice that MY golden age of 1/32 modelling has just started and keeps striving ! Look what has been hinted at by ICM ! No, not another Fockestang, or Messfire, sorry (well, nor really ) Me happy, even though I also already have the beautiful Silver Wings kit . Hubert
-
Fell to the temptation of adding another Lukgraph kit to the stash. After all, you can’t get enough yellow wings, can you ? And now I can rationalise that I was right. The Curtiss F6C-1 I ordered shows « sold out » on Lukgraph’s site ! (Prescient) Hubert
-
1/32nd Heinkel 219 // Werner Streib crash At Venlo
HubertB replied to Rowdy's topic in LSM 1/35 and Larger Work In Progress
WOW ! Hubert -
Count me in, both ways. I have some books to donate, but may add a kit as well ... Hubert
-
This is impressive. I got their OV-10 wheels, and they are very nice as well. Hubert
-
1/32 Focke Wulf D9 // Wrnr 600150
HubertB replied to Rowdy's topic in LSM 1/35 and Larger Work In Progress
Last time I destroyed a plastic kit, it definitely did not look like that ! Hubert -
He’s baaaaaaack ! Hubert
-
HpH P-63C build #3 finished
HubertB replied to JohnB's topic in LSM 1/32 and Larger Aircraft Ready for Inspection
Looking really good, John ! I know you do not like heavy weathering, but these Kingcobras in Indochina wera really war-weary ... Hubert -
1/32 Revell RF-4C 14th TRS
HubertB replied to SapperSix's topic in LSM 1/35 and Larger Work In Progress
Superb ! I’m with Gaz. Your ejection handles look very realistic and a lot better than most (especially mine ) attempts. Hubert -
VERY nice ! A nitpicking comment : your base and the presentation would benefit from having the « ground » level (or above) with the frame, rather than ensconced in it. It would give a more « open » impression of the whole. I hope my comment is clear. Hubert
-
Das Kamel - Hansa Brandenburg W.12
HubertB replied to DocRob's topic in LSM 1/35 and Larger Work In Progress
Btw, Marion is a woman , a Swiss lady from Zürich. Her site is in English and German. Hubert -
Das Kamel - Hansa Brandenburg W.12
HubertB replied to DocRob's topic in LSM 1/35 and Larger Work In Progress
Do you know Marion Ball ? One of the legends of figure painting ... http://www.mb-miniatures.com/pages/en/home.php Hubert -
1:32nd scale - Bristol M.1c
HubertB replied to sandbagger's topic in LSM 1/32 and Larger Aircraft Ready for Inspection
Excellent result with what is not a very easy kit. The look of the M.1 c is really interesting compared to a lot of its contemporaries. Very racer-like, which HAS to please me Hubert -
Finishing a kit .... nuff’ said Hubert

