GazzaS
-
Posts
6,396 -
Joined
-
Last visited
Content Type
Profiles
Forums
Events
Gallery
Everything posted by GazzaS
-
Am I the only modeller in the world that doesn’t use a cutting mat? My bench top is plywood and covered with paint marks, glue blobs. Is there any benefit other than keeping your bench cut mark free?
-

Ford GT II - The Fast and the Novice - Tamiya 1/24
GazzaS replied to DocRob's topic in LSM 1/35 and Larger Work In Progress
Looks sweet, Rob! I like the look of that panel, too. -
Takom Panzerkampfwagen I 1/16 scale... with figure
GazzaS replied to GazzaS's topic in LSM 1/35 and Larger Work In Progress
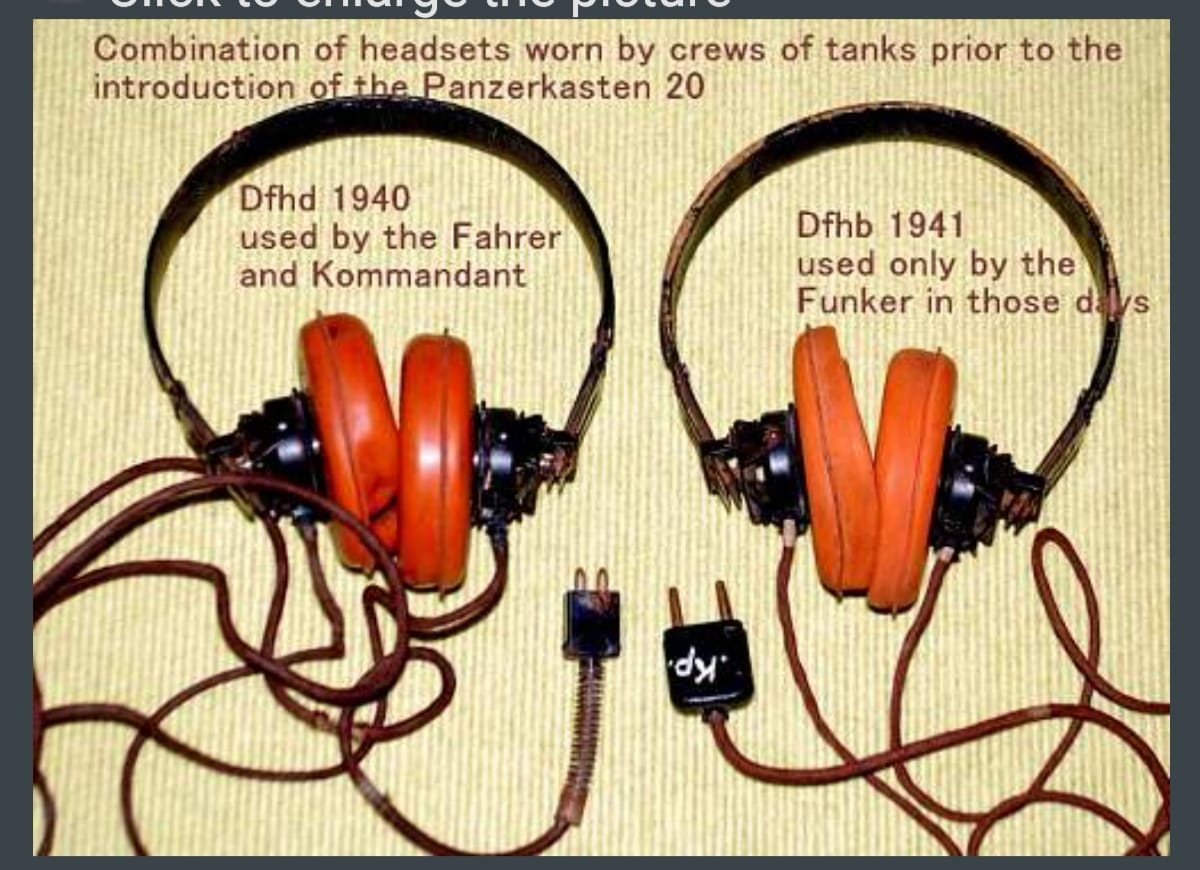
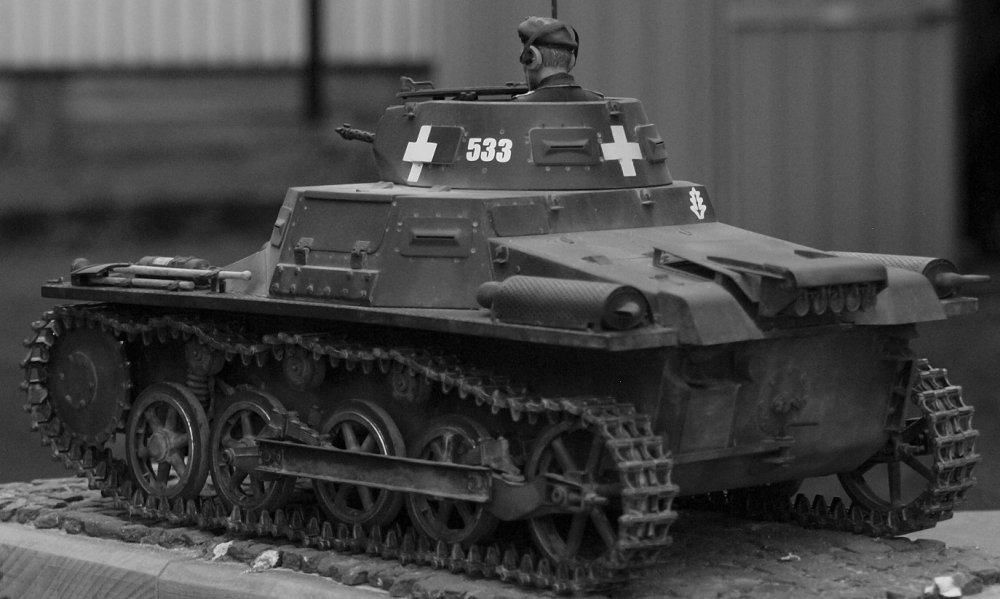
Thank you for the kind word, fellas. Unfortunately... last night I learned I was not finished. This photo popped up on facebook because of a comment from Mr. Dave Byrden regarding my B&W photos. He was congratulating me because I had chosen the proper color... Well... I chose feldgrau. But the real color will blow your minds: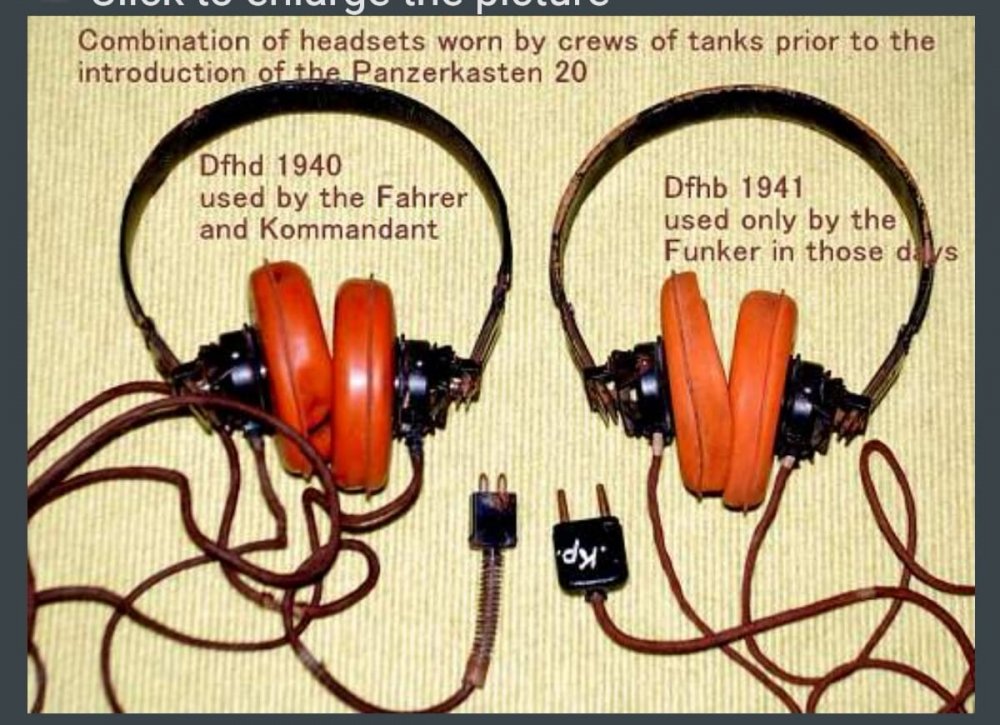
-
Takom Panzerkampfwagen I 1/16 scale... with figure
GazzaS replied to GazzaS's topic in LSM 1/35 and Larger Work In Progress
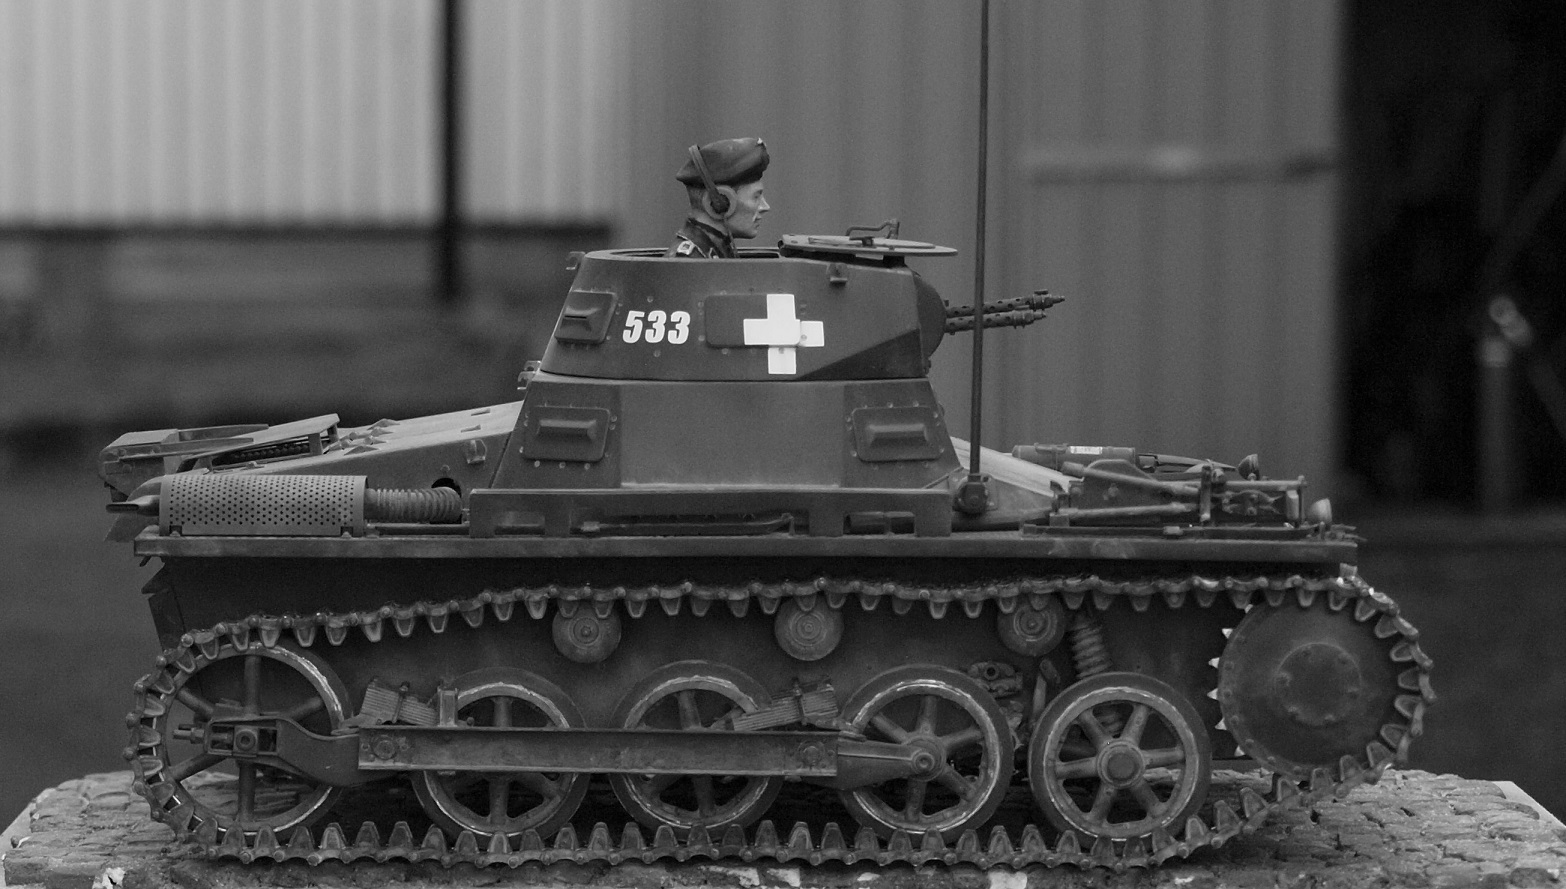
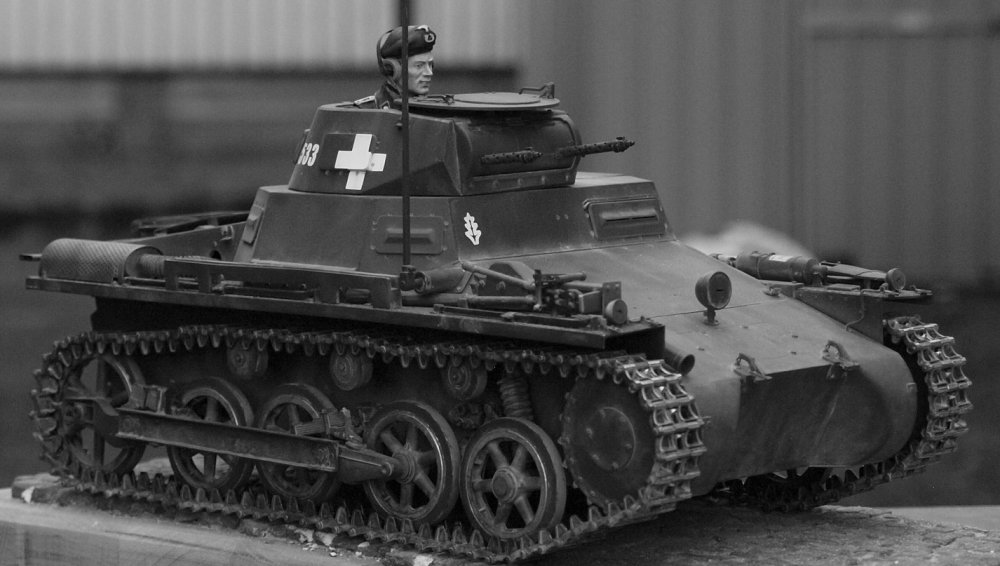
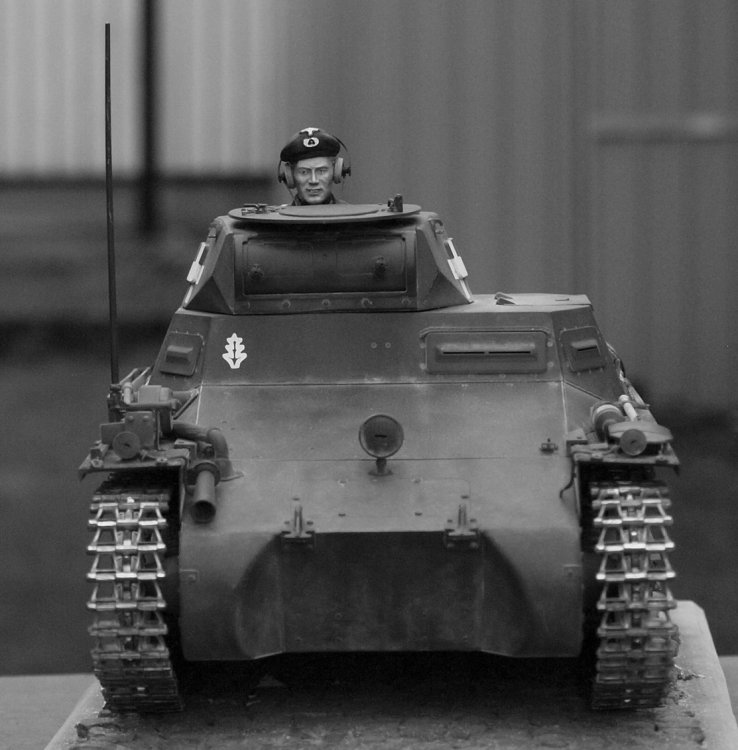
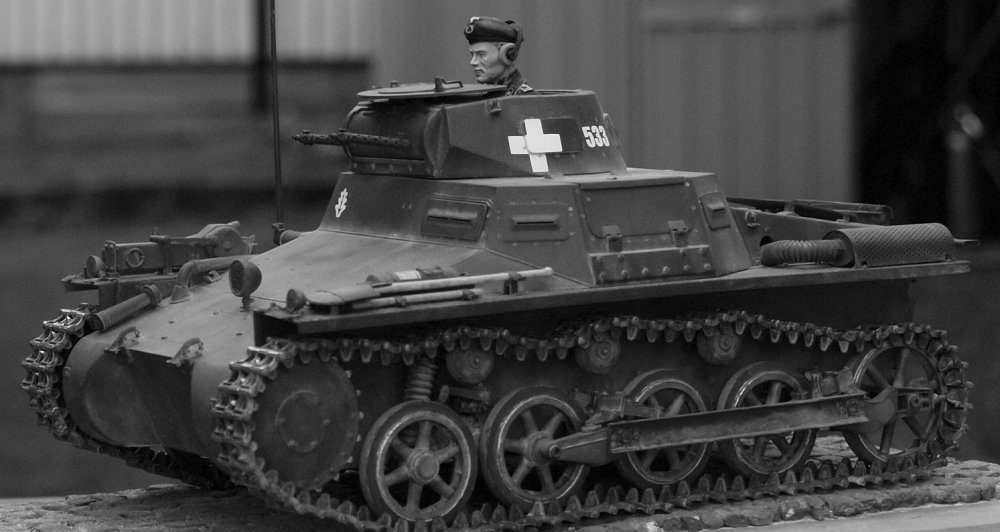
Hi everyone! On the last day of a build, I celebrate by throwing away the box and anything I don;t want to keep for spares. The decals were horrible... so I even pitched them. Without further ado... the B&W preview. I'll do a color RFI once the proper base is completed.
-
Mengnut Wings Fokker Dr. 1
GazzaS replied to Wolf Buddee's topic in LSM 1/35 and Larger Work In Progress
That make's perfect sense, Wolf! Thank you! I'll have to find some even finer bits than I have. The smallest I have is .0137inch or .35mm. -
Gottfreid Weiroster Bf 109G6 R6 Revell 1/32
GazzaS replied to GazzaS's topic in LSM 1/35 and Larger Work In Progress
Thank you, Gents! -
Takom Panzerkampfwagen I 1/16 scale... with figure
GazzaS replied to GazzaS's topic in LSM 1/35 and Larger Work In Progress
Thank you, Fellas. Not sure about bomb proof, Peter. I have my doubts whenever it comes to gluing stuff with PVA. Whilst the cobbles adhered very well to the beech, I'm hoping that they'll al least not come off while I'm leveling a bit with sand paper and a block. PVA is still Elmer's in my head. -
Thanks for the recommendation. I really need an airbrush just for priming.
-
Fantastic!
-
Ferrari 330P4 Open top 24Hrs Daytona 1967
GazzaS replied to mark31's topic in LSM 1/35 and Larger Work In Progress
Beautiful work, Mark! -
Hobby Boss F-84E back on the bench
GazzaS replied to JohnB's topic in LSM 1/35 and Larger Work In Progress
Sweet!! -
Good... you're already half way there! Enjoy!
-
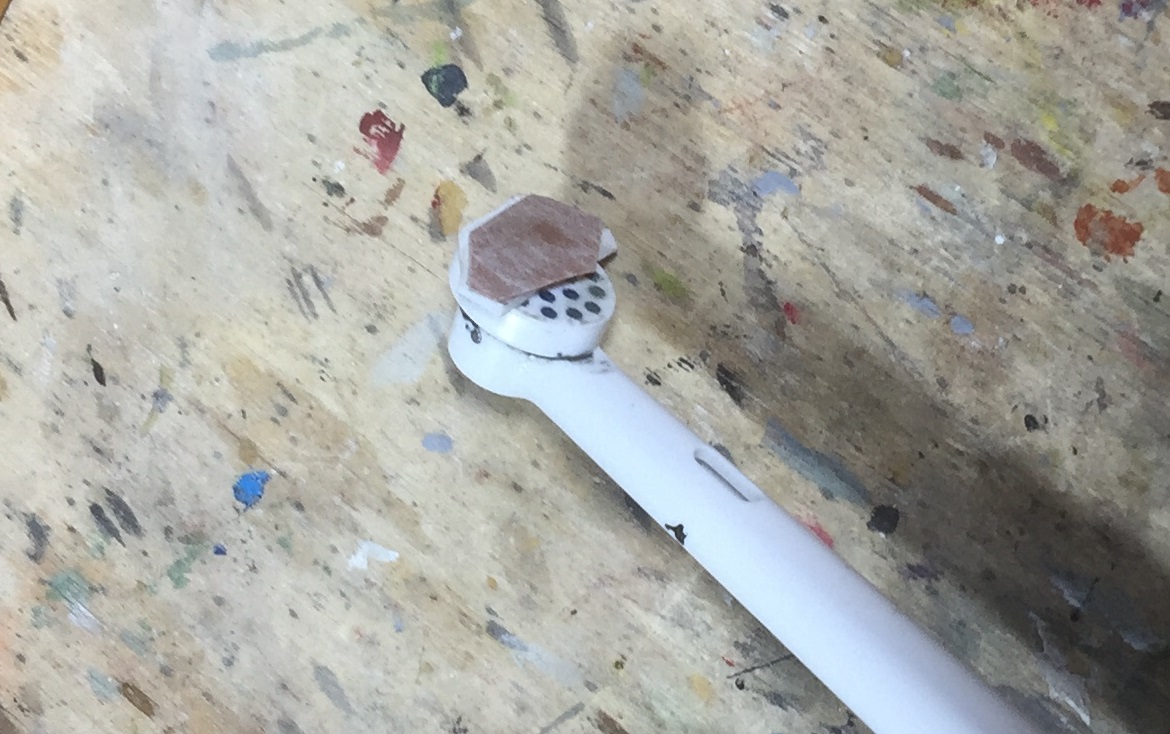
It's very simple, Peter. All you need is a cheap electric toothbrush. Double sided tape. And sandpaper. No fill is better, but the other stuff works too...you just have to replace it more often and deal with gum-up depending on what you're sanding. Cut off all of the bristles of the toothbrush. Attach two-sided tape to the flat face where the bristles used to be. Attach your sandpaper. That's the simplest bit. The toothbrush only turns in a 20-ish degree arc. So, you can shape your tape and sandpaper to get into nooks and crannies. I use three grits of paper... all no-fil, for most tasks: 340, 600, and 1200. I have also used 2000 and 3000 for finer finishes. Heck, I've even wet sanded, though the tape don't last very long. It saves so much time... you just won't believe it.


-
Atlas Cheetah E Scaleworx Conversion
GazzaS replied to GusMac's topic in LSM 1/35 and Larger Work In Progress
Epic masking! -
It's slow going Peter, but there are some time savers in the form of an electric toothbrush and CA. I've tried to make my scribing better and have seen some dividends...though I am still far from perfect. Waiting only 15-20 minutes to be able to fix a fault... or refix it... is much better than waiting overnight.
-
Takom Panzerkampfwagen I 1/16 scale... with figure
GazzaS replied to GazzaS's topic in LSM 1/35 and Larger Work In Progress
Thank you, Rob. They will need some sanding... some of them are far higher than the others. -
Takom Panzerkampfwagen I 1/16 scale... with figure
GazzaS replied to GazzaS's topic in LSM 1/35 and Larger Work In Progress
Thank you Kai! -
Takom Panzerkampfwagen I 1/16 scale... with figure
GazzaS replied to GazzaS's topic in LSM 1/35 and Larger Work In Progress
Thank you, fellas! The model is still gassing out. That's when I know it's not ready for it's final matte coat. If it stinks. Hopefully tomorrow. So, I went all in on the base. I bought a slab of 50mm (almost 2 inches) thick foam board. A bag of plaster of Paris and a 250ml bottle of PVA glue as well as an aerosol wood sealer for the edging. The edging I burned down from some pine I had on hand with a home-made bench saw. I then neatened it up with my AEG Plunge router. I have drop saw for cutting precise 45 degree corners. Then I put a different bit into the router and added a bevelled edge. Then I mixed the plaster with water and spread it out over some baking paper. After half an hour I scored it one way with a knife. Then, half our later I chopped the drying plaster with an Ulu, using the curved blade to avoid having to lift as I separated the cobbles. So, here were are with everything drying. Except for the cobbles, everything is dry fitted. And everything needs to dry overnight. Happy modelling!
-
Mengnut Wings Fokker Dr. 1
GazzaS replied to Wolf Buddee's topic in LSM 1/35 and Larger Work In Progress
Everything looks nice, Wolf. The decal floor and all came out very sharply. I'm curious about your usage of Bob's Buckles. I love them myself, but have never used the tubing without the eyelet... hate to be a pita... but just how do you do it? -
Israeli Mirage III C with Atar9C
GazzaS replied to Kaireckstadt's topic in LSM 1/35 and Larger Work In Progress
That looks very nice, Kai. Working over a pre shade has always been one of those problem things for me. -
Gottfreid Weiroster Bf 109G6 R6 Revell 1/32
GazzaS replied to GazzaS's topic in LSM 1/35 and Larger Work In Progress
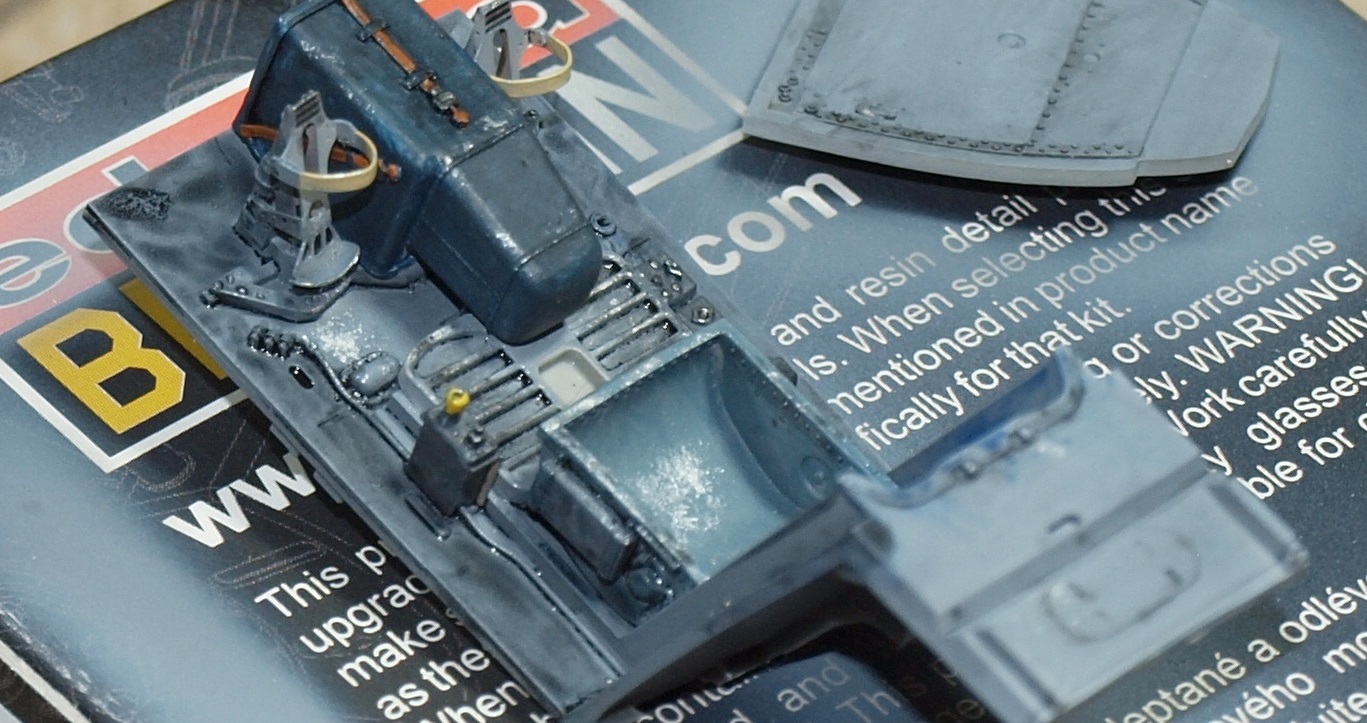
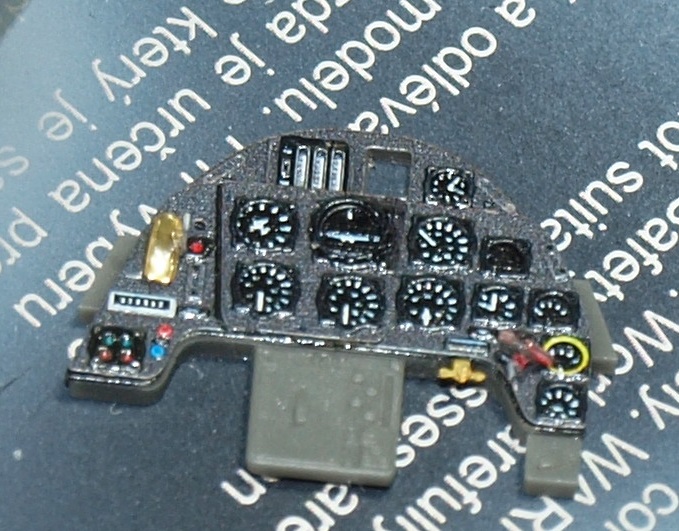
A little more done on the office. Details painted with acrylics. Different shades for different components. And the 2 applications of oil look a little rough. But I know that 109 cockpit well... it will be dark in there, even with the canopy open... and the seat belts will cover a lot of space. So, it should be ok. 'There are still a lot of little detail pieces to add. But I wanted to get the base structures painted first.
-
My point was: If they sit in your stash for a year or two, it might be too late (for whatever reason) to ask for a refund or replacement parts.
-
Hobby Boss F-84E back on the bench
GazzaS replied to JohnB's topic in LSM 1/35 and Larger Work In Progress
Cool! -
Short Sunderland MkII
GazzaS replied to ThomasProbert's topic in LSM 1/35 and Larger Work In Progress
Ummm yeah... what GusMac said! +1 -
Ford GT II - The Fast and the Novice - Tamiya 1/24
GazzaS replied to DocRob's topic in LSM 1/35 and Larger Work In Progress
Quite a surprise, Rob. I'm no car guy either so I won;t be much help. But it is a nice start with some accurate paintwork. Carry on!