BlrwestSiR
-
Posts
9,209 -
Joined
-
Last visited
Content Type
Profiles
Forums
Events
Gallery
Everything posted by BlrwestSiR
-
Don't you hate it when they use 4WD?
-

Special Hobby Whirlwind
BlrwestSiR replied to Peterpools's topic in LSM 1/35 and Larger Work In Progress
The Whirlwind looks great Peter. Glad to hear the decals went on without a hitch. -
Catch any?
-
GWH Curtiss P-40B; The Flying Tigers
BlrwestSiR replied to Peterpools's topic in LSM 1/35 and Larger Work In Progress
Here you go.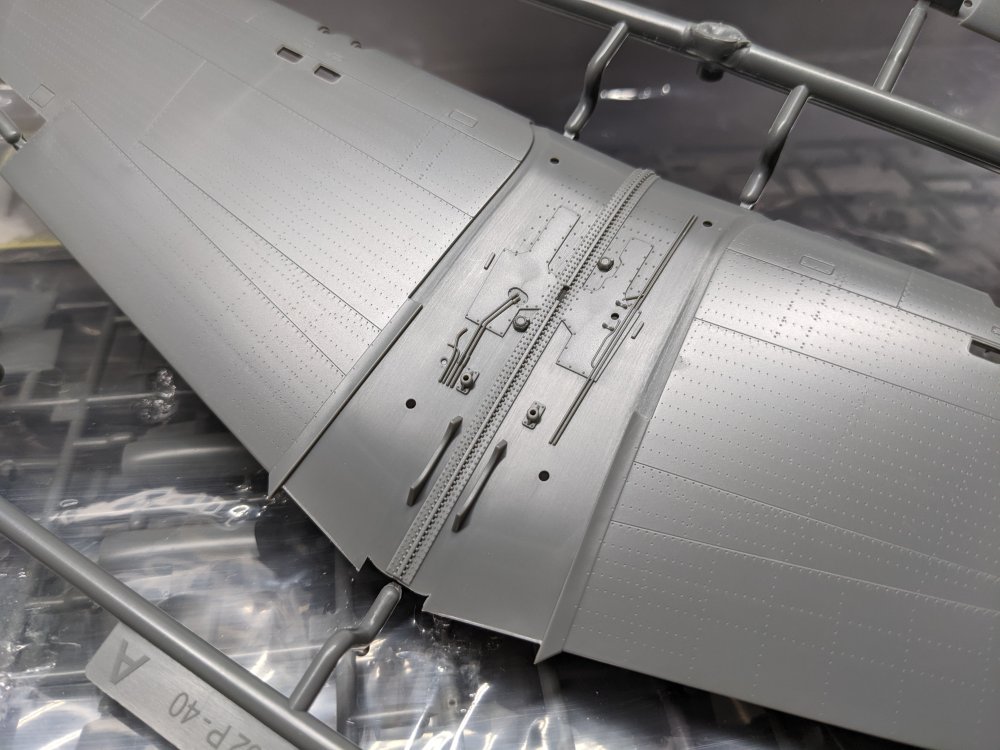
-
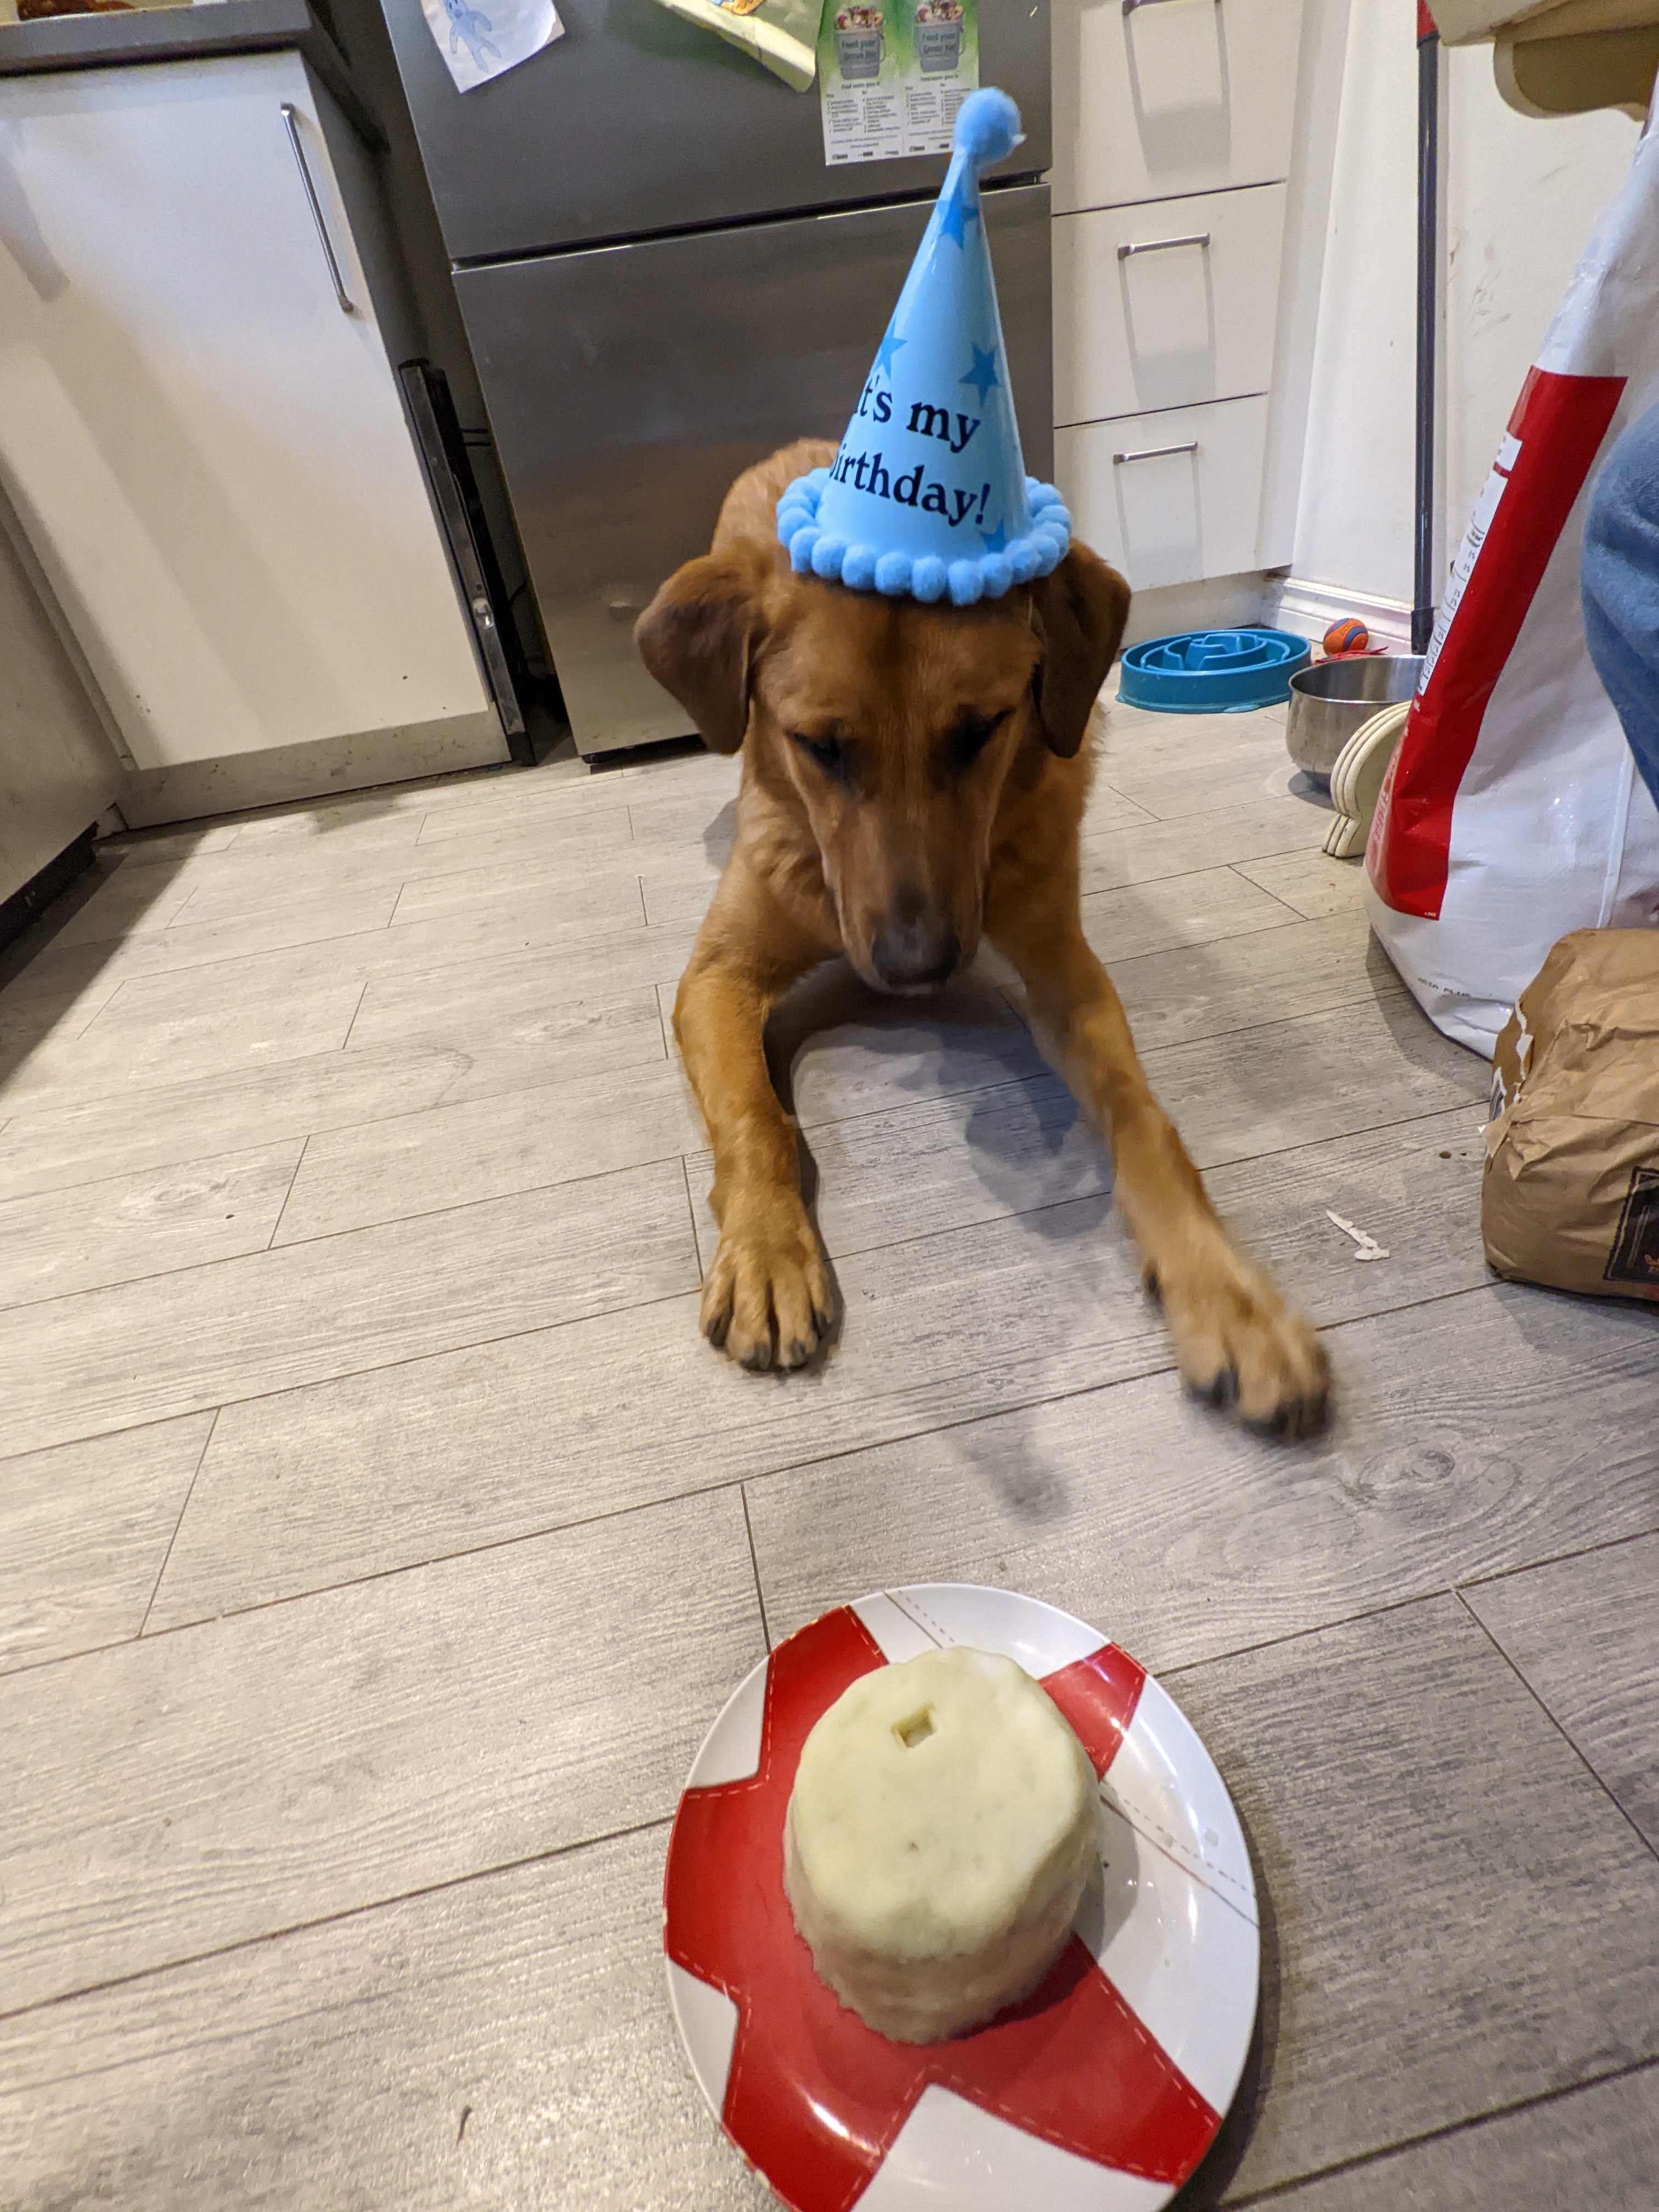
"The things I have to do for my birthday cake"

-
Great build Martin! Still can't believe it's 1/72. Carl
-
The F-35 is out in Dec. My LHS is taking pre-orders with a discount. Might just bite.
-
This goofball is 1 years old today. Here's his two sisters.

-
F4U-1A Corsair Tamiya 1/32
BlrwestSiR replied to DocRob's topic in LSM 1/35 and Larger Work In Progress
Great work on the Corsair and enjoy your vacation. Carl -
What is on your bench right now ? Share a picture :)
BlrwestSiR replied to Martinnfb's topic in Modelling Discussion
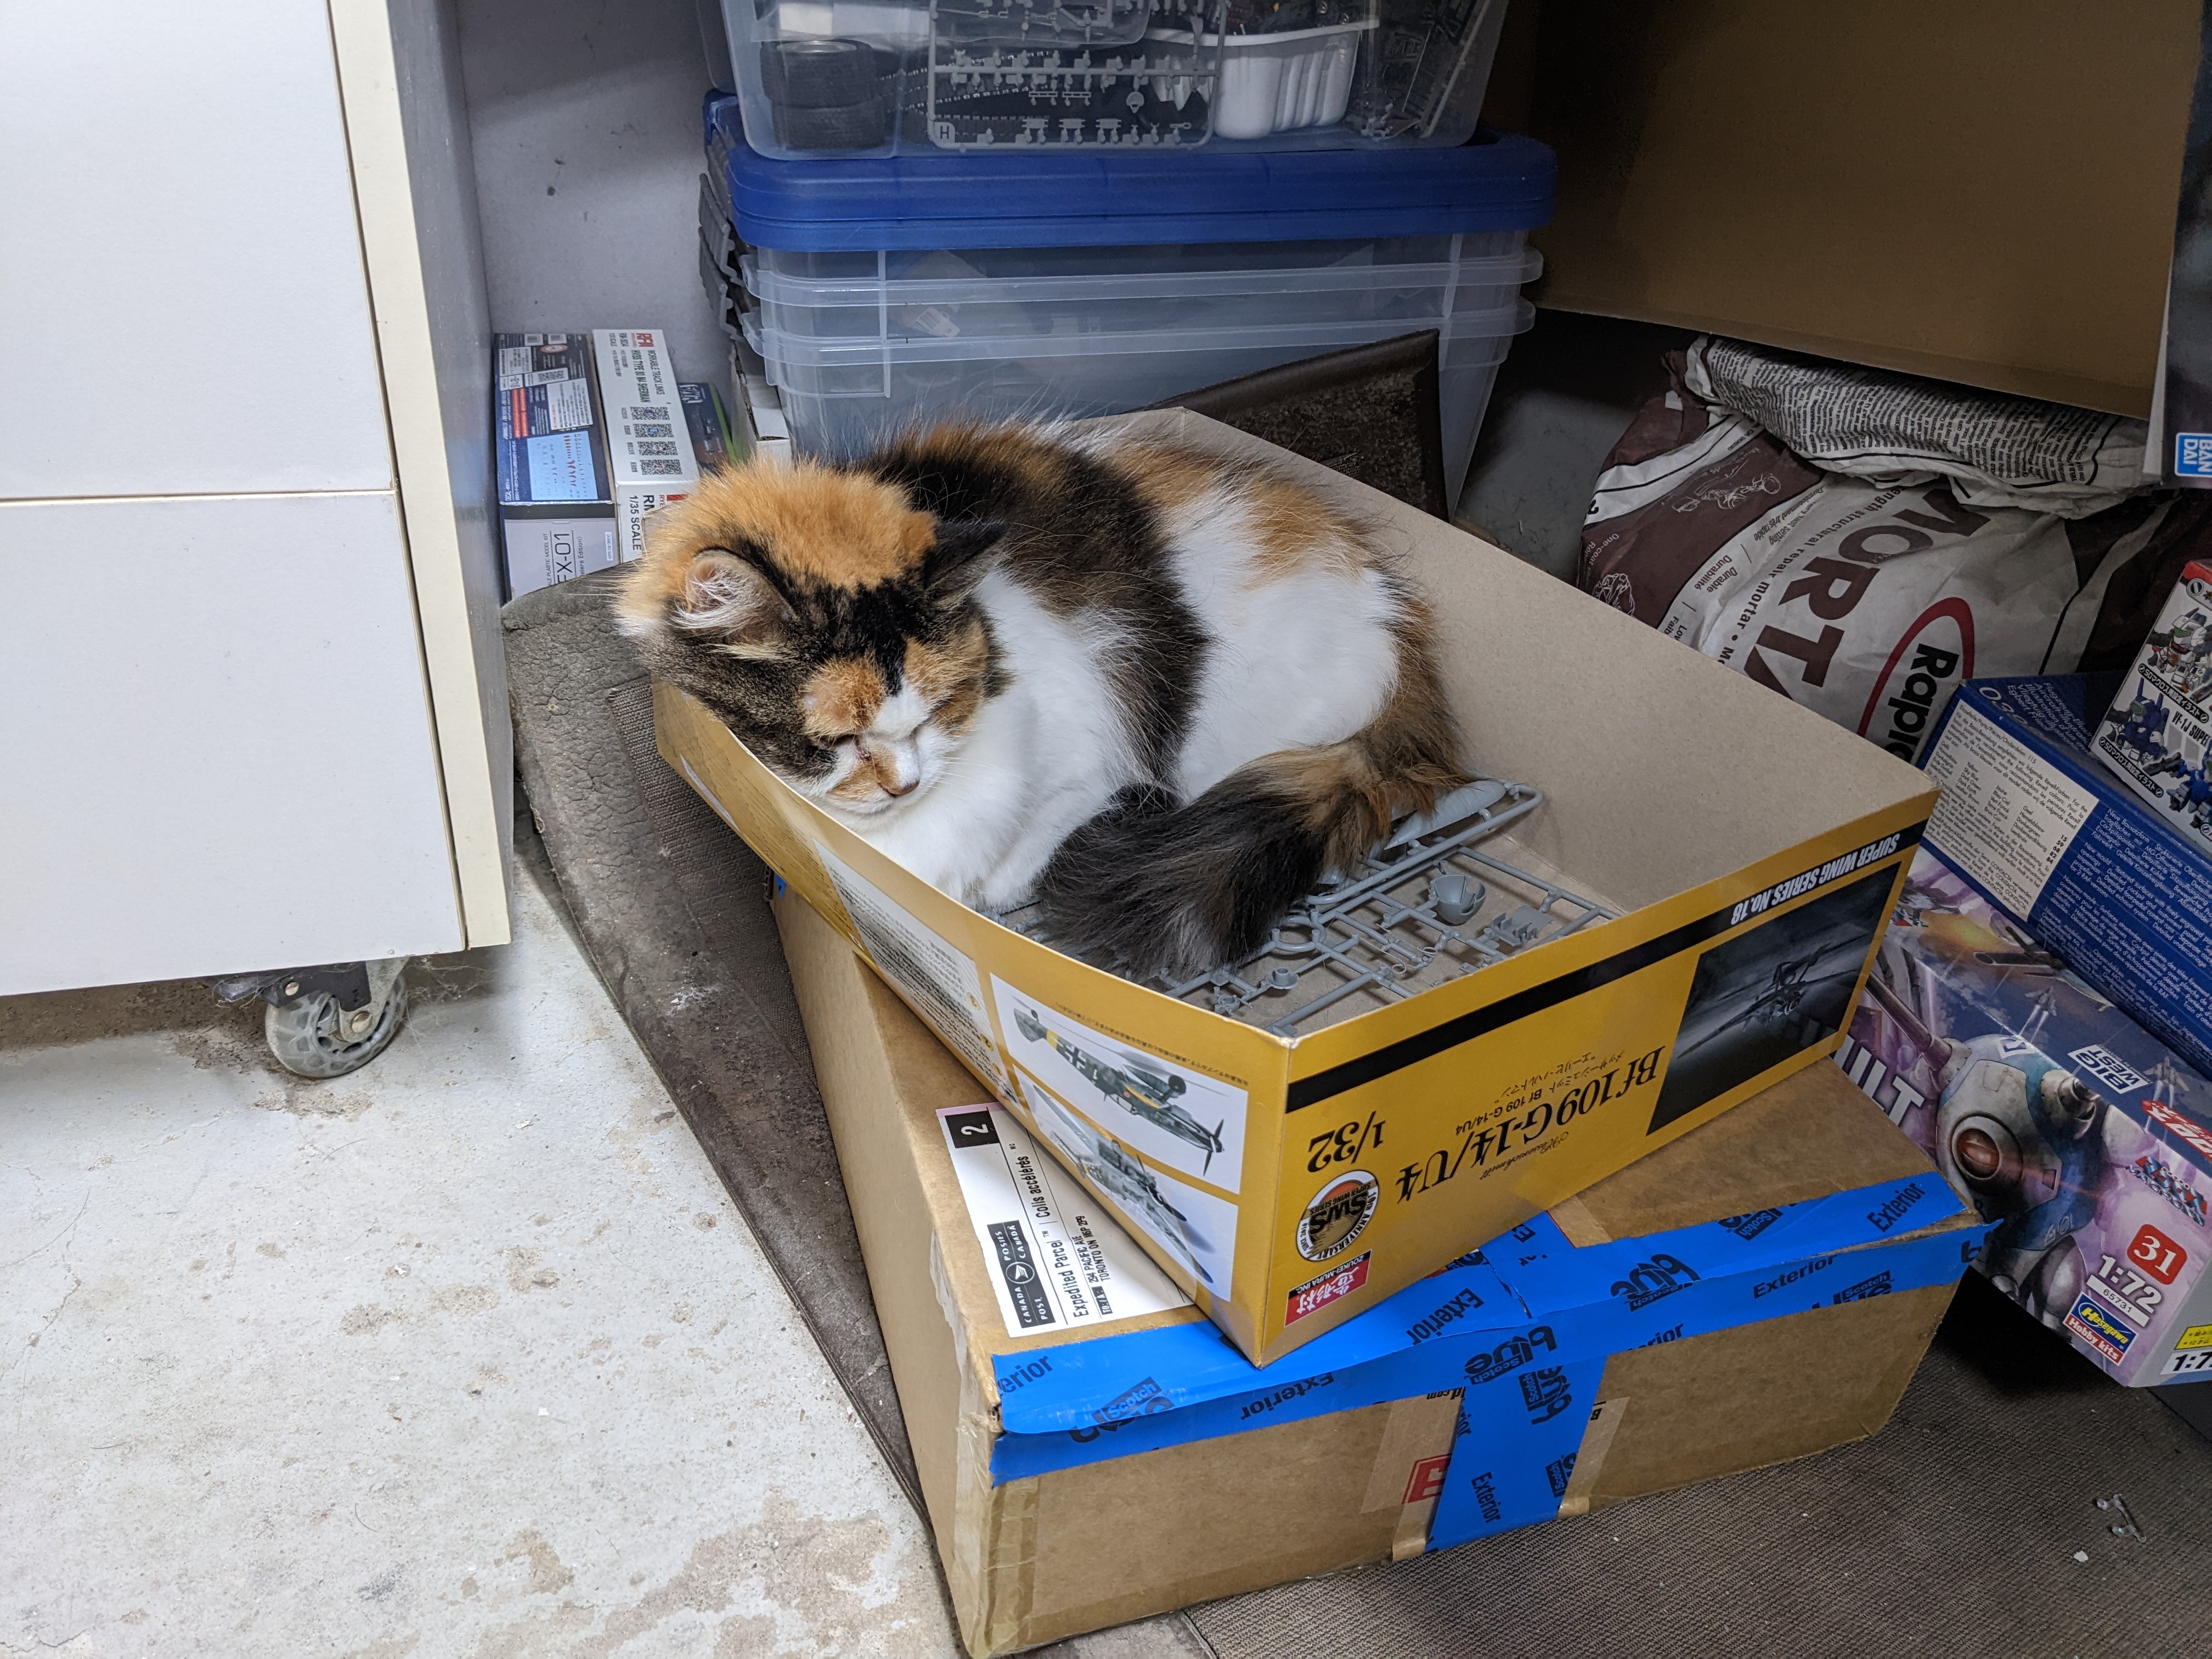
And our other cat didn't want to be left out. At least she's not on the bench...
-
P-51 Bardahl Special 2022 version next up
BlrwestSiR replied to JohnB's topic in LSM 1/35 and Larger Work In Progress
Nice changeup from a Corsair. It'll be a nice compliment to the one you already did. I'm looking at those screw heads and shuddering at the thought of doing them all by hand.... -
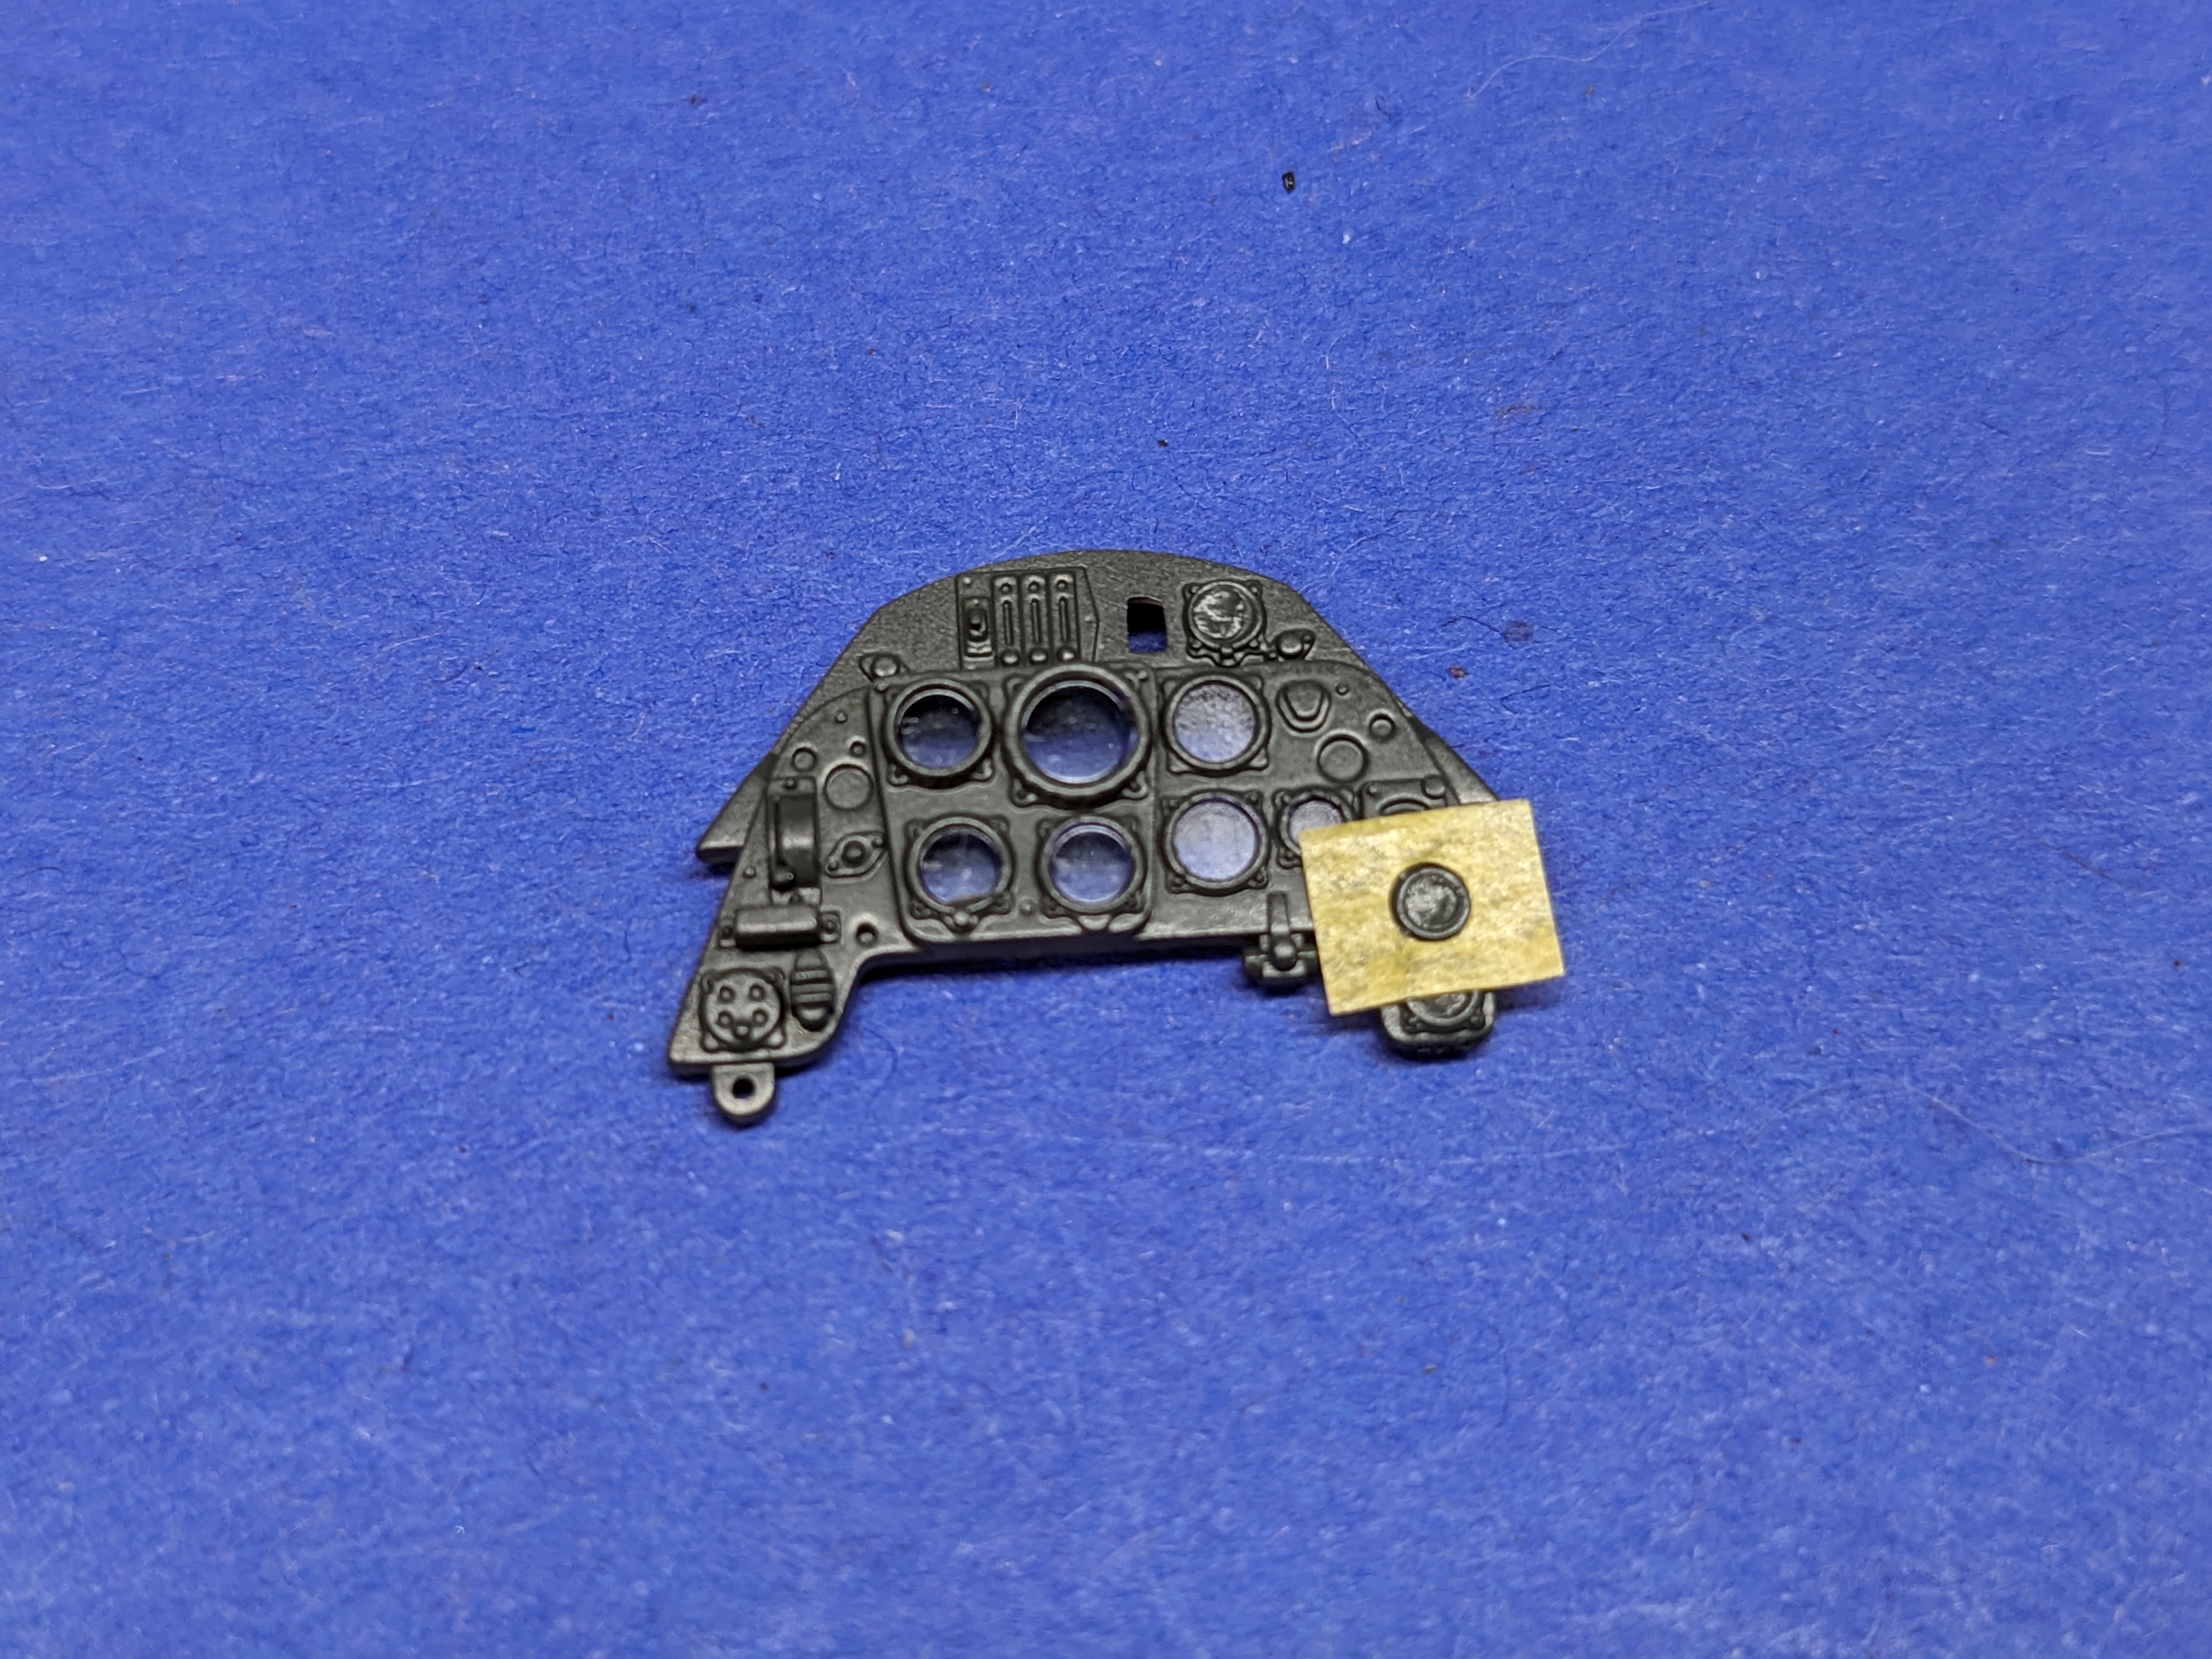
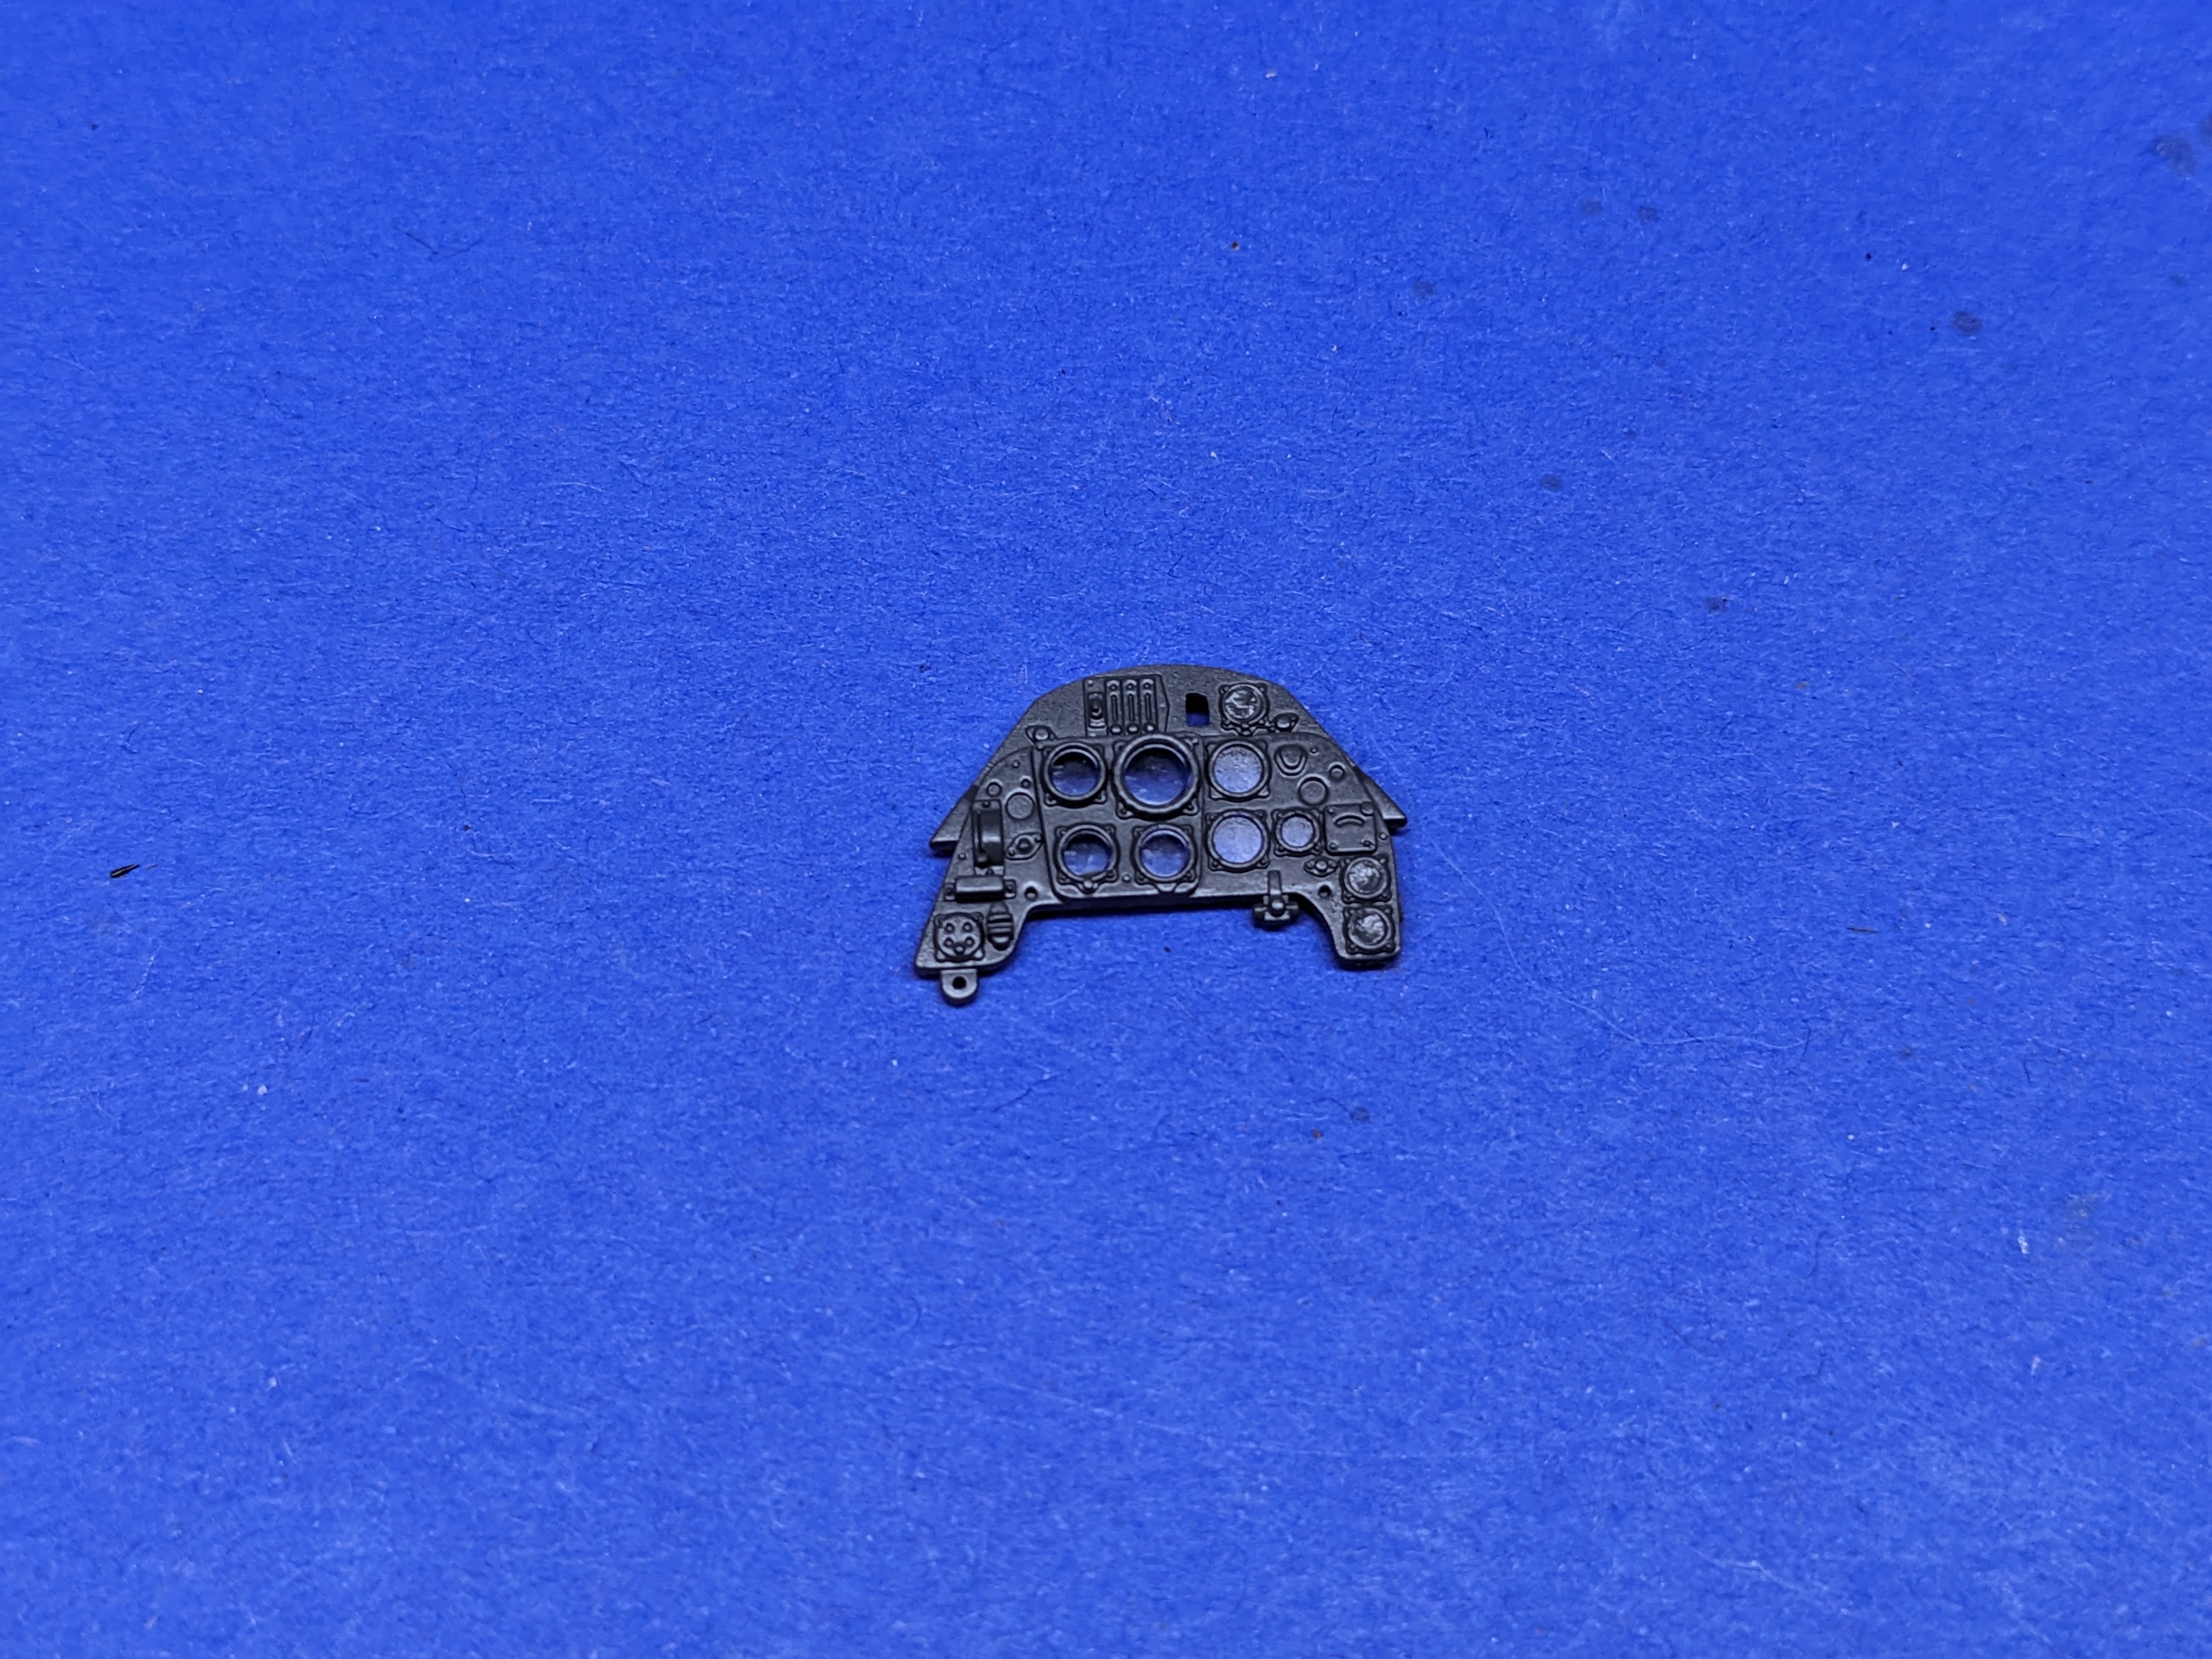
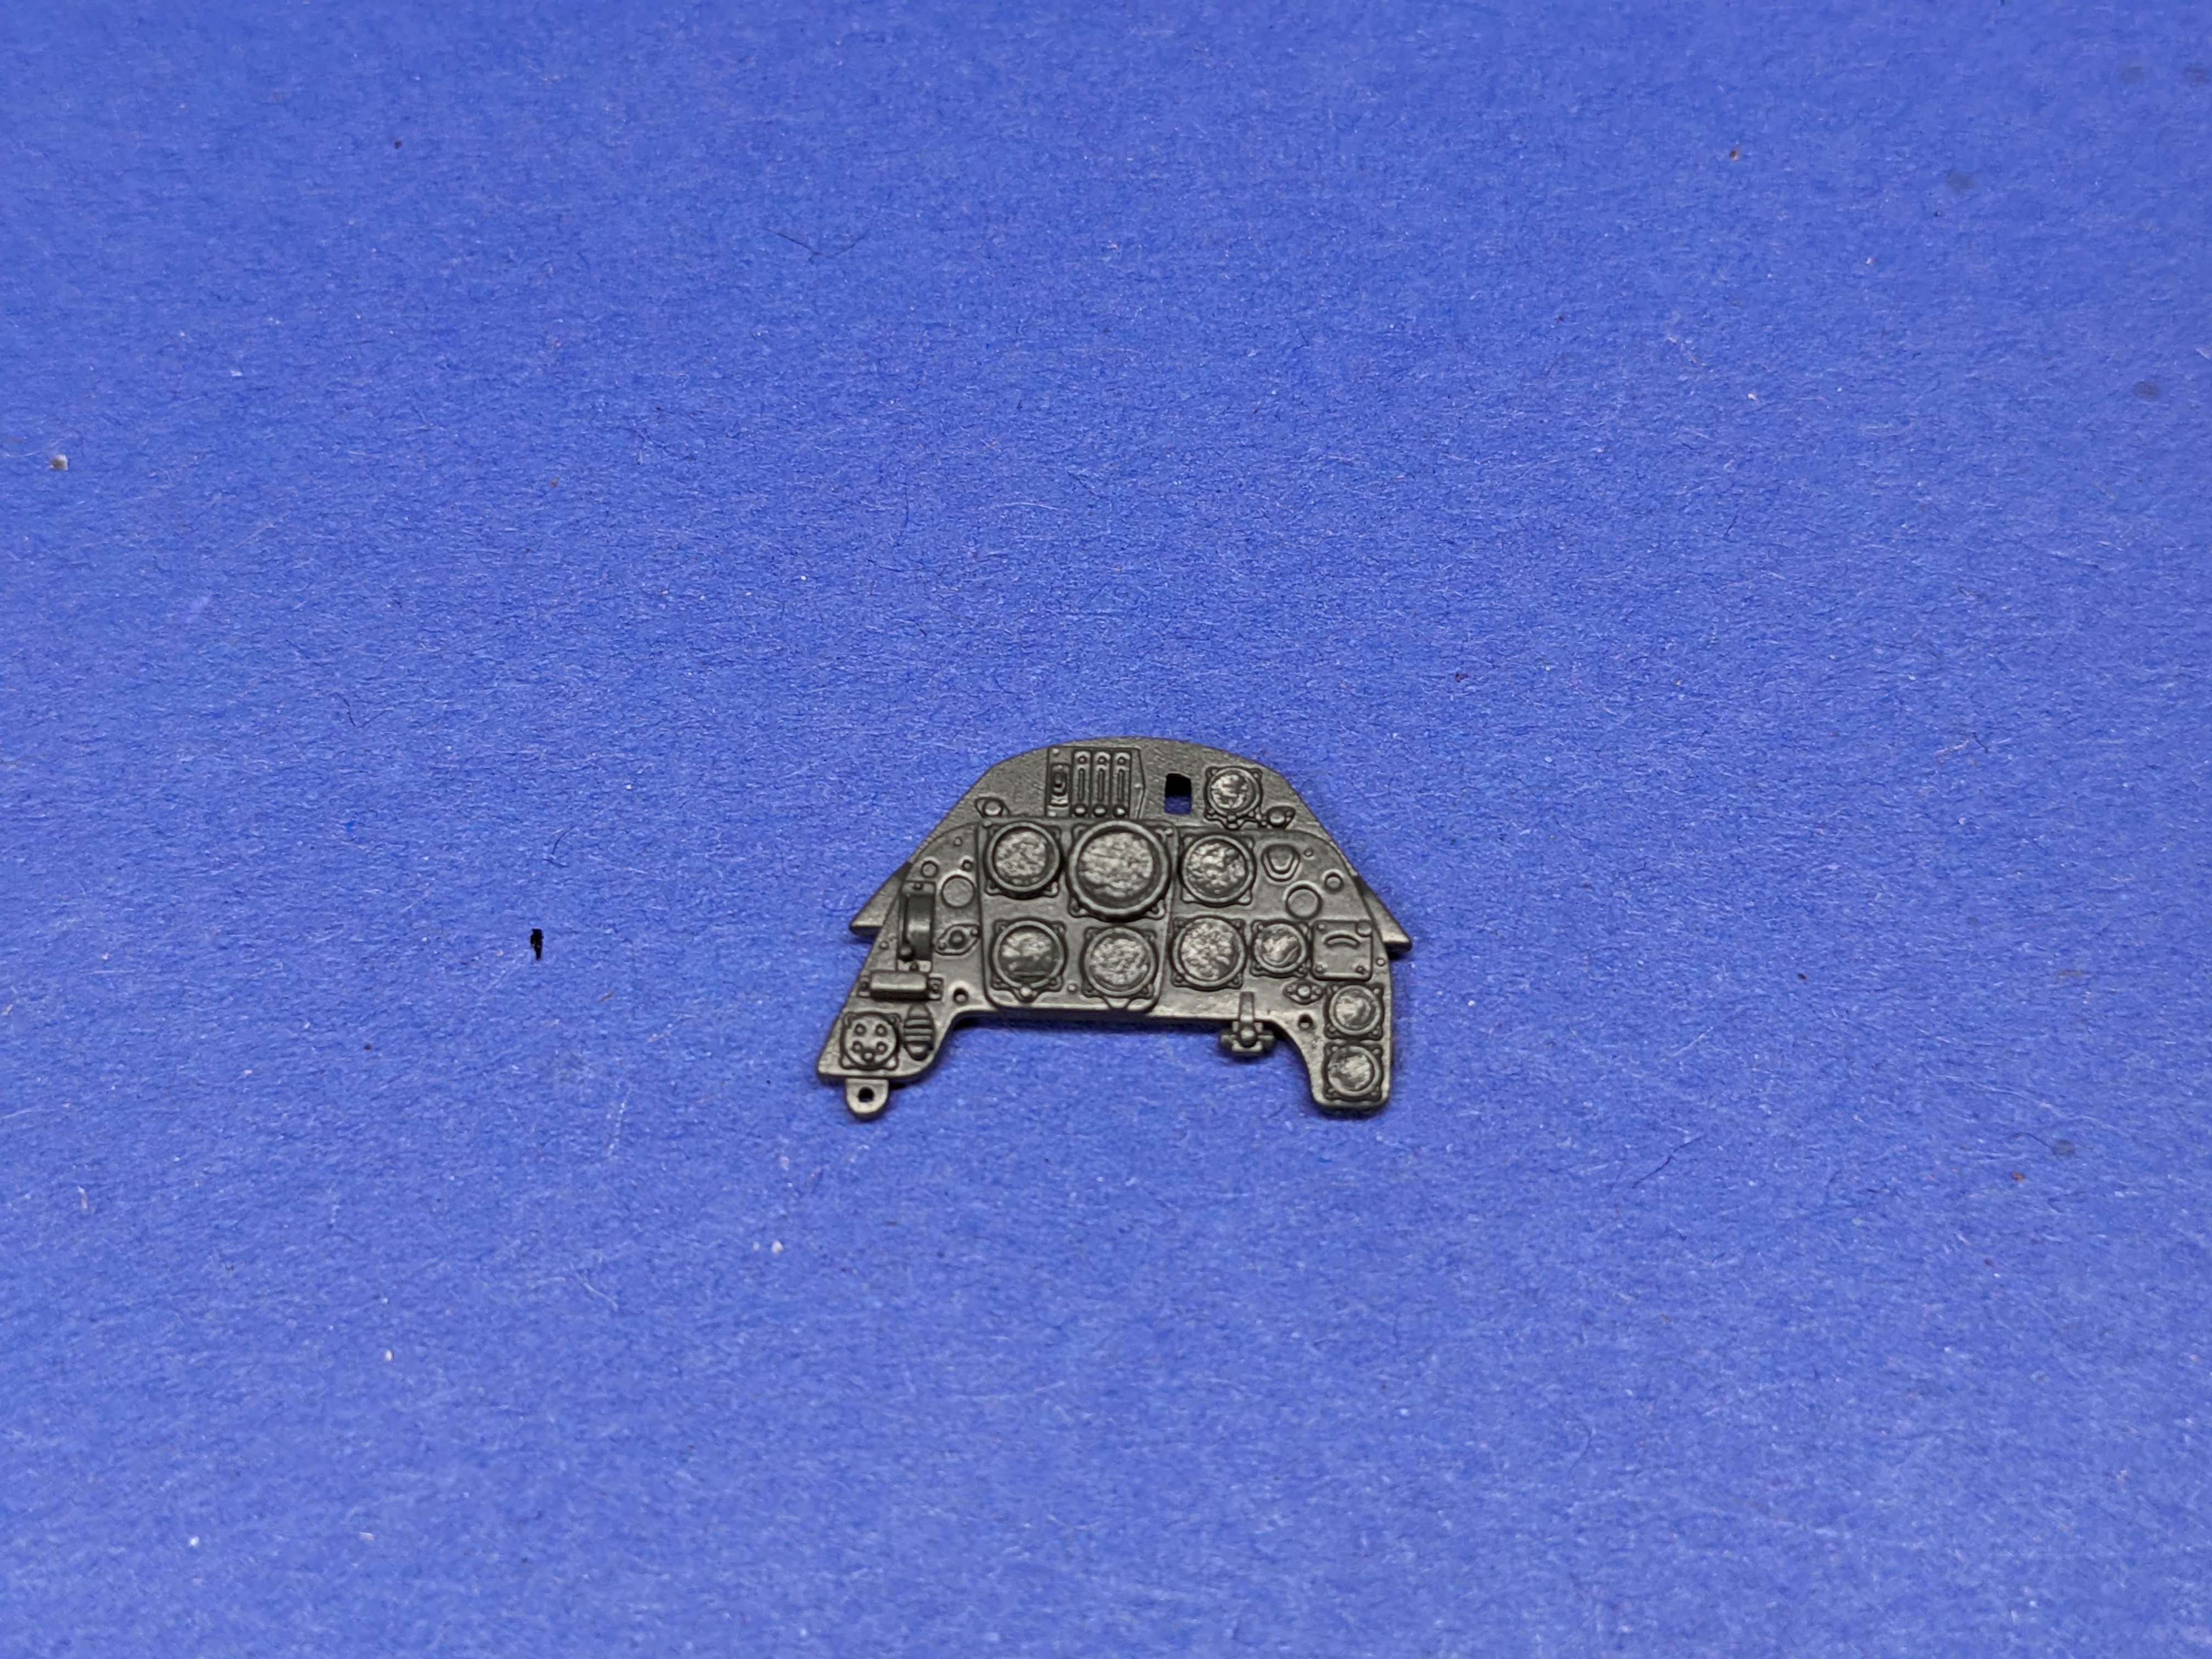
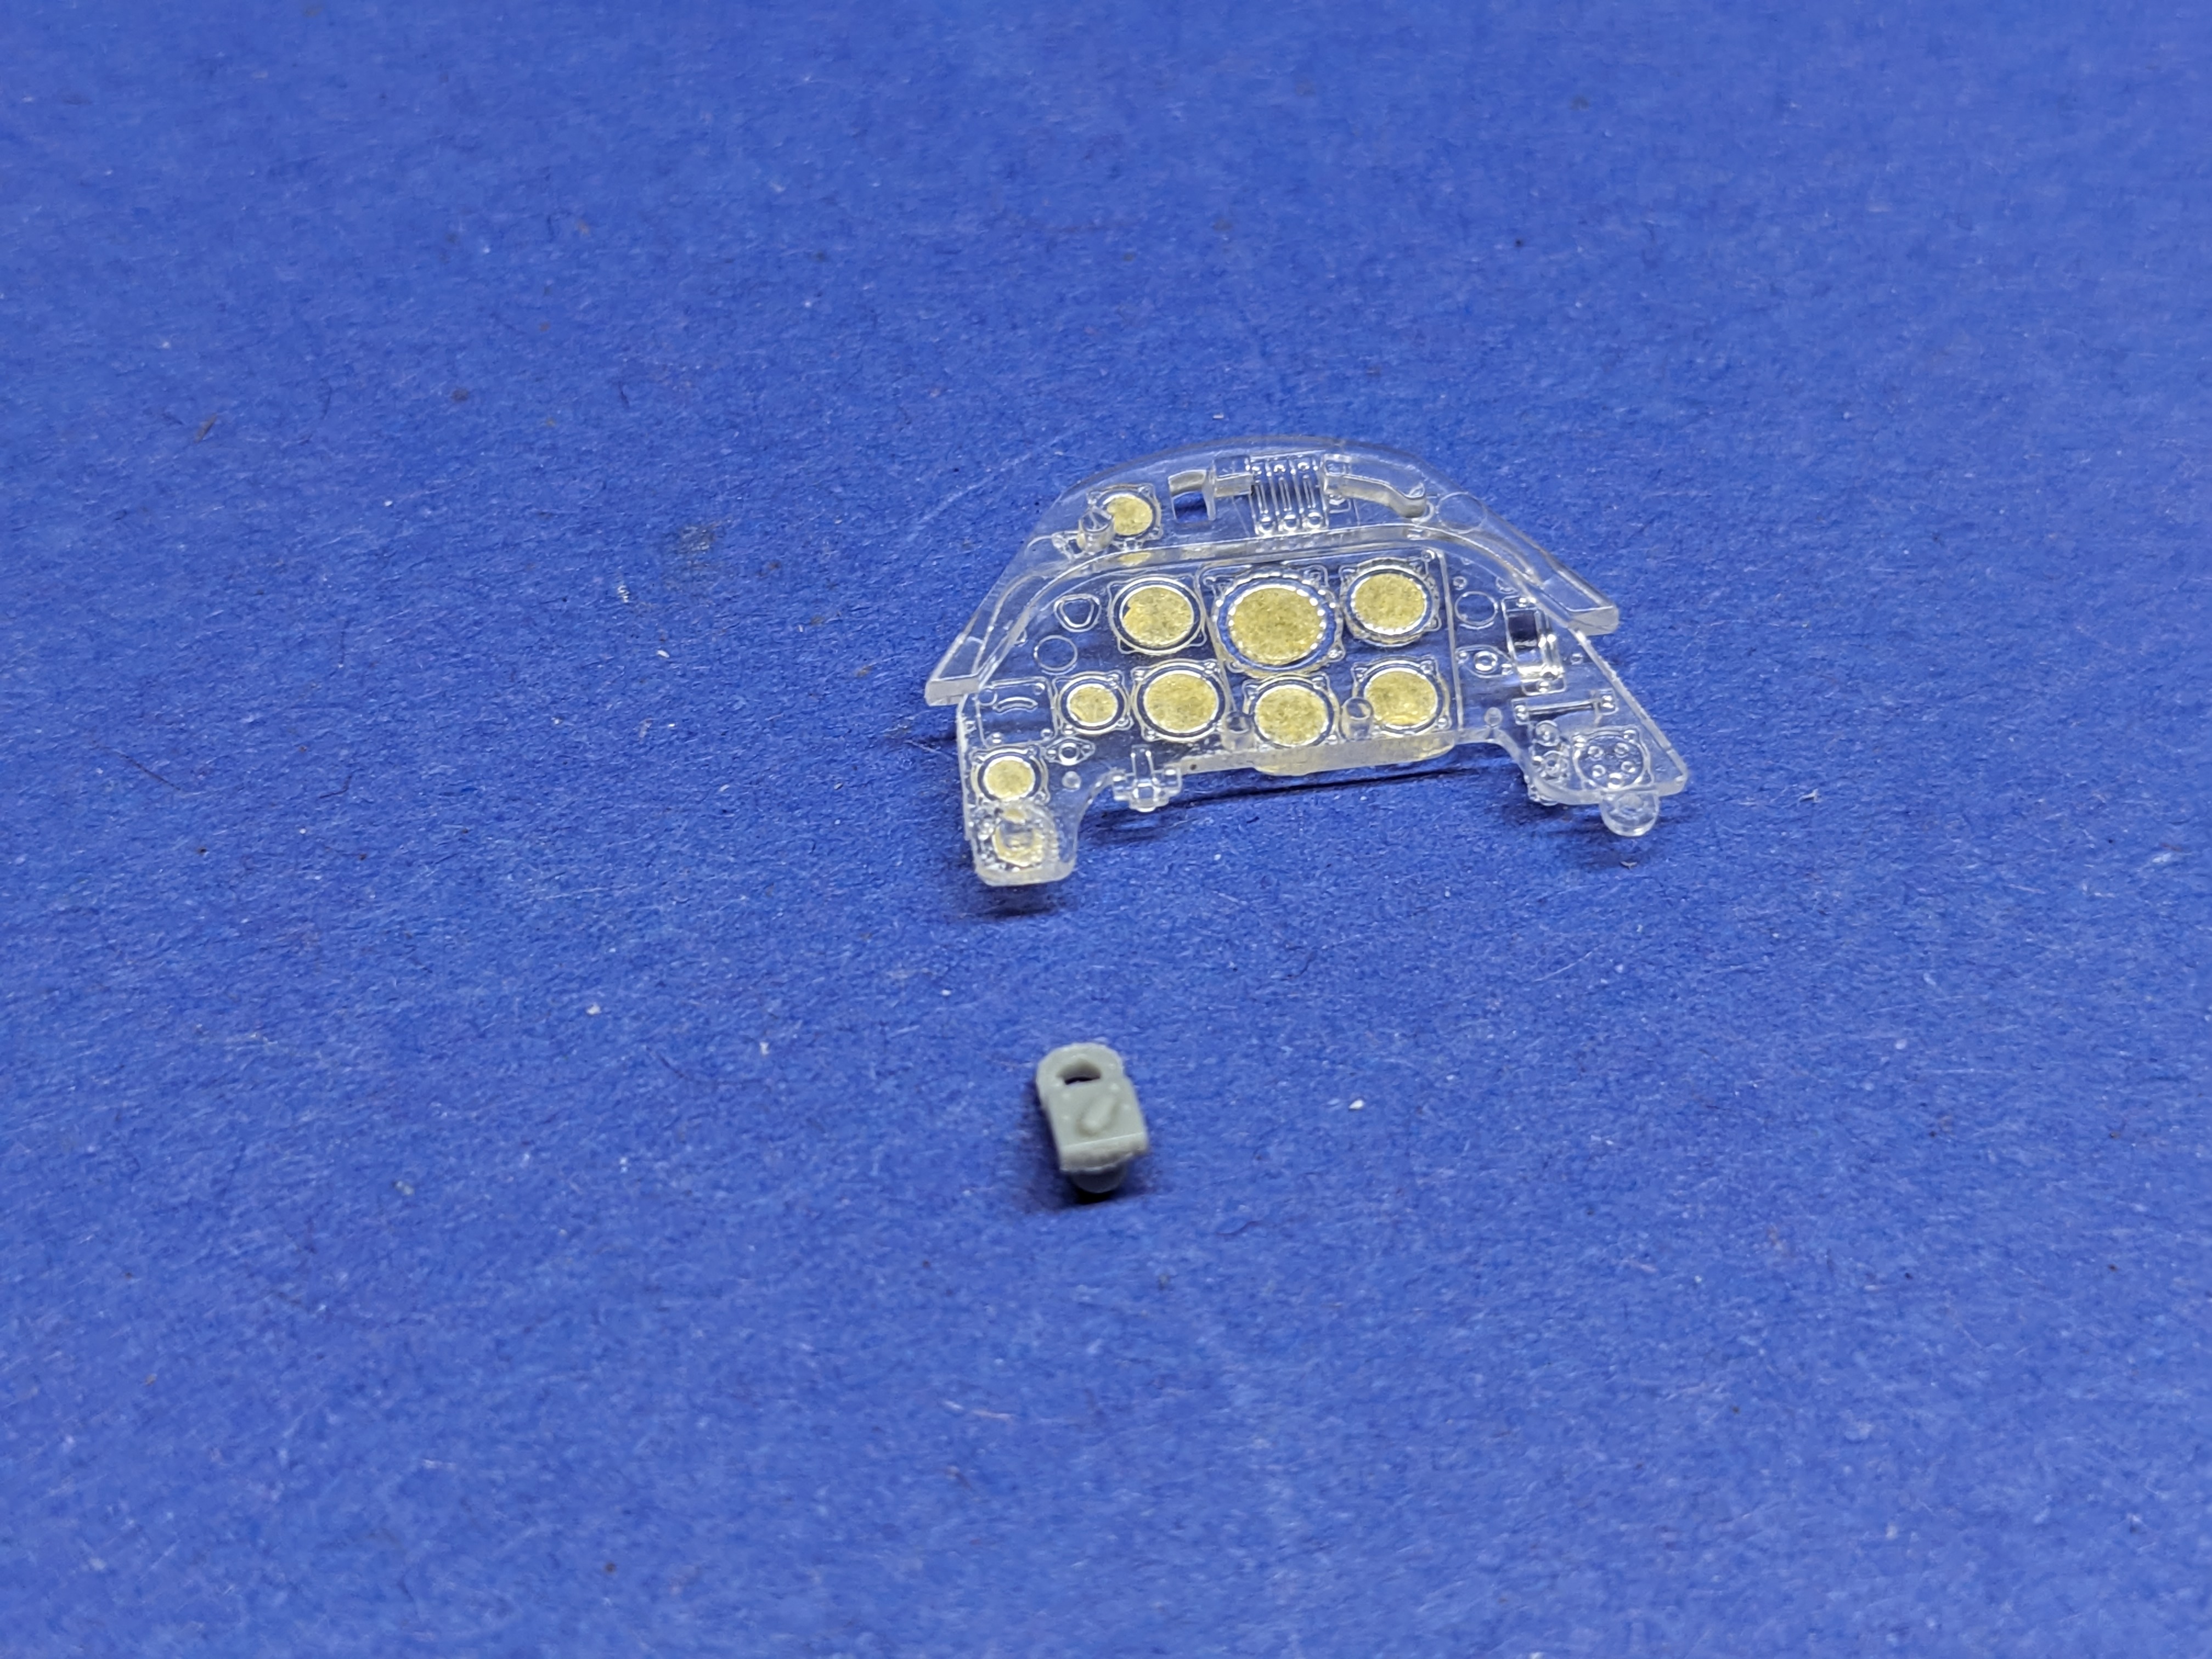
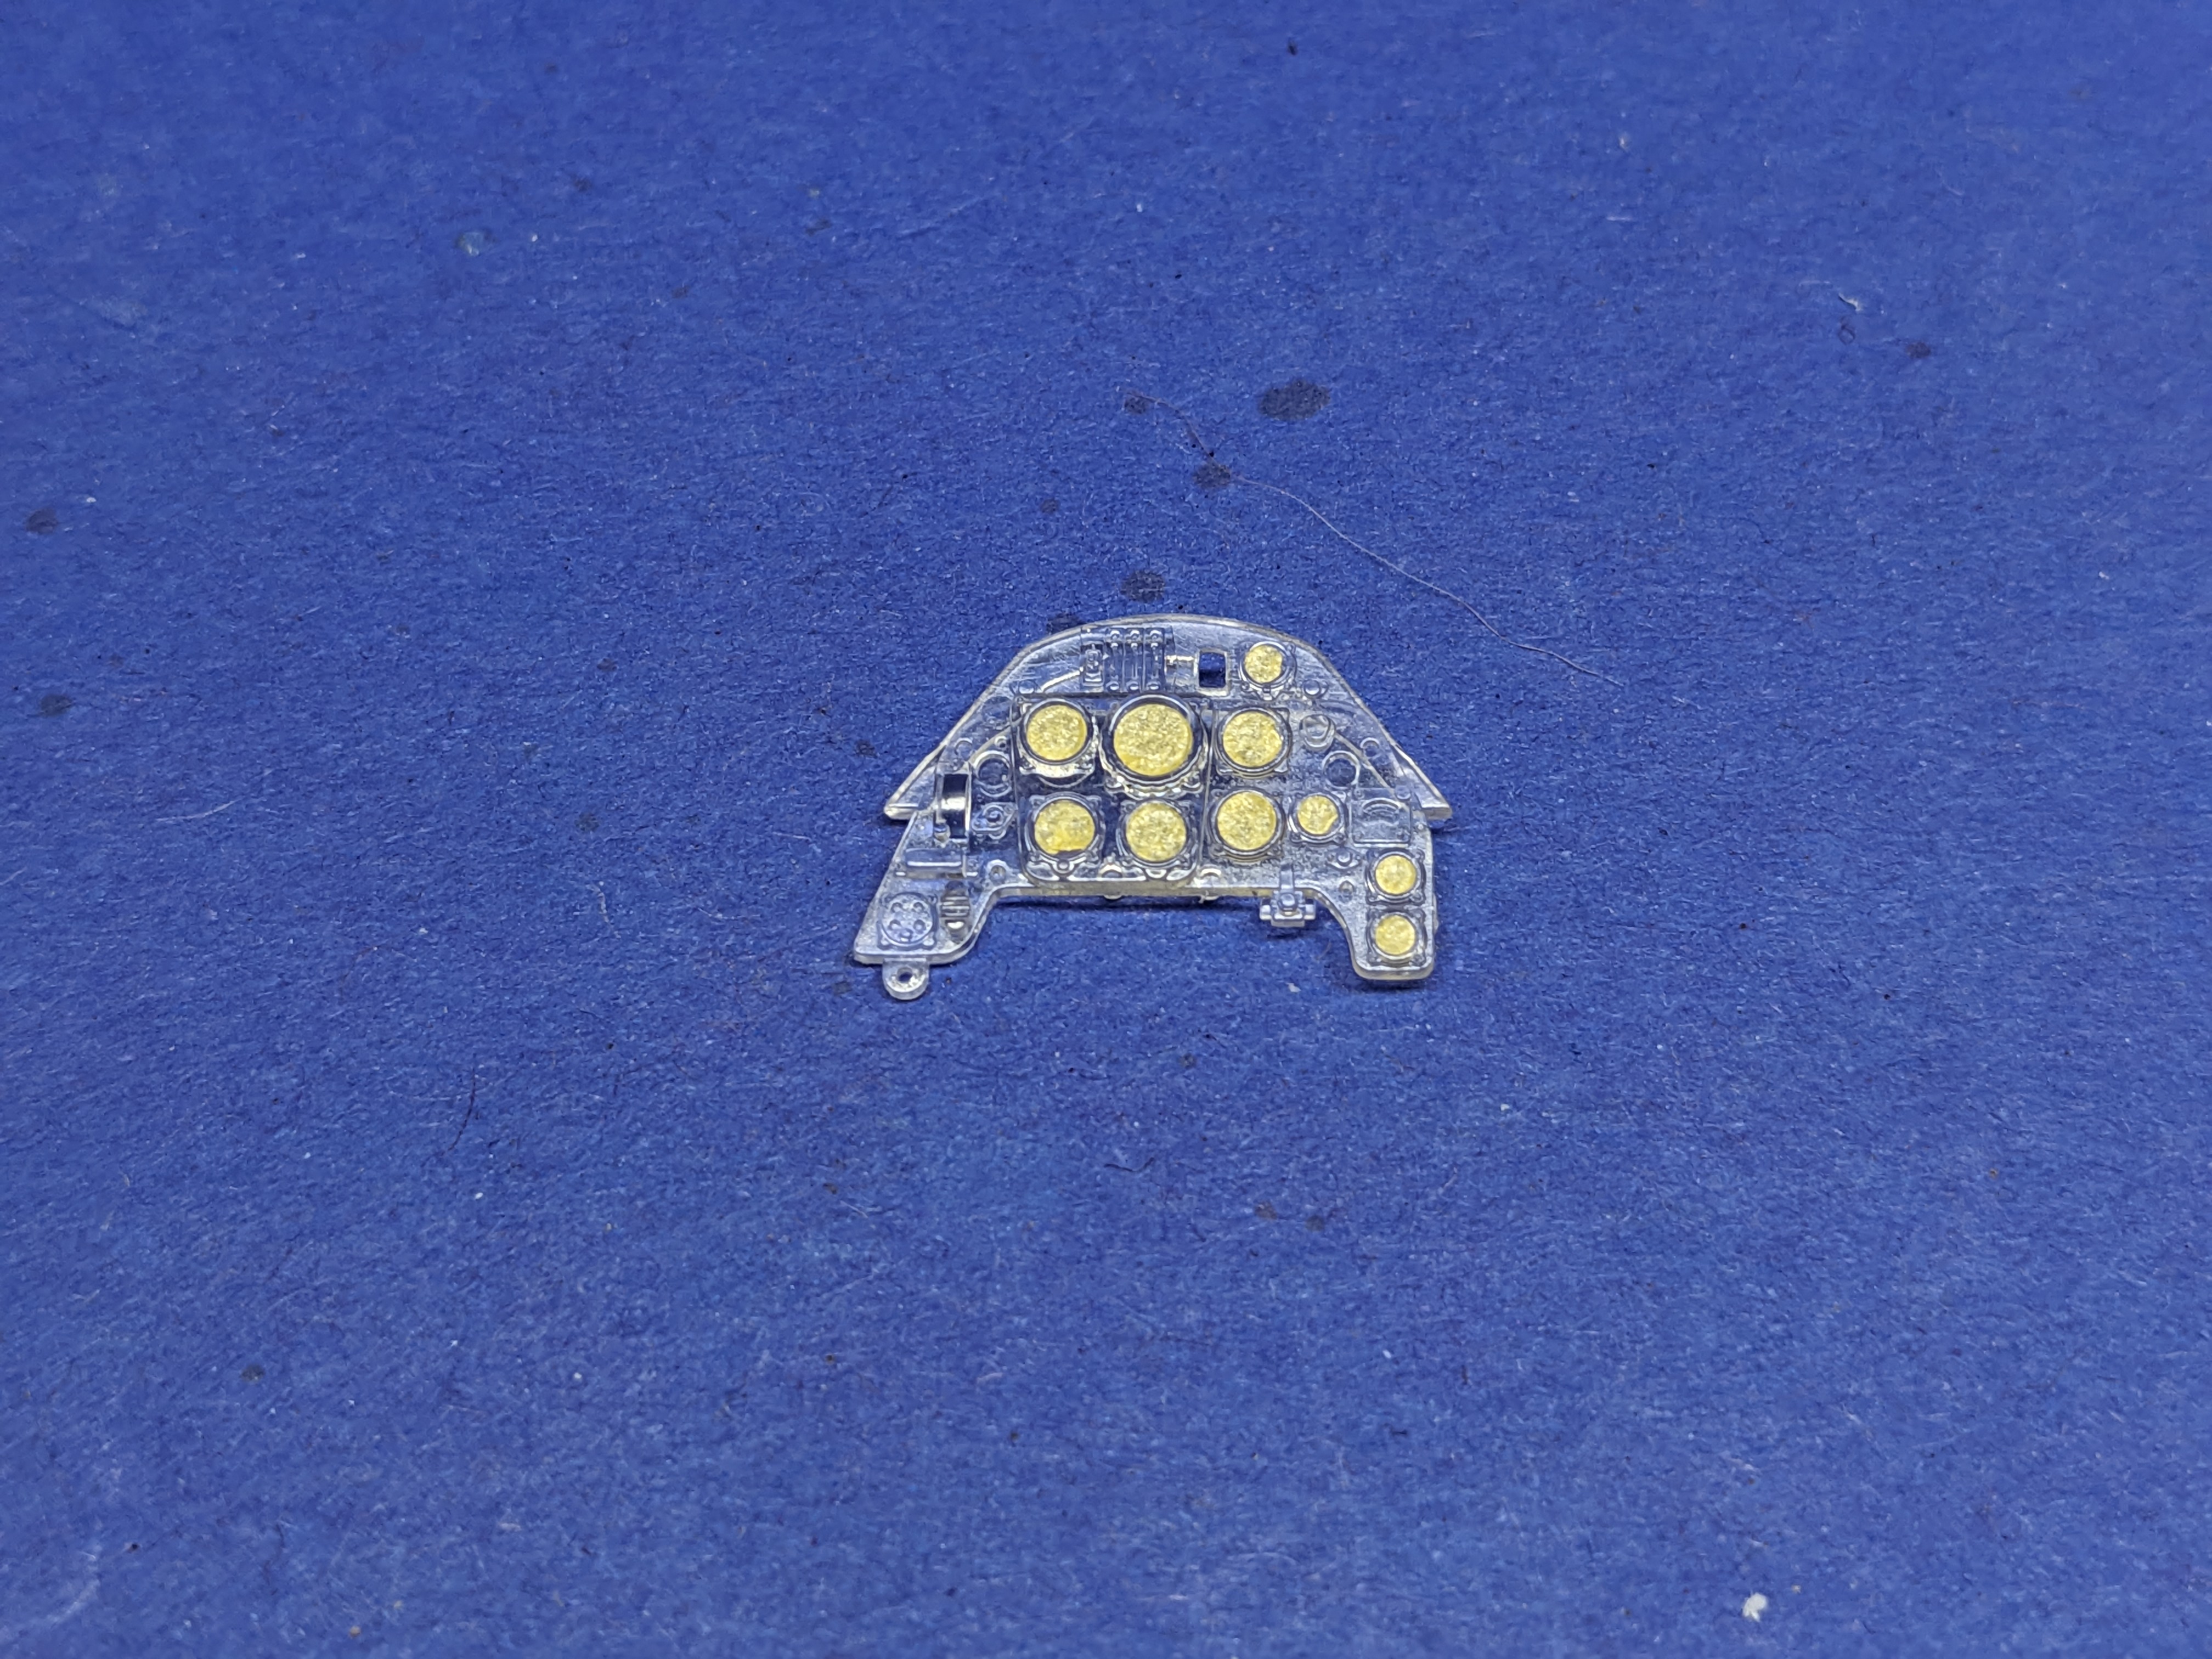
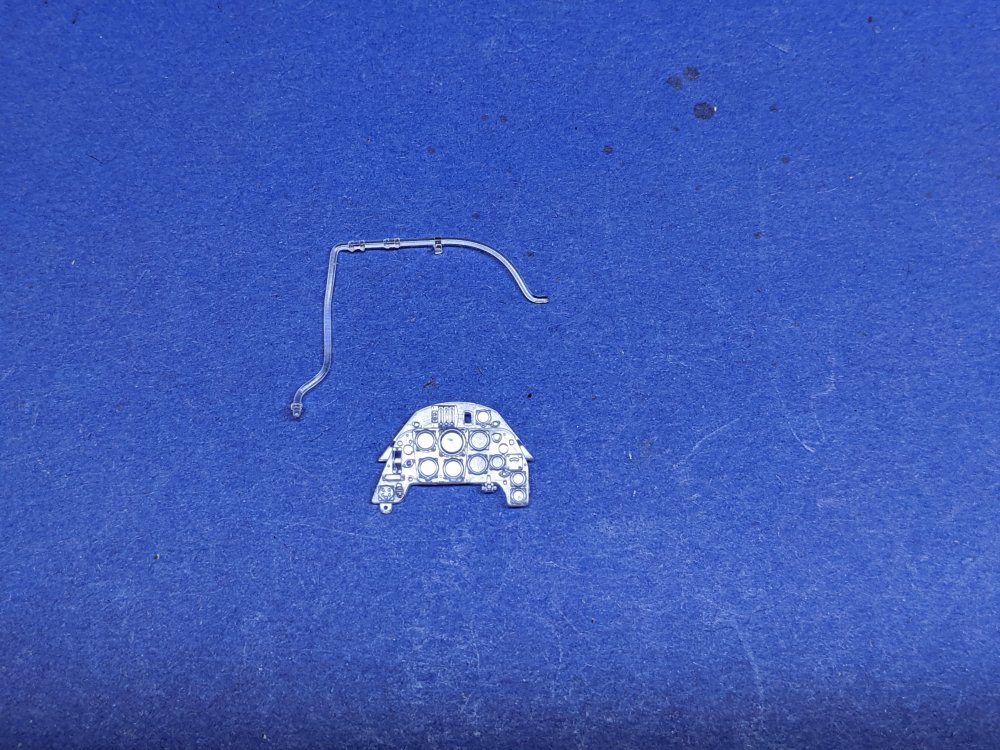
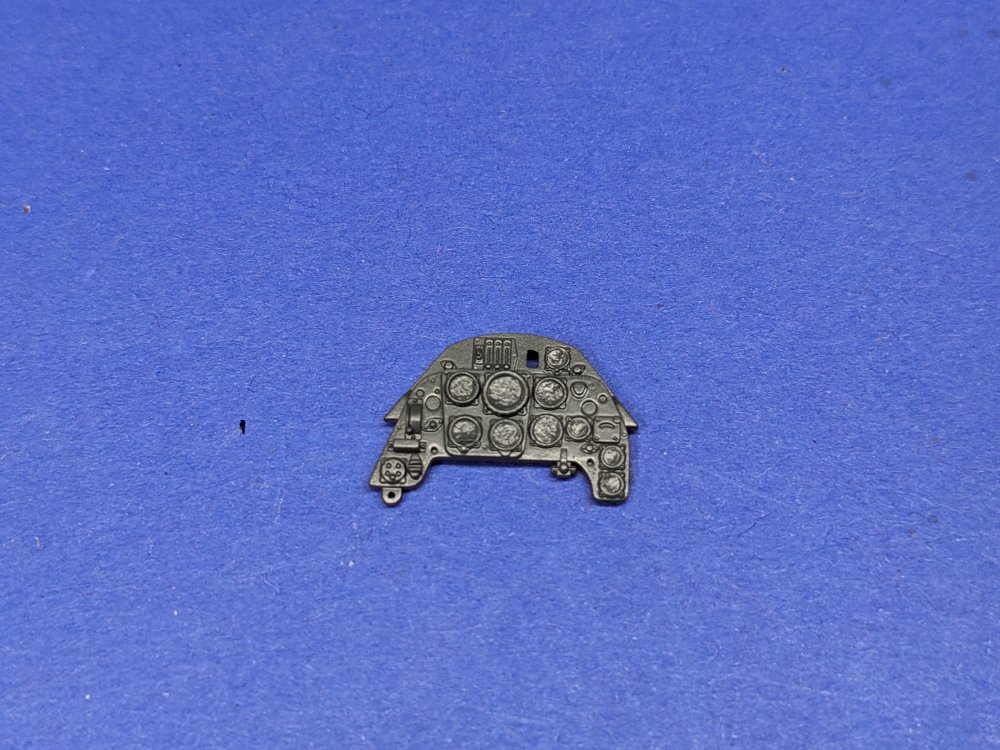
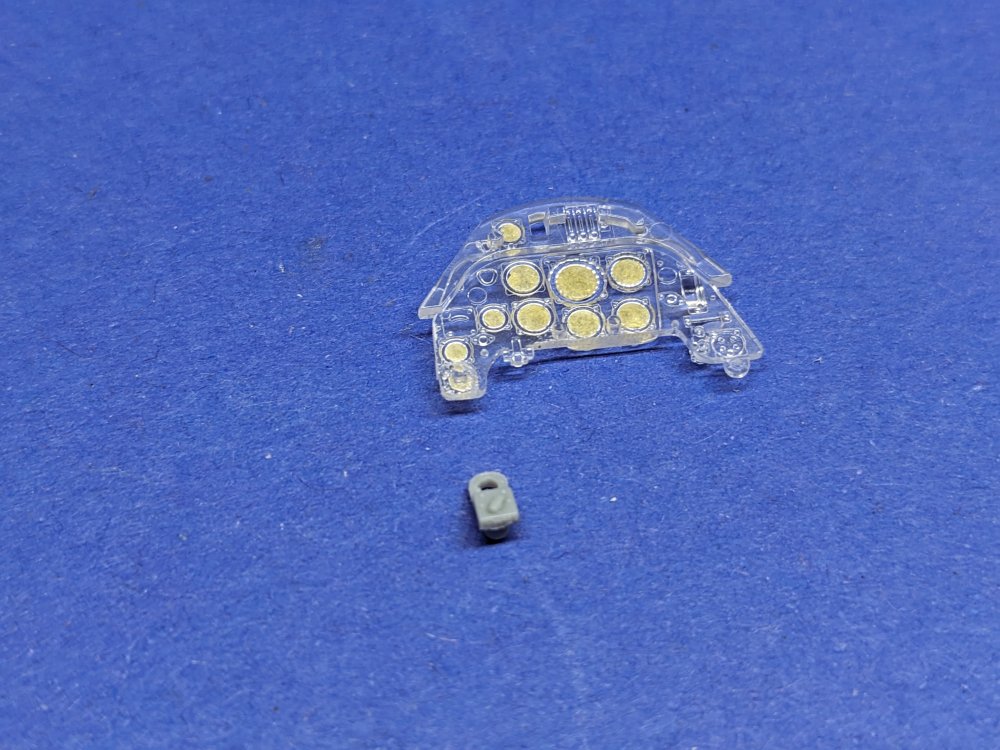
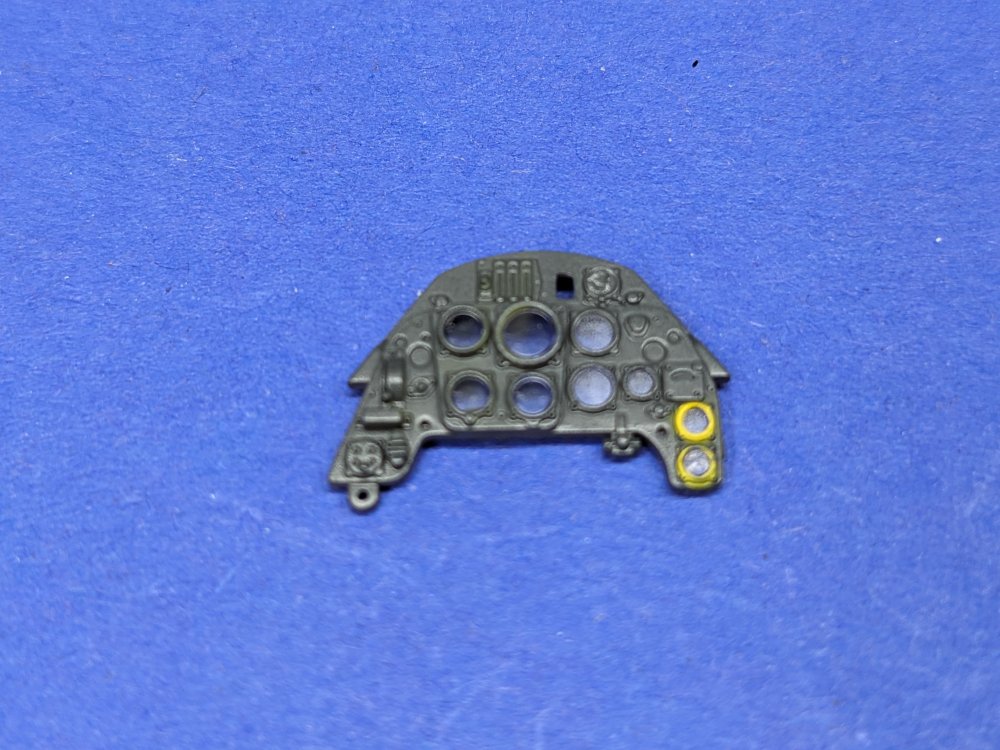
Back to the build, I decided to use the clear IP and apply the provided decals to the back side as suggested. As I am terrible with a brush, I decided to airbrush the panel. I first masked off the dial faces using precut tape circles. The sheet I bought start with 1mm diameter circles and they increase in 0.2mm increments so it's way to find the right size. At this point I noticed that there is a mounting pin on the backside directly in line with the lower most rightside instrument. This means there's no way the decal could go on the back as intended. To remedy this, uncut the pin off and sanded and polished the panel. The panel was then painted. After removing a couple of the masks, I was happy to see that they had worked. There are a couple of the bezels that need to be done in yellow. For those ones, I left the instrument masks in place and added an exterior one to go around the bezel. Can you tell I hate brush painting? The yellow was airbrushed and then I removed the remaining masks. It worked so now to apply the decals.


- 90 replies
-
- 5
-

-

-
- zoukei-mura
- 109
- (and 1 more)
-
@Redshift, sorry if I came across as being too critical. It's not something that I would have considered to be lacking. If anything , I'd say the opposite true in that there would more complaints about I'd they had included moulded wiring as it would have been grossly out of scale. Or worse, moulded in place. Maybe they could have included a wiring diagram and that could be suggested to ZM. They do tend to listen to criticisms about their kits and have made changes as a result, ie their kits are in one colour now instead of multicoloured plastic. As for covering up a complete engine, I personally prefer the closed up look. I'm going to see if the cowl panels can be removed after completion. We'll find out soon enough.
- 90 replies
-
- 3
-
-
- zoukei-mura
- 109
- (and 1 more)
-
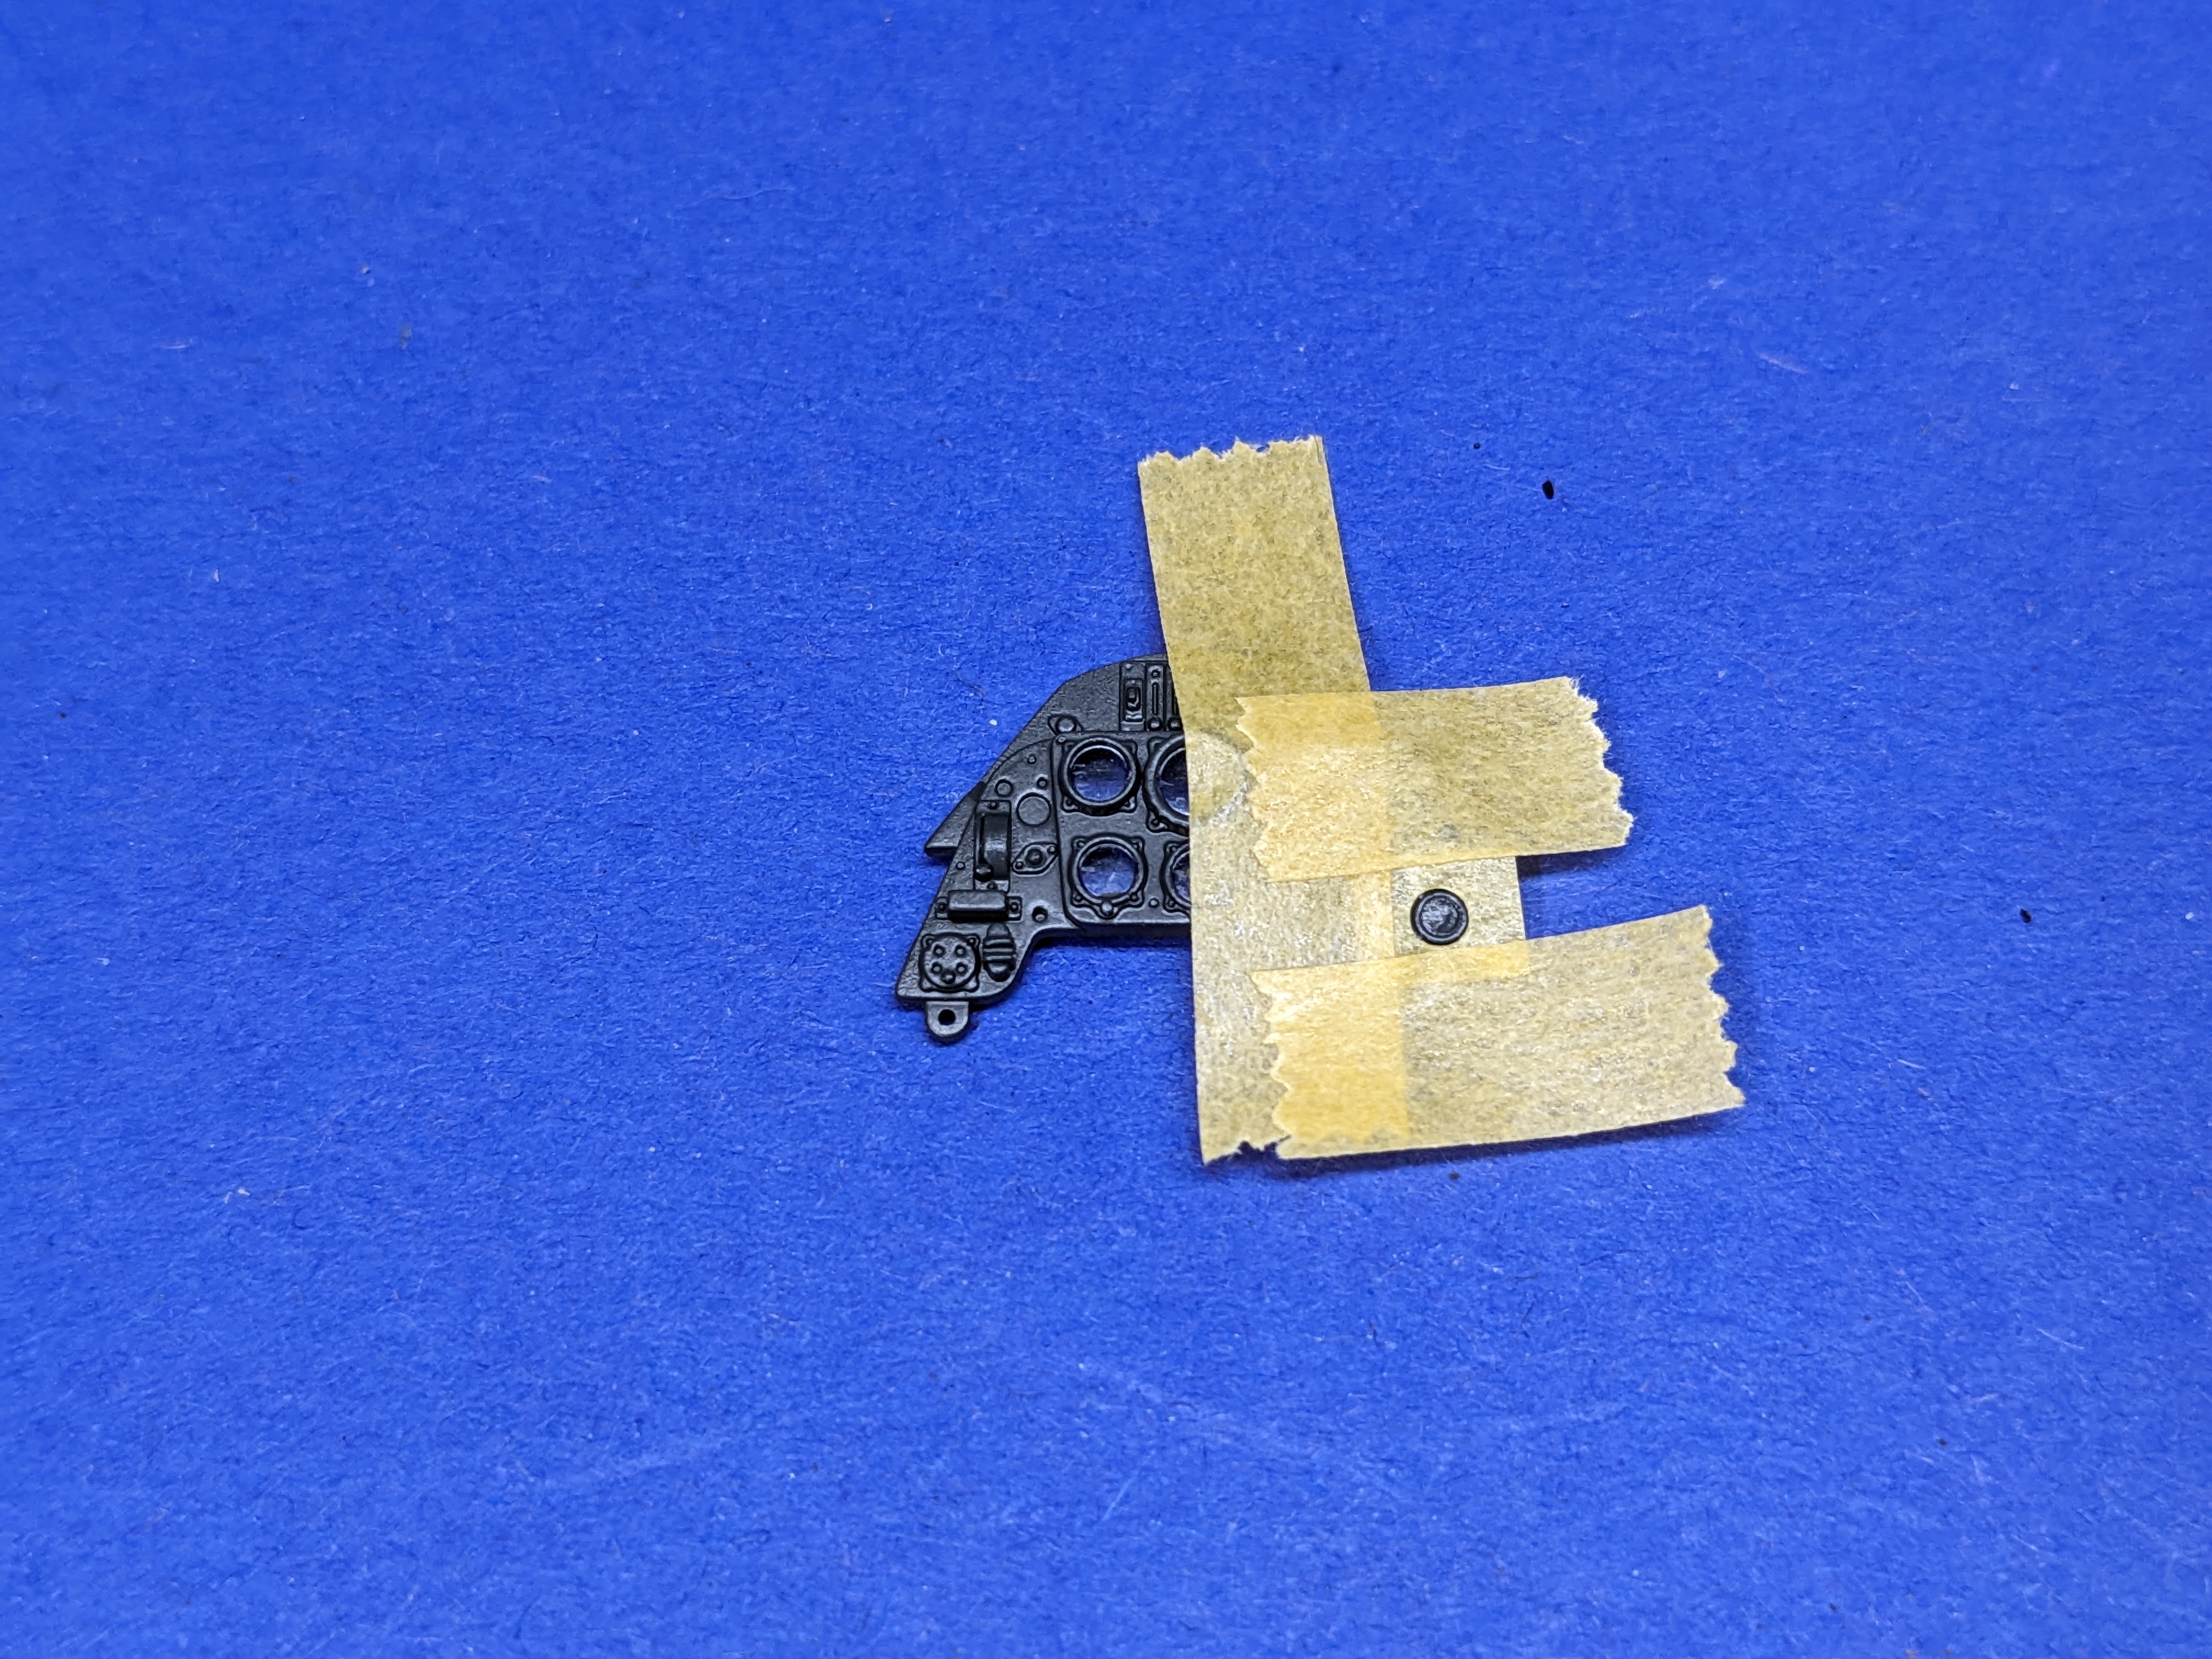
If you're using the clear one, watch out for the locating pin in the bottom right corner. It goes right where the instrument decal is supposed to. I clipped it off and will just use PVA to glue on the knob that is mounted there. Otherwise the wings look good.
-
GWH Curtiss P-40B; The Flying Tigers
BlrwestSiR replied to Peterpools's topic in LSM 1/35 and Larger Work In Progress
I'm right there with Hubert and Gary. Hope someone brought lots of popcorn. -
Thanks Martin! Your help pointing out the issue and you suggestion to do the review are both greatly appreciated. I haven't seen the Tamiya ,109 but if they did the same breakdown, then it shows that the execution is where ZM needs that little bit more of a push.
- 90 replies
-
- 3
-
-
- zoukei-mura
- 109
- (and 1 more)
-
I don't think that ZM are relying on the builder's ignorance by not providing a wiring diagram for the kit and things they will just ignore it. Making wiring fit under a closed cowling is not easy. Some of the best builders out there have had a hard time doing it and just getting the engine bearers to fit nevermind a closed cowl. Very few companies have in fact ever provided a wiring diagram with their kits. WNW is the only one that comes to mind. When the Tamiya Spitfire and all their subsequent prop kits came out, no one complained that they didn't have an engine wiring diagram. Those with the skill and patience to do the wiring would most likely scoff at anything moulded in place much less done in IM plastic. The manufacturer has to draw the line somewhere. Me, I'm not a fan of wiring engines and really only do it when it's extremely visible like on a a radial engine. I do wish that ZM had included an engine blank and then I would have considered wiring the engine to display beside the finished plane. Which GWH has with their P-40.
- 90 replies
-
- 1
-
-
- zoukei-mura
- 109
- (and 1 more)
-
Thanks Nick! Especially since you've done reviews before as this is really my first attempt at one. Putting the spacer inside the vertical tailplane really helps take some of the slop out of the fit. Plus with it going in after the halves are glued together, it doesn't create other work down the line. The kit is let down by the execution of the parts. A bit more refinement to the fit and the detail and modelers would have been swooning over this and wondering why it took so long. Instead it's become a site point on an otherwise excellent model.
- 90 replies
-
- 5
-
-
- zoukei-mura
- 109
- (and 1 more)
-
What is on your bench right now ? Share a picture :)
BlrwestSiR replied to Martinnfb's topic in Modelling Discussion
Looks like someone felt they were being ignored. So a slight pause from my 109 build as I give someone a scratch behind the ears...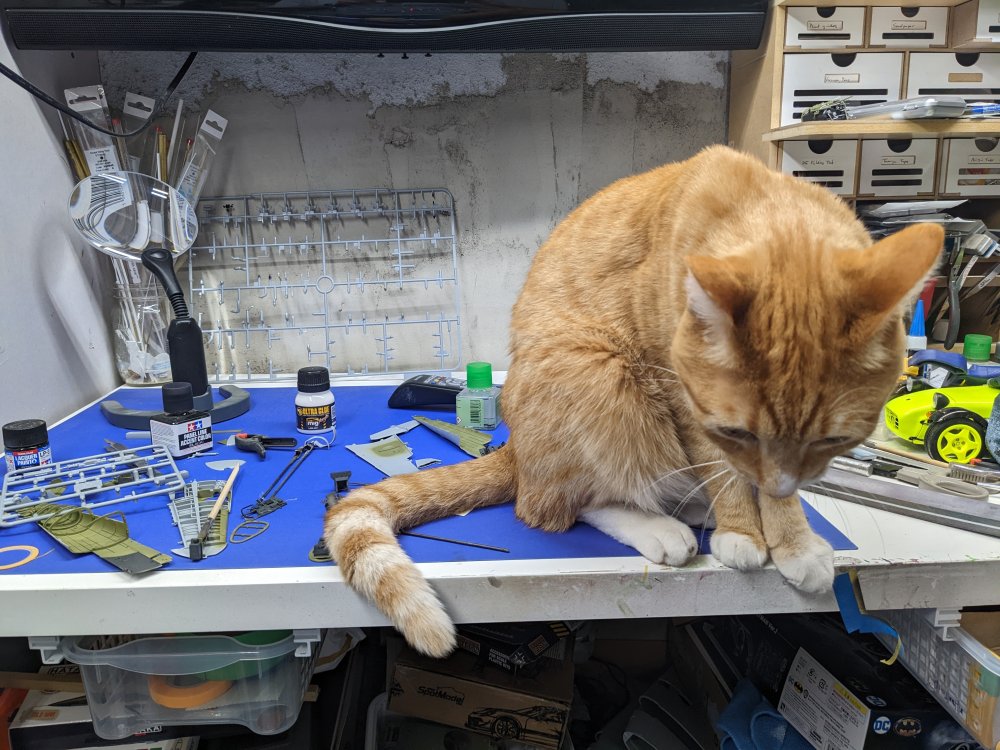
-
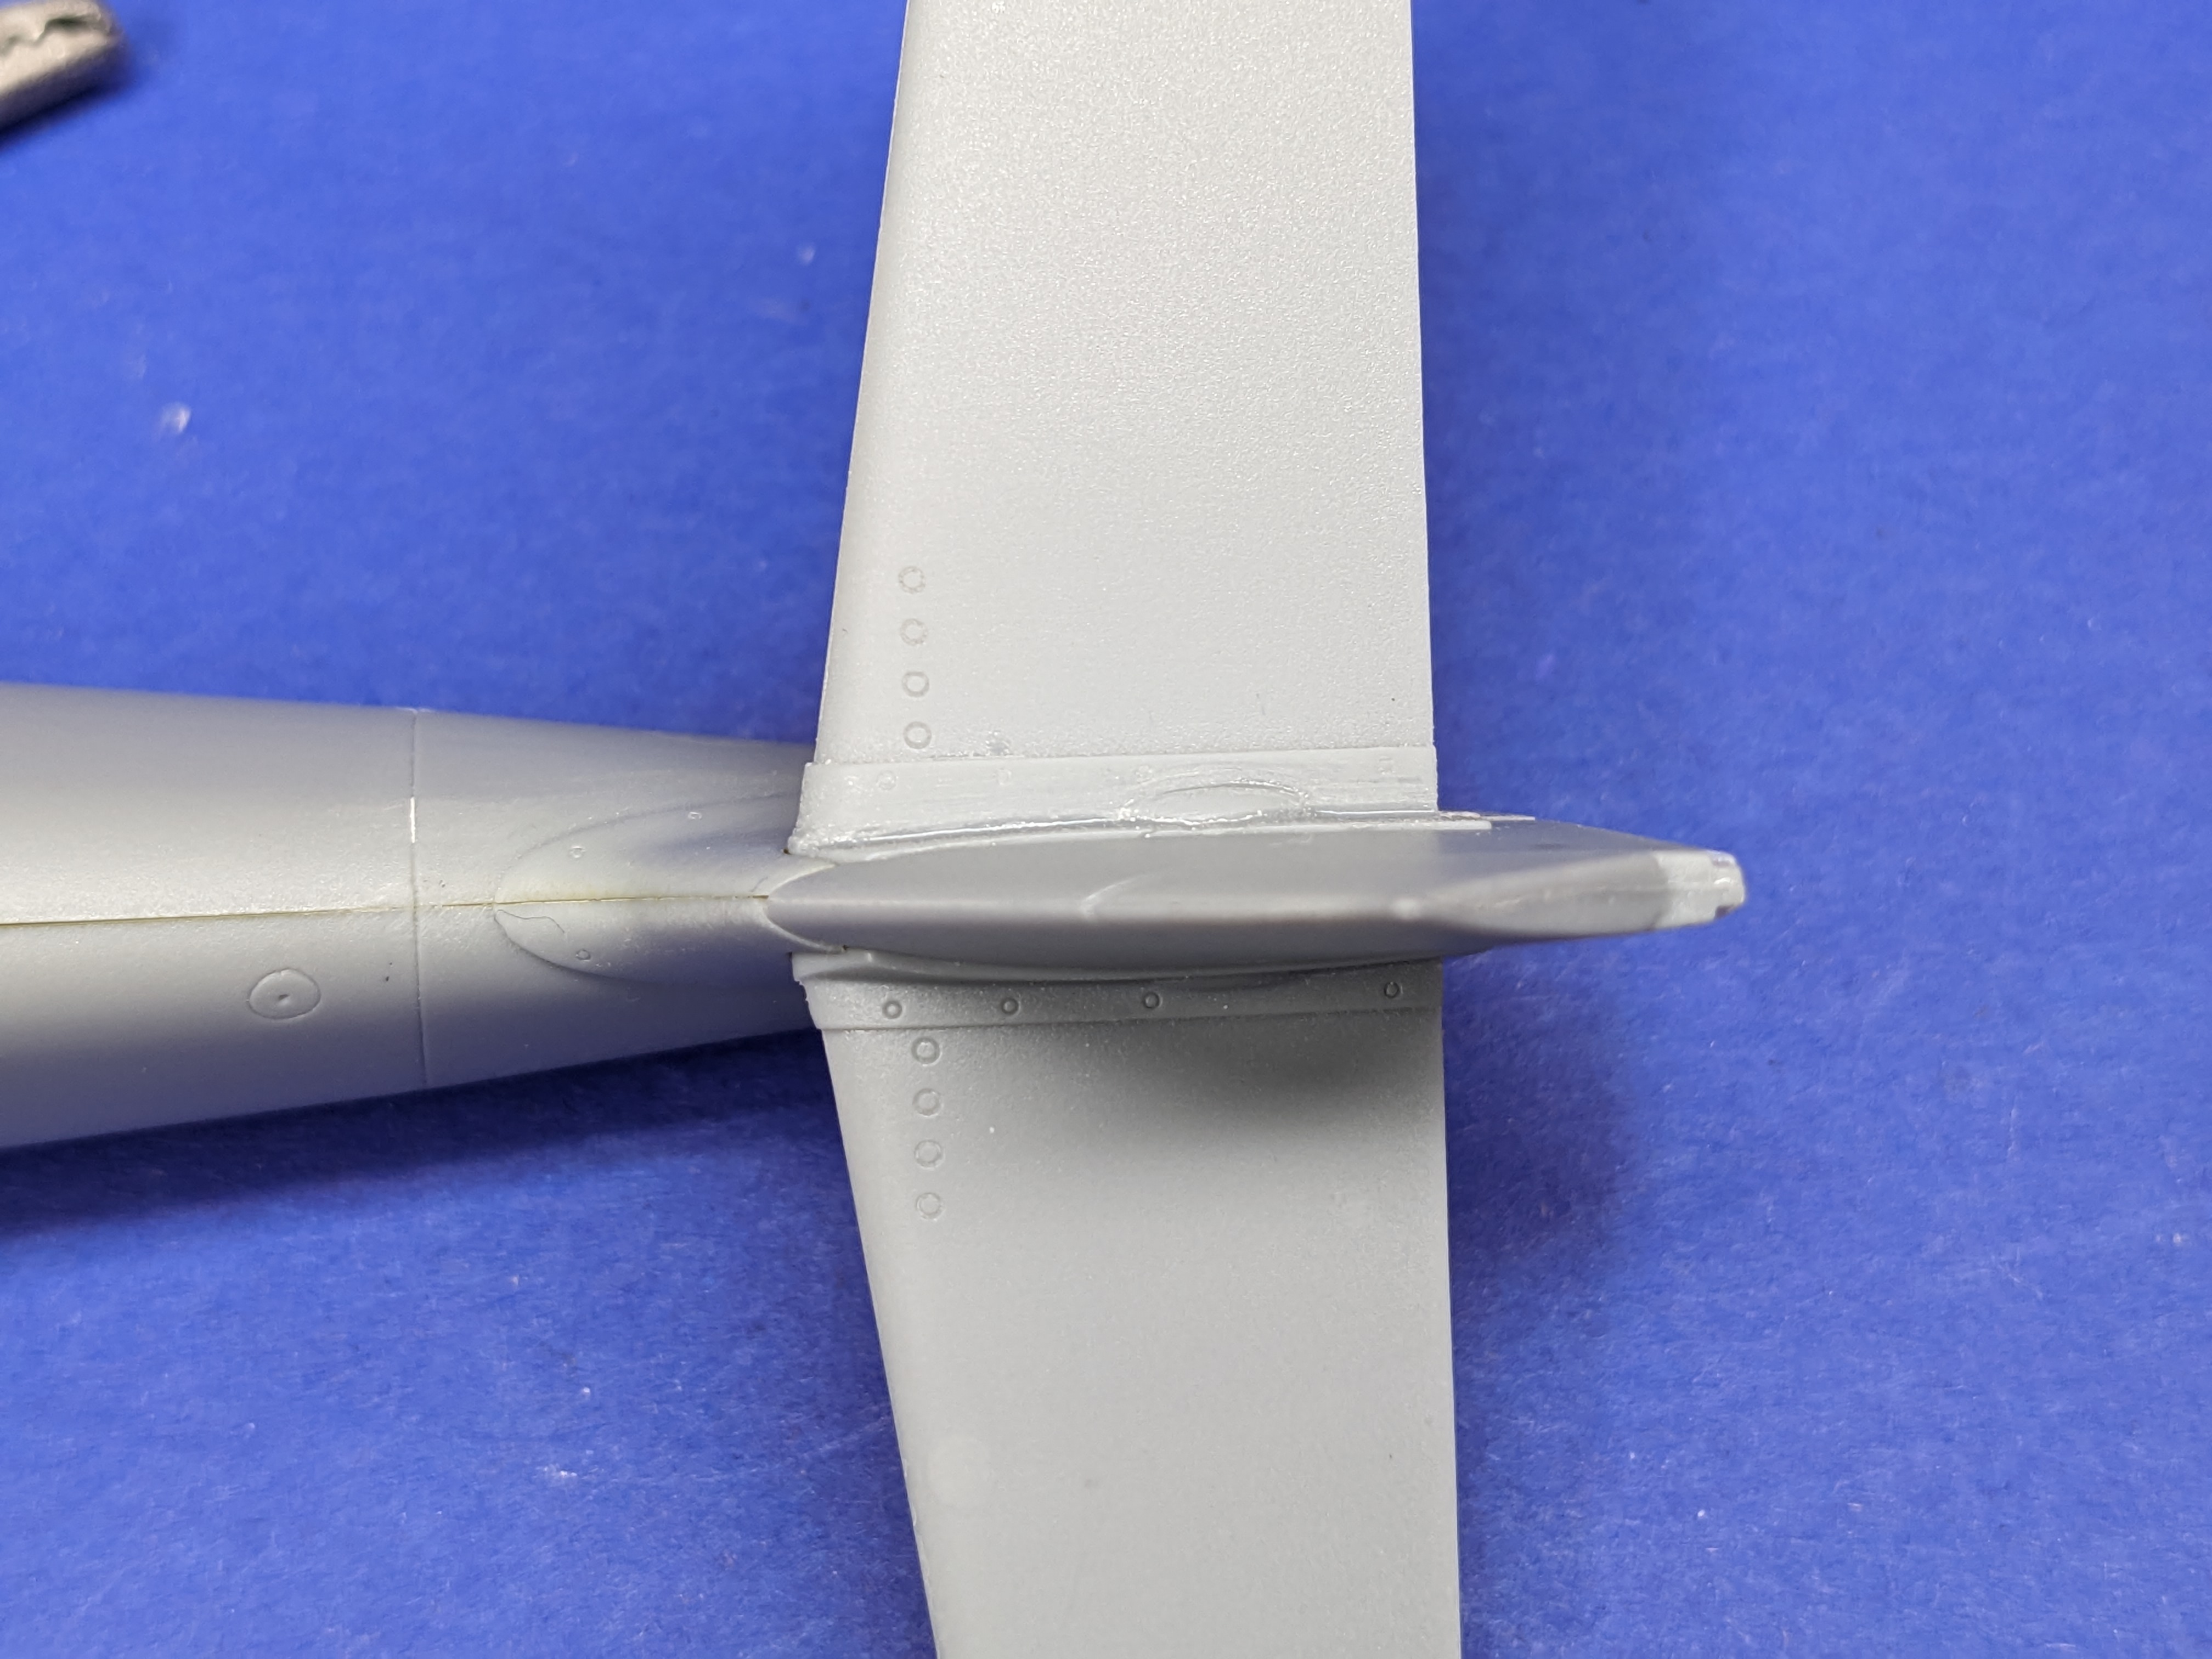
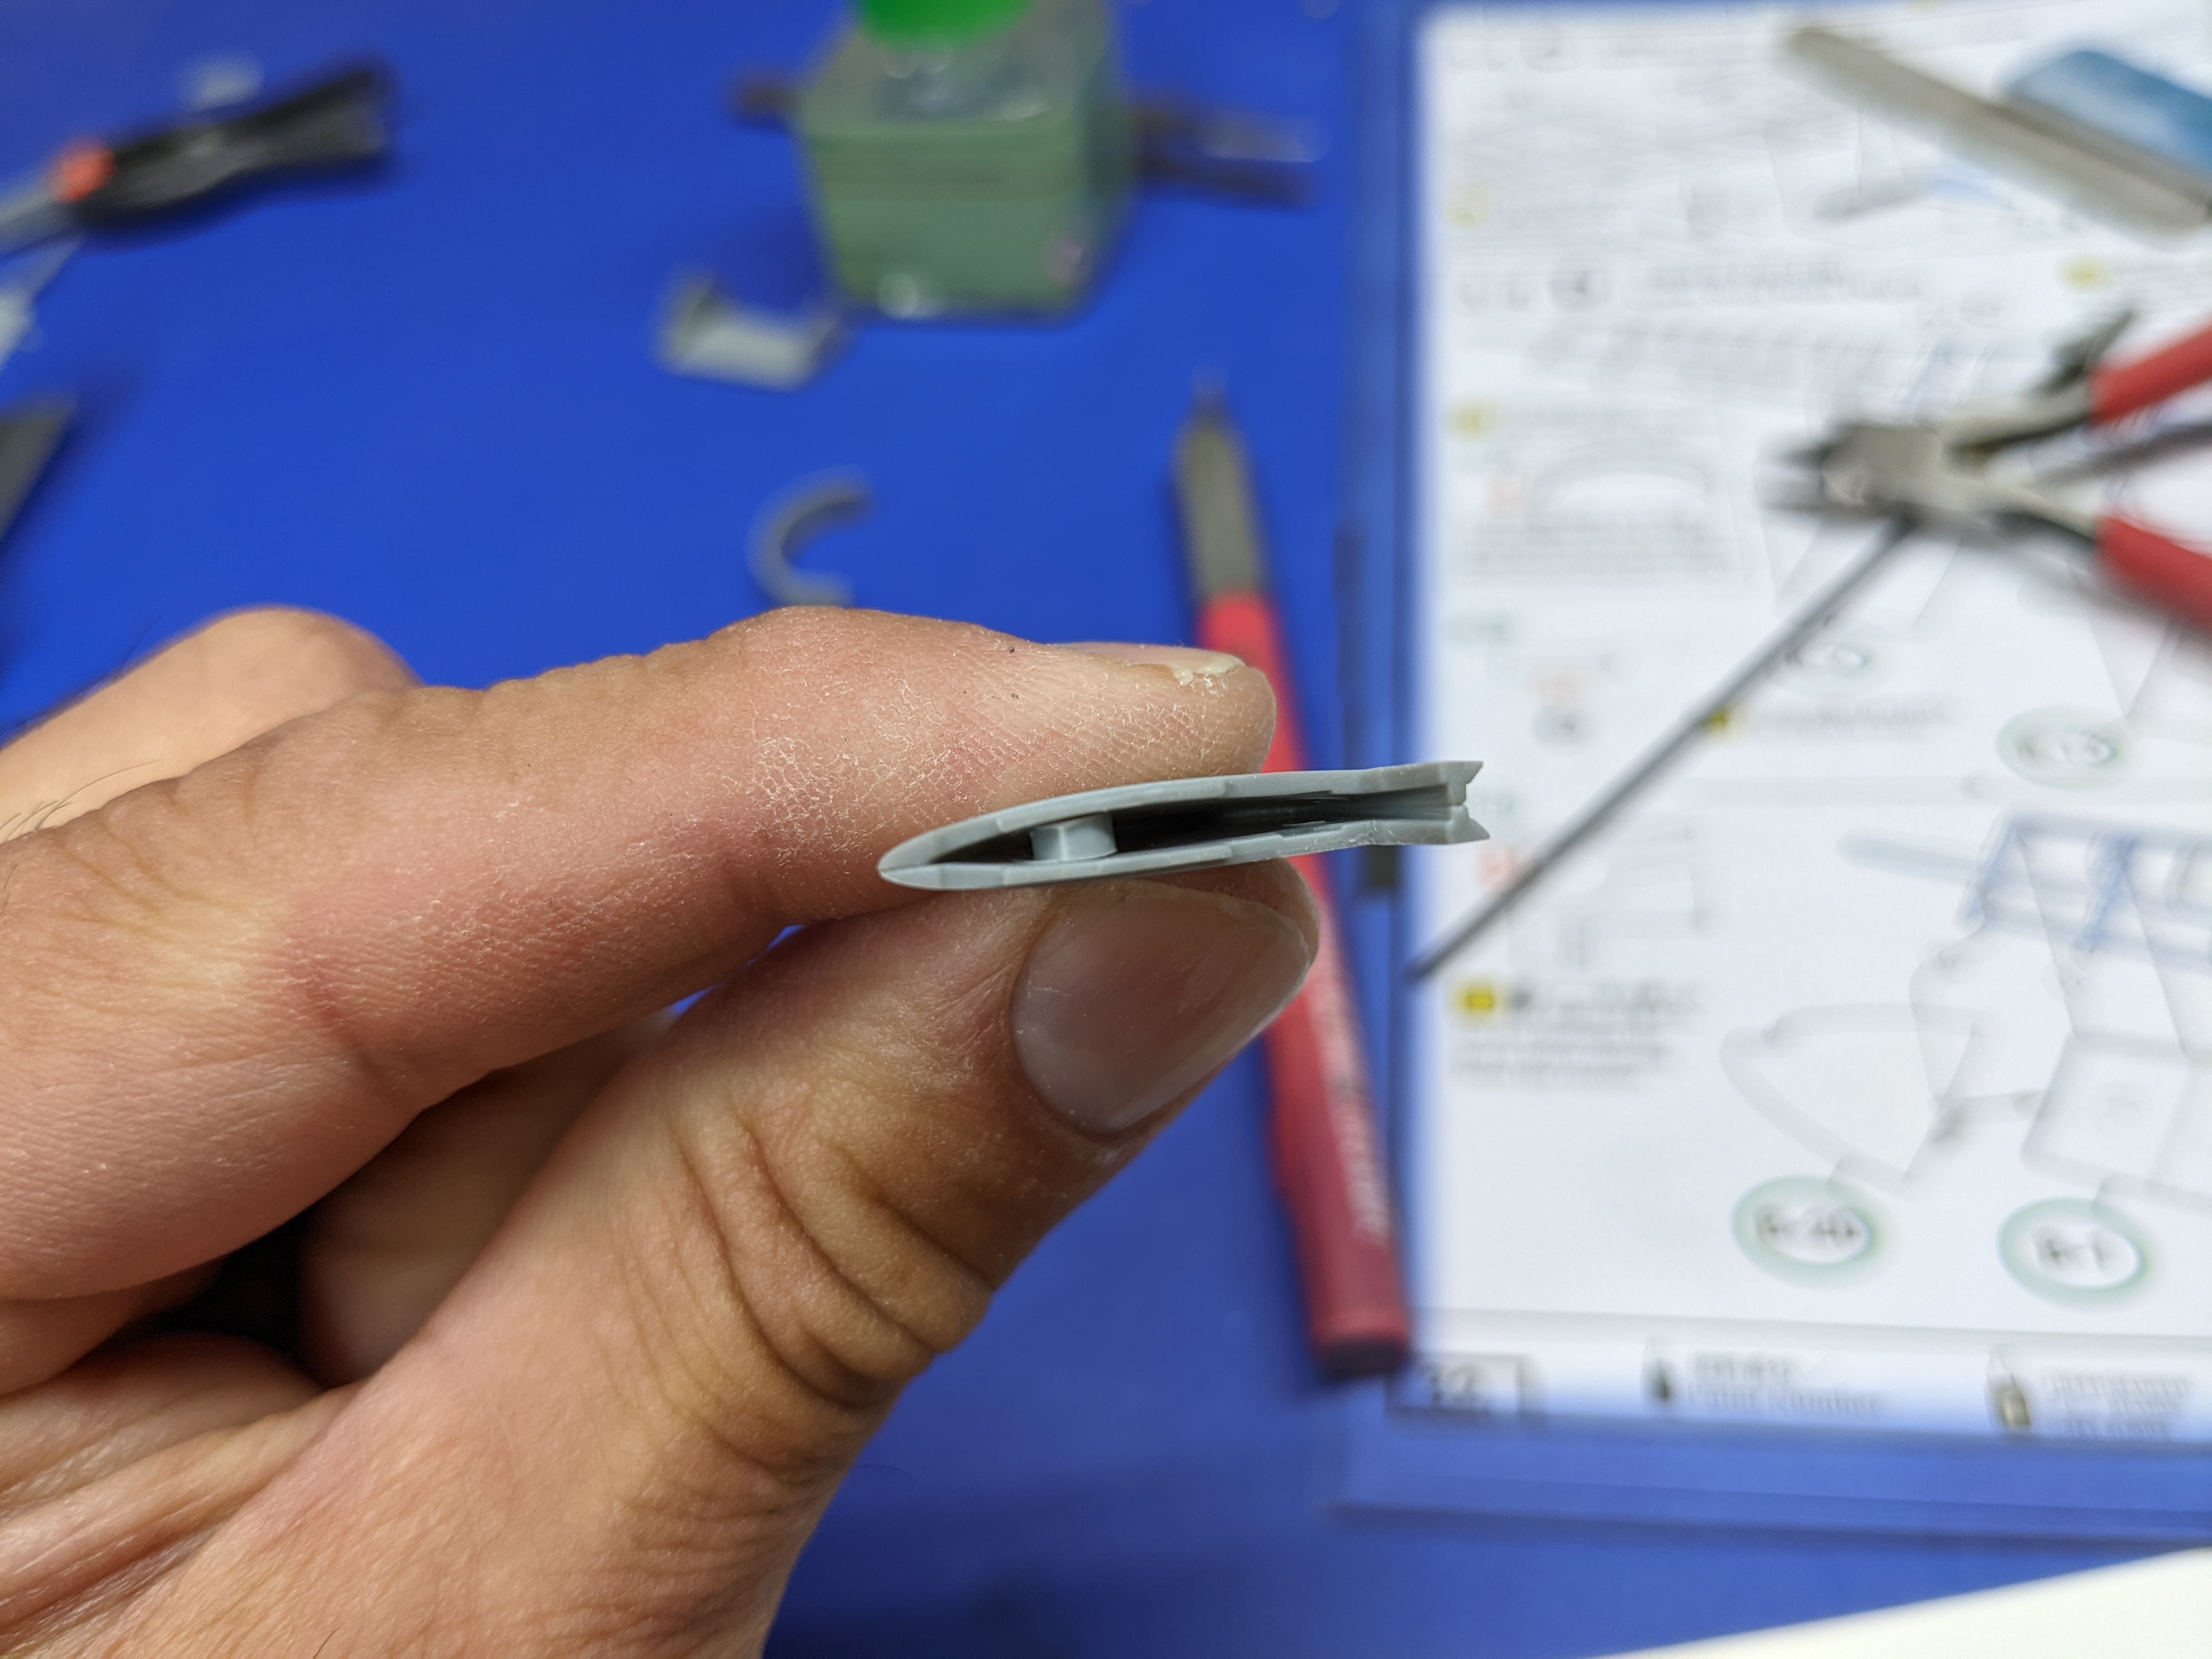
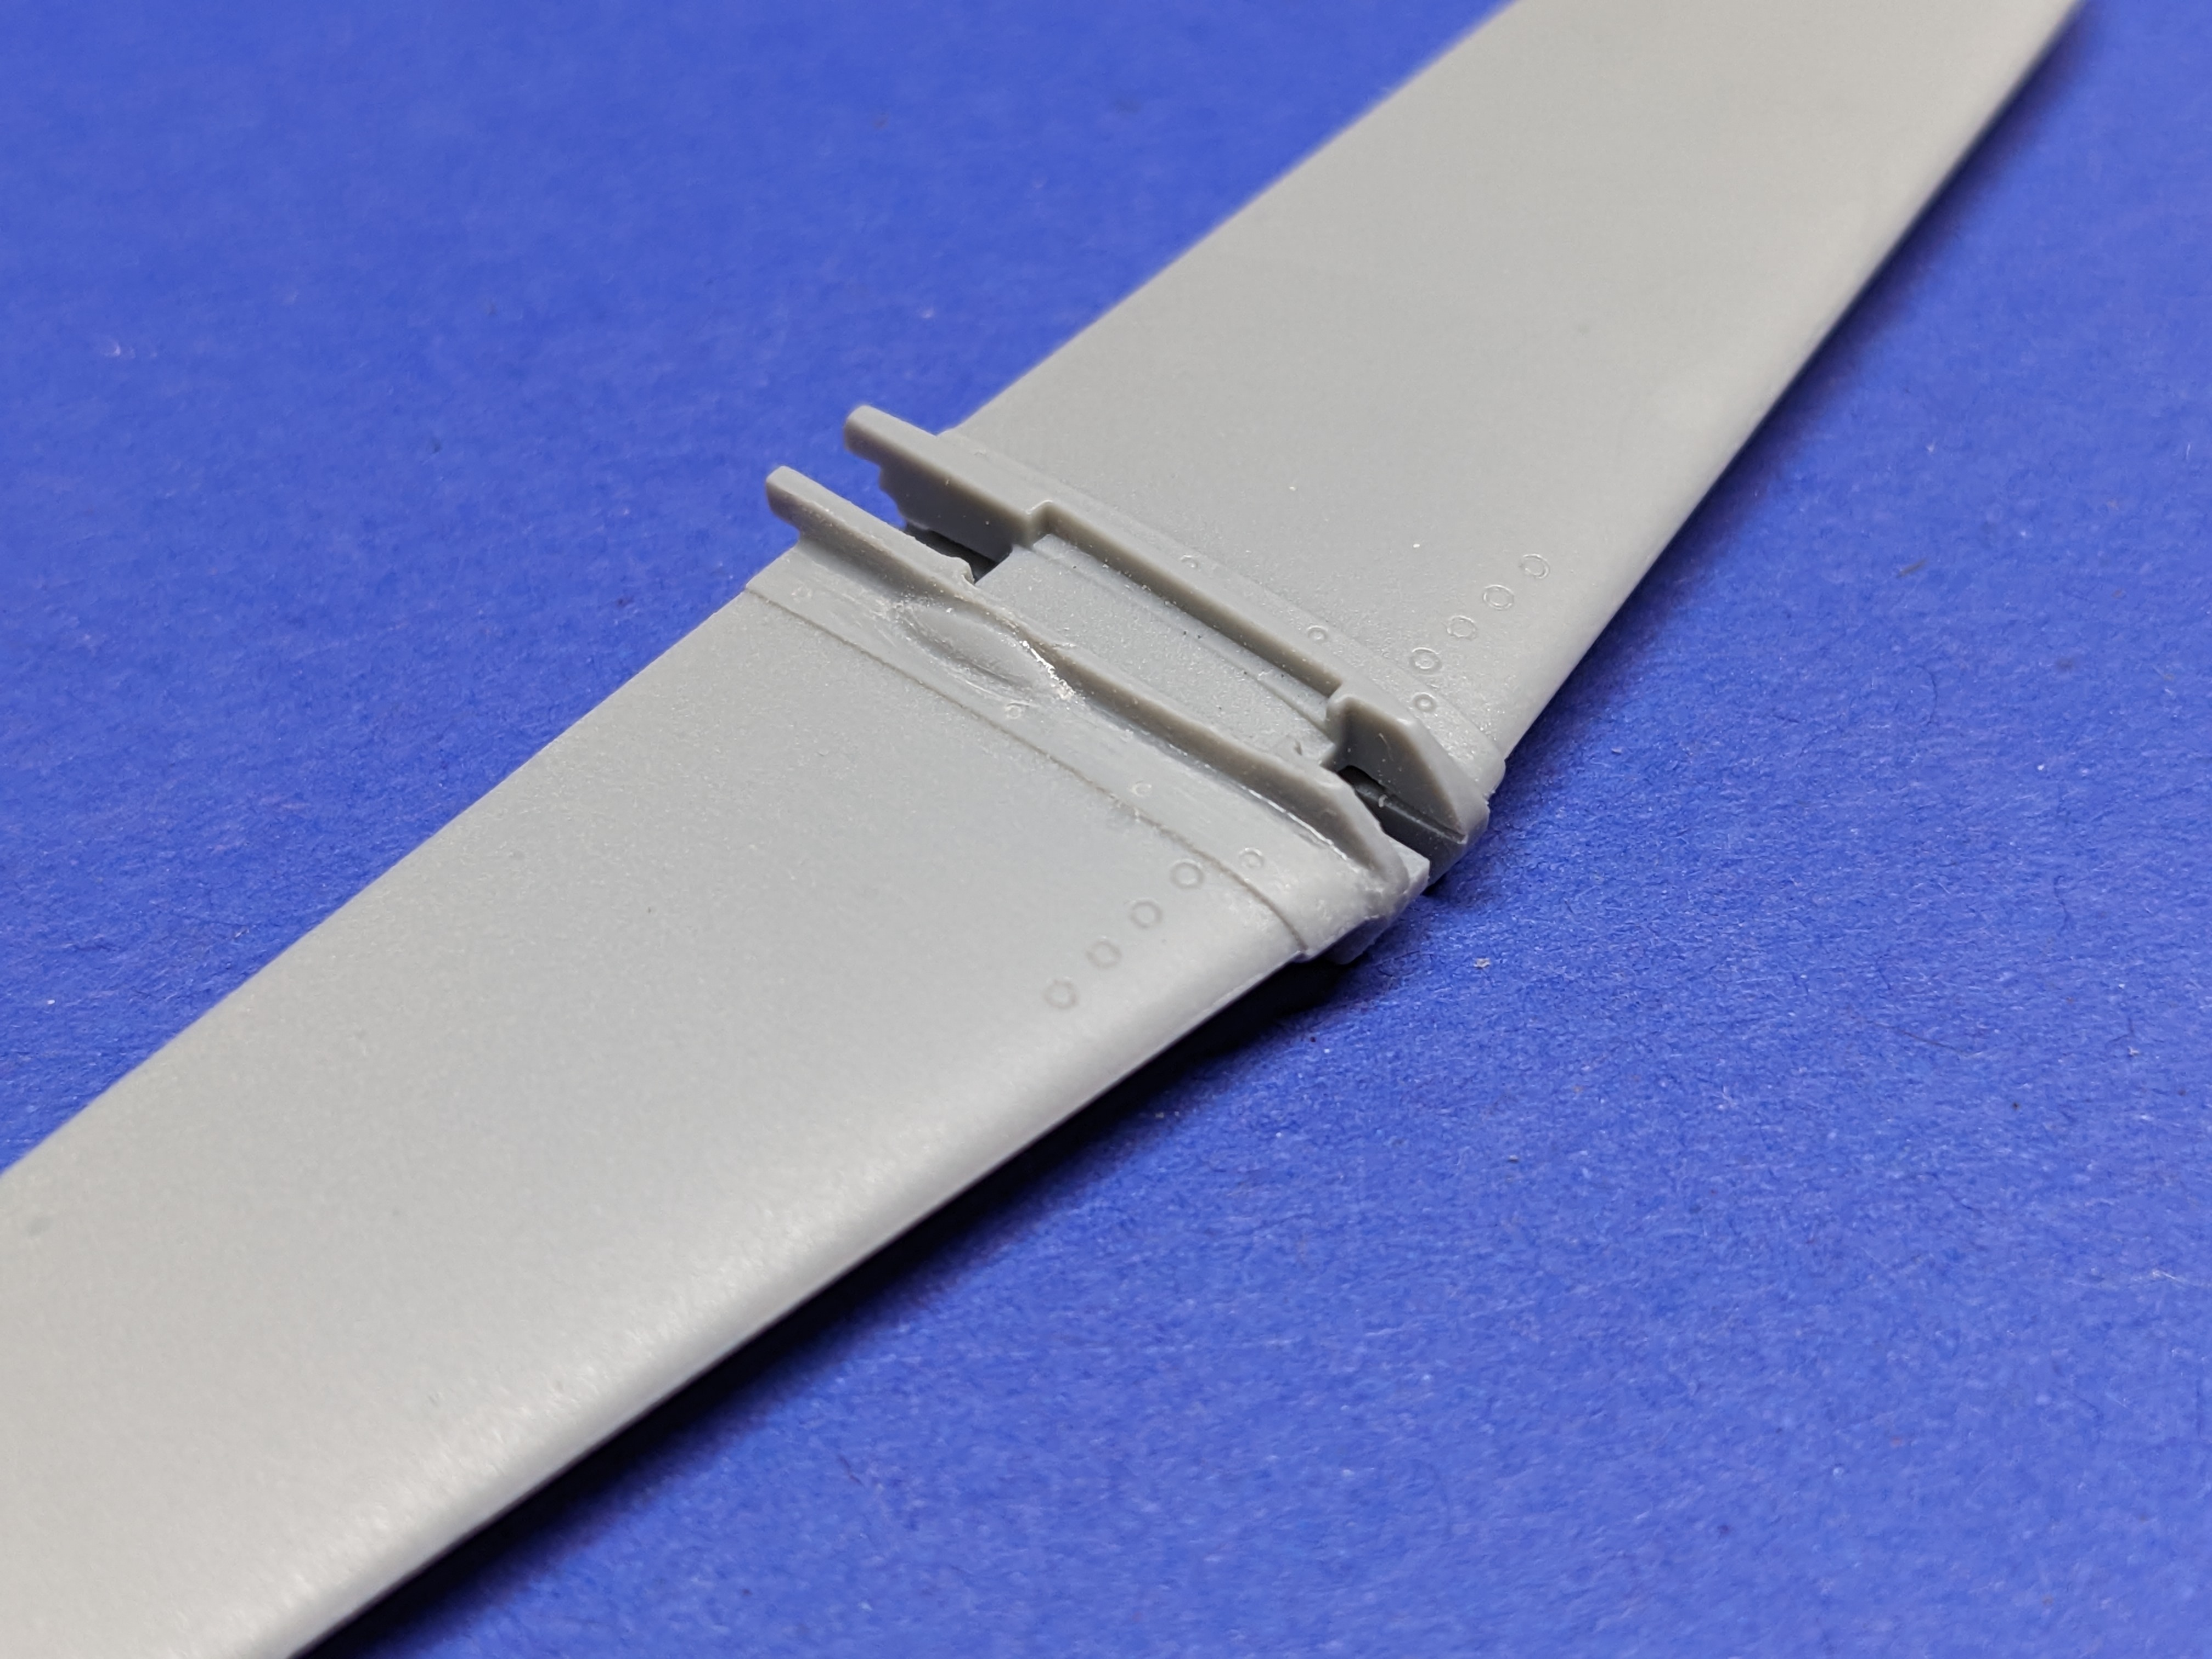
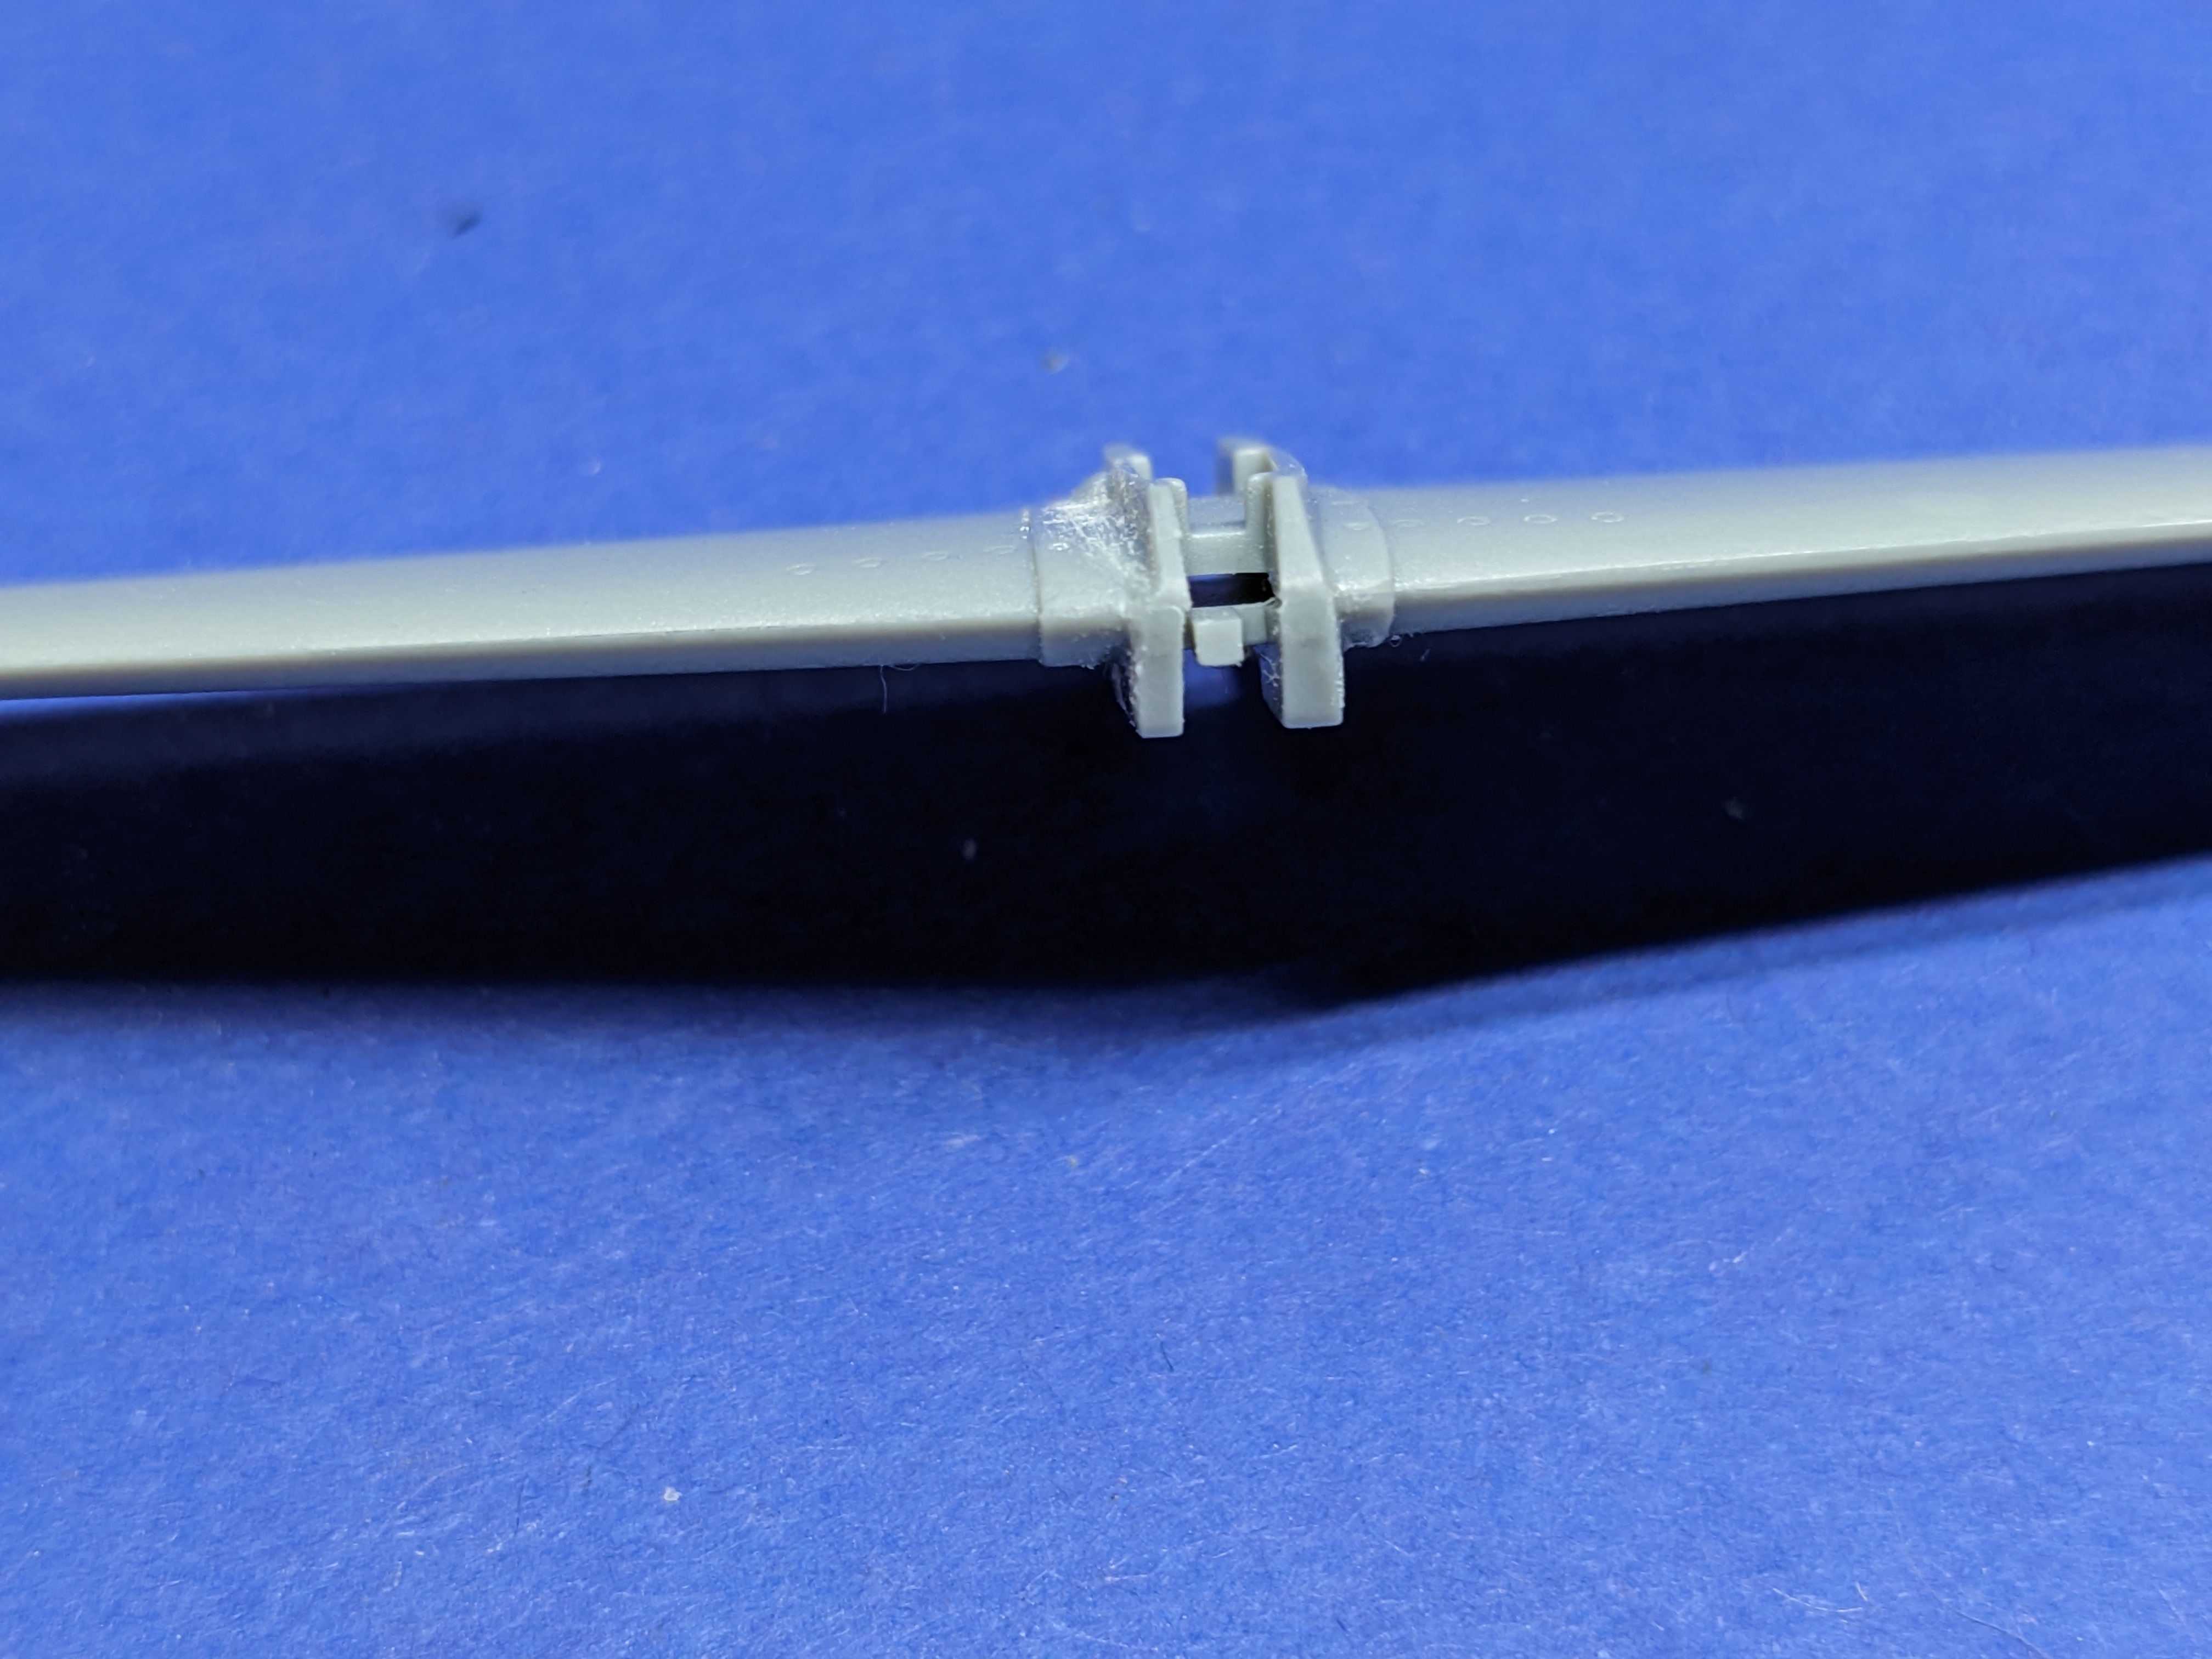
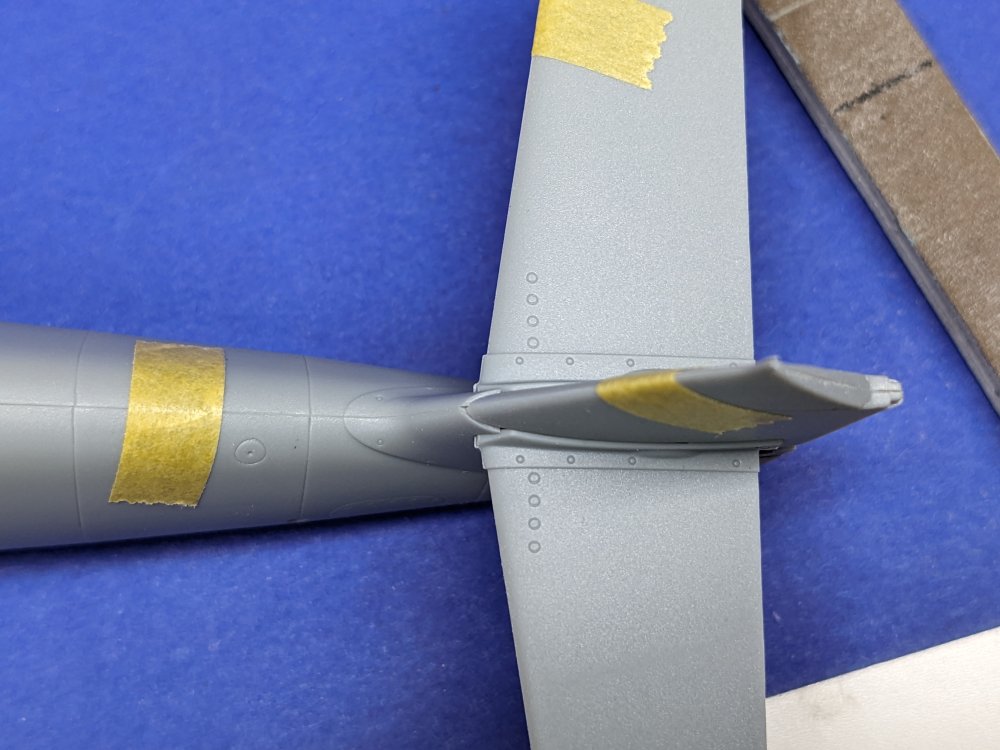
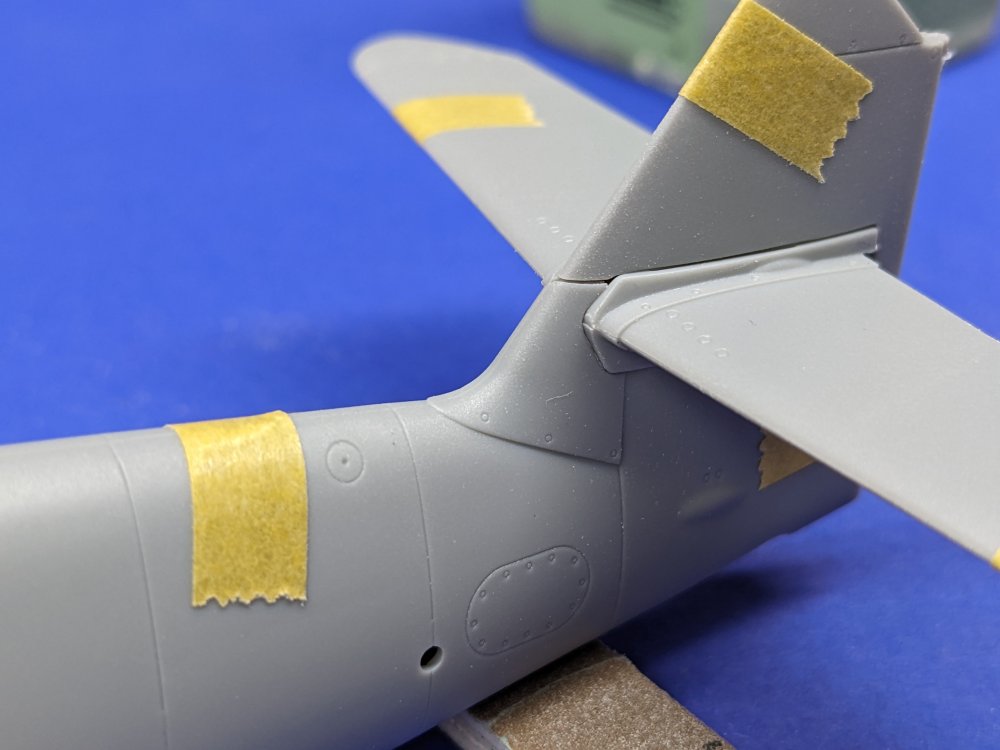
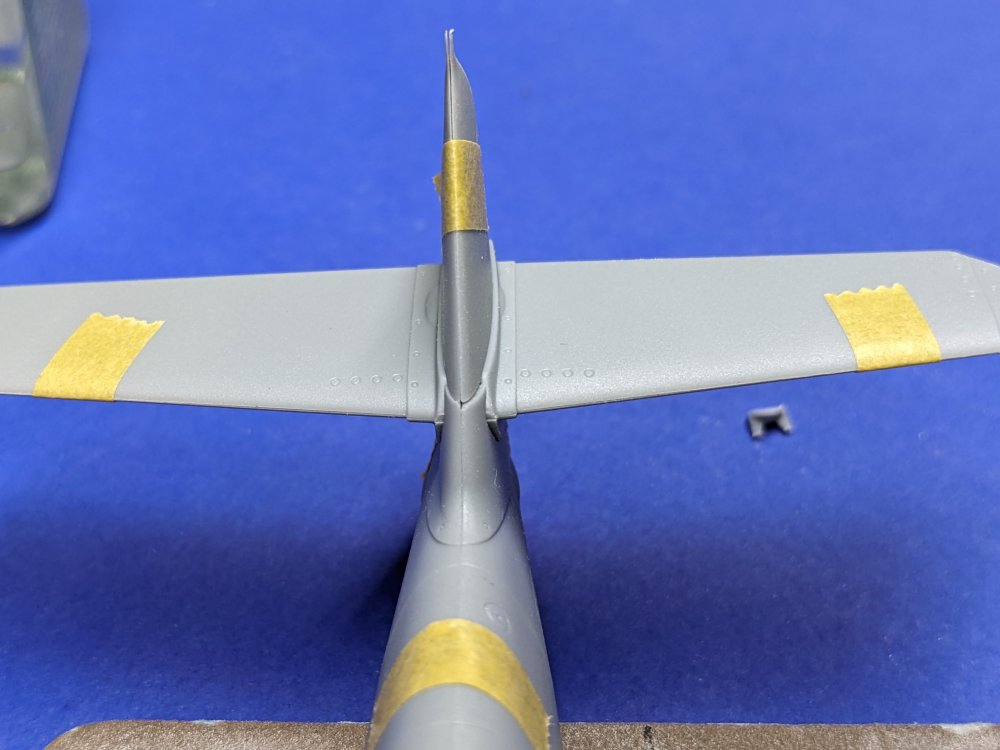
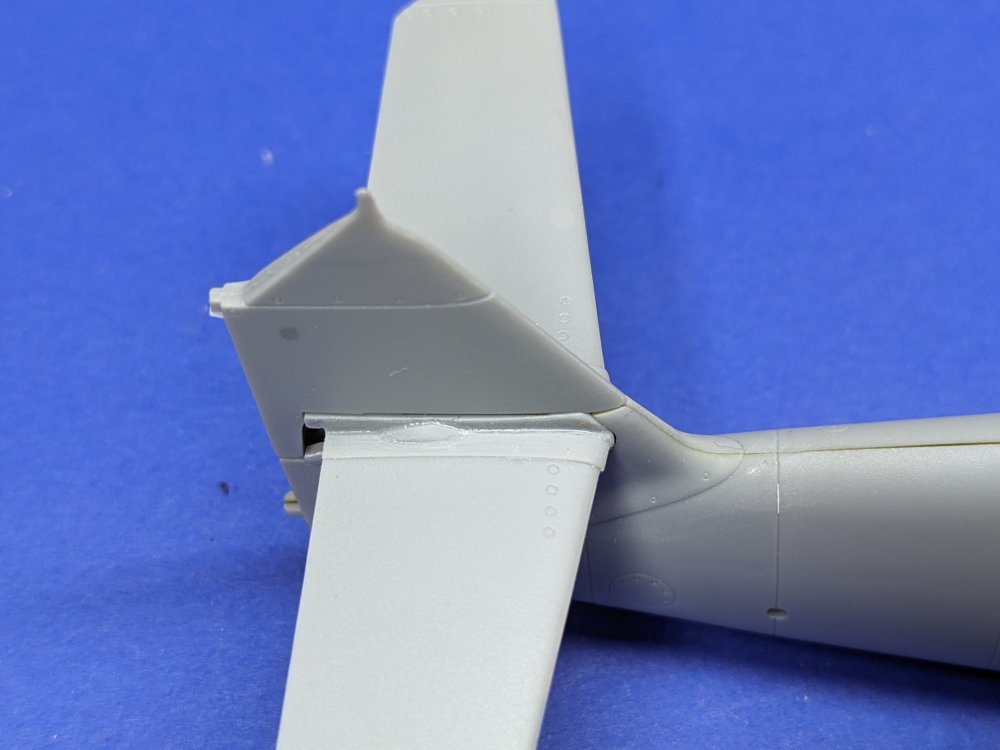
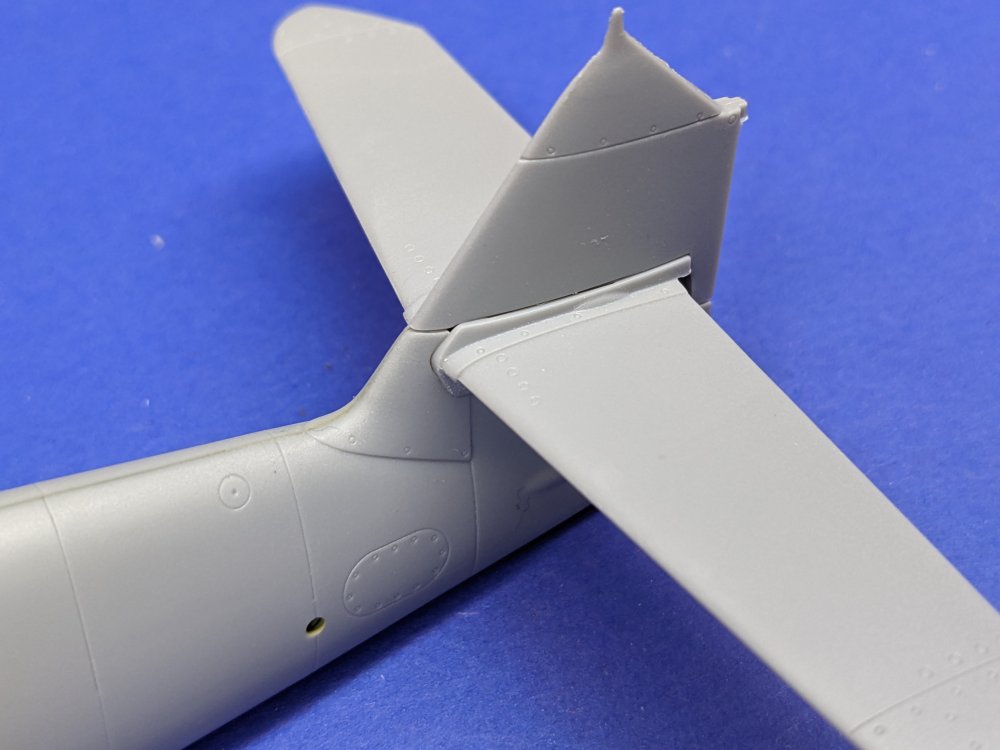
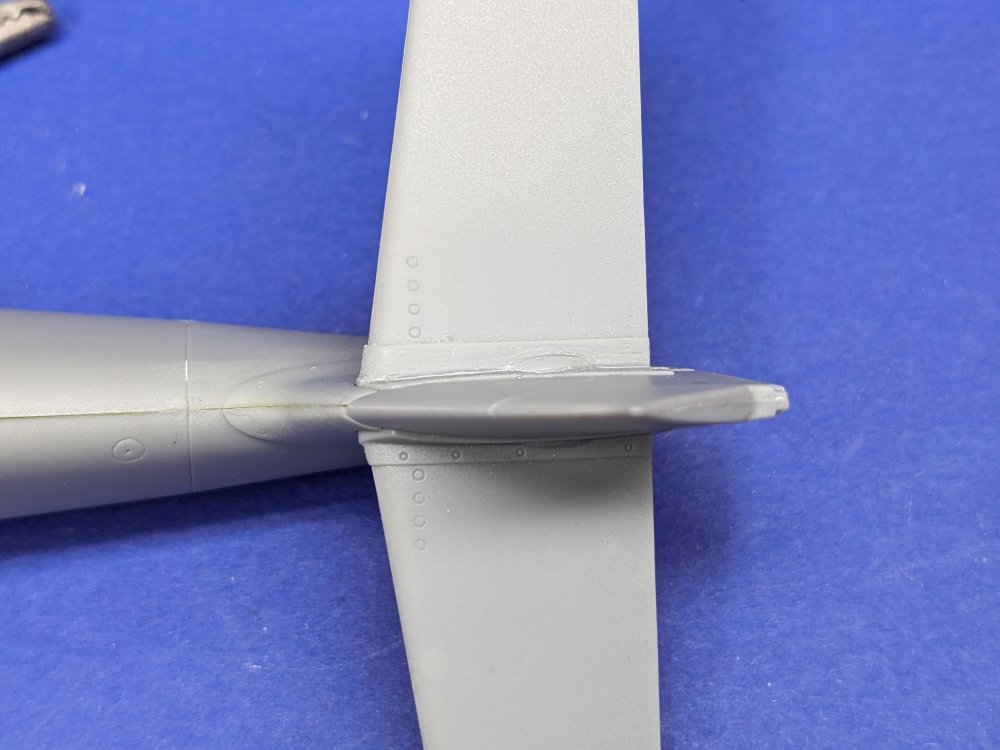
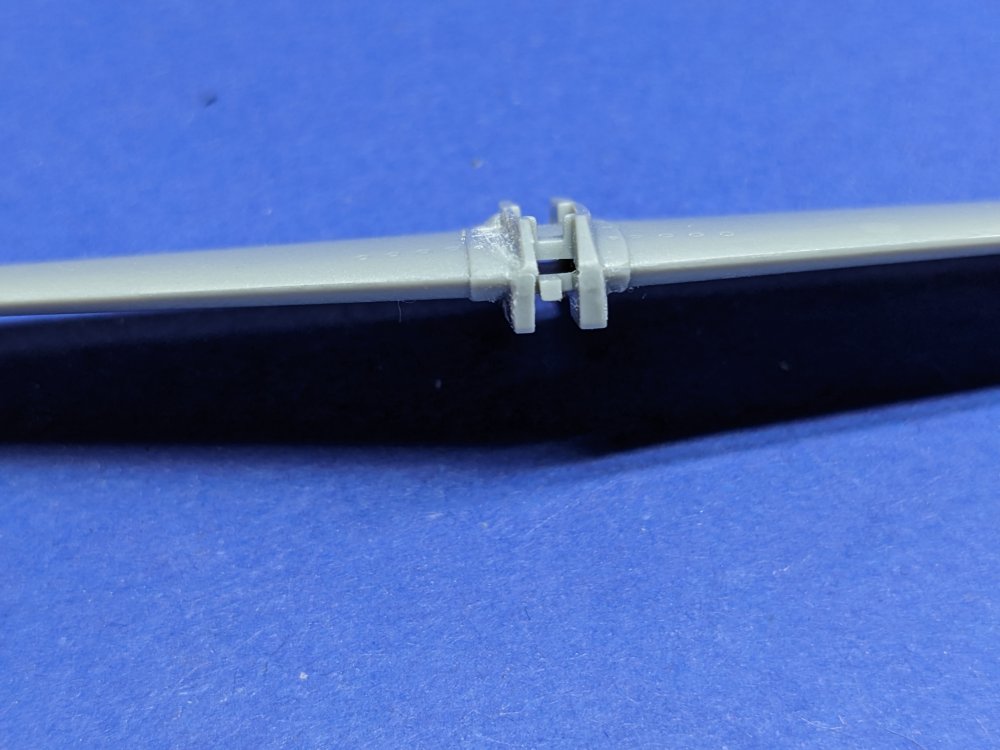
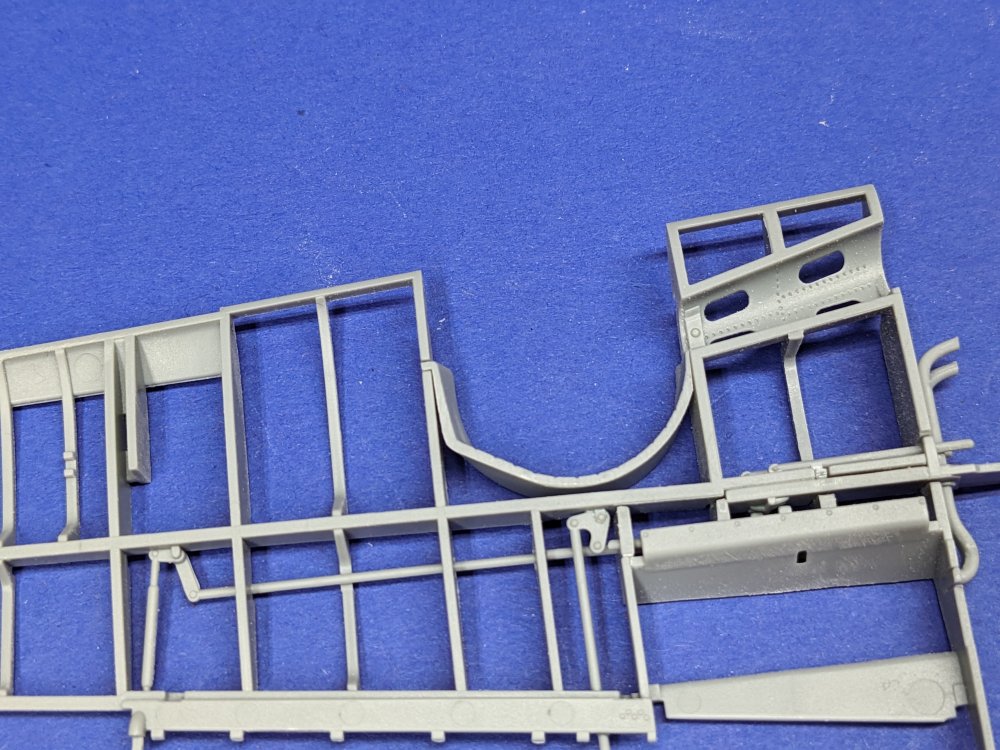
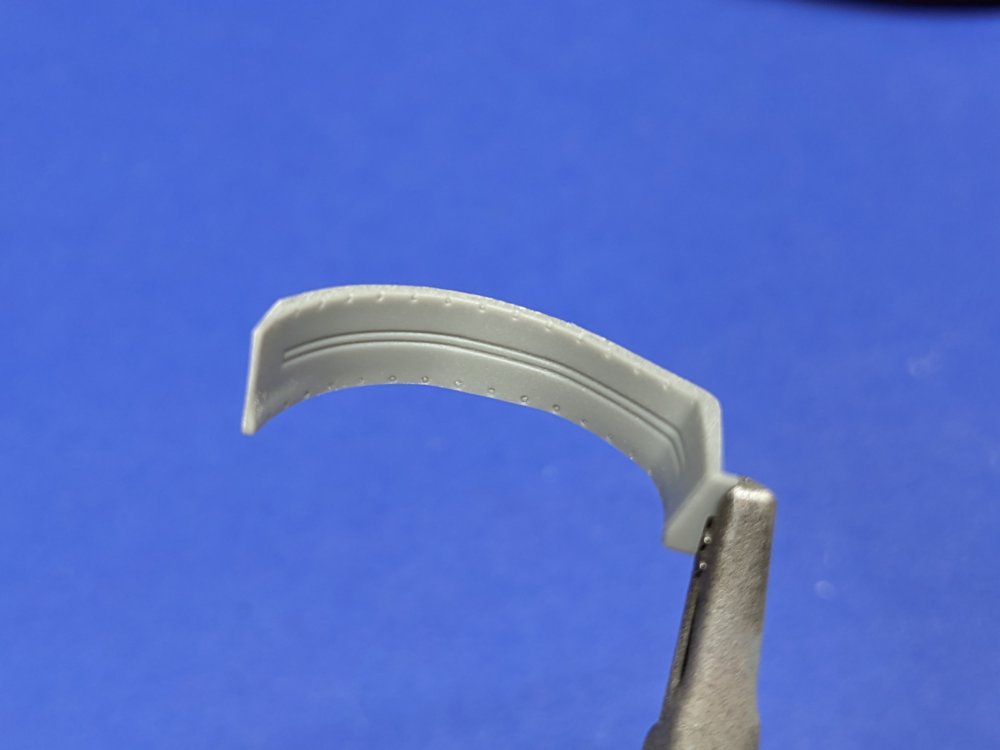
With the fuselage bulkheads in place it was time to address the elephant in the room- the rear tailplane. ZM has taken the approach of splitting the vertical tail in half where the horizontal tailplanes joins it. This is a natural break in the actual aircraft so it makes sense with regards to their philosophies around model design. At the same time, they decided to mould the horizontal tailplane flange as a part of the tailplanes themselves. OOB, here's what the assembly looks like. For the record, nothing here is glued together, just tape. To me, it's a bit messy and somewhat simplistic. I understand what ZM are aiming for but the finesse is missing. After much discussion with Martin and seeing how other members have approached the issue, I came up with my approach. I will focusbon using the short vertical tail but this should work with the tall one as well. I Inserted a piece of sprue to spread the vertical tail slightly. I noticed that it was thinner than the mounting points on the horizontal tailplanes and had a slightly sloppy fit. This tightened it up. Then, using a ceramic seam scraper I scrapped down the vertical sides of the flange, referencing the vertical tail to determine how much. The scraper I use has a rounded tip so it didn't remove or scratch into the horizontal part of the flange. An Xacto would probably work too just be careful of any sharp tips they may have. For the moment, I am focusing on the right side of the tail and leaving the left one stock as a comparison. Here it is from head one. You can see the difference in thickness. Putting the parts together, here's what it looks like. First, the modified side: The OOB one. From above. The fillet at the base of the vertical tail could also use a light sanding to reduce its height. It's like the moulded on RAM panels you see on almost all F-35 kits. I will make the same changes to the left side and then glue things together. Overall it is a reasonably simple fix but changes how the model looks significantly.


- 90 replies
-
- 10
-
-
-
- zoukei-mura
- 109
- (and 1 more)
-
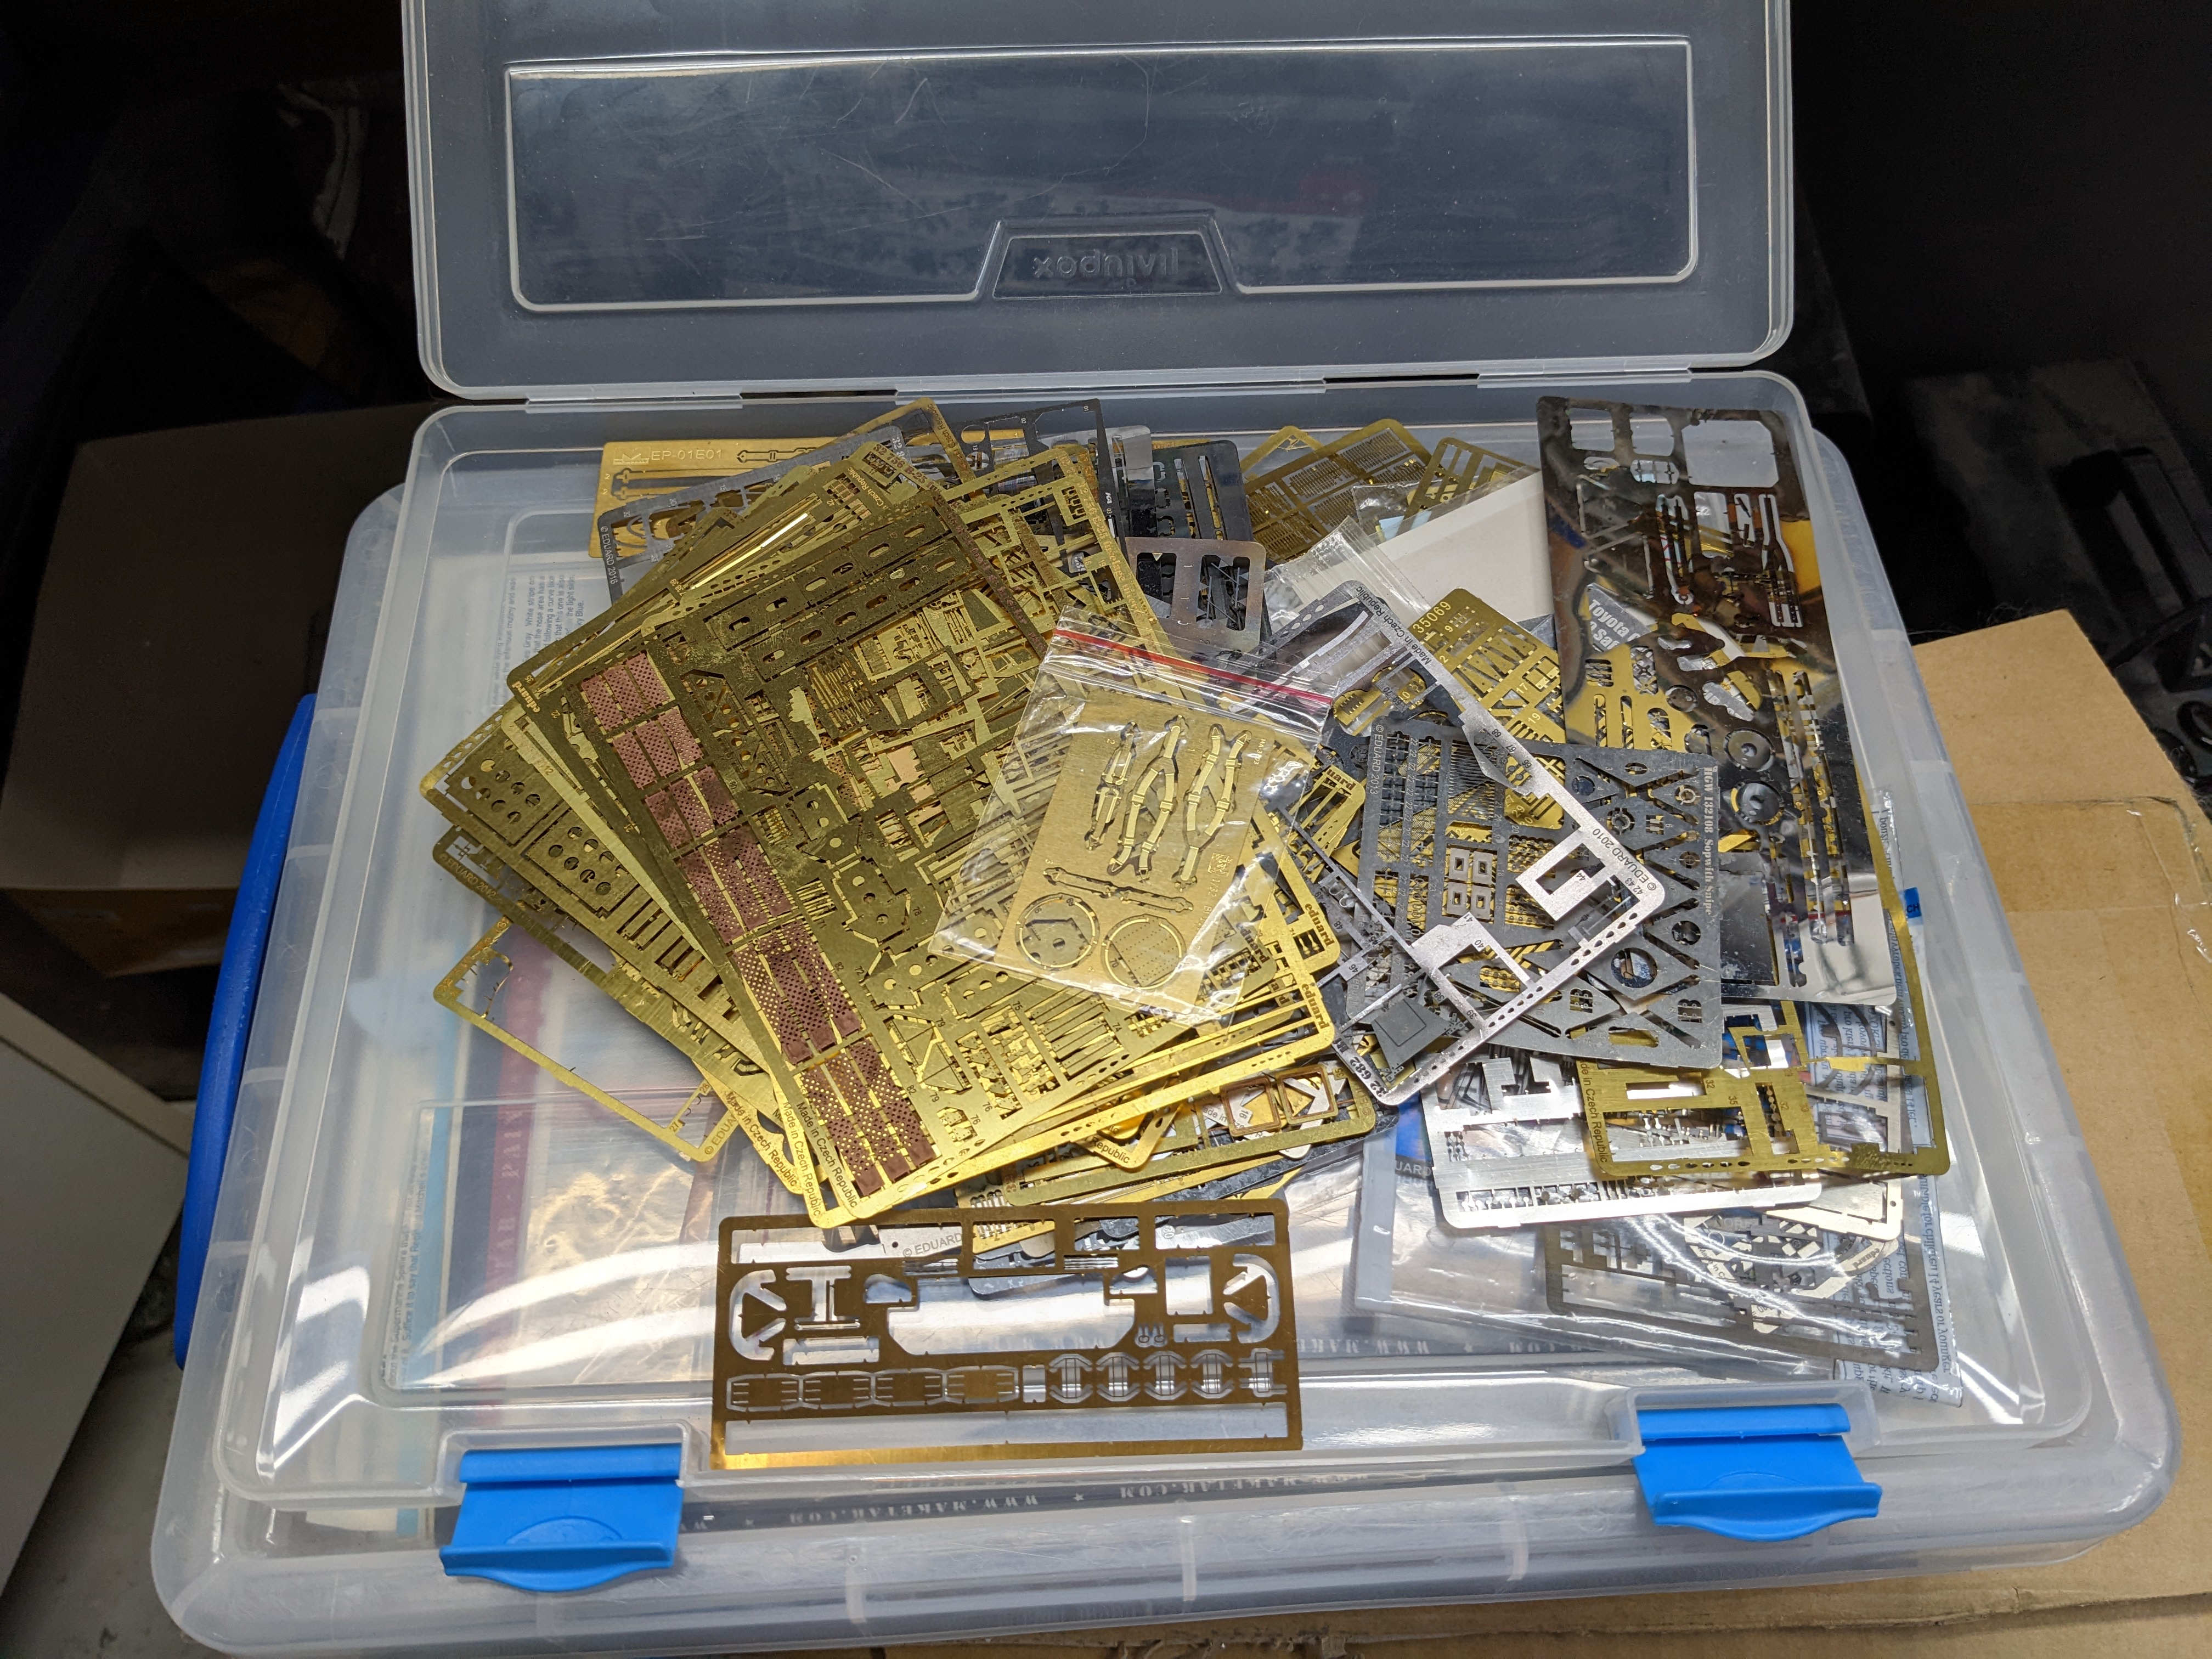
I try to put the AM in the relevant kit but that's not always the case. Sometimes it won't fit in the box so then I have it in plastic tubs. PE is usually in one tub, resin in another and decals in a different one. Unfortunately they don't always stay sorted. For example:

-
Titan Models is showing a 1/72 Kaspian Sea Monster. It will be vac formed with 3D printed detail parts. I'm tempted by their 1/48 Shuttle stack. https://www.titanmodelkits.com/future-releases.html
-
And I thought a 1/32 B-24 was big...
-
ZM have definitely crammed a lot into the kit. I think the Artsina Latina kit might be the only one with more internal detail and it doesn't have a skin to it
- 90 replies
-
- 3
-
-
- zoukei-mura
- 109
- (and 1 more)
-
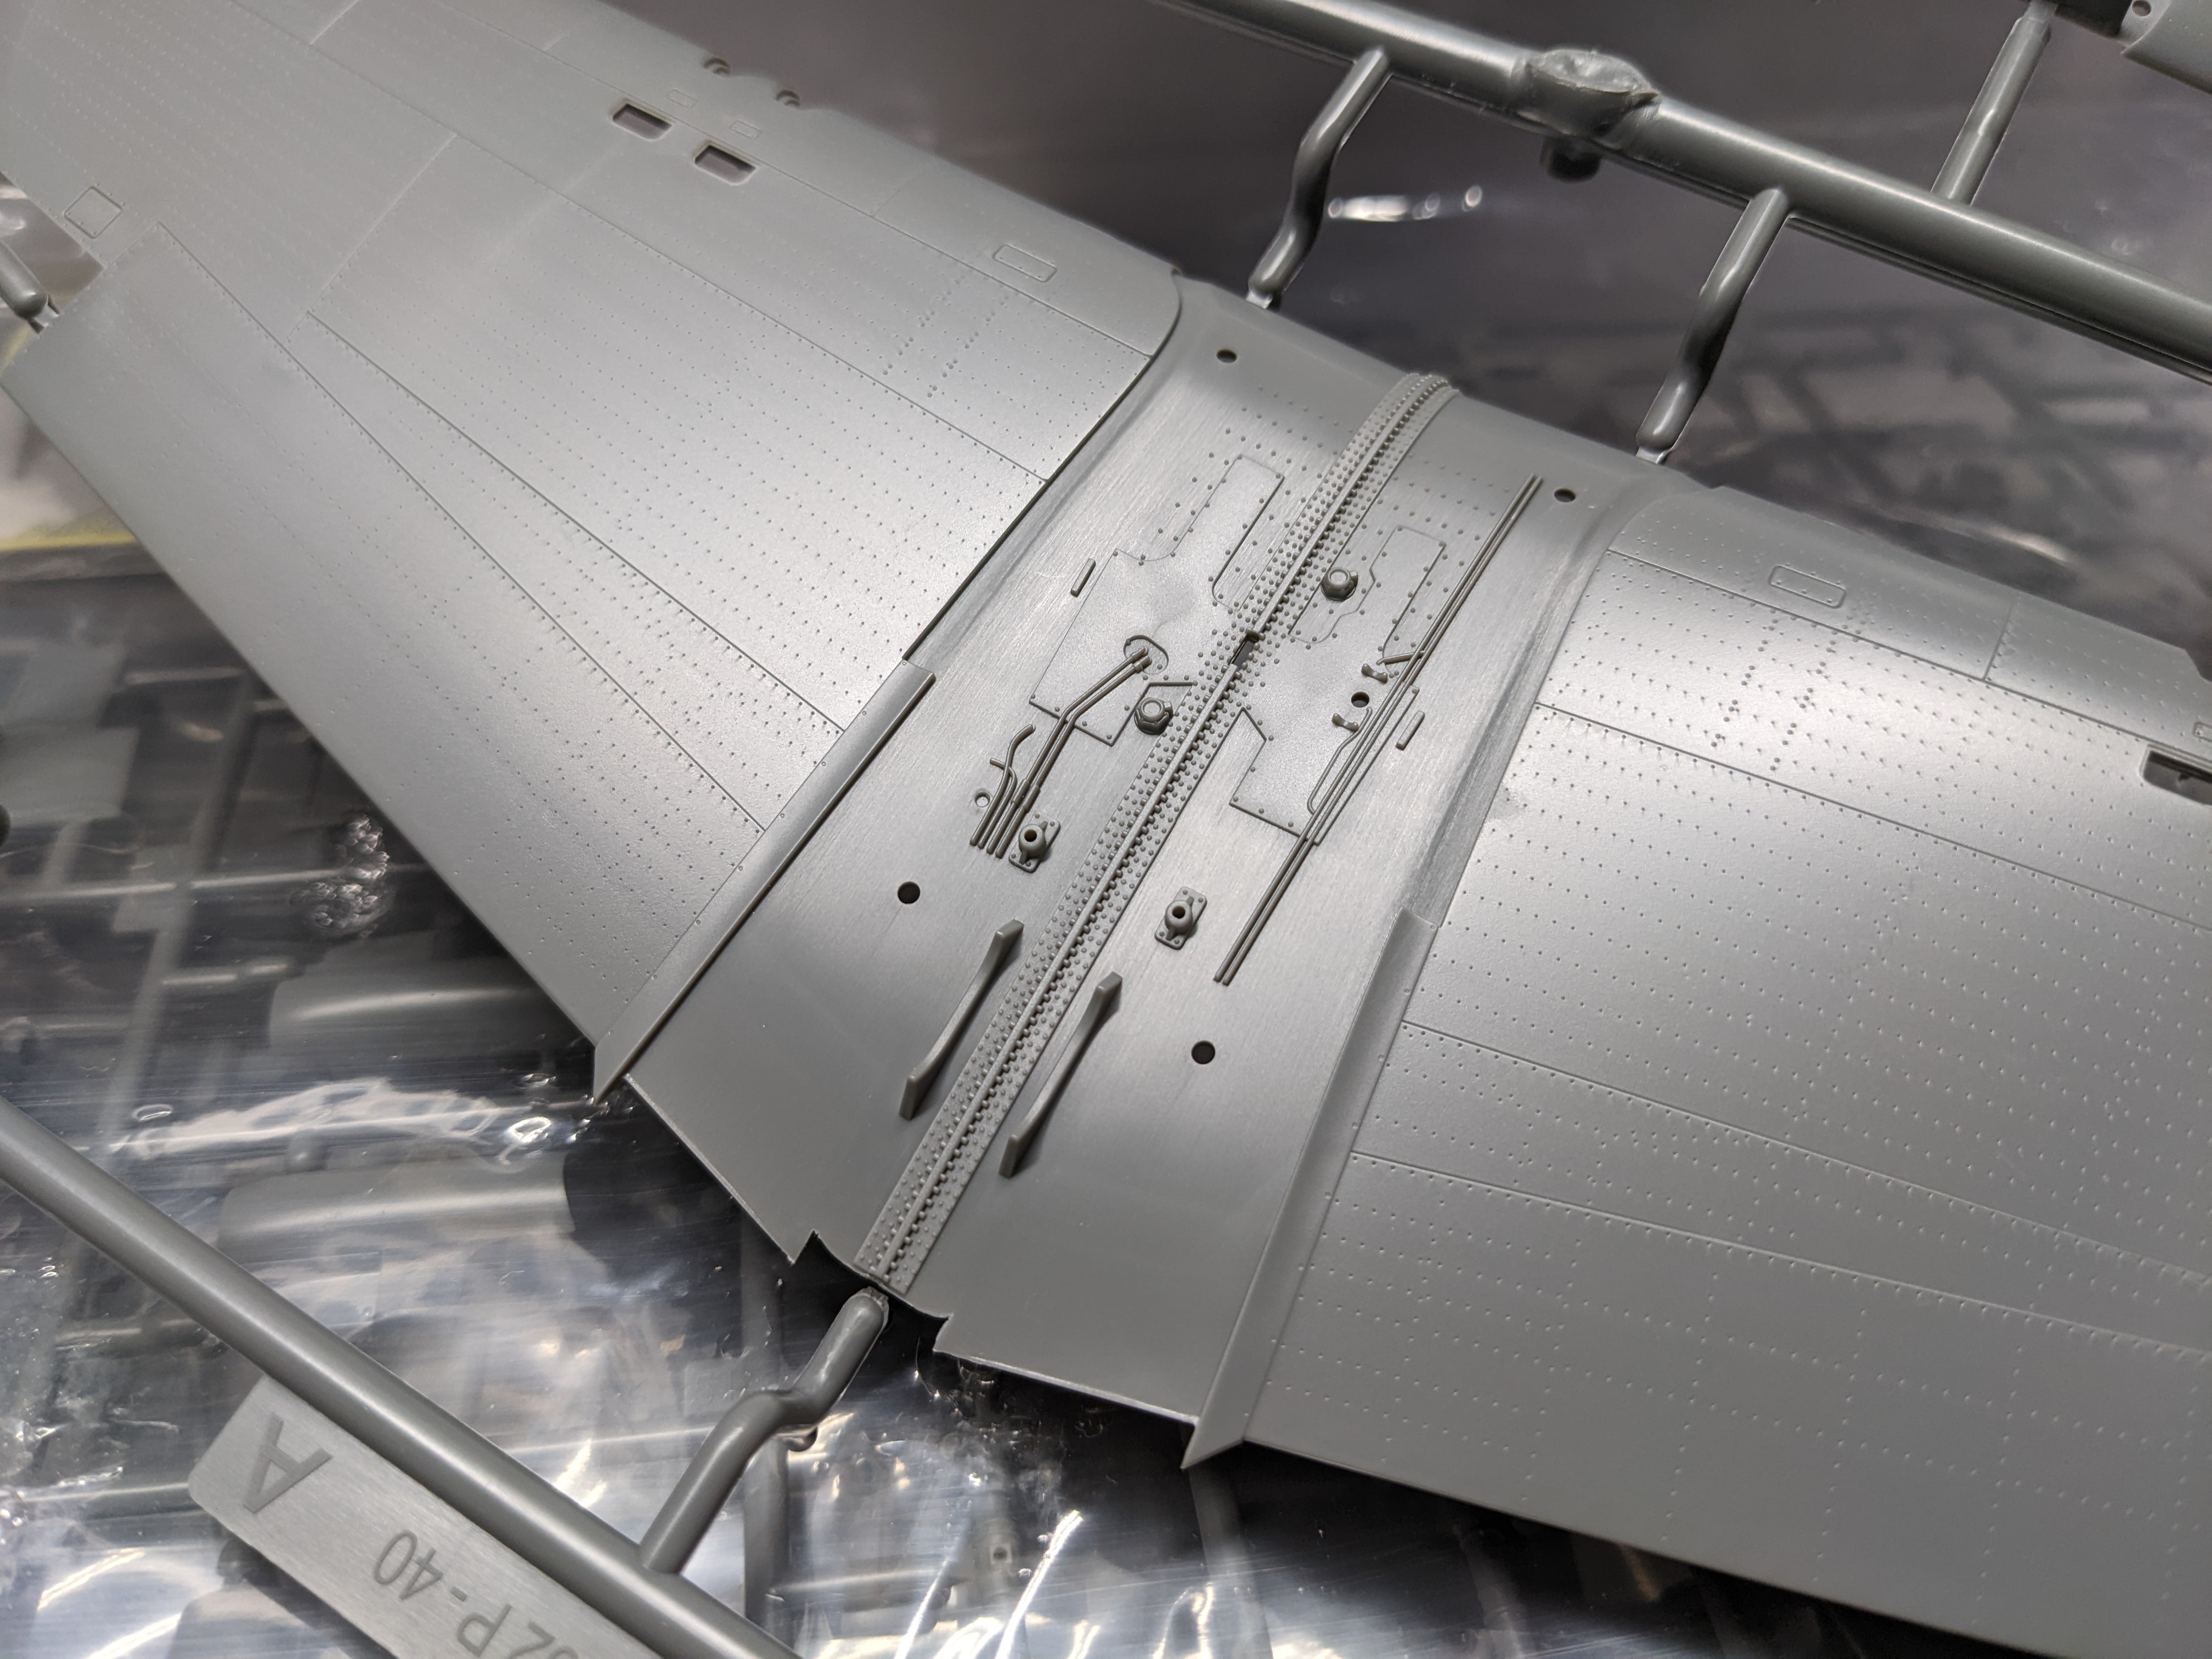
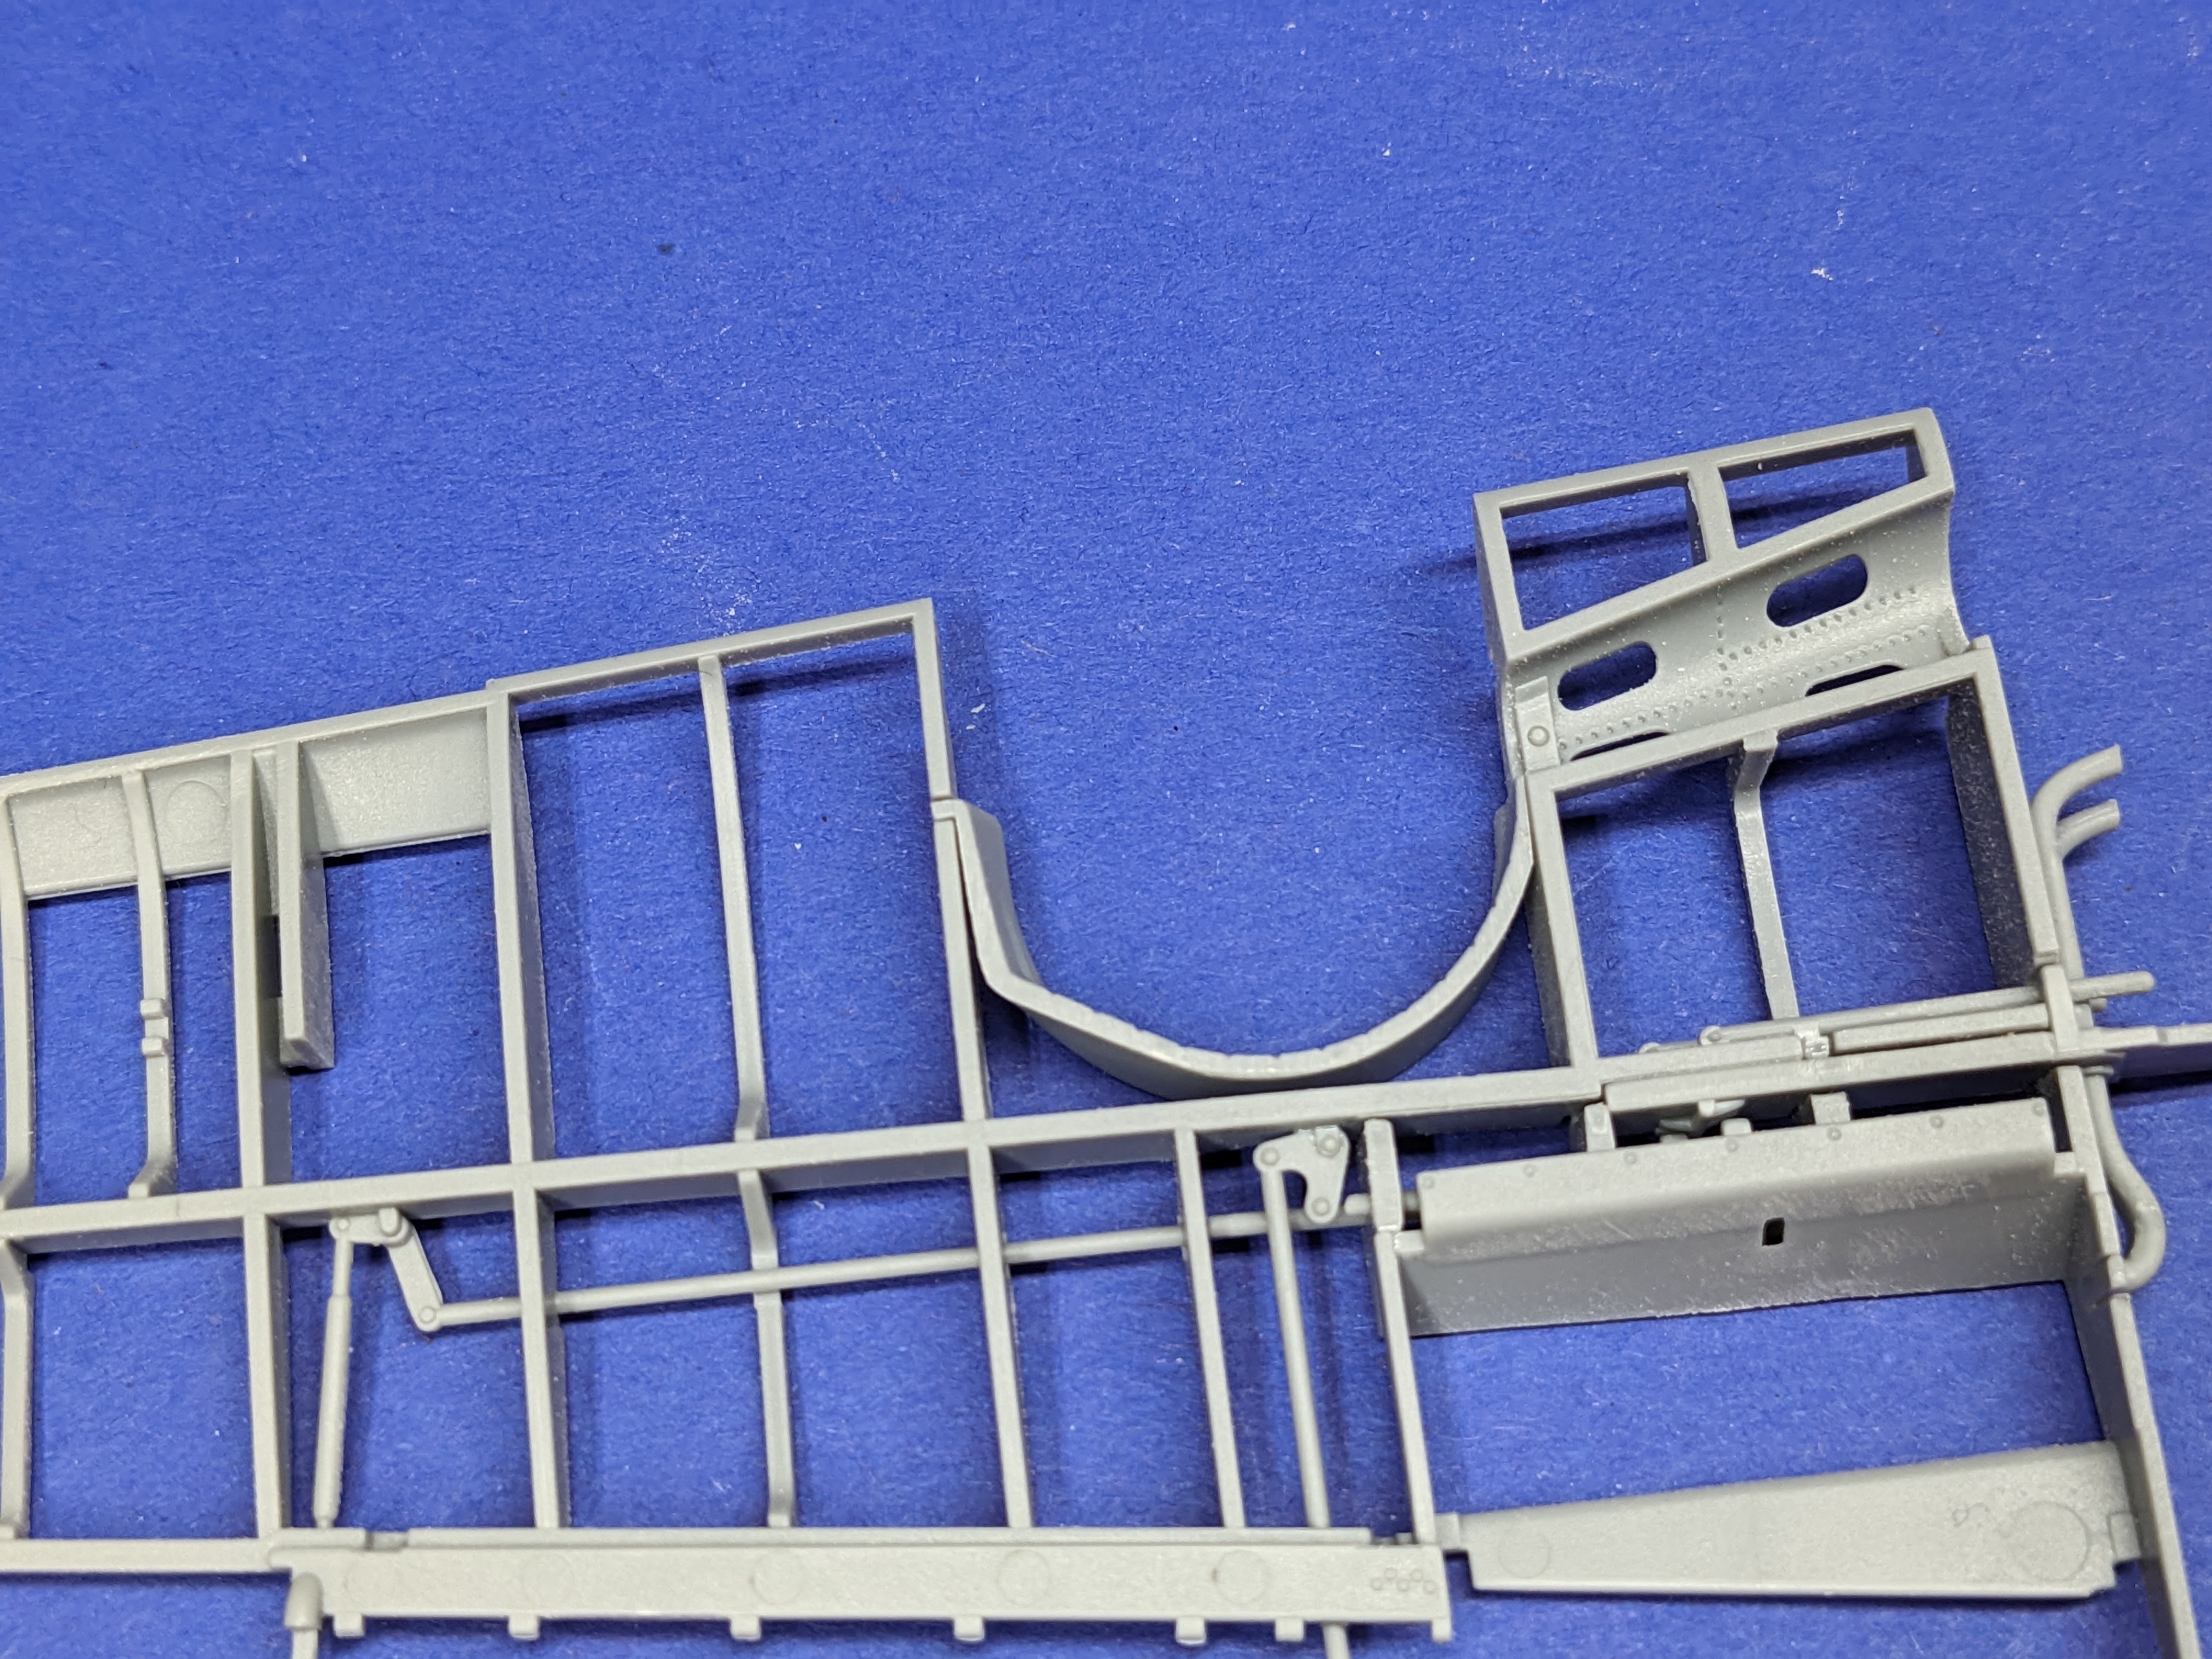
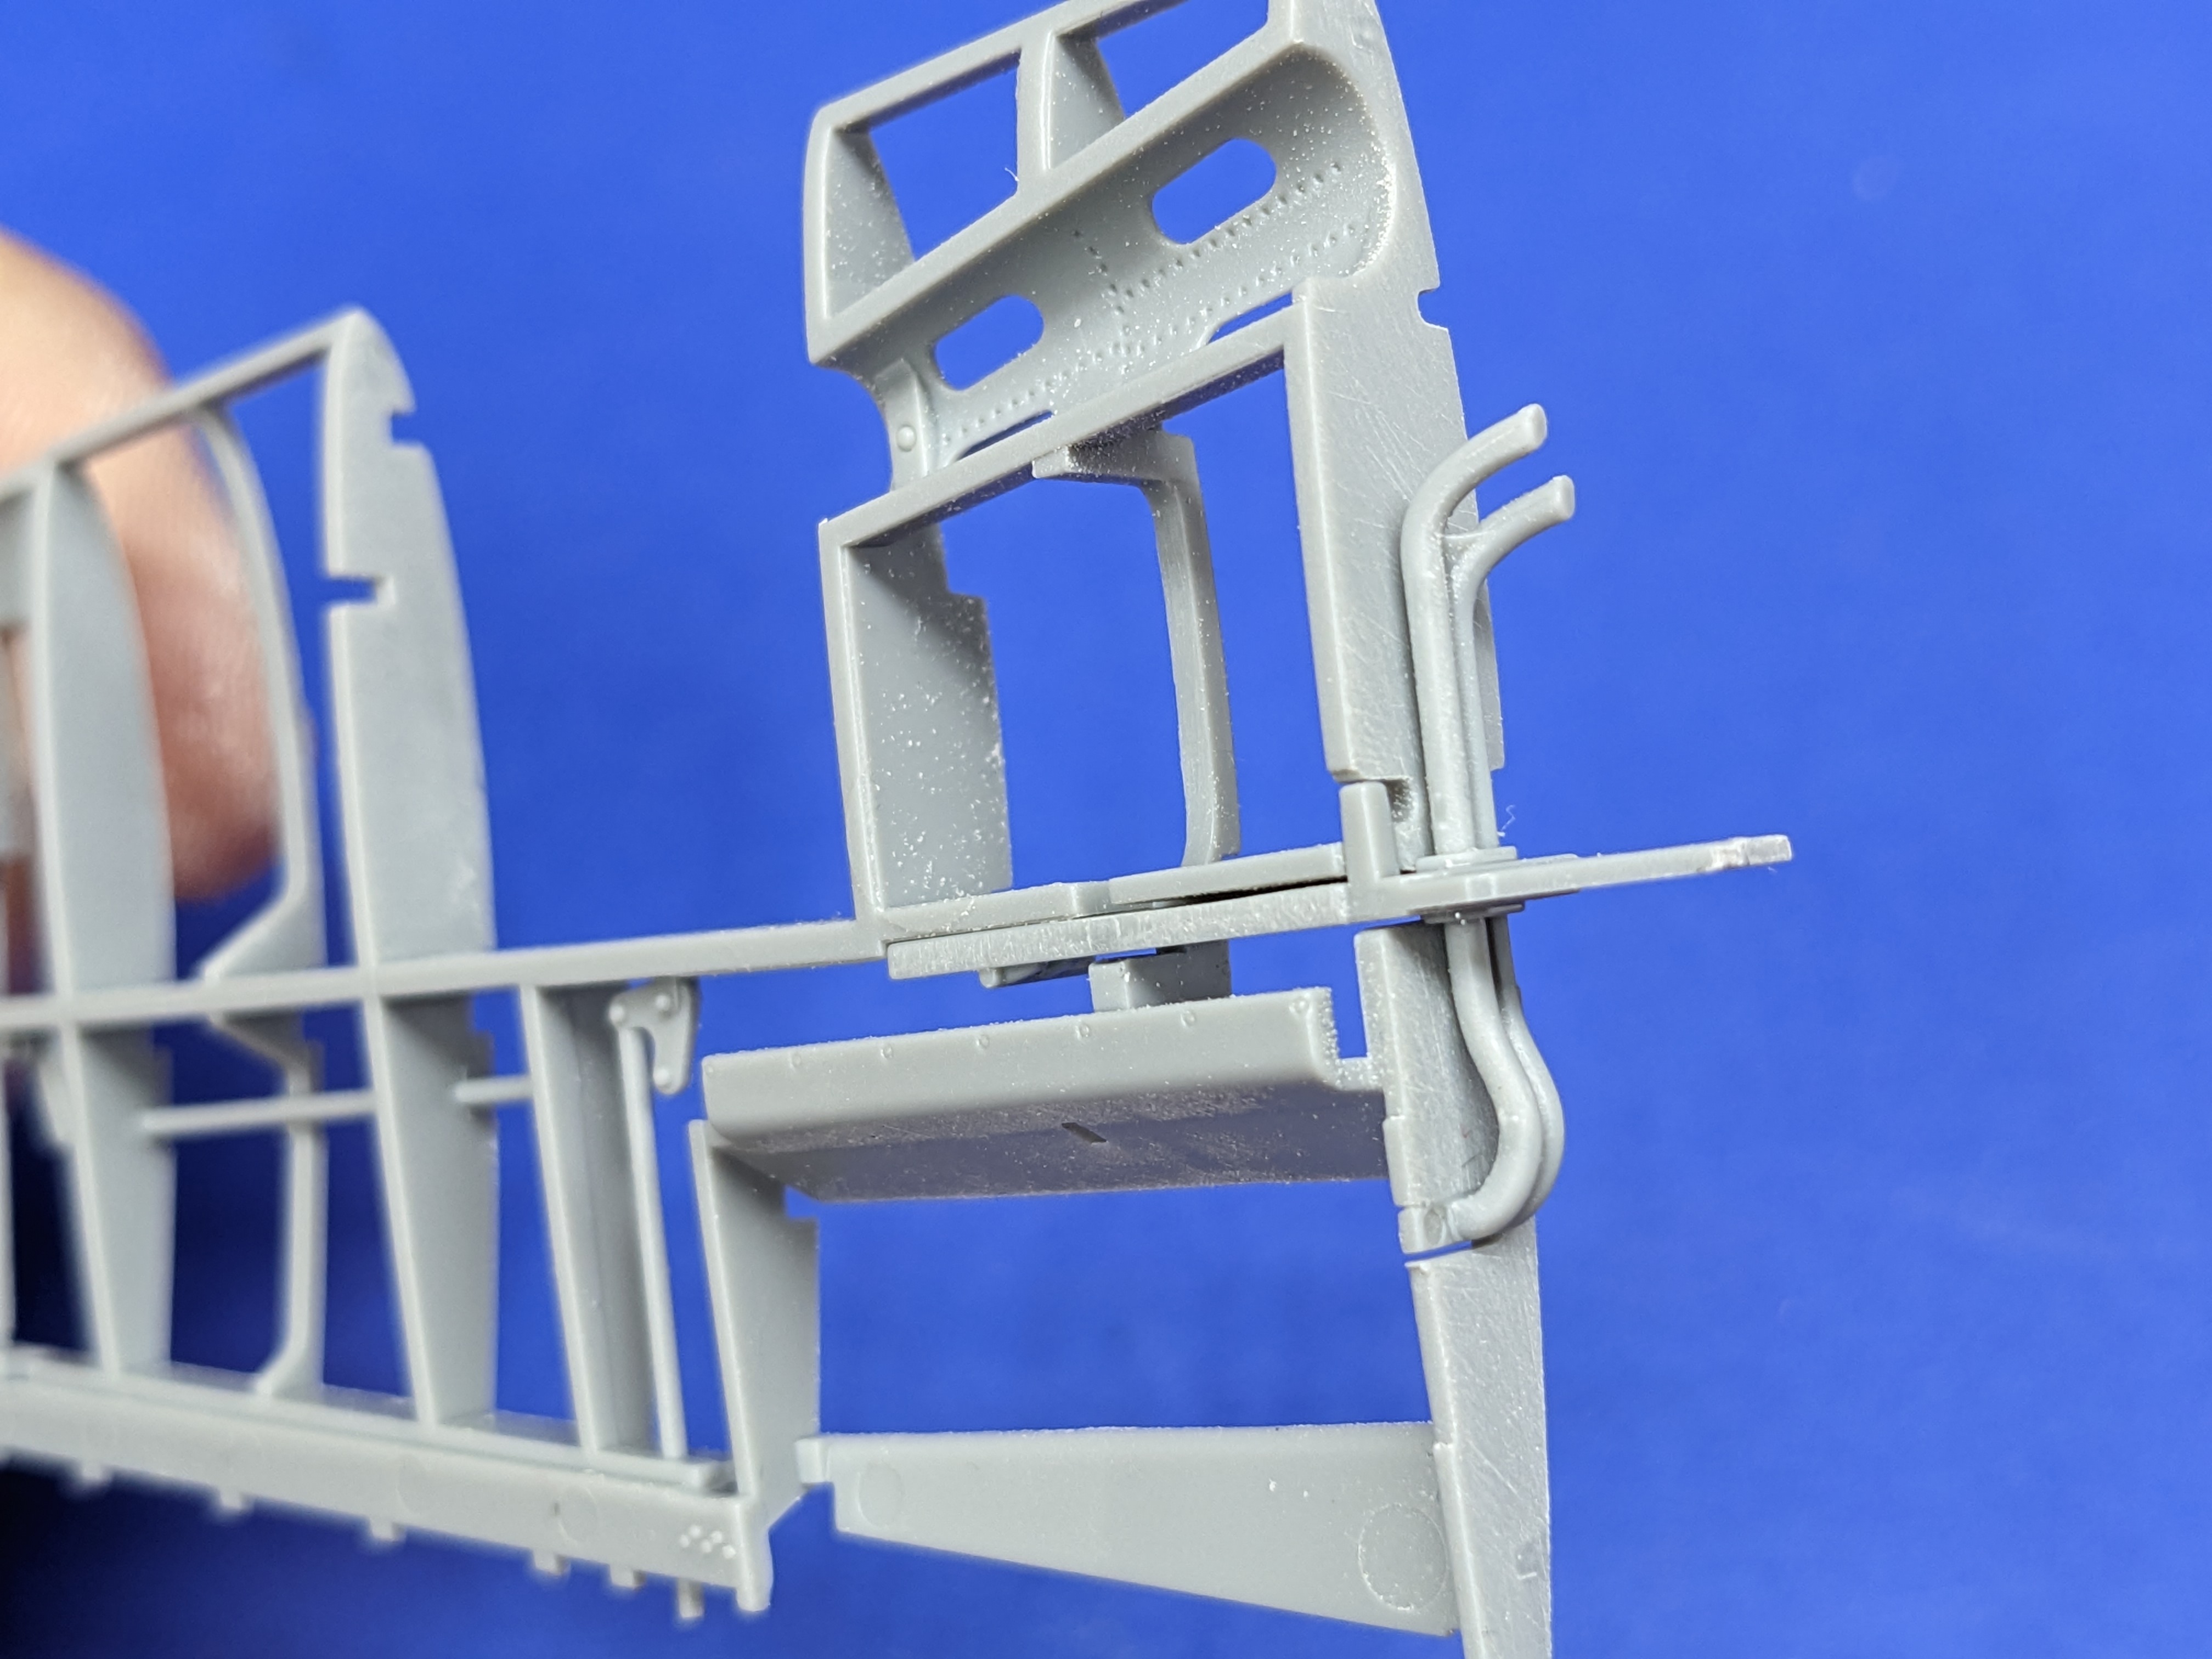
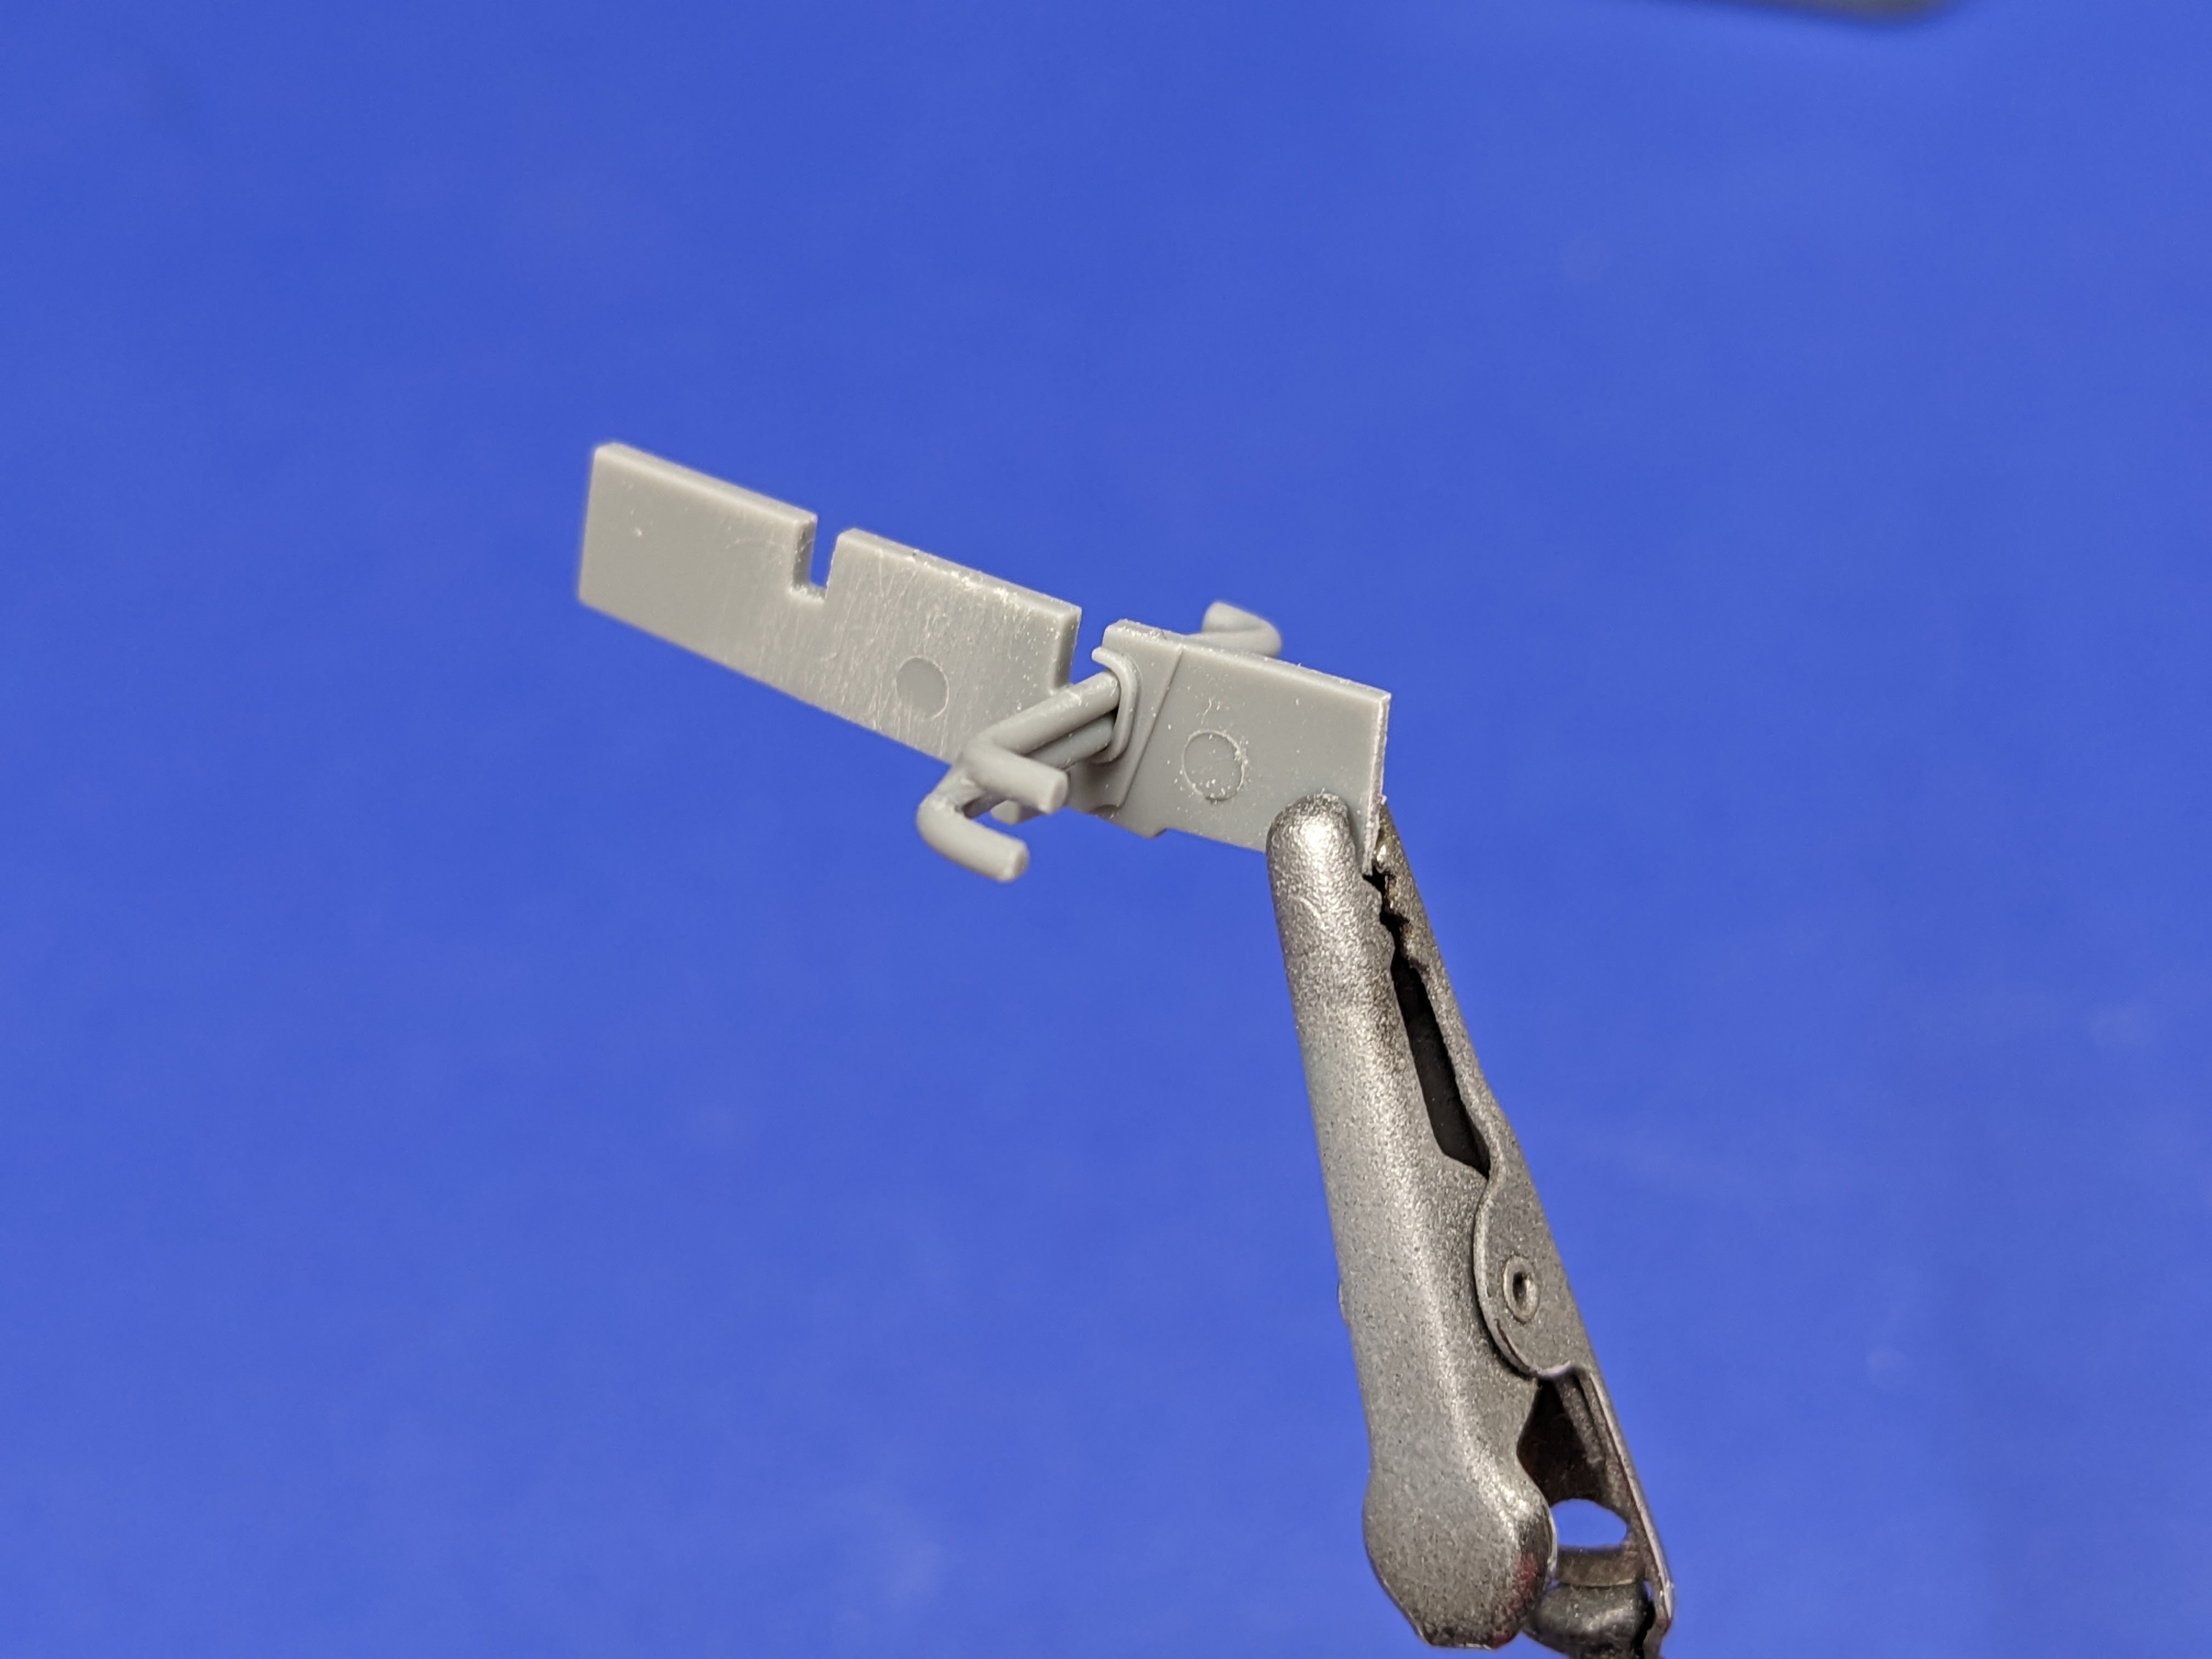
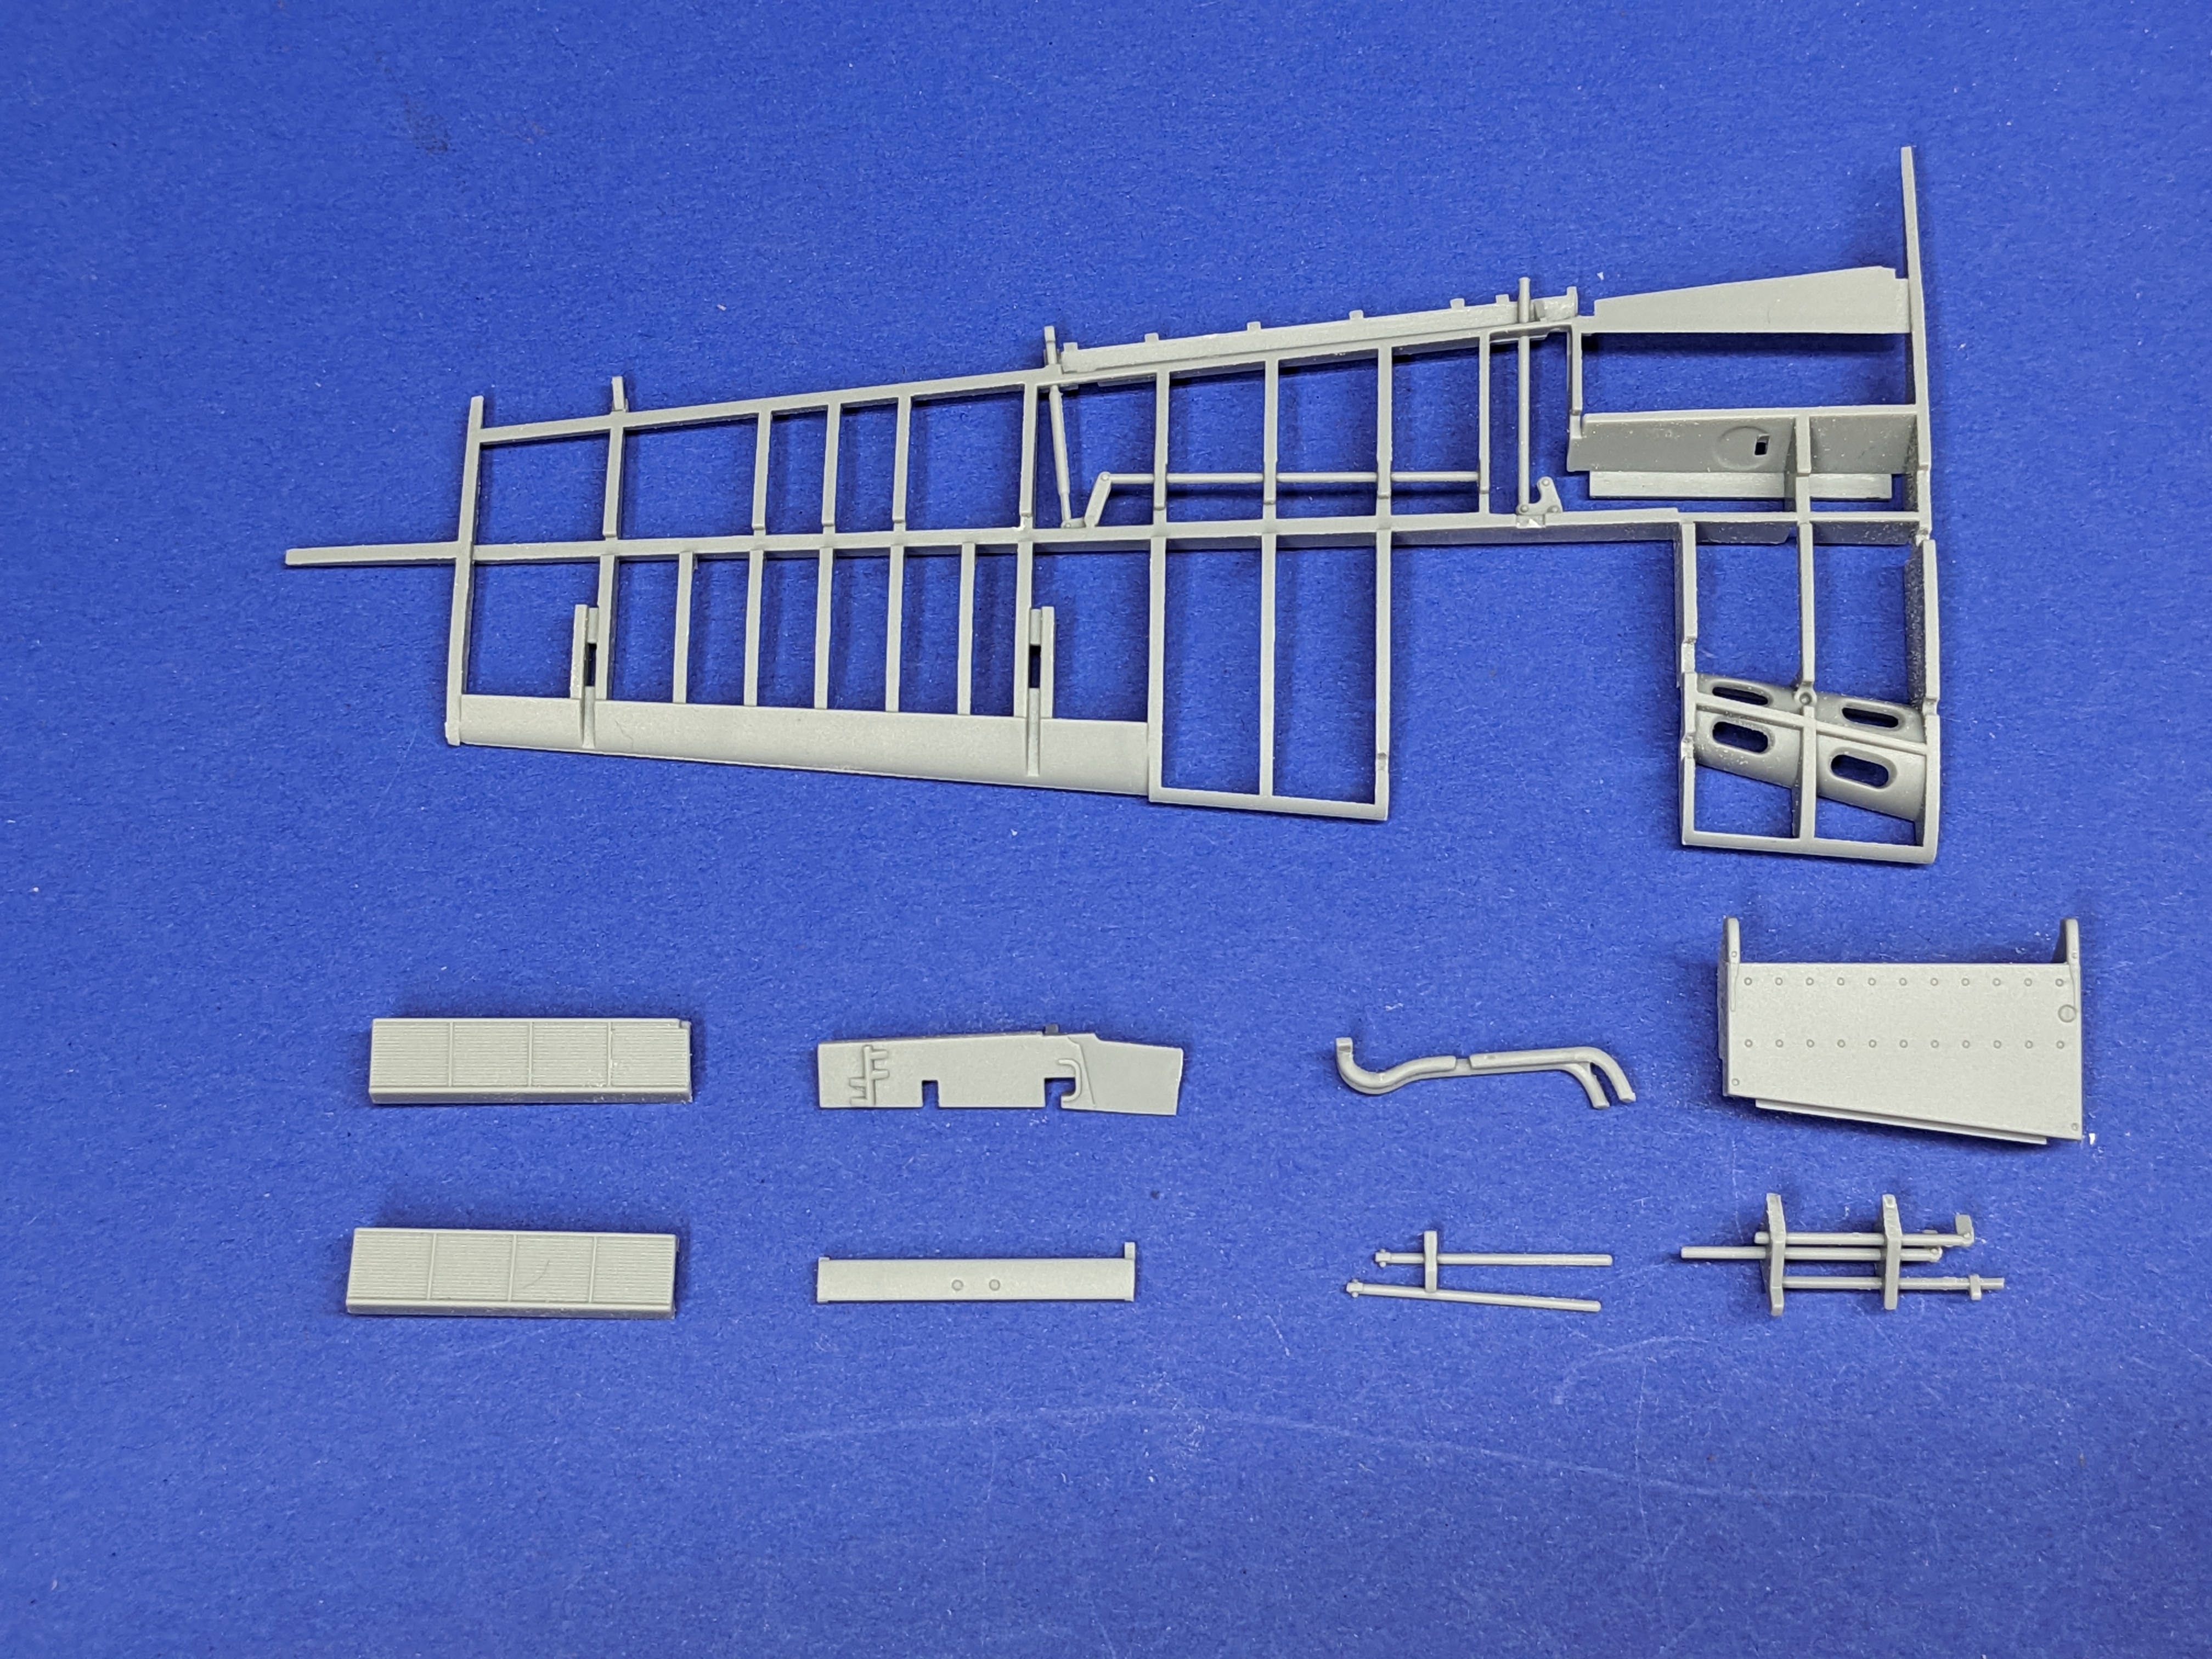
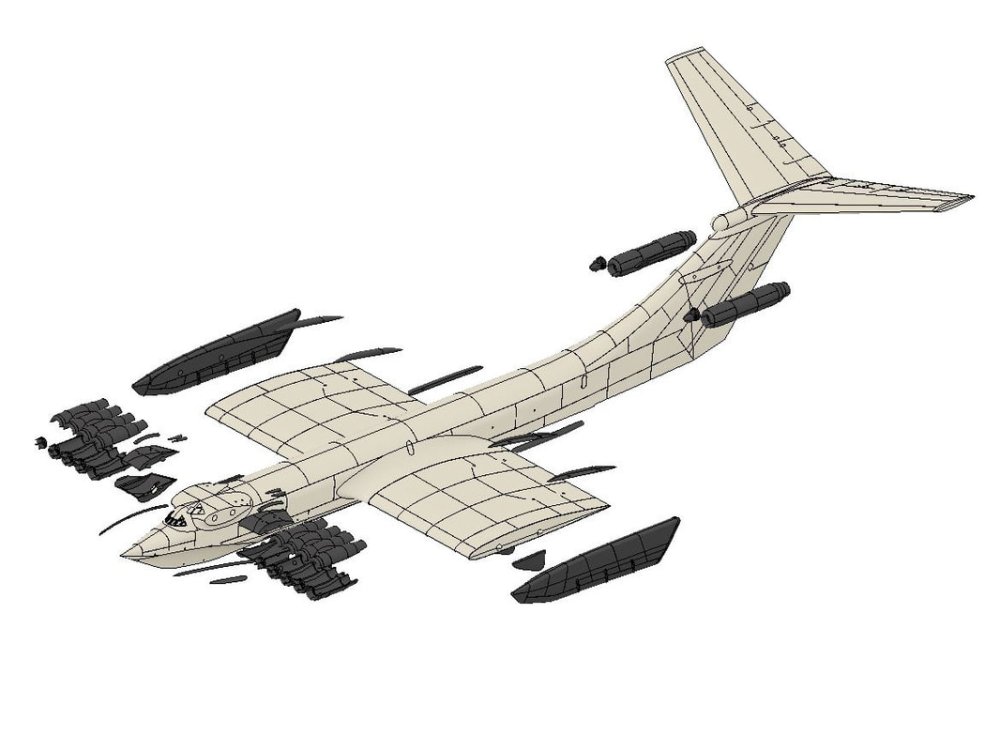
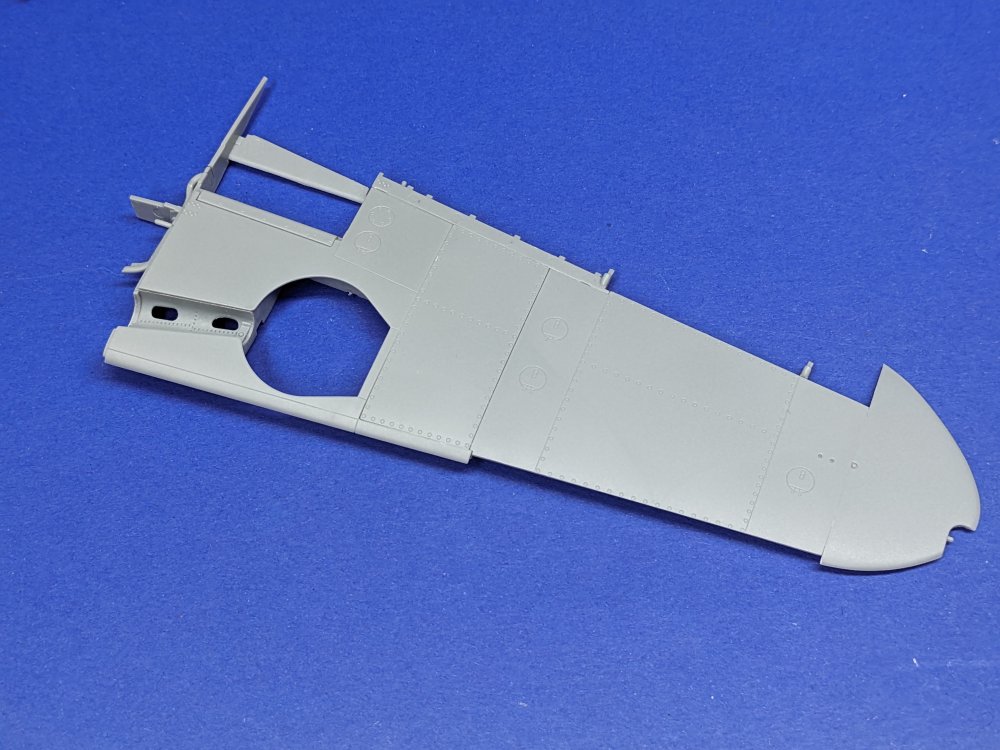
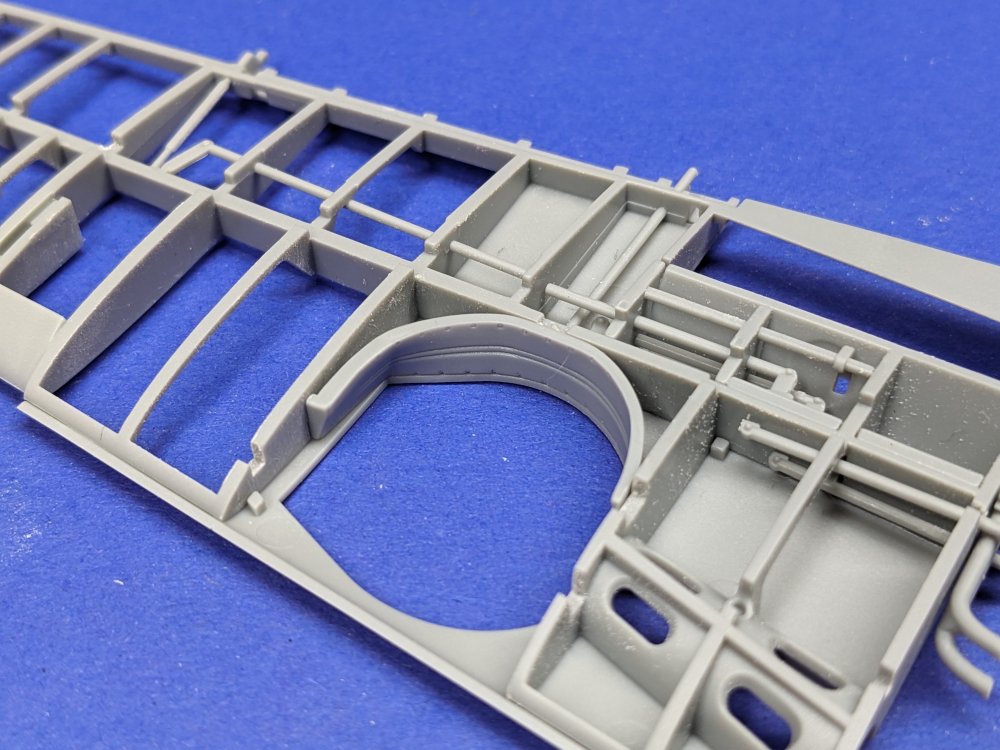
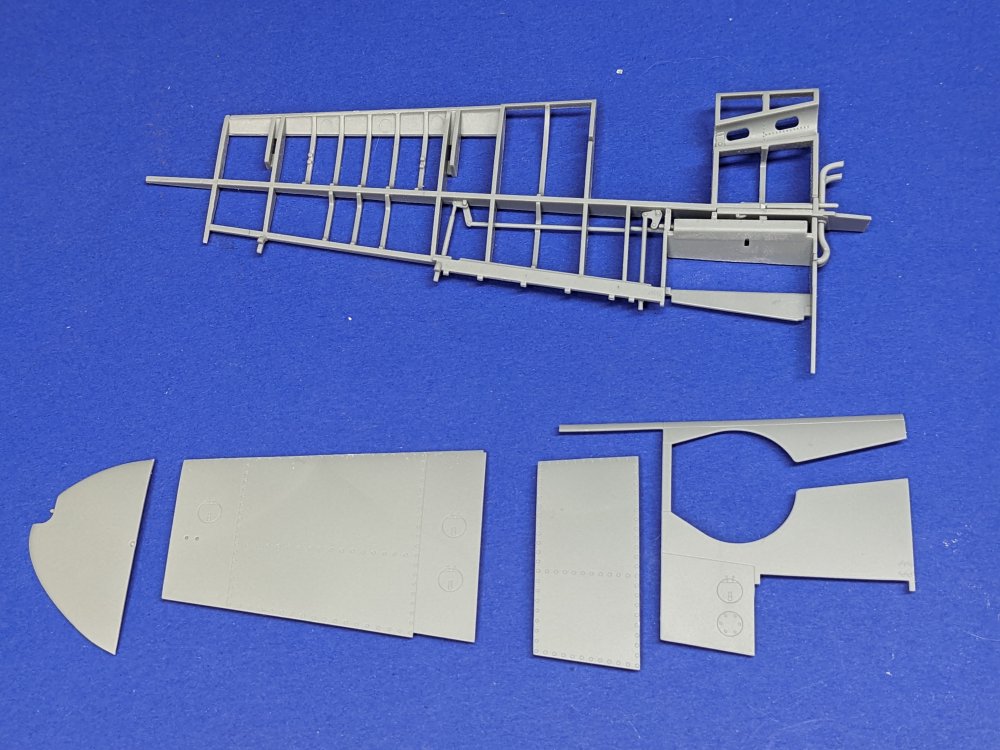
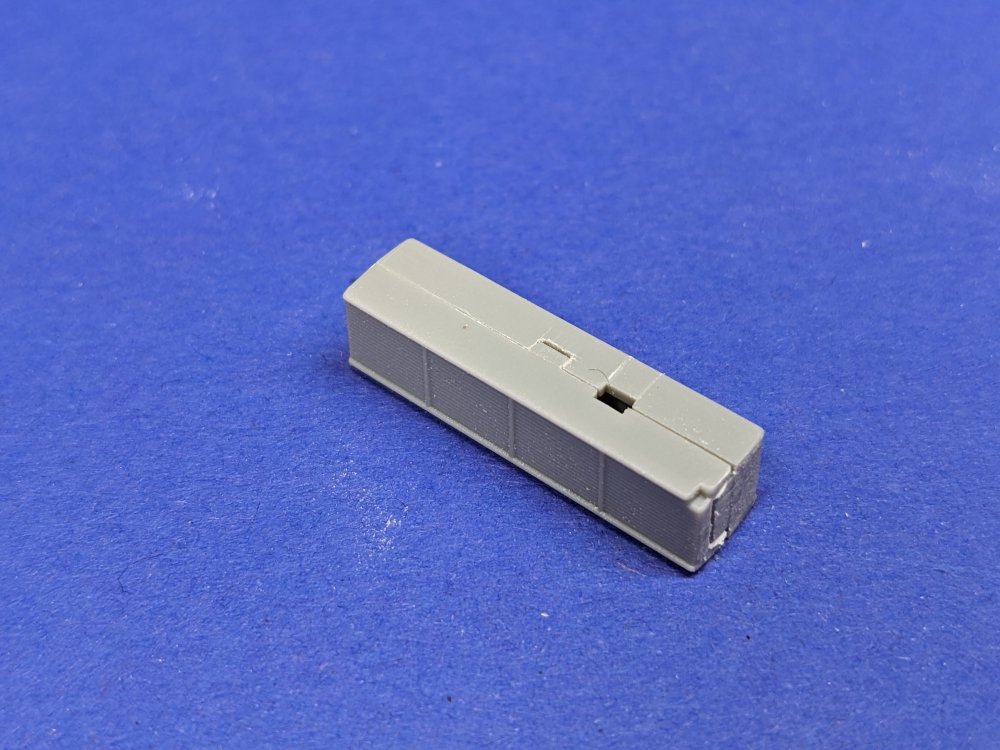
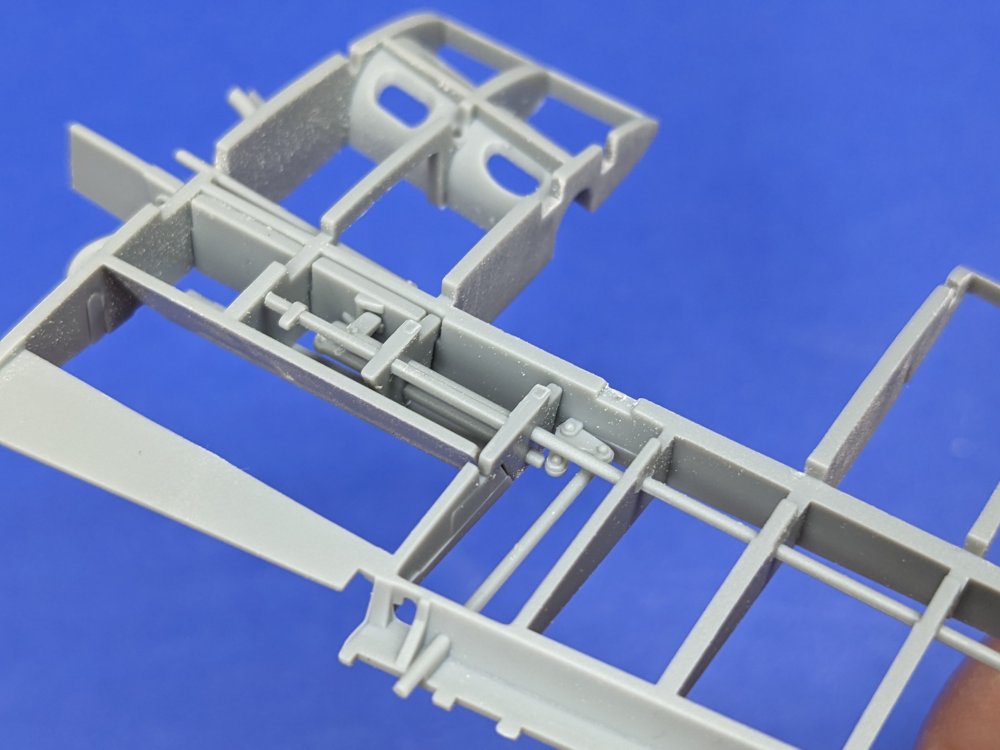
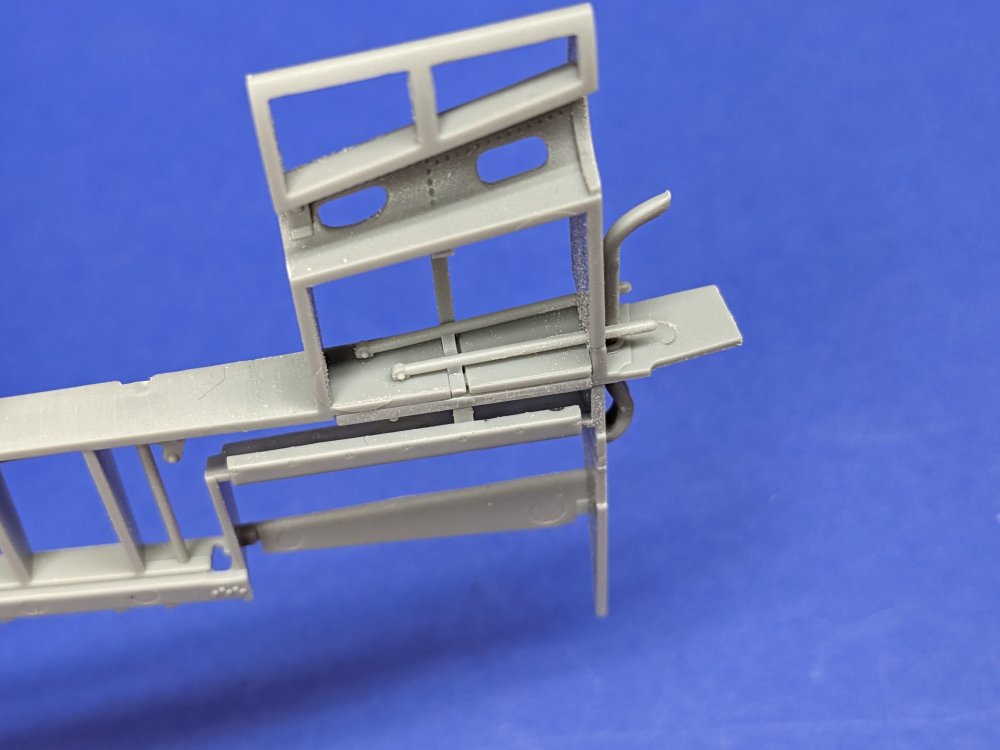
At the same time, I started work on the wings. There's several control rods, coolant lines, rada and plates. The coolant lines are the first to go on. They are attached to a section of the spar. This is then added to the spar assembly. Control rods are next. The rad is in two pieces. I found the fit wants the greatest but with a bit of a clamp, they ended up going together ok. The seam won't be visible in any case. The wheel bay liner is supposed to go in at the this point. I found the positioning a bit vague so I took a different approach and left it out for the moment. The lower wing skin is next. It's comprised of several sections. Honestly it could have been done in fewer pieces but I understand they are mimicking the panel breakdown of the actual plane. These were test fitted prior to applying cement. The fit is good. Make sure you clean up any sprue attachment points. There's a couple small gaps around the middle panel. They're probably easily filled with a quick pass of putty or possibly even Mr Surfacer. Flipping it over, I fitted the wheel bay liner and I'm glad I left it until now. This way I can better line it up with the wheel bay opening.


- 90 replies
-
- 10
-
-
-
- zoukei-mura
- 109
- (and 1 more)