BlrwestSiR
-
Posts
9,183 -
Joined
-
Last visited
Content Type
Profiles
Forums
Events
Gallery
Everything posted by BlrwestSiR
-
It's got to be better than Lawn Dart. Clunk was their nickname. They were officially called the Canuck.
-
CF-100 Clunk CF-105 Arrow I'll start with those. Carl
-

RR Spey powered RAF Phantom conversion
BlrwestSiR replied to Wingco57's topic in LSM 1/35 and Larger Work In Progress
She looks fantastic. It wouldn't know it two different kits cut and blended together. Carl- 414 replies
-
- 3
-

-
- conversion
- phantom
- (and 1 more)
-
Nice group of models Phil. Well done.
-
Fantastic looking Starfighter. Great presentation as well with the display base and engine. Carl
-
If anyone wants an HpH B-52H now's the time
BlrwestSiR replied to Winnie's topic in General Discussion
If you don't mind 1/72, this is coming out soon-ish. https://www.luckymodel.com/scale.aspx?item_no=MC-UA72210 -
An assortment of completed builds for 2020
BlrwestSiR replied to BlrwestSiR's topic in Modelling Discussion
Here's the link to the WIP thread on the display case. -
An assortment of completed builds for 2020
BlrwestSiR replied to BlrwestSiR's topic in Modelling Discussion
Thanks! It helps to have a couple boys who are getting into building models. Then I get to have bench time while watching the boys. As for the display case, I bought a pair of Ikea Detolf cases ad used the glass, wire frames, shelves and hardware. I made a new base and top from wood boards. It's probably the most cost effective way to get a case that size. Carl -
Fokker E.V / D.VIII Parasol Mikro Mir 1/32
BlrwestSiR replied to DocRob's topic in LSM 1/35 and Larger Work In Progress
Thanks for the explanation. That makes sense. I'll have to look into those Albion Alloys connectors. Carl -
Scammell tractor/trailer with M3 Grant
BlrwestSiR replied to BlrwestSiR's topic in LSM 1/35 and Larger Work In Progress
Thanks Rob! The Jeep would indeed have made things too crowded. So I'll save it for my next Scammell build which will be in NWE colours. I'll make a bigger base for that one. -
Fokker E.V / D.VIII Parasol Mikro Mir 1/32
BlrwestSiR replied to DocRob's topic in LSM 1/35 and Larger Work In Progress
Just catching up on your build. The struts are really impressive. Just curious how you get the alignment on the joint where all three struts meet? You did the V first and when you add the third one, do you solder it on too? Carl -
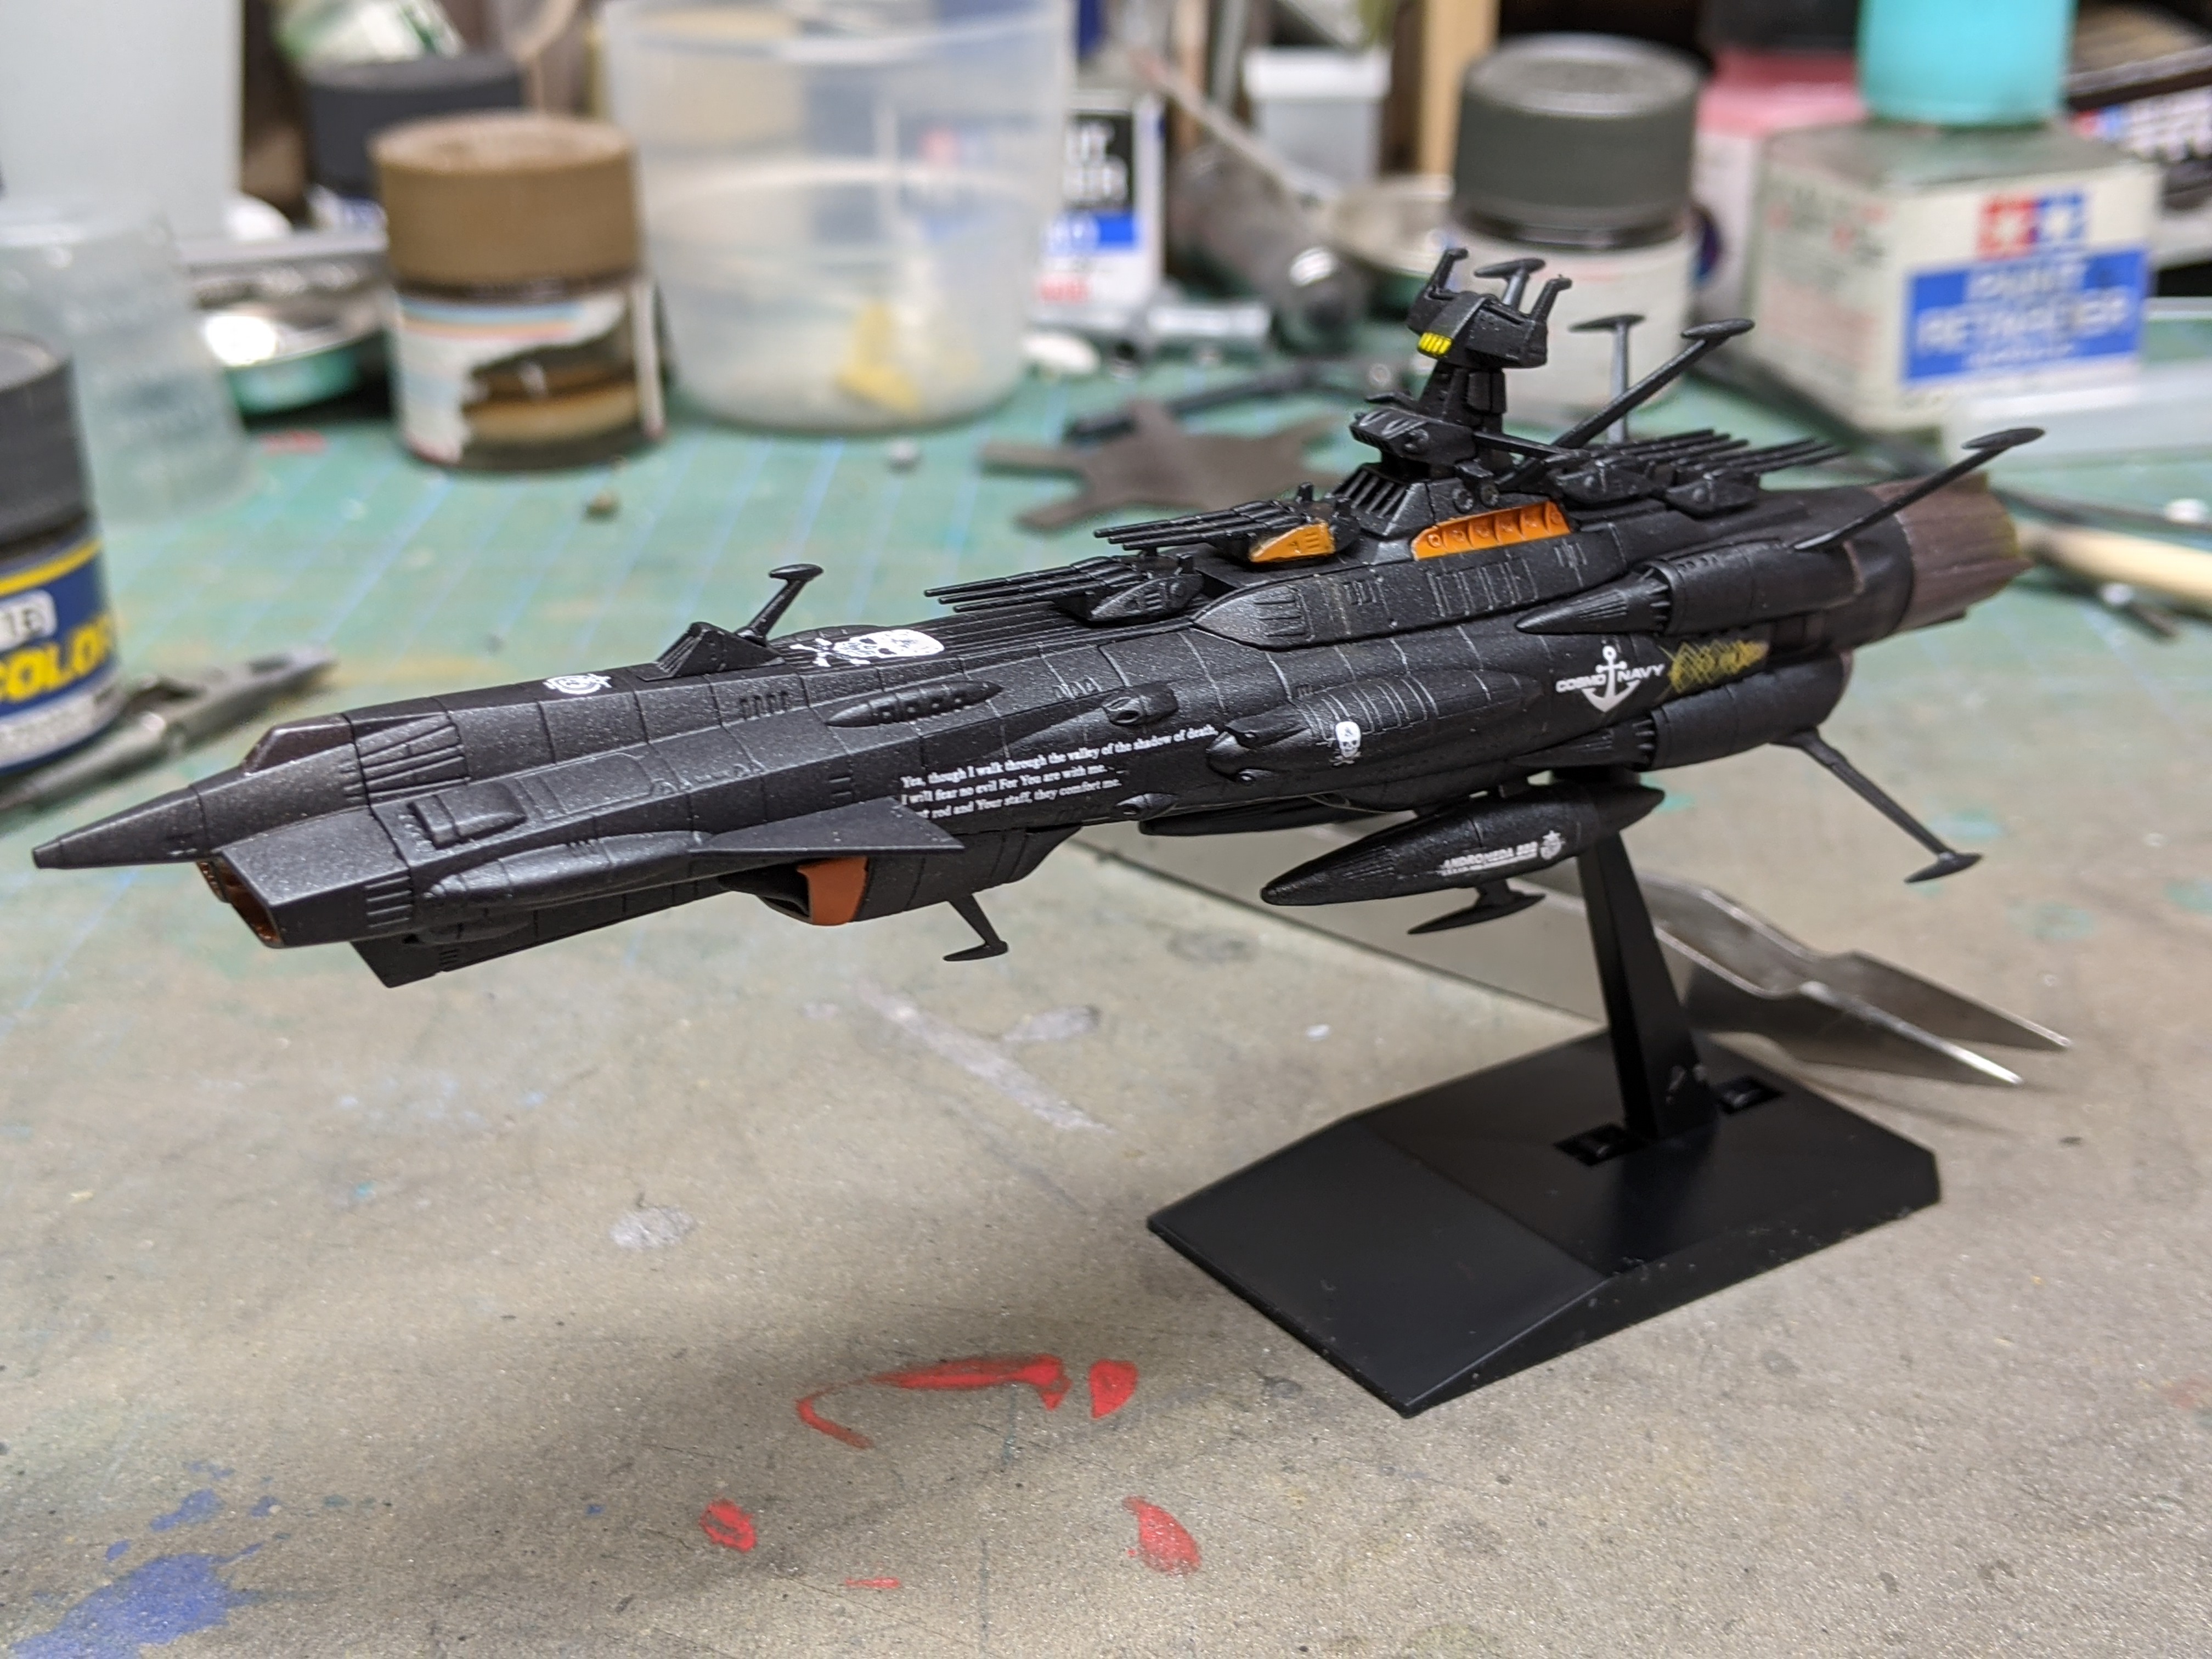
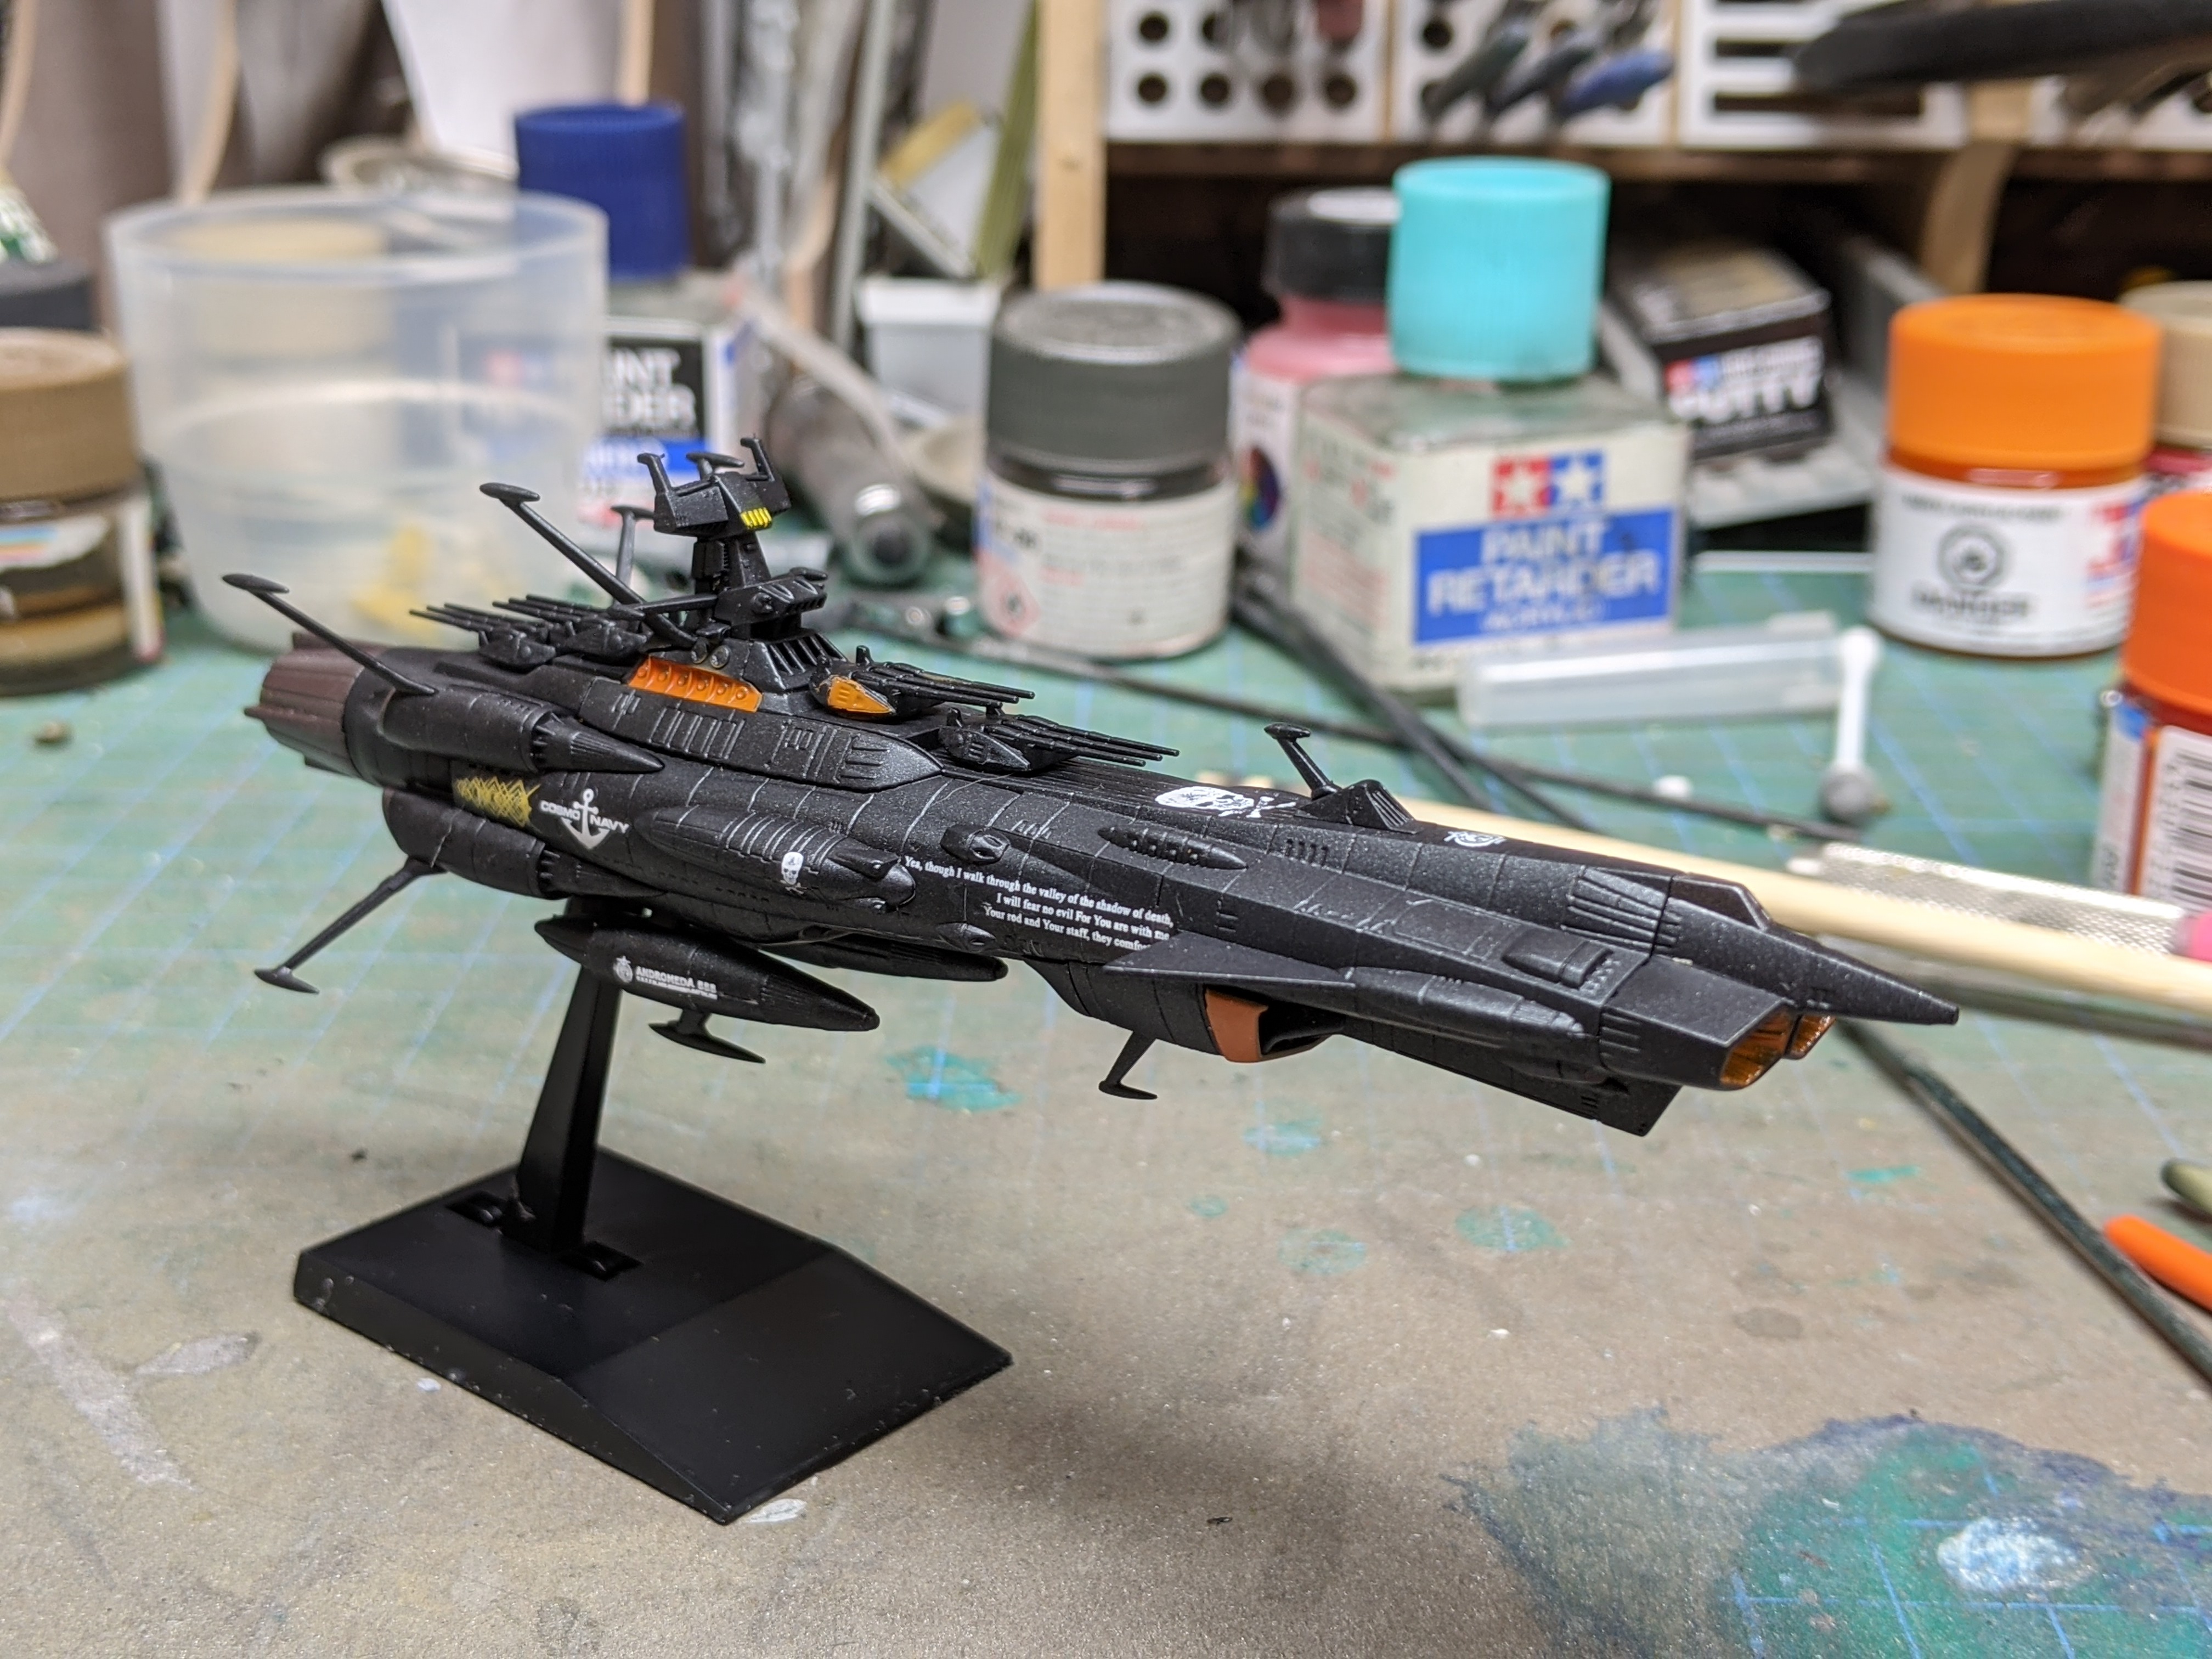
I went through my pics and found that I had managed to finish more than I expected. By scale: Tamiya Marder III Dragon Panther G late Takom Jagdtiger Schewerer plattformwagen Takom Jagdpanther Bandai 1/144 Aluminum Falcon Bandai 1/100,000 Super Star Destroyer Bandai Mecha Collection Andromeda Tamiya 1/32 Spitfire IX Hasegawa 1/32 Bf-109F Fujimi 1/12 Nissan Skyline GT-R Lastly, there's the display case I built. I also started way more than this so I will hopefully get those done in the coming year. Carl
-
It's a very looking Pfalz Bill. I've got the same kit in my stash. It's one of the few WWI planes I do have. Carl
-
Scammell tractor/trailer with M3 Grant
BlrwestSiR replied to BlrwestSiR's topic in LSM 1/35 and Larger Work In Progress
Thanks Harv! Still waiting for it to dry and see what it really looks like. -
Scammell tractor/trailer with M3 Grant
BlrwestSiR replied to BlrwestSiR's topic in LSM 1/35 and Larger Work In Progress
I'll just say it was the cats. I mean, our Calico gases me pretty much any time I'm at my bench so fair play I'd say. -
Scammell tractor/trailer with M3 Grant
BlrwestSiR replied to BlrwestSiR's topic in LSM 1/35 and Larger Work In Progress
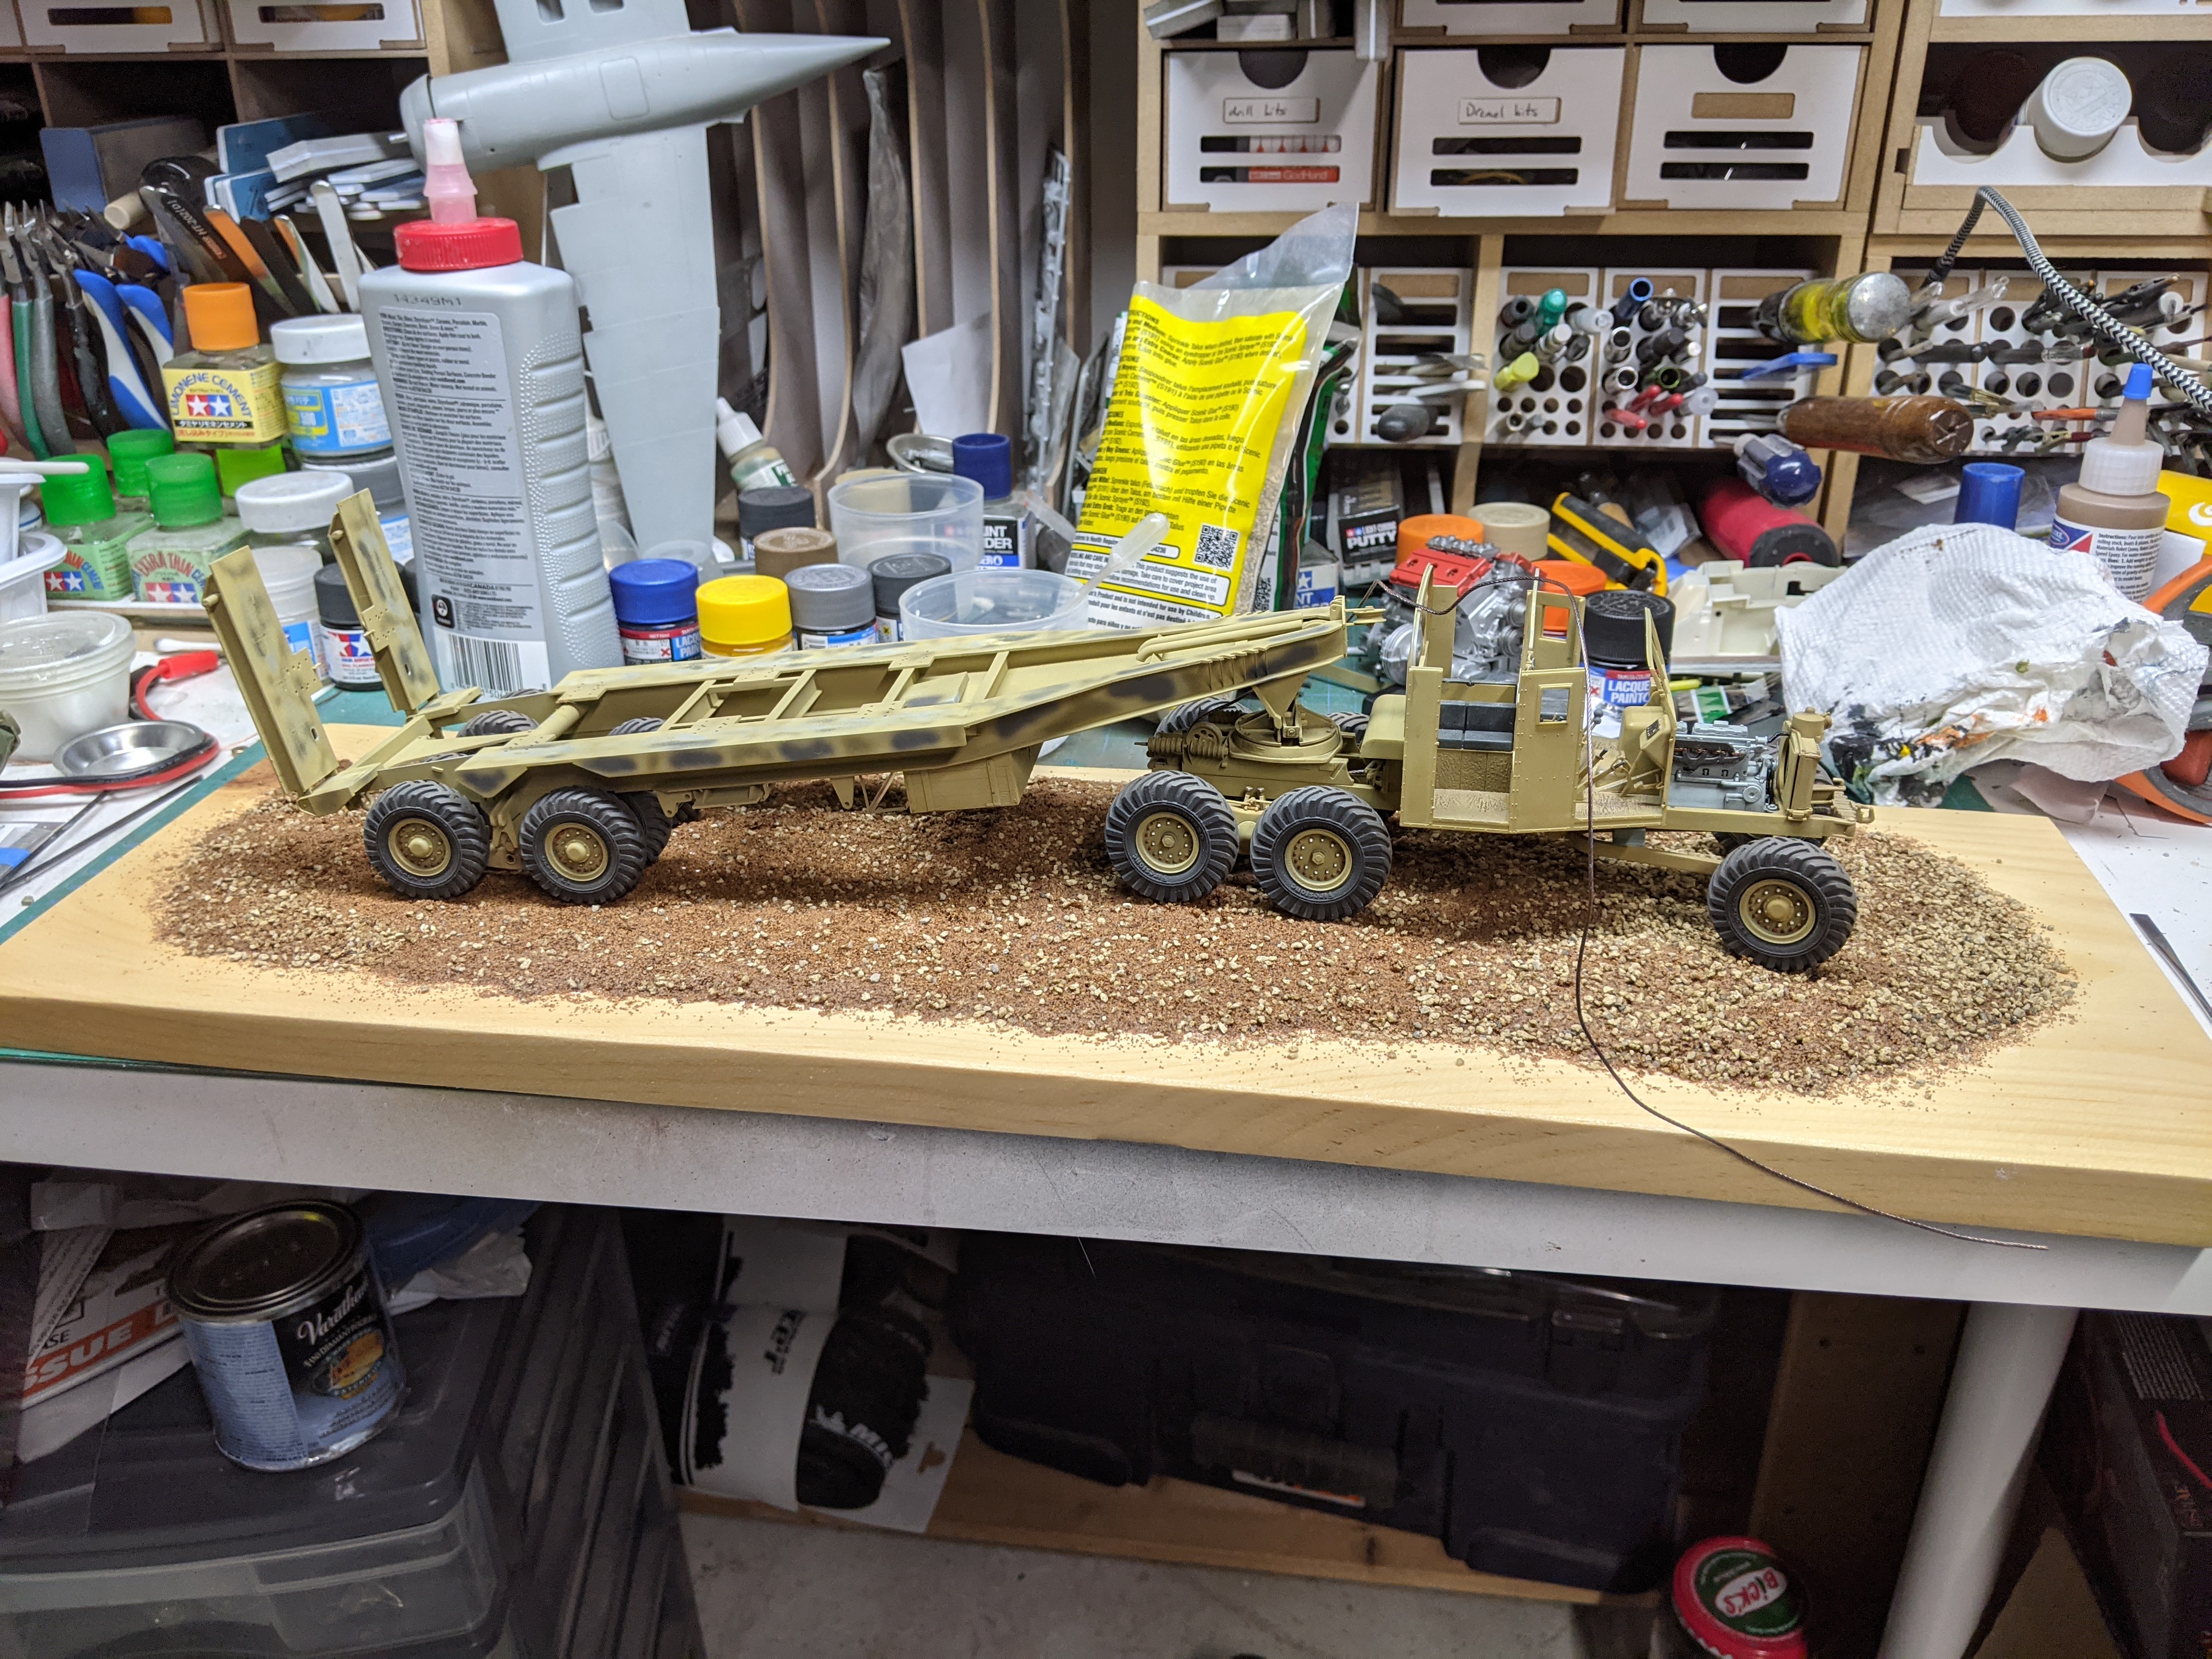
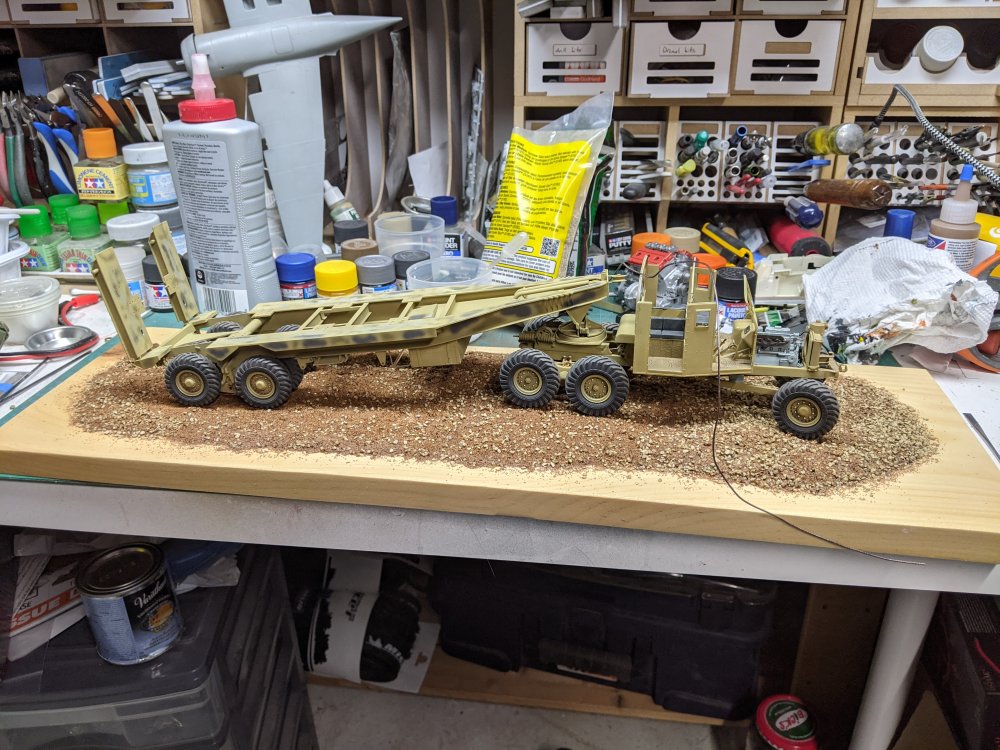
I started on the ground cover. I'm using two different grades of gravel from Woodland Scenics. One is fine talus and the other is fine ballast. I mixed a bit of both together and then sprinkle/pour it on the base. Then I'm using a dropper to apply thinned PVA glue. With the base covered, I put the Scammell on it to see how it looks. Just need to wait for the glue to stay and we'll find out soon enough.
-
2020... My completed builds for the year
BlrwestSiR replied to GazzaS's topic in Modelling Discussion
Some nice subjects there Gaz. A nice variety too. Carl -
Ernie, it's a gorgeous build. I'd be happy with it the way it is. Carl
-
I'd love to see you build the Firefly. It's my favourite WWII tank.
-
Scammell tractor/trailer with M3 Grant
BlrwestSiR replied to BlrwestSiR's topic in LSM 1/35 and Larger Work In Progress
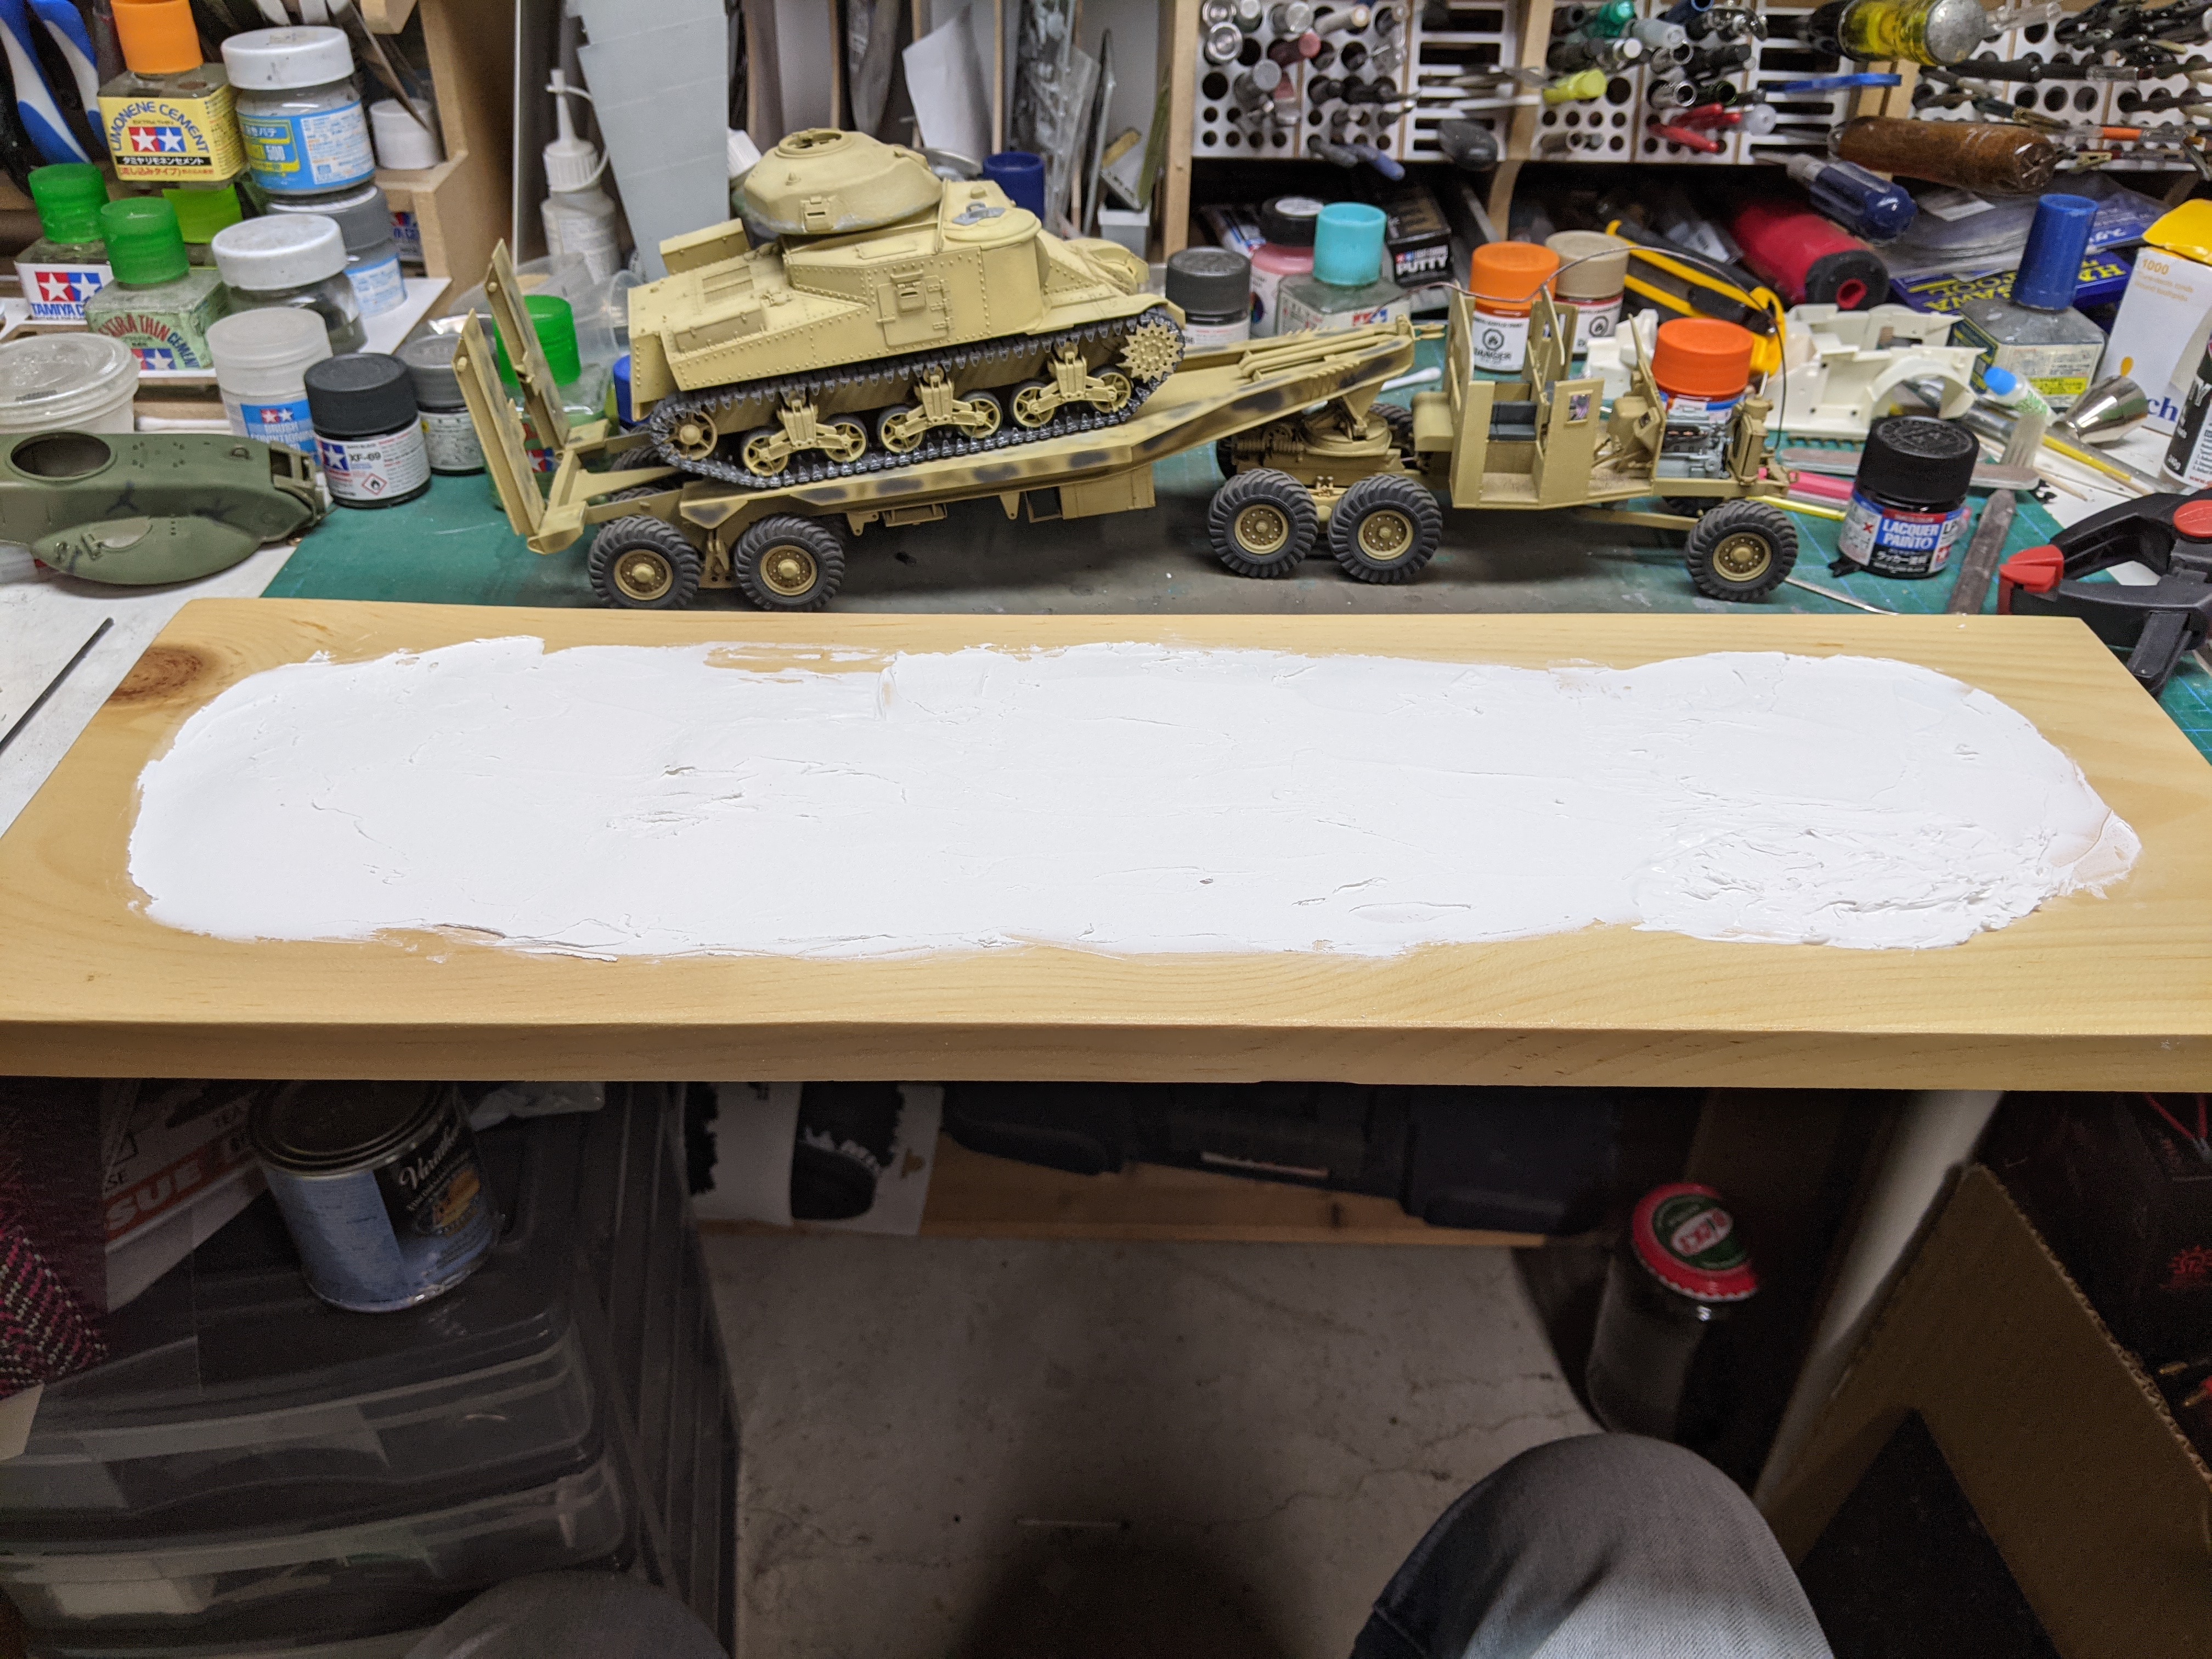
I have decided to forego the Jeep and just do the Scammell and Grant on the base. To that end, I've thrown some drywall compound on the base and shaped it so that the groundwork won't be completely flat. This is new territory for me so I hope it works.
-
HK Models Do-335 A-12
BlrwestSiR replied to JeroenPeters's topic in LSM 1/35 and Larger Work In Progress
Looks awesome. What is the passenger holding in his hand? Cellphone? Carl -
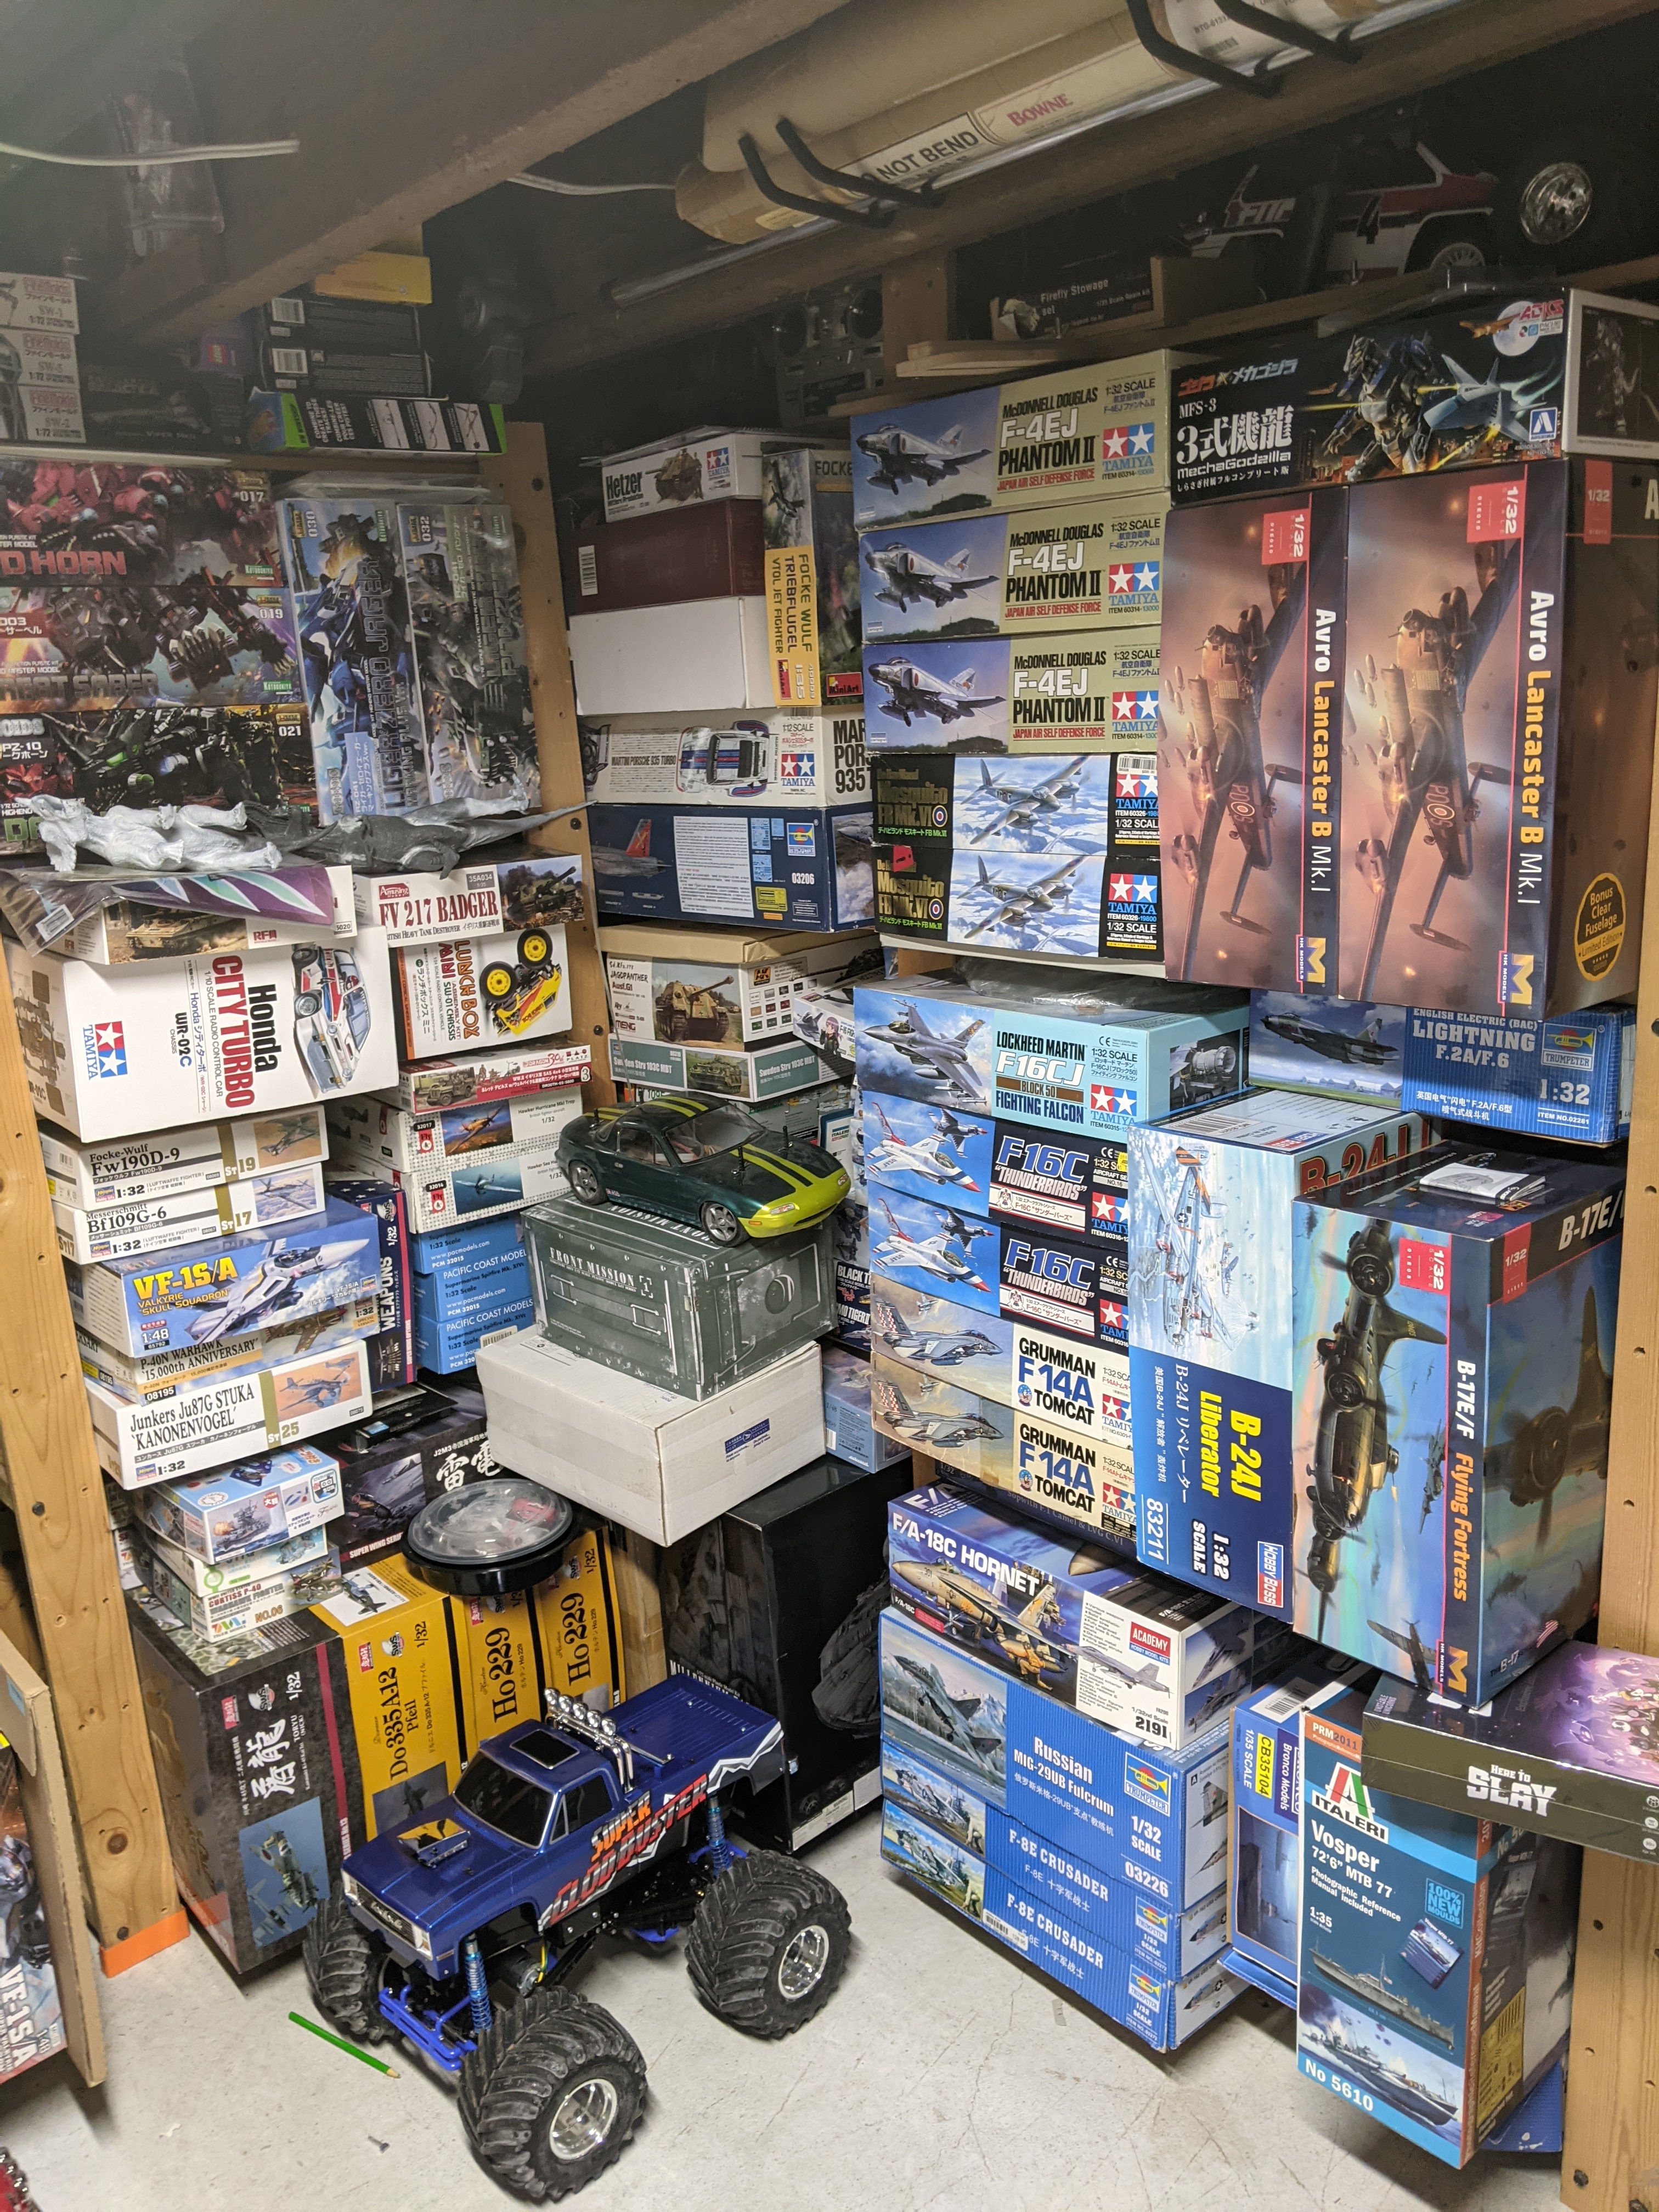
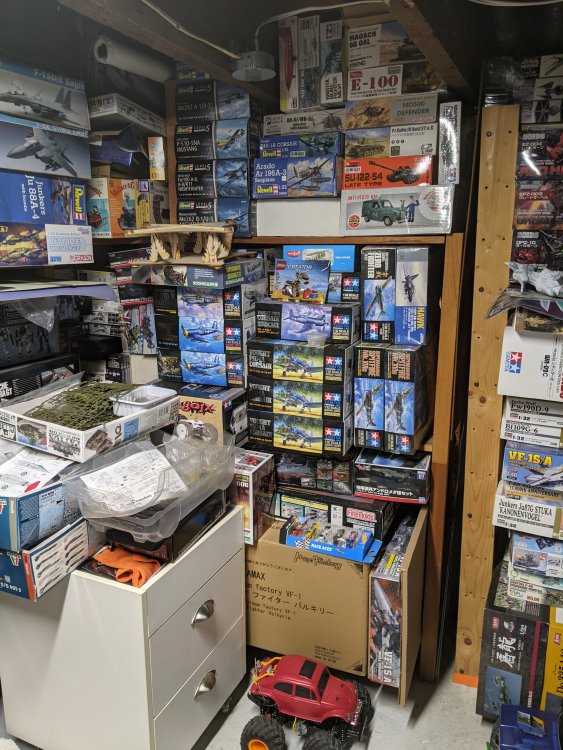
Here's my collection now that it's been reorganized and made to fit on the shelves. You'll probably note that I've got the opposite of Ernie's collection. Lots of Japanese two star shake and bake kits. The two RC car boxes are actually full of leftover sprues from finished kits.

-
Harv, it was a great job on your first tank kit. Can't wait to see you build more of them. Carl
-
What is on your bench right now ? Share a picture :)
BlrwestSiR replied to Martinnfb's topic in Modelling Discussion
I got the decals on. So it's all done.

-
It's a very nice airbrush.