BlrwestSiR
-
Posts
9,193 -
Joined
-
Last visited
Content Type
Profiles
Forums
Events
Gallery
Everything posted by BlrwestSiR
-
 Some nice looking progress there Lee. Is this the same truck from First Blood? Just remember the scene where Rambo goes back to the town and drives through/over the cop car.
 -
Share how COVID-19 Quarantine has affected you.
BlrwestSiR replied to 1to1scale's topic in General Discussion
I know the exact cause of the burnout when I built my Mossie. I had used the kit seat belts and hated the way they had turned out. At the same time, I was building the HK Mossie. So I shelves the Tamiya one and finished the HK. Harv gave me the encouragement to get the Tamiya one done about a year later and I did. Otherwise, the kit doesn't have any hangups or downfalls. She's just like all the other recent Tamiya kits. Only more so... -
American trucks......my soft spot......
BlrwestSiR replied to a topic in LSM 1/35 and Larger Work In Progress
Danny, thanks for starting this build. I'm learning so much about trucks from everyone contributing to it. Carl -
That's a bunch. The closet I come is with Tamiya Spitfires. Got nine done and two more left in the stash.
-
Cool! Ernie I think would like this. Carl
-
American trucks......my soft spot......
BlrwestSiR replied to a topic in LSM 1/35 and Larger Work In Progress
Watched a guy hook up a city bus. That's about it. He was great enough to walk me through the steps he had to do including pulling the shaft out of the rear axle so the diff would freewheel. -
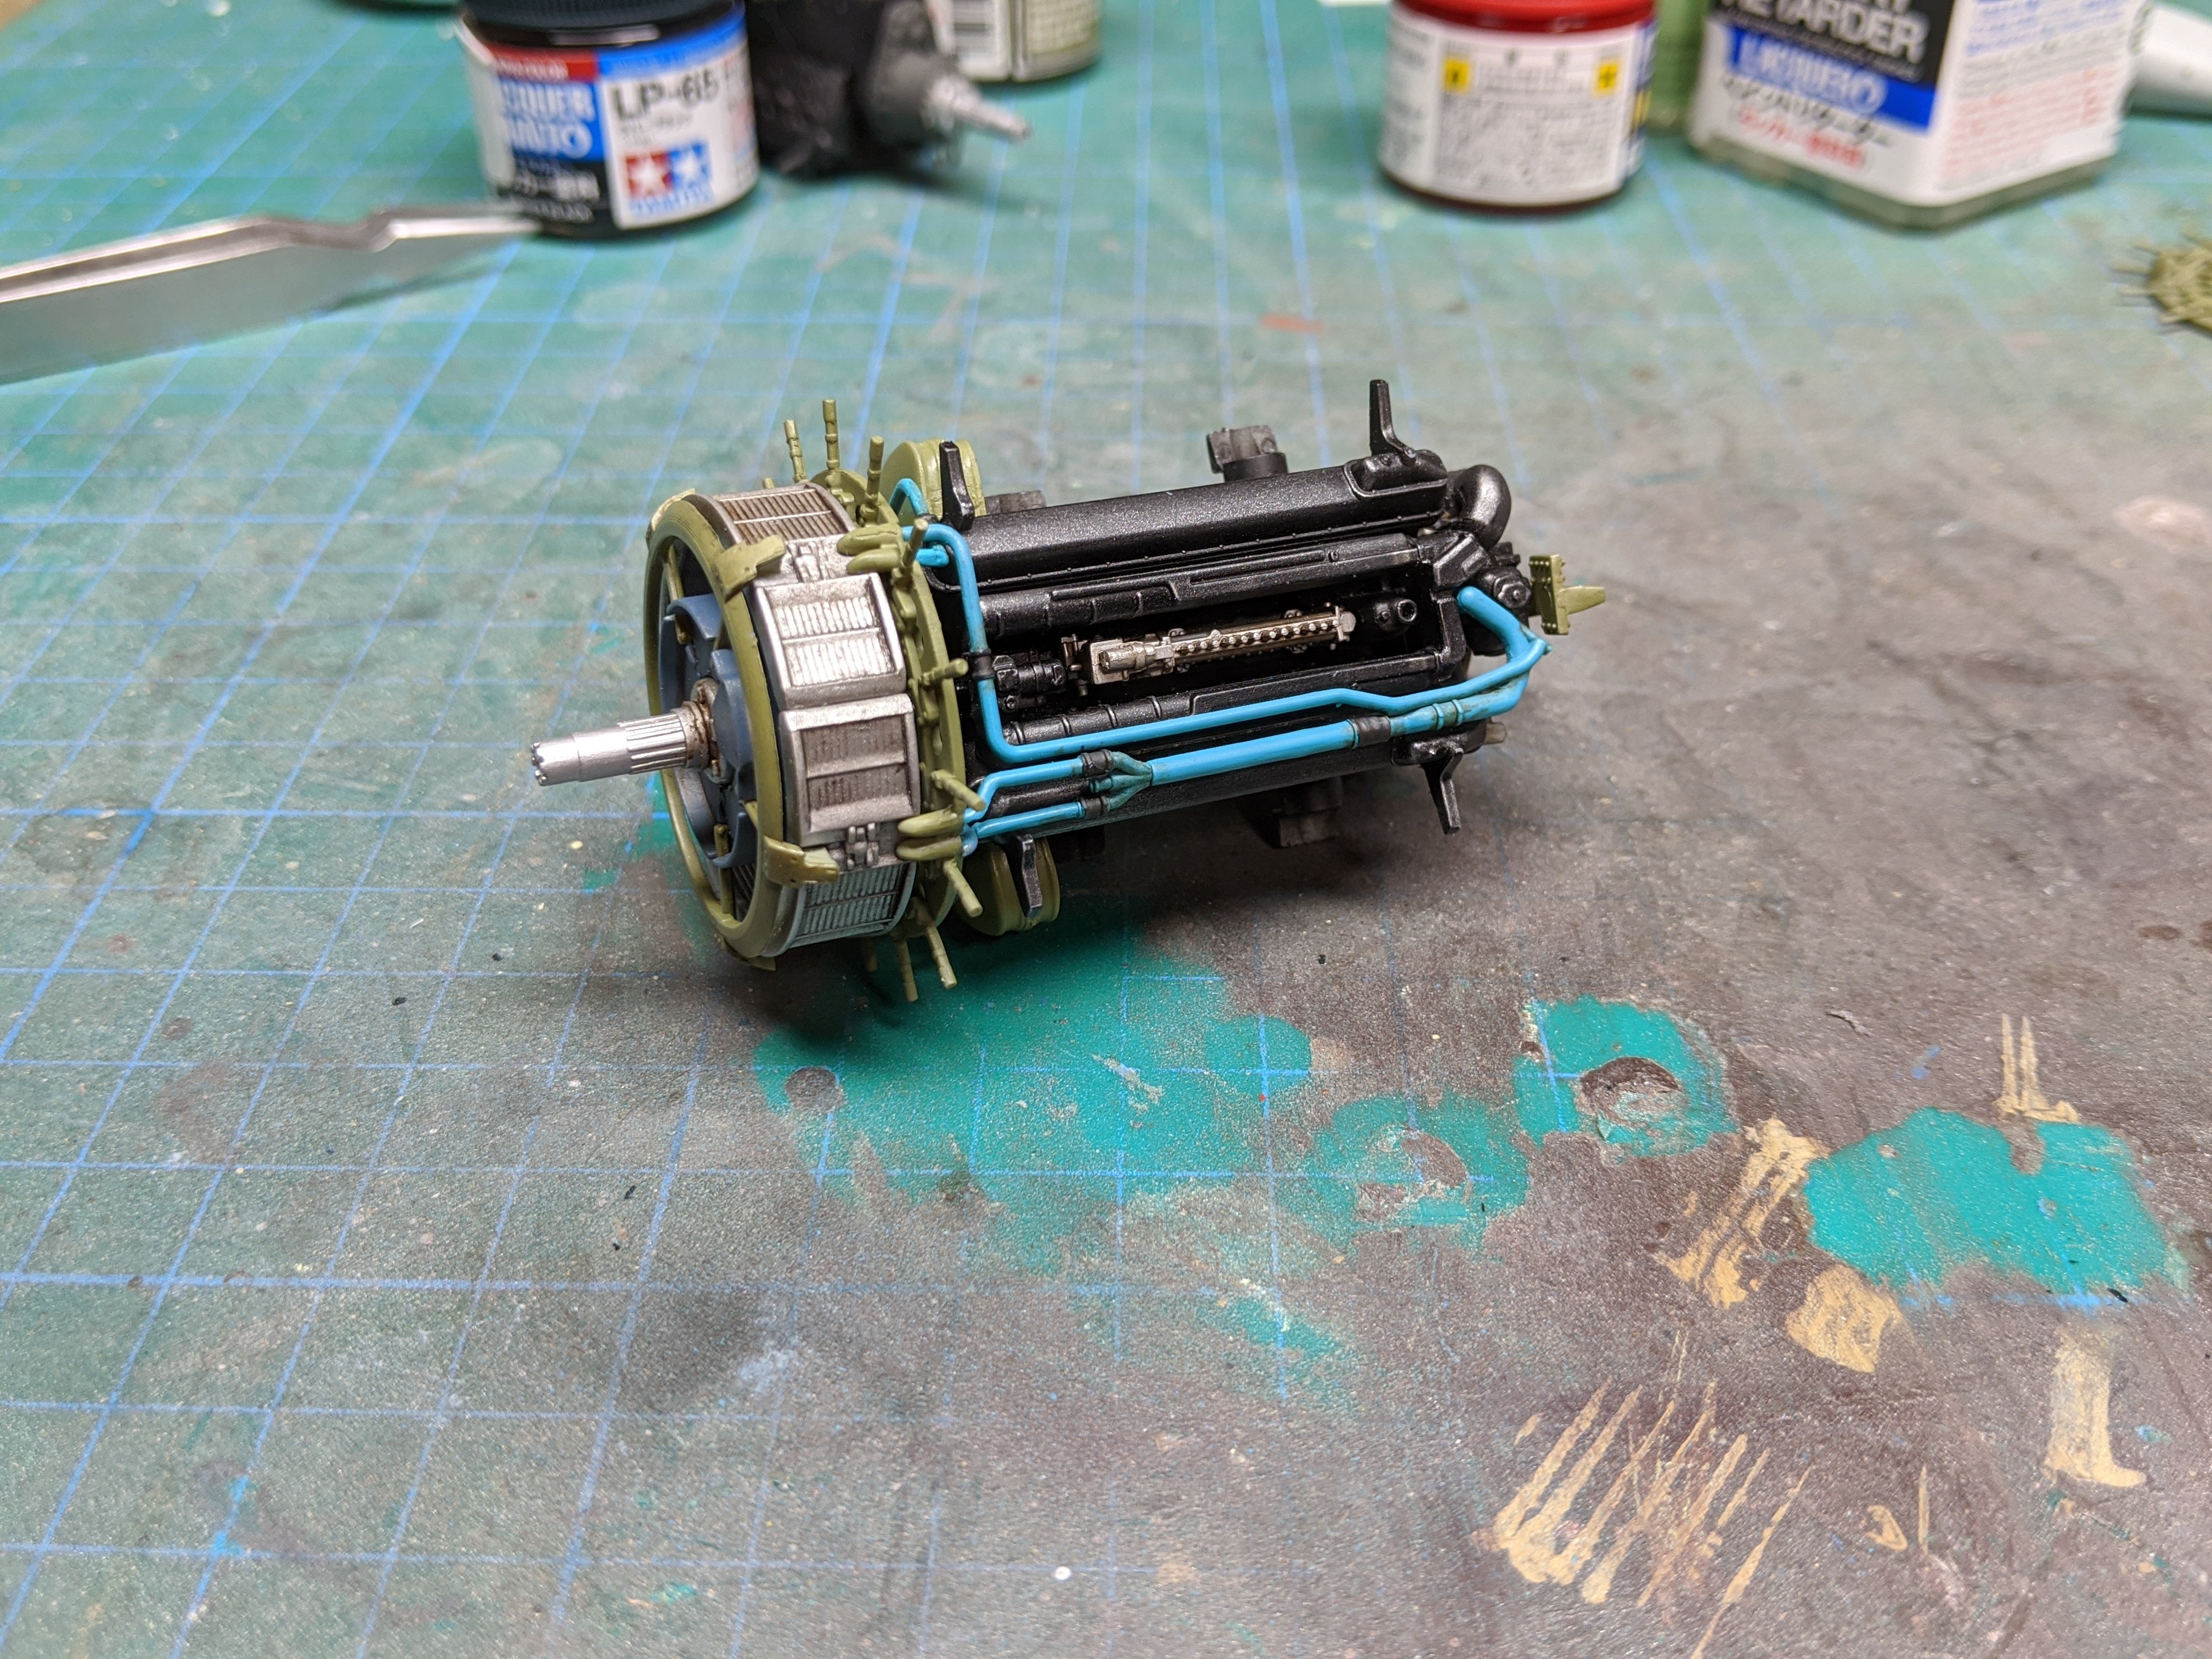
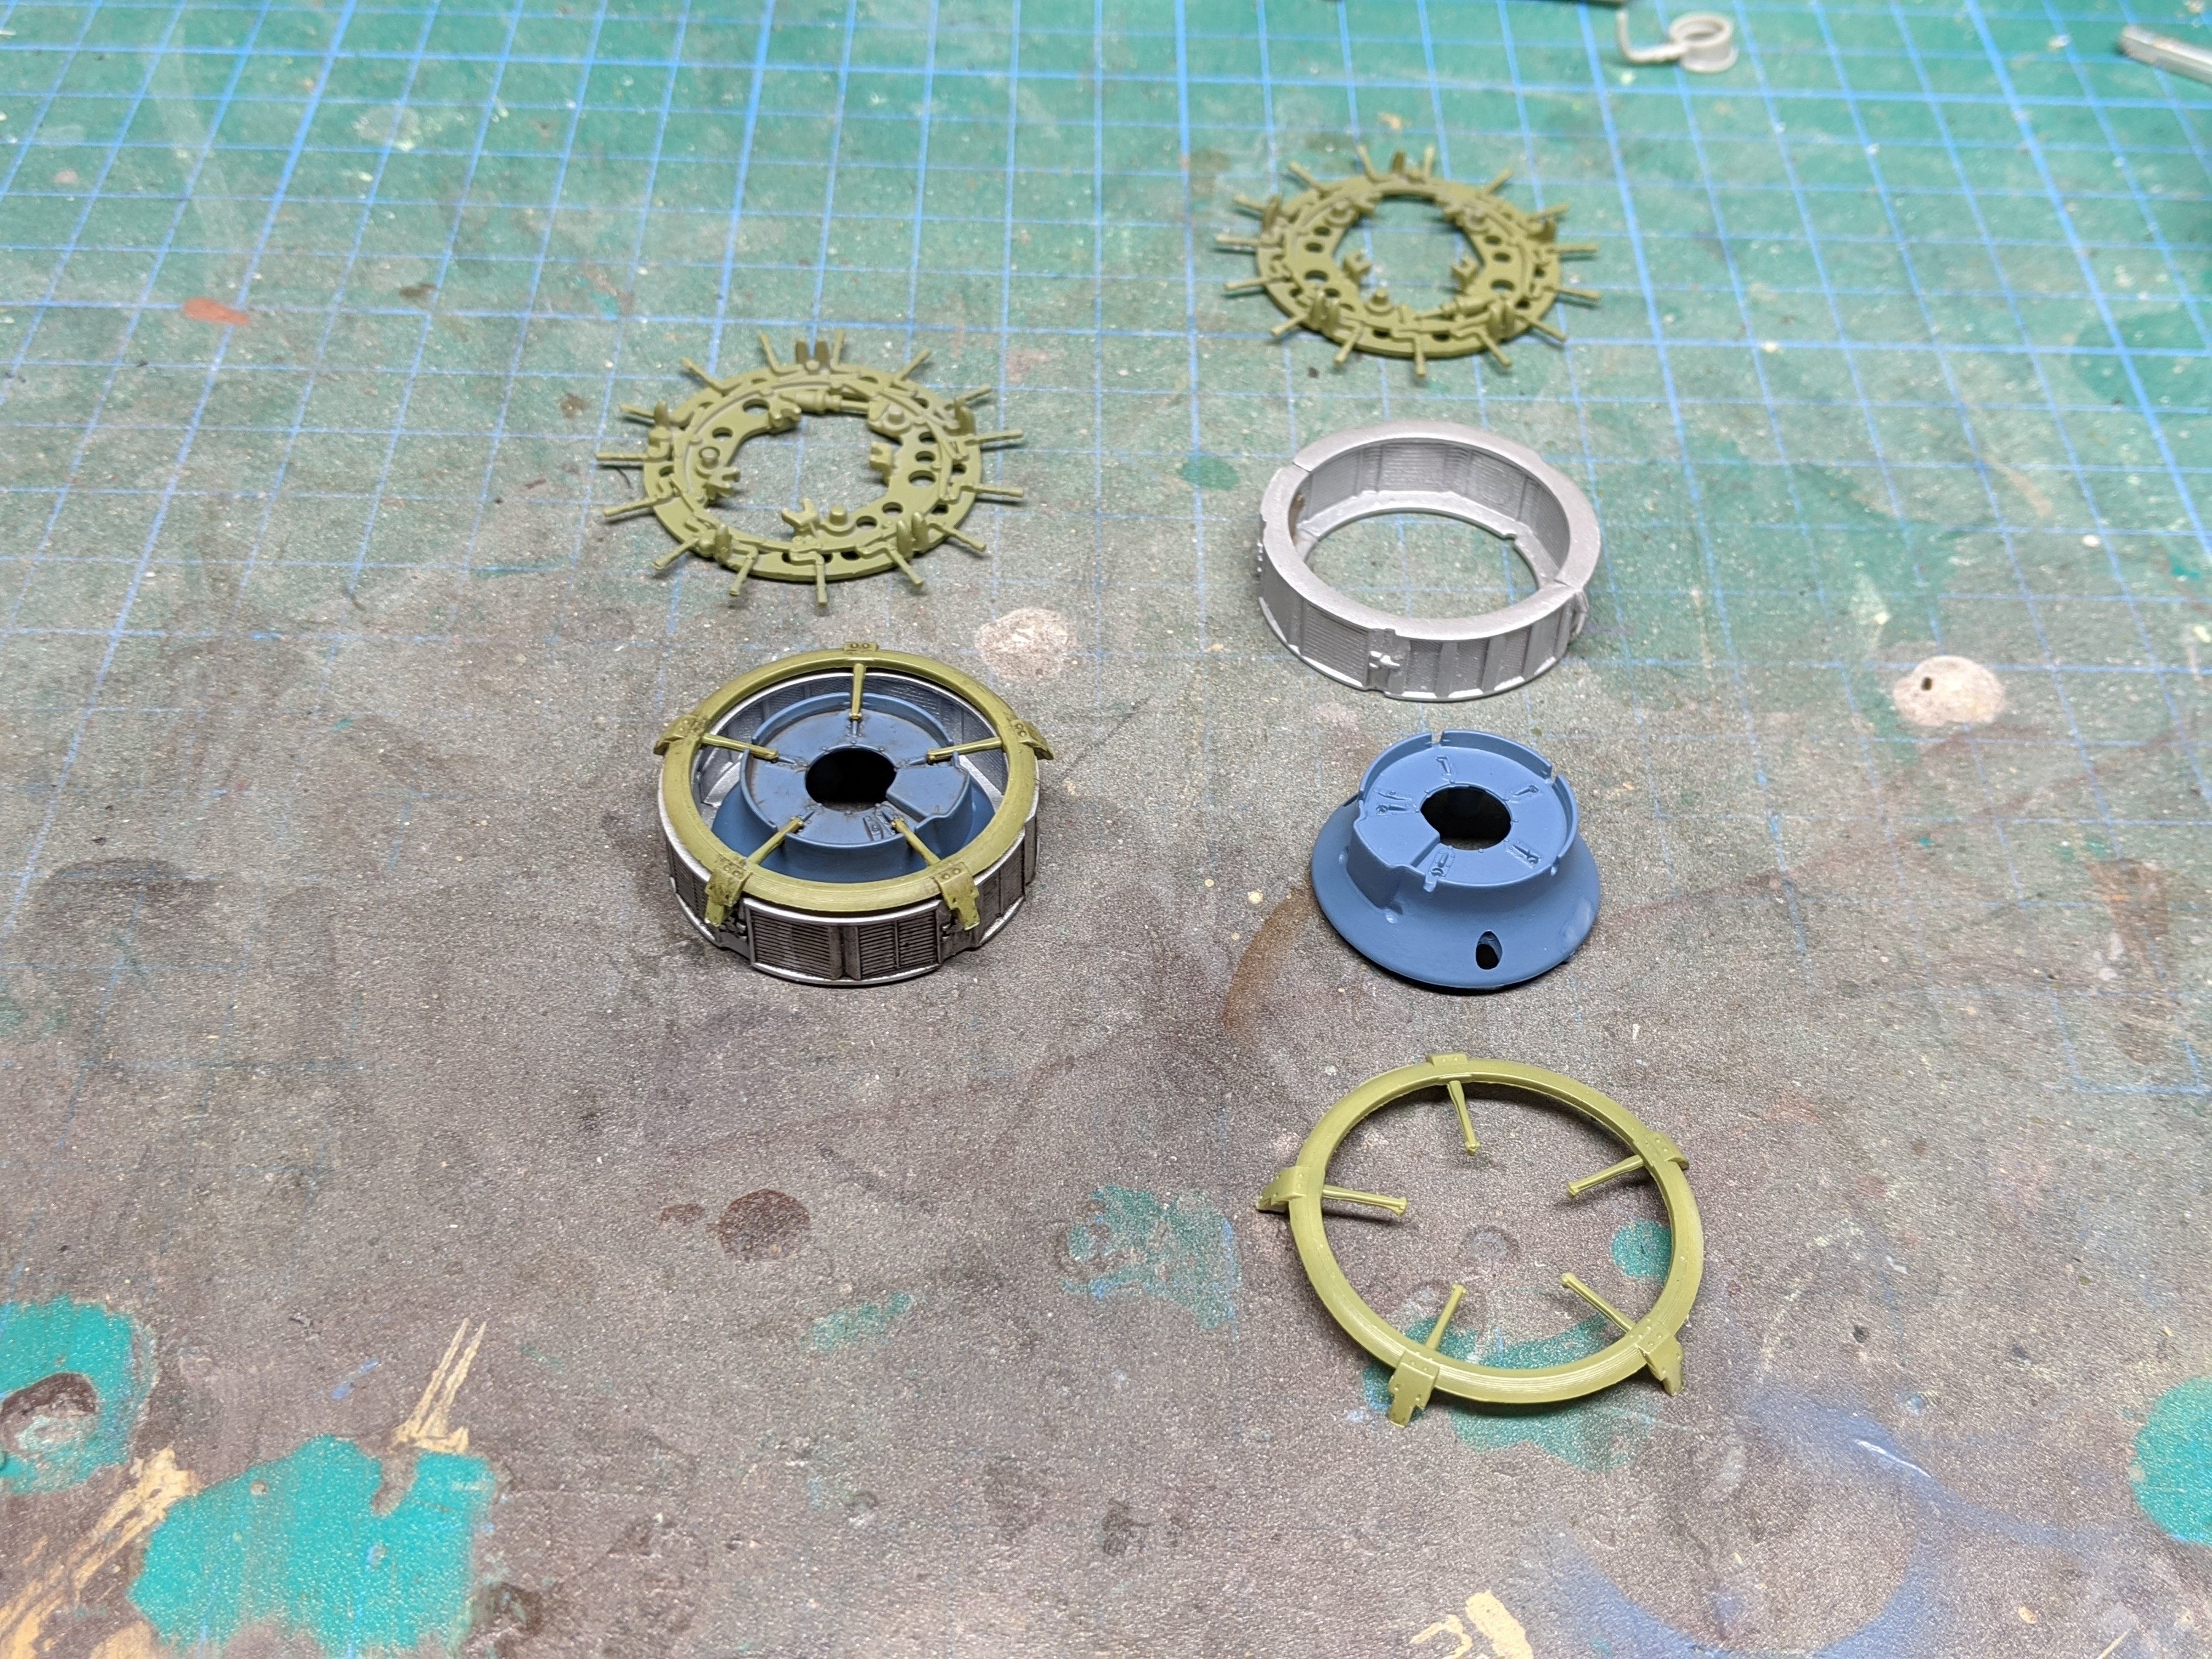
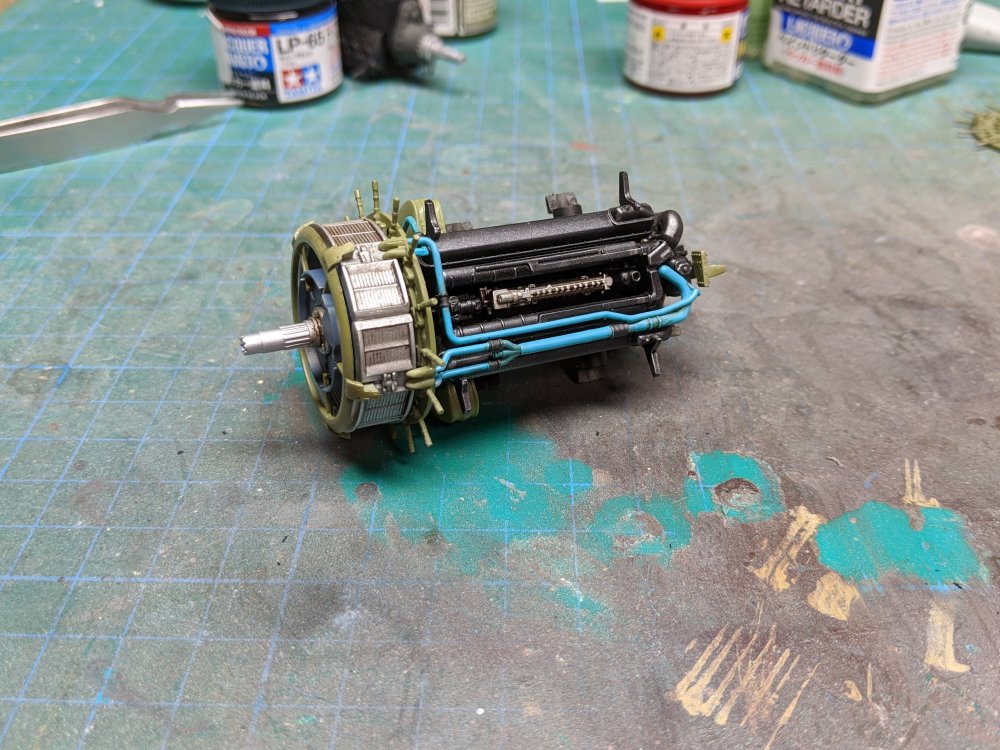
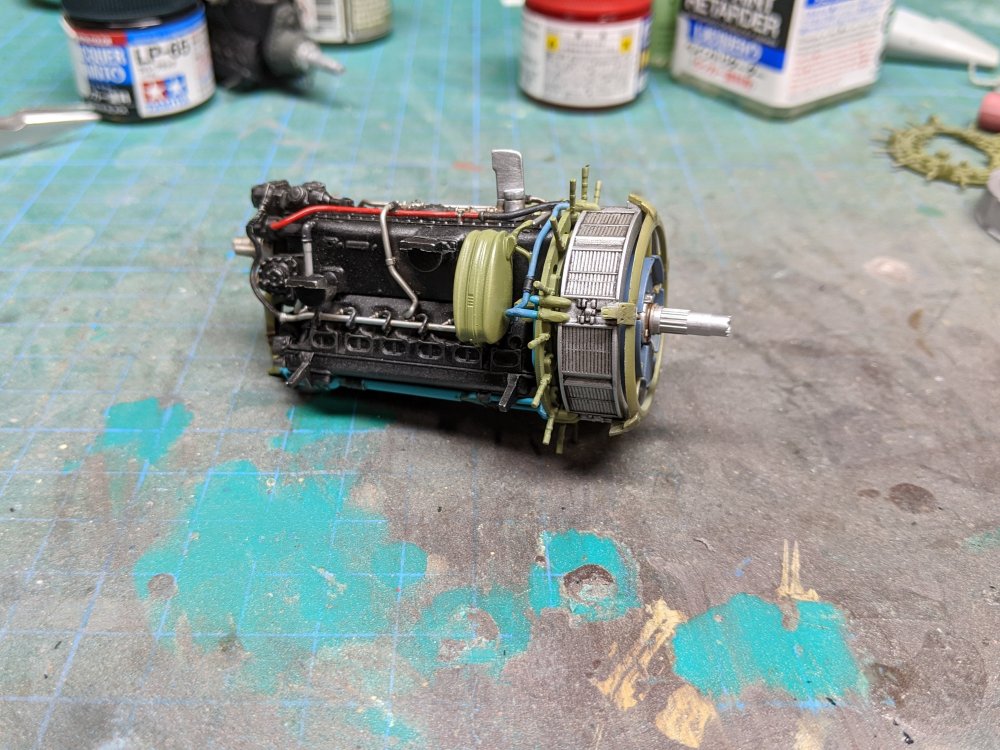
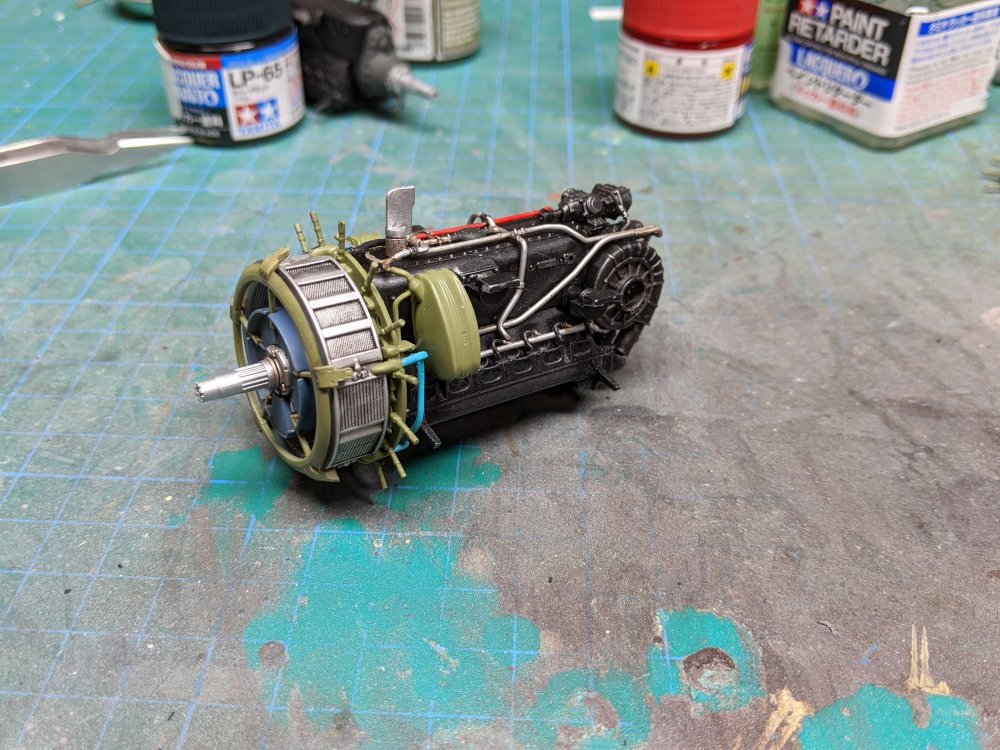
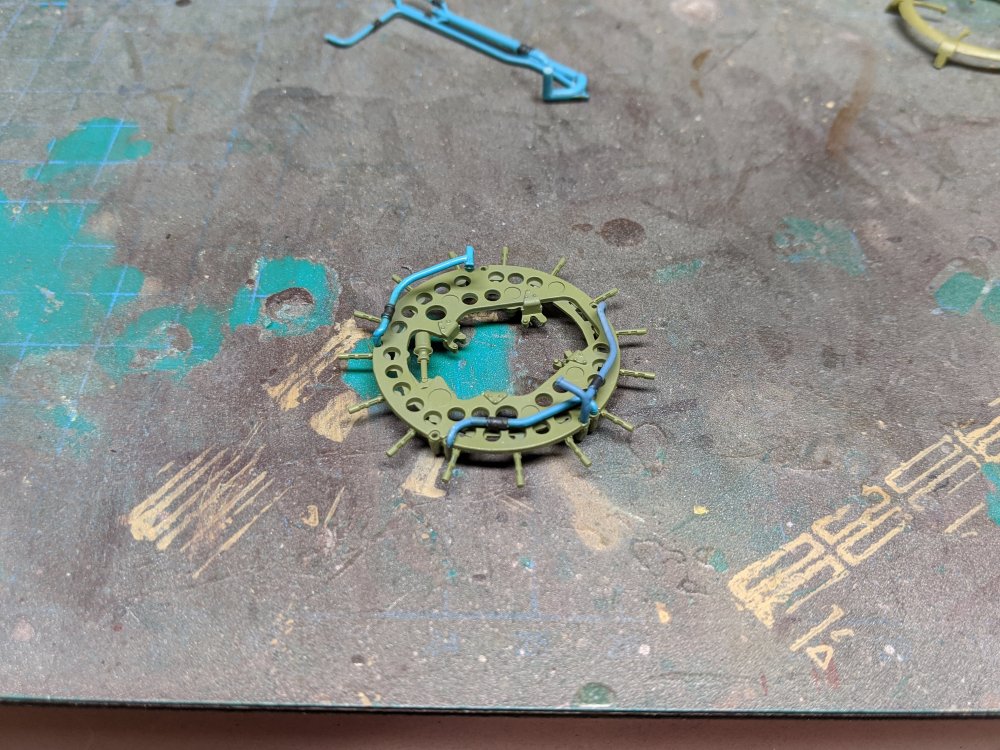
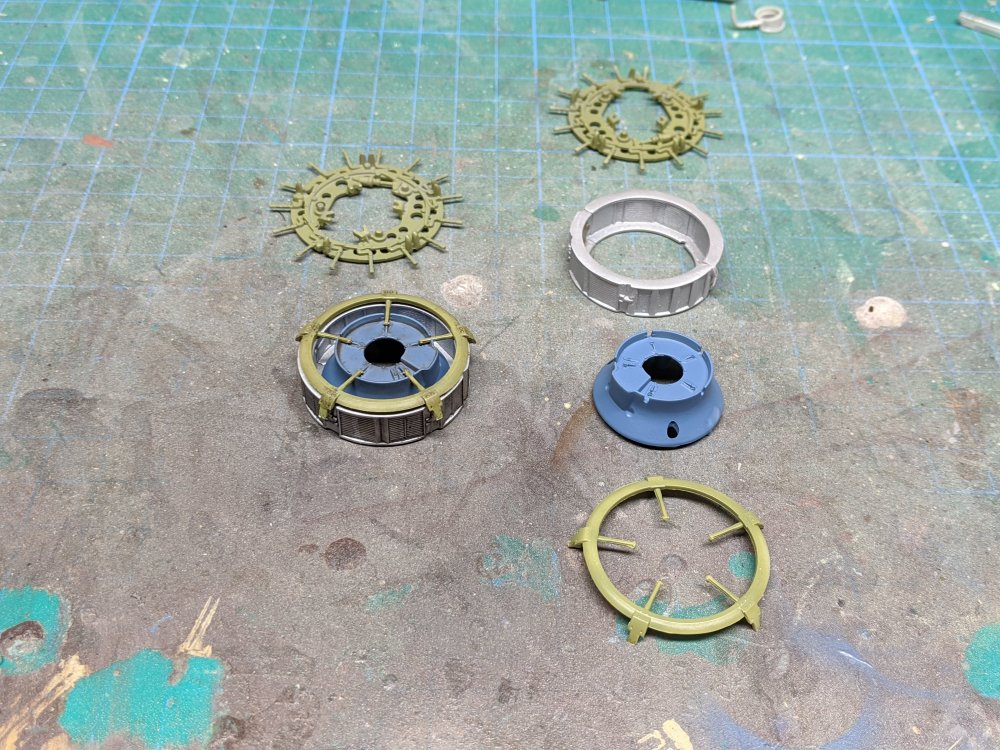
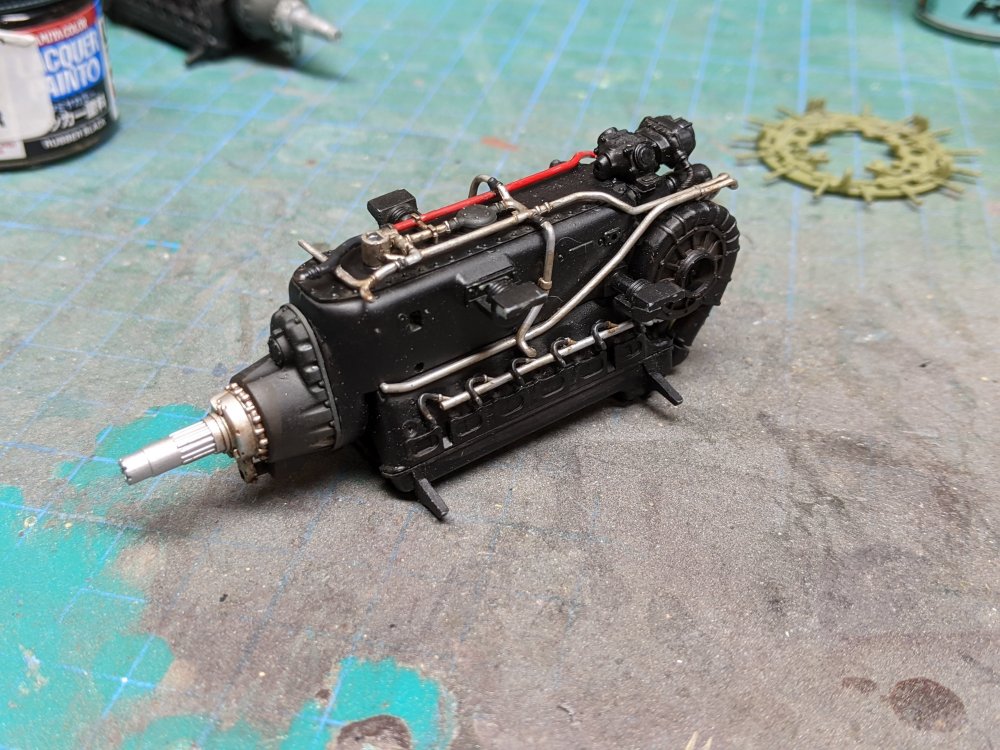
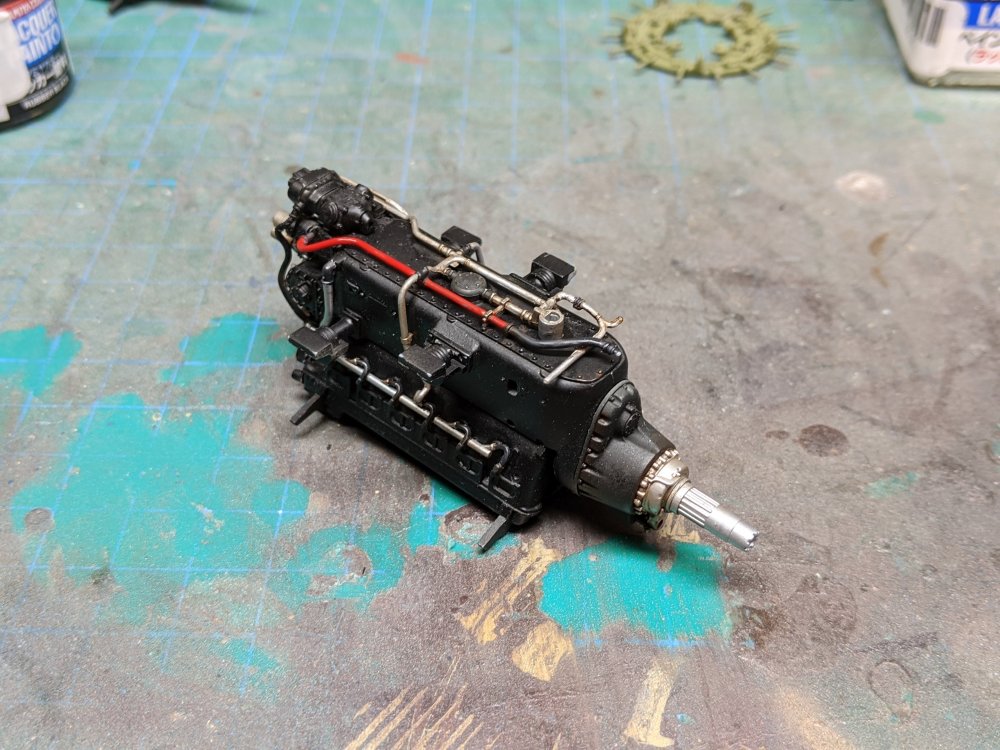
I started adding the plumbing and wiring to the engine. There's a bunch of it that ZM provide. I then started on the annular radiators and armoured engine plate. More plumbing goes behind the armour plate. With the radiator assembly installed, here's the left side. The right side. Underneath which is the area most likely to be seen once installed. I have the exhausts left to install and then the engine will be done. The other engine will be a bit simpler as I will leave off much of the fiddly stuff.
-
American trucks......my soft spot......
BlrwestSiR replied to a topic in LSM 1/35 and Larger Work In Progress
It certainly does. -
American trucks......my soft spot......
BlrwestSiR replied to a topic in LSM 1/35 and Larger Work In Progress
Whoa... -
Tamiya 1/32 P-51D/K Pacific on sale for $99
BlrwestSiR replied to 1to1scale's topic in Modelling Discussion
Possibly? I took a quick around and Great Hobbies has the D/K kit for $169 CAD shipped and the reg D for $139 CAD. So close enough to the Tamiya USA price if I really wanted one I suppose. My stash has grown a bit and I'm trying to limit it for the moment. There's a bunch of stuff I'd really like coming down the pipe so getting more multiples of kits I have is probably overkill. But thanks for playing devils advocate and making sure I'm OK!! -
Tamiya 1/32 P-51D/K Pacific on sale for $99
BlrwestSiR replied to 1to1scale's topic in Modelling Discussion
Unfortunately, no shipping to Canada. Which is probably a good thing or I'd be in trouble. The Spitfire VIII is the same price too. Carl -
I could be up for that. Let me at least get the 219 finished first though.
-
Kevin, give one of them a try. Their approach is a bit different from most other manufacturers. Their quality had improved with each new kit and the Ki-45 plus one of their most recent ones.
-
Thankfully no, or everything would have been trampled into unidentifiable bits of plastic. The big saving grace was I have a spout top on the bottle so it didn't completely pour out onto the fuselage.
-
Is it safe to admit that I've never built a 190? I have the Revell A-8 and Hasegawa D9 in the stash though if that counts as a bit of redemption.... Carl
-
I got one from Harv last year in the raffle. It's on the to-do pile.
-
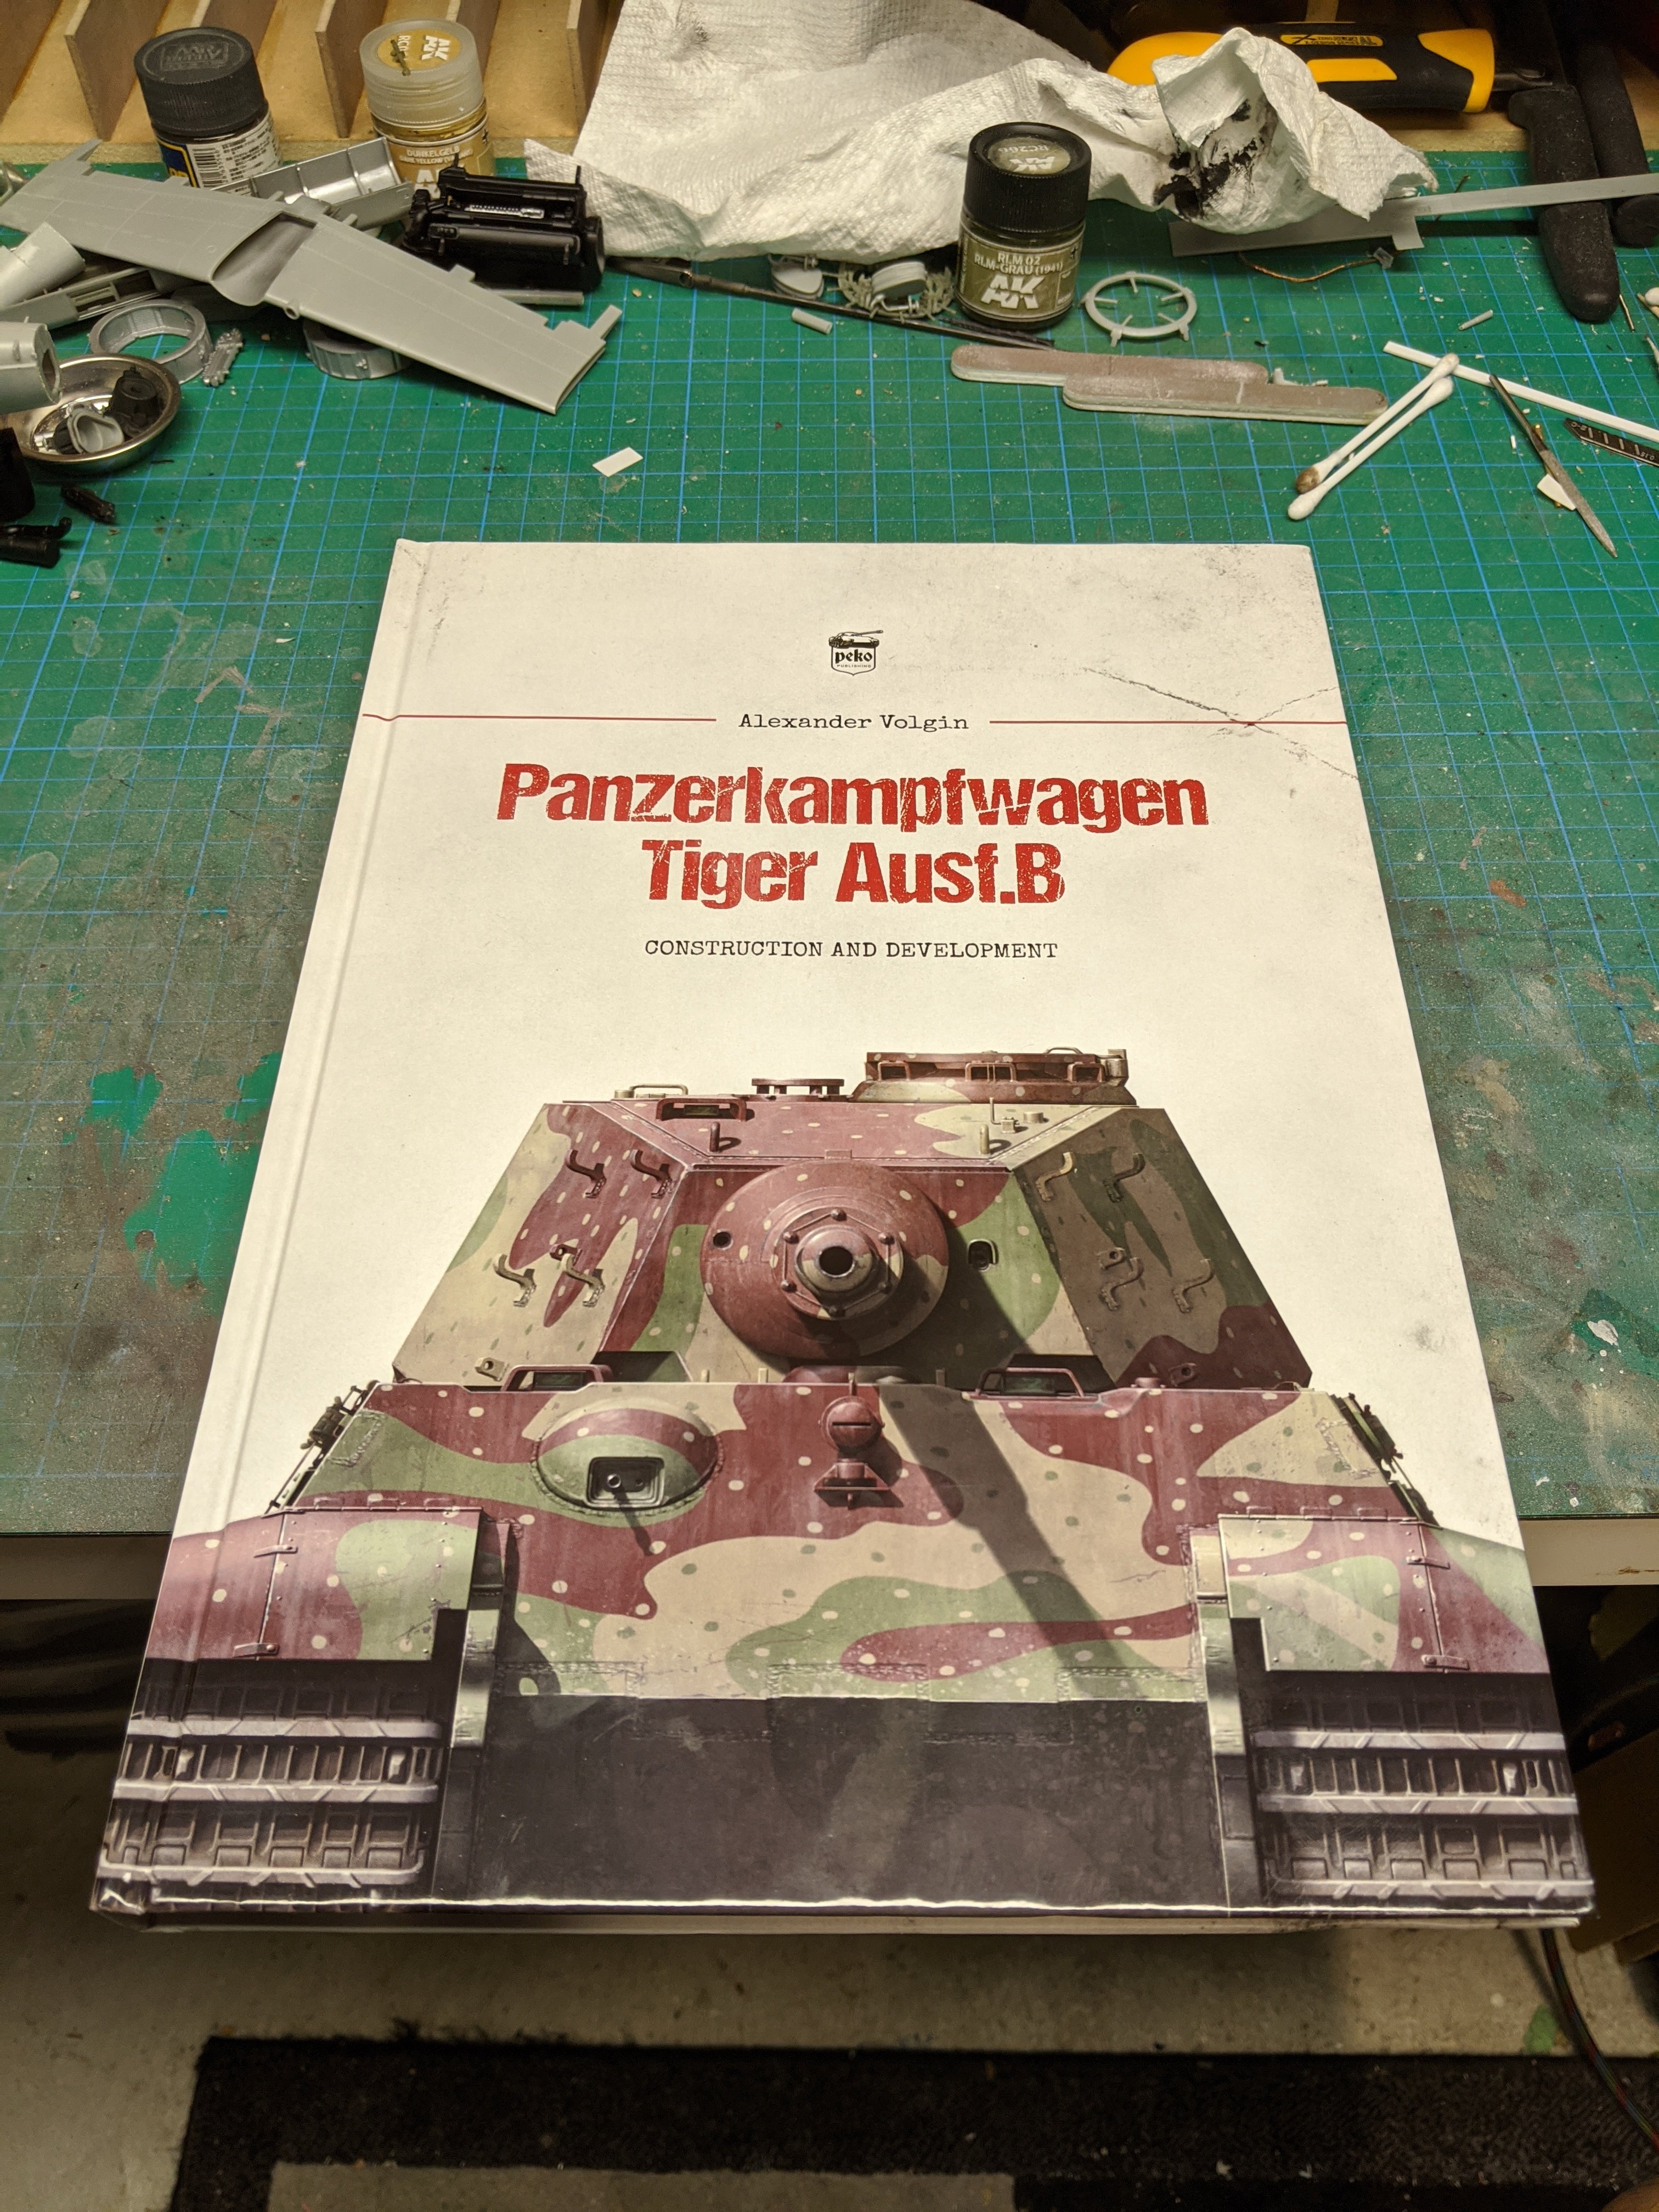
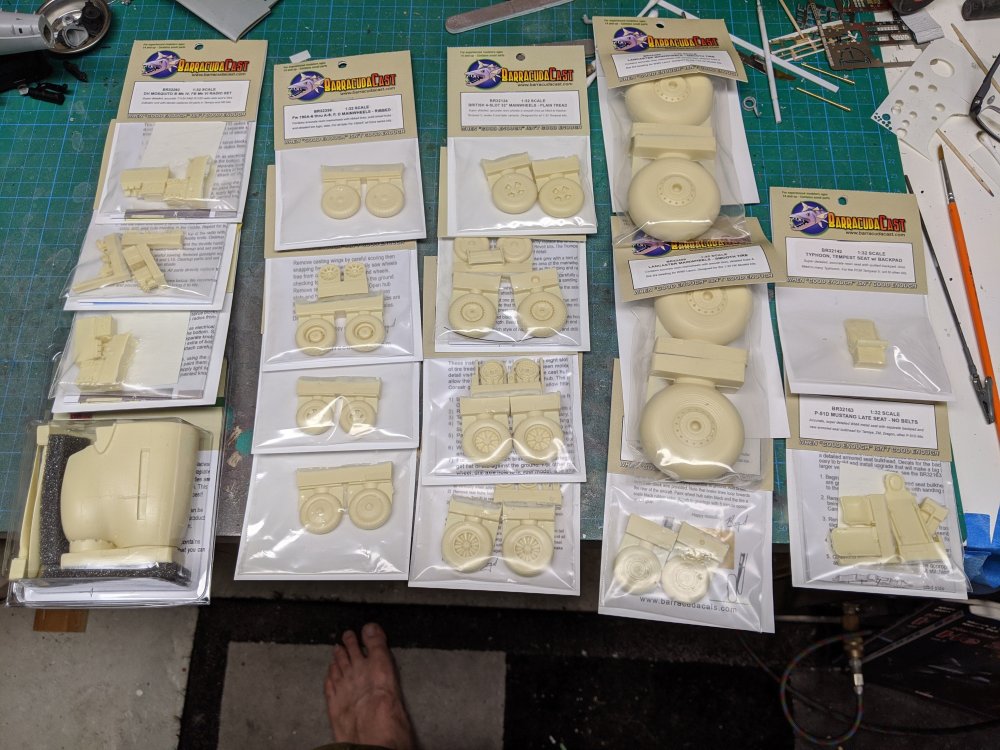
Speaking of resin, I had my order from Barracuda show up today. I also picked up a book on big kitties.

-
If you could and get back to me , that would be great. Otherwise I have no idea what the parts are from. Carl
-
Ernie, speaking of resin bits can you check the Bf 110 G conversion you got from me? I'm wondering if it's missing bits as I found some resin props and other stuff and that's the only thing I can think of.
-
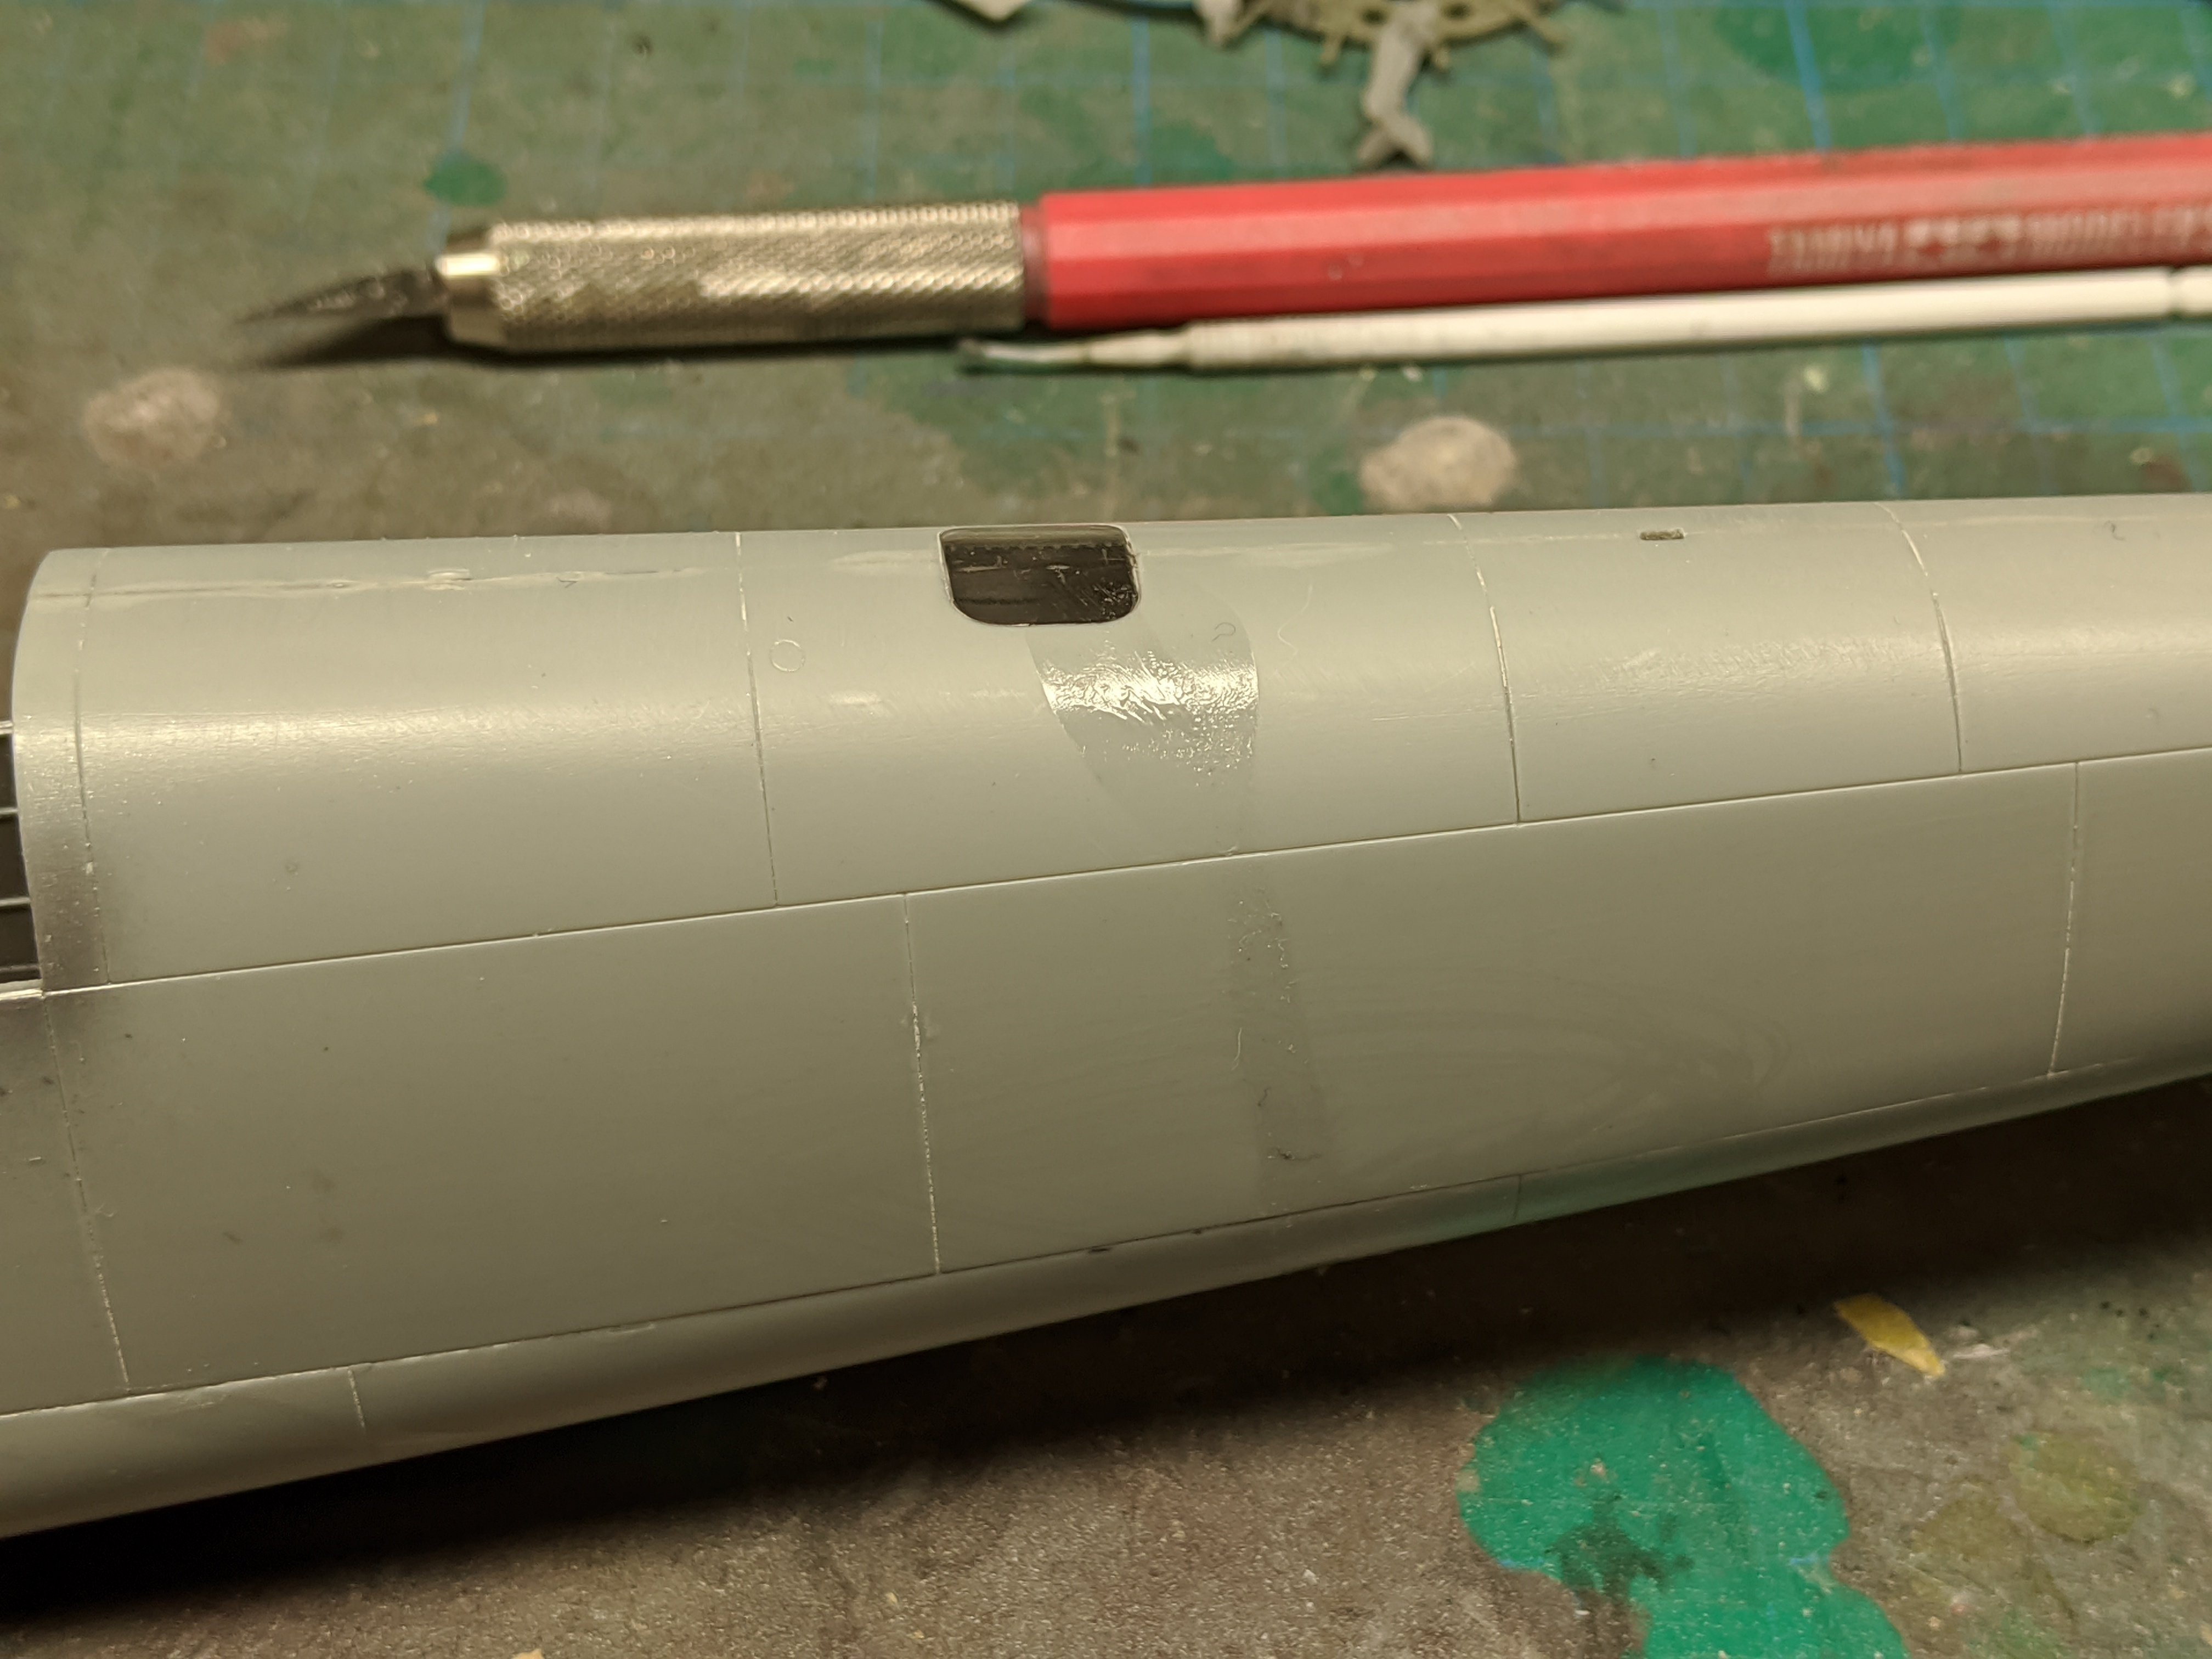
I agree. It actually got onto the clear panel but that buffed out as well. I think the saving grace was it didn't get a chance to pool on the fuselage.
-
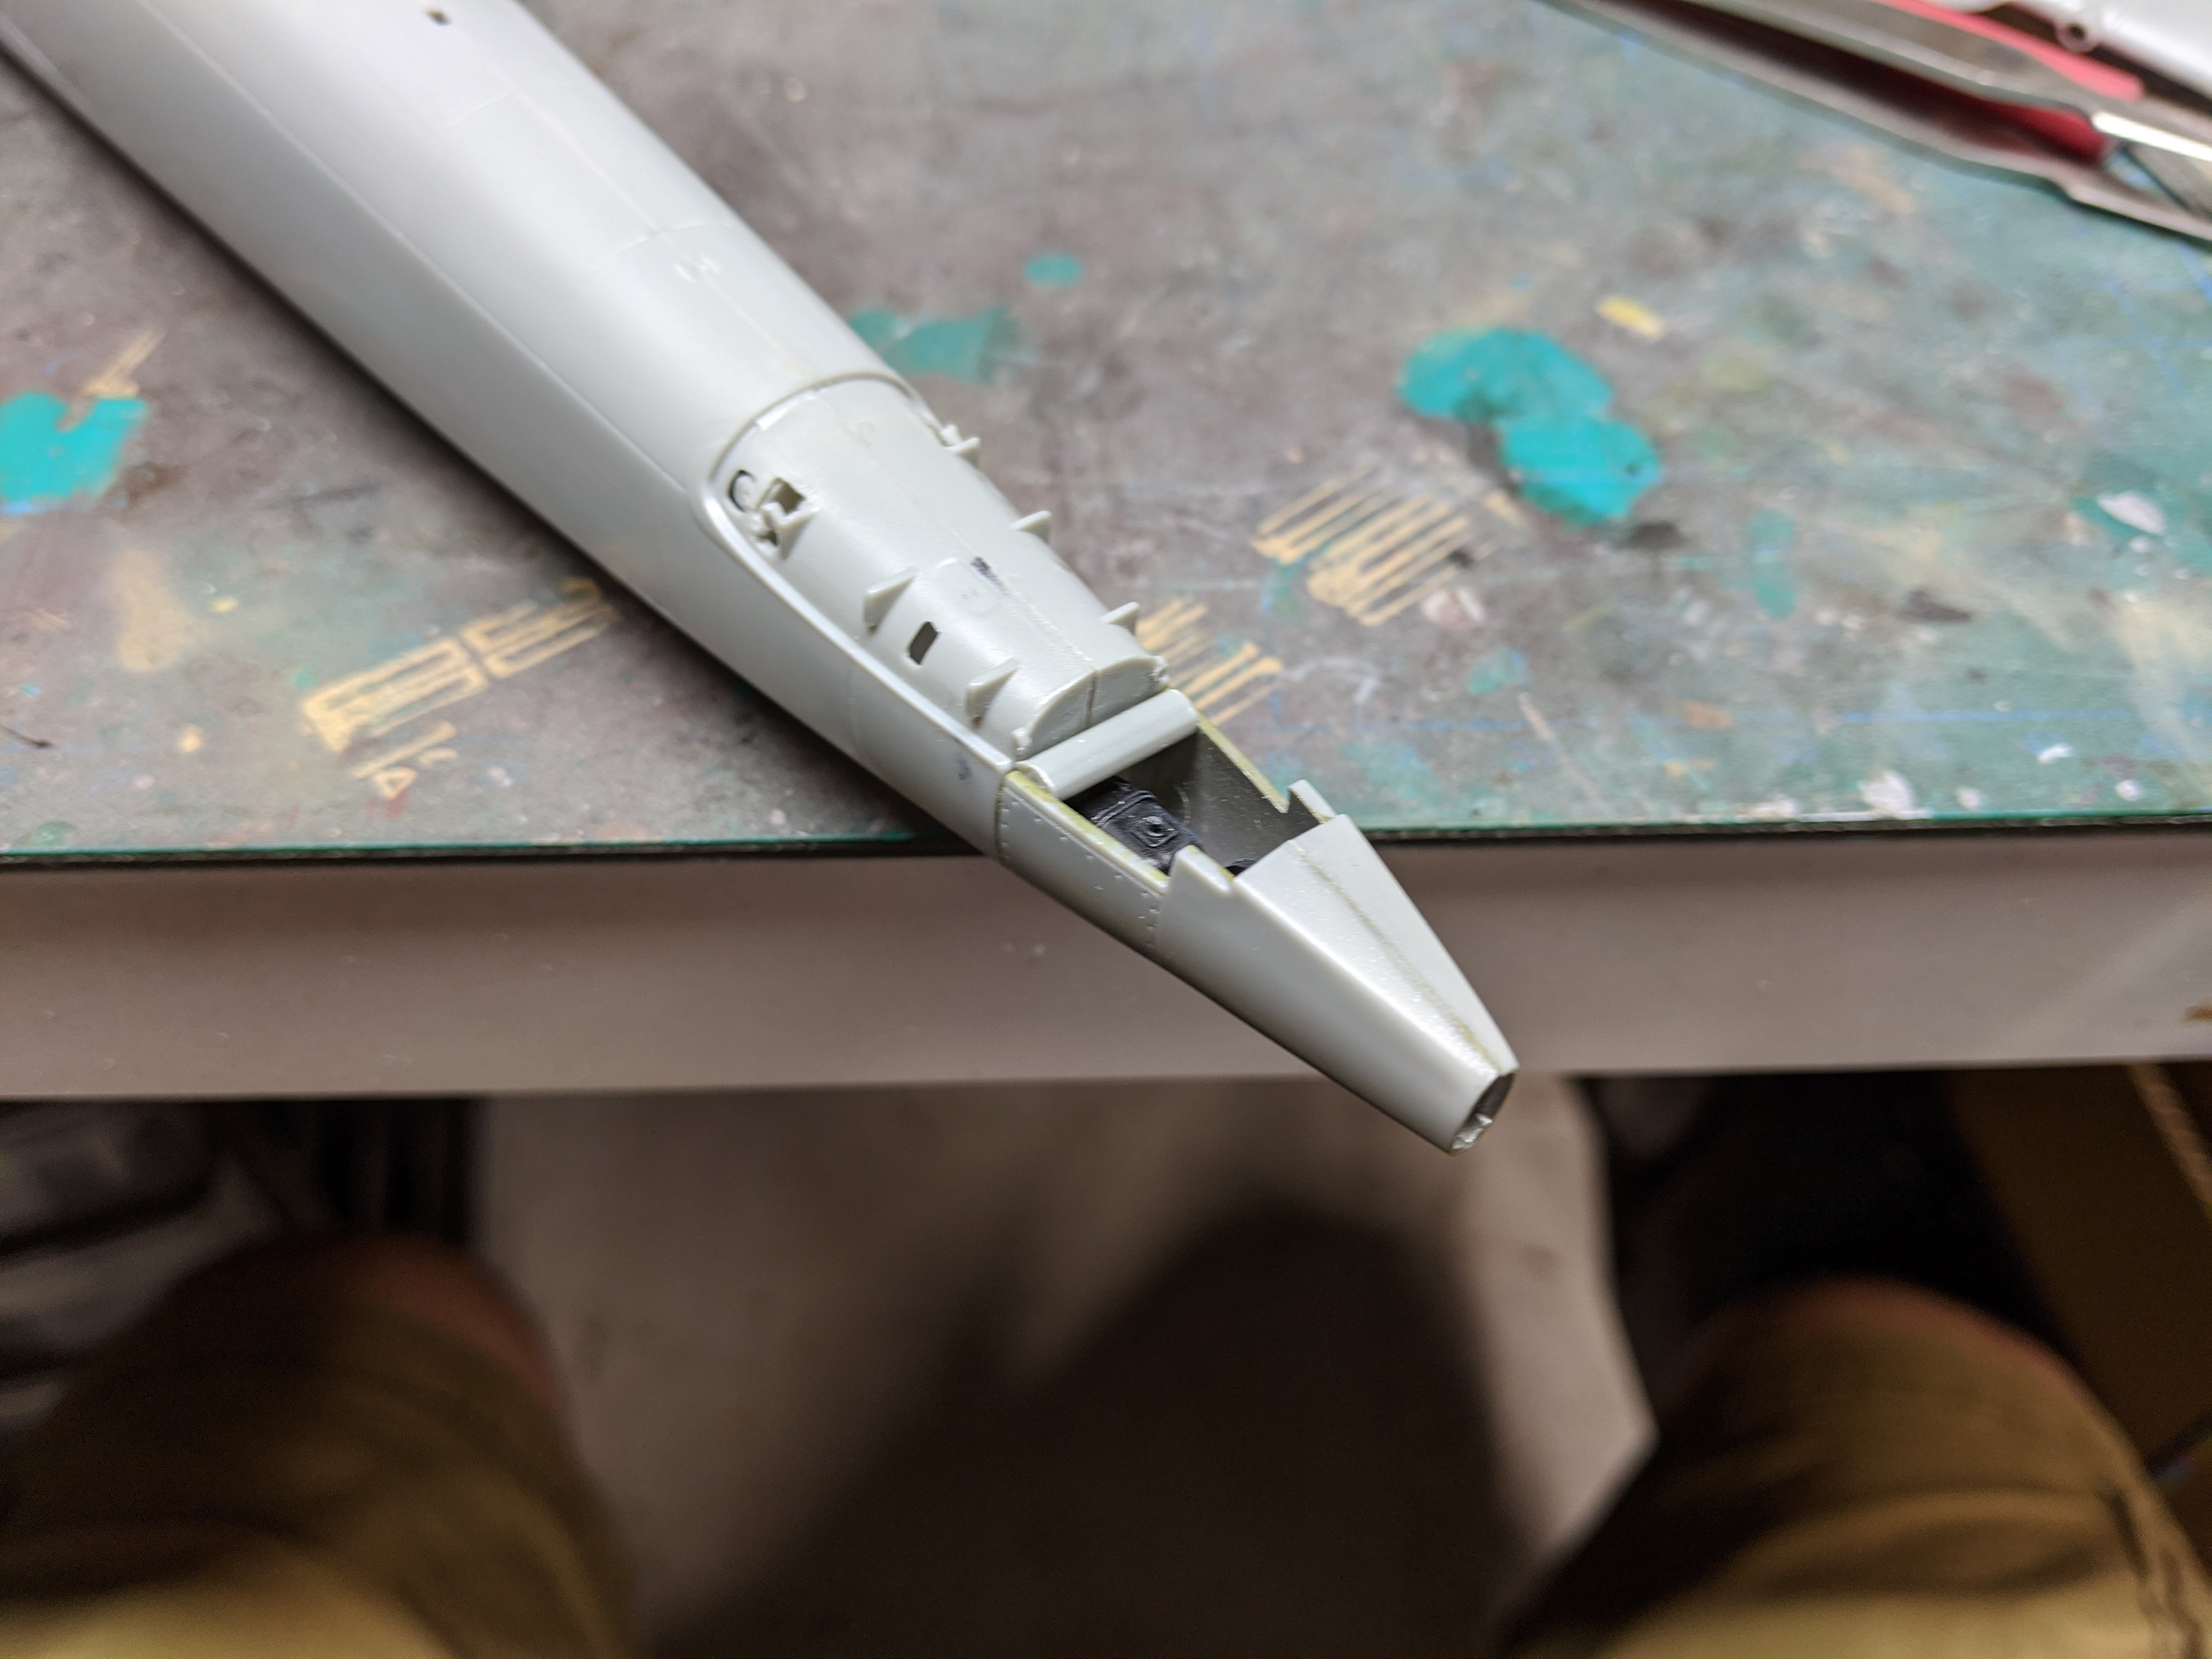
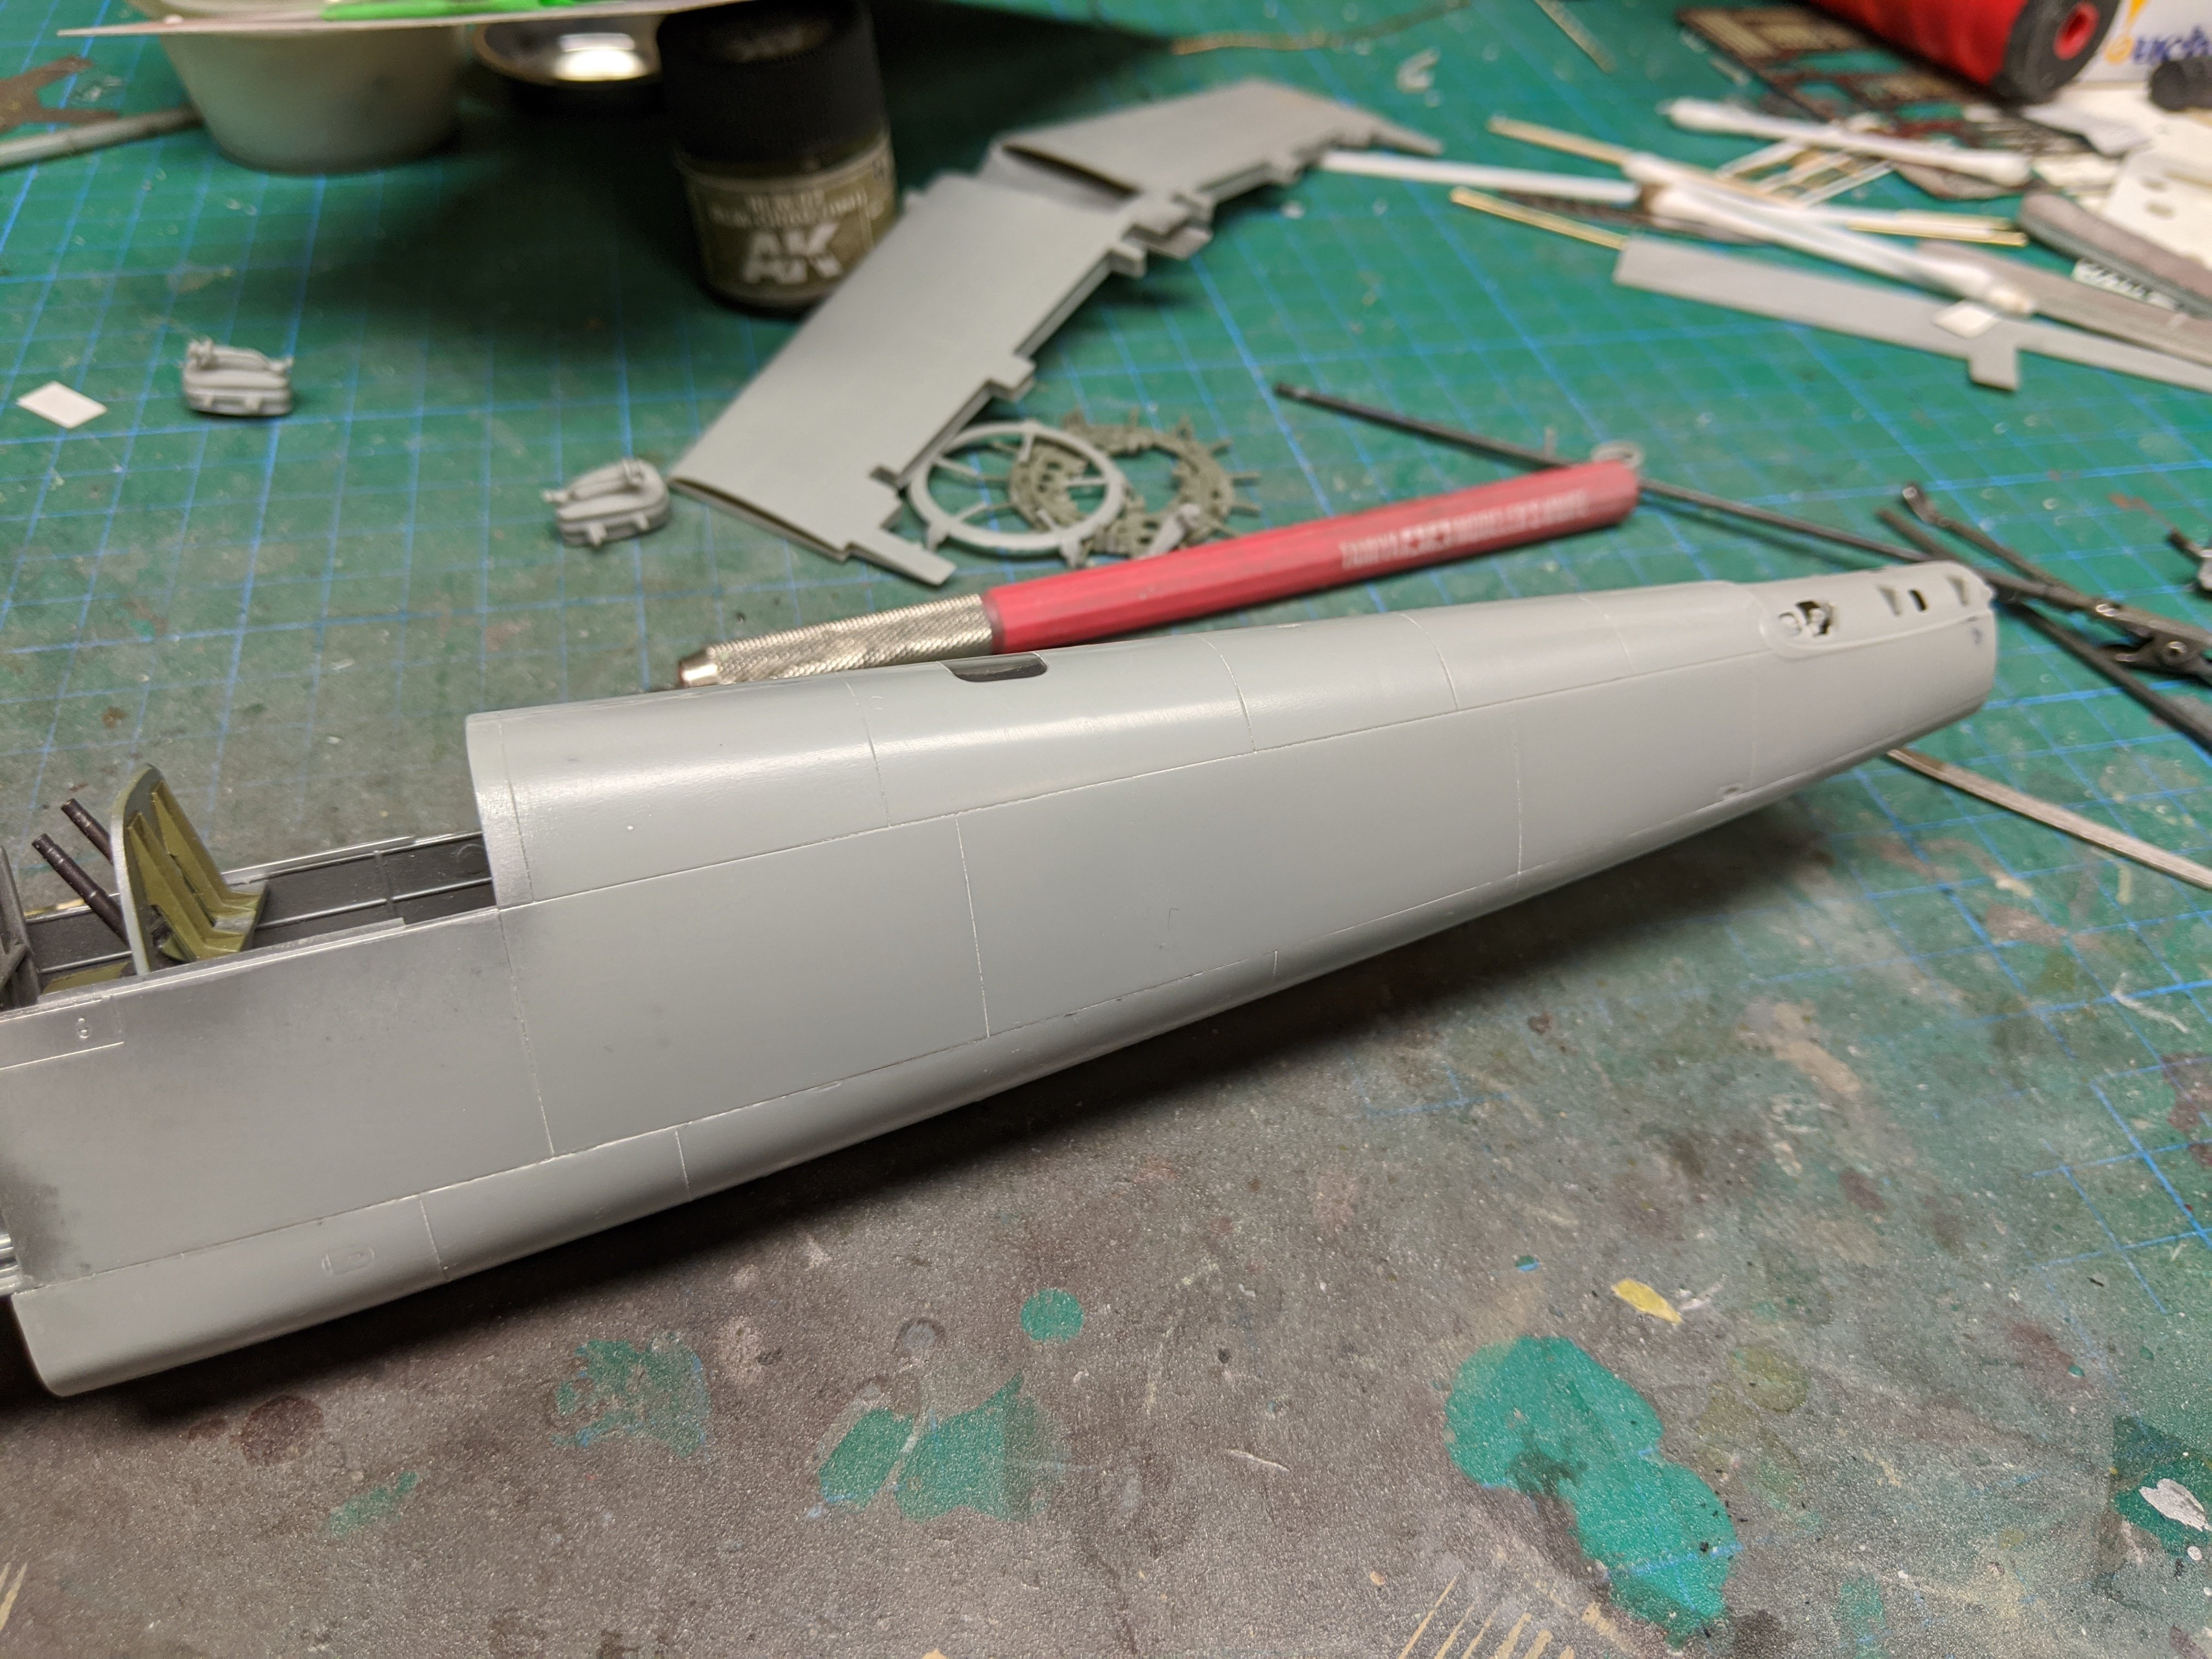
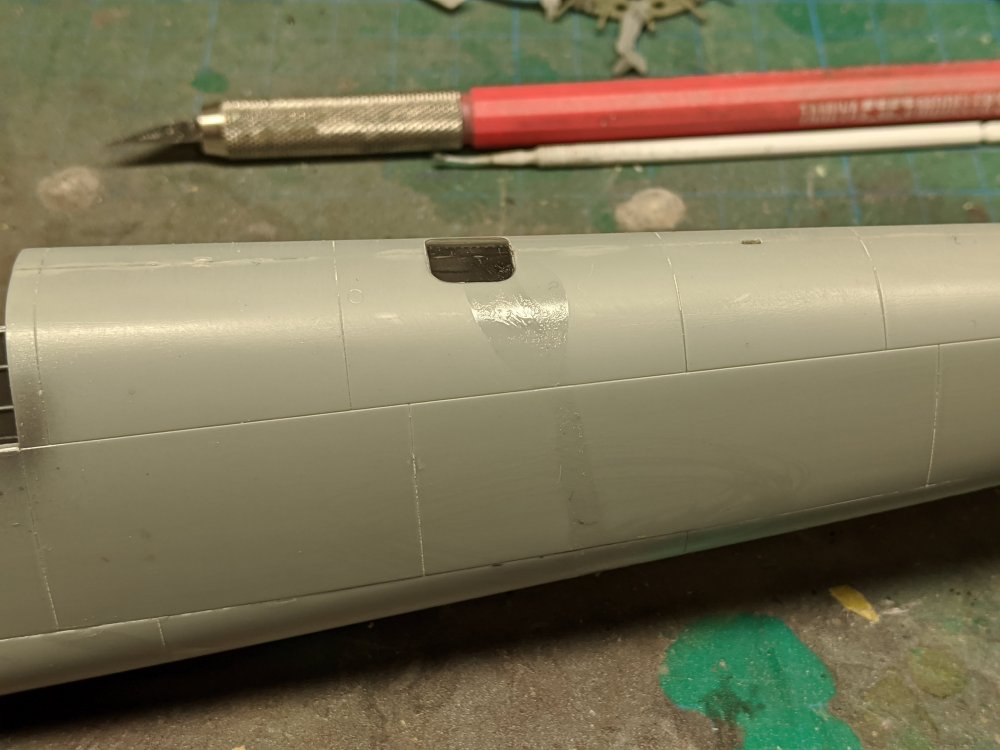
A smidge of progress and a small faux pas. I was cleaning out my airbrush when I tipped over my bottle of Gunze tool cleaner. Well, that stuff has acetone in it and it started dripping onto the fuselage. Thankfully I was able to wipe it off fairly quickly. It still ate some of the plastic though. It wasn't too bad so I was able to sand it back to smooth. I then assembled the tailcone and the anntena inside it. I had to use a temporary spreader bar to get the right width when I glued it to the fuselage. Once that's dry, I'll keep at it. Carl


- 68 replies
-
- 11
-

-
Sometimes it is tough deciding on what to do. Same with the Tamiya Mossie. I usually build my planes closed up but there's so much nice detail in the kit I decided to get a second one. This way I can do one with some panels open/left off.
-
American trucks......my soft spot......
BlrwestSiR replied to a topic in LSM 1/35 and Larger Work In Progress
Nice and clean. You wouldn't know they had been chromed previously. Carl -
Looks great Harv.
-
What is on your bench right now ? Share a picture :)
BlrwestSiR replied to Martinnfb's topic in Modelling Discussion
How big is your workbench that you can fit a 1:1 scale plane on it?!!!. Truly stunning work there.