BlrwestSiR
-
Posts
9,218 -
Joined
-
Last visited
Content Type
Profiles
Forums
Events
Gallery
Everything posted by BlrwestSiR
-
My vote is for RCAF Tiger Meet. If you need the decals I have them.
-
Looks great John. The RNZAF Corsairs really got beat in use. This give lots of opportunity fora weathered finish or something even more extreme like one that's half tricolor and half GSB.
-

"Alert 1 to Eagle 1, splash the Zeros!"- Tamiya F-14
BlrwestSiR replied to BlrwestSiR's topic in Let’s Get Wet Group Build.
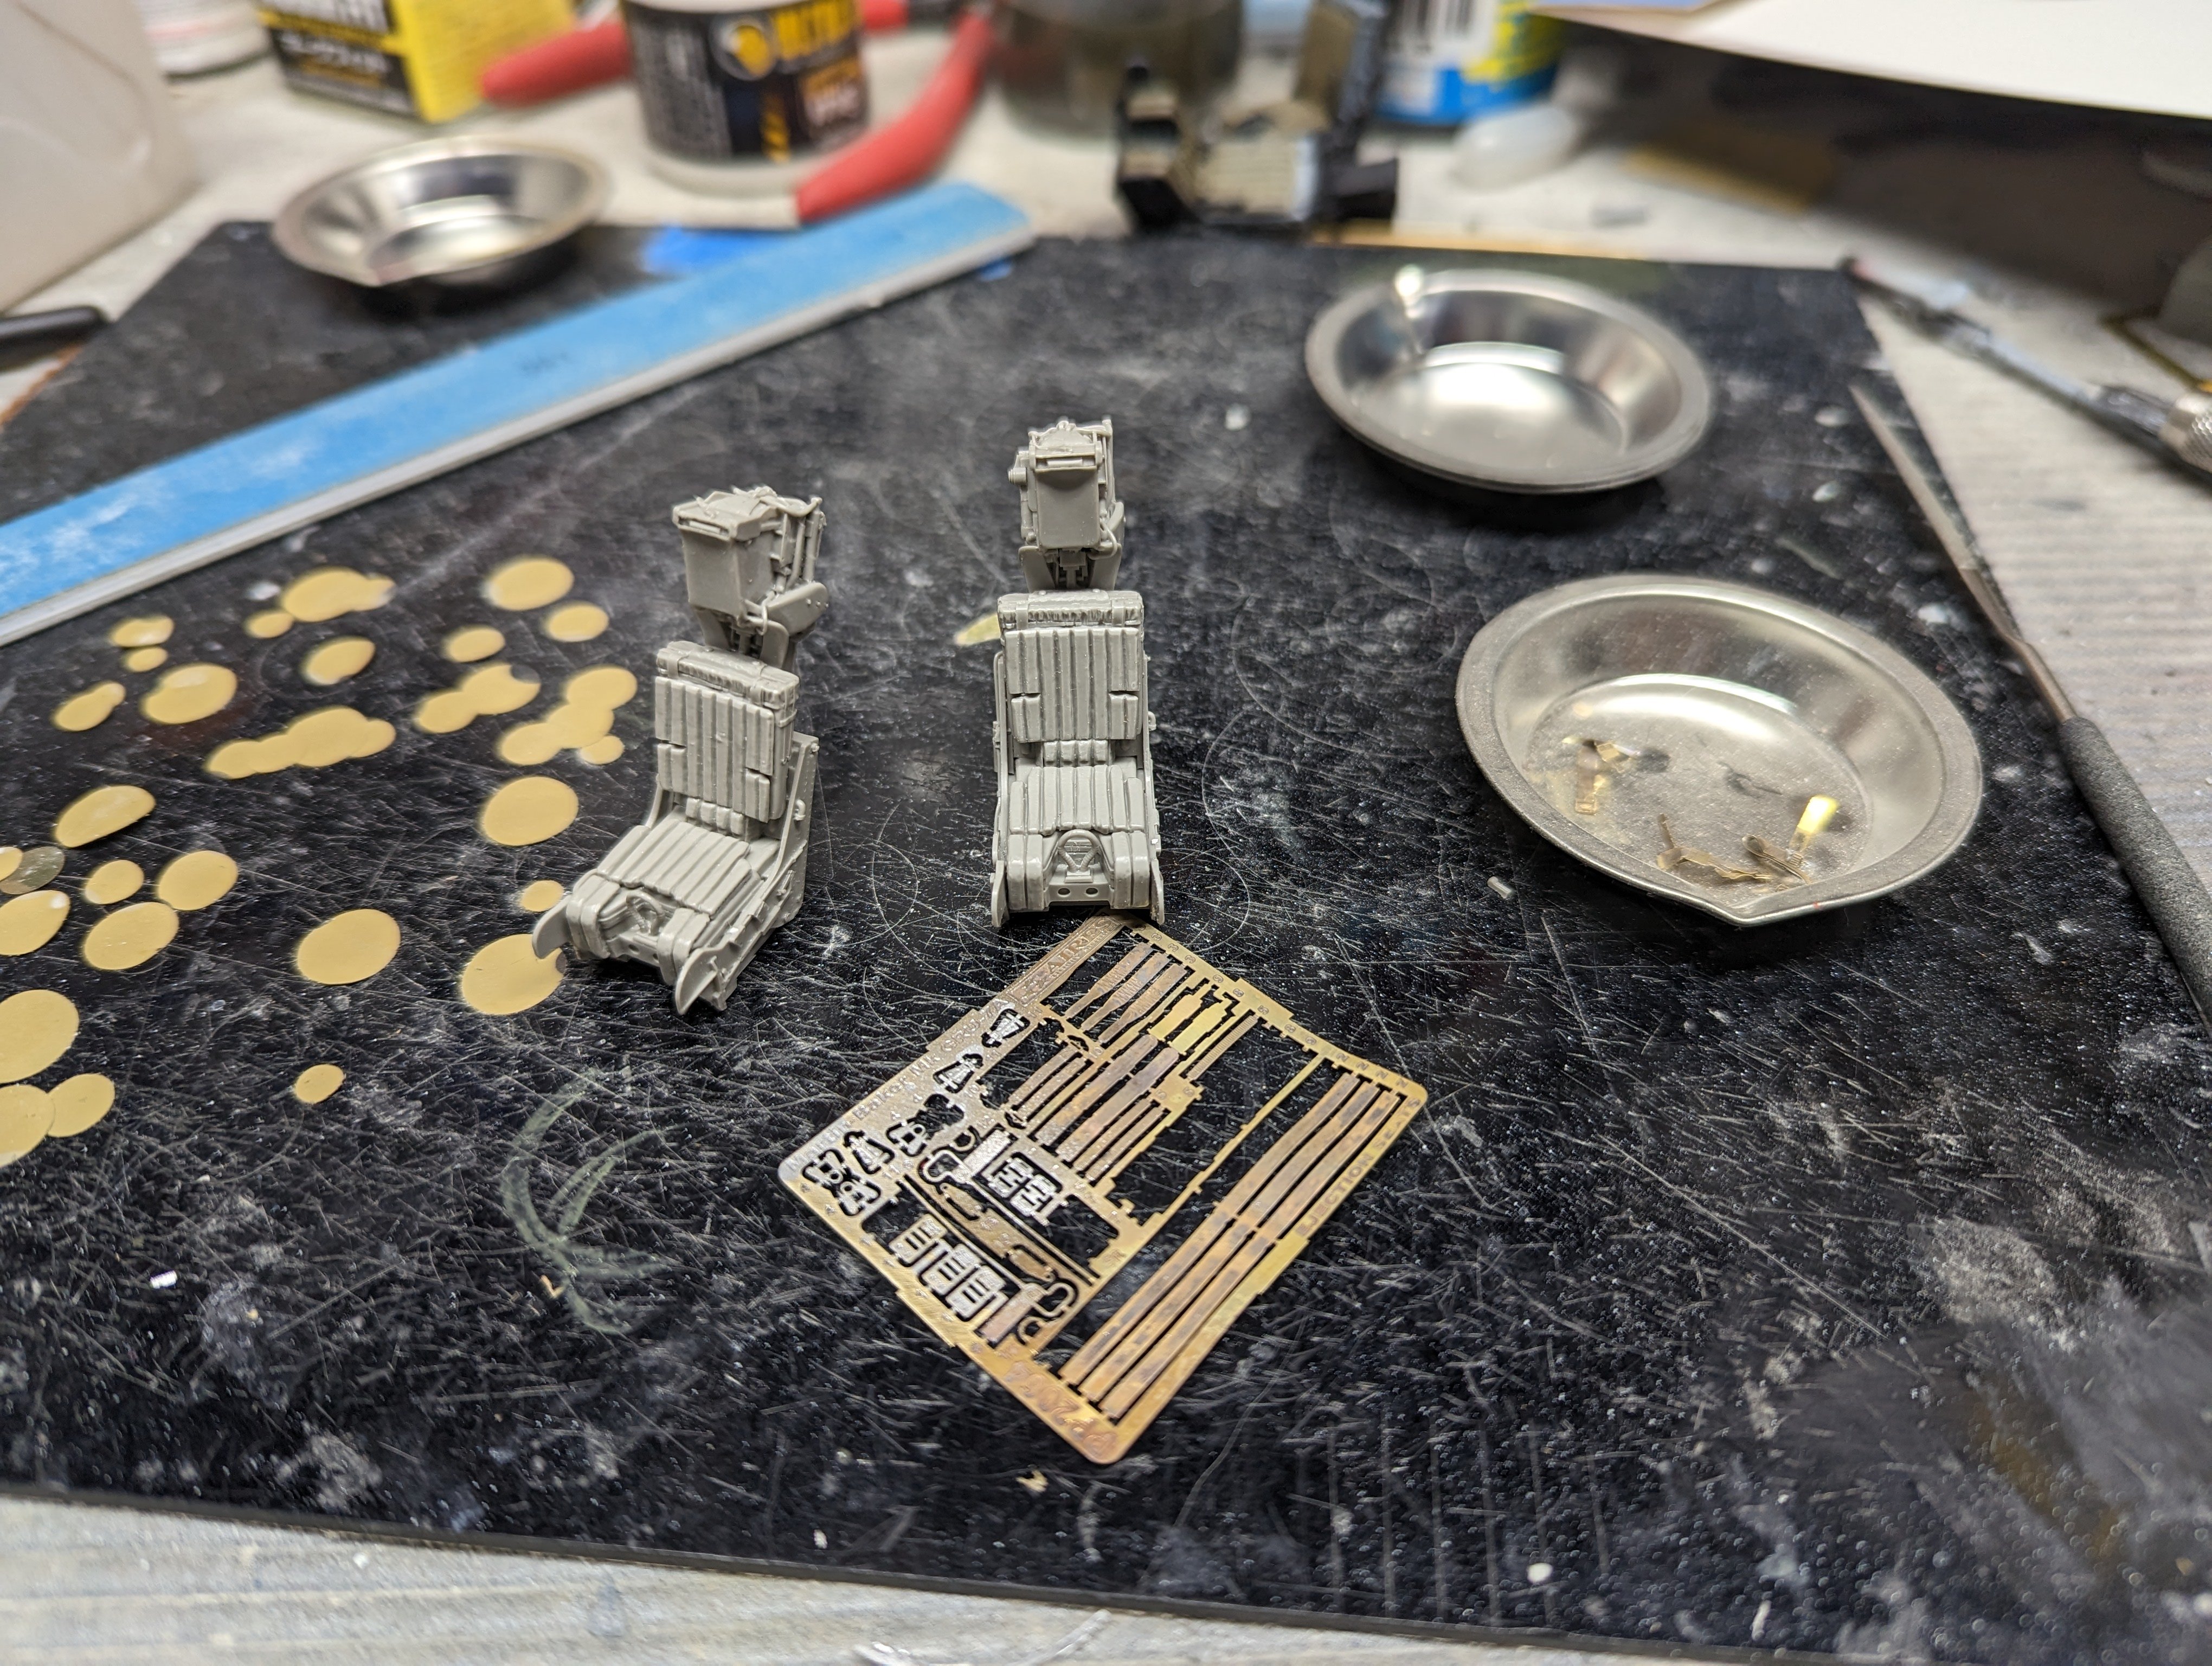
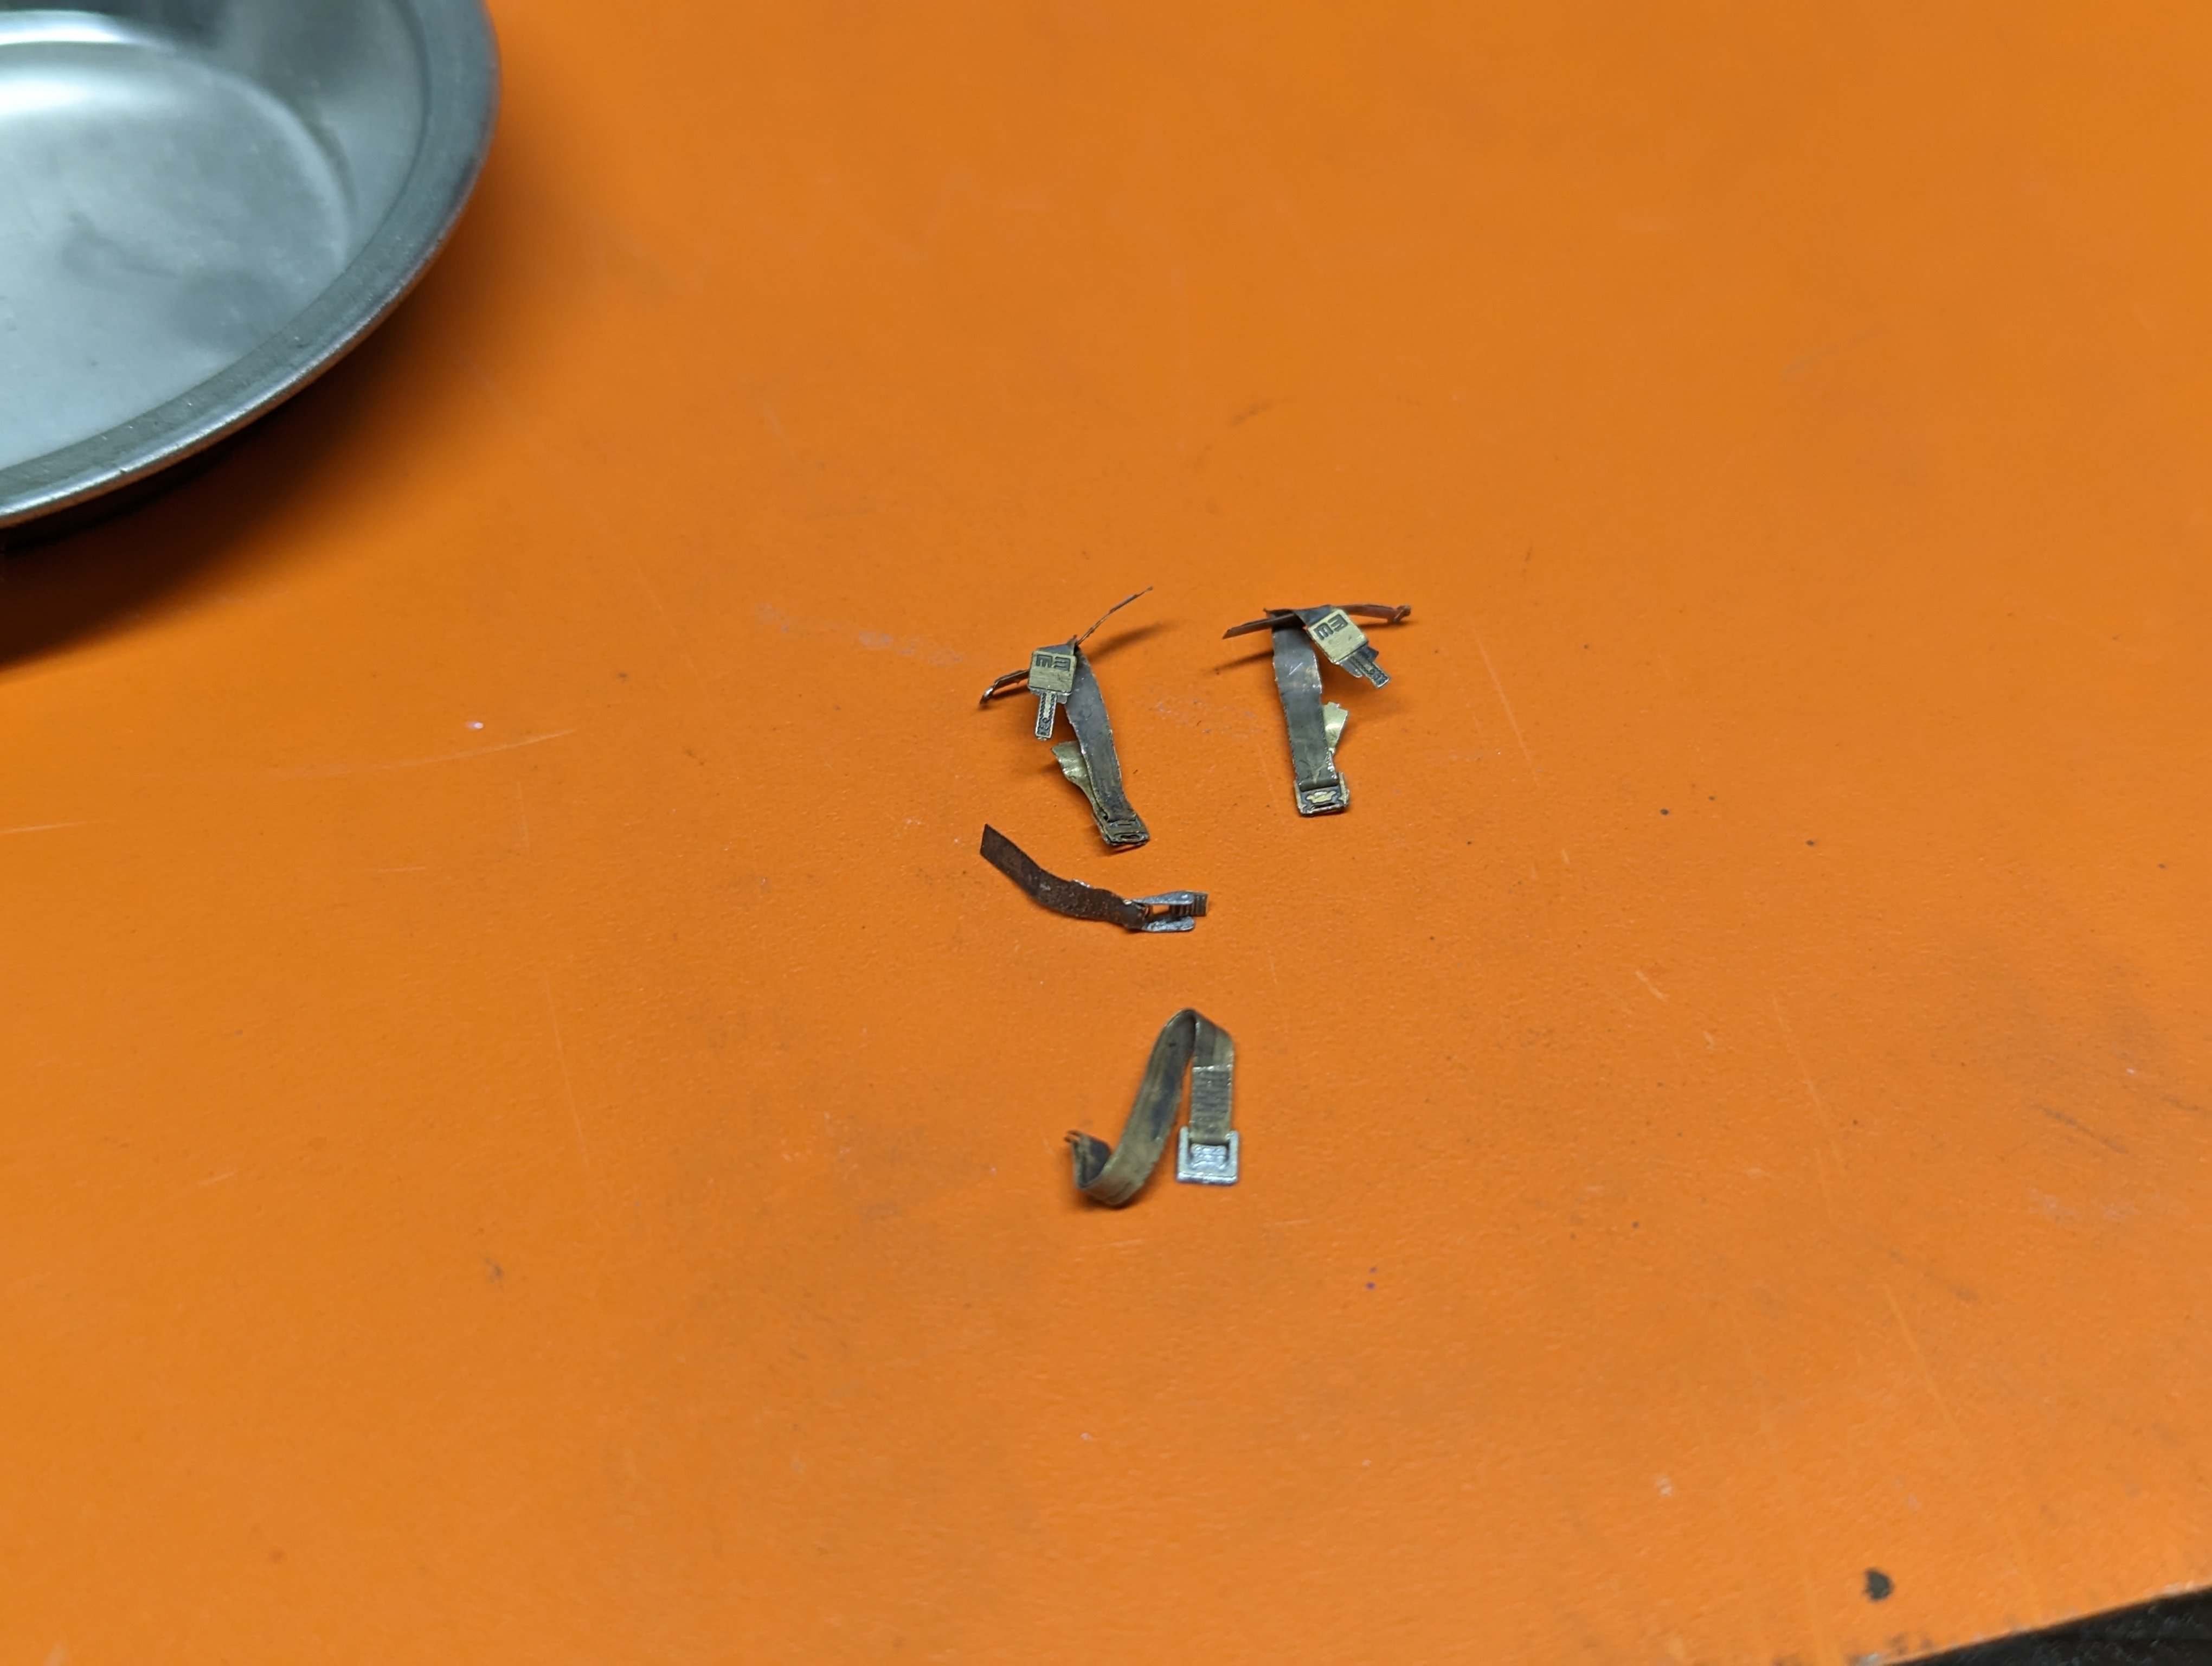
Ok, time for an update. I received the Aires seats recently so I started on them. First up is the PE belts. As much as I generally don't like PE belts, the ones Aires include with their seats work for me. They have great surface detail and being unpainted brass, I can anneal them to make them fit. One set of belts almost done.

-
You're making fast work of the Kingfisher Neil. Great work too.
-
Rob, from what I recall the McLarens were done in a florescent red that when photographed or filmed would show up much darker. The decals in my Tamiya MP4/6 are florescent red as is the colour call outs for painting it. That being said, there are apparently a couple different shades that were used depending on the era.
-
Arado 234 Nachtigall on Speed
BlrwestSiR replied to DocRob's topic in LSM 1/35 and Larger Work In Progress
A nice milestone. The 234 is a big plane that's for sure. -
1/16 scale Tiger VI Ausf E early build
BlrwestSiR replied to CrankyCrafstman's topic in LSM 1/35 and Larger Work In Progress
Great to see someone building one of these. I picked one up from my LHS as they had it one sale. I've ordered paint masks so I can do Tiger 131 when the time comes. -
Arado 234 Nachtigall on Speed
BlrwestSiR replied to DocRob's topic in LSM 1/35 and Larger Work In Progress
Great job there Rob. Arado certainly didn't make it easy for us modelers when they designed the 234 but it really looks stunning when you can pull it off. ZM have announced they're going to do a 234 kit so I might wait for that before I build another. It's not easy to find the Fly kit nowadays. -
Great job Peter. The gear bays look fantastic. It's nice to see that the twin booms have a nice positive fit to the wings and tail. Took Tamiya to figure out a foolproof way to do it.
-
what's on your to buy list for 2023 (newly released kits only)
BlrwestSiR replied to npb748r's topic in Modelling Discussion
Hope that's not a Photochop! -
That Panzerwagen has a hot rod vibe to it. I get the impression of a chopped top and the swept back tail just adds to the effect.
-
Tamiya Mosquito FB Mk VI 60326 - 1/32
BlrwestSiR replied to Bomber_County's topic in LSM 1/35 and Larger Work In Progress
Great work on the cockpit Phil. The Red Fox panels look like a worthwhile investment. -
Just catching up on this Ernie and you're really off to a flying start. Looking at your progress on the cockpit and all the individual parts you've already added, it makes me think that HpH is the anti Kotare. Where Kotare have simplified their cockpit in terms of the number of parts, HpH is using as many as they can. Whether it's mould limitations or philosophy or a bit of both, it's interesting to see the difference in approach. I'm still no the biggest fan of early war Japanese planes but I may just have to get one for the challenge of the build.
-
Arado 234 Nachtigall on Speed
BlrwestSiR replied to DocRob's topic in LSM 1/35 and Larger Work In Progress
Nice job on one of the toughest parts of the build. Getting the IP in place cleanly is such a challenge but you've done a great job. You're making me want to do another 234 now. -
F4U-1 Birdcage Corsair, PTO camouflage and colours
BlrwestSiR replied to Martinnfb's topic in AIRCRAFT
Martin and I in the past have discussed a significant Corsair from a Canadian perspective which is Robert Hampton Grey's Corsair. Specifically the one he was flying that earned him posthumously the Victoria Cross. Any thoughts on that one? Carl -
F4U-1 Birdcage Corsair, PTO camouflage and colours
BlrwestSiR replied to Martinnfb's topic in AIRCRAFT
I bet John B looked at this pic and said "I need that kit for my stash!" -
Indeed, our resident sleuth comes to the rescue. Thanks for the additional pics and Images.
-
LSM Modelling News 2023 merged Fran and Artful69’s threads
BlrwestSiR replied to Fran's topic in Modelling Discussion
I'm curious as to how many sections that barrel will be in to fit in the box. -
That's the best image I've seen. I just finished going through my references and couldn't find anything.
-
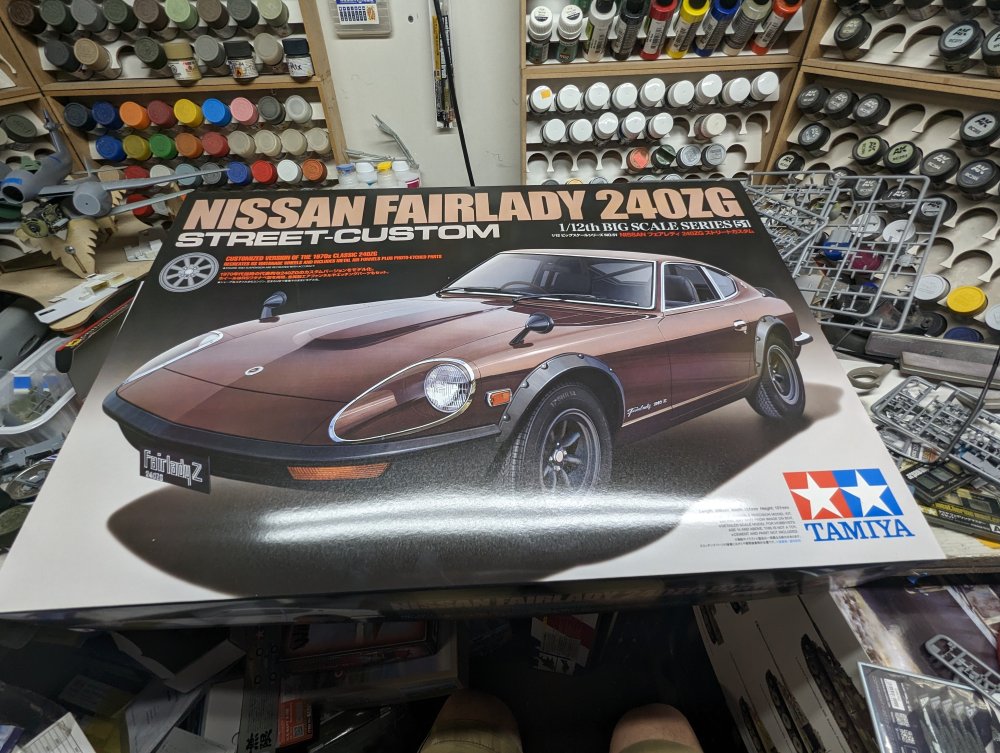
Thanks! I think it'll go nicely with the R32 GT-R that I did earlier. It's unfortunate that Hasegawa won't re-issue the 1/12 Twin Turbo 300Z that they did in the early '90s then it would be perfect to have all three.
-
Kotare Spitfire
BlrwestSiR replied to sharkcoach's topic in LSM 1/32 and Larger Aircraft Ready for Inspection
Looks great nd something different markings wise. Nicely done! -
One I give it a try, I'll post the results and let everyone know.
-
Revell/Dragon Me-110 1/32
BlrwestSiR replied to KevinM's topic in LSM 1/35 and Larger Work In Progress
Nice job on the mottling as well as the overall paint job. The yellow does look a bit bright but I suspect it'll tone down if you do any weathering. -
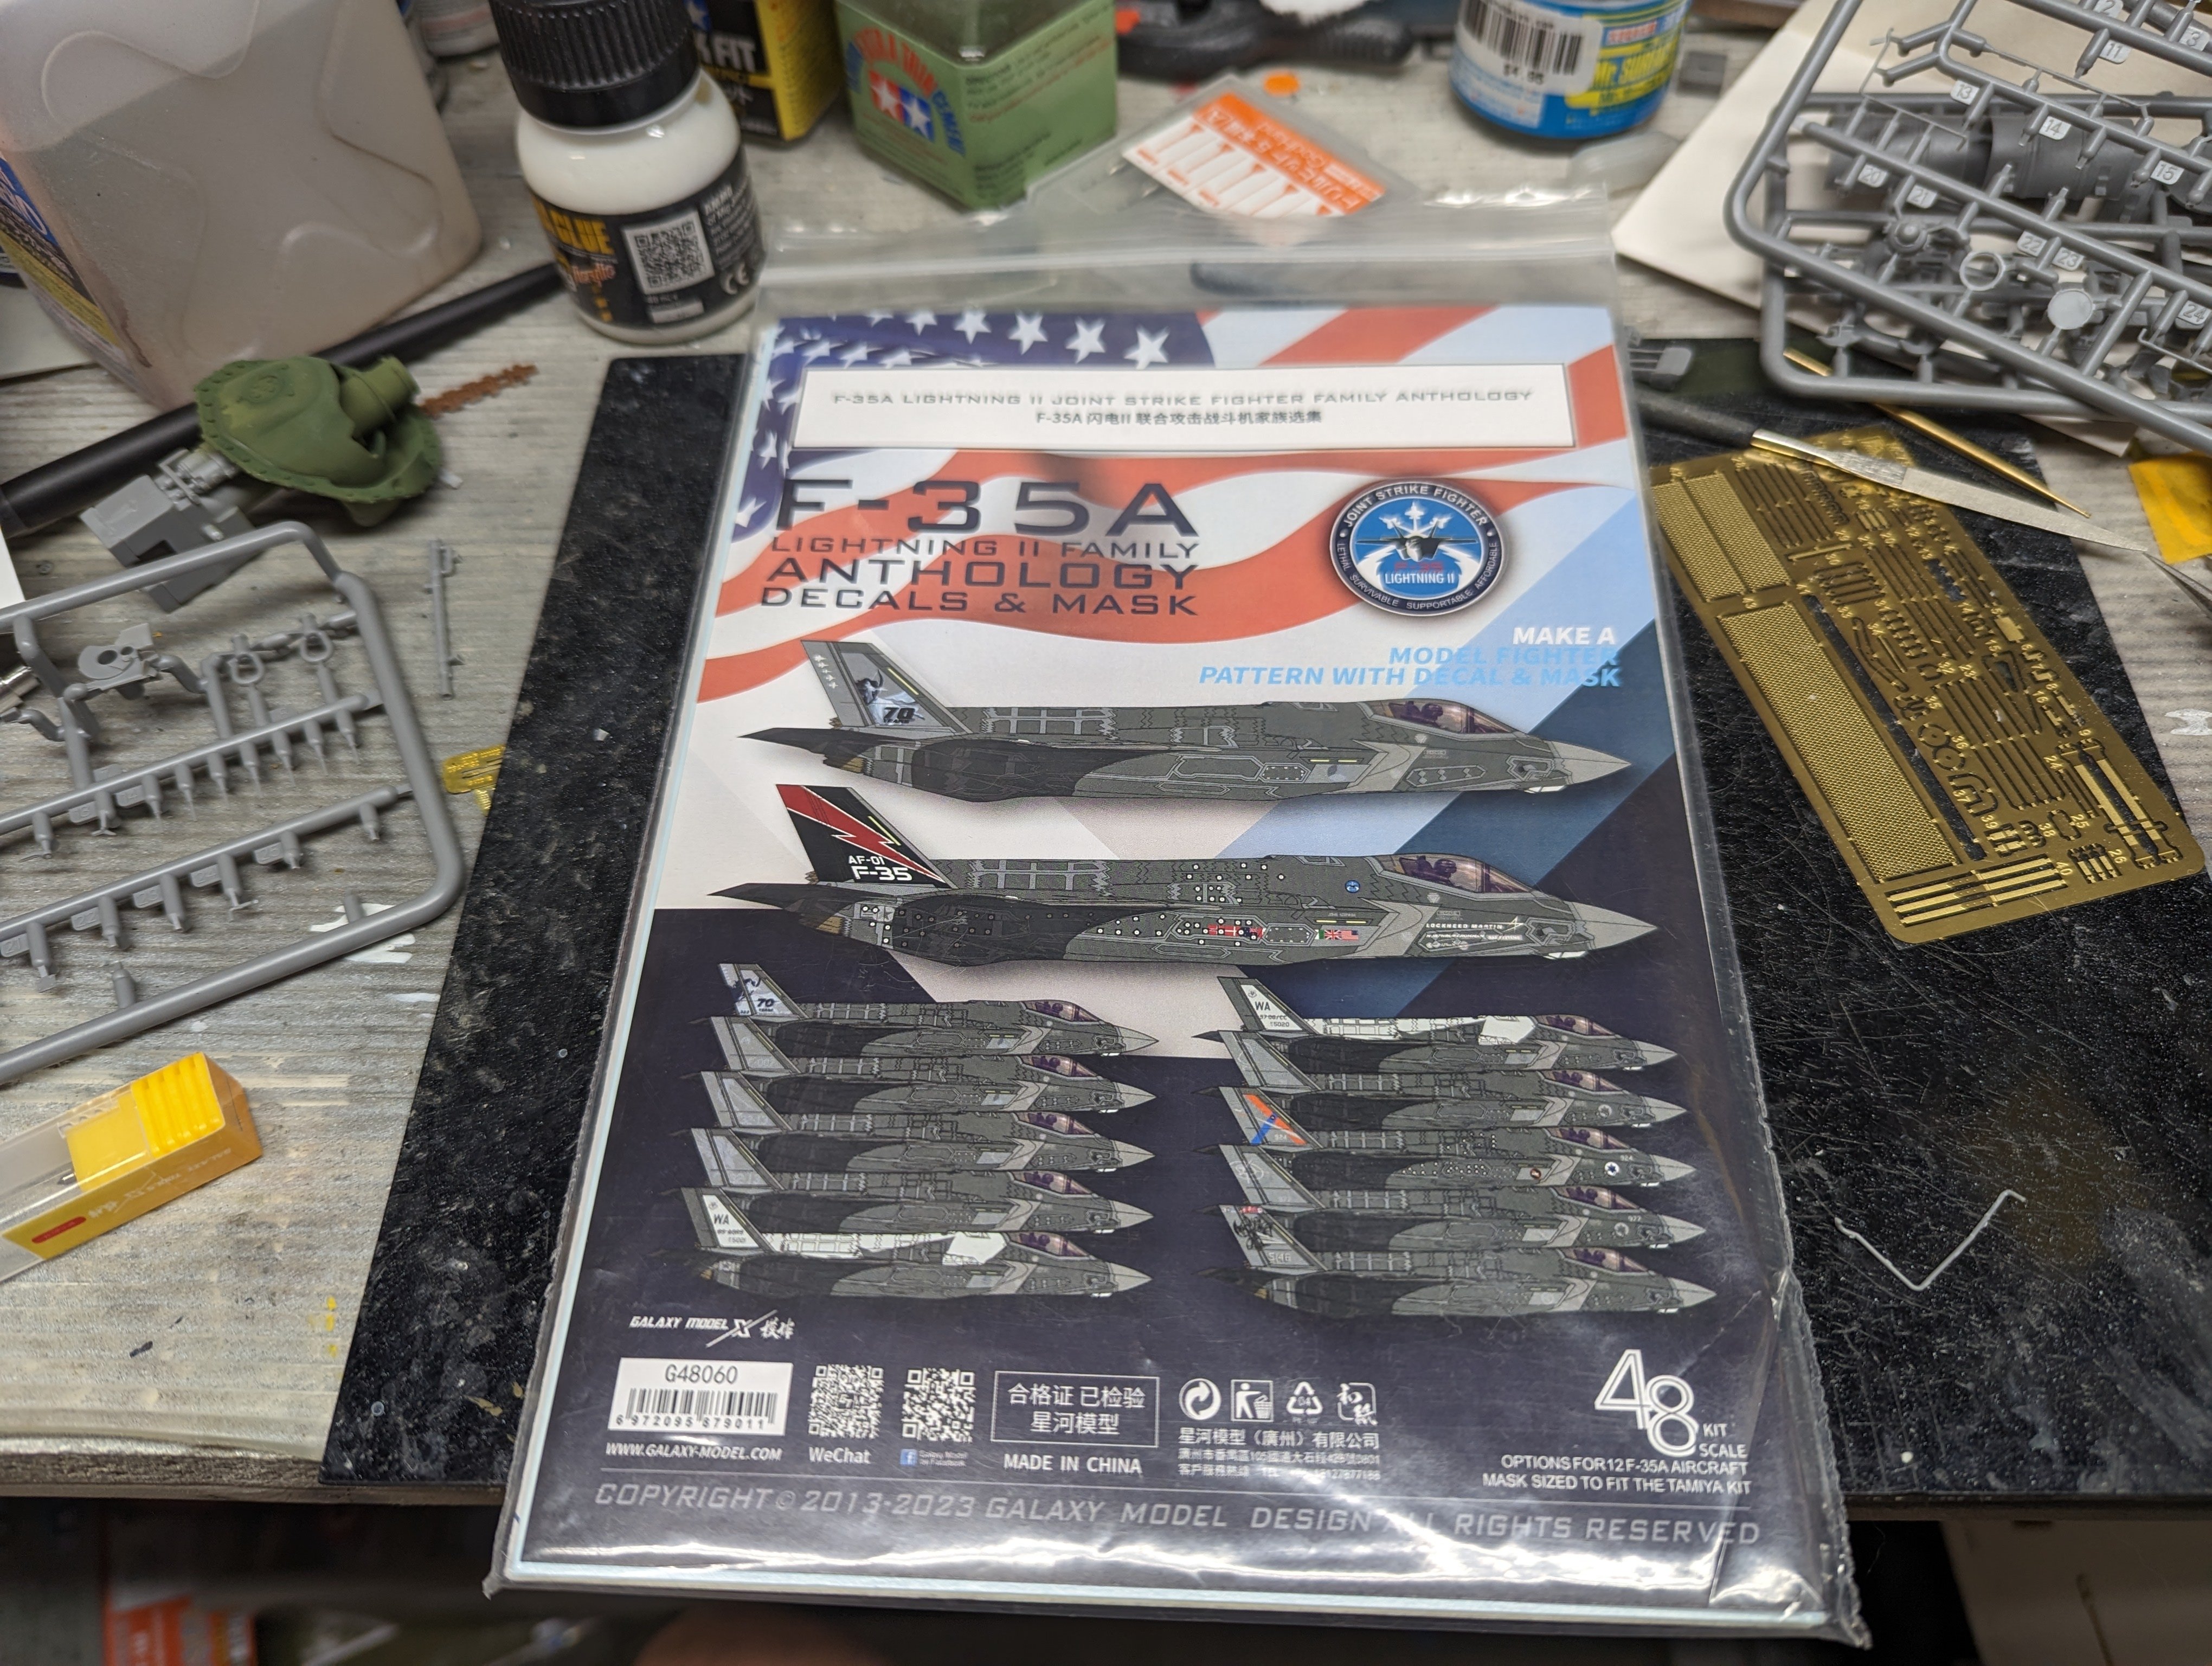
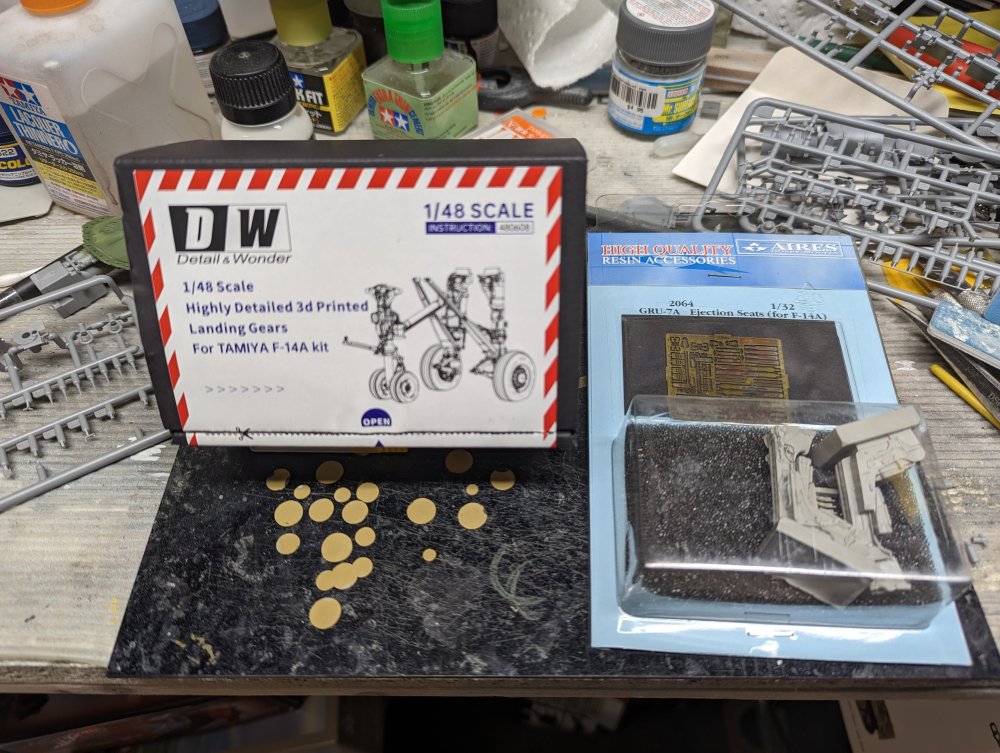
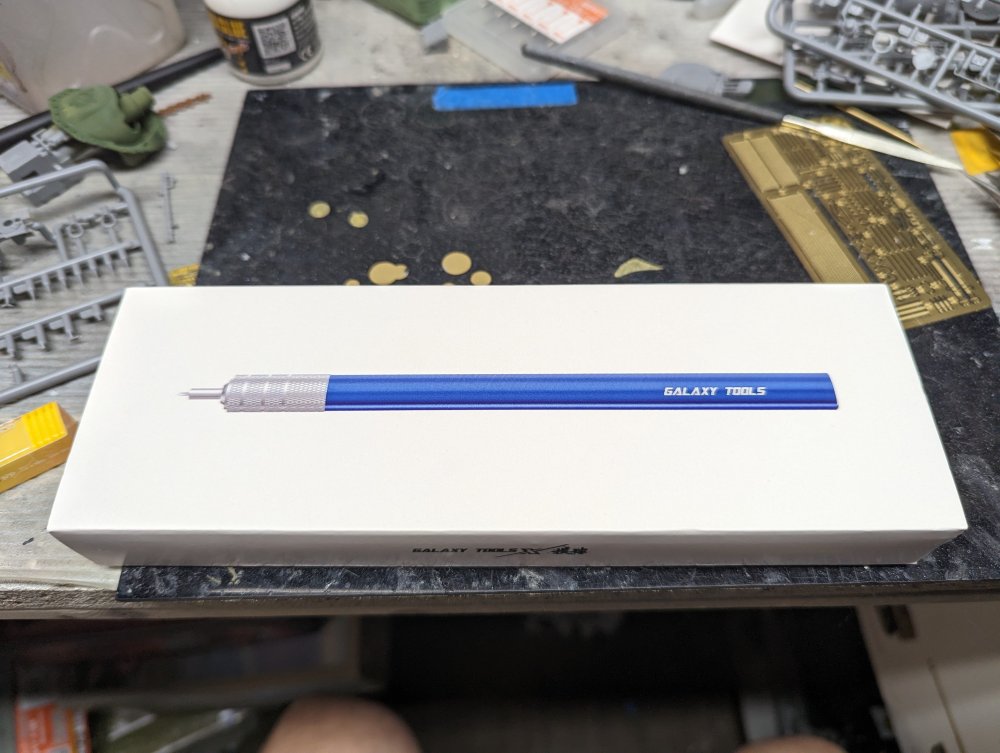
I had a couple orders show up recently. First up are some F-14 bits in different scales. Both are for Tamiya kits though. With the seats, I finally have everything for my Final Countdown Tomcat so I'll probably get back to that shortly. Next up is a decal sheet for the Tamiya F-35A kit. It also includes masks for the aggressor scheme which is what I'll be using. With some of the other choices included, I may just have to get another kit. I also got a new tool that's supposed to help with cutting fine curves in tape. We'll see how that works out. Lastly, I had a set of 3D printed resin rims and tires but no model for them so I had to solve that problem.

-
So, IS the new Airfix Spitfire lXc worth it?
BlrwestSiR replied to Clunkmeister's topic in Modelling Discussion
For me, if it had been a XIV, I'd have been first in line at the LHS for one.