DocRob
-
Posts
7,048 -
Joined
-
Last visited
Content Type
Profiles
Forums
Events
Gallery
Everything posted by DocRob
-
Only three parts per link, that's a simple track by Meng's standards. I built their T-90 and if I remember it right there were five to six parts needed per link, depending if you wanted to use rubber pads or not. I used them nevertheless, though I also had some Friuls. The plastic ones by Meng were better looking and functioning then the white metal stuff. One evening sweetened by a bottle of wine and the job is done . If you leave your path of leaving models clean, you can spare some time with spilling dust or mud. C'mon it's armor . Is such a predator supposed to be totally clean? Cheers Rob
-

RSO Radschlepper Ost - Having a Break
DocRob replied to DocRob's topic in D-Day 75th Anniversary Group Build
In the sideview there are similarities, but the general dimensions and front design are a complete other pair of shoes. To open the Tatra, you lift the whole thing, while with the RSO you fold the upper part in the middle and then you can dismount the sides. That dinosaur engine of the RSO looks like maintenance is not often on the schedule. It's big, mean and simple. Cheers Rob -
RSO Radschlepper Ost - Having a Break
DocRob replied to DocRob's topic in D-Day 75th Anniversary Group Build
Tonight it's open air rock concert and drinks for 'Ctrl-Alt-Delete' and a Paella before, to gain enough strength and relaxing those old eyeballs, while looking at the sunset . Cheers Rob -
RSO Radschlepper Ost - Having a Break
DocRob replied to DocRob's topic in D-Day 75th Anniversary Group Build
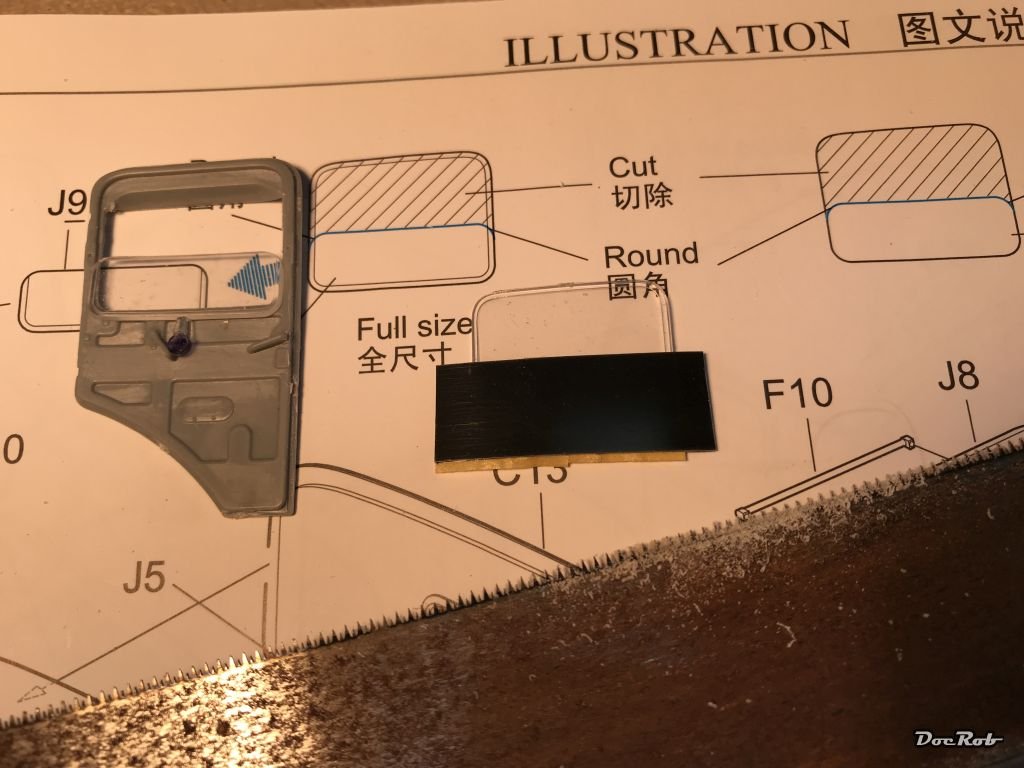
Lots of tiny details where added to many of the subassemblies, specially in the front fender and hood section. The provided PE-sheet is not that big, but keeps me busy with lots of tiny parts. The moulding of the cowlings is superb, you can look through the very fine cooling slots. Another part of the build, I was a little afraid of, where the cabin door windows. As my setting is a summer setting these should be open, in case of the RSO that seems to mean half open, which meant, I had to cut the clear parts. To do so i marked the sawing line with Tamiya tape and used Dynotape as a guide for the saw. That worked good like you can see on the left side of the picture. The next question is, do I mask the windows, or do I use marker for the sealings or do I use them as they are. I will dry fit and see then. Cheers Rob

-
1/32 PZL P.11c supposedly coming in 2020 from IBG Models
DocRob replied to [CAT]CplSlade's topic in General Discussion
That has been made earlier (1918) by Junkers (D1) at least as a full metal design and even earlier in different wooden styles by Fokker and others. Cheers Rob Picture for discussion purpose only -
Not easy to tell from the pictures, I have a slight tendency towards 'A'. Are these the embossed ones? It seems to me, that they enhance the three dimensional appearance of the rivets a little better, wich leads to a little bit more 'made' look than 'B' Especially with tiny details like rivets, sometimes the most convincing way isn't to reproduce the real thing, but to use a method which looks best considering the scale effect and emphasis of a certain look you like to achieve. Cheers Rob
-
RSO Radschlepper Ost - Having a Break
DocRob replied to DocRob's topic in D-Day 75th Anniversary Group Build
Yes Gary, that's what I think too. The manual shows four different vehicles from 1944 with only one namely put into the Normandy area in three tone camo. Primarily I thought tri tone, but while building; I changed my mind, because the grey is fitting better to the RSO's appearance, is a nicer base for intense weathering and will be of more contrast in a dio.(naturally tri tone isn't ). The manual is a bit vague about the interior colors and your pic is of great help concerning the stowage boxes and cabin Interieur. I was thinking dark grey too for those areas. I show one of the boxes half open, because the guy shaving himself in front of the RSO is picking his stuff from there. Interesting is the inner lid of the stowage boxes doors in your pic, where I thought it's not detail, but moulded for a correct fit and was about to remove. The base color in your pic seems to be Dunkelgelb (German dark yellow) without camo, another option, but again lacks of contrast. Cheers Rob -
RSO Radschlepper Ost - Having a Break
DocRob replied to DocRob's topic in D-Day 75th Anniversary Group Build
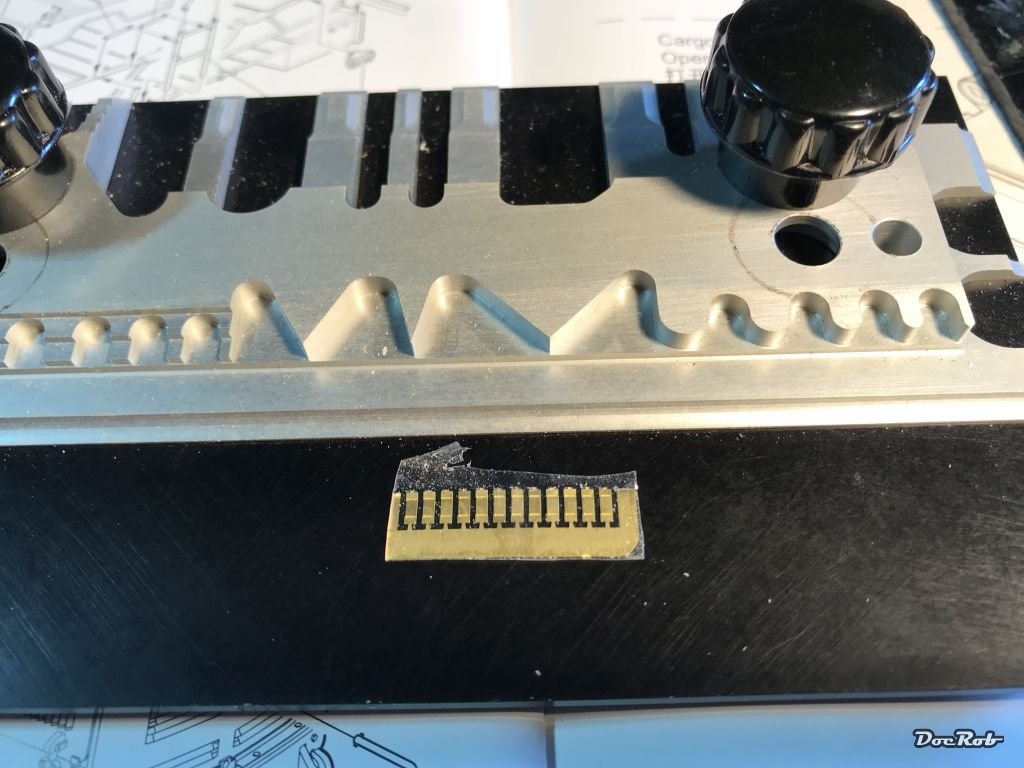
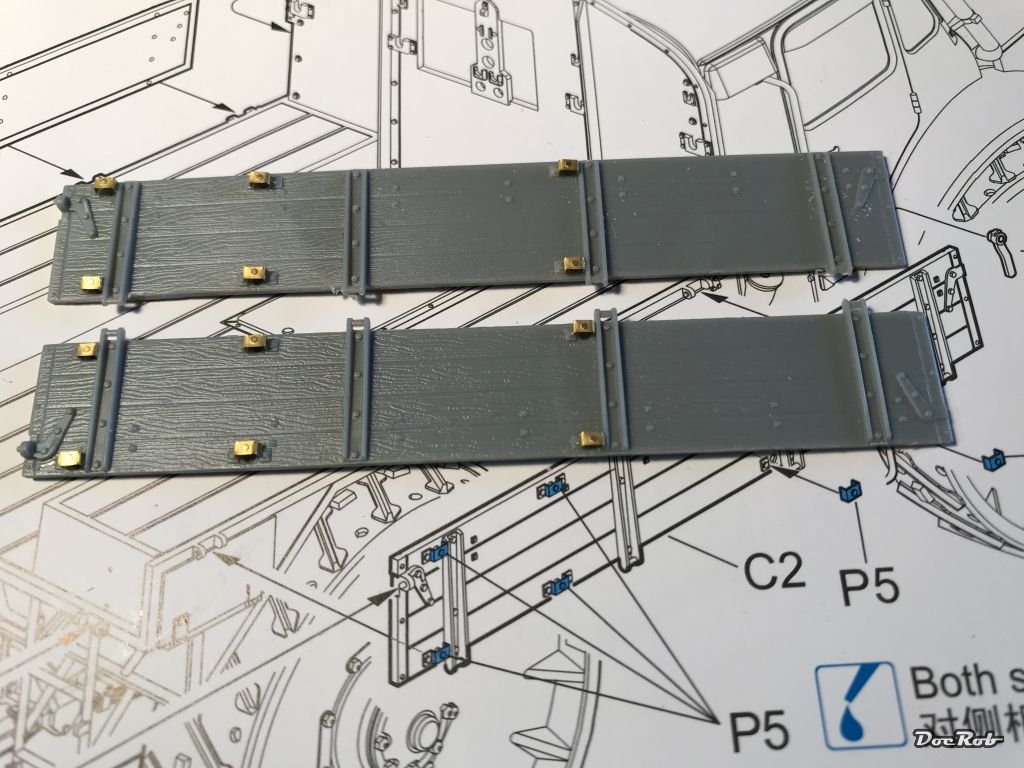
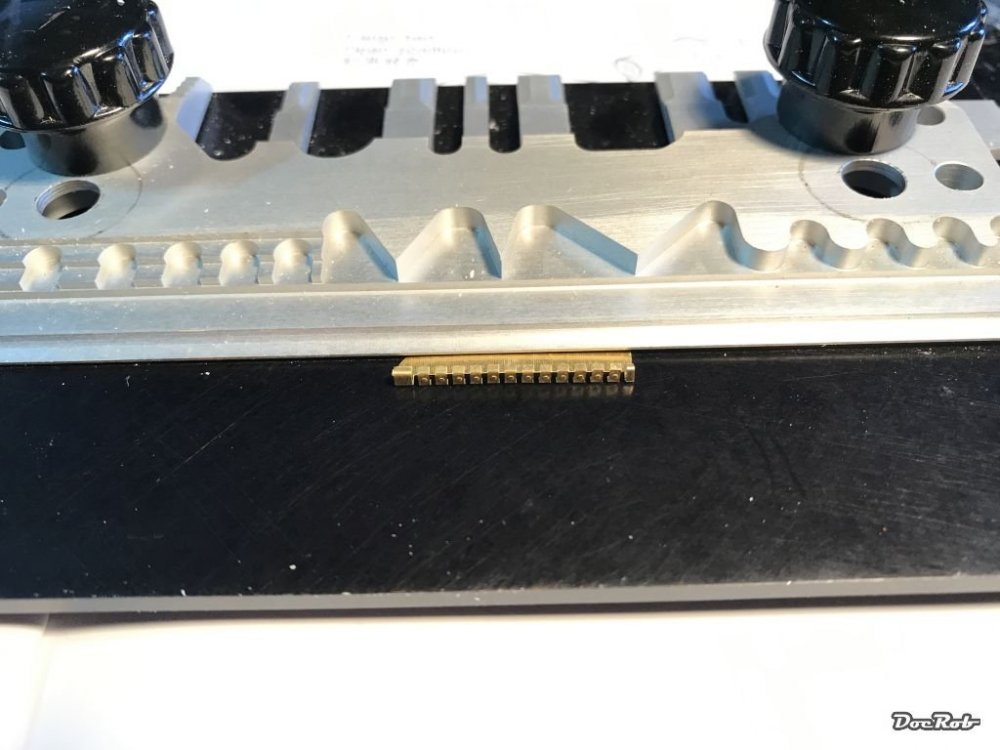
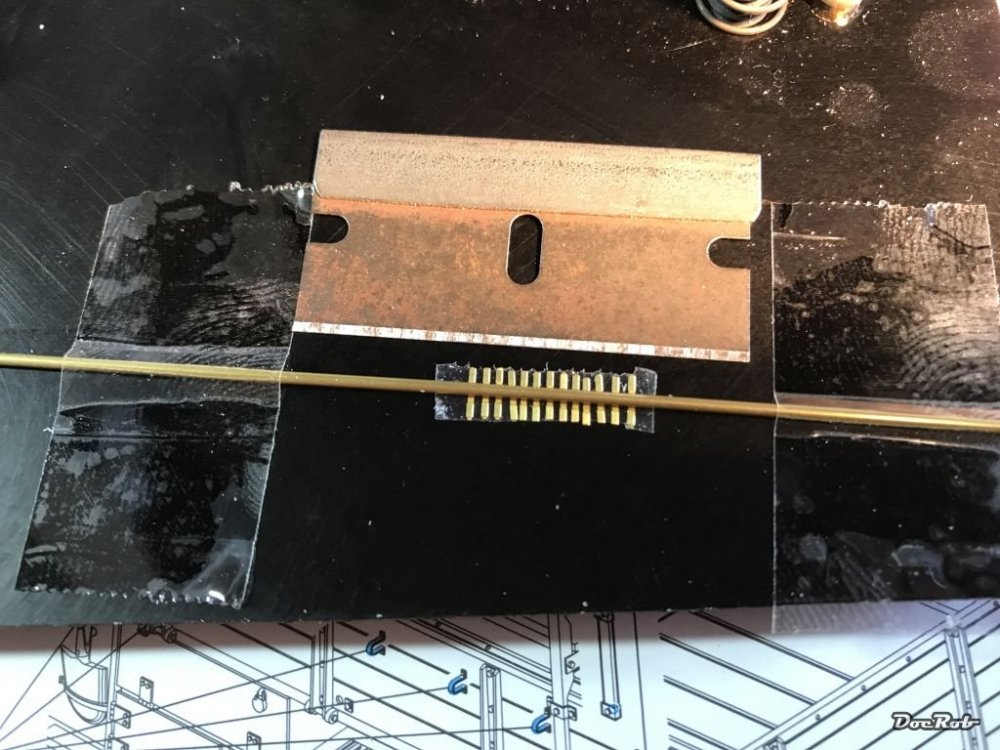
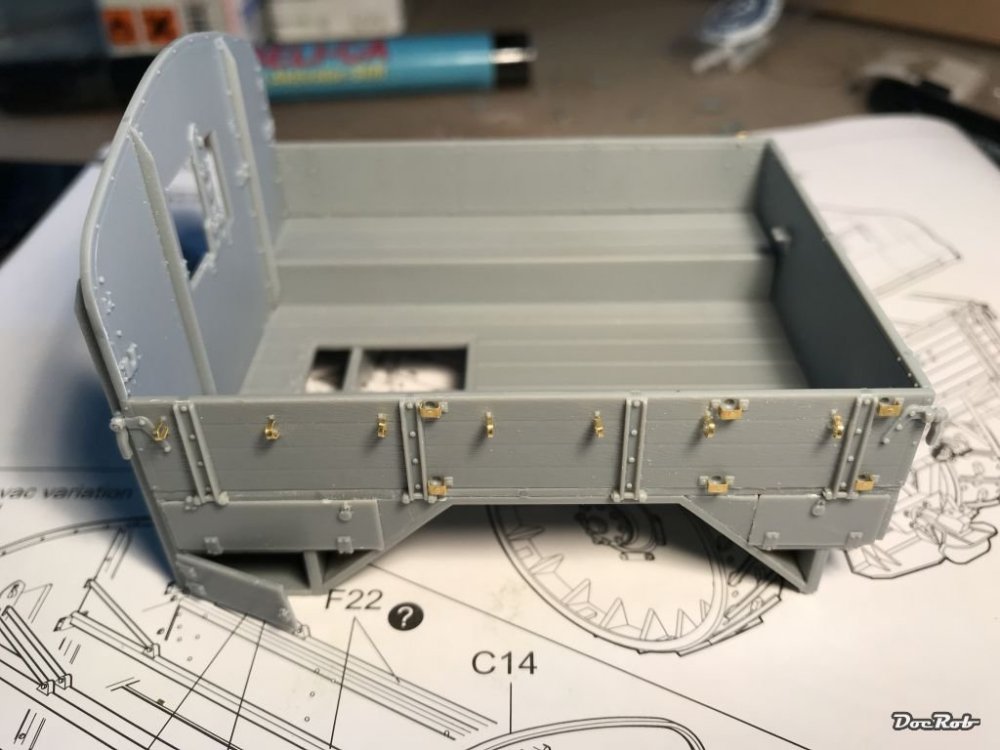
Little things slowing the pace of the build, literally. I finished the loading compartment and adding the little PE-details proved time intense and eyeball testing . One thing helped a lot, PE-sheets on adhesive foil makes live easier. For the tiny hooks I used a 1mm brass rod for bending. I hope the little hooks will stay in place while airbrushing. Cheers Rob Final result The way to get there

-
Communist Russia’s Finest Passenger Service MI-4
DocRob replied to 1to1scale's topic in LSM 1/35 and Larger Work In Progress
Looking great, you can hear the leather creaking of that pilots chair. Cheers Rob -
Ho229 at the Udvar-Hazy Center
DocRob replied to JeroenPeters's topic in LSM 1/35 and Larger Work In Progress
This is looking really good, are you sure about adding the wings? Somehow your Ho looks special without, looking at your pictures (no joke this time). Cheers Rob -
RSO Radschlepper Ost - Having a Break
DocRob replied to DocRob's topic in D-Day 75th Anniversary Group Build
Thanks Martin, but the wheels are only temporary mounted, but good from you to mention. Now I wont forget while finally assembling. Cheers Rob -
RSO Radschlepper Ost - Having a Break
DocRob replied to DocRob's topic in D-Day 75th Anniversary Group Build
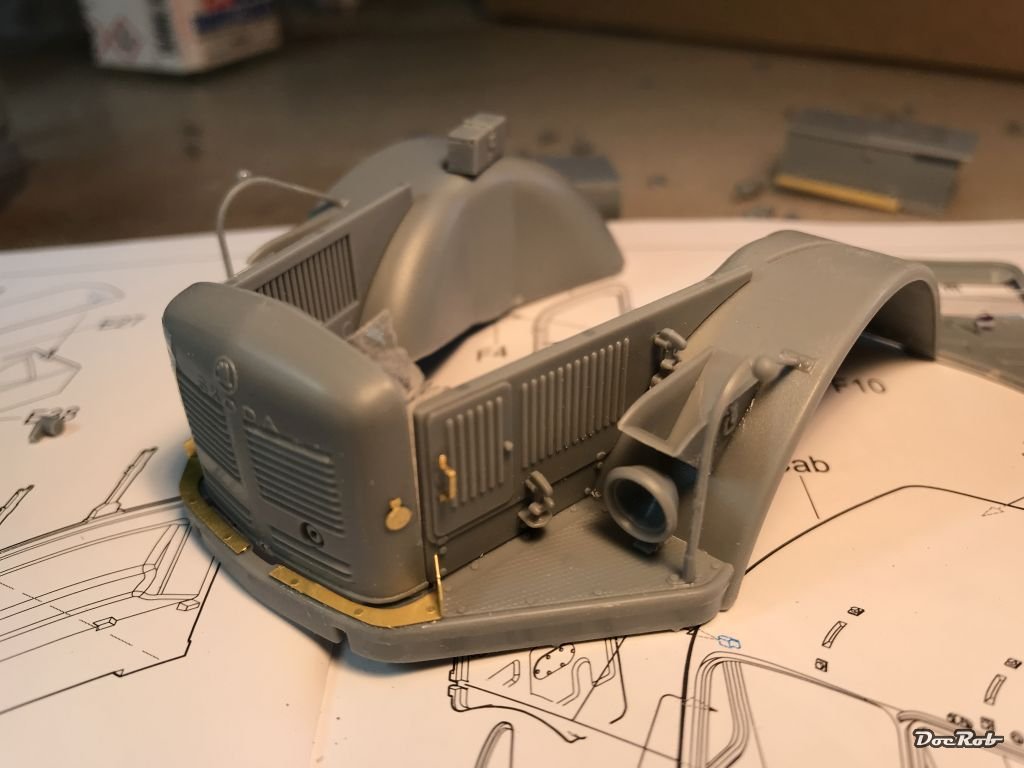
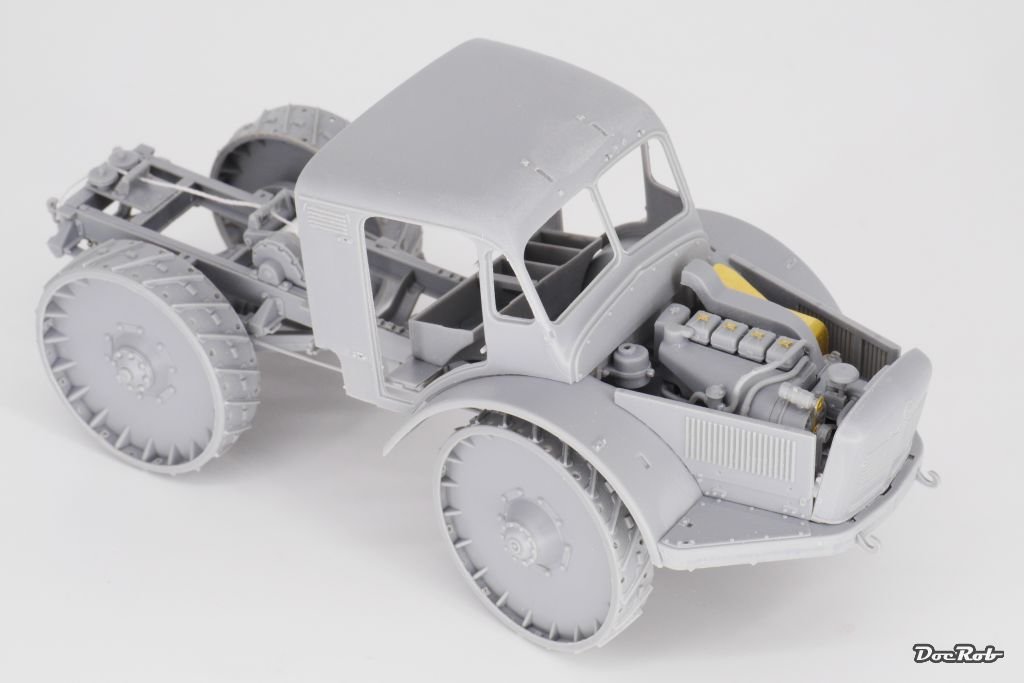
Decisions, decisions, I attached some of the major components loosely, to decide, how much of the engine will be shown. The good side is, that general fit of the parts seem to be really good. I tend to close the hood of the engine, because I will let at least the driver door and the front window open and the open engine hood shows only parts of the power plant. Another decision to be made is the paint scheme. At first I was sure to do a tri tone camo on dunkelgelb, but am not that sure anymore. The grey fits better to the vehicle. Were there grey RSO's deployed around D-Day? Cheers Rob The main components are not glued yet, that's why it looks like a Hommage to the stage design of 'The Cabinet of Dr. Caligary' with it's weird angles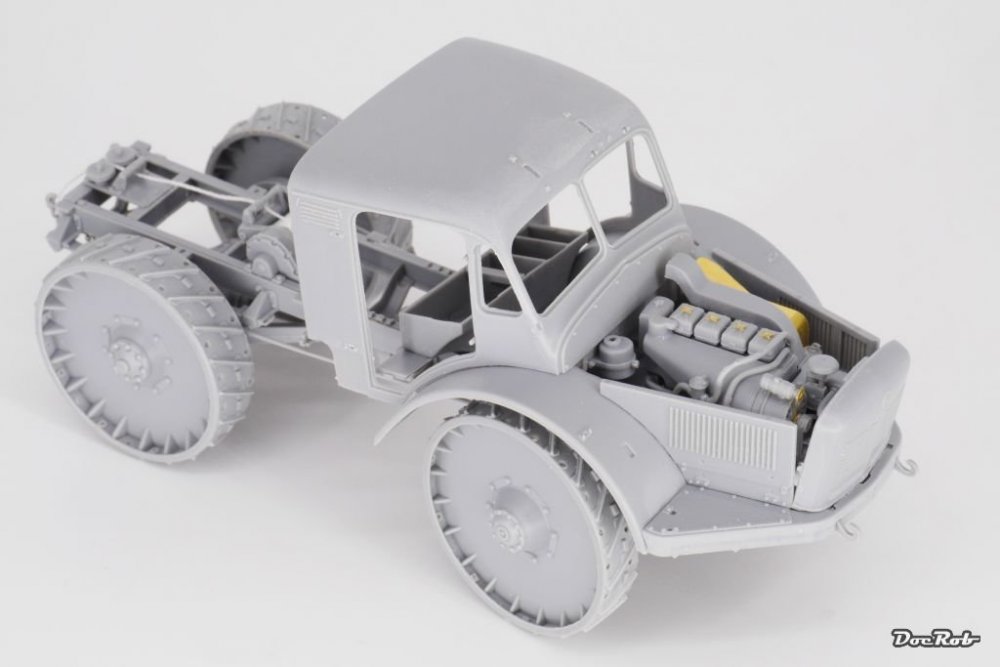
-
1/35 Tiger 1 - Late Production.
DocRob replied to Bomber_County's topic in D-Day 75th Anniversary Group Build
Nice PE-work Phil. those fenders look great and so many opportunities to let them look a little bit deformed realistically in PE. Cheers Rob -
'Skeletal' Fokker D.VII
DocRob replied to sandbagger's topic in LSM 1/32 and Larger Aircraft Ready for Inspection
Stunning work Mike, your Fokker is a piece of art and it was a pleasure to follow. The depth of detail is breathtaking and there are lots of points for the eyes to discover. By all that detail work you at least skipped working with Lozenge decals a lot . Cheers Rob -
RSO Radschlepper Ost - Having a Break
DocRob replied to DocRob's topic in D-Day 75th Anniversary Group Build
Thanks Phil, I have no idea about the way the beast needs to stop. Given the max speed of 15 km/h, the size of the brakes (big) it shouldn't be to bad. Cheers Rob -
RSO Radschlepper Ost - Having a Break
DocRob replied to DocRob's topic in D-Day 75th Anniversary Group Build
Gracias Senhores, the kit is a pleasure to build and has lots of visible components, so function of the real thing is transparent. Cheers Rob -
1/18 P51C Mustang "Lopes Hope 3rd"
DocRob replied to airscale's topic in LSM 1/35 and Larger Work In Progress
Outstanding, your metal sheets look like the real deal. You cannot reproduce this look in plastic, equal if you're foiling or airbrushing NMF, plainly amazing. Cheers Rob -
Your Zim is looking great, I like it more than the pre formed stuff from Attac and the Eduard PE, it looks more 'applied' Cheers Rob
-
Nice work on the Zim. Is your Jagdpanther equipped with side skirts? With these mounted and the wheels and track added there will be just a little sight of the wrong pattern on the sides. Some mud caking and voila. I'm not sure these early Jagdpanther had side skirts and yes; I know you don't like your models dirty, but hey, it's armor. Cheers Rob
-
Nice, is there a WIP on the horizon? Cheers Rob
-
What is on your bench right now ? Share a picture :)
DocRob replied to Martinnfb's topic in Modelling Discussion
These look great, what are they, a kind of trout? We have these colorful ones in the Atlantic in great amounts here on the Canarian Islands. They are called Vieja (Old women) or Parrot fish in English, I believe. Can't imagine what smitty will make out of this name . They taste great, accompanied by a young dry white wine and look good while snorkeling. Cheers Rob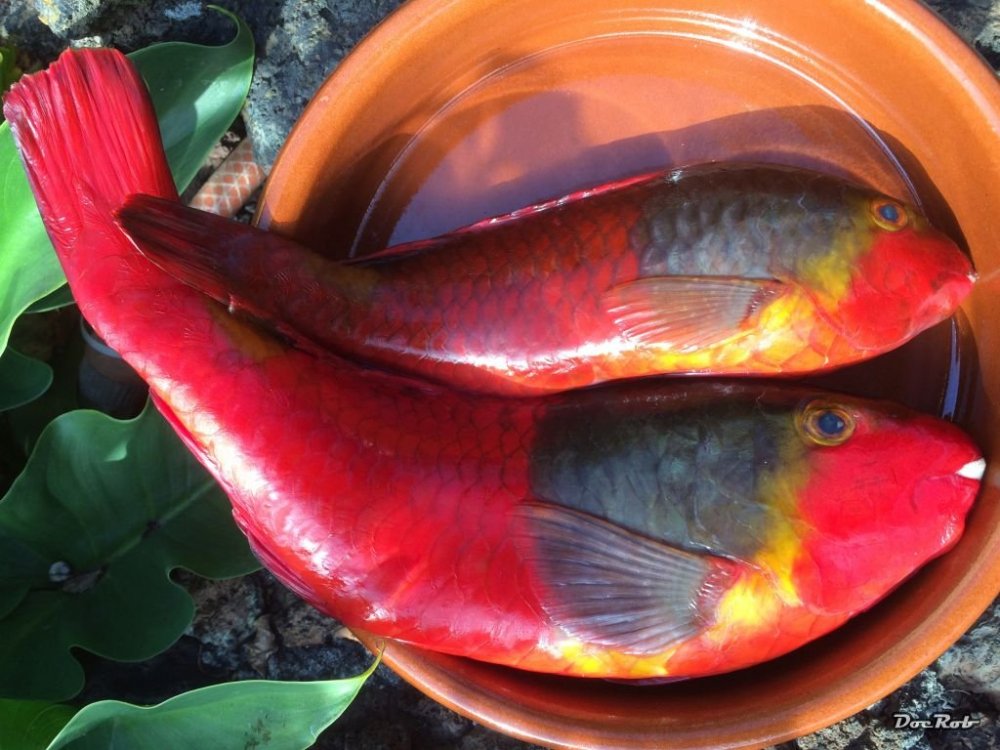
-
What is on your bench right now ? Share a picture :)
DocRob replied to Martinnfb's topic in Modelling Discussion
When I put only 'Peto' in my browser, I don't get the fish, but no male either , how could that happen, smitty ? If you browse for Peto fish or Peto pescado you get lots of pics and discription about naked fish. It's always about what you expect to find with that good ole internet. Cheers Rob -
What is on your bench right now ? Share a picture :)
DocRob replied to Martinnfb's topic in Modelling Discussion
Here in Spain they are called Peto and if you want an explanation, the fishermen tell you it's kind of a white tuna. They do look like something between a Tuna and a Barracuda, but they are like smitty said part of the Mackrel family and can be as long as two meters and they taste pretty good with a salsa made of fresh mangas, red onions, chily lime and a little bit of palm honey. Cheers Rob -
RSO Radschlepper Ost - Having a Break
DocRob replied to DocRob's topic in D-Day 75th Anniversary Group Build
It is a beast Carl, and Gaz is right about the comparison to early Us tractors, true heavy metal . Cheers Rob -
RSO Radschlepper Ost - Having a Break
DocRob replied to DocRob's topic in D-Day 75th Anniversary Group Build
Thanks guys, these wheels are something special, but hey, no more tire pressure checking, and driven through a tight corner with max speed (15 km/h) on tarmac will lead to sparks flying around . Yeah Jeff, it's a great kit, the fit is good with the exception of alignment points, these tend to have some tolerance, fit wise. By break rods I meant the mechanical push rods for the breaks, which are about 10cm long, thin and attached to the sprue with six or seven attachment points. Not too easy to clean up without breaking them. Bee wax sounds good for the provided cord, never thought about it, but use the stuff sometimes for my hair to get a decent look and might try it for the cable. Tamiya extra thin works good with the cord as well. Cheers Rob