DocRob
-
Posts
7,055 -
Joined
-
Last visited
Content Type
Profiles
Forums
Events
Gallery
Everything posted by DocRob
-

Silver Bird Pfalz D.IIIa
DocRob replied to DocRob's topic in LSM 1/32 and Larger Aircraft Ready for Inspection
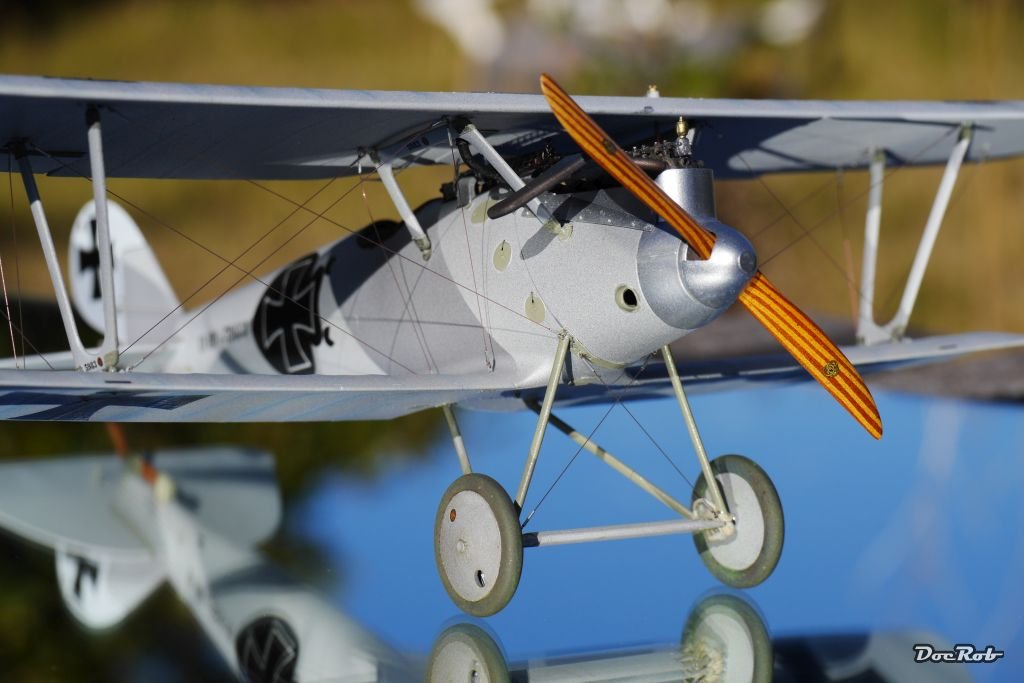
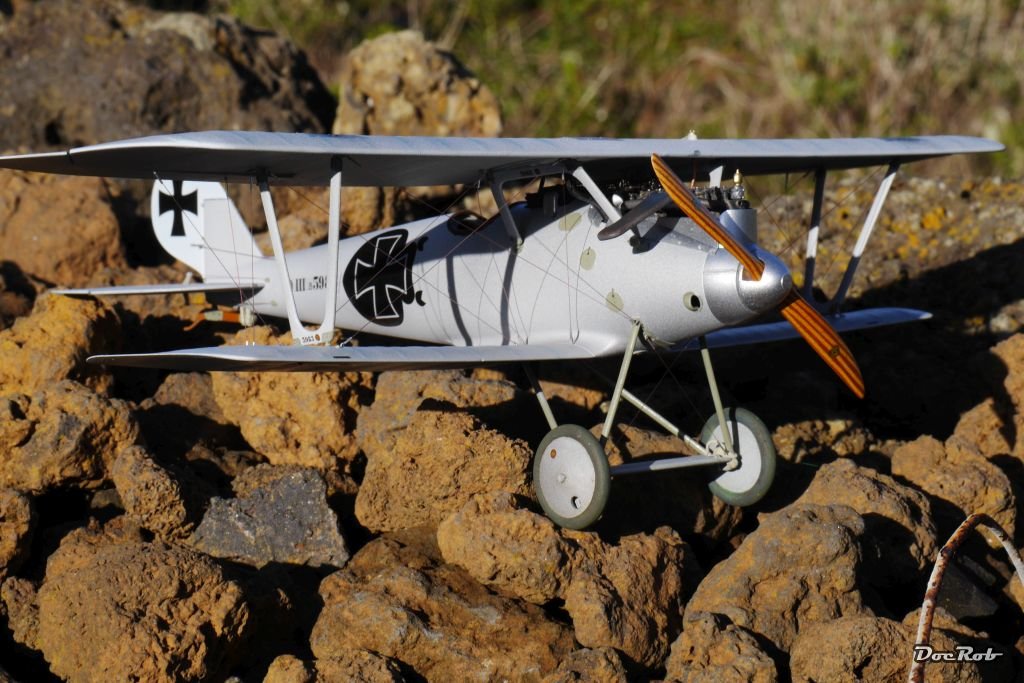
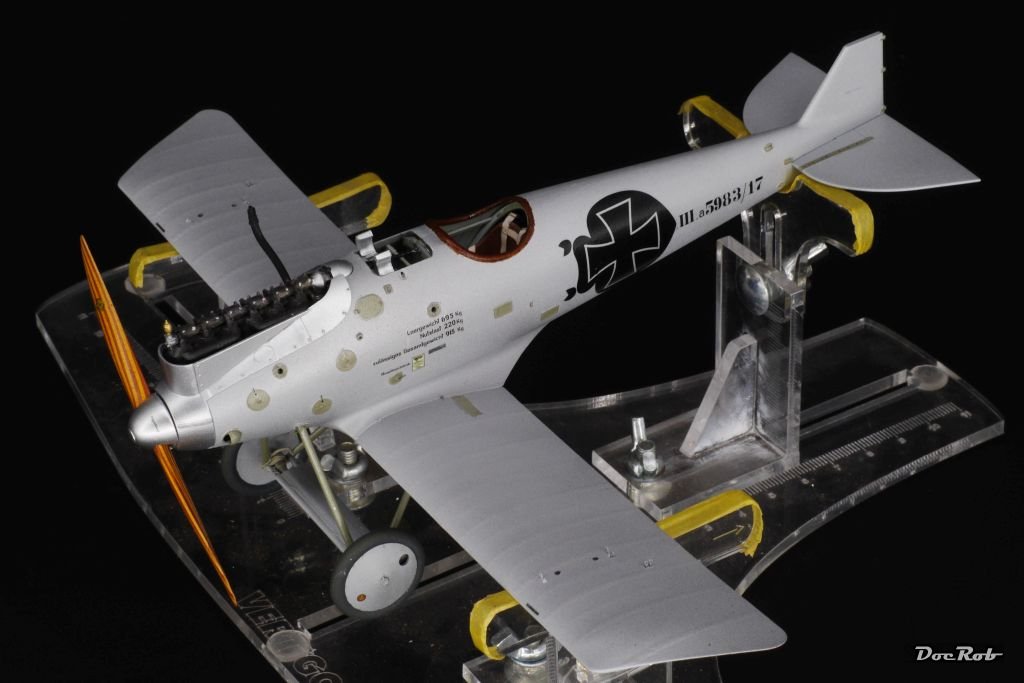
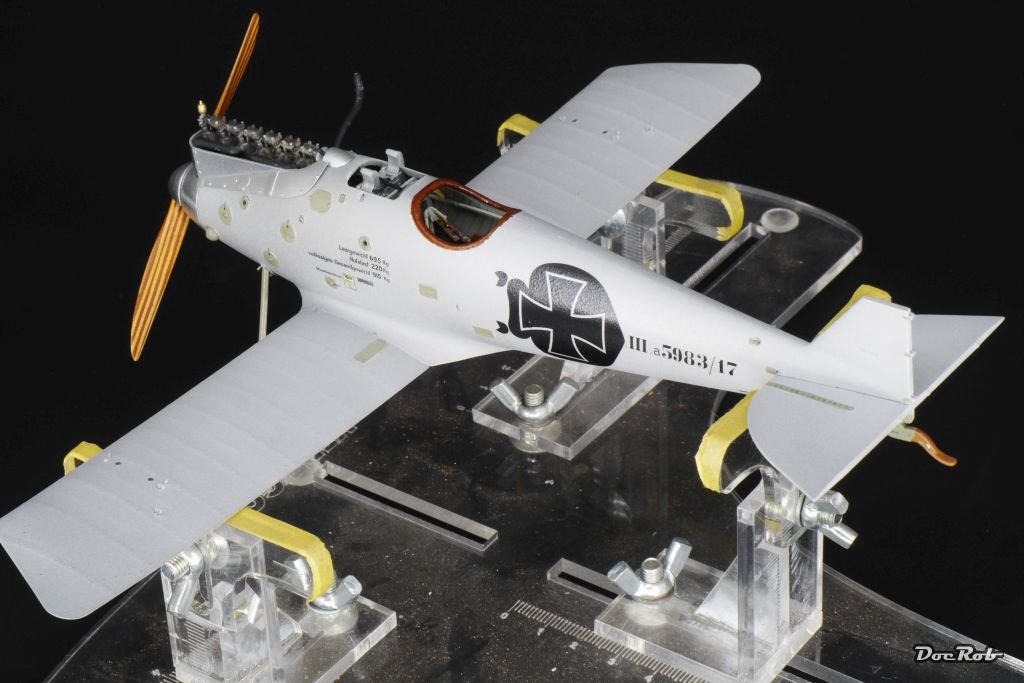
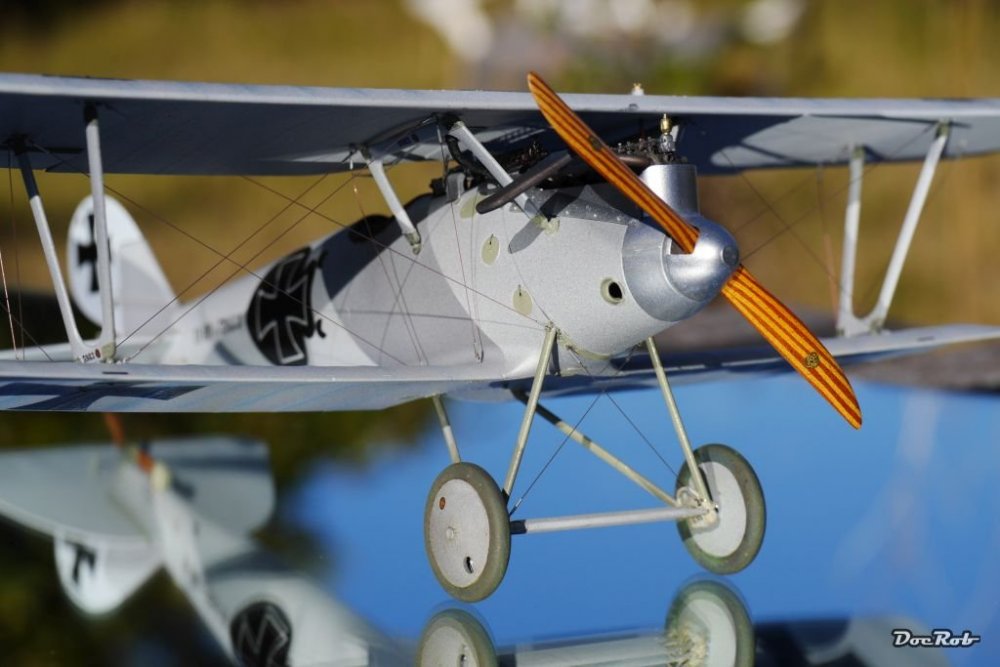
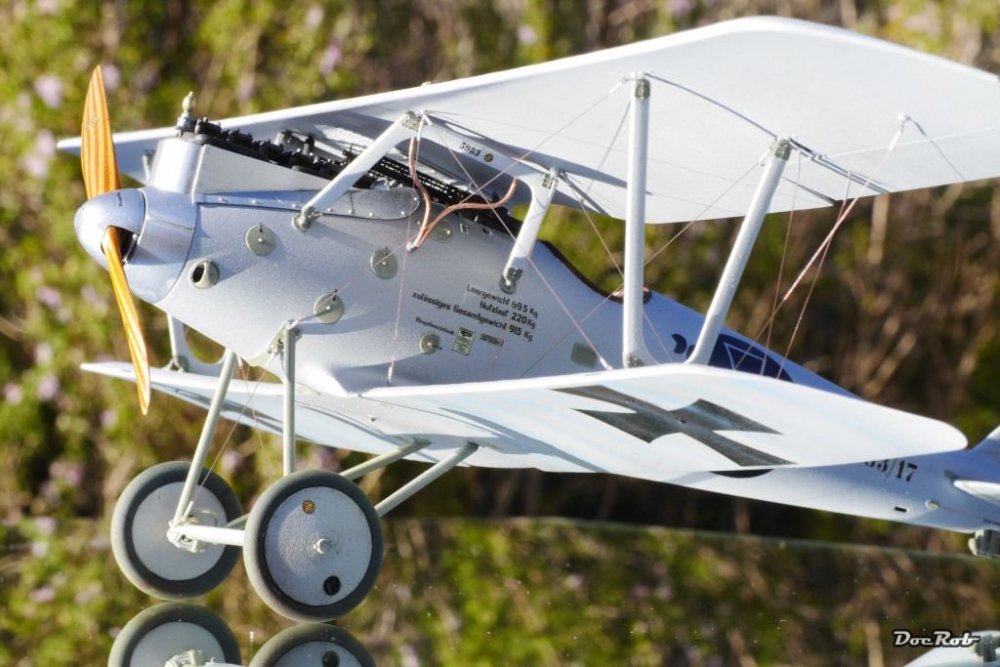
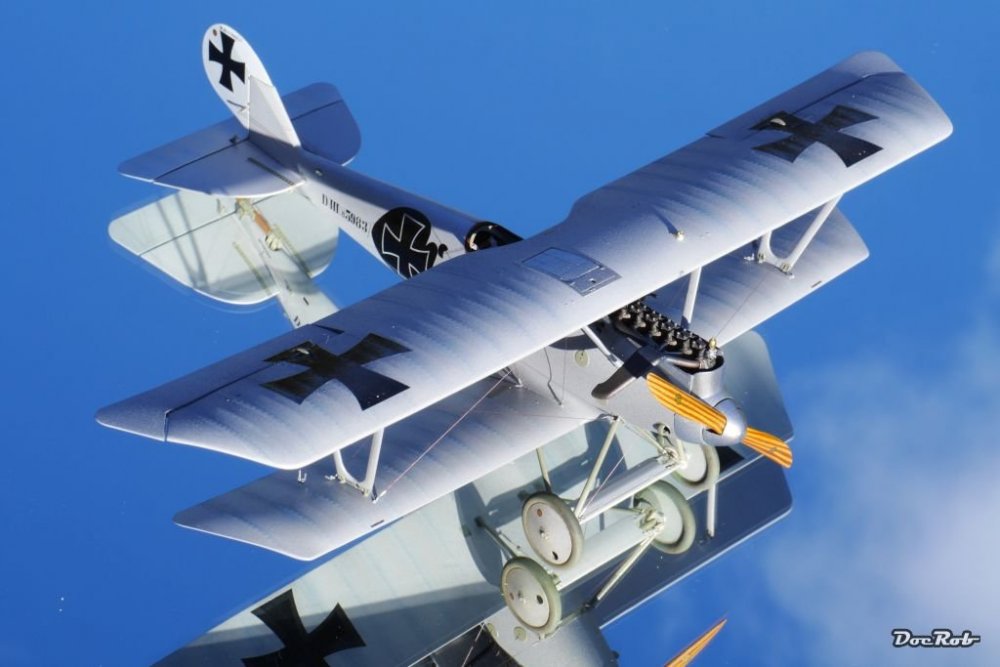
Muchas Gracias Senhores. @Gaz; I wanted do achieve a mostly factory fresh look of the plane with minimal weathering, because weathering would have had a great effect on the Silbergrau finish, which I tried to depict. The initially shading was hard to see in bright light. After browsing through my washes and pigments I found a jar of Neptune blue pigments and tried it on a dummy. The blue postshading imitates the effect of shadows on the spars which normally would be highlighted. But in this case it gives a 'cheap' illusion of a little translucency which can be detect on historic pics. Cheers Rob -
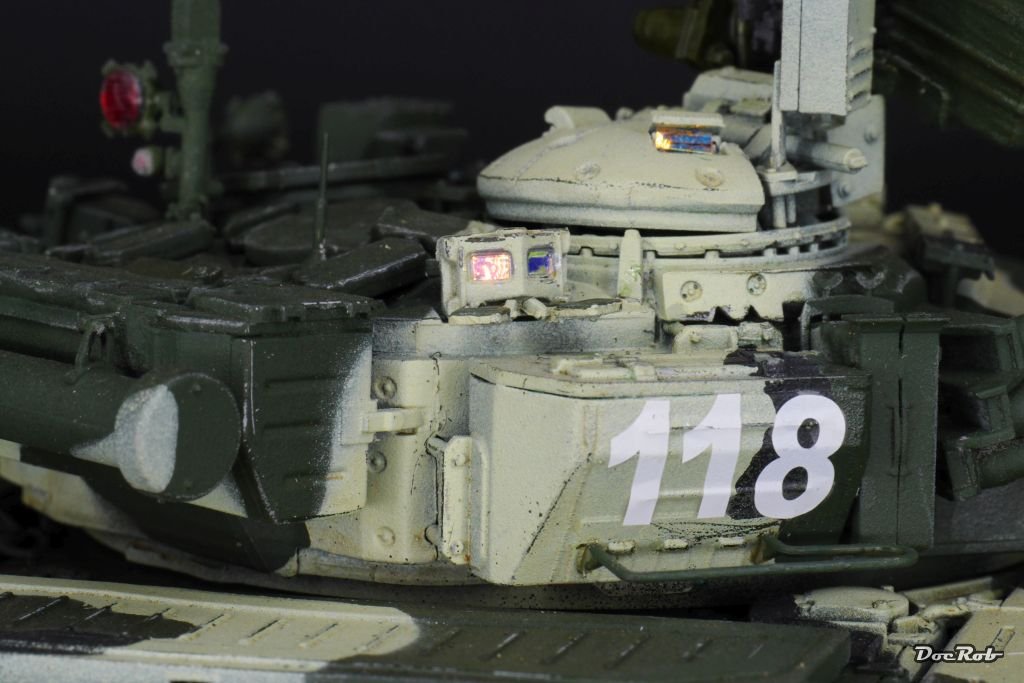
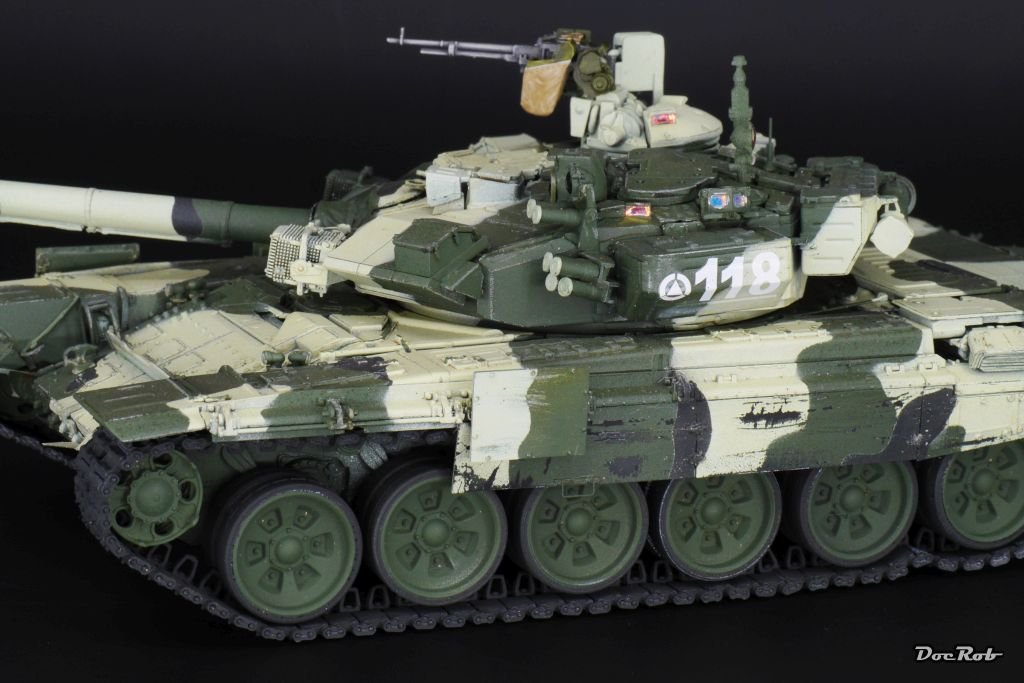
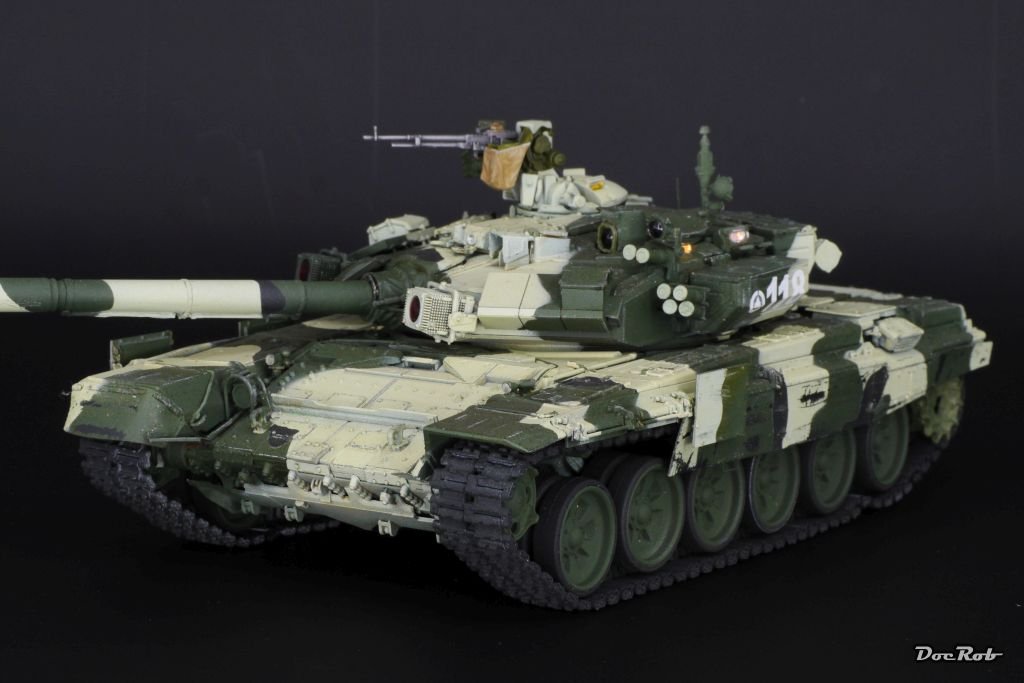
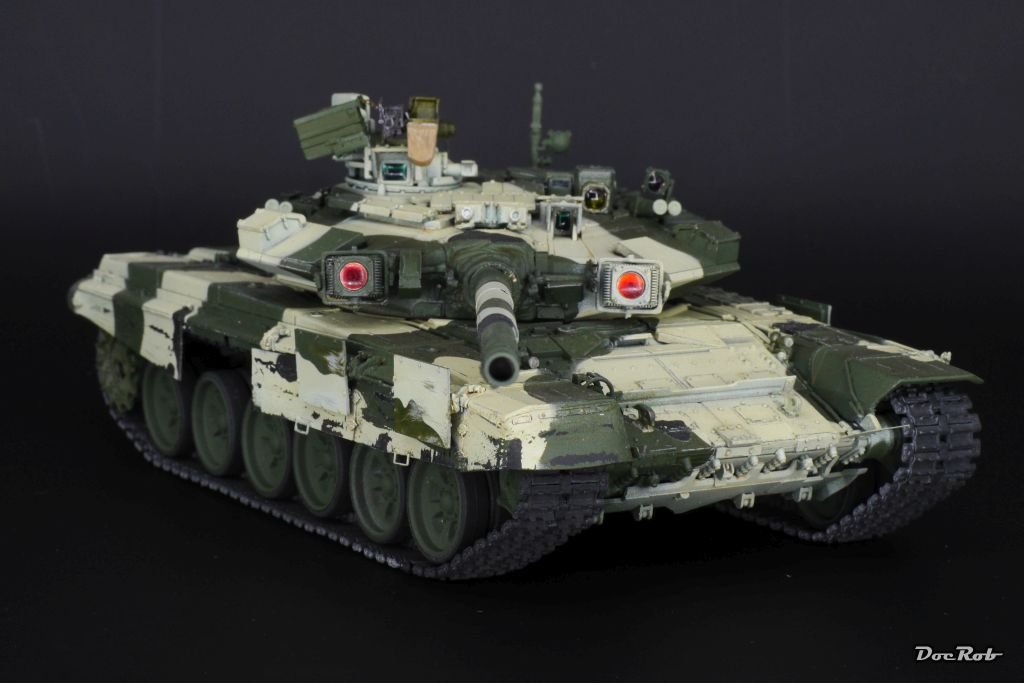
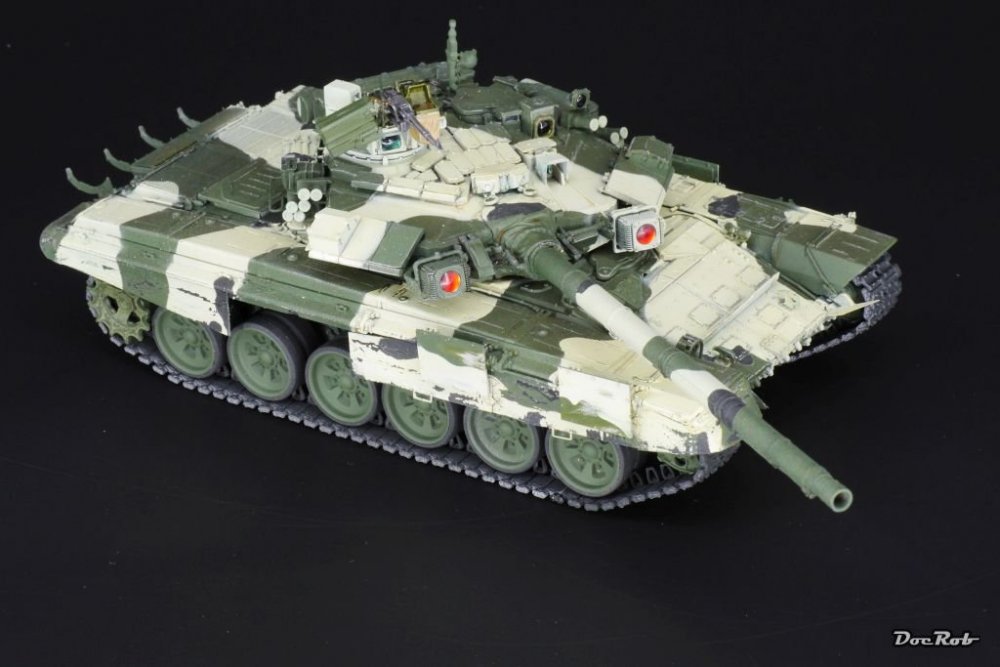
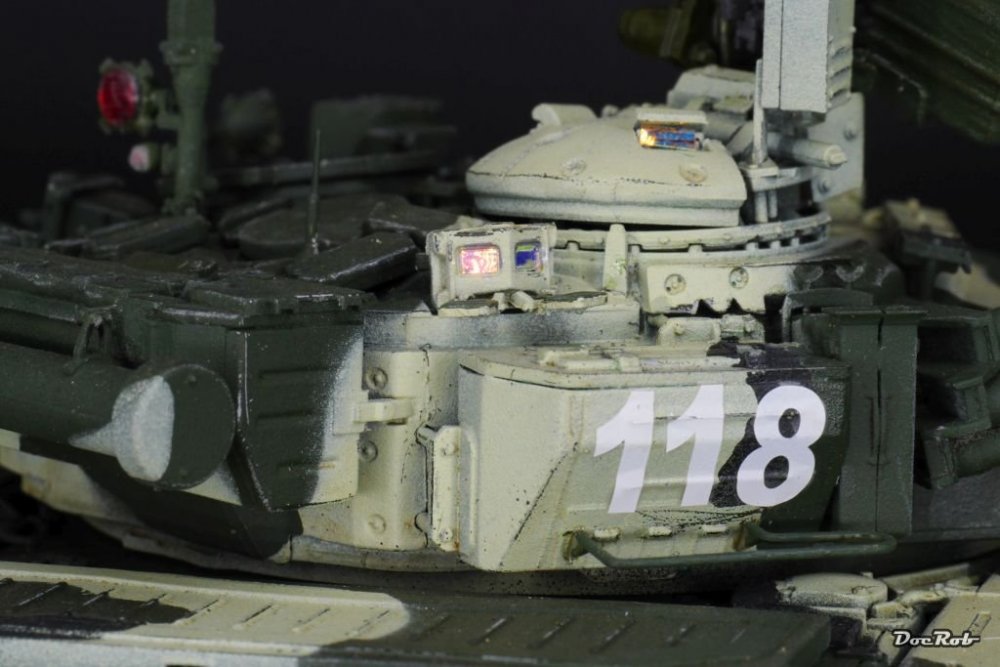
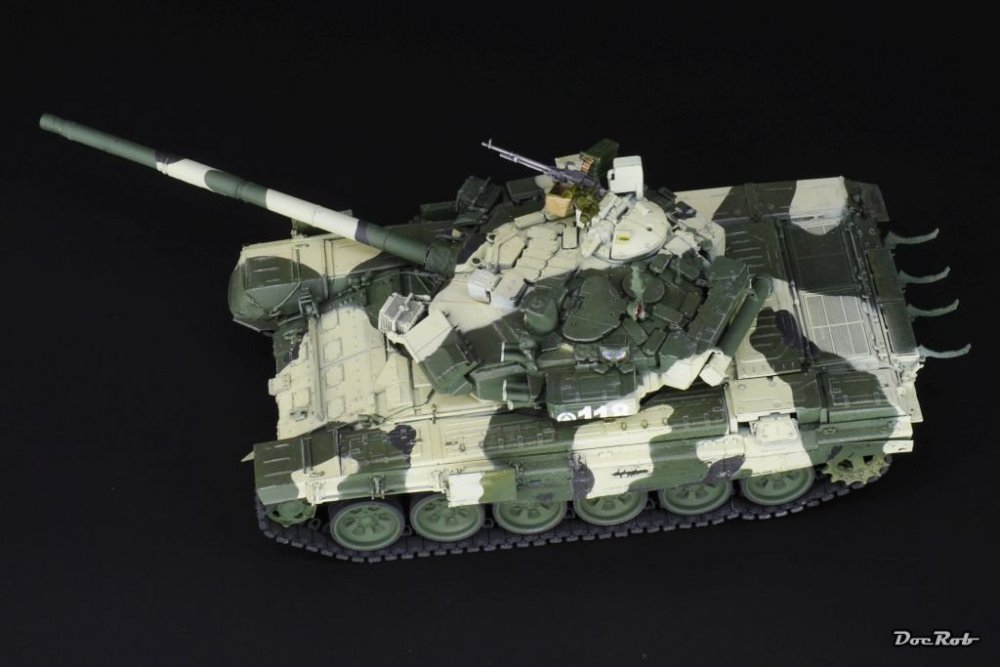
My good intentions for 2020 are still in order, today I finished the second some time ago started kit of the year. There was not that much to do, but lots of detail work and some surgery on broken parts summed up for a whole day of work. For the first time I used reflective foil from AFC Club for the vision blocks and like the result which looks not so good on photos, but great in real live. Next step will be snow, ice and mud and a little dio. Cheers Rob
-
Japanese Aircraft. Your thoughts, likes and dislikes.
DocRob replied to Sir Desmond Glazebrook's topic in General Discussion
Oh, I forgot one, I might buy. A Ki-51 Sonia in 1/48 from Wingsy Kits. I like the plane and would like to represent exactly this paintjob, how, I'm not sure, maybe first airbrushing red brown, then masking the dots with liquid mask, then spraying light grey, again using liquid mask and finally spray dark green. I will try on a dummy an decide then. I will take my time testing, so there is a slim chance for the companies to release a 1/32 version , but then again in LS it would be a freehand paintjob . Picture for discussion purpose only Cheers Rob -
Silver Bird Pfalz D.IIIa
DocRob replied to DocRob's topic in LSM 1/32 and Larger Aircraft Ready for Inspection
Thanks Hubert, I missed the Gotha G.IV initally and hope that there will be a re-release. Since I was a young I dreamt of a decent Spad XIII kit, but without being able to tell a reason that has changed recently. I 'am more fascinated by German WW1 planes lately, colourful paintjobs everywhere and even the Lozenge camo is fancy. I would like to do a Felixstowe in a Razzle Dazzle scheme, but it's to big for me. Cheers Rob -
Very sad news indeed, another urn the rest of the Pythons have to carry to Aspen. Cheers Rob
-
Japanese Aircraft. Your thoughts, likes and dislikes.
DocRob replied to Sir Desmond Glazebrook's topic in General Discussion
I built only one so far and had a lot of fun. You have to like these Hasegawa kits. Detail is ok and they build in a breeze, which leaves more capacity for weathering, wear and tear. I have only one more Japanese plane in stash, a 1/48 F1M2 'Pete' which will be weathered heavily to as an abandoned sea plane. In the moment I don't plan to purchase more, but get myself honey trapped by you or myself sometimes and considered a resin Lukgraph Nakajima Ko-4 for some time. Cheers Rob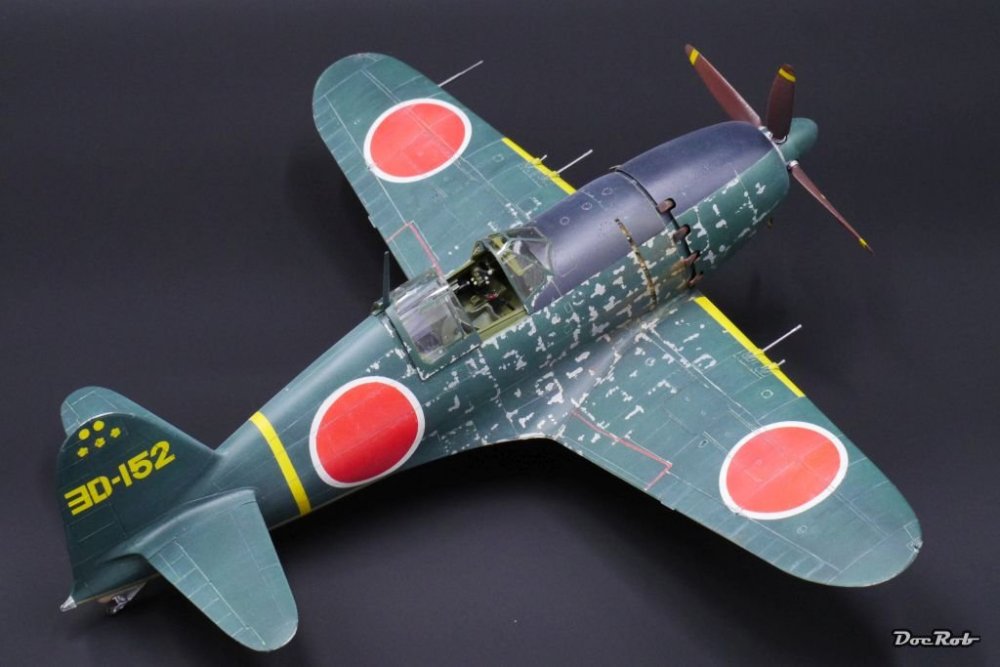
-
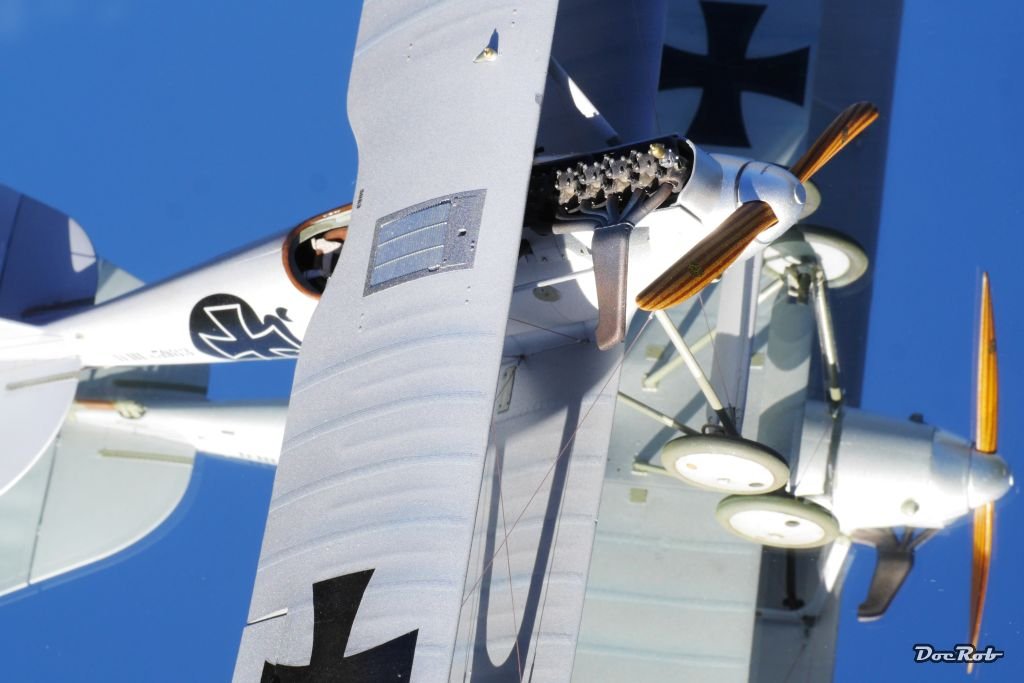
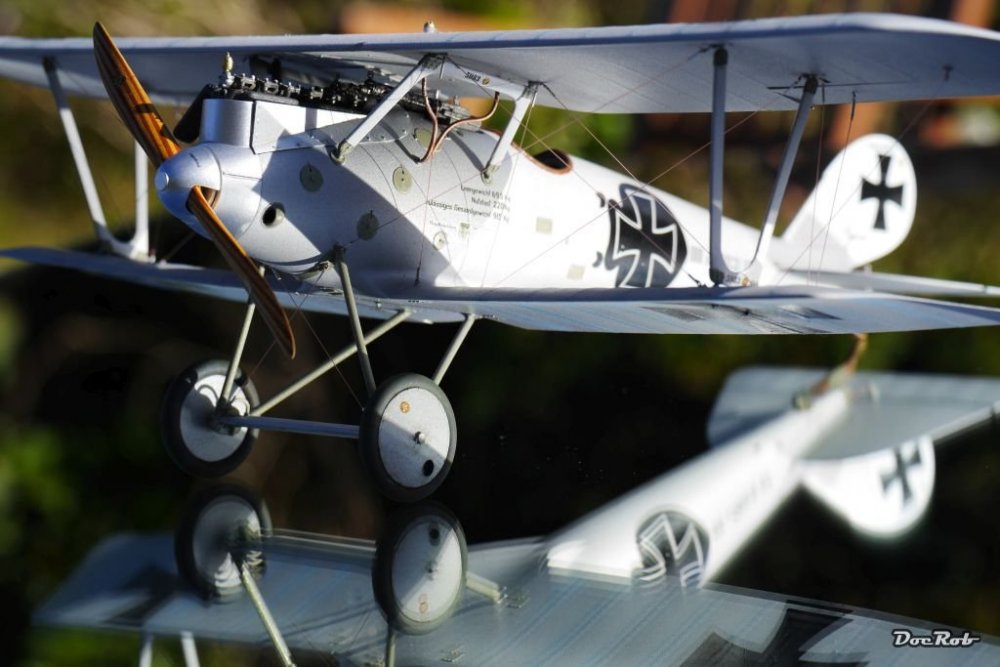
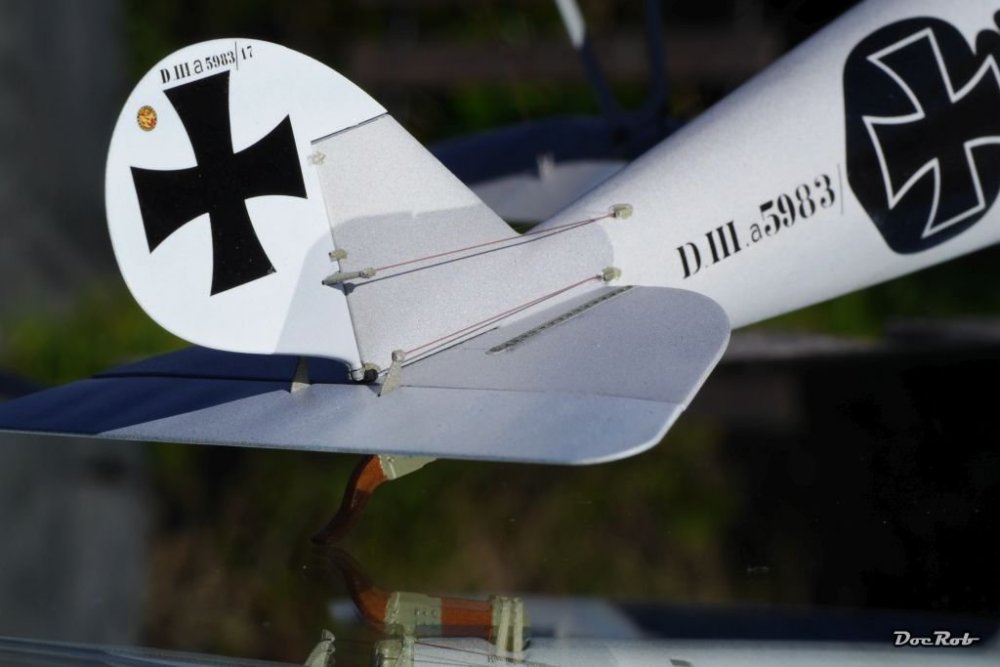
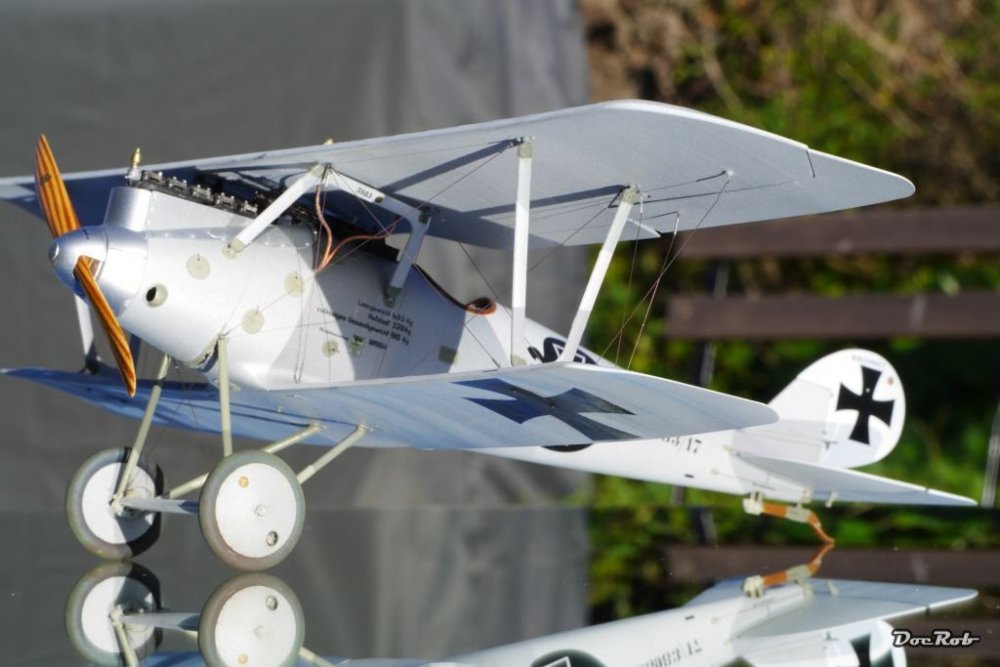
Hola Senhores, Some years ago, while I was still living in Berlin, I started this kit and left it partly build in the box until recently, where I felt the urge to build something from that period and wanted to finish some of the started kits. The big time lag is the main reason, why I didn't wrote a WIP, the other is, it is my first WNW kit, first rigging experience and first kit of it's time with all these different materials to reproduce, like metal, wood, cloth... The kit itself is a gem, fit is almost perfect, details are sharp and the fragile bird is somewhat sturdy in the end. Most things went well, with the exception of decaling, my process of applying and sealing needs to be improved. After some evaluations I chose the factory fresh Colour scheme for my Pfalz, mainly because the Pfalz Silbergrau (silver grey) is the perfect appearance for this very elegant (maybe the most elegant of it's time) plane and because it's Pilot Hans Joachim Buddecke was born in Berlin like me. For the build I used some aftermarket like Master barrels, HGW exterior PE, Bob's buckles and eyelets from Gaspatch. My first rigging job was daunting, but everything went right, after testing different methods. The finish was achieved using RLM 2 on the fuselage for ports and hatches, then masking these and applying my own mix of Pfalz Silbergrau, which consisted of Tamiya White and Dark metal. Afterwards I misted some AK Aluminum onto it. I used some tonal variations for giving some depth to the base Colour and used some Neptune Blue Mig-Pigments for post shading mainly the wings. If you never build a WNW kit, you should try, I am hooked now and have some more in my stash. A Fokker D.VII in Lozenge, a Hansa Brandenburg W.12, a Snipe and a Fokker Eindecker and a FE.2b which still gives me the creeps, when I look at the rigging. Bur I think my next WW1 plane will be a Micro Mir Fokker Ev/DVIII. This will be a not so easy project with some scratching involved including brass soldering for the flimsy struts. Cheers Rob


-
All the beautiful detail work aside, the most stunning aspect on your Berg is the perfectly blended overall look. Cheers Rob
-
No PE for my Trumpeter P-47 razorback cockpit
DocRob replied to Clunkmeister's topic in General Discussion
Handpainting? PE makes modelling uniform. Cheers Rob -
Unbelievable attention to detail. Your engine will look great, I'm sure. Cheers Rob
-
Great stains and grime, a shame that it will show only on a mirror. Cheers Rob
-
What is on your bench right now ? Share a picture :)
DocRob replied to Martinnfb's topic in Modelling Discussion
...and DIRT . Your classic looks great. Cheers Rob -
This kit looks awesome, and a little like a must have . Cheers Rob
-
Hasegawa Nakajima Ki-84.
DocRob replied to Sir Desmond Glazebrook's topic in LSM 1/35 and Larger Work In Progress
Looking good, but why weathering before decaling? If you put the decals on first, you can give them the fitting weathered appearance. Cheers Rob -
When I get my eyesight straight again with the help of some nice wine, I will tell you that this Pfalz is also my first WNW kit and yes the rigging part is daunting, but somehow it worked well with fishing line and Bobs Aluminum tubes and lots of patience and sharp tweezers. Bad hair day with my Pfalz

-
What is on your bench right now ? Share a picture :)
DocRob replied to Martinnfb's topic in Modelling Discussion
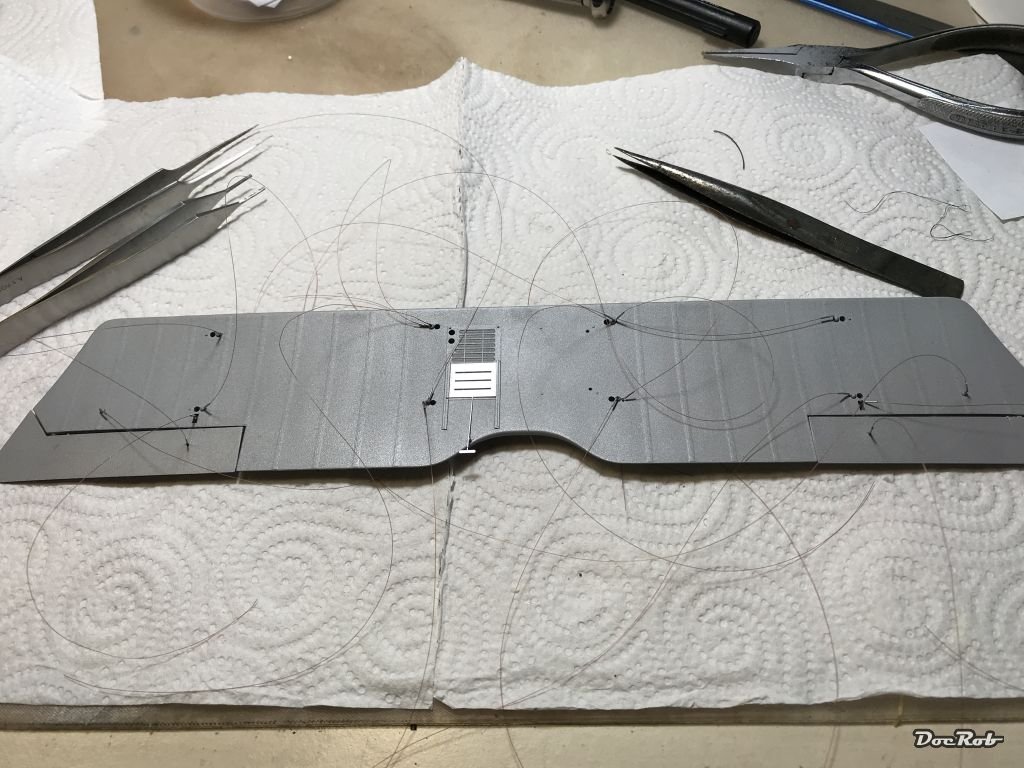
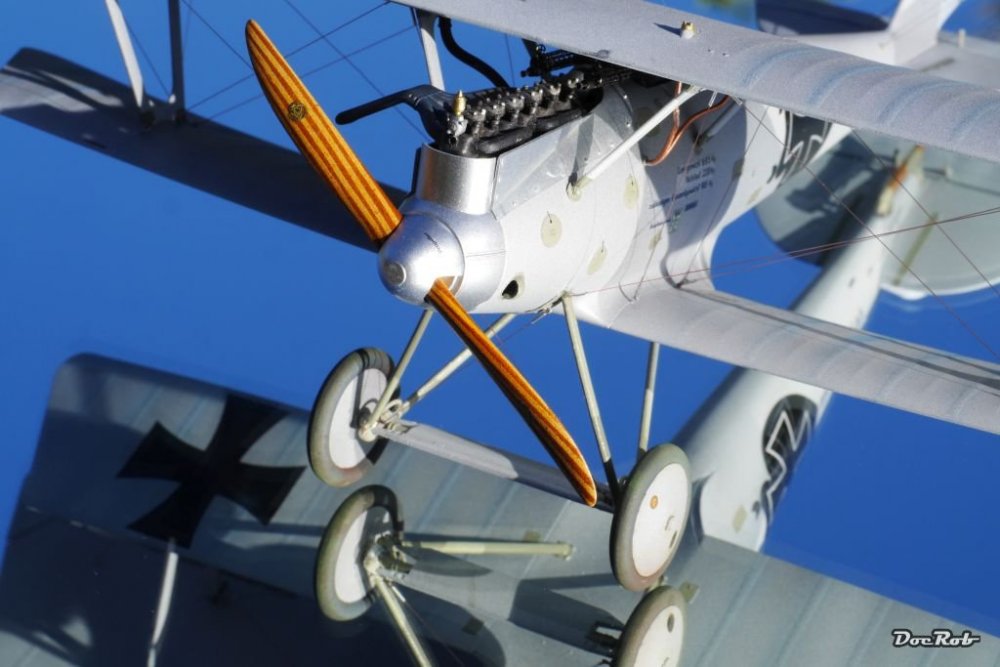
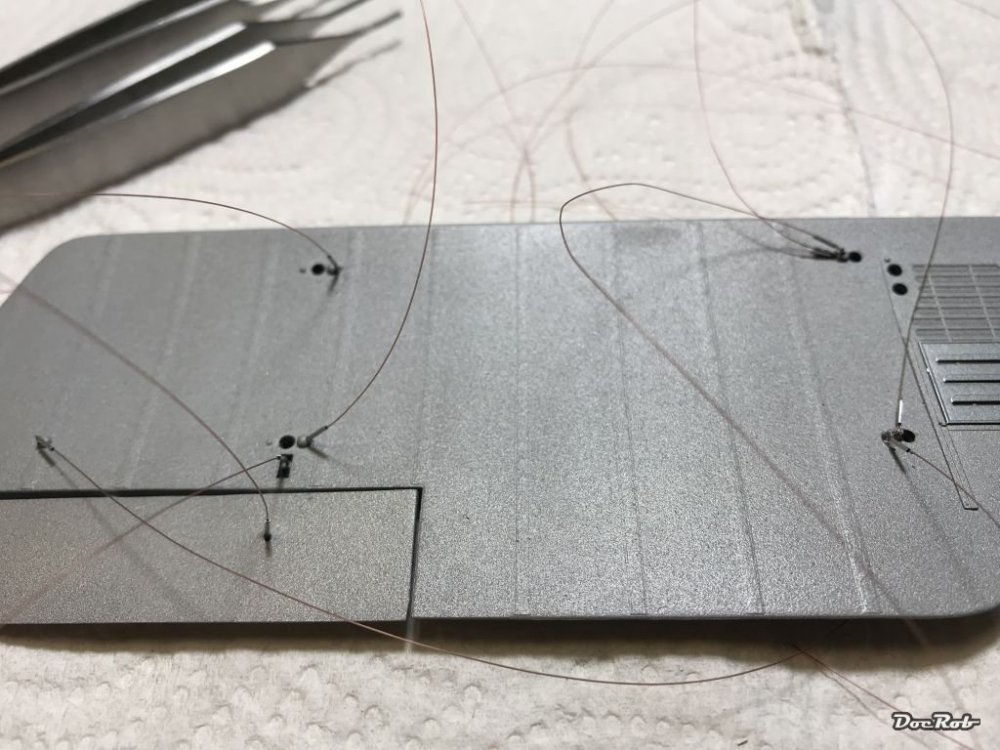
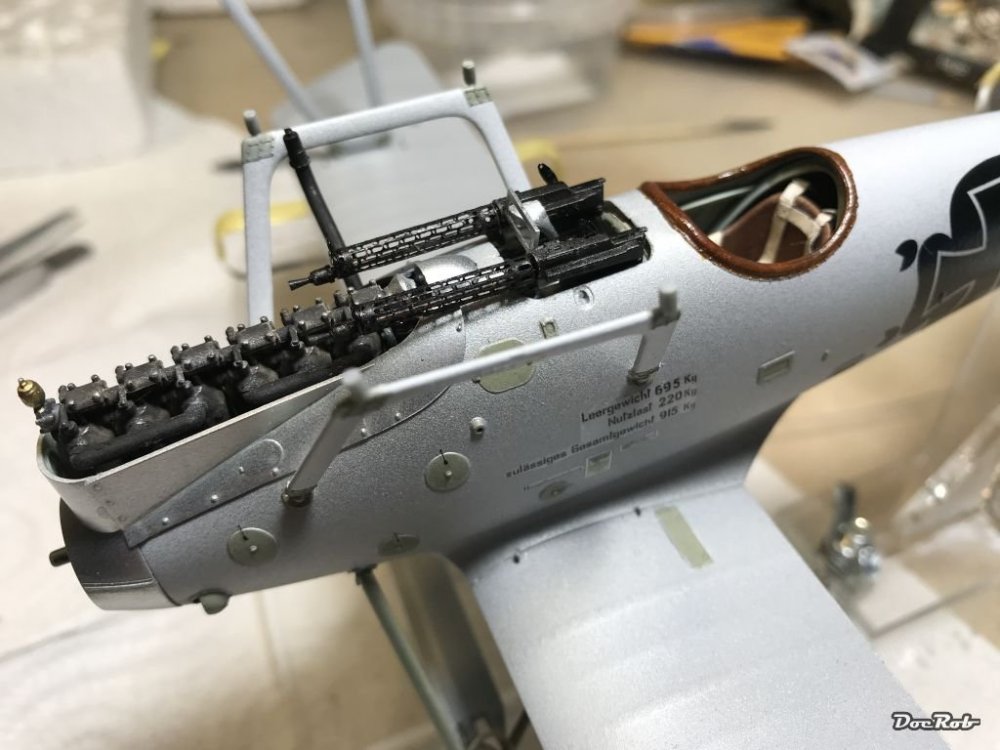
Rigging time on my Pfalz build. I managed to do all the pre rigging on the upper wing using Bobs Alu tubes and 0,12 mm fishing line. The line is fiddled into the tube, then into the eyelet and again trough the tube. You need some tweezer force to push the line trough the tube for the second time. The benefit is, that adjusting and securing with CA is easy, the downside might be the rigging of the lower fuselage with less maneuvering space. Its an eye stressing work , but after three hours this step was done. The Spandau MG's where added, which featured Master barrels and some smaller brass parts. Cheers Rob
-
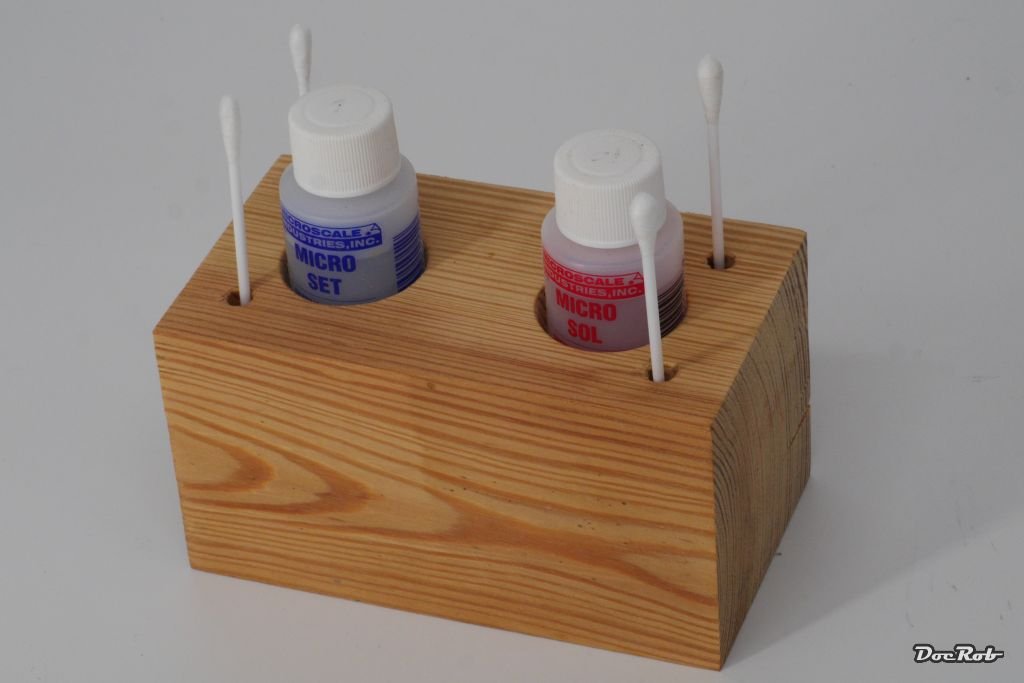
Not anymore, since I made this wooden holder .

- 8 replies
-
- 7
-

-
- bottle holder
- cement
- (and 1 more)
-
What is on your bench right now ? Share a picture :)
DocRob replied to Martinnfb's topic in Modelling Discussion
Thanks Gaz, it seems to be a part of the wing with the places, where the wing spars were imprint into the cloth. Cheers Rob -
What is on your bench right now ? Share a picture :)
DocRob replied to Martinnfb's topic in Modelling Discussion
Thanks Gaz, that pic would be well appreciated. The historic photos are very hard to read, because among the normal interpretation problems, Silbergrau changes it's appearance more than other Colours, because of the slightly reflective nature of the coating. Your assumption, that it was painted dope, is what I read too. If that photo you mentioned is an actual one, it may help to interpret the right hue better. Cheers Rob -
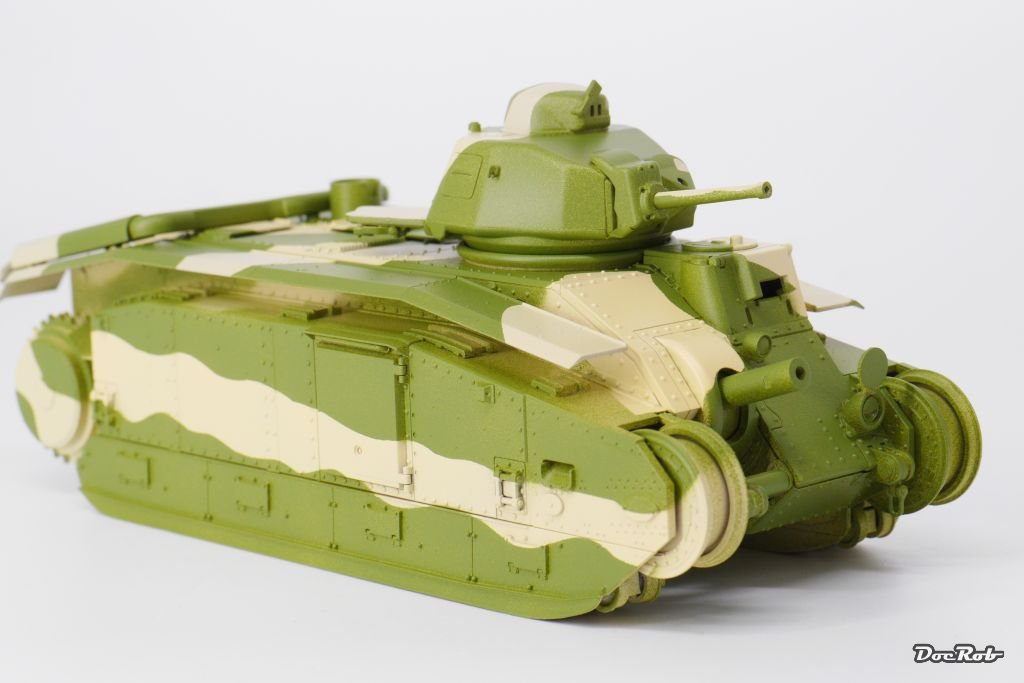
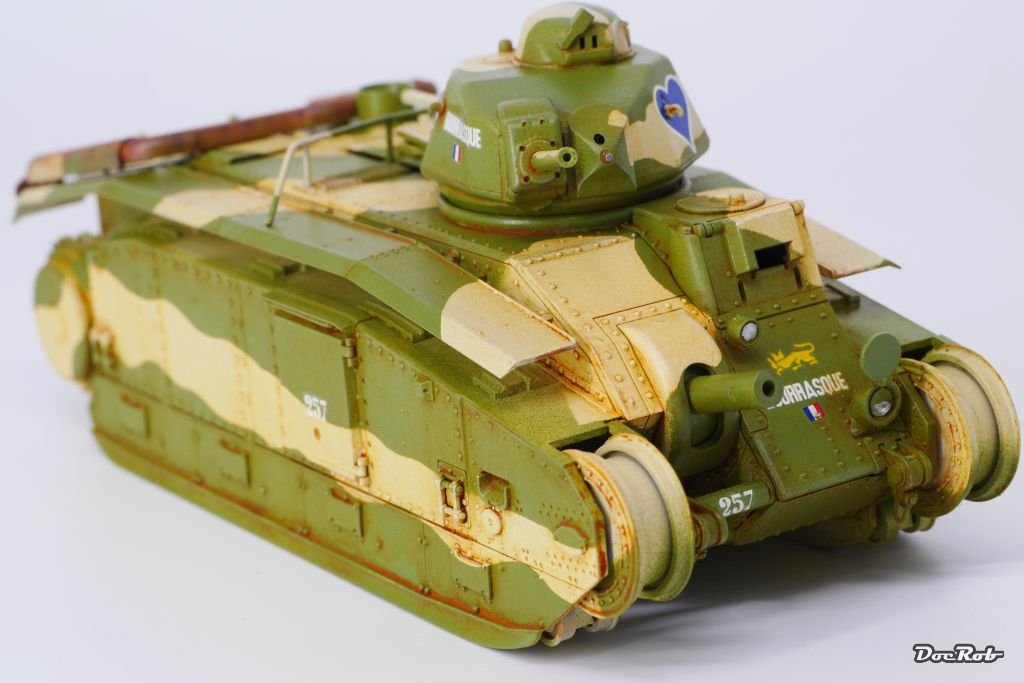
Using filters means to apply a very diluted transparent Colour over the whole surface or parts of the kit, to gain a tonal balance. To achieve that you have to choose the right filter color. The Char 1b here is only airbrushed in the first picture and I didn't like the stark contrasts. Among other effects the second picture shows the Char after a treatment with a red brown filter and whoosh, everything blends together and I got a reasonable tonal balance. Cheers Rob


-
You found a treasure in the midst of a pirates nest. It's a great story, that there are companies willing to do legal business after they went rogue and were talked out of it, by the initative of a forum. Very good to see these things happen. I would like to see you tackle this glider with a WIP and I believe this will be outstanding. The use of wood and silk paper will be a nice shift from plastic, though I believe it will be very fragile in 1/32. Seeing these laser cut parts, specially what seems to be the frame structure makes me look at my clumsy hands… I wish you luck with that project and it maybe gets me to continuing my wooden ship kit of the Cutter 'Le Renard'. Actually there is lots of fun working on wooden kits. Cheers Rob
-
What is on your bench right now ? Share a picture :)
DocRob replied to Martinnfb's topic in Modelling Discussion
Some progress with the Pfalz. I added all the little things prior to the rigging. I will pre-rig the upper wing first, attach it to the struts and then connect the pre riggings with the lower wings eyelets and add turnbuckles. The typical Colour Silbergrau gave me some headaches while trying to mix. I tried different aluminum Colours from Alclad and AK and mixed them with Tamiya flat white. All these mixtures went lumpy, so I used the Tamiya white with Tamiya metallic gray and misted some matte aluminum from AK' Extreme Metals on. It's hard to capture on a photo, but I like the effect, as the elegant Pfalz looks even more speedy. Cheers Rob

-
Fa330 Bachsteize (Wagtail)
DocRob replied to rkranias's topic in LSM 1/32 and Larger Aircraft Ready for Inspection
Flying/sailing the Bachstelze must have been very close to flying with a jet belt for it's time. Not a lot of material around the pilot an no protection at all. Must be fierce to be the pilot in rough conditions say in the northern Atlantic area. Your rendition shows this fragility perfectly, with all the detail work and the rigging. You made a piece of art out of that tiny kit. Cheers Rob -
Trumpeter A7E - Hellenic AF
DocRob replied to GusMac's topic in LSM 1/32 and Larger Aircraft Ready for Inspection
Greatness spreads Cheers Rob -
If you go for a Dragon Tiger with DS tracks it's worth to check them on arrival. On my Wittman Tiger they were packed so stupidly, that lots of the guide teeth where bent, with no chance to make the tracks useable again. I planned to use AM, so it was no deal breaker for me. Cheers Rob