DocRob
-
Posts
5,918 -
Joined
-
Last visited
Content Type
Profiles
Forums
Events
Gallery
Everything posted by DocRob
-

Hase KI-43 Oscar
DocRob replied to KevinM's topic in LSM 1/32 and Larger Aircraft Ready for Inspection
Very nice, I like the mottling, it looks so uneven even, in other words, right. Cheers Rob -
Fokker E.V / D.VIII Parasol Mikro Mir 1/32
DocRob replied to DocRob's topic in LSM 1/35 and Larger Work In Progress
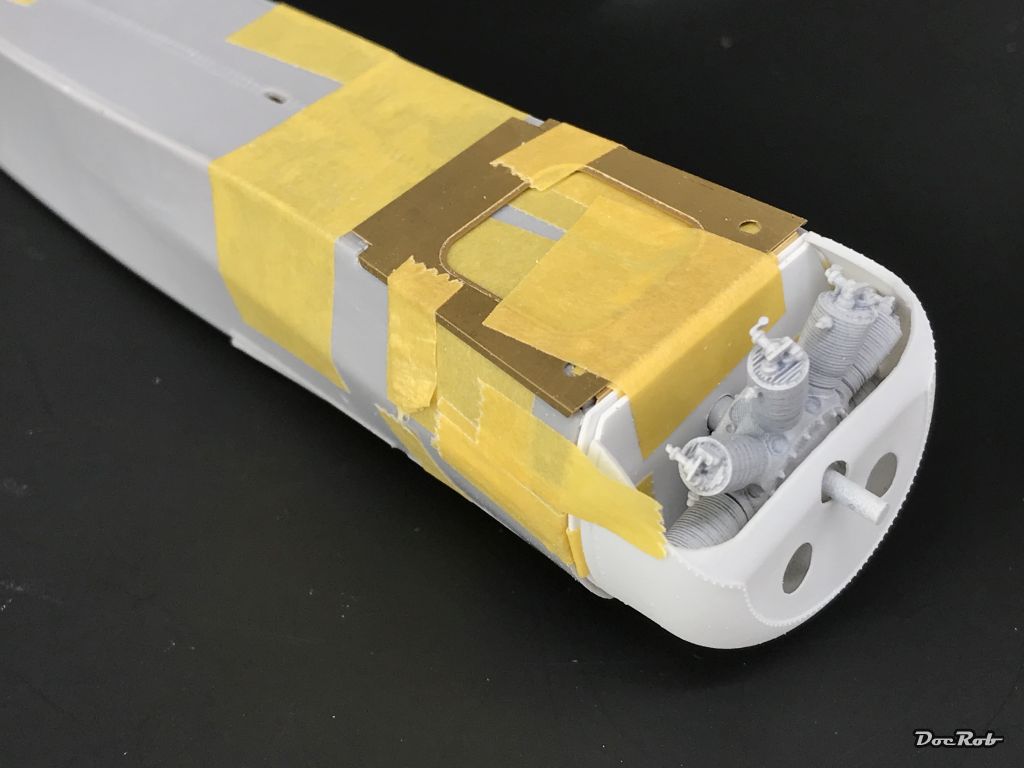
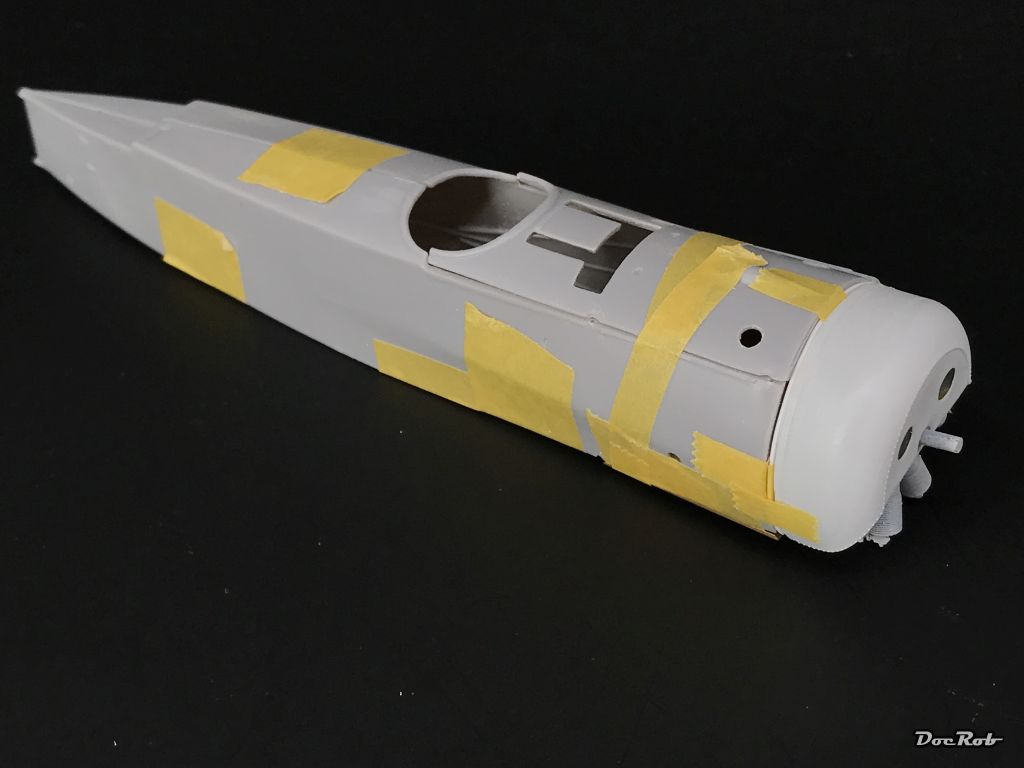
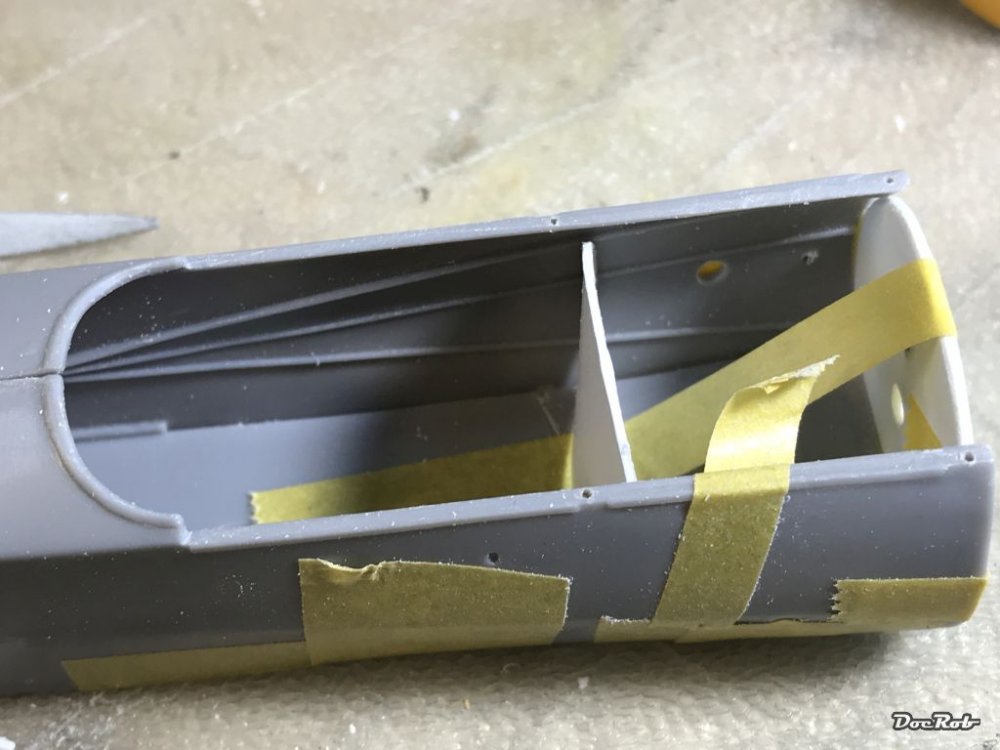
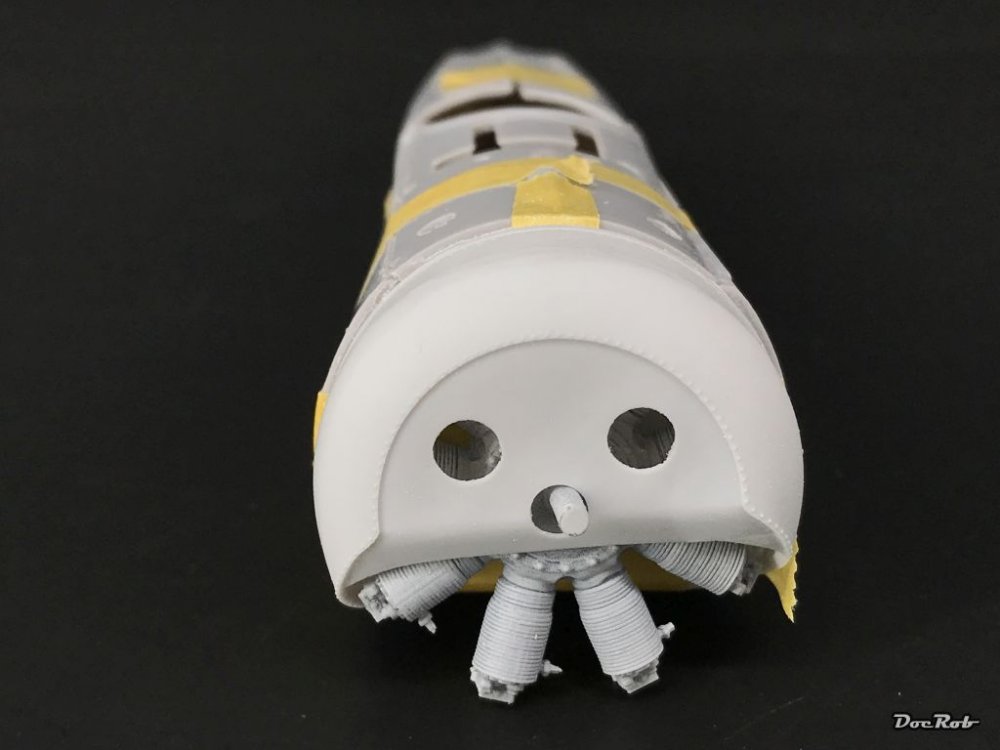
Back to the Fokker after all these festivities. If you are really bored by the perfectness of a Tamiya kit, this is for you. Some parts, I cleaned three times and still found blemishes while test fitting. Some parts, are barely recognizable as such on the sprues, they are just blobs of plastic, but there is nothing, which can't be solved by now. The good thing about the kit, is the general appearance of the fuselage covering fabric, which looks very realistic and you got the chance to use all your skills and tools. I don'tknow why, but the build has been motivating, where I can't explain why, I wanted to be sure about the fit of the fuselage, with the engine cowling mounted and test fitted for a second time. That was also necessary as I wanted to use the Aviattic PE firewall and access panel. The supplied firewall has no attachment lip to the four fuselage panels, it has to be glued flat on them, which I didn't like. I cut some spars from 0,5mm sheet, glued two together as a guide, cut a wider one, with the diameter of the hull, then attached the PE firewall and a last 0,5mm part as a guide for the cowling. As you can see, the front was taking shape, but the fuselage sides are bended inwards on the upper side. I loosely added another spar in a place, where it hopefully will be out of sight, to bend the fuselage correctly. First I thought about soldering the inner frame from brass tube, but with the spar, this seems unnecessary, I will try and use the horrible plastic part. (The spar is not final) Finally, I think I got it manageable. I never used that many tape and time while test fitting, but I think it was an important thing to do. Better now, than with painted parts. Cheers Rob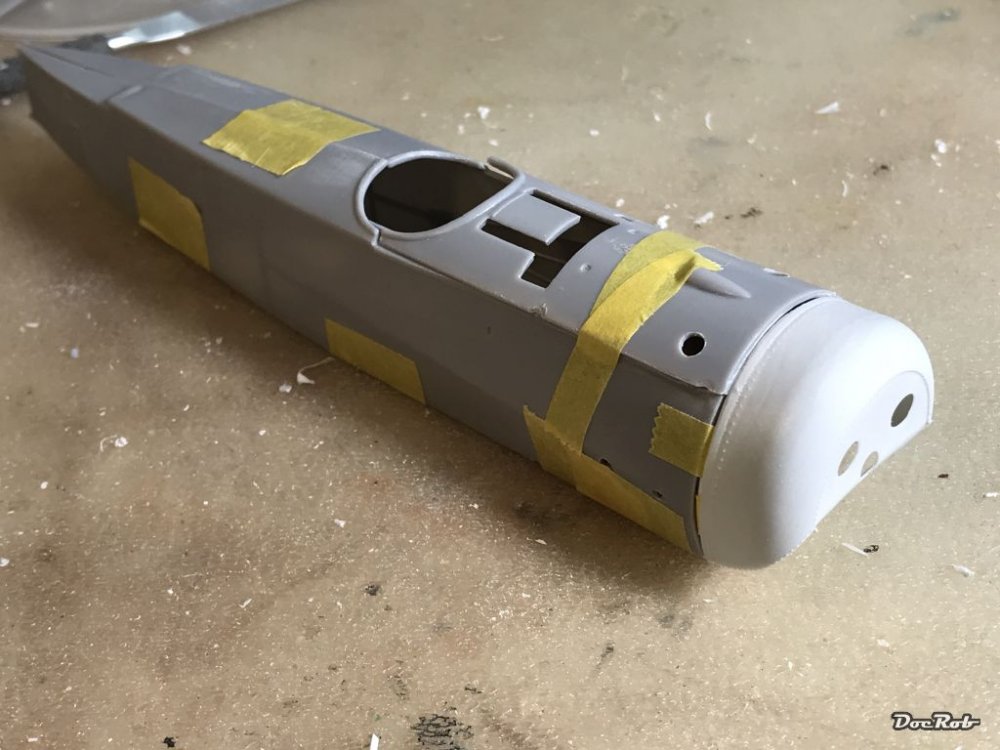


-
Zoukei-Mura P51D Mustang SWS No 4.
DocRob replied to Bomber_County's topic in LSM 1/35 and Larger Work In Progress
A shame to do so, hope enough of the detail will remain in sight under the bubble top. Cheers Rob -
The skull would fit into one of these early German movies like 'Cabinet of Dr. Caligari' or others, which means, it looks perfect and fits the timeframe with it's design and making. What a badass Gotha. Cheers Rob
-
1/6 scale Honda police motorcycle Question
DocRob replied to belugawhaleman's topic in General Discussion
Just do it, that's what LSM is for and I personally like to see a great variety of different subjects. It's not only about 109's and Spit's. A little off the trotten path is, where it gets really interesting. Cheers Rob -
Amazing, love the twin engine layout, and have again to bow my head, savouring your scratch building skills. Cheers Rob
-
Zoukei-Mura P51D Mustang SWS No 4.
DocRob replied to Bomber_County's topic in LSM 1/35 and Larger Work In Progress
Thanks Phil, I mixed them up, the waxes are clearly buffable, the paint not. Cheers Rob -
Zoukei-Mura P51D Mustang SWS No 4.
DocRob replied to Bomber_County's topic in LSM 1/35 and Larger Work In Progress
Looking good Phil. I never thought about buffing AK's Extreme Metals and have the feeling that wouldn't change the look a lot. I would be interested in your experiences. Cheers Rob -
Very dynamic display, I like it a lot, with the flag adding a lot of contrast. It's always good, to see something different in modelling, chapeau. BTW, welcome to LSM, you will notice, that you found the right place of laid back plastic nuts, at least, I hope so. Cheers Rob
-
What is on your bench right now ? Share a picture :)
DocRob replied to Martinnfb's topic in Modelling Discussion
Go gold, 'b' is not bad either, but chrome rims on a Stratos? I hope 'c' is only a joke and makes the Lancia look like the piece of soap, the original donator looks like . Cheers Rob -
Santa came in the mail. Married folks can relate
DocRob replied to Clunkmeister's topic in Modelling Discussion
Call yourself lucky, discussing about a kit subject with your wife. I've given up on that, after my last try of showing her my Lozenge camouflaged Siemen Schuckert D.III twins. She said, the Tarnstoff reminds her of the anti graffiti design on the seats of the Berlin subway. Hell yes, the effect is the same, it's camouflaging, but how can you compare . The only way, I can get to her, is discussing technical aspect. As an engineer, she has a wide interest into engines, gears, ..., like, what was that about the Oberursel Umlaufmotor... Can't wait to see your Santa ride grow, is there still something left from the original plastic ? Cheers Rob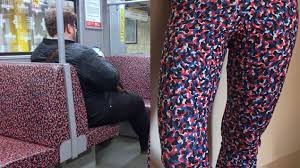
-
Thanks a lot for the detailed explanation. The resulting pics look great, but show the reason, why I was hesitating to buy a camera for snorkeling. On my island, the water normally is very transparent, when the sun is shining and there are only small waves, but the blueish greenish refraction effect of the water is strongly visible, even in shallow water of two or three meter depth on photos. The only real solution is artificial light, which makes the equipment heavy and expensive and/or the use of software to reduce the effect. It seems, I have to rely on my brain HD to take underwater pictures and ponder about, how amazingly well the human eye adopts to difficult lighting conditions, where technique still partly fails. Most of the fishes you see while snorkeling, are relatively small, colourful and you have to try to get really close. sometimes you spot some bigger rays or a turtle. Octopus, Sepia, and Morenas are common and sometimes you spot large flock of fishes, sometimes with hunting Barilotes (small type of tuna) darting through. There is quite a mix of close up, motion capturing, which a camera had to fulfil. The depth range is between surface and 10 meters. Cheers Rob
-
I hope for you that your second you is not made by Mikro Mir. If so you would mess up your working situation eternally, without installing a lot of AM and do lots of grinding, which could accumulate to more work, than you had before, while working . Cheers Rob and a Happy New Year
-
I'm not Fran, but it will be a Revell kit . Cheers Rob
- 161 replies
-
- 4
-

-
- greatwallhobby
- italeri
- (and 6 more)
-
Thanks for posting Fran, my favorite is also the SR-71 and I hope they get it right. The other (re-) releases are not very tempting to me . Cheers Rob
- 161 replies
-
- 4
-
-
- greatwallhobby
- italeri
- (and 6 more)
-
Very interesting and nice pics as well. I'm pondering about what camera to use for snorkeling here on my island. I will not go professional or with a heave lighting equipment. What type of camera do you use for your photos? Cheers Rob
-
Wow, the bike looks very real, nice work on the details and painting. I wish, there were more interesting high quality bike kits in large scales on the market. I could go for one of my old KTM 950 SM, which looks a bit more badass. Cheers Rob
-
Fokker E.V / D.VIII Parasol Mikro Mir 1/32
DocRob replied to DocRob's topic in LSM 1/35 and Larger Work In Progress
Thanks Gaz, but the only night fighter in my stash is the ZM HE-219, where I have some metal antlers and a Fly Arado-234 in midbuild, with a Master set for the antennas. Cheers Rob -
Fokker E.V / D.VIII Parasol Mikro Mir 1/32
DocRob replied to DocRob's topic in LSM 1/35 and Larger Work In Progress
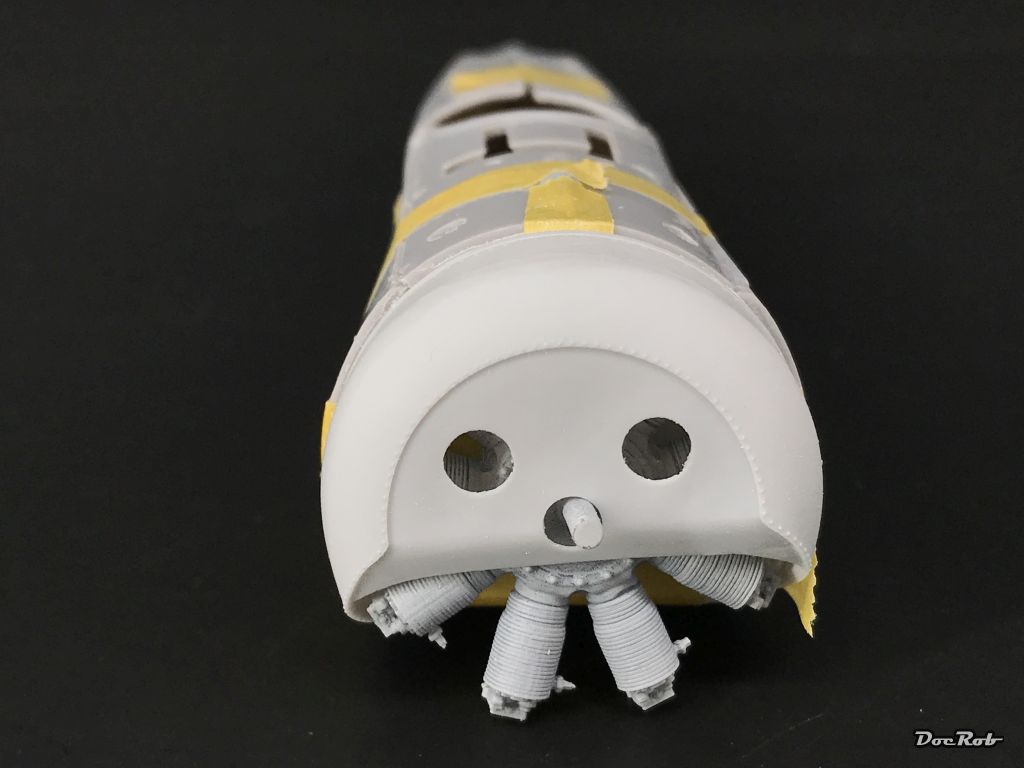
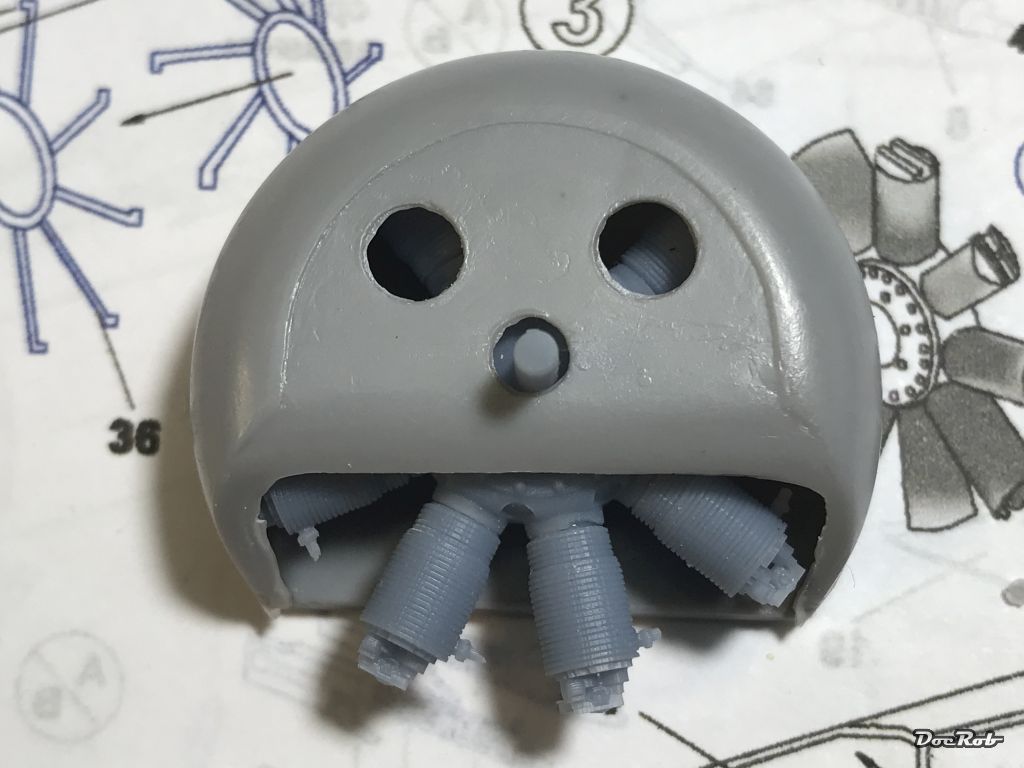
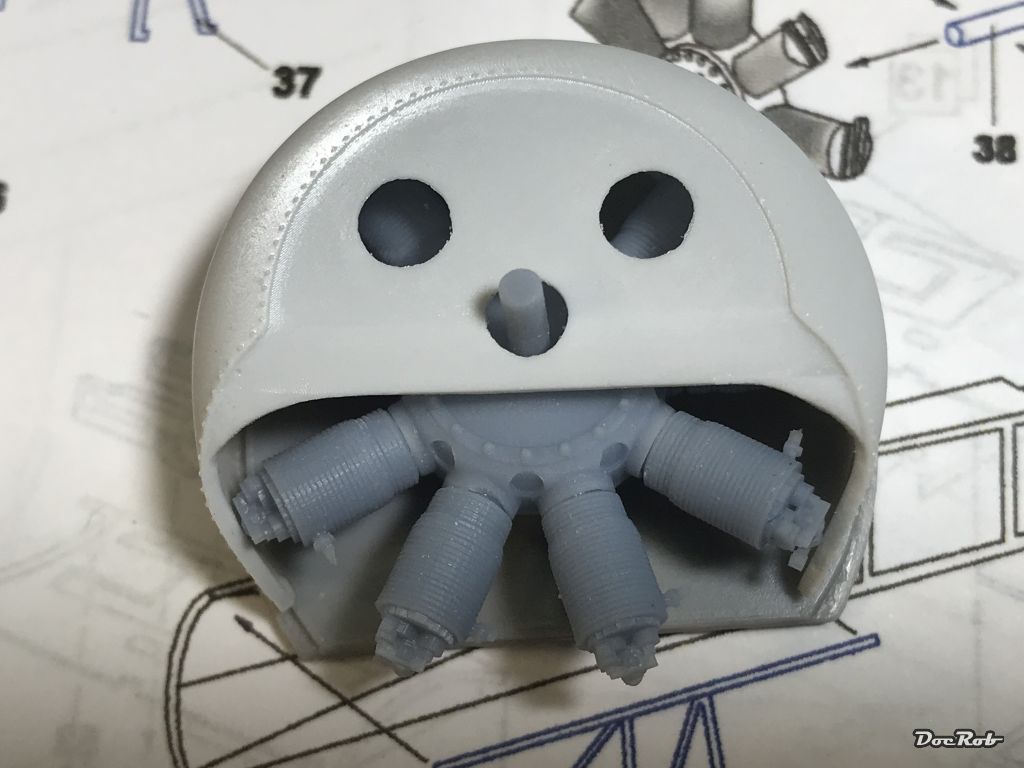
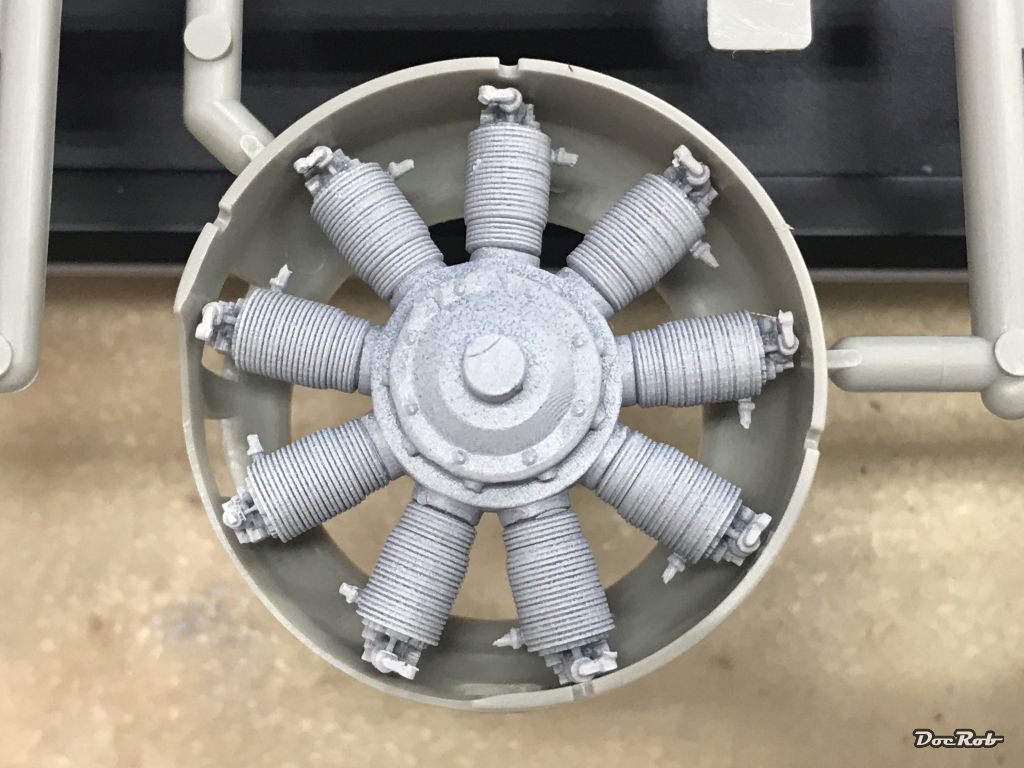
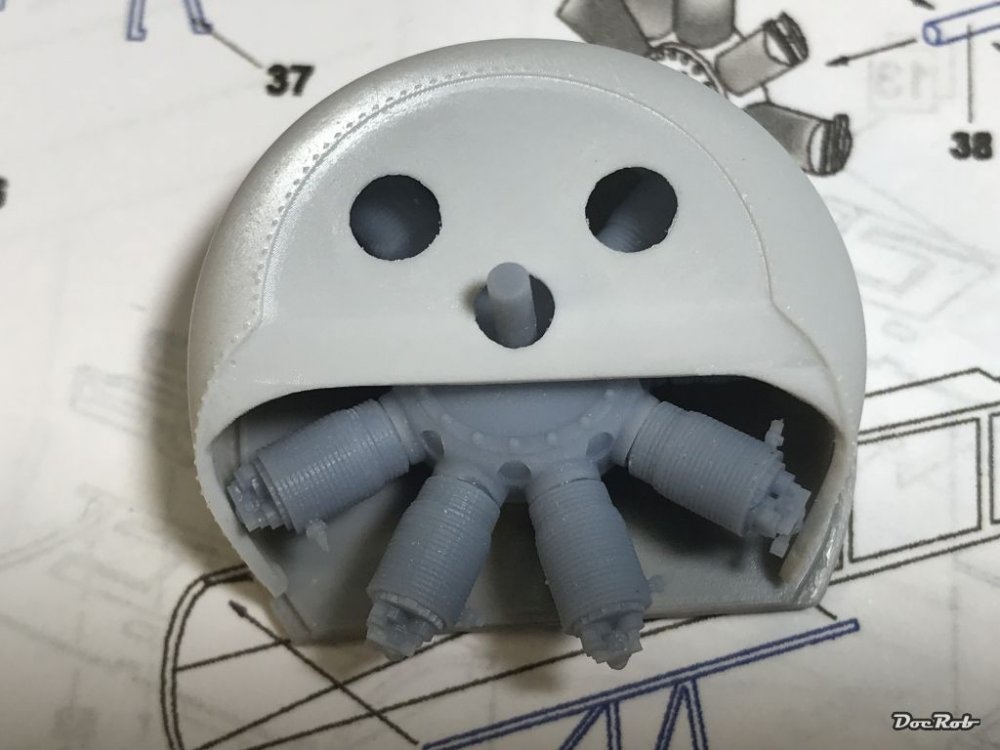
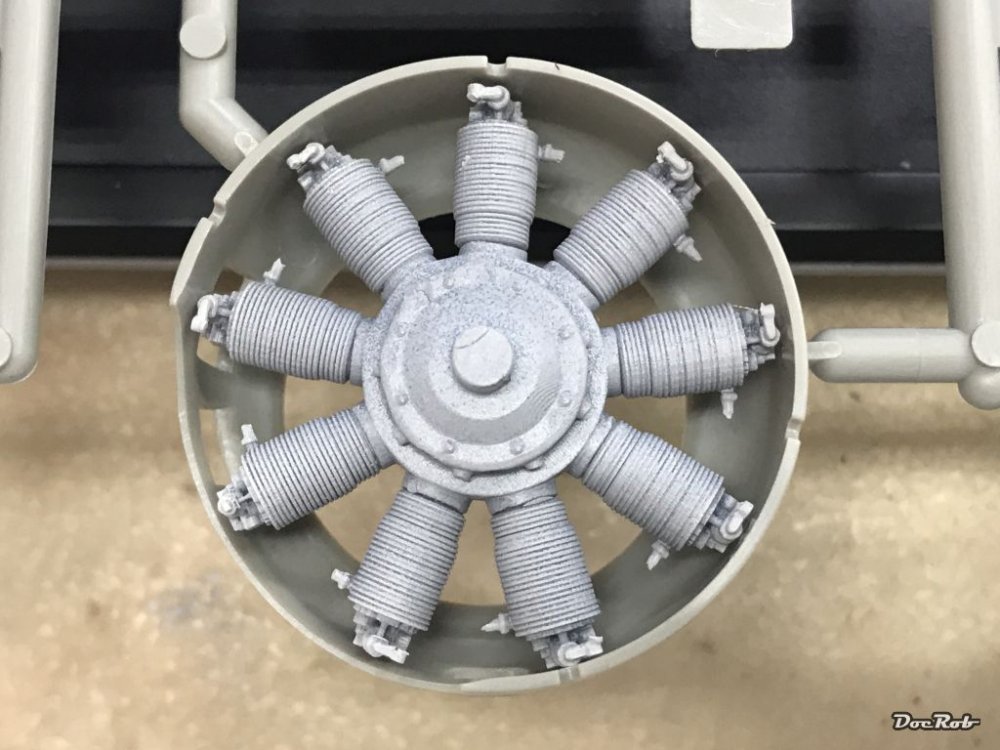
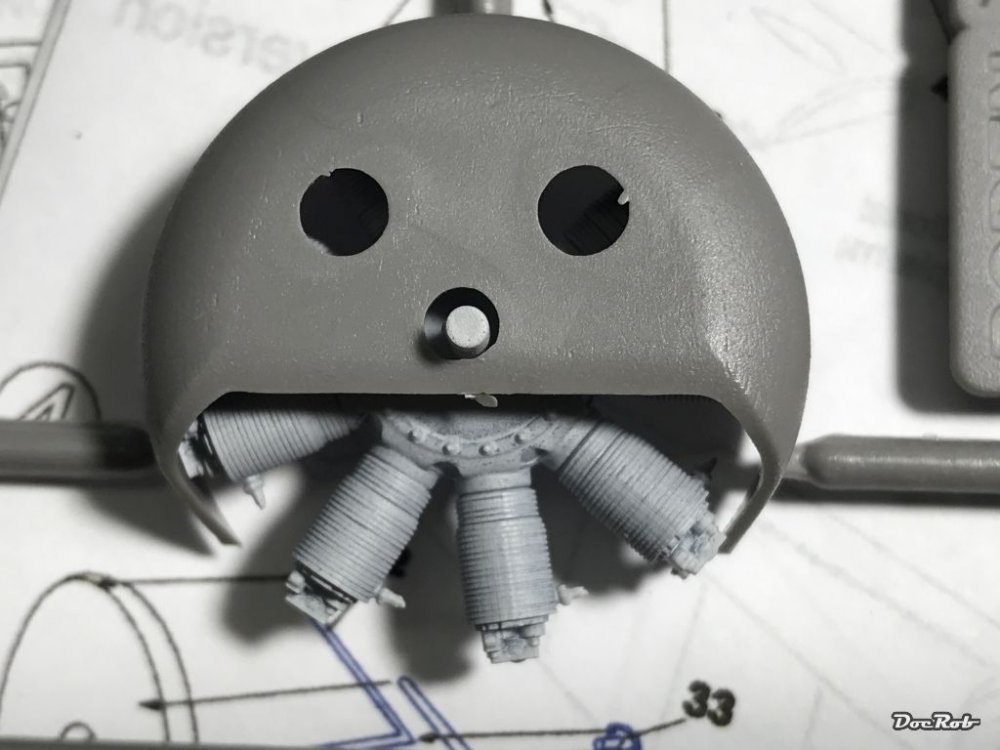
Something about compability of the Lukgraph Le Rhone engine. I went the extra mile and tested all cowlings in my stash, for whom a Le Rhone engine would be suitable, maybe somebody is interested. Mikro Mir Fokker D.V/E.VIII kit cowling fits (look at the plastic and it's one of the better parts) Aviattic Fokker D.V/E.VIII fits (note the shape differences to the above kit part, the Aviattic cowling shows four full cylinders, were the Mikro Mir one shows two full and two halfed cylinders) Wingnut Wings Le Rhone Camel fits tightly, not sure if it would turn, because I didn't assembled the firewall attachment Roden Fokker DR.1 cowl fits tightly as well, no idea if it is able to turn. And this is how the primed engine looks, ready to receive metal colours. Cheers Rob

-
F-104 Flyout MFG2 (German Navy)
DocRob replied to Kaireckstadt's topic in LSM 1/32 and Larger Aircraft Ready for Inspection
A clear 10 on the wow-scale. Everything looks great, the paintjob, the detailing, the interior, chapeau, you nailed it. I have to get me a F-104 once, I was tempted several times, but haven't bought one. Such a consequent no-frill design, with only minimal additions to the engine, to form a plane out of it. Cheers Rob -
Fokker E.V / D.VIII Parasol Mikro Mir 1/32
DocRob replied to DocRob's topic in LSM 1/35 and Larger Work In Progress
Until now, only the V is soldered. The connection is made with Albion Alloys four way Connecto connectors, which are bent the way the three struts have to align and the fourth is for mounting the wing on. The long struts will be soldered later, while attaching the wing. It may be necessary to shorten them a little, but this is too vague to be done now. Cheers Rob -
Scammell tractor/trailer with M3 Grant
DocRob replied to BlrwestSiR's topic in LSM 1/35 and Larger Work In Progress
That looks sweet, the Jeep in the scene might have looked a bit too cramped, there is enough for the eye to find in the dio. Cheers Rob -
Fokker E.V / D.VIII Parasol Mikro Mir 1/32
DocRob replied to DocRob's topic in LSM 1/35 and Larger Work In Progress
Indeed Gaz, the material is very forgiving and the process seem to allow differently casted shapes, which reduces the parts count. As I'm new to printed parts, I tested primer and glues on residues. Tamiya rattle can primer doesn't do harm, but you definitely need CA for gluing, Plastic cement doesn't work. Cheers Rob -
Your Pfalz is looking great. It's one of the most elegant planes of it's era . I finished mine as well this year, and would build another, if I could get a hold on one. Cheers Rob
-
An assortment of completed builds for 2020
DocRob replied to BlrwestSiR's topic in Modelling Discussion
Great output and a place to put them, nice. Cheers Rob